Tools Required
| • | BO-47666 Hose Retainer Ring Installer |
| • | J 35616 GM Approved Terminal Test Kit |
- If replacing the roof side hoses, put the folding top in the service position. Refer to Folding Top Retainer Strap Installation Position .
- If replacing the pump side hoses, open the rear compartment.
- Disconnect the battery. Refer to Battery Negative Cable Disconnection and Connection .
- If replacing the header latch hydraulic cylinder hoses, remove the right side rear compartment trim panel. Refer to Rear Compartment Side Trim Replacement - Right Side .
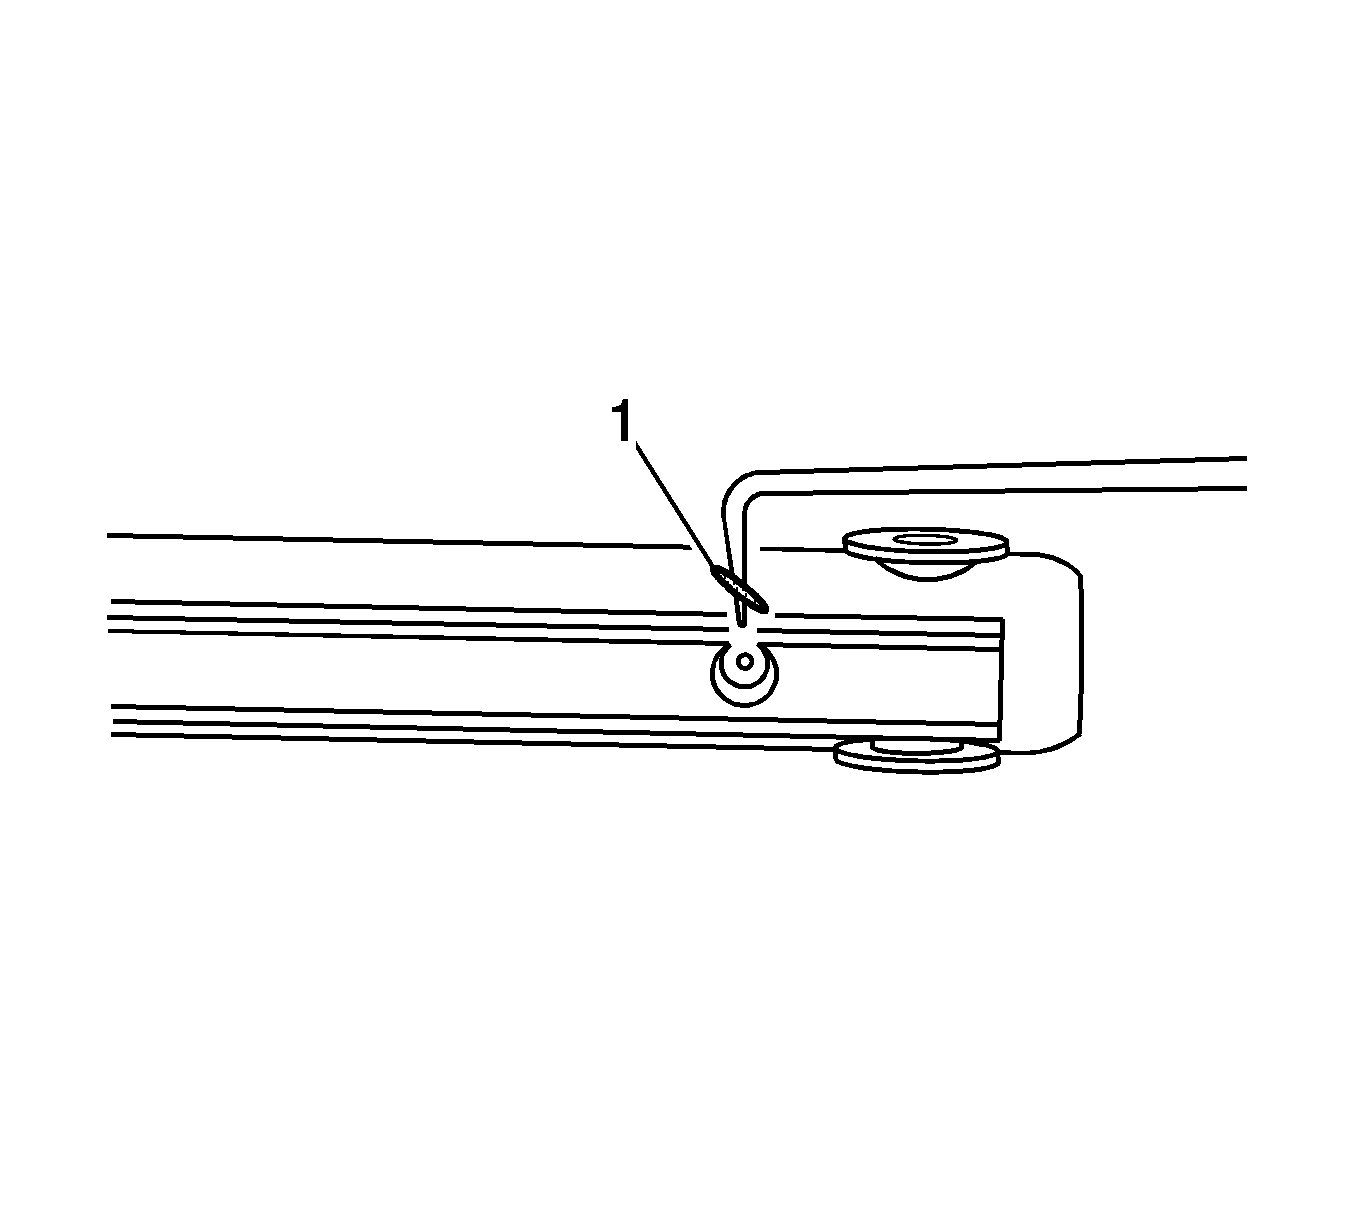
- Release the hydraulic pump bypass valve pressure (1). Refer to Folding Top Pump Bypass Valve Pressure Release Adjustment .
- If replacing the main side rail link cylinder hoses, remove the left side and front rear compartment trim panel. Refer to Rear Compartment Side Trim Replacement - Left Side and Rear Compartment Front Trim Panel Replacement .
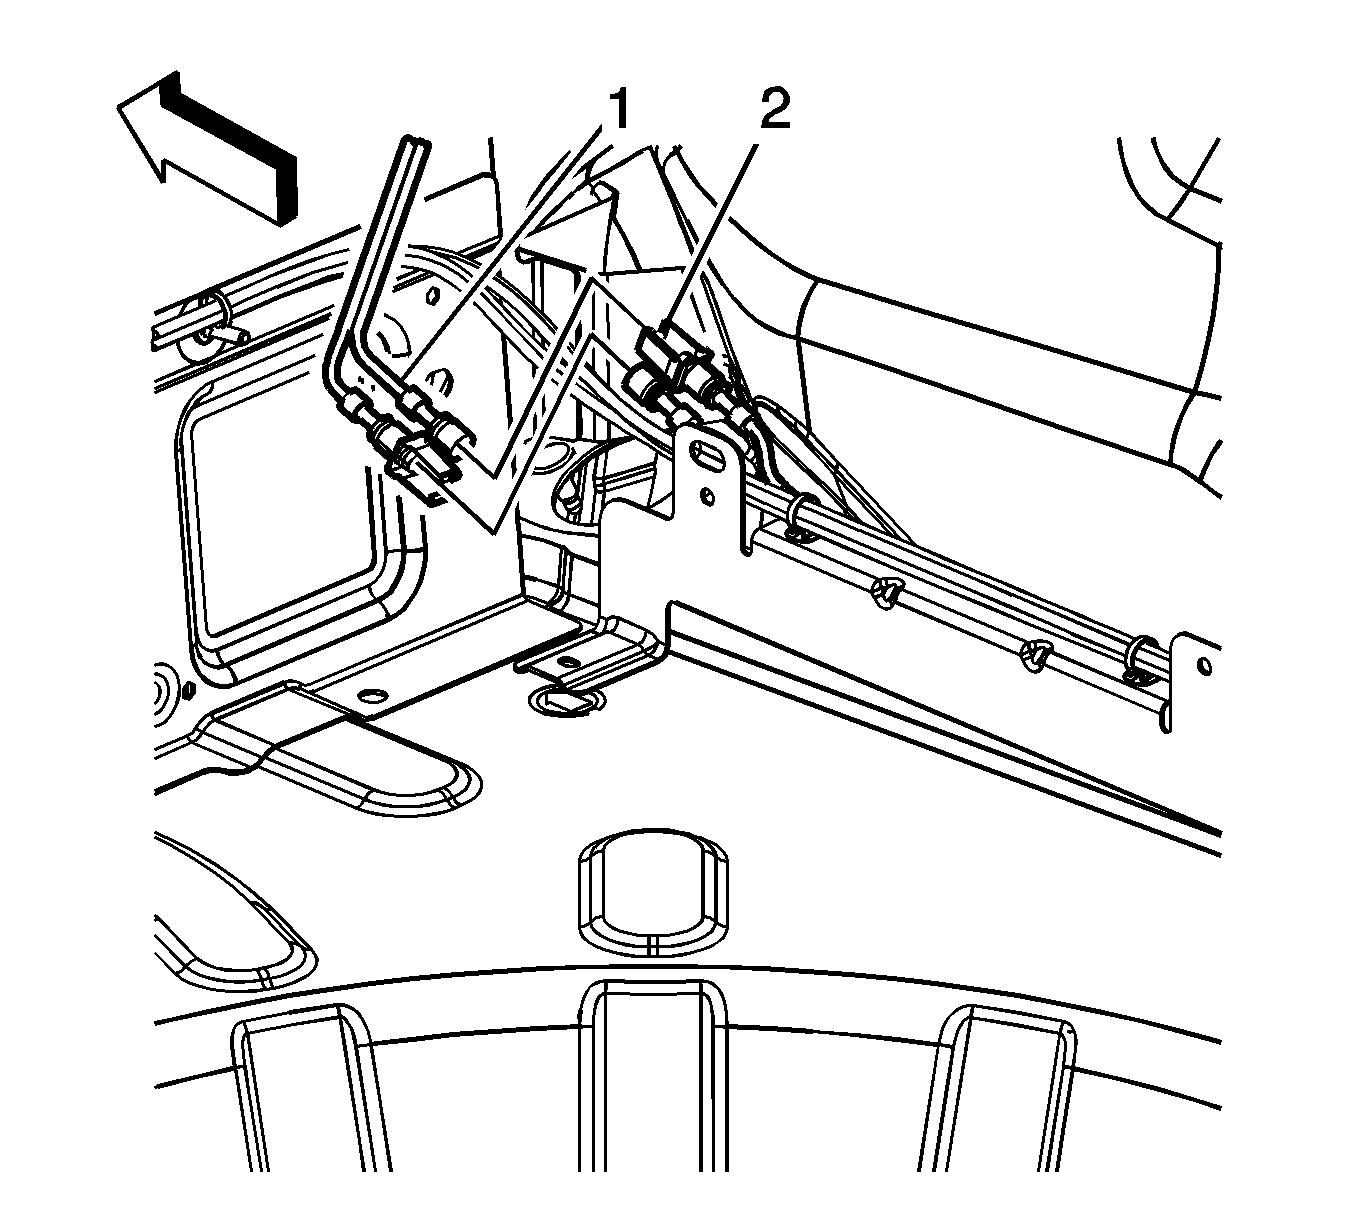
- Disconnect the 2 quick releases (3) from the folding top cylinder valve.
- Locate the pair of cylinder hoses that need replacement. Refer to Folding Top Hydraulic Cylinder Hose Identification .
- Install a new O-ring on each hose that was removed.
- Install the new hoses to the cylinder valve until fully seated.
- Install the hose retaining screw to the cylinder valve.
- Connect the 2 quick releases (3) to the folding top cylinder valve.
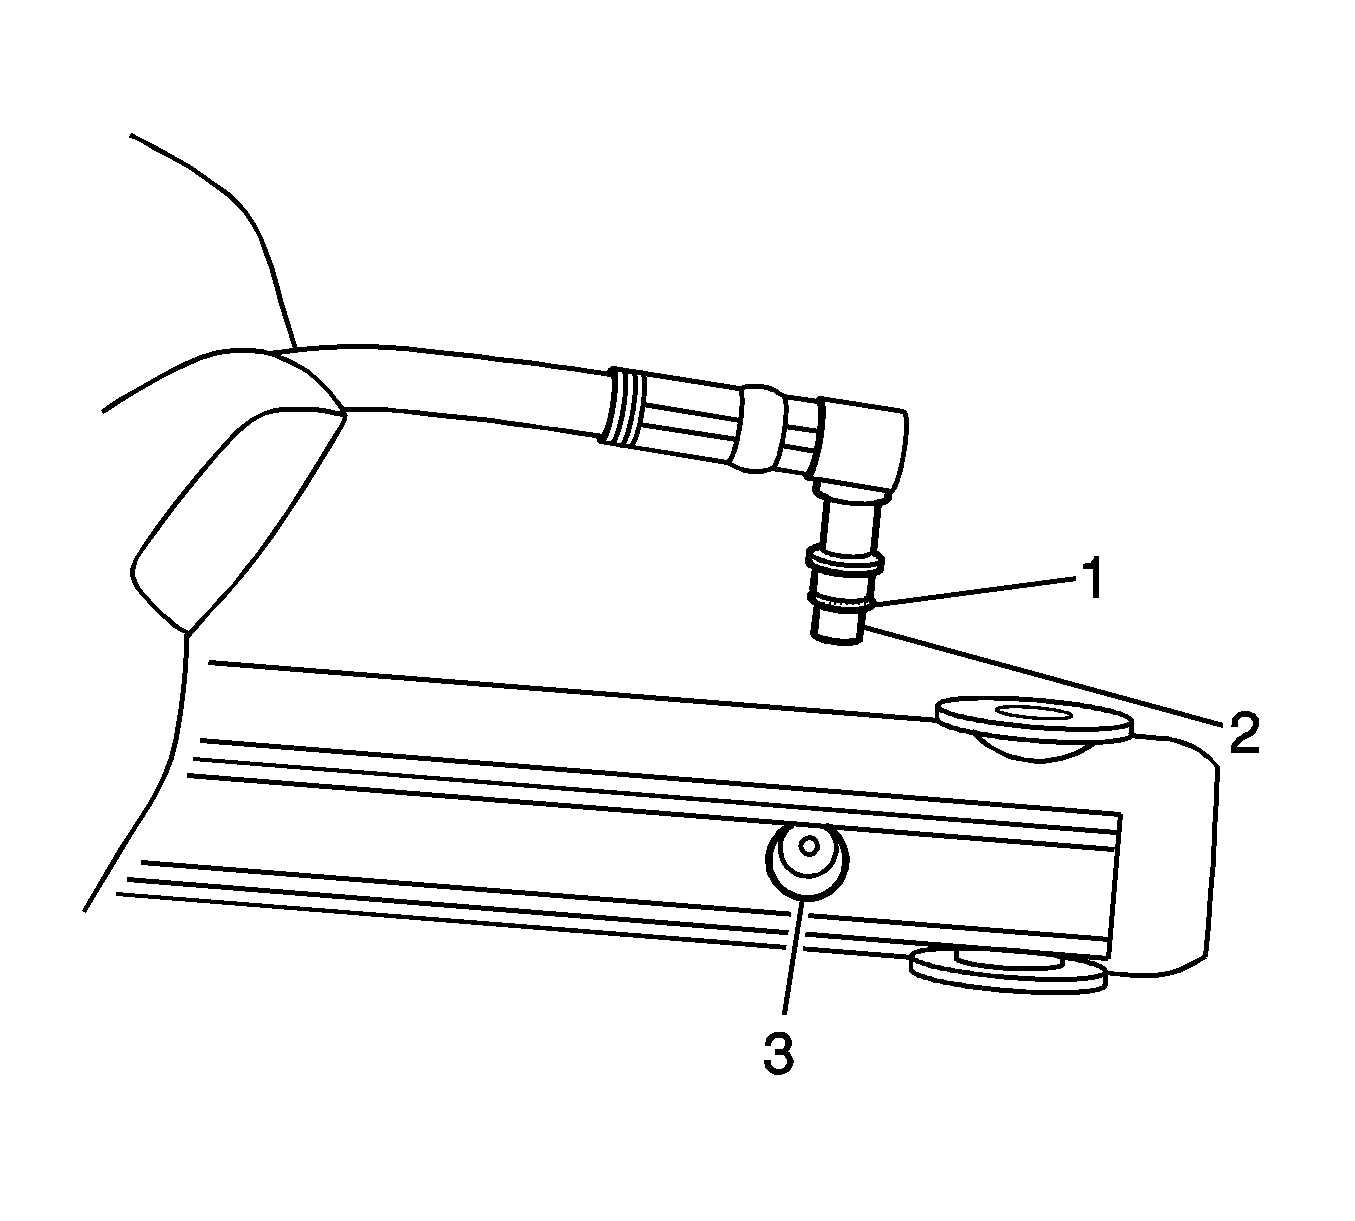
- Disconnect the right side quick release from the hydraulic line connectors (1, 2).
- Connect the new header latch cylinder to the hydraulic line connectors (1, 2).
- If replacing the roof side hoses only, go to step 40.
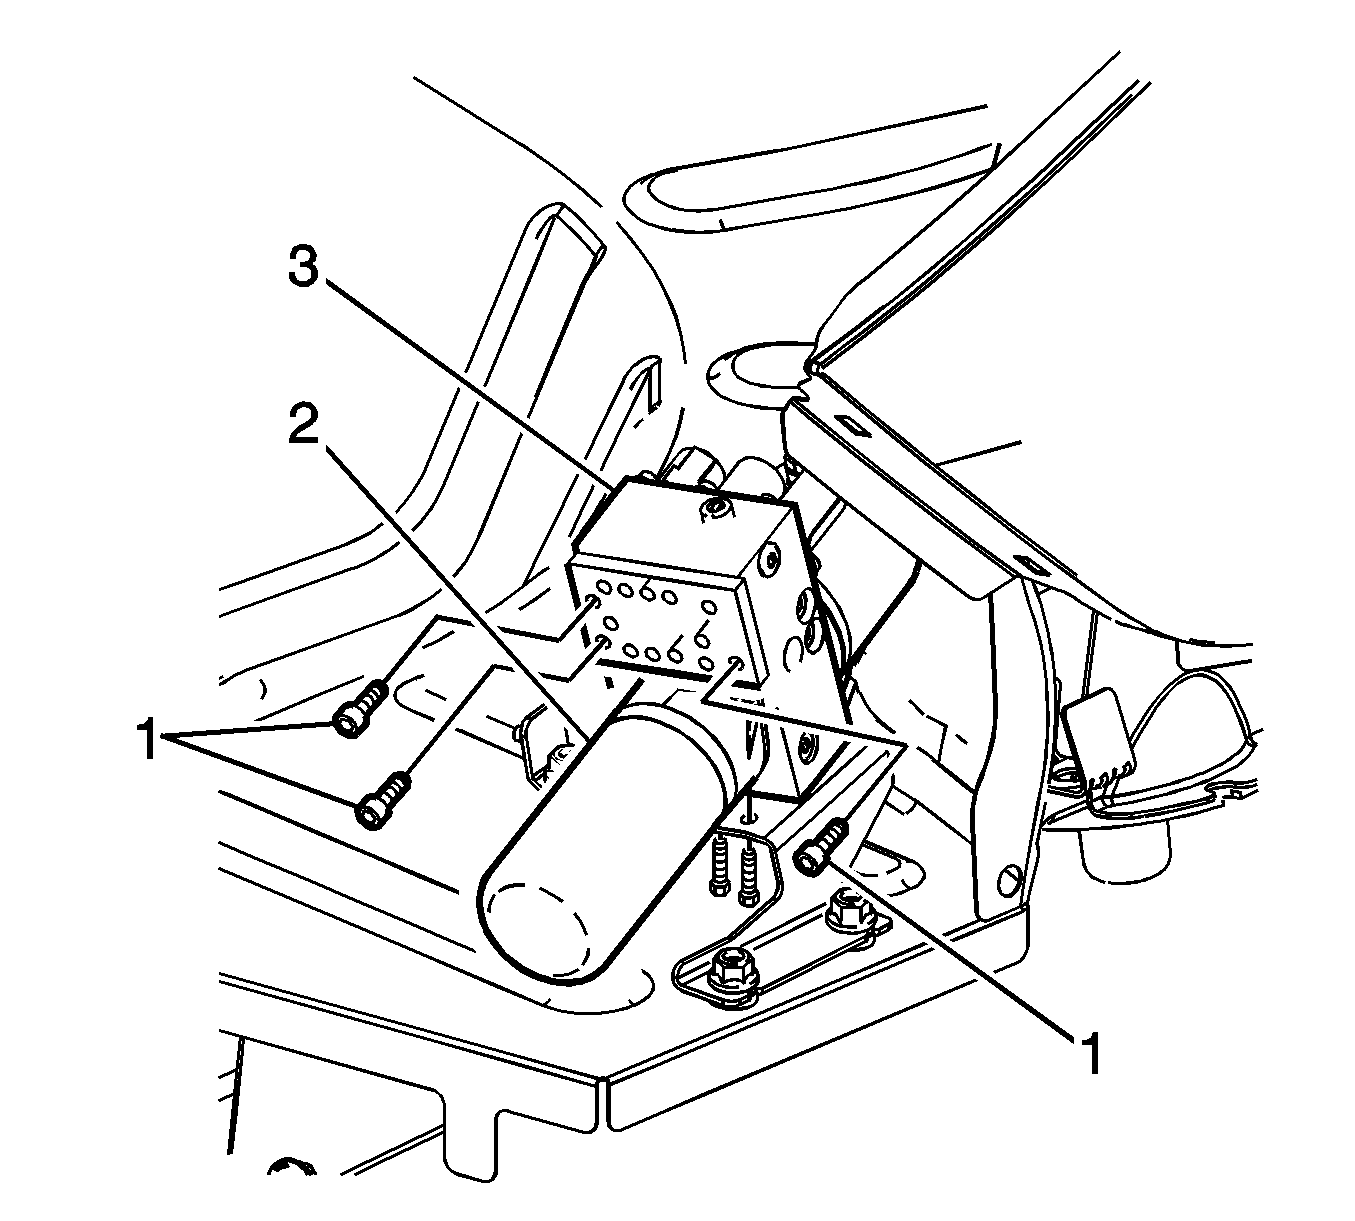
- Remove the nuts (2) that attach the hydraulic pump bracket to the floor pan.
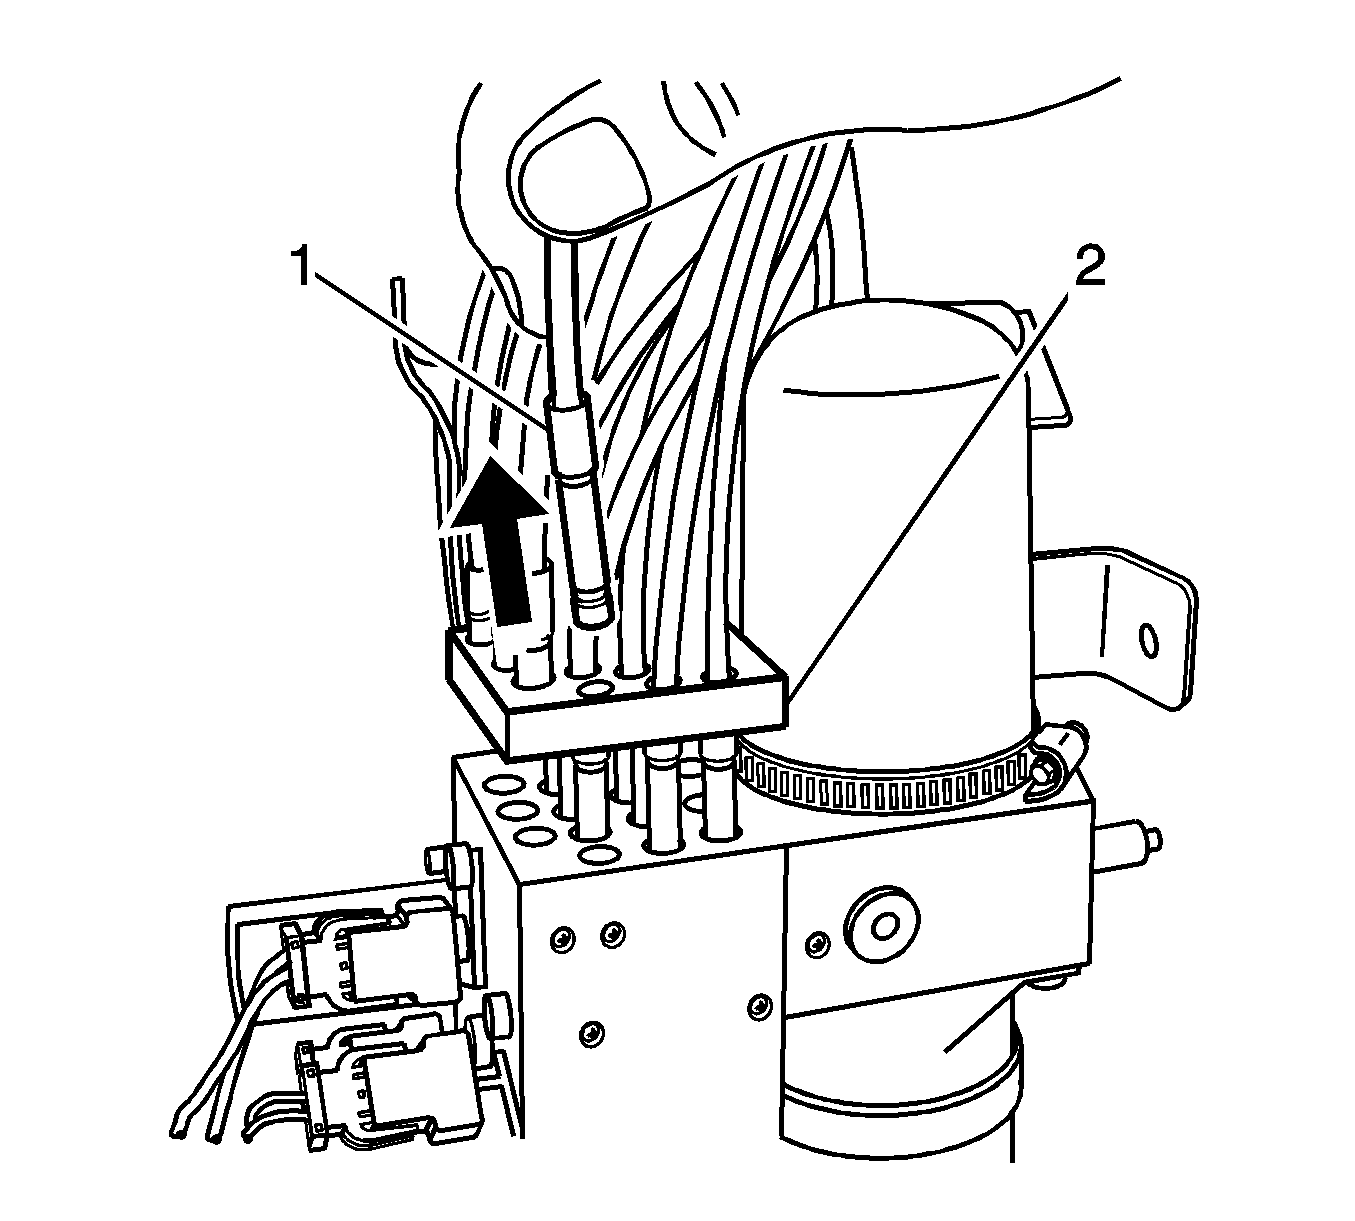
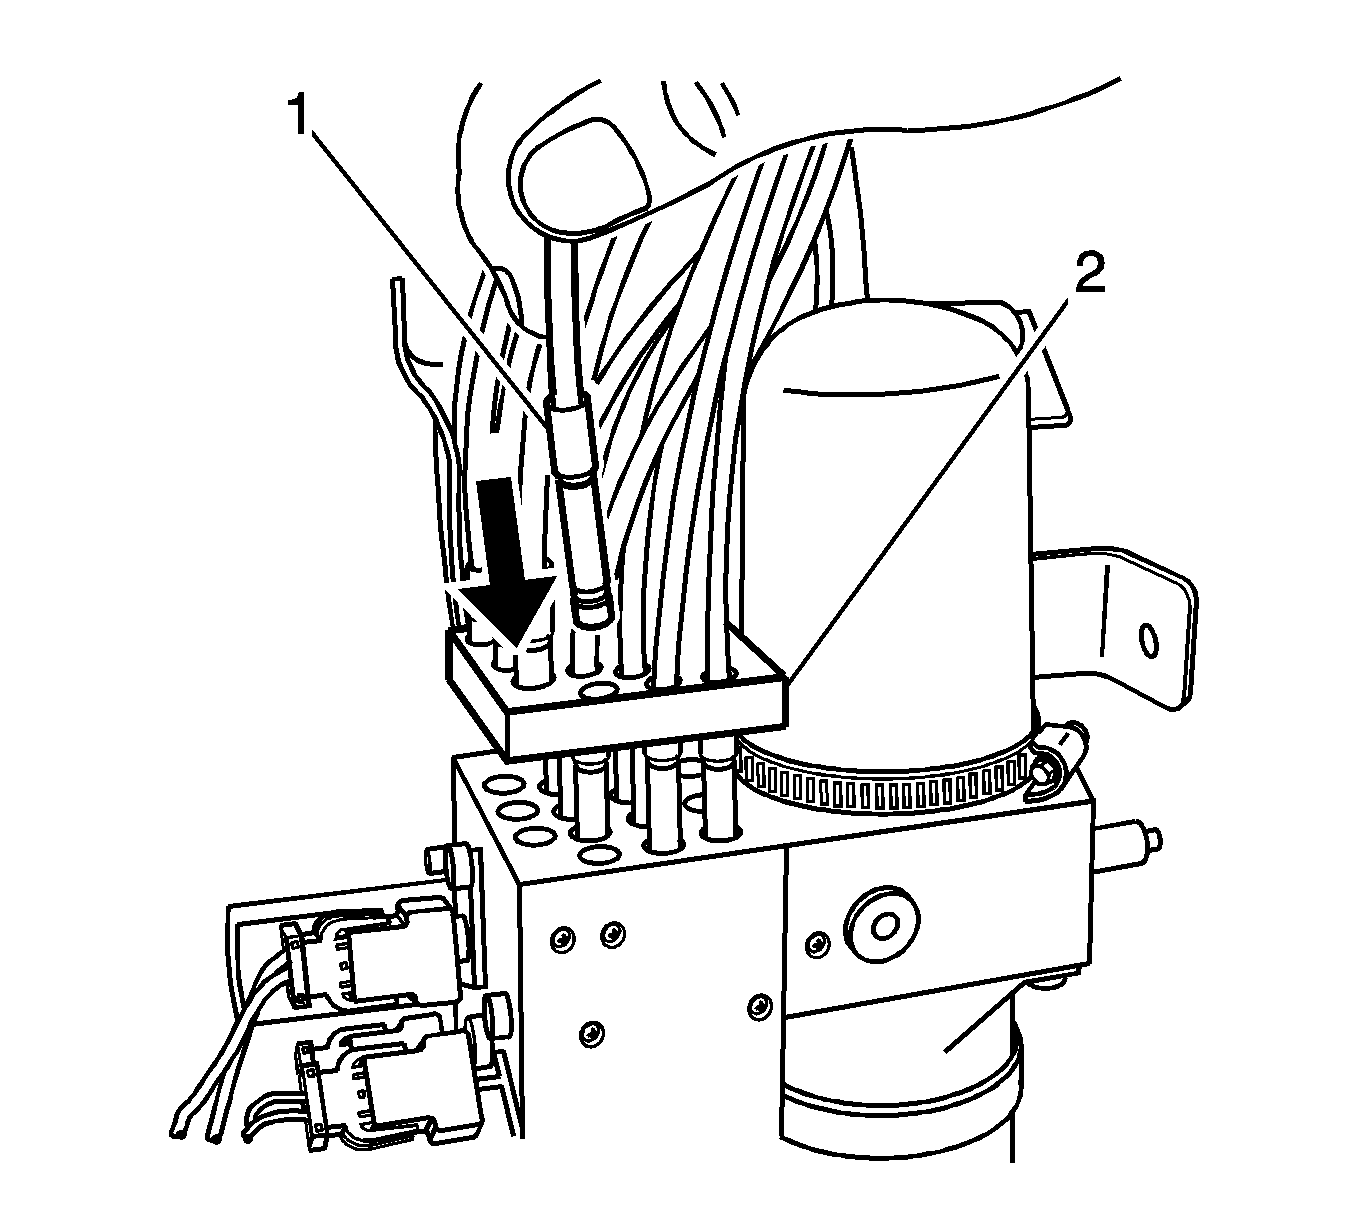
- Disconnect the electrical connector from the folding top control module, motor, solenoids and the pump bracket.
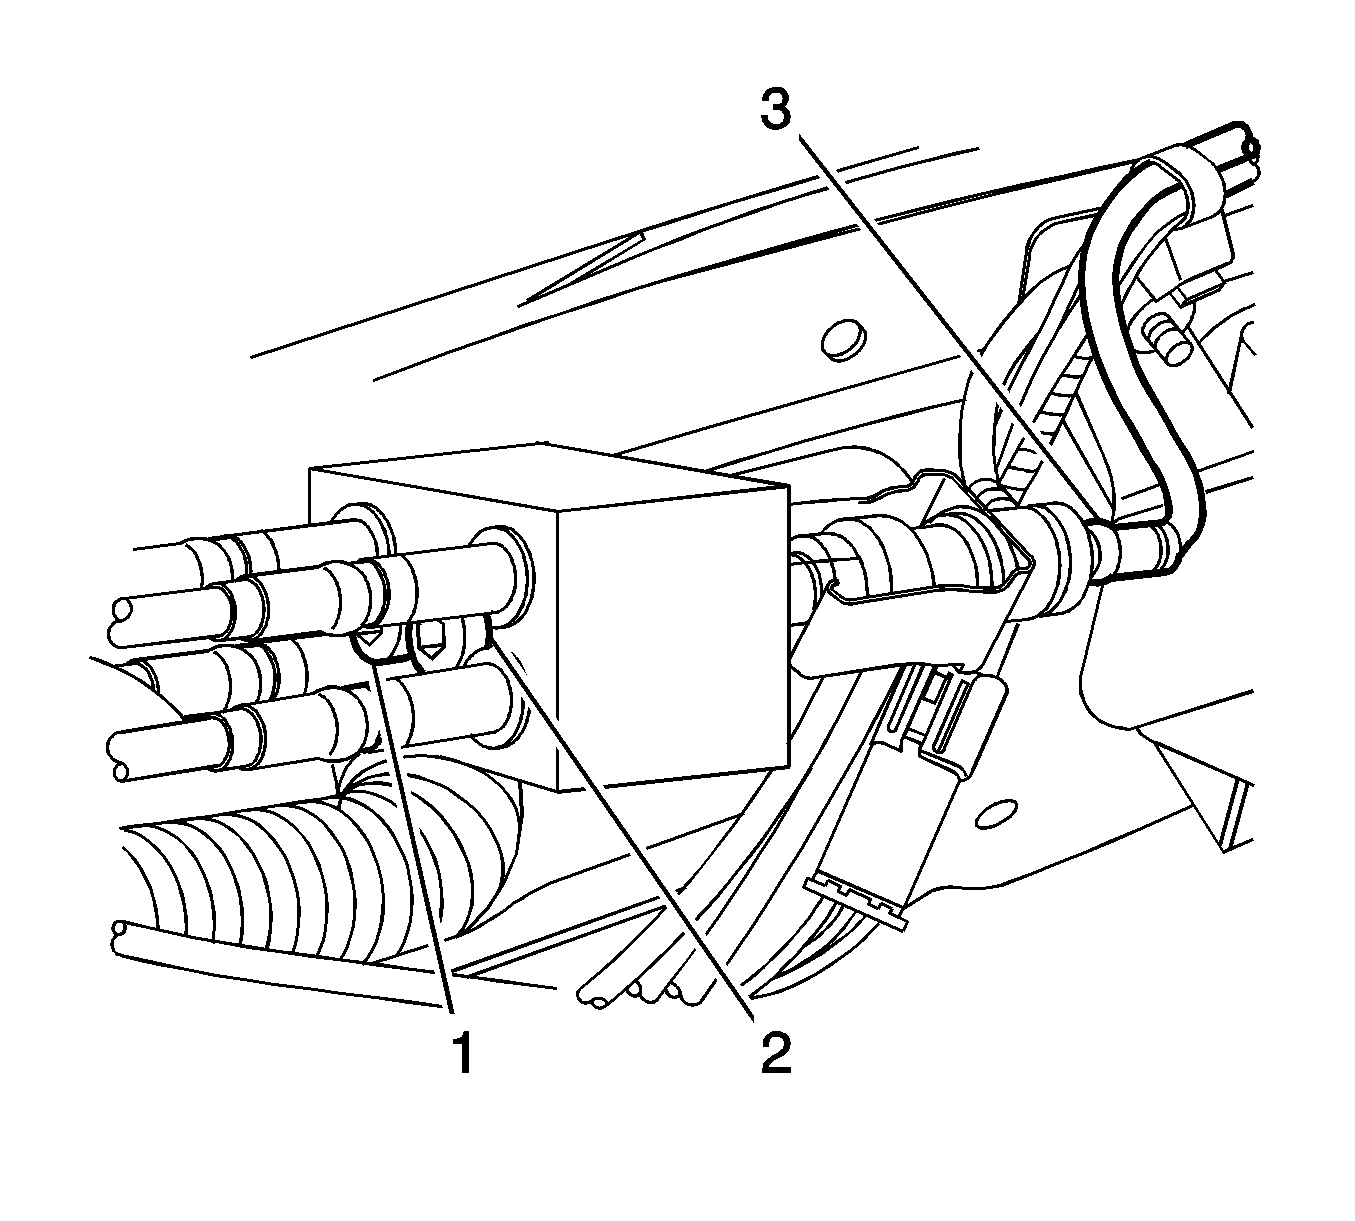
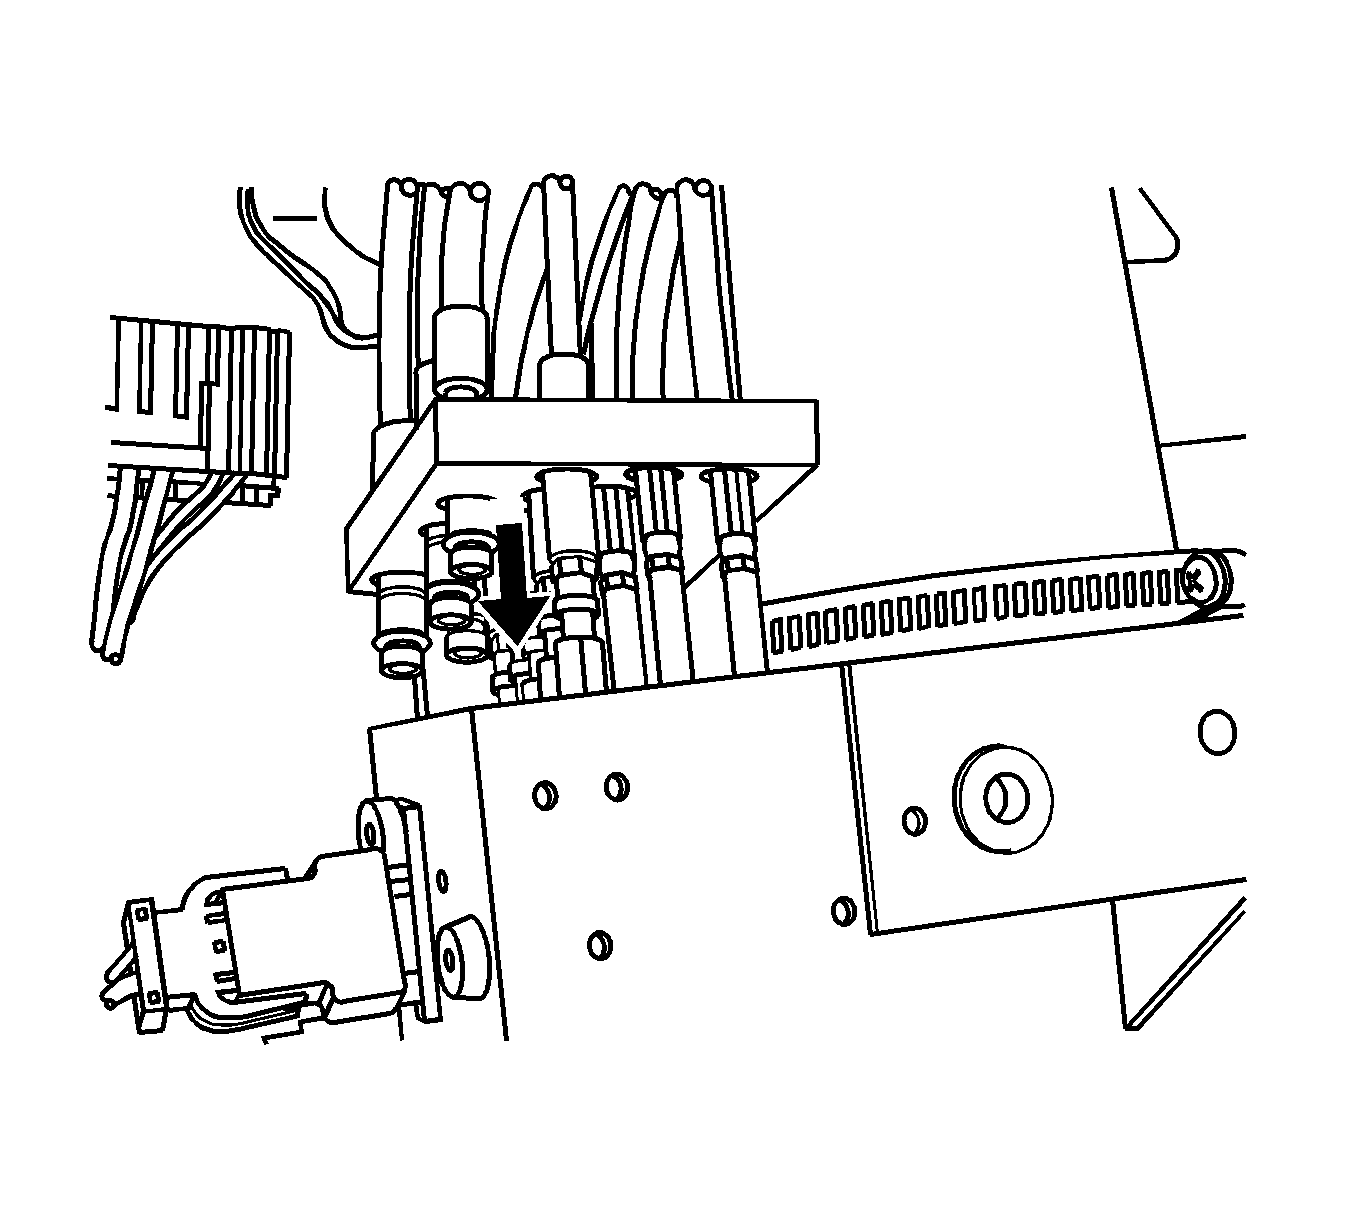
- Rotate the pump outward, to access hydraulic lines manifold bolts (1).
- Remove the bolts (1) from the pump manifold plate.
- Remove the reservoir filler plug.
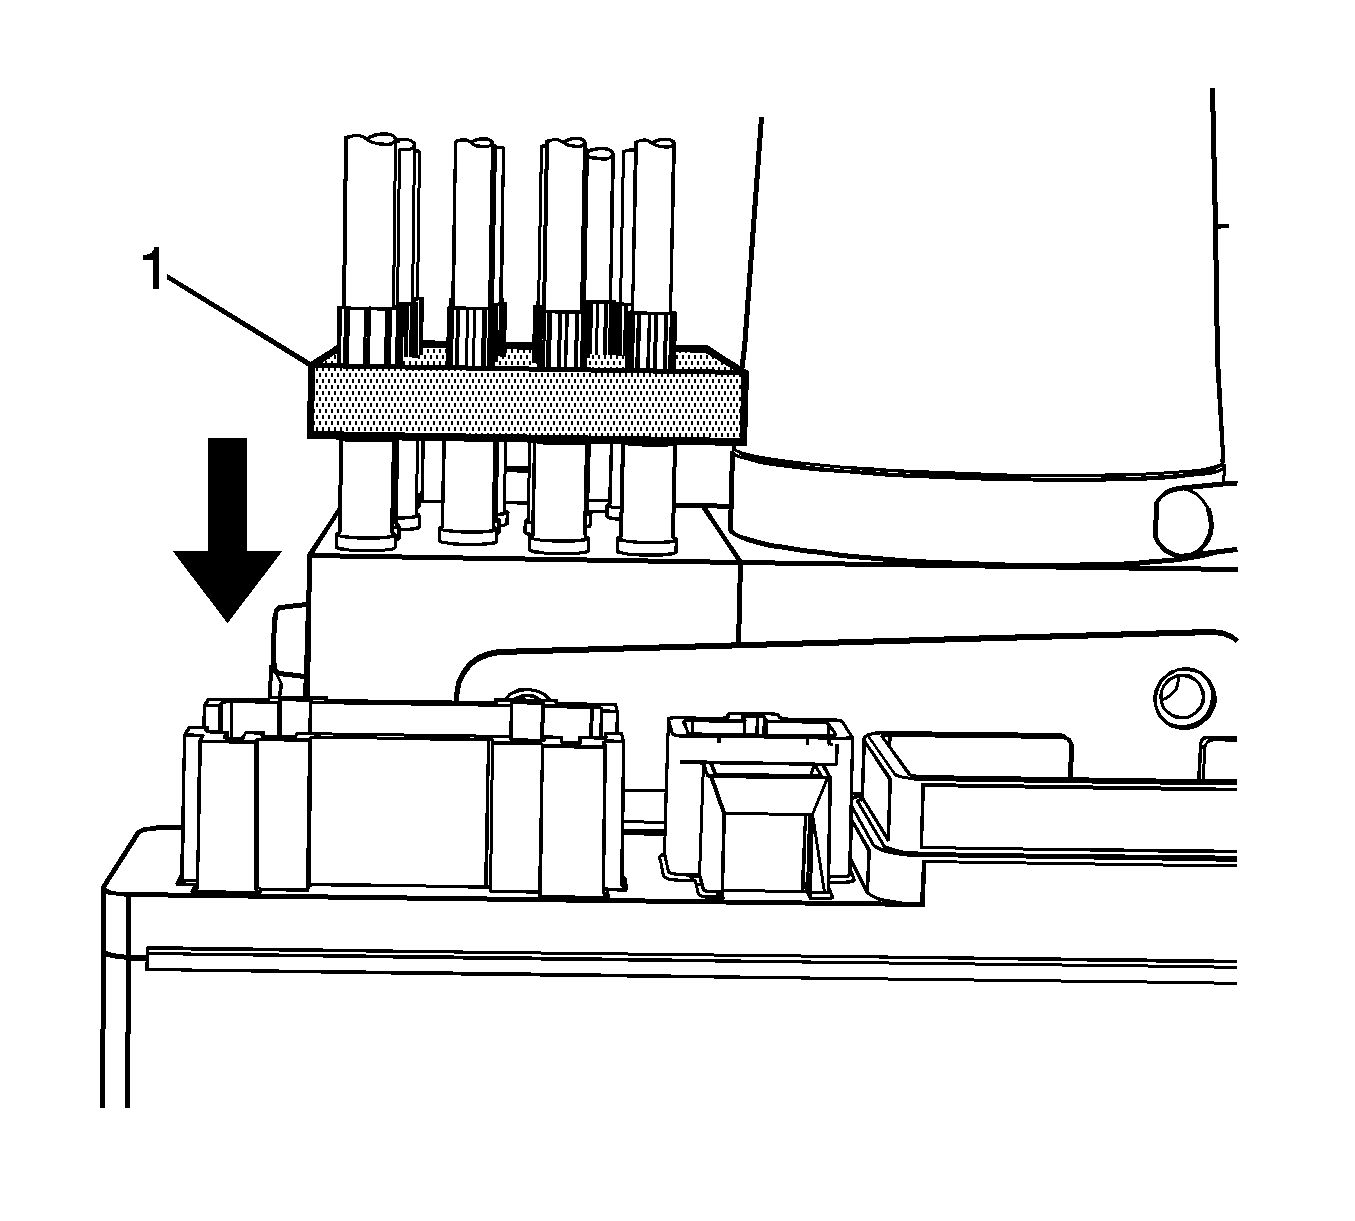
- Carefully lift up on the manifold plate (1).
- Locate the pair of cylinder hoses that need replacement. Refer to Folding Top Hydraulic Cylinder Hose Identification .
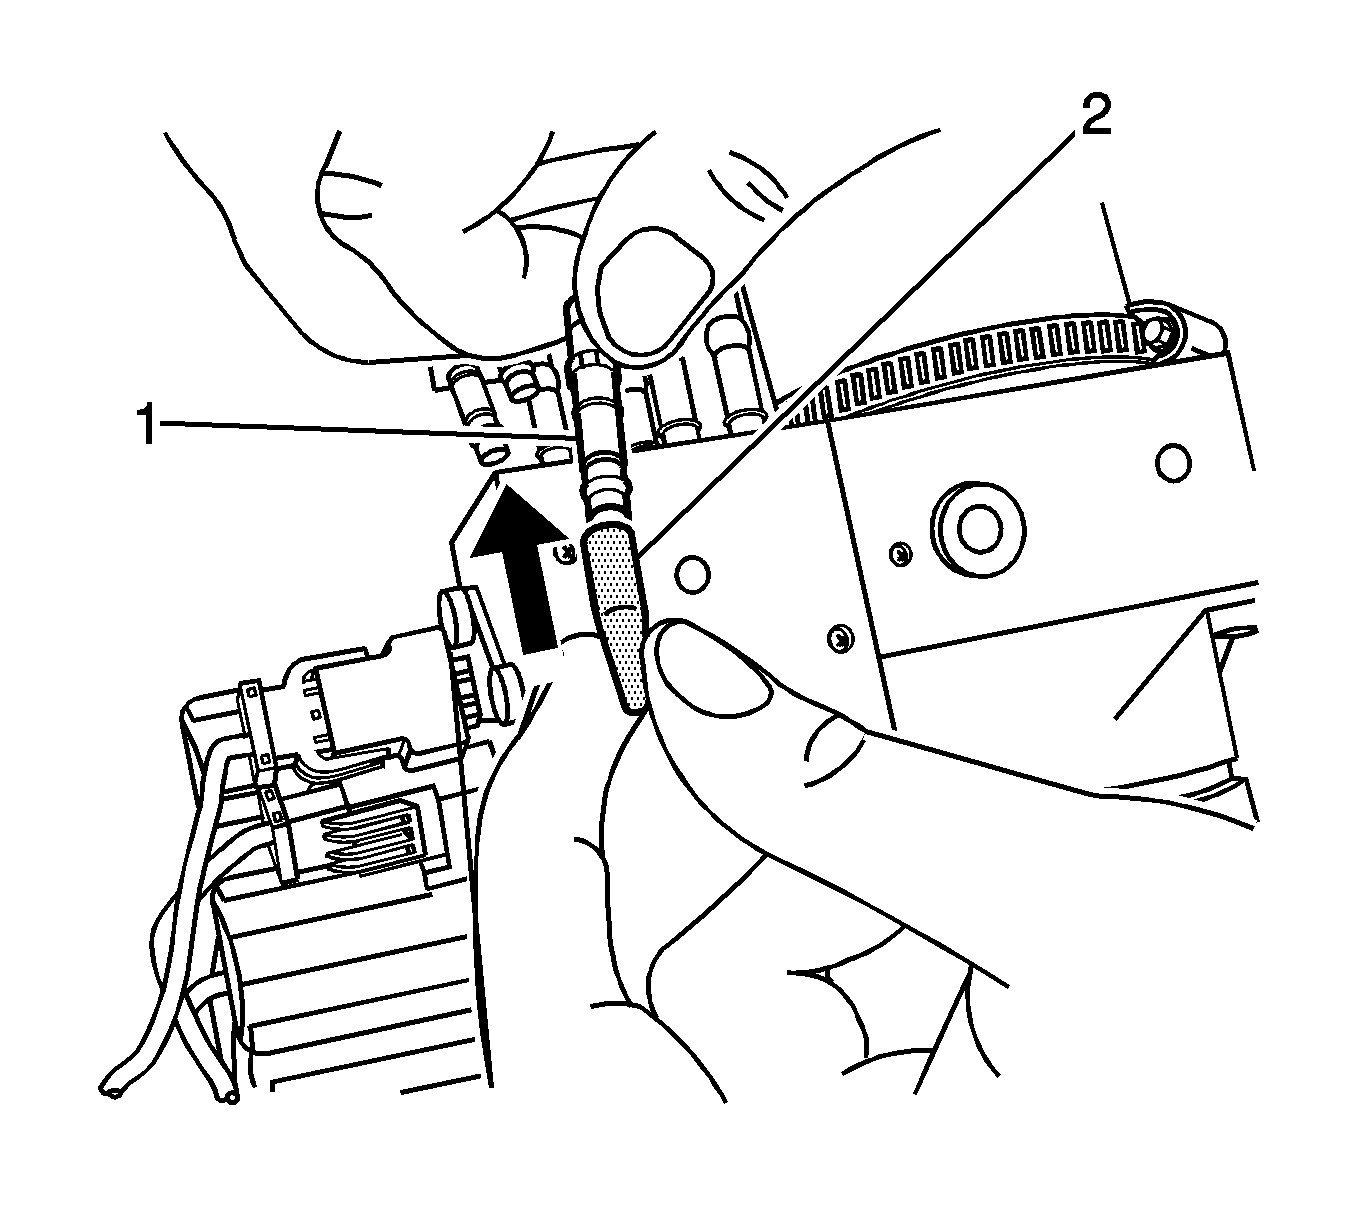
- For each set of hoses being replaced, remove one hose by pulling straight up from the pump. Use a clean shop towel to control any hydraulic fluid leakage.
- Push the hose back through the manifold plate.
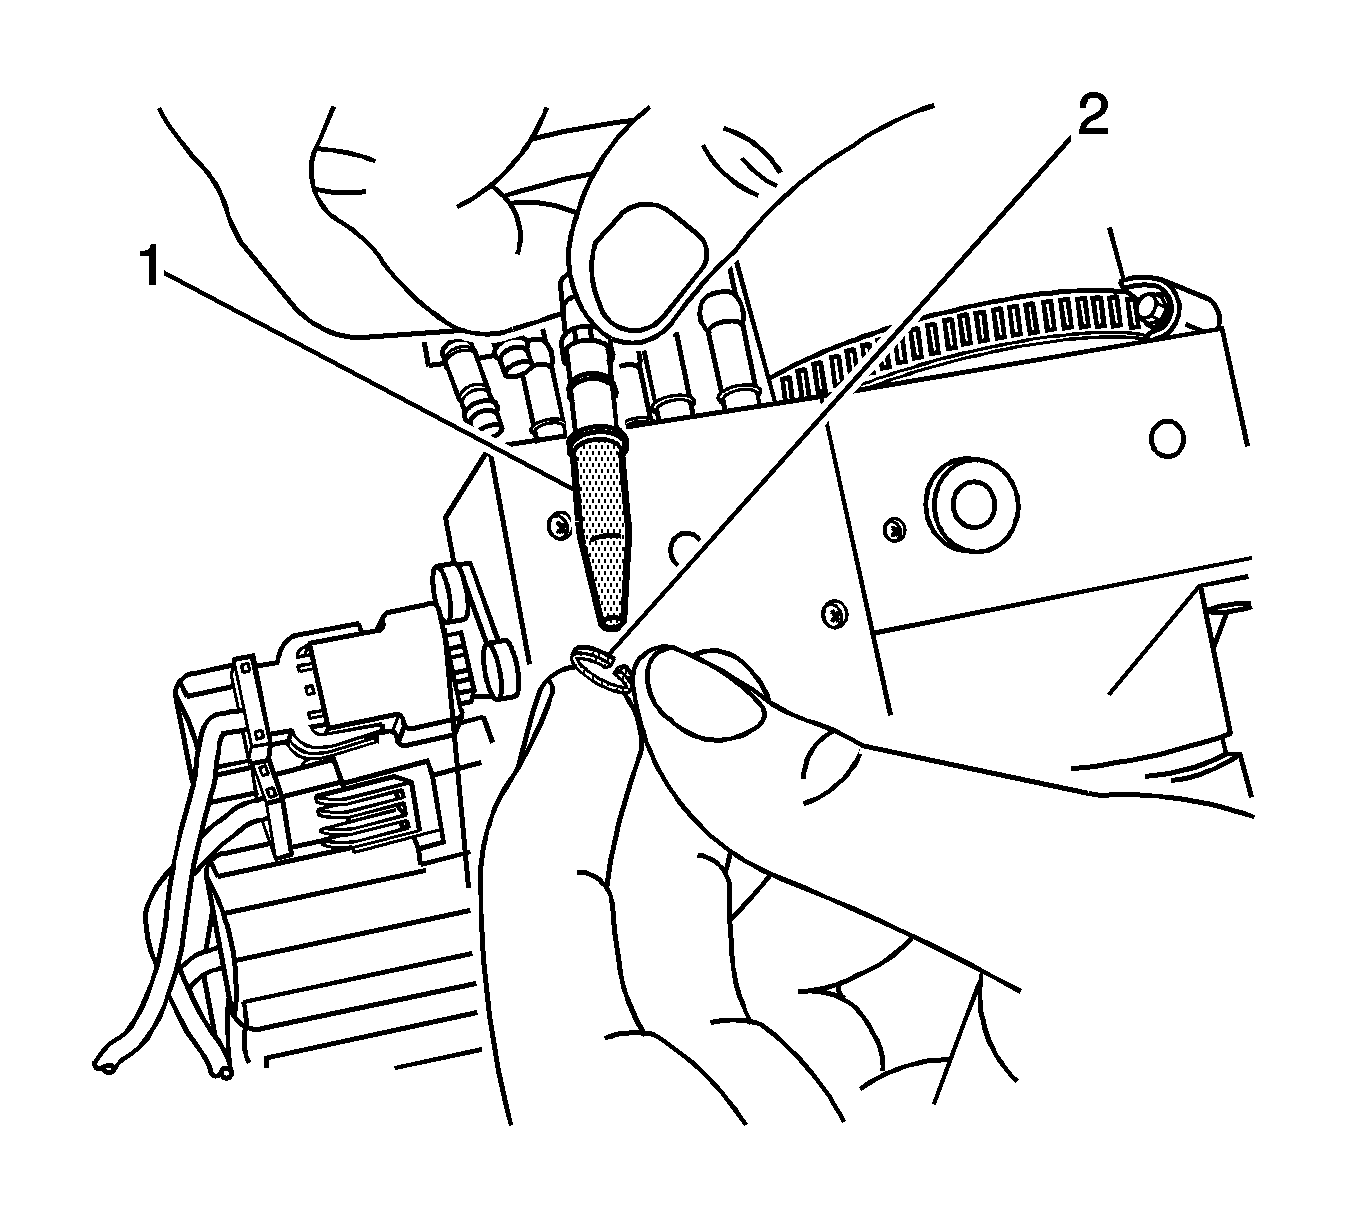
- Remove the hose retaining ring (1).
- Remove the hose (1) from the manifold plate (2).
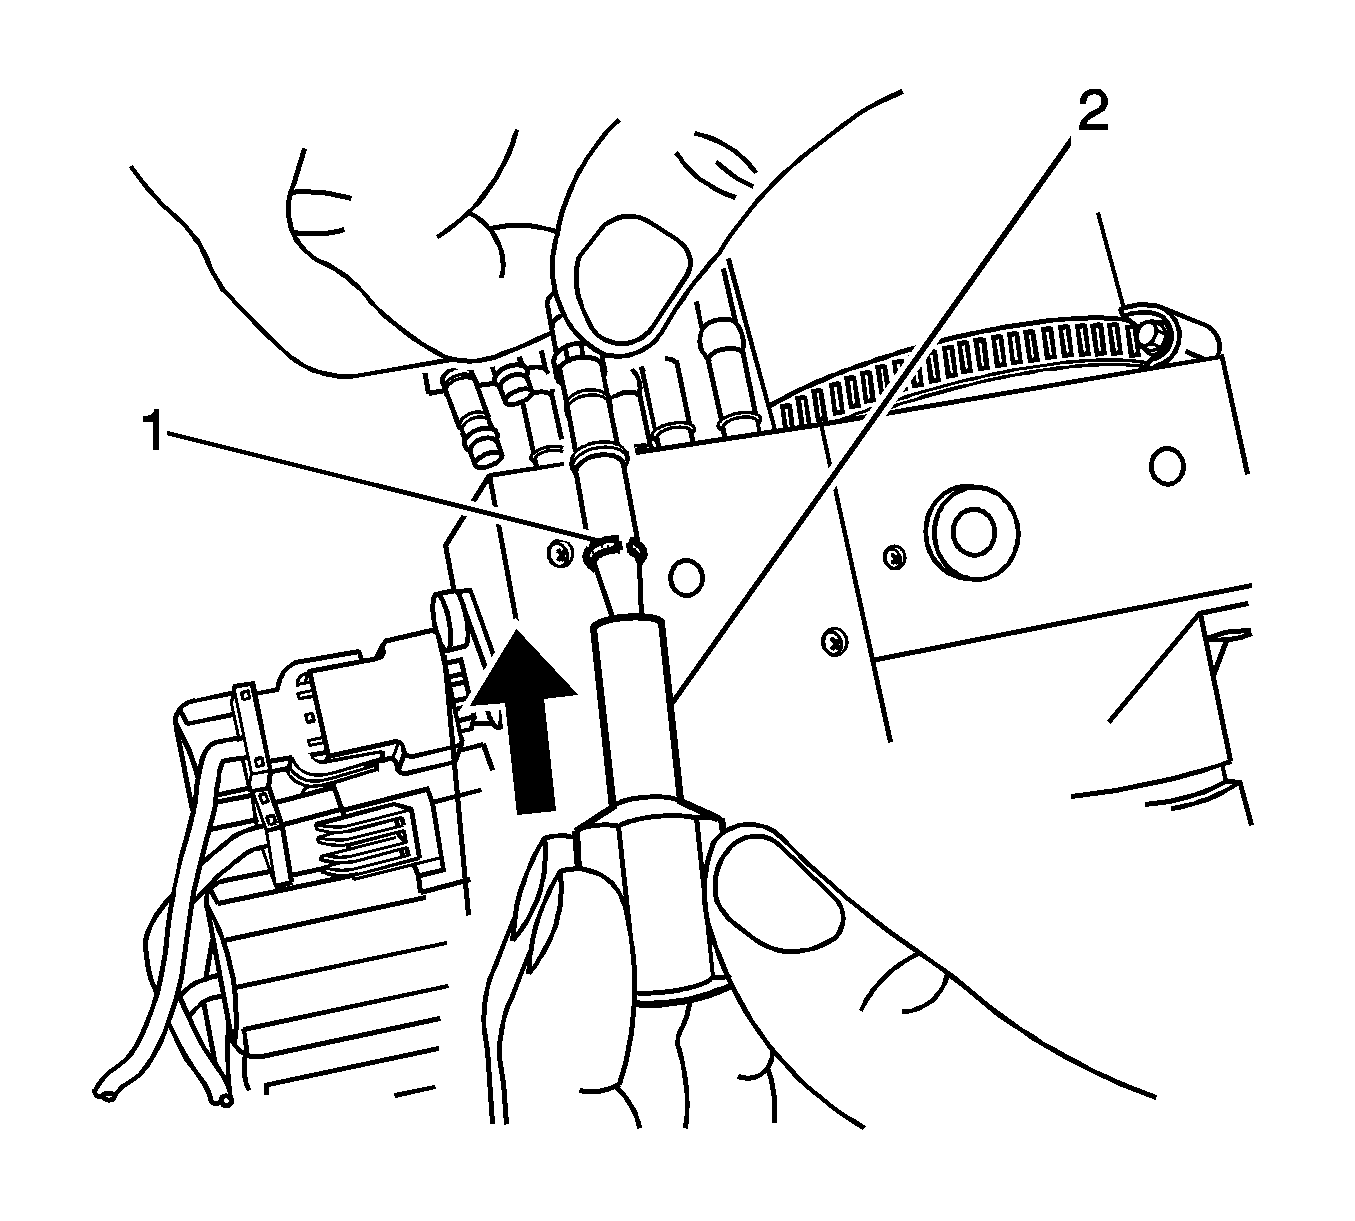
- Push the manifold end of the new hose (1) through the manifold plate (2).
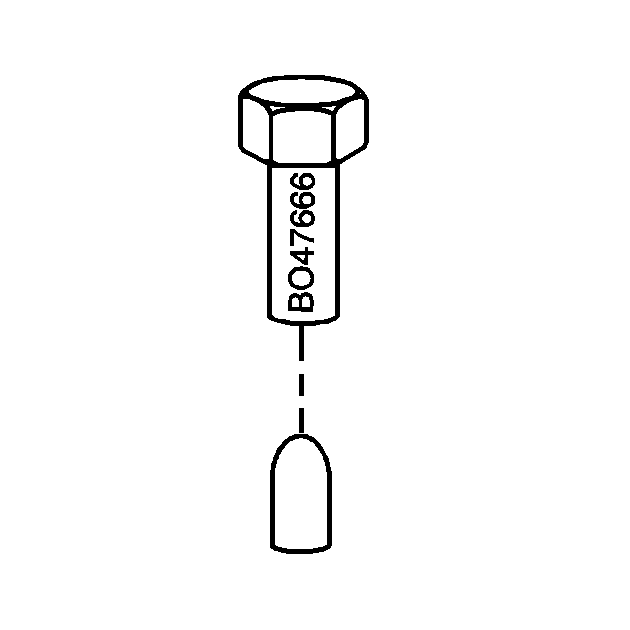
- Using the installer BO-47666 , install a new hose-retaining ring onto the hoses.
- Push the assembly cone (2) over the end of the hose (1) until the cone is fully seated.
- Install the retaining ring (2) onto the assembly cone (1).
- Using the installer BO-47666 (2), push the retaining ring (1) into place.
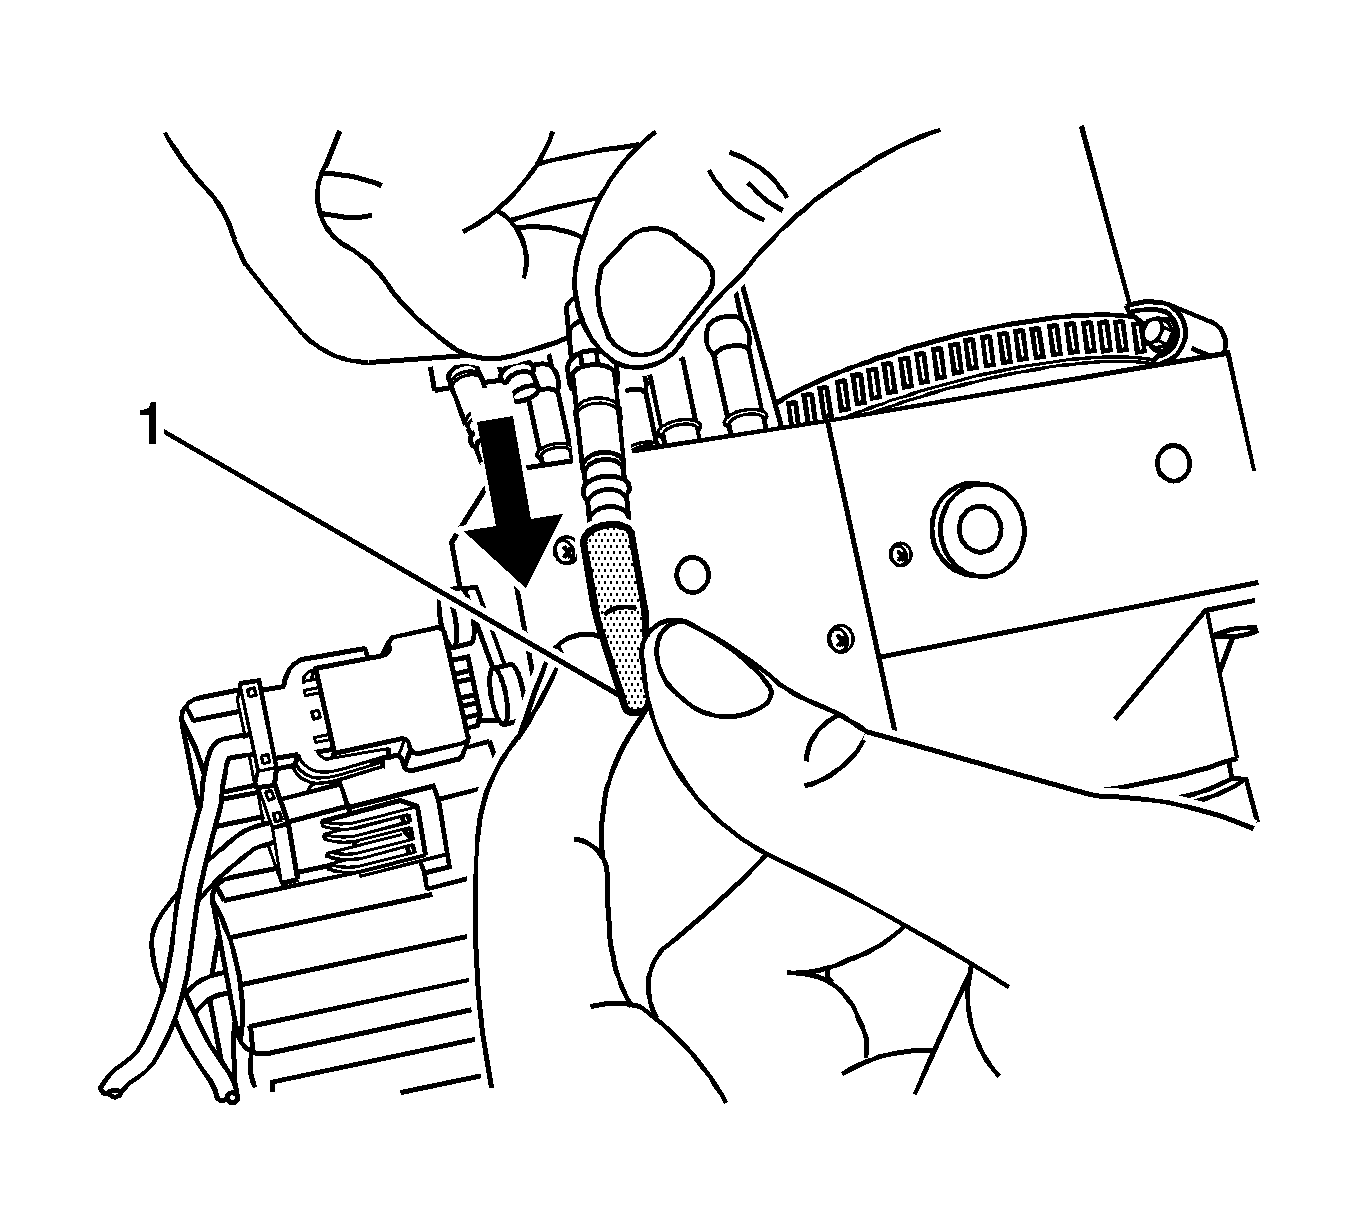
- Remove the assembly cone (1).
- Repeat the replacement procedure for the second hose.
- Install a new O-ring (1) on each cylinder hose that you removed from the pump manifold.
- Align the manifold plate bolt holes to the holes on the pump. This will ensure that the cylinder hoses are placed in the correct port.
- Align the cylinder hoses into each port and push down until the hoses are seated properly in the hydraulic pump manifold.
- Push down on the manifold plate (1) and verify that all of the cylinder hoses are seated properly.
- Install the manifold plate bolts (1).
- Remove the hydraulic cylinder from the mounting location. Do NOT remove the hoses from the cylinder at this time. Refer to the following procedures:
- Route the new hose set to the cylinder in the same way as the set being replaced.
- Depending on the hose set, you may have to remove and replace the following components:
- Use a small flat-bladed tool to release the retainer flex clip (1) from one of the cylinder hoses.
- Remove the retainer flex clip (1).
- Remove the cylinder hose (1). Use a clean shop towel to control any hydraulic fluid leakage.
- Remove the cylinder hose O-ring (1) from the cylinder.
- Install a new O-ring (1) onto the cylinder hose (2).
- Install the hose into the cylinder port (3). Press straight down on the hose until the hose is fully seated in the cylinder.
- Install a new cylinder hose retainer flex clip (1). Inspect the retainer flex clip to ensure that the flex clip is fully seated around the hose (2).
- Repeat the replacement procedure for the second hose.
- Install the appropriate hydraulic cylinder to the mounting location.
- Install the reservoir filler plug, if removed.
- Position the hydraulic pump to the correct mounting location if moved.
- Install the nuts (2) that attach the hydraulic pump bracket to the floor pan.
- Connect the electrical connectors to the folding top control module, motor, solenoids and to the pump bracket.
- Remove the protective covering.
- Tighten the hydraulic pump bypass valve. Refer to Folding Top Pump Bypass Valve Pressure Release Adjustment .
- Connect the battery. Refer to Battery Negative Cable Disconnection and Connection .
- Inspect the hydraulic system fluid level and add fluid as needed. Refer to Folding Top Fluid Addition .
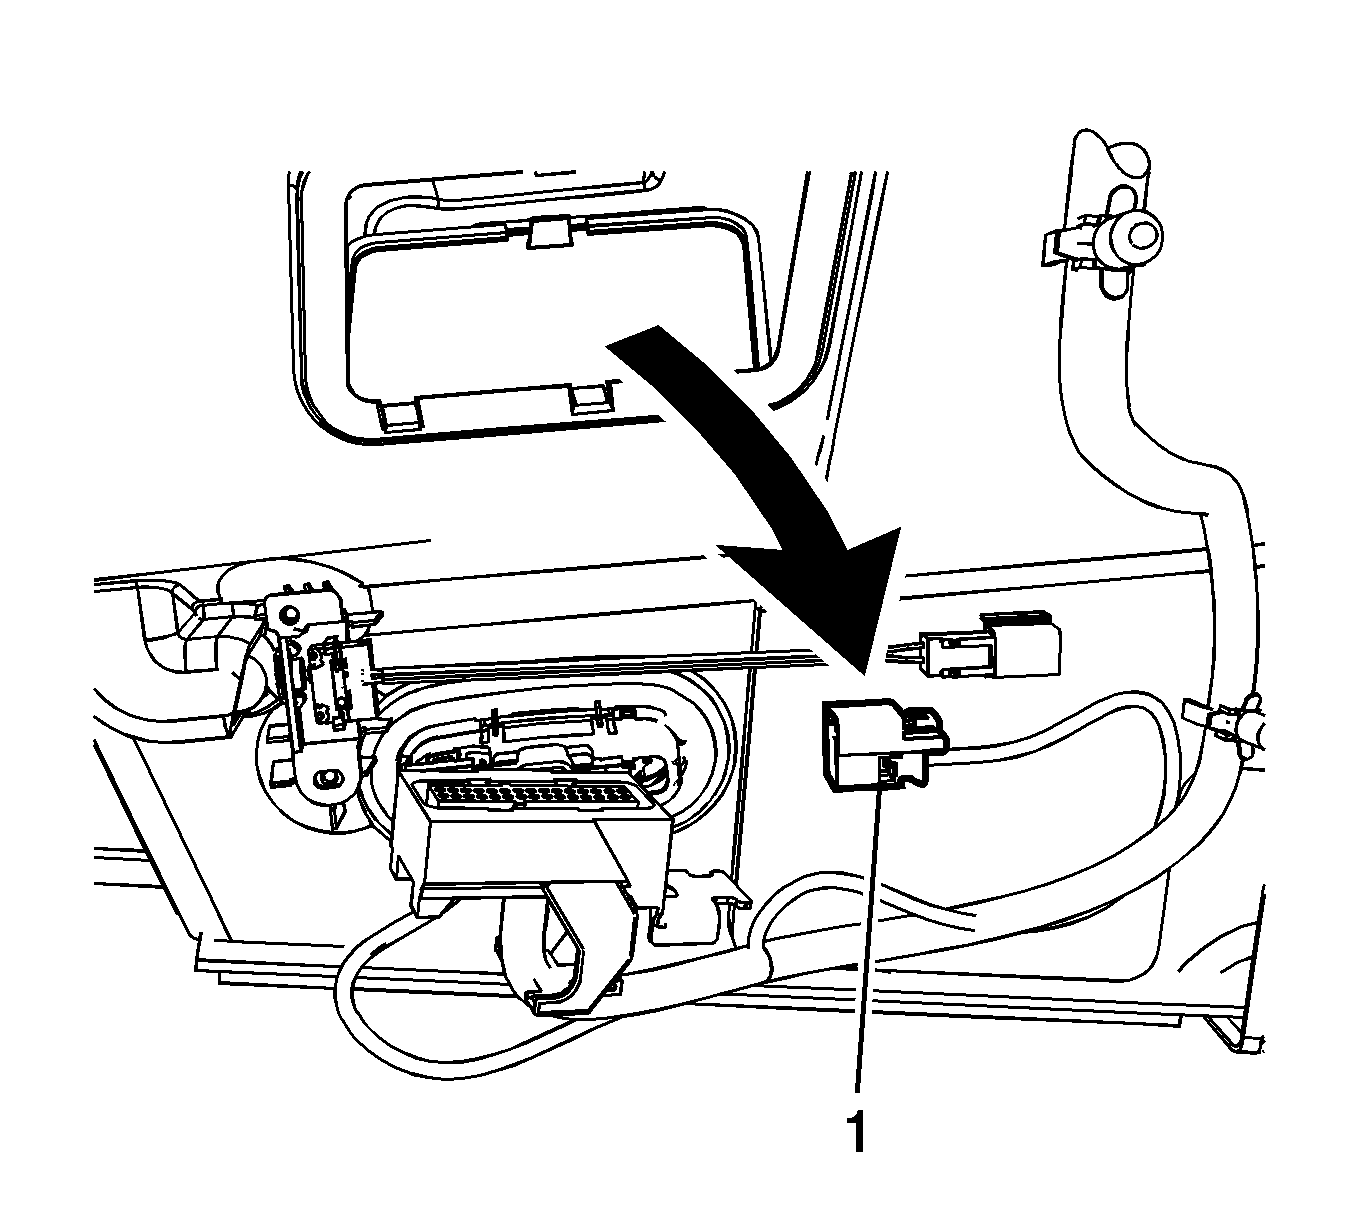
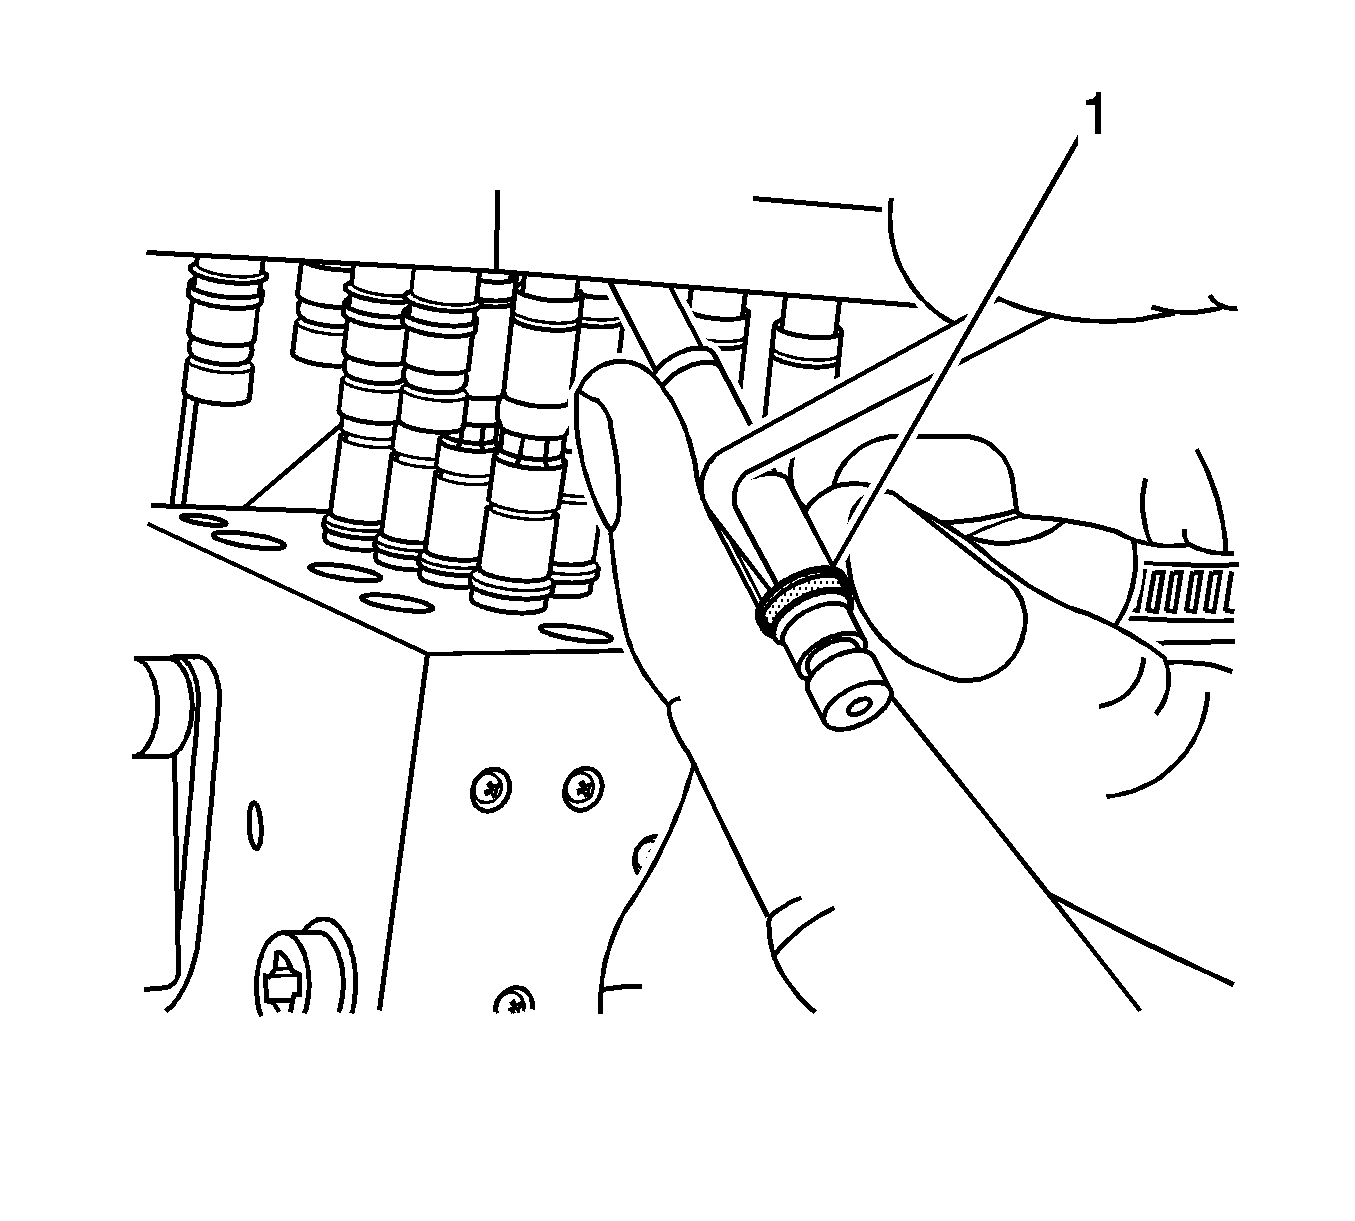
- Connect a test kit J 35616 jumper switch to the actuator assembly folding top stowage compartment switch wiring harness (1) located behind the right rear trim panel next to the folding top hydraulic pump.
- Using the jumper switch, cycle the folding top 3 times to ensure there are no leaks.
- Install the left side and front rear compartment trim panel, if removed. Refer to Rear Compartment Side Trim Replacement - Left Side and Rear Compartment Front Trim Panel Replacement .
- Install the right side compartment trim panel. Refer to Rear Compartment Side Trim Replacement - Right Side .
- Close the rear compartment lid.
Caution: Refer to Eye Protection Caution in the Preface section.
Caution: Refer to Folding Top Hydraulic Pressure Caution in the Preface section.
Caution: Refer to Servicing Electrical Components Caution in the Preface section.
Notice: Refer to Cylinder Hoses Notice in the Preface section.
Important:
• Do Not reuse spring flex clip. Replace spring flex clip after disassembly. • Before disconnecting the cylinder hoses, have the replacement cylinder ready. • Once the cylinder hose or the port plug has been removed, Do NOT move the cylinder rod. This will cause fluid to squirt out of the ports.

| 5.1. | Place shop towels under the hydraulic cylinder lines before disconnecting. |
| 5.2. | Place a protective cover over the rear compartment interior and the adjacent body panels. |
Important: When replacing the roof side hoses, Do Not disconnect hoses at the pump.
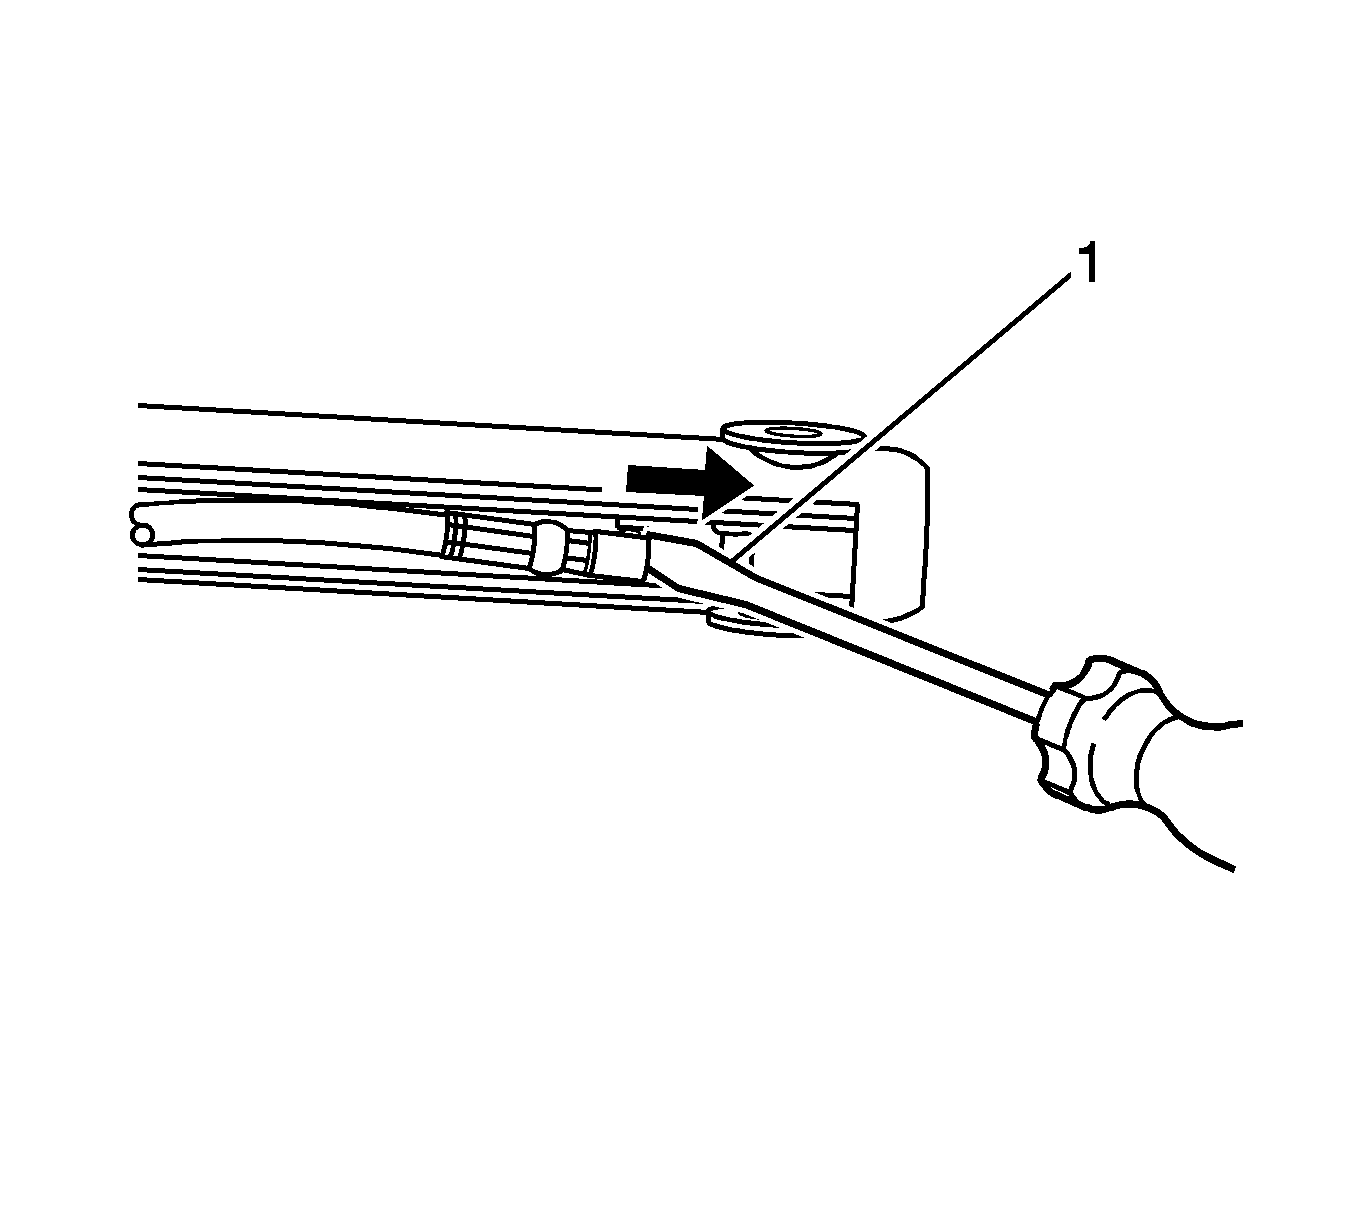
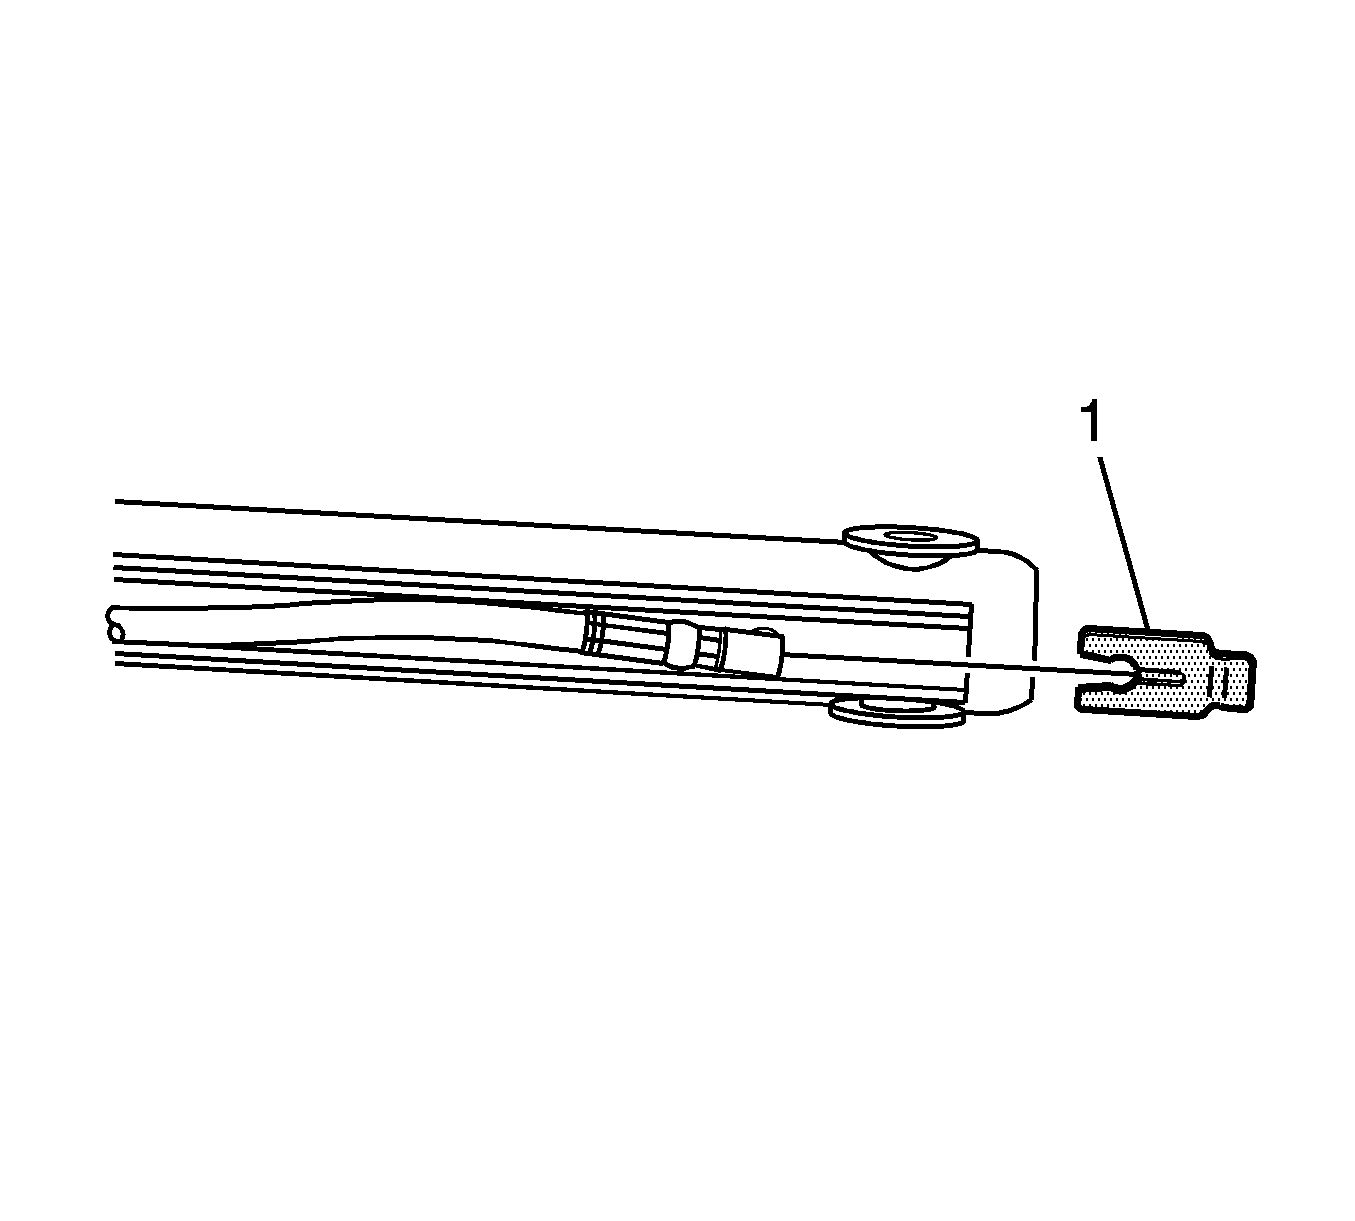
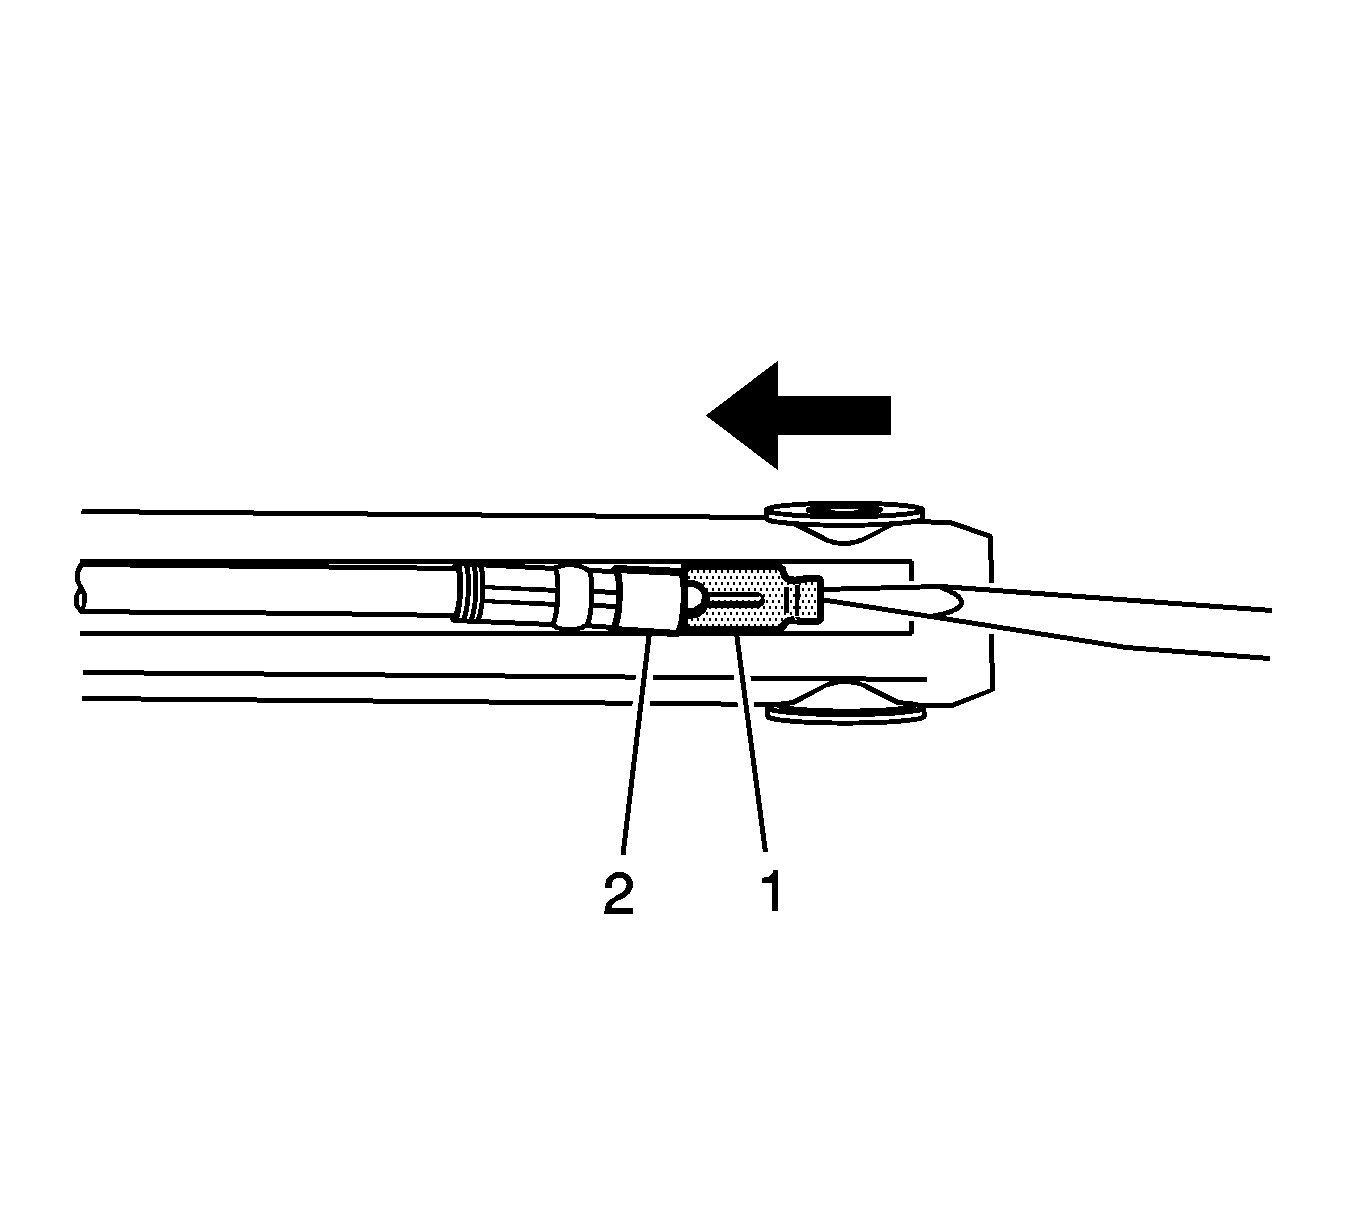
Disconnect the hose set from the cylinder valve, by removing the retaining screw (1 or 2) and then pull outward from the valve.
Notice: Refer to Fastener Notice in the Preface section.
Tighten
Tighten the bolts to 5 N·m (44 lb in).
Identify the hose numbers to be replaced.

Important: Remove the two hoses connections one at a time. Repeat the following procedure for the second hose.

Tighten
Tighten the bolts to 10 N·m (89 lb in).
Important:
• If you are replacing hose sets for more than one cylinder, complete the procedure for one cylinder before you begin with another. • If replacing any of the pump side quick release hoses, hydraulic cylinder removal is not necessary.
Important: Improper hose routing can lead to hose failure as a result of rubbing or pinching.
Important: Remove only one fastener at a time so that the amount of slack between fasteners can be exactly duplicated between the hose sets.
| • | The tie wraps |
| • | The P-clips |
| • | The wire loom |
| • | The conduit |
Important: Remove the two hoses connections one at a time. You will repeat this entire procedure for the second hose later. Refer to Folding Top Hydraulic Cylinder Hose Identification .

Important: After you have removed the cylinder hose, do NOT move the cylinder rod. This will cause fluid to squirt out of the ports.
Important: Use caution when removing O-ring from the cylinder, steel tools can scratch the O-ring sealing surface inside the cylinder which could cause a leak.
Important: Apply LOCTITE™ Blue, GM P/N 12345382 (Canadian P/N 10953489) or equivalent to the bracket nuts (2).
Tighten
Tighten the nuts to 18 N·m (13 lb ft).