Removal Procedure
- Remove the instrument panel (IP) insulators. Refer to Instrument Panel Insulator Panel Replacement - Right Side and Instrument Panel Insulator Panel Replacement - Left Side .
- Remove the T-tops, if equipped.
- Remove the IP upper trim pad. Refer to Instrument Panel Upper Trim Pad Replacement .
- Remove the knee bolster deflector. Refer to Knee Bolster Deflector Replacement - Left Side .
- Remove the IP storage compartment door. Refer to Instrument Panel Compartment Door Replacement .
- Disable the supplemental inflatable restraint (SIR) system. Refer to Disabling the SIR System in Restraints.
- Remove the stoplamp switch. Refer to Stop Lamp Switch Replacement in Hydraulic Brakes.
- Remove the radio. Refer to Radio Replacement in Entertainment.
- Remove the instrument cluster. Refer to Instrument Cluster Replacement .
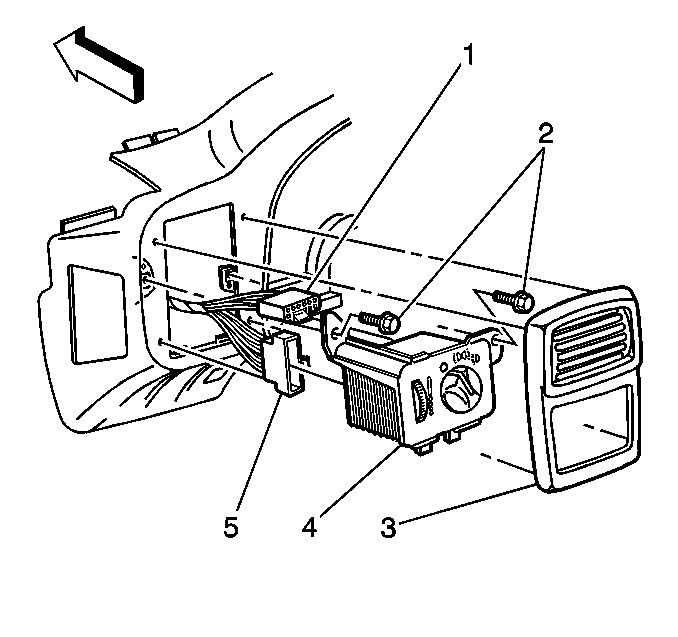
- Remove the left hand IP accessory trim plate (3). (Chevrolet only).
- Remove the headlamp switch bolts (2). (Chevrolet only).
- Disconnect the headlamp switch connector (1) from the headlamp switch (4). (Chevrolet only).
- Disconnect the dimmer switch connector (5) from the headlamp switch (4). (Chevrolet only).
- Unsnap the headlamp switch (2) from the IP. (Pontiac only).
- Disconnect the headlamp switch connector (1) from the headlamp switch (2). (Pontiac only).
- Disconnect the dimmer switch connector (3) from the headlamp switch (2). (Pontiac only).
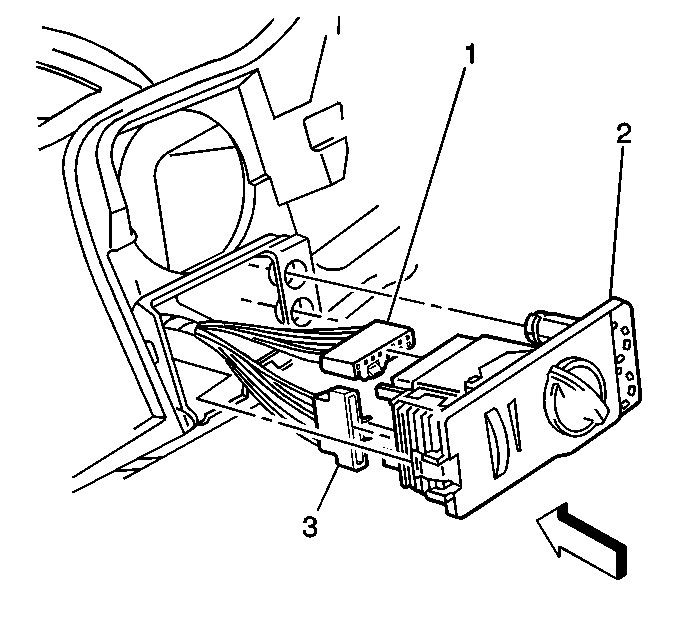
- Remove the temperature control cable bolt.
- Remove the temperature control cable from the module.
- Unsnap the retainer (1) from the IP.
- Remove the retainer (1) from the switch (2).
- Push the harness through the IP opening.
- Remove the heating, ventilation and air conditioning (HVAC) control. Refer to Control Assembly Replacement in HVAC Systems - Manual.
- Remove the daytime running lamp (DRL) ambient light sensor module from the HVAC duct.
- Disconnect the DRL module electrical connectors.
- Remove the DRL module.
- Remove the front floor console. Refer to Front Floor Console Replacement .
- Remove the fuse block cover.
- Remove the fuse block mounting bolt.
- Reposition the fuse block.
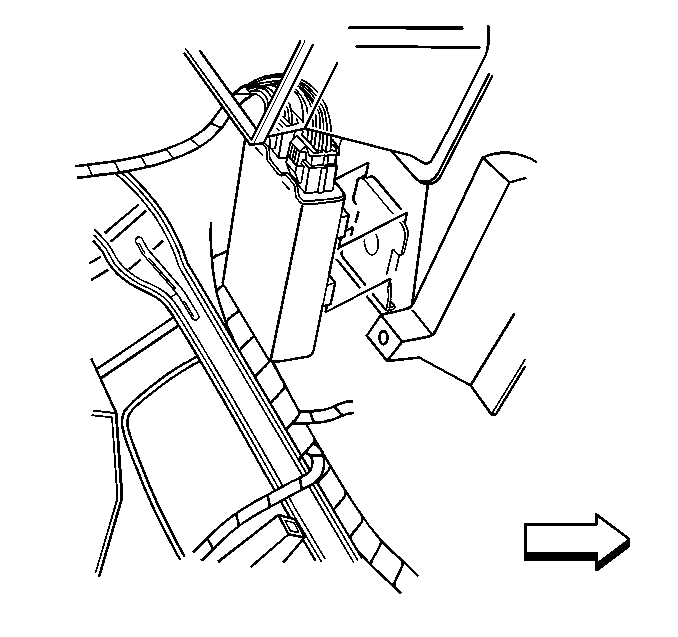
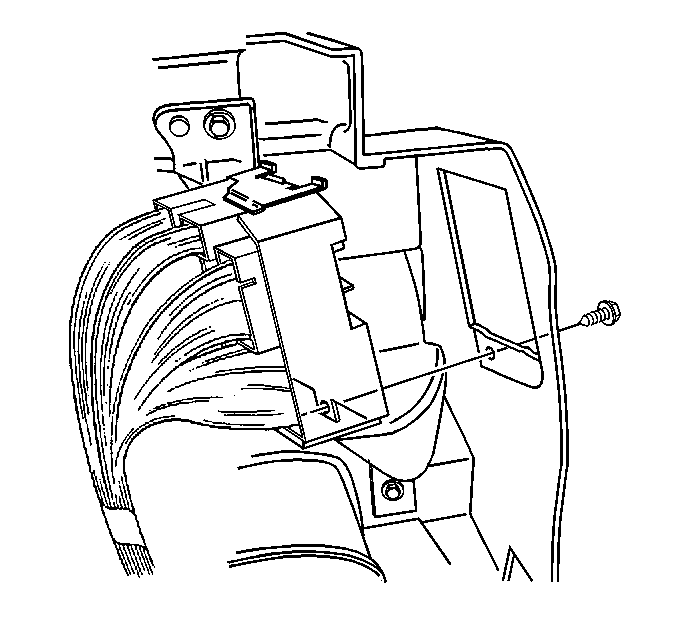
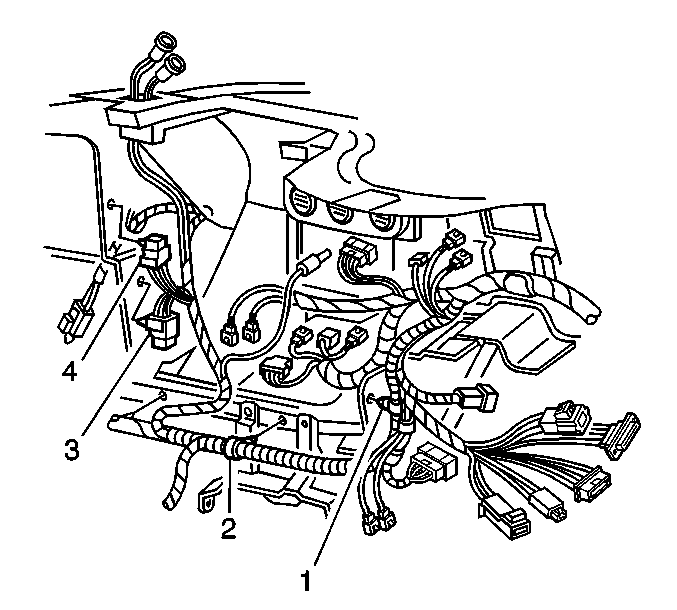
- Remove the data link connector (DLC) mounting bolts (2).
- Remove the DLC (3) from the tie bar (1).
- Cut the tie strap securing the steering column branch to the air distributor duct.
- Unclip the star connector from the knee bolster bracket.
- Remove the IP carrier mounting nuts (2).
- Remove the cross car and IP harness grounds from the IP mounting studs.
- Remove the IP carrier mounting bolts (1).
- Pull the IP outward from the front of dash.
- Remove the three upper bolts starting at the passenger side from the air distribution duct.
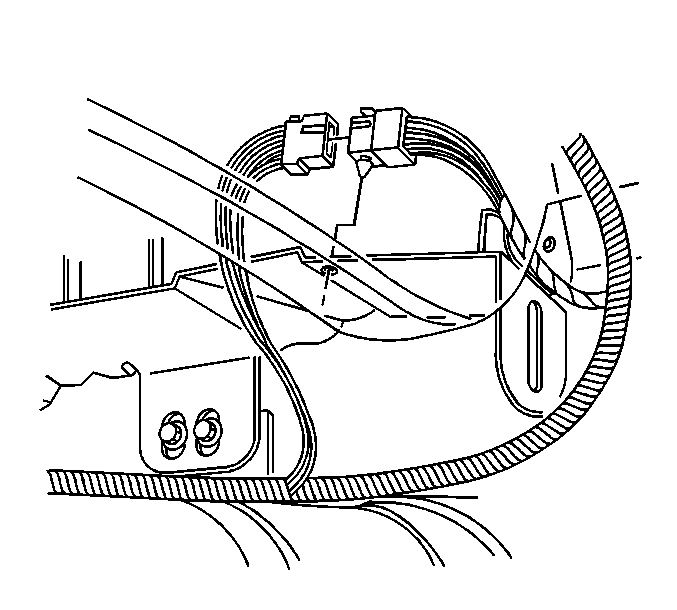
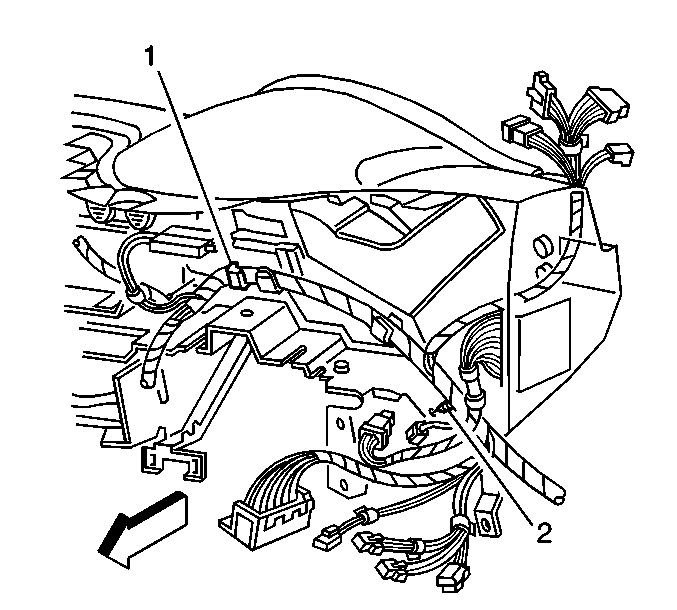
- Remove the forward lamp harness (1) and the cross car harness (2) from the hook.
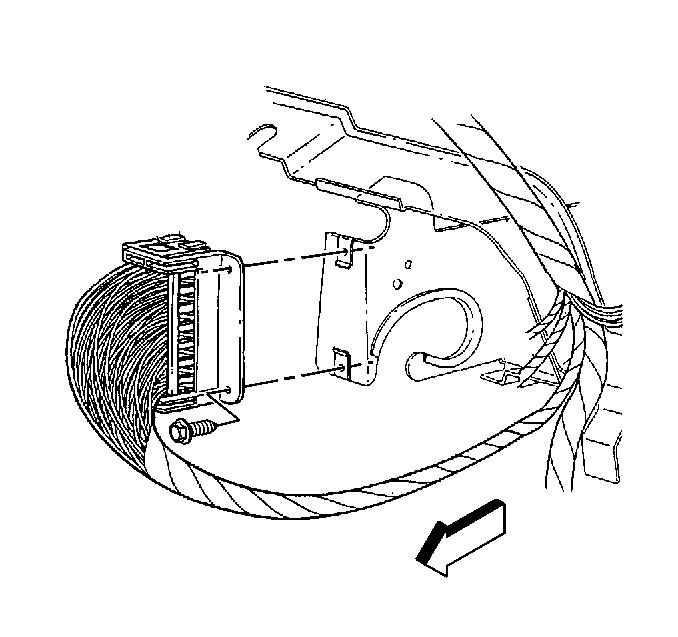
- Remove the 48-way connector bolts and connector from the IP.
- Remove the hatch release relay from the IP.
- Remove the blower motor relay from the IP.
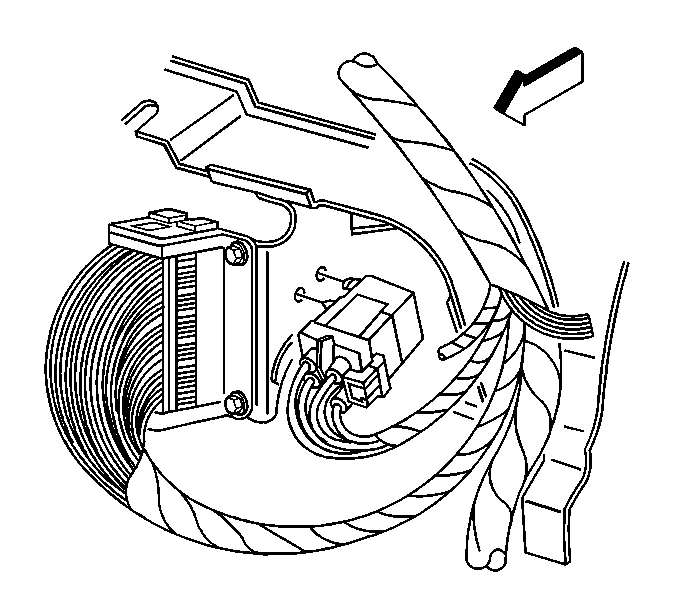
- Disconnect the IP harness to air conditioning (A/C) resistor connector.
- Unclip the A/C resistor connector from the IP.
- Remove the rear fog lamp relay (1), if equipped from the SIR bracket.
- Remove the convertible top relay (2), if equipped from the SIR bracket.
- Disconnect the rosebud connectors (3) from the IP tie bar.
- Remove the harness rosebuds (1,2) from the IP.
- Remove the convertible top motor relay (3), if equipped from the SIR bracket.
- Remove the theft deterrent relay (4) from the SIR bracket.
- Remove the harness branches from the IP openings.
- Remove the IP cluster connector from the IP.
- Remove the IP harness from the retaining clips (1).
- Disconnect the harness rosebud (2) from the IP.
- Remove the harness headlamp branch from the IP opening.
- Remove the IP carrier from the vehicle.
- Place the IP carrier face down on a work surface.
- Remove the lower and driver side bolts from the air distribution duct.
Caution: When you are performing service on or near the SIR components or the SIR wiring, you must disable the SIR system. Refer to Disabling the SIR System. Failure to follow the correct procedure could cause air bag deployment, personal injury, or unnecessary SIR system repairs.


Installation Procedure
- Align the air distribution duct to the IP.
- Install the lower and driver side air distribution duct bolts.
- Install the IP carrier to the vehicle.
- Route the harness headlamp branch through the IP opening.
- Connect the harness rosebud (2) to the IP.
- Place the IP harness over the retaining clips (1).
- Connect the IP cluster connector to the IP.
- Route the harness branches through the IP openings.
- Connect the theft deterrent relay (4) to the SIR bracket.
- Connect the convertible top motor relay (3), if equipped to the SIR bracket.
- Connect the harness rosebuds (1,2) to the IP.
- Connect the rosebud connectors (3) to the IP tie bar.
- Connect the convertible top relay (2), if equipped to the SIR bracket.
- Connect the rear fog lamp relay (1), if equipped to the SIR bracket.
- Clip the A/C resistor connector to the IP.
- Connect the IP harness to the A/C resistor connector.
- Connect the blower motor relay to the IP.
- Connect the hatch release relay to the IP.
- Install the 48-way connector and bolts to the IP.
- Route the cross car harness (2) and forward lamp harness (1) over the hook.
- Install the upper bolts to the air distribution duct.
- Align the IP carrier to the dash, with the outboard slots in the IP tie bar over the studs on the IP mounting brackets at the front body hinge pillar inner panel.
- Press the IP forward and engage the slots in the tie bar onto the studs on the steering column mounting bracket.
- Align the holes in the IP carrier and the passenger side SIR bracket to the J-nuts on the dash.
- Install the IP carrier mounting bolts (1).
- Align the cross car and the IP harness ground to the appropriate IP mounting studs.
- Install the IP carrier mounting nuts (2).
- Clip the star connector to the knee bolster bracket.
- Install a tie strap securing the steering column harness branch to the air distributor duct.
- Align the data link connector to the tie bar (1).
- Install the data link connector bolts (2).
- Install upper tabs on the fuse block into the IP carrier.
- Install the fuse block mounting bolt.
- Install the front floor console. Refer to Front Floor Console Replacement .
- Connect the DRL module electrical connectors.
- Install the DRL module to the HVAC duct.
- Install the HVAC control. Refer to Control Assembly Replacement in HVAC Systems - Manual.
- Pull the harness through the IP opening.
- Install the retainer (1) to the switch (2).
- Snap the retainer (1) to the IP.
- Install the temperature control cable to the module.
- Install the temperature control cable bolt.
- On the Pontiac, perform the following steps:
- On a Chevrolet, perform the following steps:
- Install the IP cluster. Refer to Instrument Cluster Replacement .
- Install the radio. Refer to Radio Replacement in Entertainment.
- Install the stoplamp switch. Refer to Stop Lamp Switch Replacement in Hydraulic Brakes.
- Enable the SIR system. Refer to Enabling the SIR System in Restraints.
- Install the IP storage compartment door. Refer to Instrument Panel Compartment Door Replacement .
- Install the knee bolster deflector. Refer to Knee Bolster Deflector Replacement - Left Side .
- Install the IP upper trim pad. Refer to Instrument Panel Upper Trim Pad Replacement .
- Install the T-tops, if equipped.
- Install the IP insulators. Refer to Instrument Panel Insulator Panel Replacement - Right Side and Instrument Panel Insulator Panel Replacement - Left Side .
Tighten
Tighten the lower and driver side air distribution duct bolts to 2.2 N·m
(19 lb in).
Tighten
Tighten the 48-way connector bolts to 1.5 N·m (11 lb in).
Tighten
Tighten the air distribution duct bolts to 2.2 N·m (19 lb in).
Tighten
Tighten the IP carrier mounting bolts (1) to 2 N·m
(18 lb in).
Tighten
Tighten the IP carrier mounting nuts (2) to 2.5 N·m
(22 lb in).
Tighten
Tighten the data link connector bolts (2) to 2 N·m
(18 lb in).
Tighten
Tighten the fuse block mounting bolt to 1.5 N·m (13 lb in).
Tighten
Tighten the temperature control cable bolt to 2.2 N·m (19 lb in).
| 43.1. | Connect the dimmer switch connector (3) to the headlamp switch (2). |
| 43.2. | Connect the headlamp switch connector (1) to the headlamp switch (2). |
| 43.3. | Snap the headlamp switch (2) to the IP. |
| 44.1. | Connect the dimmer switch connector (5) to the headlamp switch (4). |
| 44.2. | Connect the headlamp switch connector (1) to the headlamp switch (4). |
| 44.3. | Install the headlamp switch bolts. |
Tighten
Tighten the headlamp switch bolts to 2 N·m (18 lb in).
| 44.4. | Install the left hand IP accessory trim plate (3). |
