For 1990-2009 cars only
Removal Procedure
- Raise and support the vehicle. Refer to Lifting and Jacking the Vehicle .
- Apply tape to corners of panel and adjacent surfaces to help prevent paint damage.
- Remove the hood. Refer to Hood Replacement .
- Remove the hood hinge. Refer to Hood Hinge Replacement .
- Raise and support the vehicle. Refer to Lifting and Jacking the Vehicle .
- Remove the front wheel. Refer to Tire and Wheel Removal and Installation .
- Remove the front wheelhouse liner. Refer to Front Wheelhouse Liner Replacement .
- Remove the front fender sound insulator. Refer to Front Fender Insulator Replacement .
- Remove the rocker panel moulding. Refer to Rocker Panel Molding Replacement .
- Remove the front bumper fascia. Refer to Front Bumper Fascia Replacement .
- Remove the front bumper fascia bracket. Refer to Front Bumper Impact Bar Bracket Replacement .
- Remove the headlamp. Refer to Headlamp Replacement .
- Remove the side indicator. Refer to Repeater Lamp Replacement .
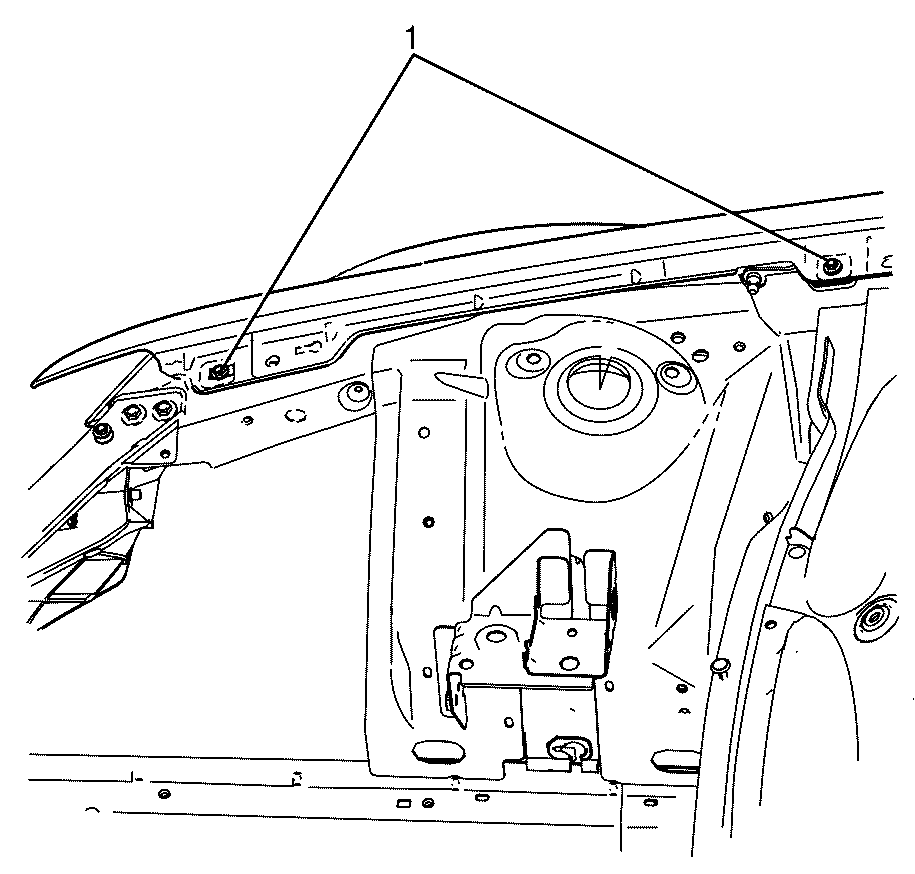
- Remove the front fender to front end module retaining bolt (1).
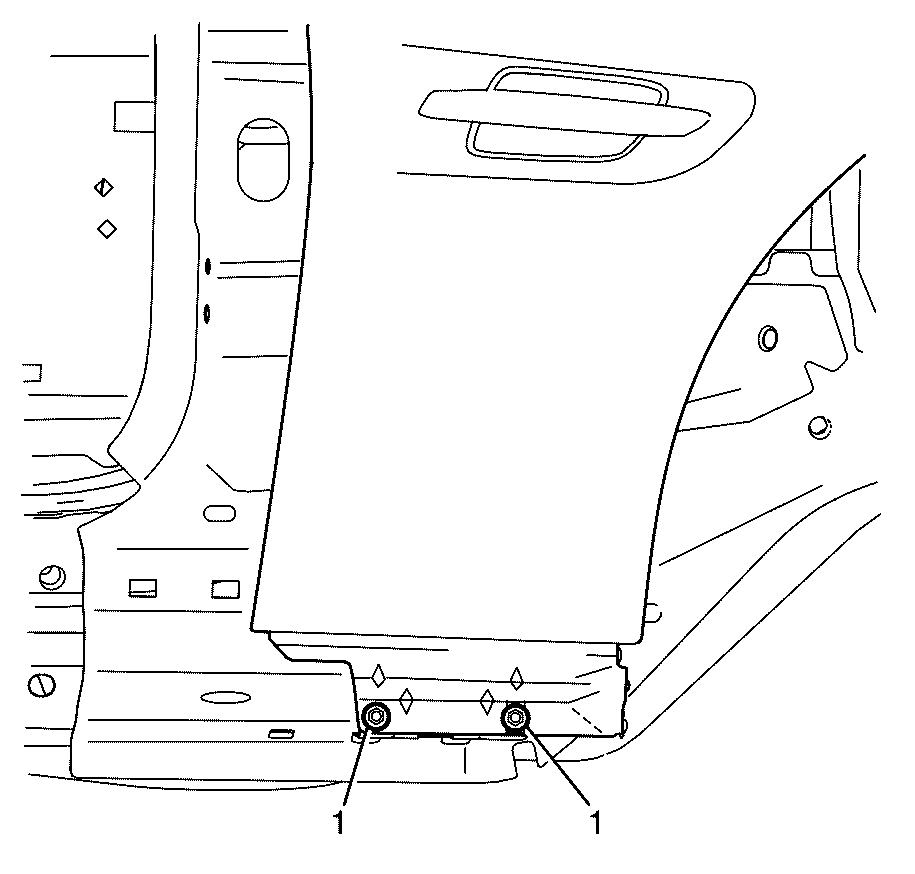
- Remove the front fender to body side retaining bolts (1).
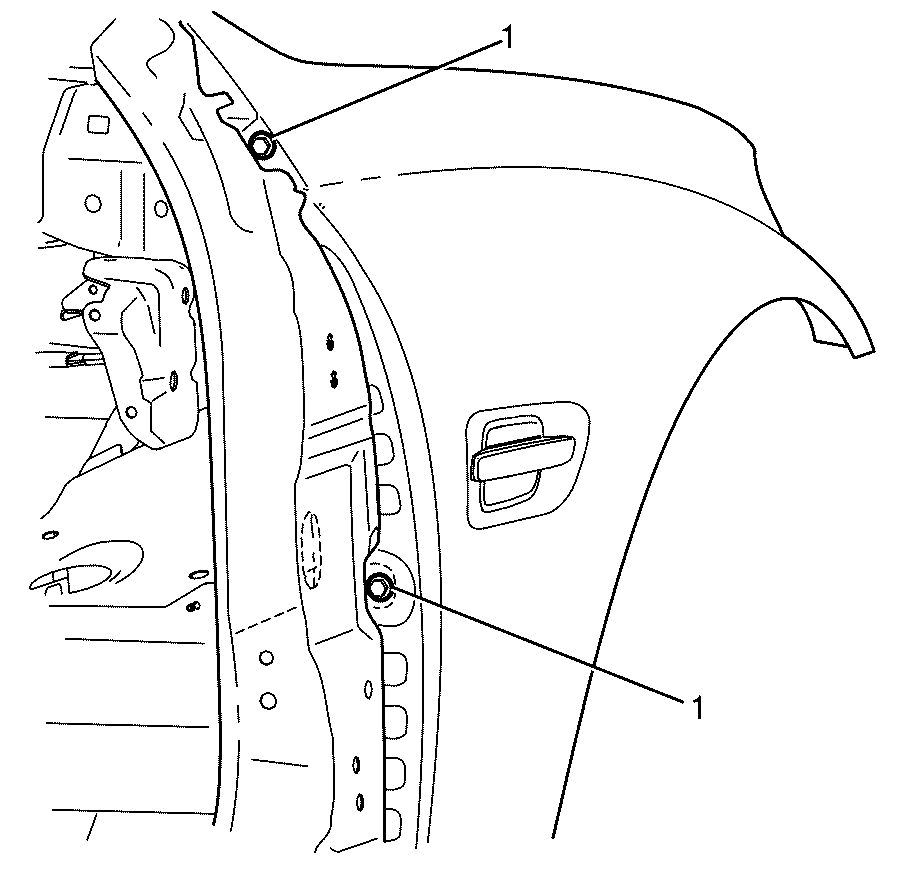
- Remove the front fender to door pillar retaining bolts (1).
- Remove the front fender to inner wheelhouse retaining bolts (1).
- Remove the front fender from the vehicle.
Caution: Refer to Vehicle Lifting Caution in the Preface section.
Caution: Refer to Safety Glasses Caution in the Preface section.

Installation Procedure
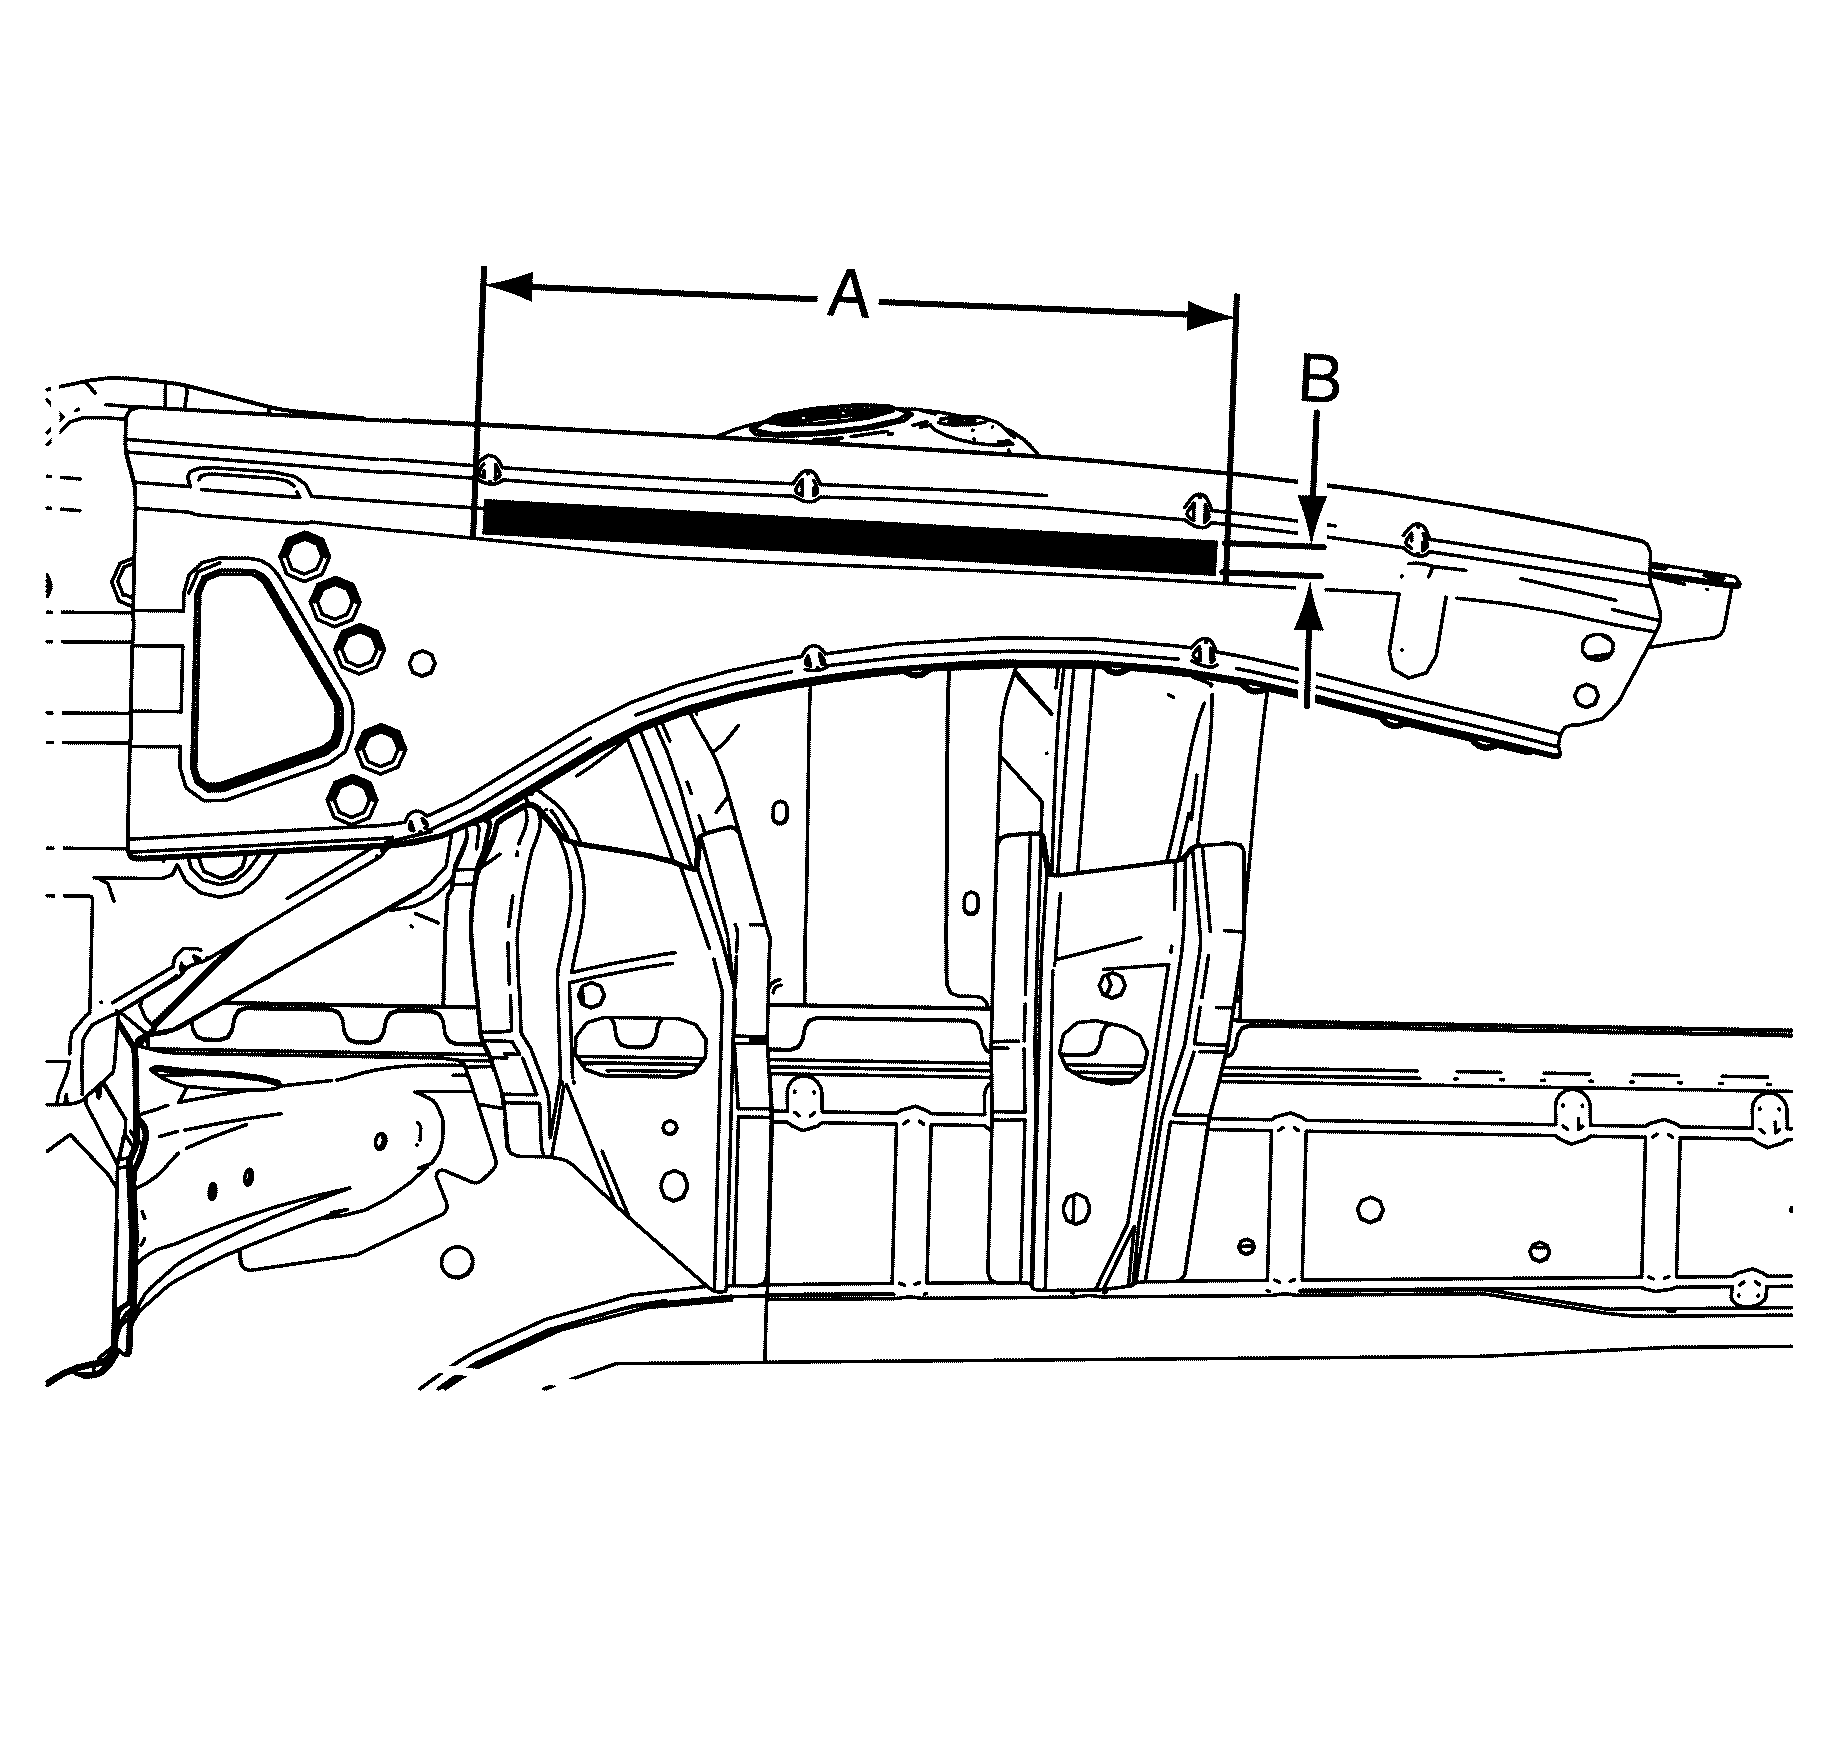
- Apply an even amount of urethane GMW3041 or equivalent (Between the second and fourth swage (A) and 25 mm wide (B) of the upper wheelhouse brace).
- Position the front fender to the vehicle.
- Install the front fender to inner wheelhouse retaining bolts (1).
- Install the front fender to door pillar retaining bolts (1).
- Install the front fender to body side retaining bolts (1)
- Install the front fender to front end module retaining bolt (1)
- Install the front wheel. Refer to Tire and Wheel Removal and Installation .
- Lower the vehicle.
- Tighten the front fender to inner wheelhouse retaining bolts (1)
- Tighten the front fender to door pillar retaining bolts (1).
- Tighten the front fender to body side retaining bolts (1).
- Tighten the front fender to front end module retaining bolt (1).
- Raise and support the vehicle. Refer to Lifting and Jacking the Vehicle .
- Remove the front wheel. Refer to Tire and Wheel Removal and Installation .
- Install the front fender sound insulator. Refer to Front Fender Insulator Replacement .
- Install the side indicator. Refer to Repeater Lamp Replacement .
- Install the rocker panel moulding. Refer to Rocker Panel Molding Replacement .
- Install the headlamp. Refer to Headlamp Replacement .
- Install the front bumper fascia bracket. Refer to Front Bumper Impact Bar Bracket Replacement .
- Install the front bumper fascia. Refer to Front Bumper Fascia Replacement .
- Install the front wheelhouse liner. Refer to Front Wheelhouse Liner Replacement .
- Install the front wheel. Refer to Tire and Wheel Removal and Installation .
- Lower the vehicle.
- Install the hood hinge. Refer to Hood Hinge Replacement .
- Install the hood. Refer to Hood Replacement .
- Carefully remove the tape from the corners of the panels and adjacent surfaces.
Notice: Refer to Fastener Notice in the Preface section.
Important: Do not fully tighten at this stage.
Do not fully tighten at this stage.
Important: Do not fully tighten at this stage.
Do not fully tighten at this stage.
Important: Do not fully tighten at this stage.
Do not fully tighten at this stage.
Important: Do not fully tighten at this stage.
Do not fully tighten at this stage.
Tighten
Tighten the bolts to 9 N·m (80 lb in).
Tighten
Tighten the bolts to 9 N·m (80 lb in).
Tighten
Tighten the bolts to 9 N·m (80 lb in).
Tighten
Tighten the bolts to 9 N·m (80 lb in).
