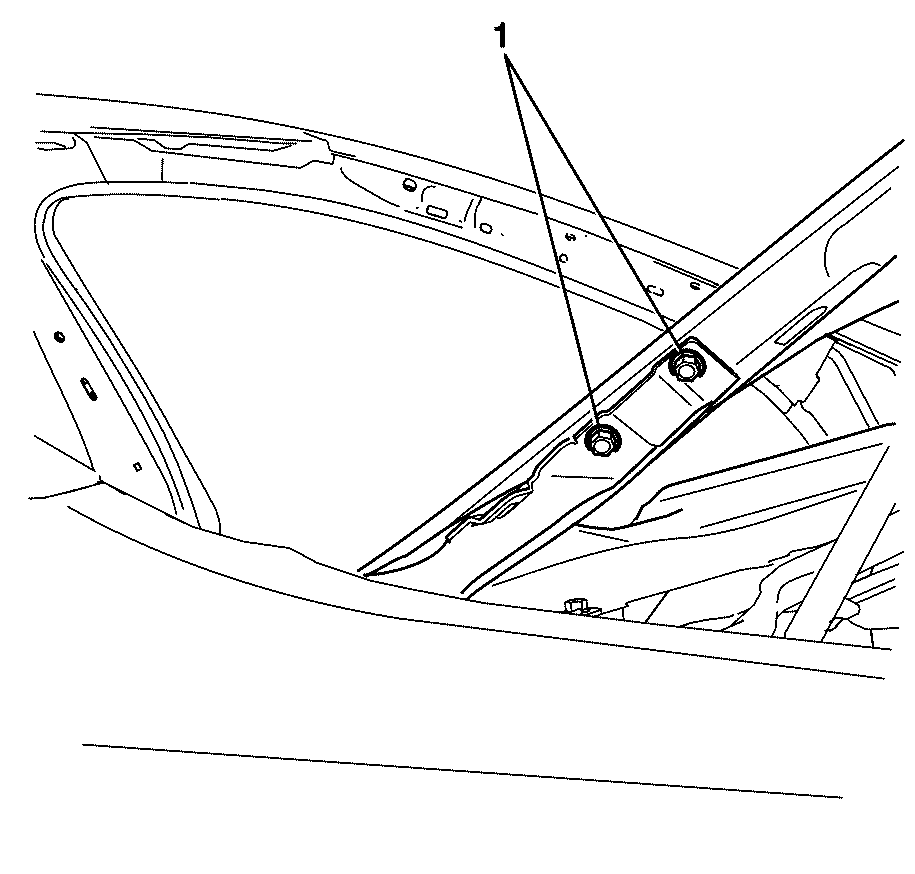
For 1990-2009 cars only
Removal Procedure
- Install a suitable hood brace to the vehicle.
- Apply tape to the corners of the panels and adjacent surfaces.
- Using a grease pencil, mark the location of the hinge on the hood assembly.
- Remove the hood bumpers from the hood. Refer to Hood Bumper Replacement .
- Remove the hood insulator from the hood. Refer to Hood Insulator Replacement .
- Remove the hood assist rods. Refer to Hood Open Assist Rod Replacement .
- With the aid of an assistant, remove the hood to the hood hinge retaining bolts (1), repeat this procedure for the opposite side.
- Remove the hood.
- Remove the suitable hood brace from the vehicle.
Important: When a suitable hold open device is being removed or installed, provide alternate support to avoid the possibility of damage to the vehicle or personal injury.

Installation Procedure
- With the aid of an assistant, install the hood to the vehicle.
- Position the hood to the hood hinges using the grease pencil marks on the hood, repeat this procedure for the opposite side.
- Install the suitable hood brace to the vehicle.
- Install the hood to hood hinge retaining bolts (1).
- Install the hood assist rods. Refer to Hood Open Assist Rod Replacement .
- Install the hood insulator to the hood. Refer to Hood Insulator Replacement .
- Install the hood bumpers to the hood. Refer to Hood Bumper Replacement .
- Adjust the hood as necessary. Refer to Hood Adjustment .
- Tighten the hood to the hood hinge retaining bolts (1).
- Remove the suitable brace from the vehicle.
- Carefully remove the tape from the corners of the panels and adjacent surfaces.

Important: Do not fully tighten at this stage.
Do not fully tighten at this stage.
Notice: Refer to Fastener Notice in the Preface section.
Tighten
Tighten the bolts to 20 N·m (15 lb ft).
