For 1990-2009 cars only
Removal Procedure
- Disable the SIR system. Refer to SIR Disabling and Enabling.
- Remove the floor mats from the vehicle, if equipped.
- Remove the body hinge pillar trim panels. Refer to Body Hinge Pillar Trim Panel Replacement.
- Remove all 4 side door sill trim plates. Refer to Door Sill Plate Replacement.
- Remove the center pillar lower trim panels. Refer to Center Pillar Lower Trim Panel Replacement.
- Remove the front floor console. Refer to Front Floor Console Replacement.
- Remove the rear floor console. Refer to Rear Floor Console Replacement.
- Remove the front seats. Refer to Front Seat Replacement - Bucket.
- Remove the vehicle YAW sensor. Refer to Vehicle Yaw Sensor with Vehicle Lateral Accelerometer Replacement.
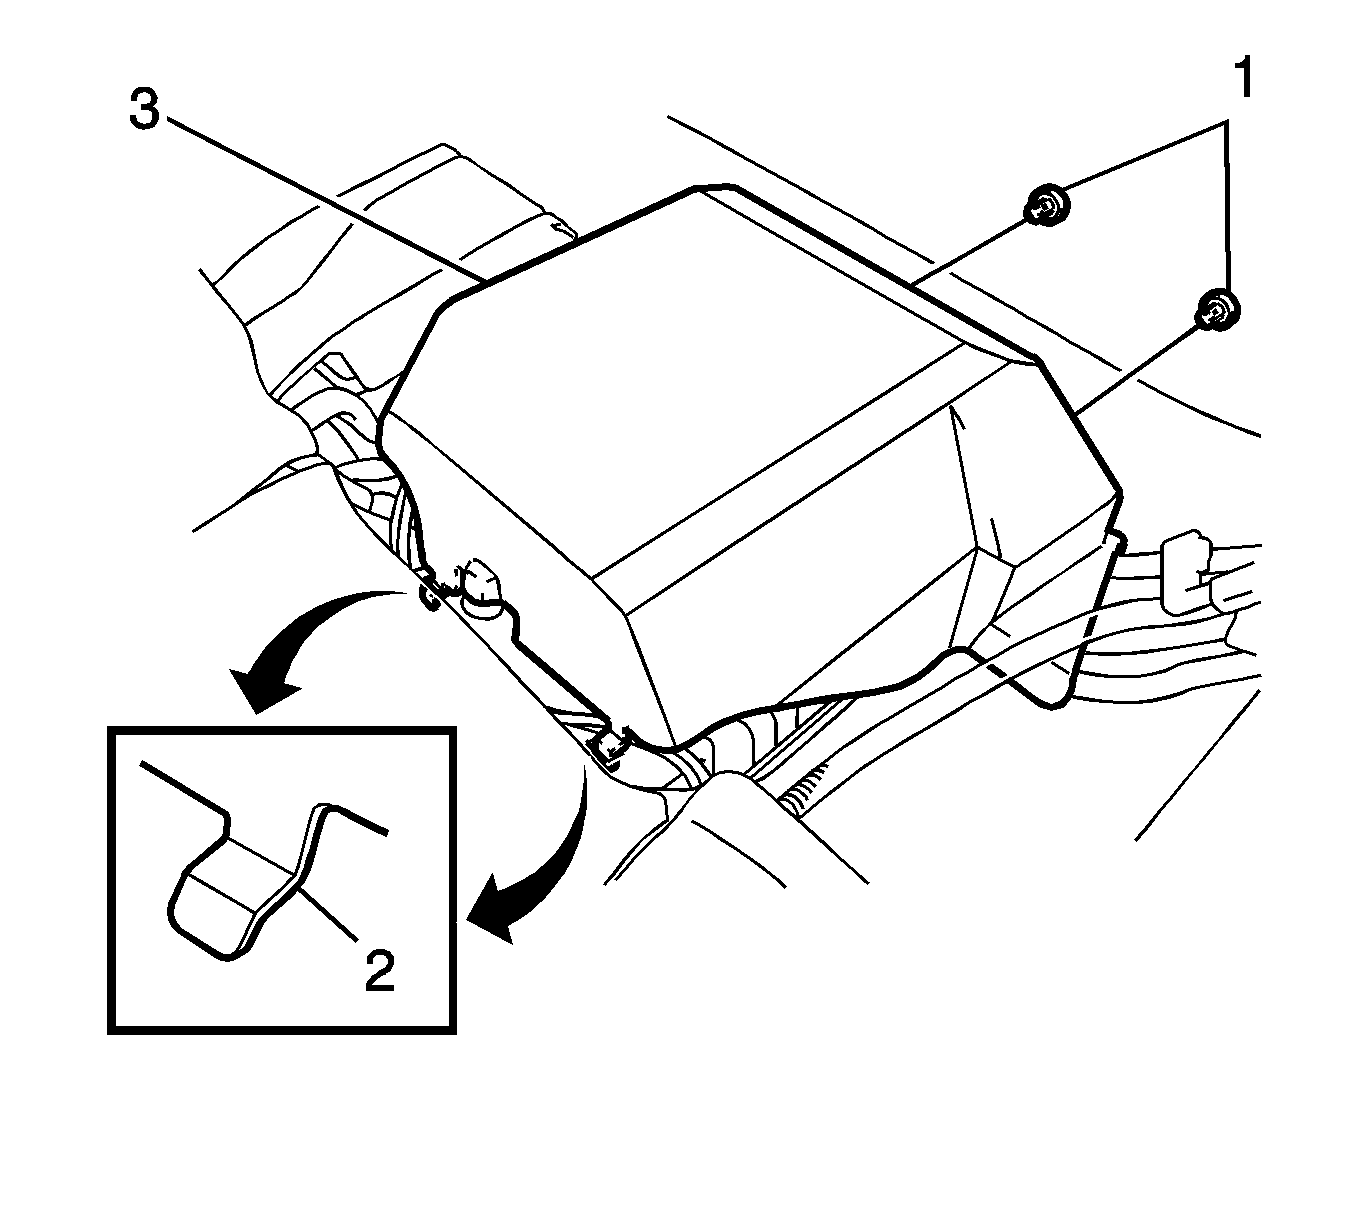
- Remove the two clips (1).
- Disengage the two guides (2) and remove the communication interface module cover (3).
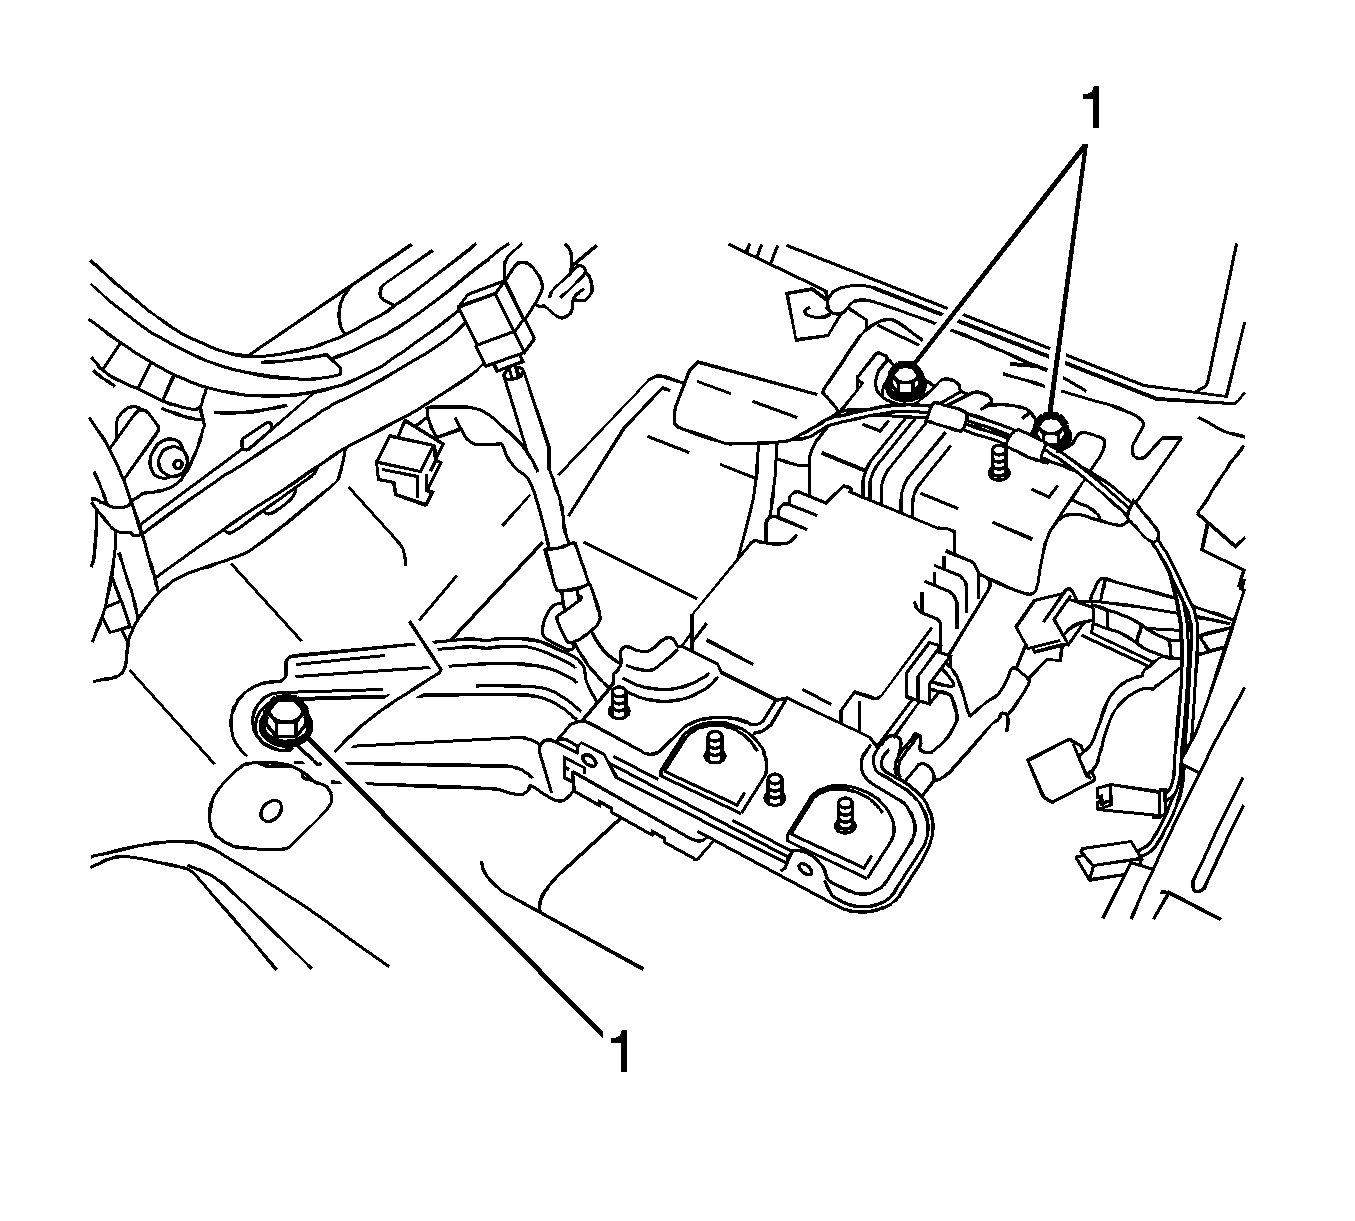
- Disconnect the electrical connectors from the A/C D/C module and the communication interface module.
- Remove the three bolts (1) from the module bracket.
- Remove the module bracket from the vehicle.
- Remove the speaker amplifier, if equipped. Refer to Radio Speaker Amplifier Replacement.
- Remove the rear seat cushion. Refer to Rear Seat Cushion Replacement.
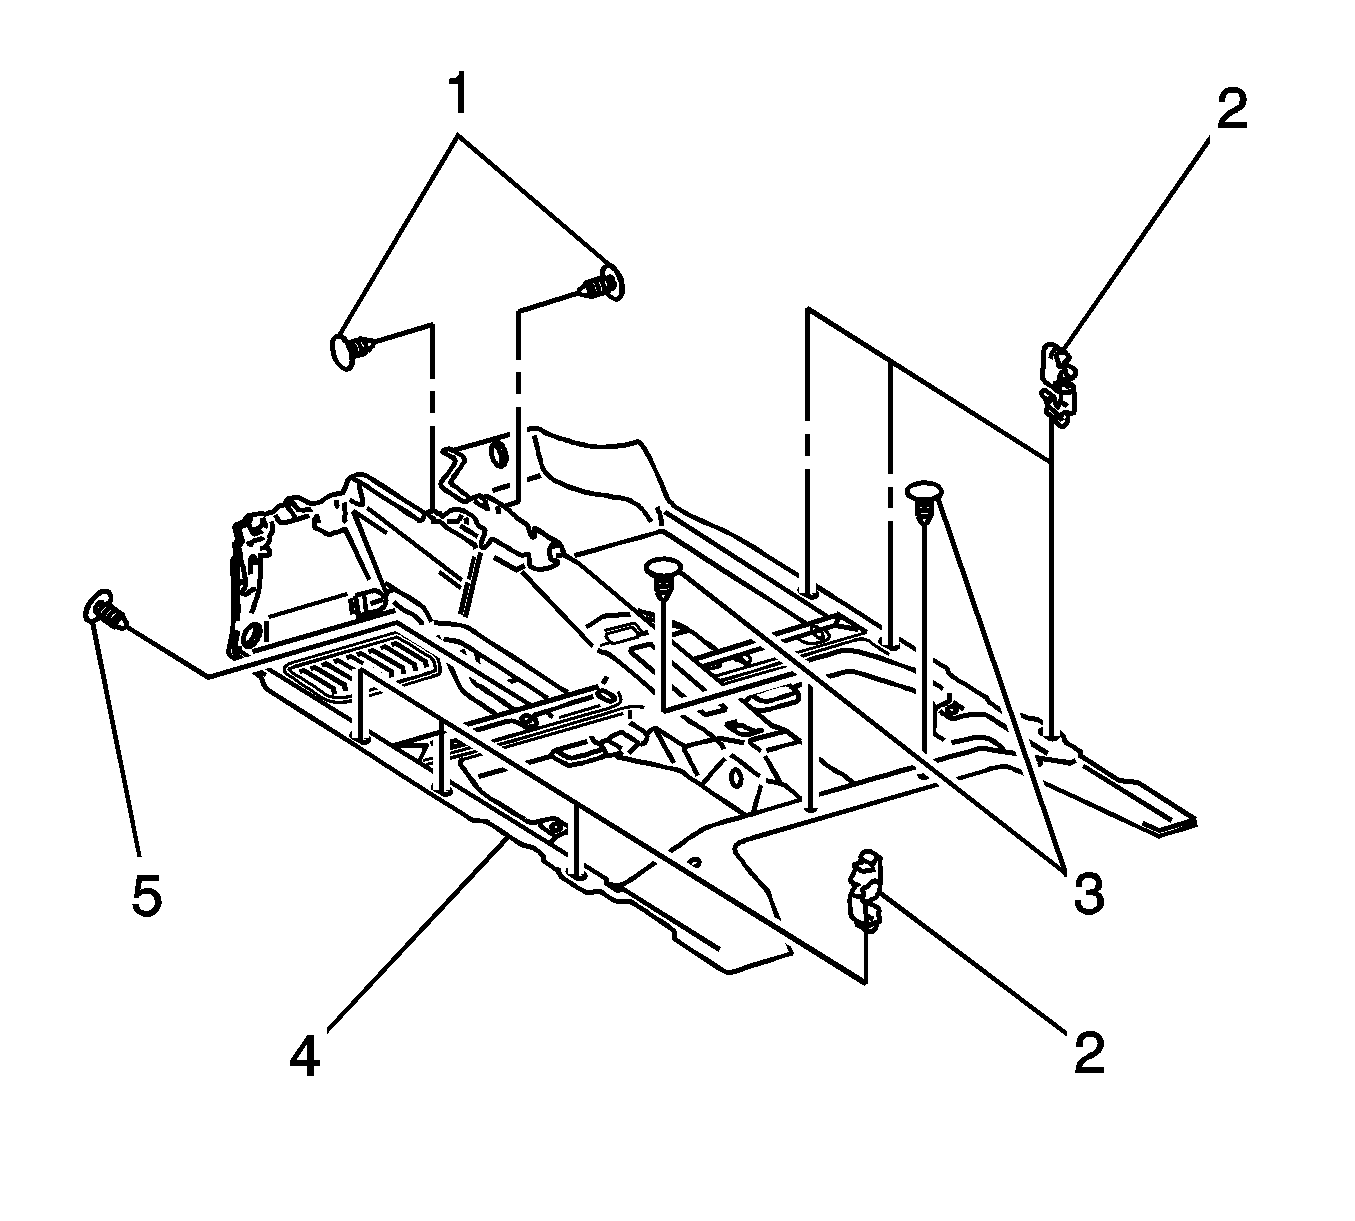
- Remove the two plastic retainers (1) which secure the front of the floor panel carpet (4).
- Remove the plastic retainer (5) which secure the middle of the floor panel carpet (4).
- Remove the two plastic retainers (3) which secure the rear of the floor panel carpet (4).
- Disengage the floor carpet retainers (2) from each door opening.
- Remove the floor panel carpet (4) from the vehicle.
Warning: Refer to SIR Warning in the Preface section.


Installation Procedure
- Install the floor panel carpet (4) to the vehicle.
- Engage the floor carpet retainers (2) to each door opening.
- Install the two plastic retainers (3) which secure the rear of the floor panel carpet (4).
- Install the plastic retainer (5) which secure the middle of the floor panel carpet (4).
- Install the two plastic retainers (1) which secure the front of the floor panel carpet (4).
- Install the rear seat cushion. Refer to Rear Seat Cushion Replacement.
- Install the speaker amplifier, if equipped. Refer to Radio Speaker Amplifier Replacement.
- Install the module bracket to the vehicle.
- Install the three bolts (1) to the module bracket and tighten to 19 N·m (14 lb ft).
- Connect the electrical connectors to the A/C D/C power module and the communication interface module.
- Engage the two guides (2) and install the communication interface module cover (3).
- Install the two clips (1).
- Install the vehicle YAW sensor. Refer to Vehicle Yaw Sensor with Vehicle Lateral Accelerometer Replacement.
- Install the front seats. Refer to Front Seat Replacement - Bucket.
- Install the rear floor console. Refer to Rear Floor Console Replacement.
- Install the front floor console. Refer to Front Floor Console Replacement.
- Install the center pillar lower trim panels. Refer to Center Pillar Lower Trim Panel Replacement.
- Install all 4 side door sill trim plates. Refer to Door Sill Plate Replacement.
- Install the body hinge pillar trim panels. Refer to Body Hinge Pillar Trim Panel Replacement.
- Install the floor mats from the vehicle, if removed.
- Enable the SIR system. Refer to SIR Disabling and Enabling.


Caution: Refer to Fastener Caution in the Preface section.

