For 1990-2009 cars only
Removal Procedure
Caution: Cap the fittings and plug the holes when servicing the fuel system in order to prevent dirt and other contaminants from entering the open pipes and passages.
- Relieve the fuel system pressure. Refer to Fuel Pressure Relief.
- Drain the fuel tank. Refer to Fuel Tank Draining.
- Remove the rear compartment trim panel. Refer to Rear Compartment Trim Panel Replacement.
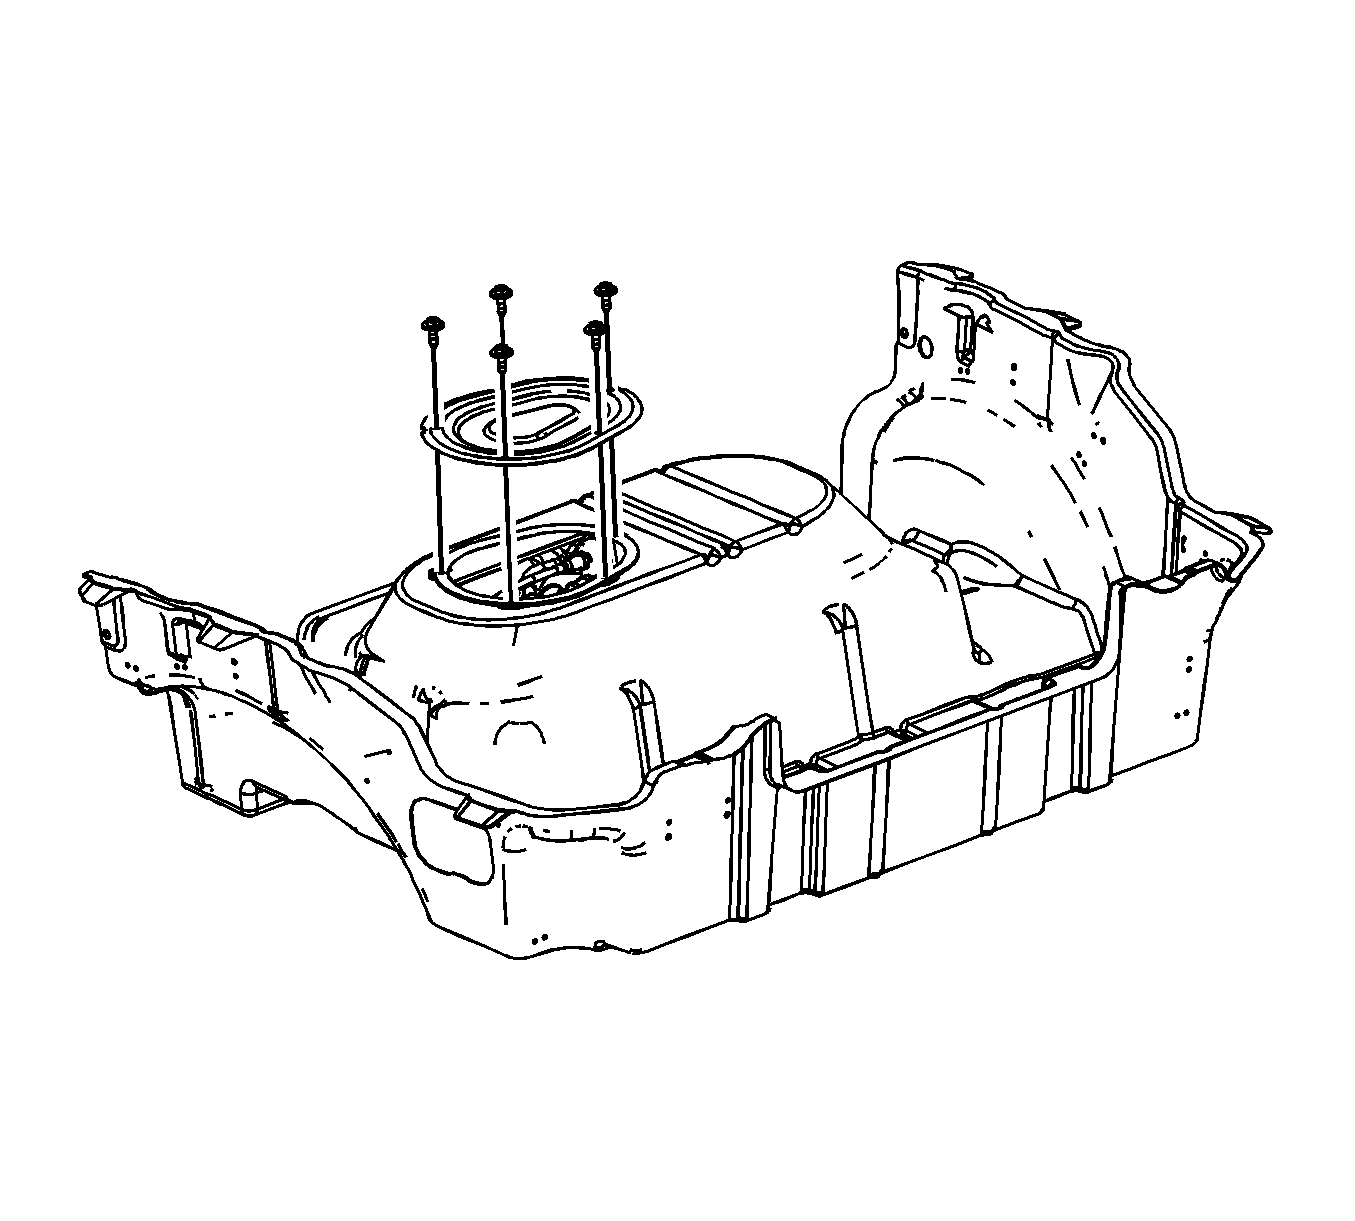
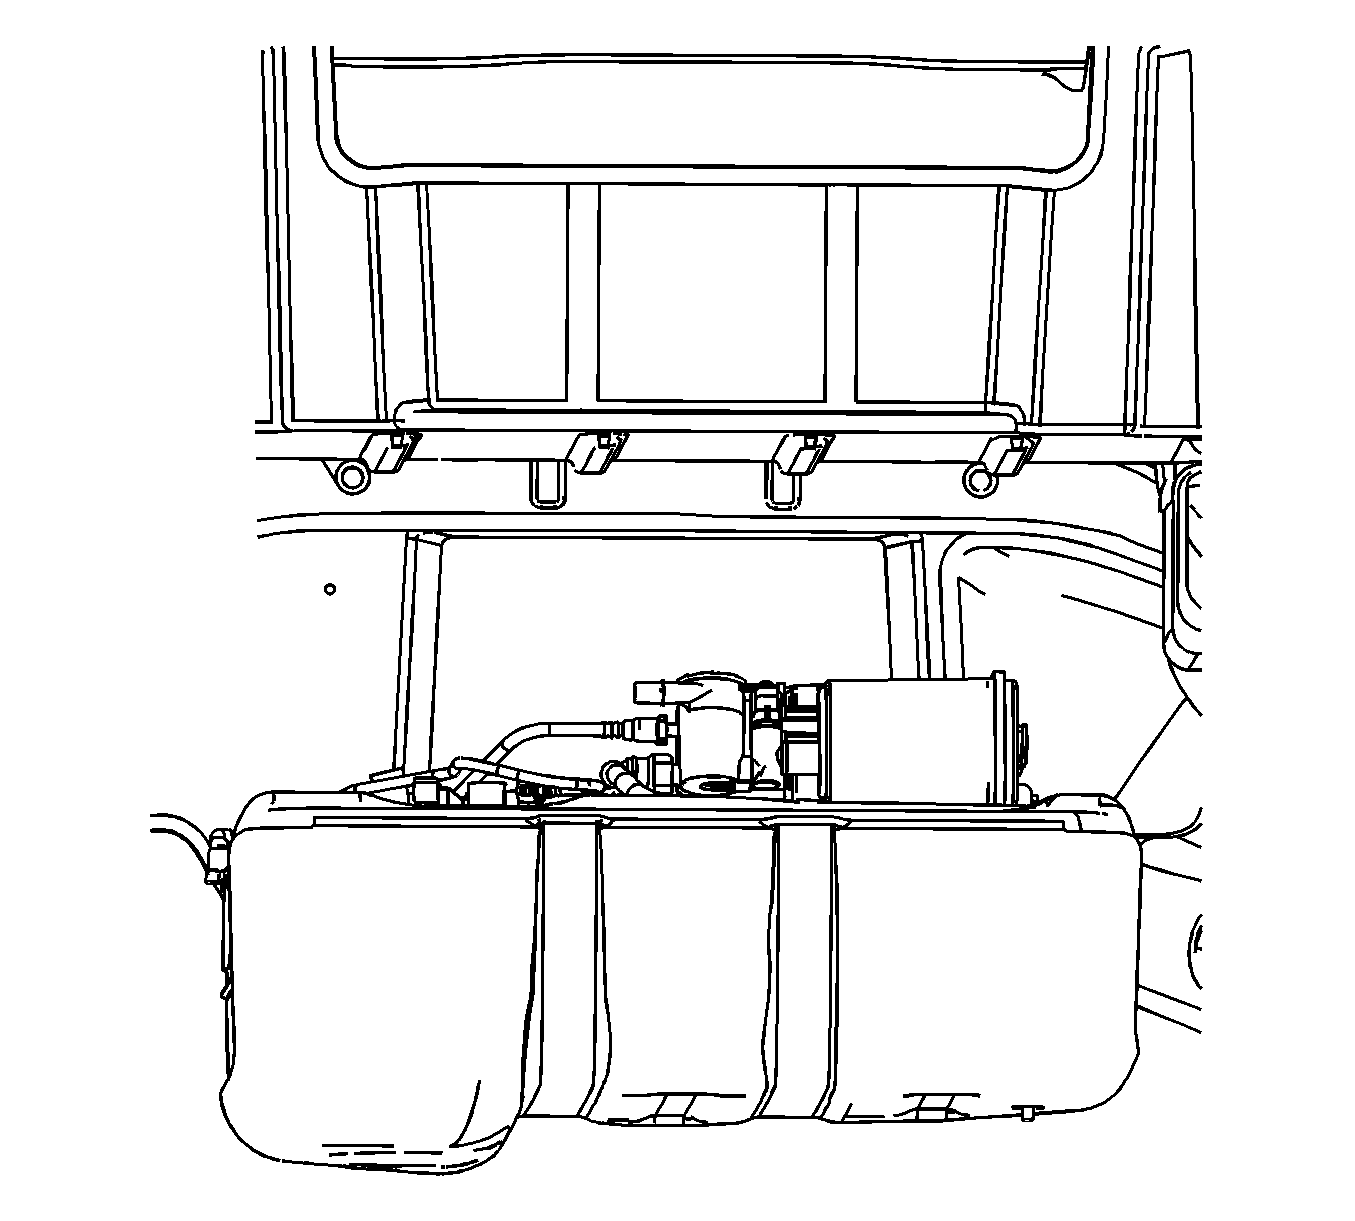
- Remove the fuel pump module access cover bolts.
- Remove the fuel pump module access cover.
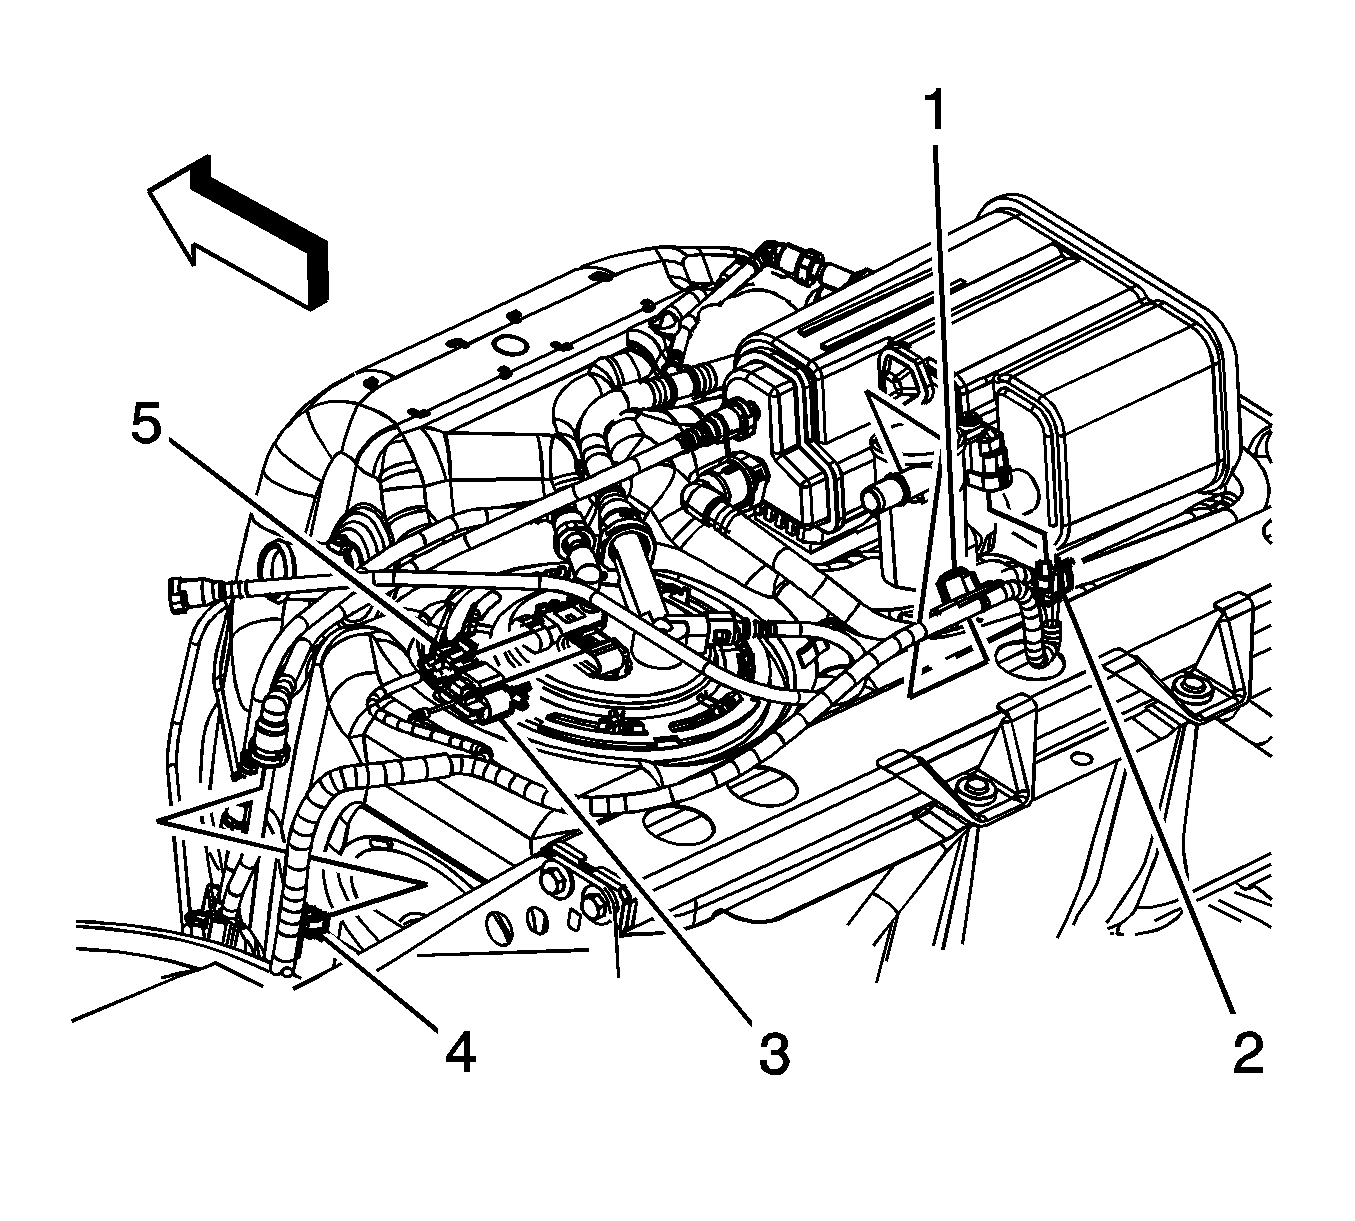
- Disconnect the fuel sending unit electrical connector (3).
- Disconnect the fuel tank pressure sensor electrical connector (5).
- Disconnect the evaporative emission (EVAP) canister vent solenoid electrical connector (2).
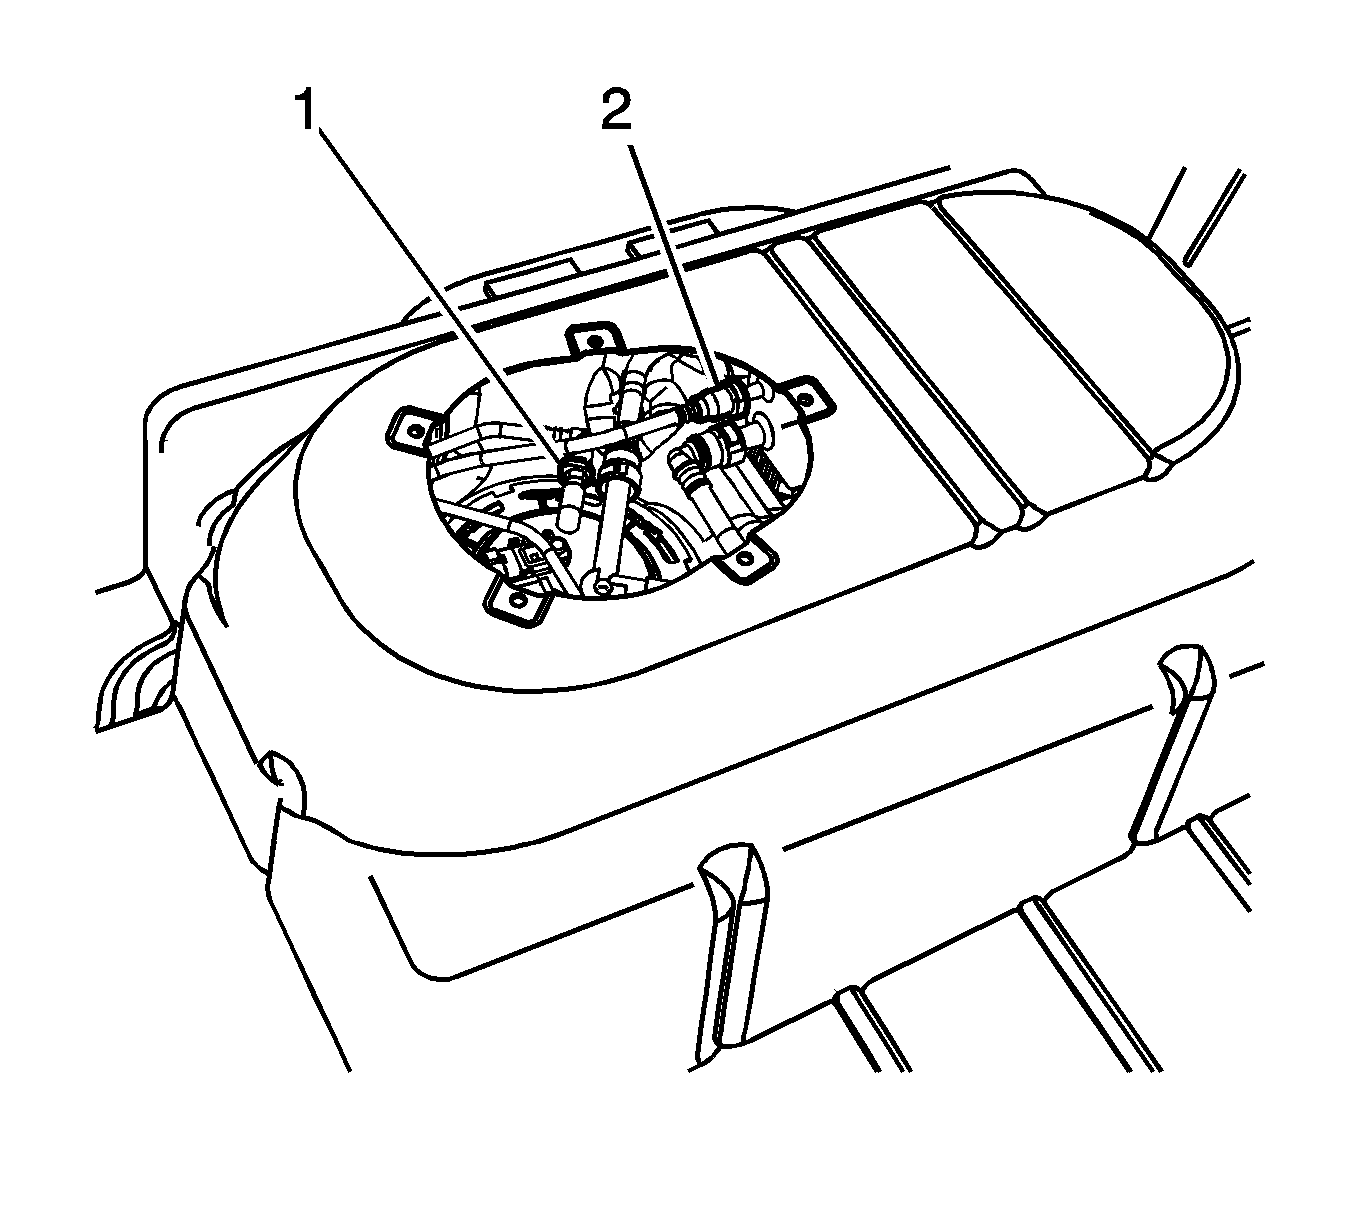
- Disconnect the fuel pump fuel feed line quick connect fitting (1) from the module. Refer to Plastic Collar Quick Connect Fitting Service.
- Disconnect the EVAP canister purge line quick connect fitting (2) from the module. Refer to Plastic Collar Quick Connect Fitting Service.
- Secure the fuel feed and EVAP purge lines up out of the way.
- Remove the fuel fill pipe. Refer to Fuel Tank Filler Pipe Replacement.
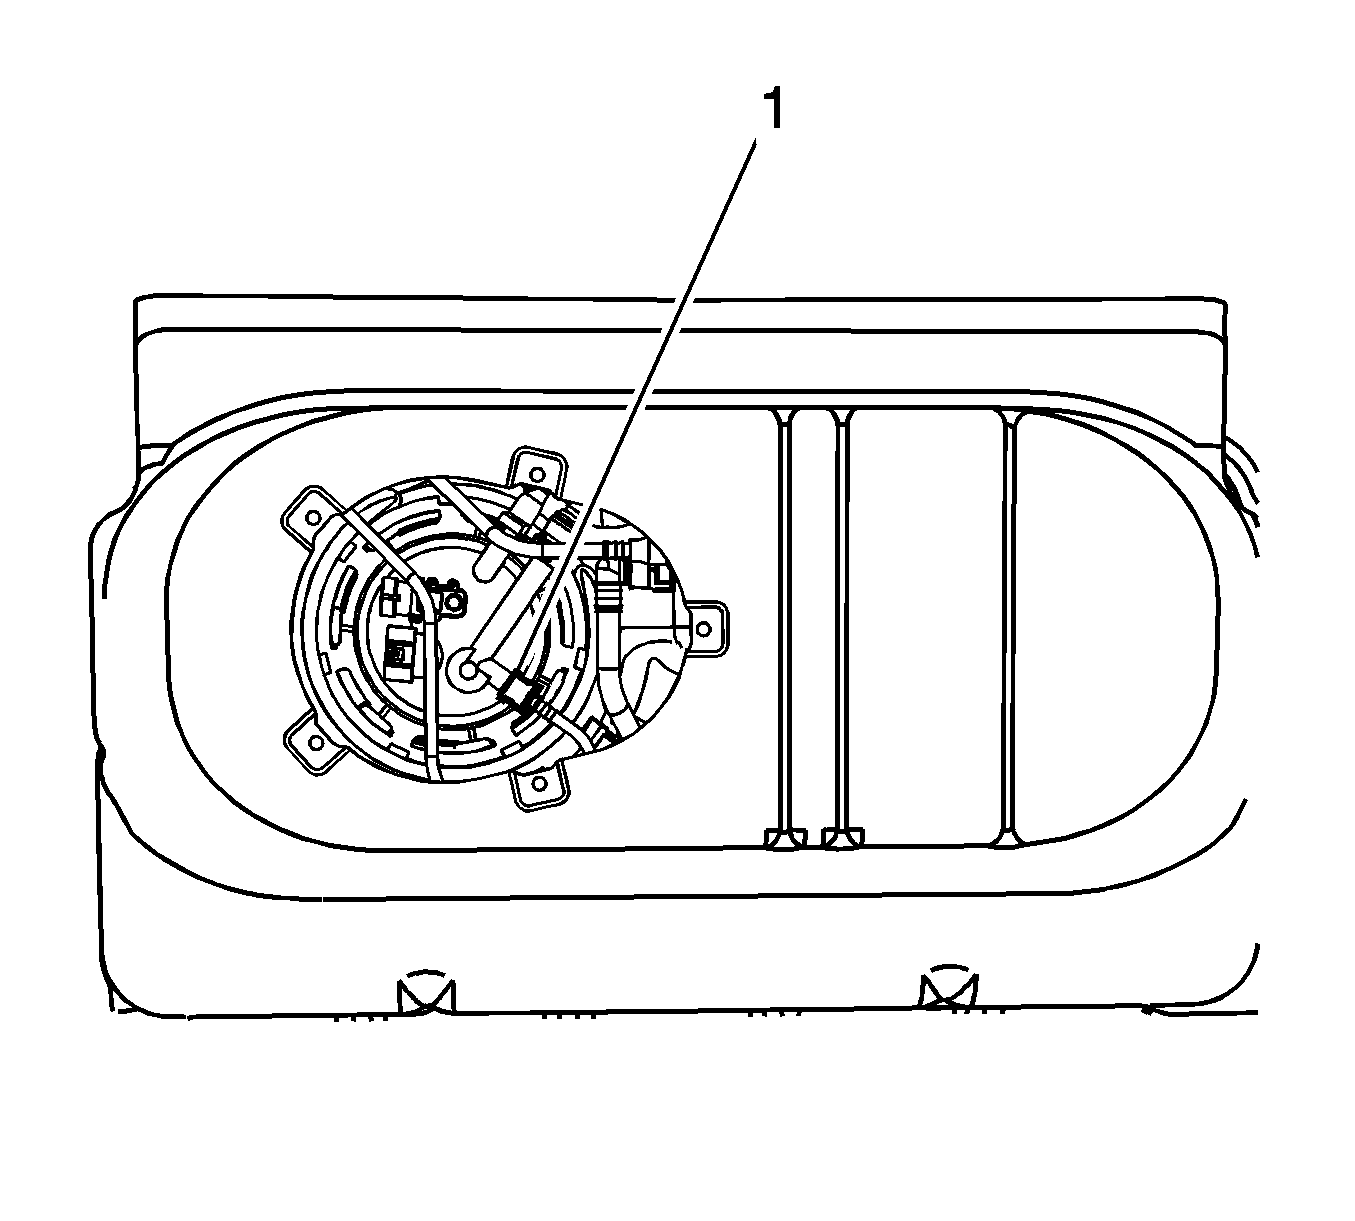
- Disconnect the fuel tank fill pipe EVAP line quick connect fitting (1) from the module. Refer to Plastic Collar Quick Connect Fitting Service.
- Remove the fuel tank fill EVAP line out through the access hole in order to prevent damage to the pipe when removing the tank.
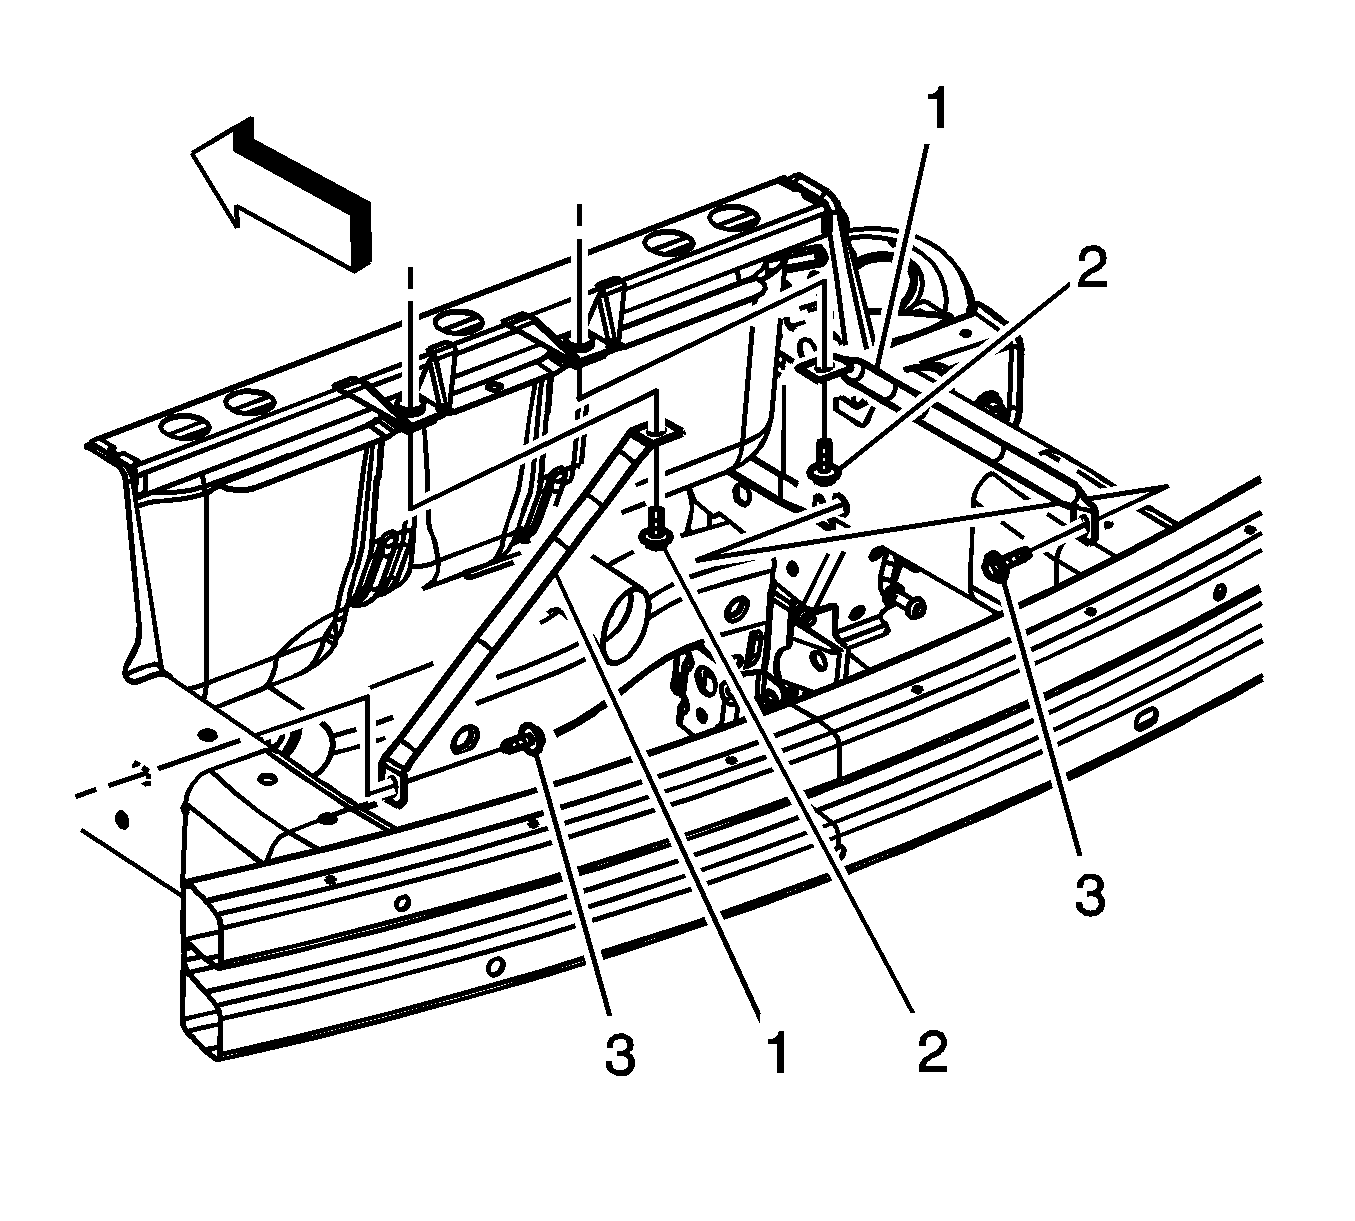
- Remove the rear suspension crossmember. Refer to Rear Suspension Support Crossmember Replacement.
- Remove the stabilizer shaft. Refer to Stabilizer Shaft Replacement.
- Position an adjustable jack under the fuel tank.
- Remove the fuel tank strap/support bolts (2).
- Remove the fuel tank support bolts (3).
- Remove the fuel tank supports (1).
- Remove the adjustable jack from under the fuel tank and with the aid of an assistant, tilt the tank down towards the left side of the vehicle and carefully remove the tank.
- Place the fuel tank onto a suitable work surface.
- Cap or plug the fuel feed and EVAP lines in order to prevent fuel loss and/or system contamination.
- If the fuel tank is being replaced, perform the following:
Note: Ensure that the fuel tank is completely drained because of the severe angle that the tank will need to be tipped, in order to remove the tank.
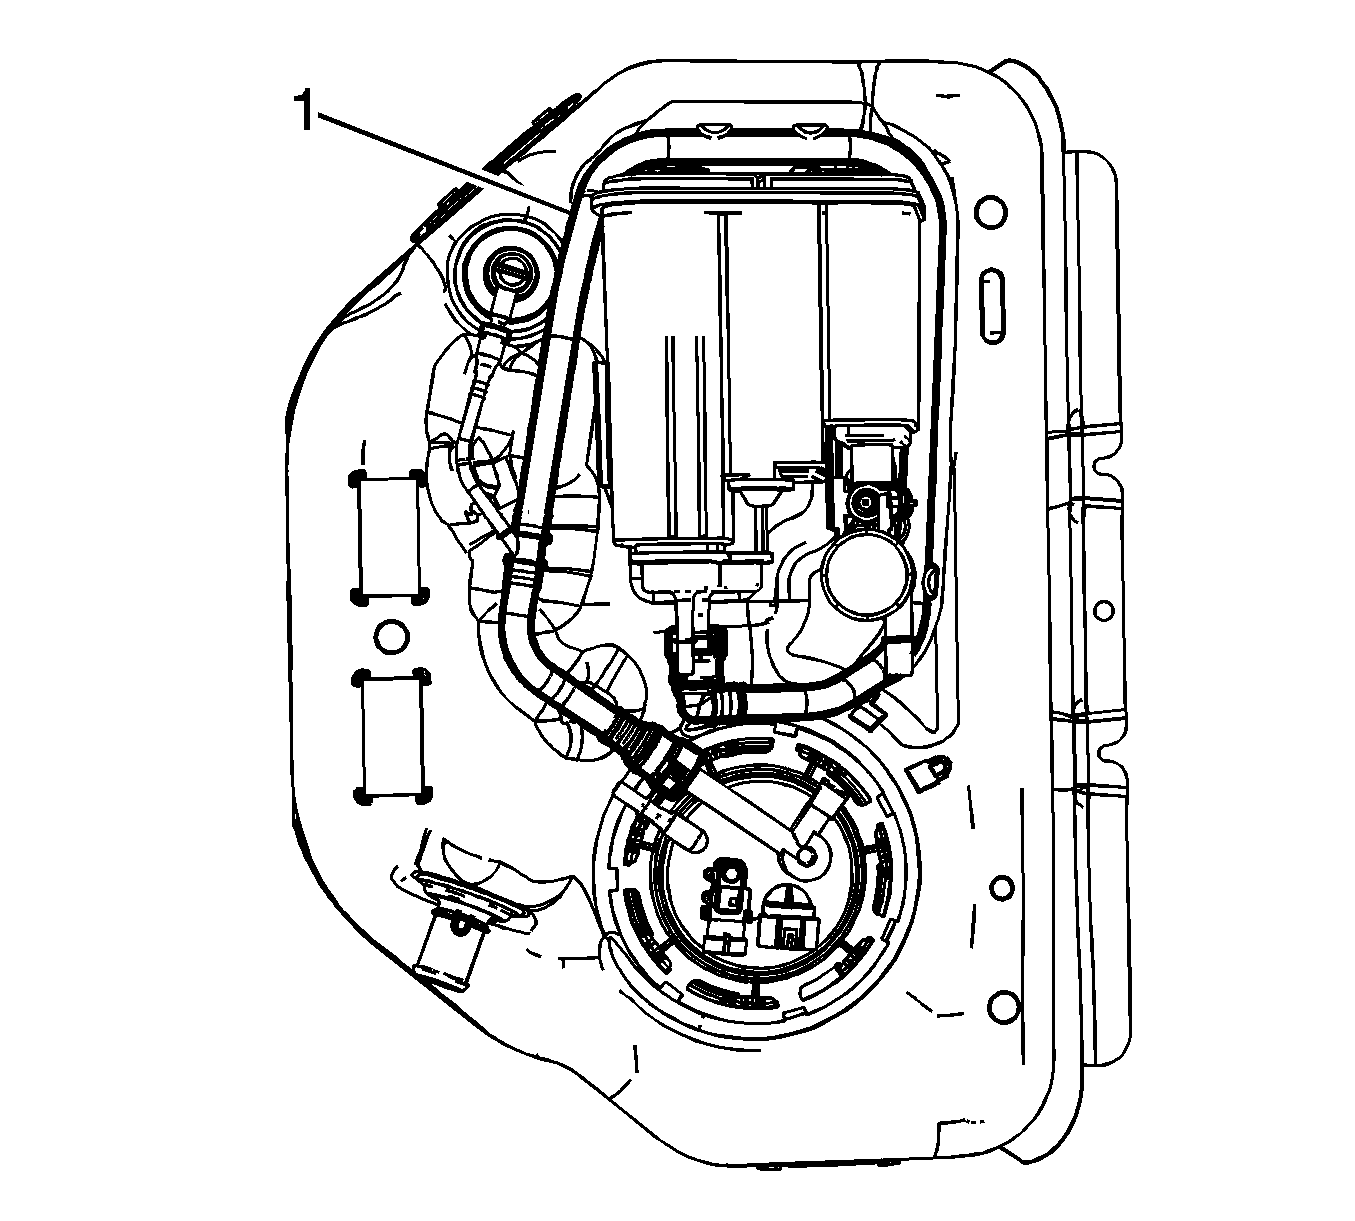
| • | Disconnect and remove the EVAP line (1). Refer to Plastic Collar Quick Connect Fitting Service. |
| • | Remove the EVAP canister. Refer to Evaporative Emission Canister Replacement. |
| • | Remove the fuel pump module. Refer to Fuel Pump Module Replacement. |
Installation Procedure
- If the fuel tank was replaced, perform the following:
- Remove the caps or plugs from the fuel feed and EVAP lines.
- With the aid of an assistant tilt the tank up and carefully install the tank in from the left side of the vehicle.
- Position an adjustable jack under the fuel tank.
- Position the fuel tank supports (1).
- Install the fuel tank strap/support bolts (2) and tighten to 22 N·m (16 lb ft).
- Install the fuel tank support bolts (3) and tighten to 22 N·m (16 lb ft).
- Remove adjustable jack from under the fuel tank.
- Install the stabilizer shaft. Refer to Stabilizer Shaft Replacement.
- Install the rear suspension crossmember. Refer to Rear Suspension Support Crossmember Replacement.
- Install the fuel tank fill EVAP line in through the access hole.
- Connect the fuel tank fill pipe EVAP line quick connect fitting (1) to the module. Refer to Plastic Collar Quick Connect Fitting Service.
- Install the fuel fill pipe. Refer to Fuel Tank Filler Pipe Replacement.
- Unsecure the fuel feed and EVAP purge lines and position to the module.
- Connect the EVAP canister purge line quick connect fitting (2) to the module. Refer to Plastic Collar Quick Connect Fitting Service.
- Connect the fuel pump fuel feed line quick connect fitting (1) to the module. Refer to Plastic Collar Quick Connect Fitting Service.
- Connect the EVAP canister vent solenoid electrical connector (2).
- Connect the fuel tank pressure sensor electrical connector (5).
- Connect the fuel sending unit electrical connector (3).
- Install the pump module access cover.
- Install the fuel pump module access cover bolts and tighten to 10 N·m (89 lb in).
- Install the rear compartment trim panel. Refer to Rear Compartment Trim Panel Replacement.
- Connect the negative battery cable. Refer to Battery Negative Cable Disconnection and Connection.
- Inspect for leaks using the following procedures:
| • | Install the fuel pump module. Refer to Fuel Pump Module Replacement. |
| • | Install the EVAP canister. Refer to Evaporative Emission Canister Replacement. |
| • | Install and connect the EVAP line (1). Refer to Plastic Collar Quick Connect Fitting Service. |
Caution: Refer to Fastener Caution in the Preface section.
| 24.1. | Turn ON the ignition, with the engine OFF for 2 seconds. |
| 24.2. | Turn OFF the ignition for 10 seconds. |
| 24.3. | Turn ON the ignition, with the engine OFF. |
| 24.4. | Inspect for fuel leaks. |
