GM Service Manual Online
For 1990-2009 cars only

Removal Procedure


    Object Number: 1623160  Size: SH
  1. Remove the drive belt tensioner. Refer to Drive Belt Tensioner Replacement .
  2. Remove the crankshaft balancer. Refer to Crankshaft Balancer Replacement .
  3. Remove the air cleaner assembly. Refer to Air Cleaner Assembly Replacement .
  4. Remove the windshield washer solvent reservoir. Refer to Windshield Washer Solvent Container Replacement .
  5. Install the engine support fixture. Refer to Engine Support Fixture .
  6. Remove the engine mount to bracket bolts.

  7. Object Number: 1623161  Size: SH
  8. Remove the engine mount to side rail nuts.
  9. Remove the engine mount from the engine compartment.

  10. Object Number: 1623162  Size: SH
  11. Remove the engine mount bracket to engine bolts.
  12. Remove the engine mount bracket.

  13. Object Number: 1578293  Size: SH
  14. Remove the engine front cover to water pump bolt.

  15. Object Number: 1578292  Size: SH
  16. Raise and suitably support the vehicle. Refer to Lifting and Jacking the Vehicle .
  17. Remove the engine front cover bolts.
  18. Remove the engine front cover.

  19. Object Number: 1578294  Size: SH
  20. Remove and discard the engine front cover gasket.

Installation Procedure


    Object Number: 1578294  Size: SH
  1. Install a NEW engine front cover gasket to the dowel pins.
  2. Install the engine front cover.
  3. Notice: Refer to Fastener Notice in the Preface section.


    Object Number: 1578292  Size: SH
  4. Install the engine front cover bolts.
  5. Tighten
    Tighten the bolts to 25 N·m (18 lb ft).

  6. Lower the vehicle.

  7. Object Number: 1578293  Size: SH
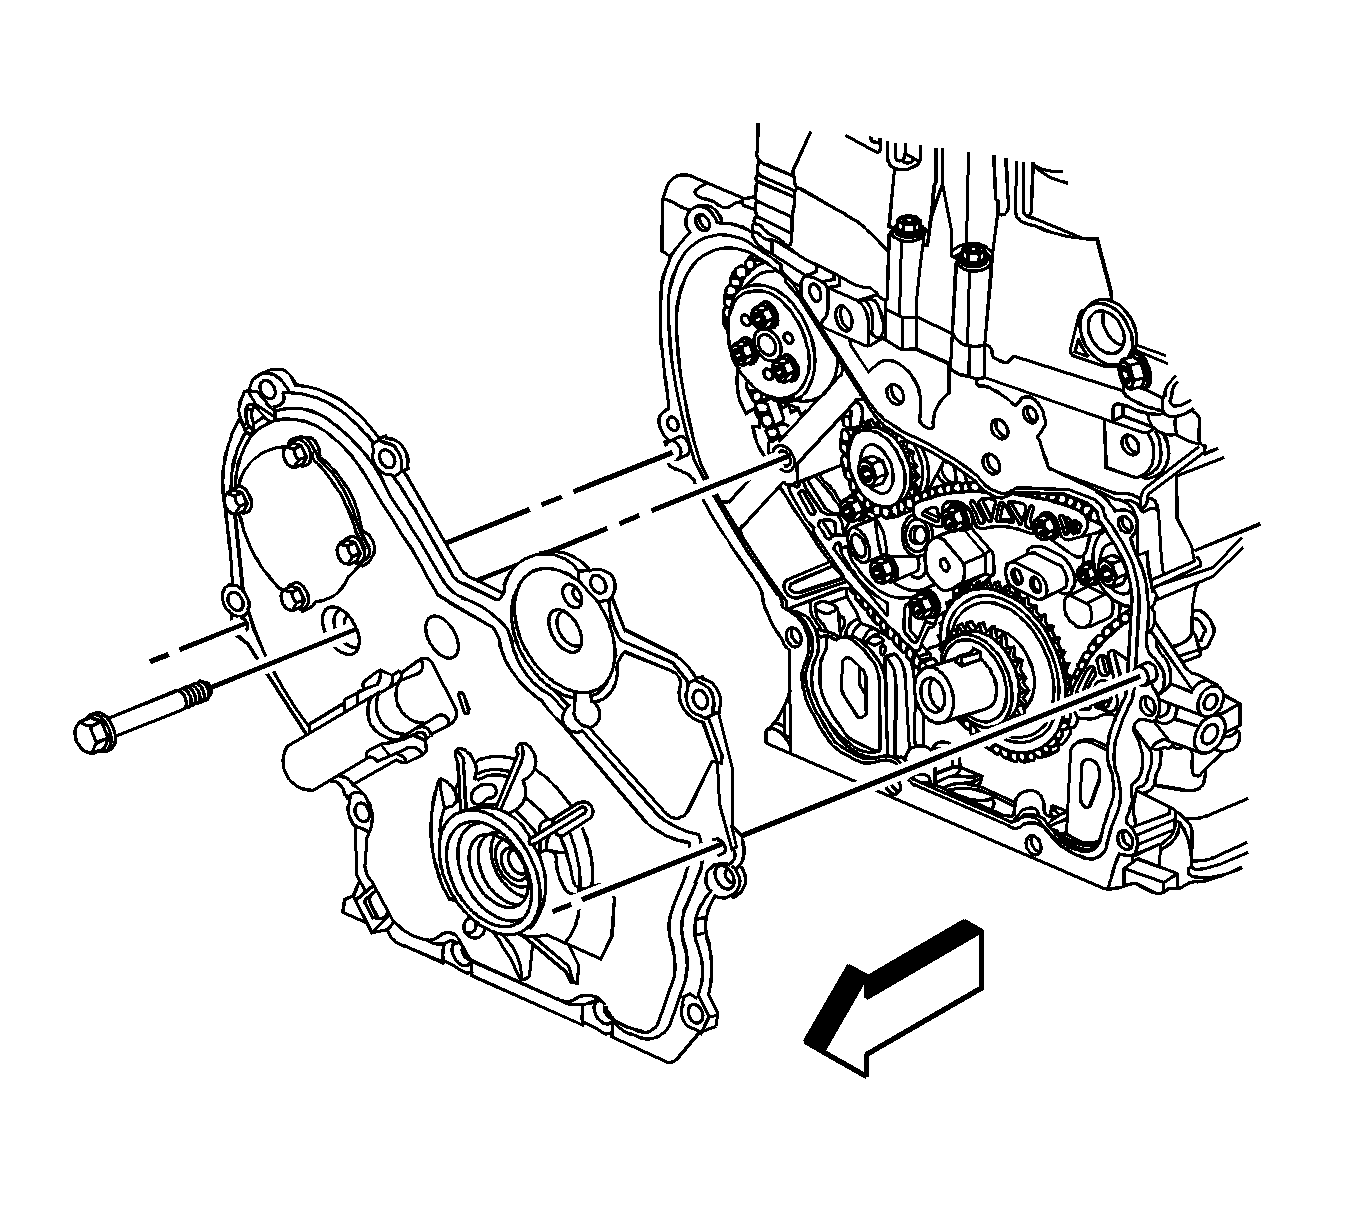
  8. Install the engine front cover to water pump bolt.
  9. Tighten
    Tighten the bolt to 25 N·m (18 lb ft).


    Object Number: 1623162  Size: SH
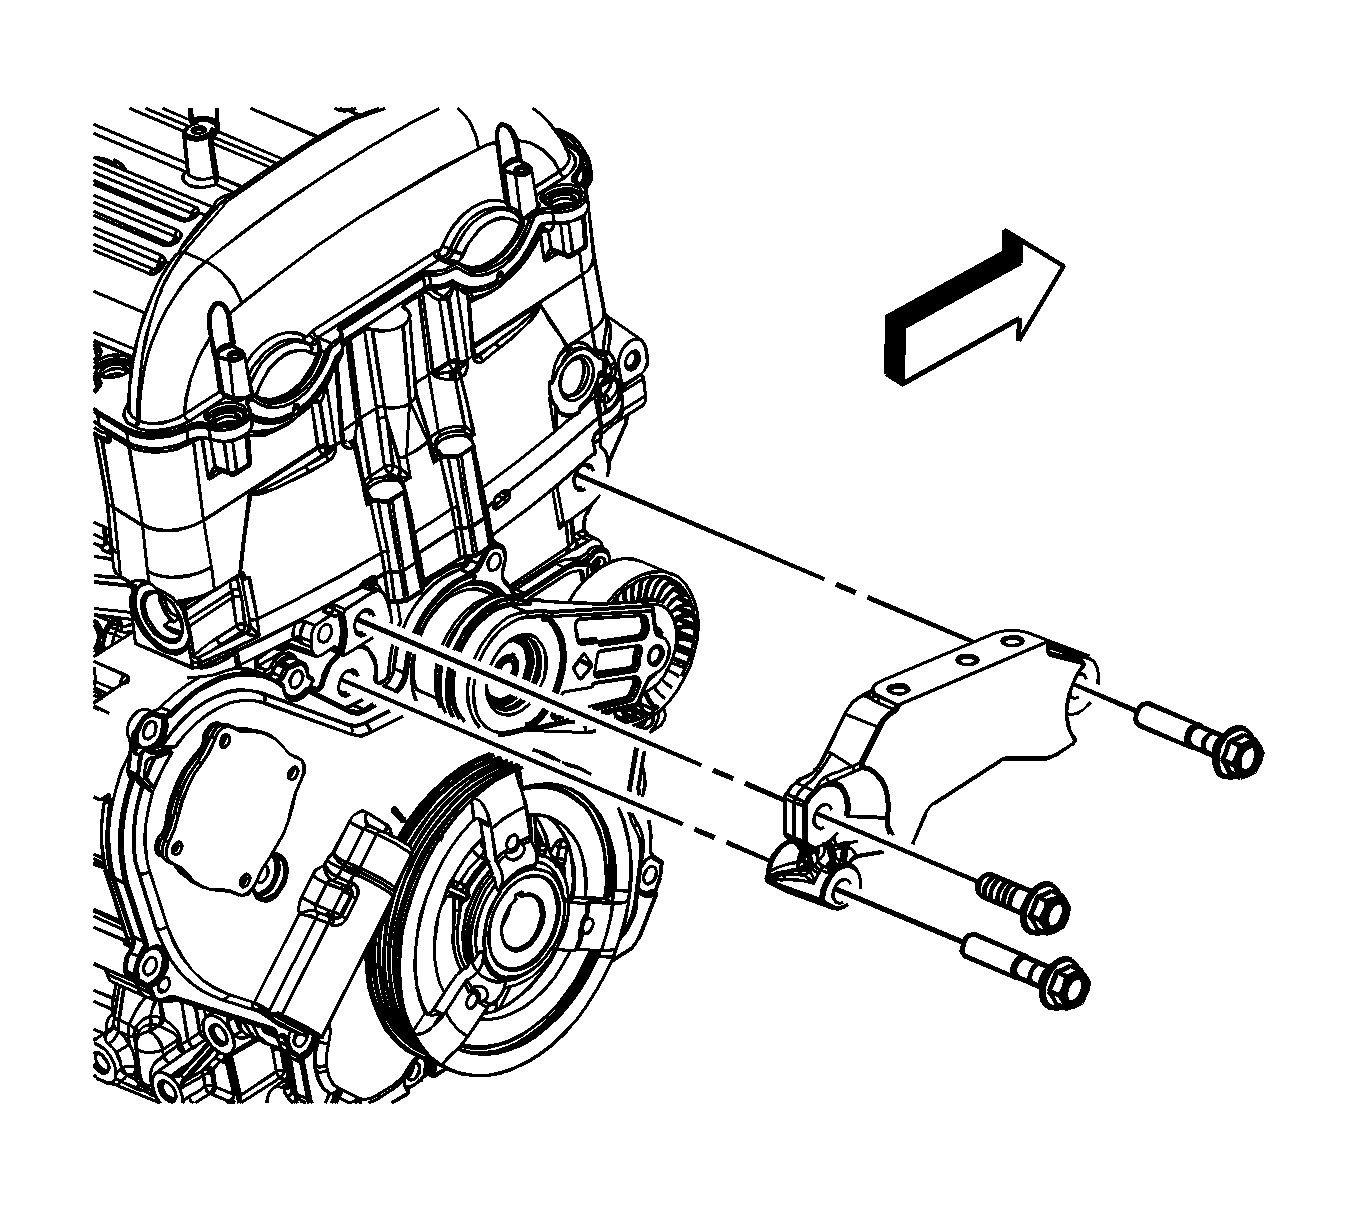
  10. Position the engine mount bracket to the engine.
  11. Install the engine mount bracket bolts in the following locations.
  12.    - The long bolts in the forward and lower rear holes
       - The short bolt in the upper rear hole
  13. Tighten the engine mount bracket bolts in the following sequence.
  14. 8.1. Upper rear
    8.2. Lower rear
    8.3. Forward

    Tighten
    Tighten the bolts to 50 N·m (37 lb ft).


    Object Number: 1623161  Size: SH
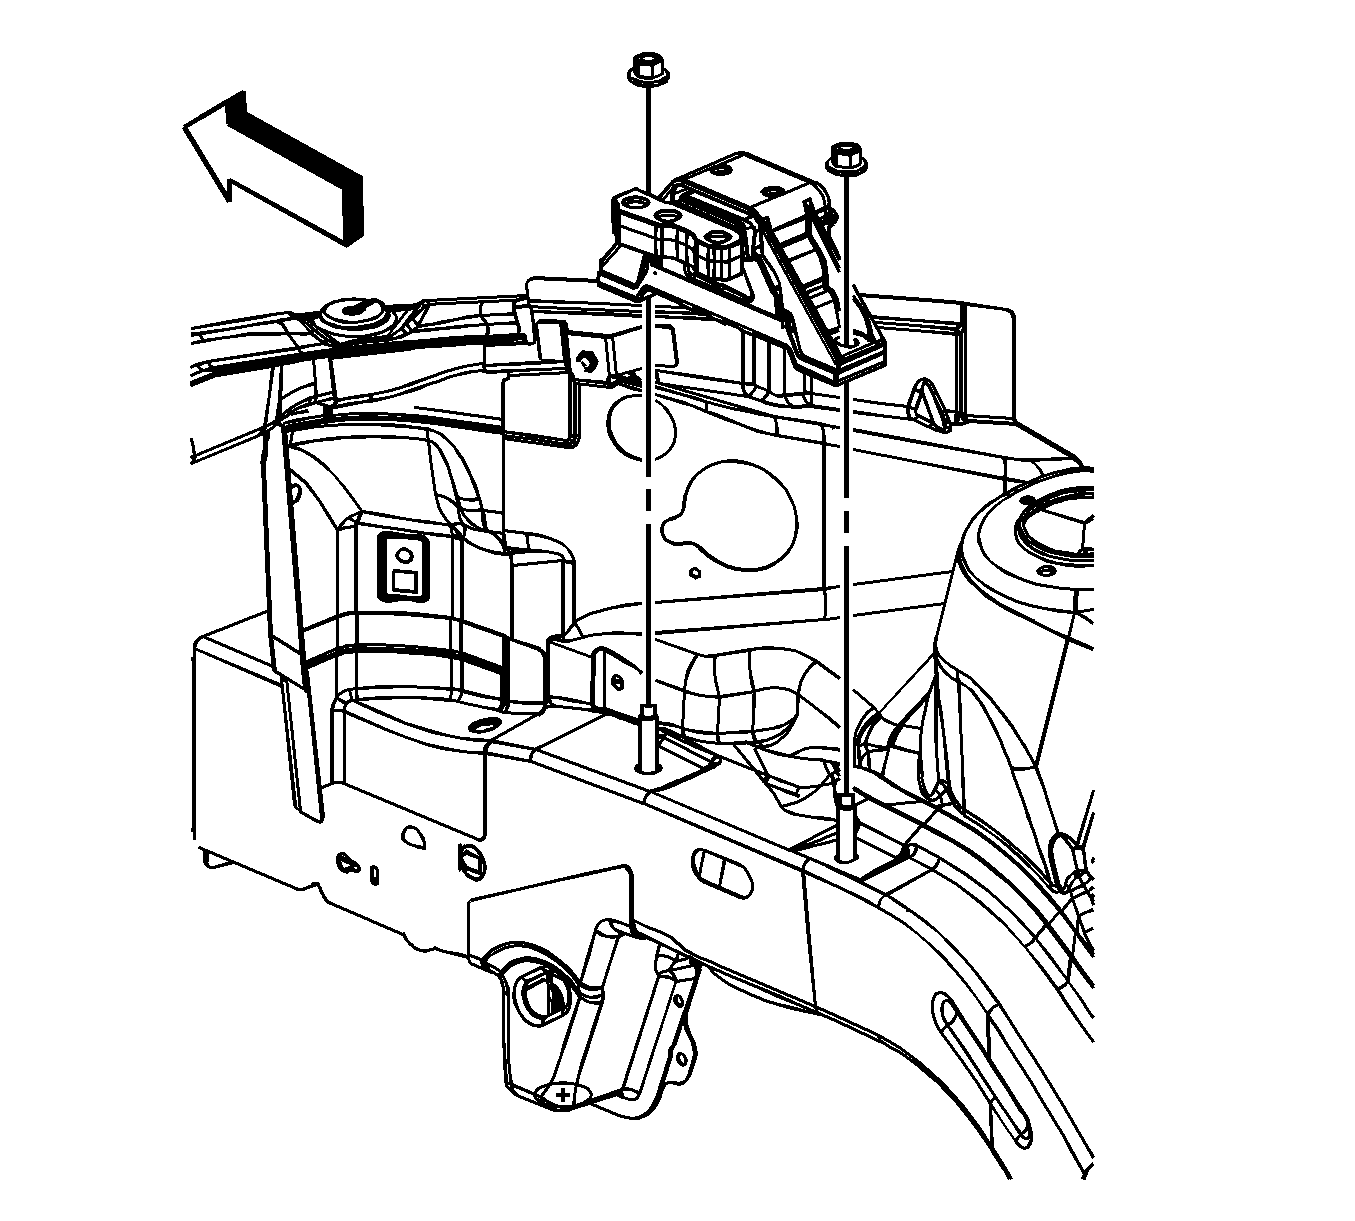
  15. Install the engine mount to the engine compartment.
  16. Install the engine mount to side rail nuts.
  17. Tighten
    Tighten the nuts to 100 N·m (74 lb ft).


    Object Number: 1623160  Size: SH
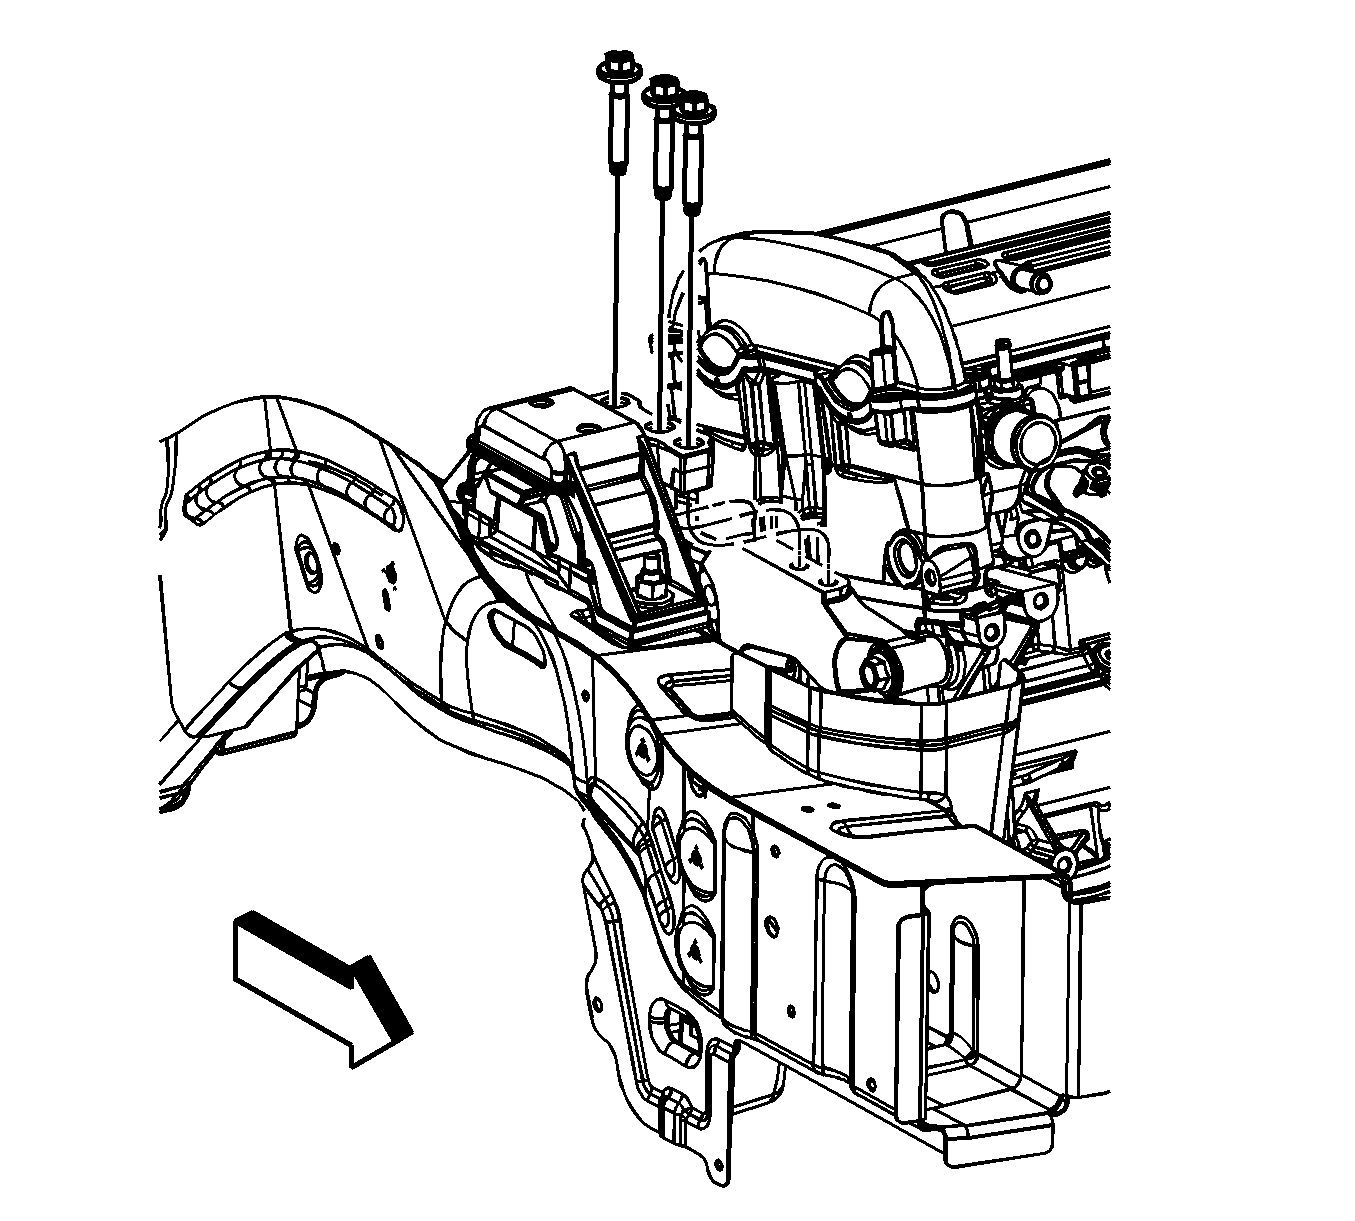
  18. Install the engine mount to bracket bolts.
  19. Tighten the engine mount to bracket bolts in the following sequence.
  20. 12.1. Middle
    12.2. Rear
    12.3. Front

    Tighten
    Tighten the bolts to 50 N·m (37 lb ft).

  21. Remove the engine support fixture. Refer to Engine Support Fixture .
  22. Install the windshield washer solvent reservoir. Refer to Windshield Washer Solvent Container Replacement .
  23. Install the air cleaner assembly. Refer to Air Cleaner Assembly Replacement .
  24. Install the crankshaft balancer. Refer to Crankshaft Balancer Replacement .
  25. Install the drive belt tensioner. Refer to Drive Belt Tensioner Replacement .