Removal Procedure
- Disconnect the battery ground negative cable. Refer to Battery Negative Cable Disconnection and Connection .
- Remove the upper intake manifold. Refer to Upper Intake Manifold Replacement .
- Remove the left valve rocker arm cover. Refer to Valve Rocker Arm Cover Replacement - Left Side .
- Remove the right valve rocker arm cover. Refer to Valve Rocker Arm Cover Replacement - Right Side .
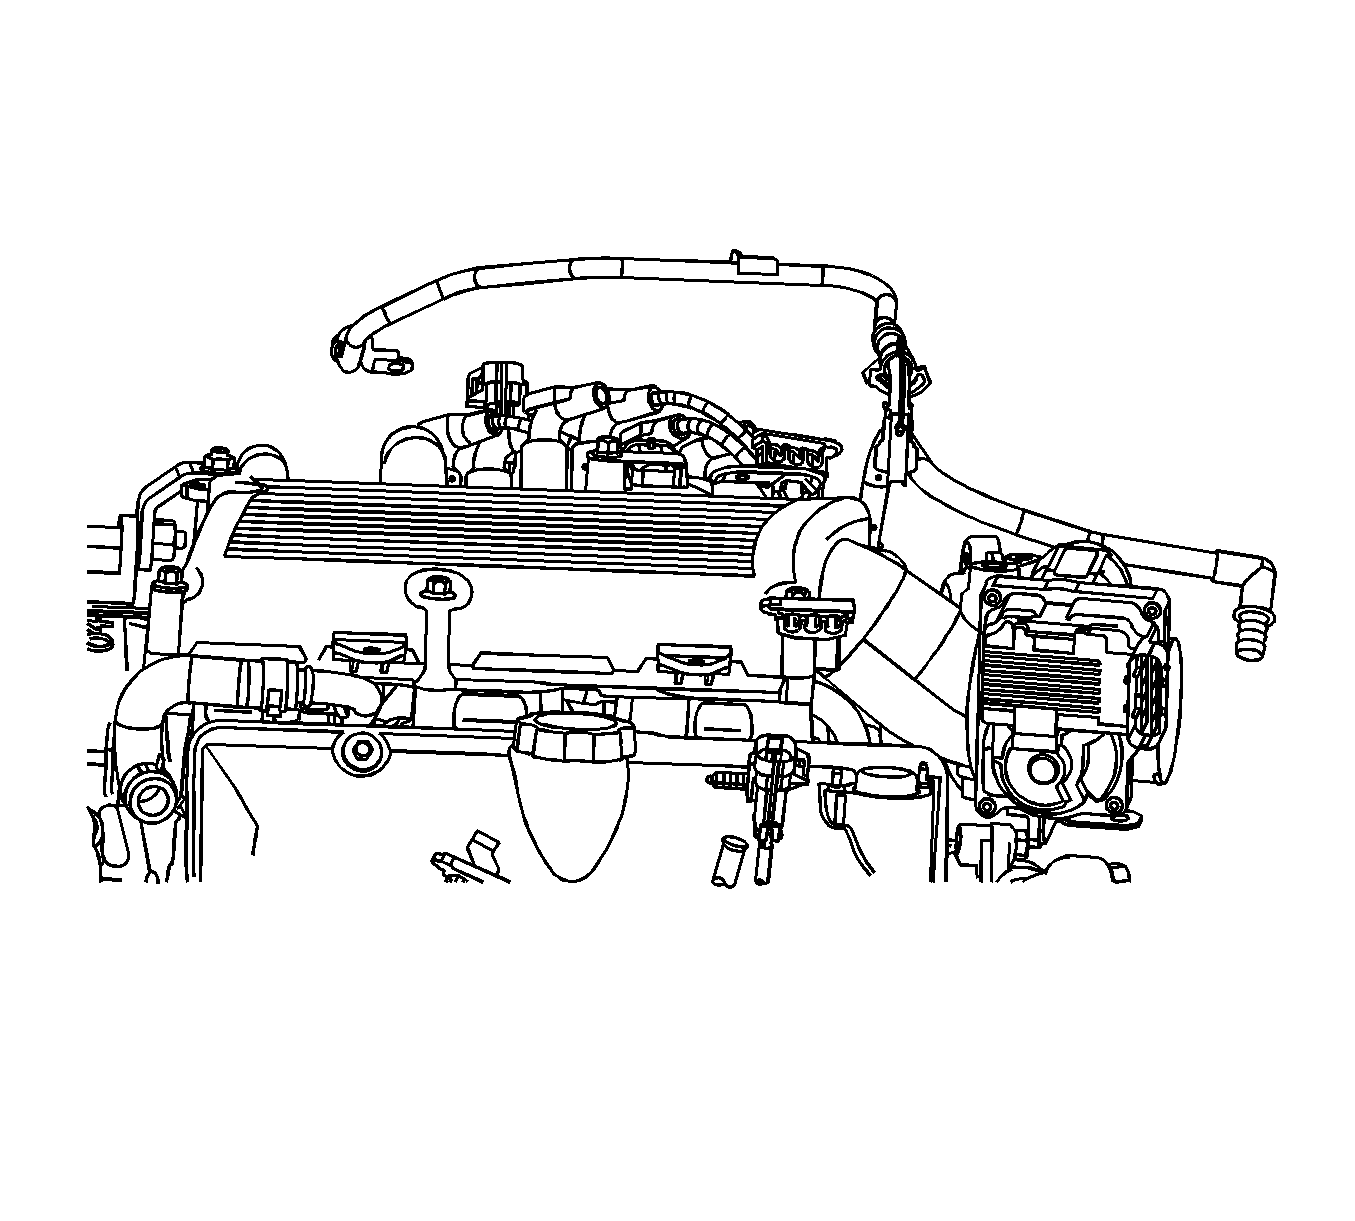
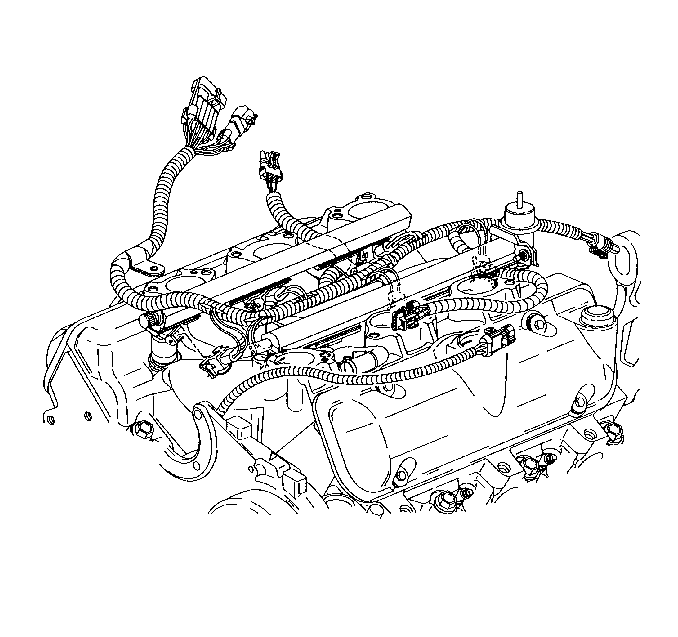
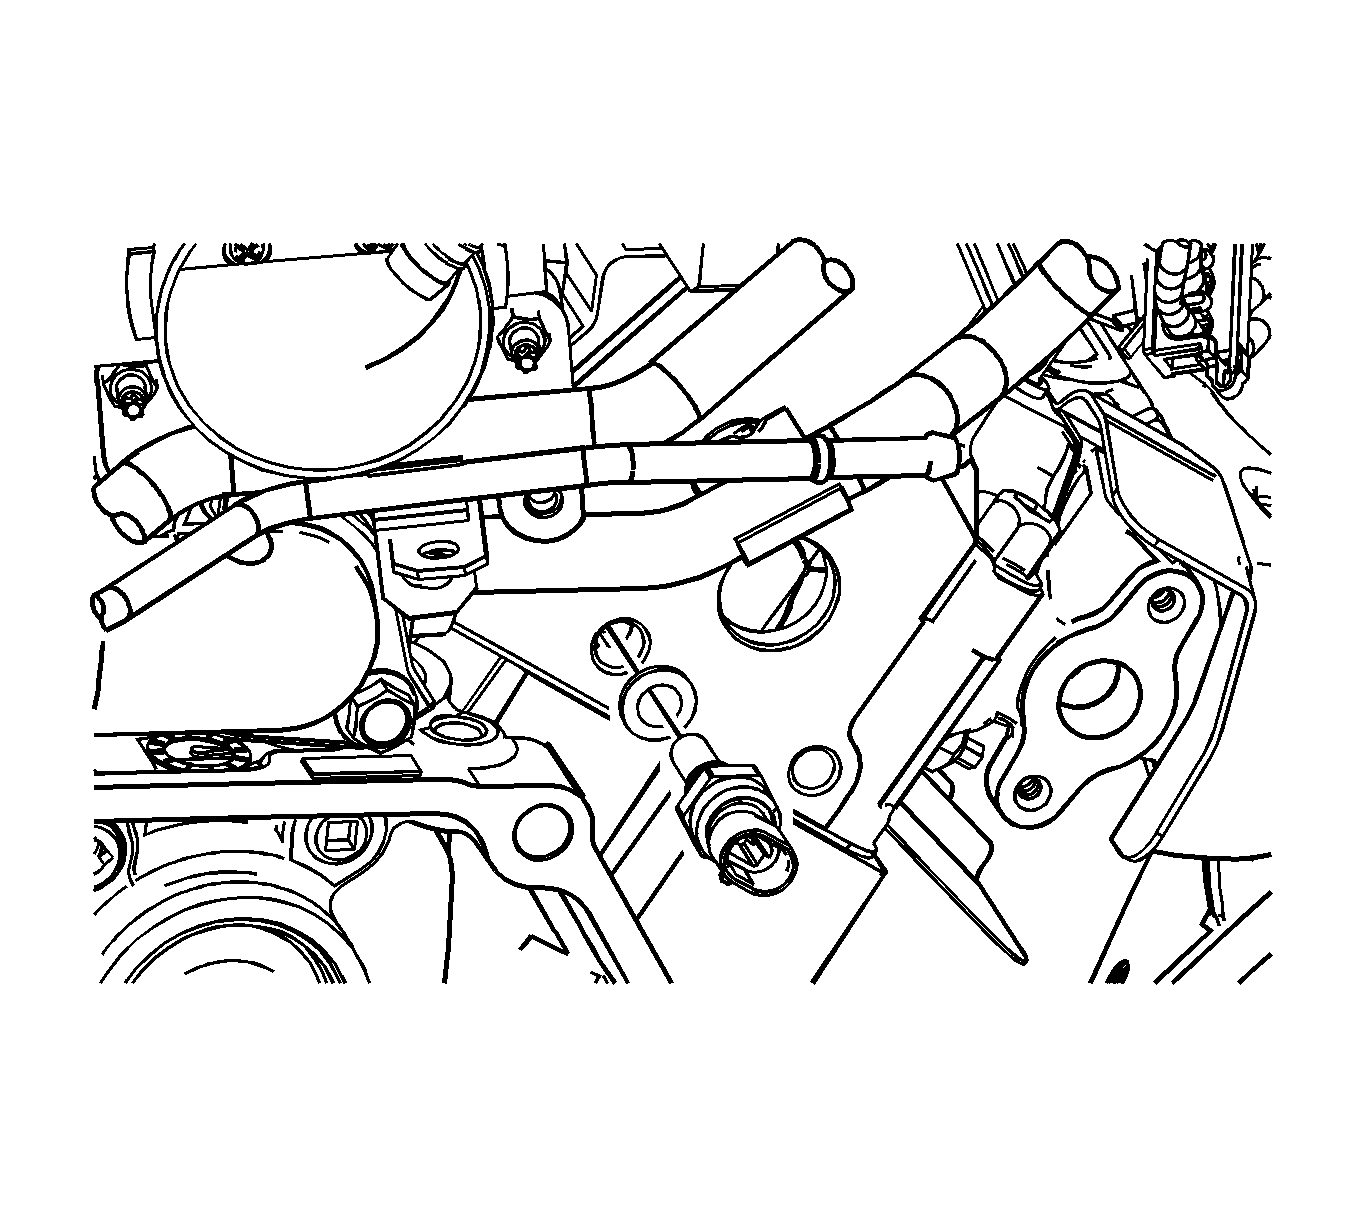
- Disconnect the engine coolant temperature (ECT) wiring harness.
- Disconnect and remove the fuel injector and manifold air pressure (MAP) wiring harness.
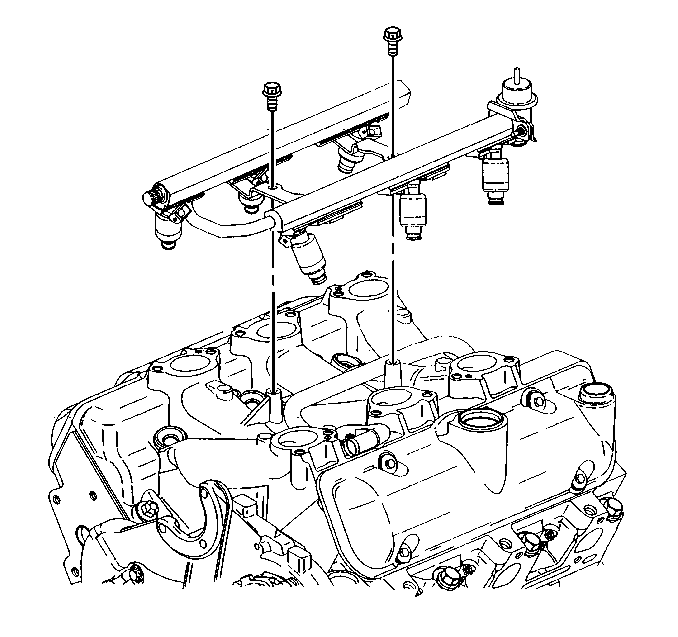
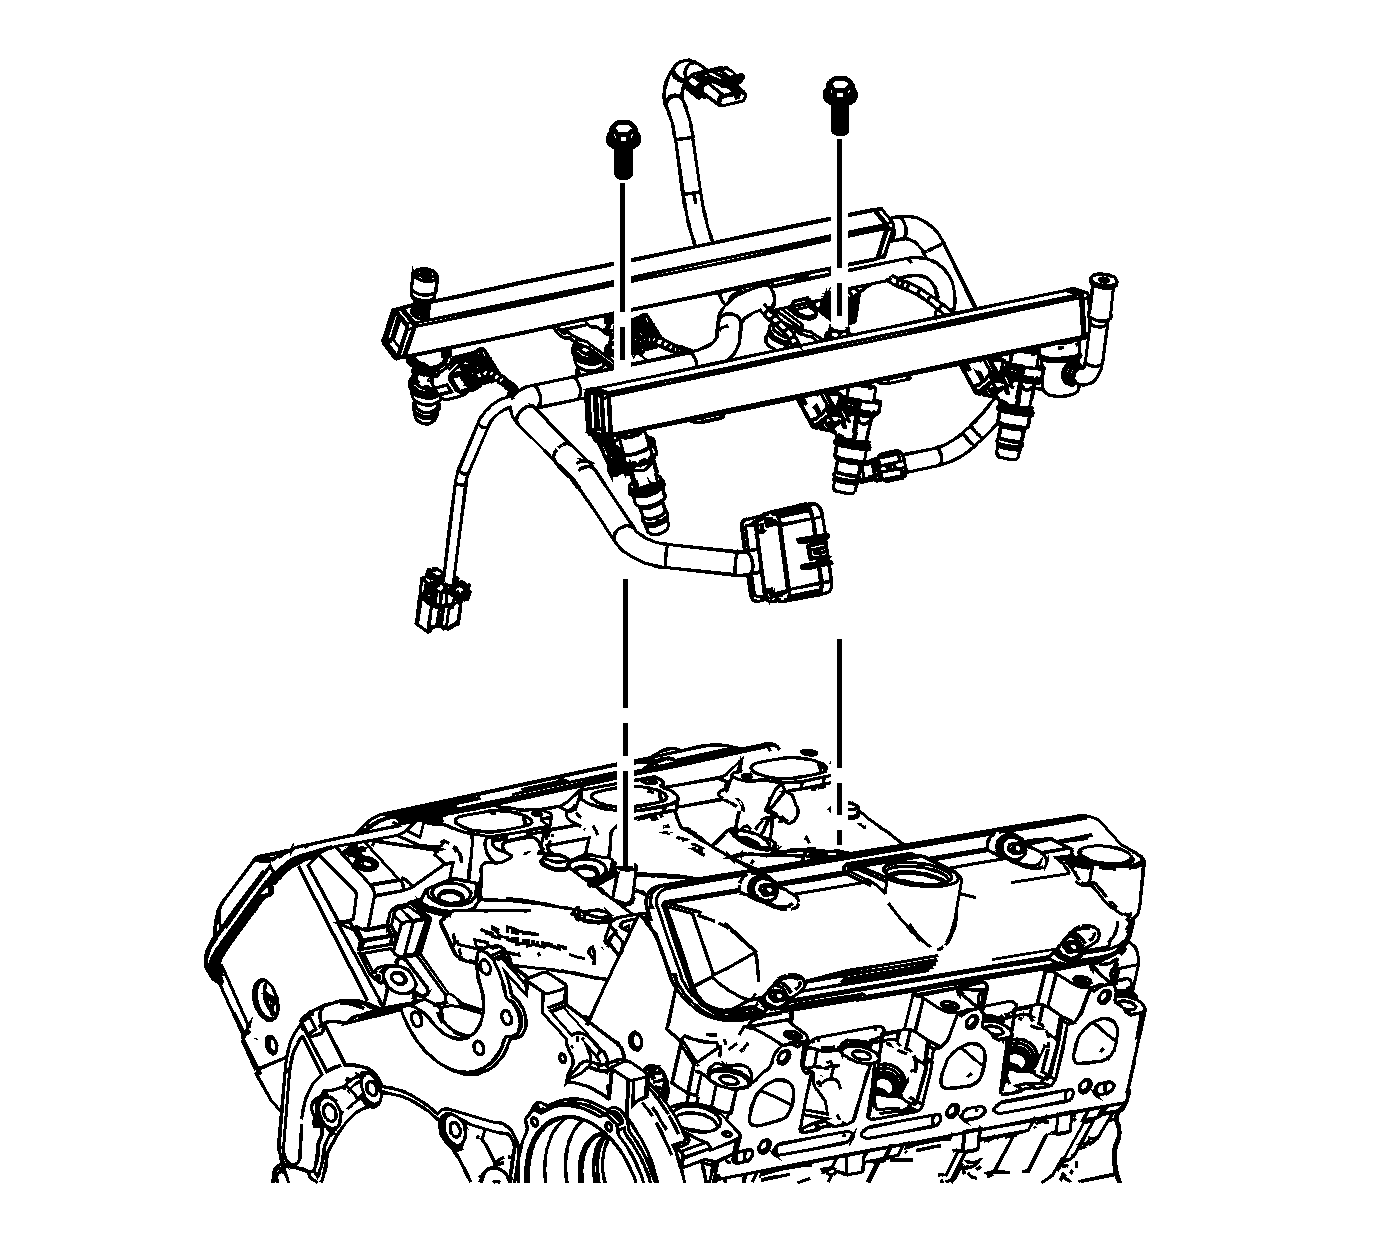
- Remove the fuel injector rail. Refer to Fuel Injection Fuel Rail Assembly Replacement .
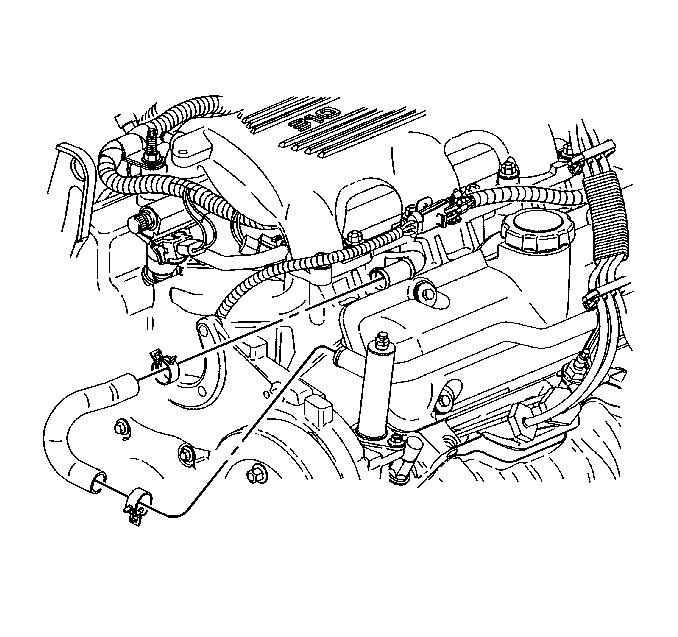
- Disconnect the heater inlet pipe with heater hose from the lower intake manifold and reposition.
- Disconnect the radiator inlet hose from the engine. Refer to Radiator Inlet Hose Replacement .
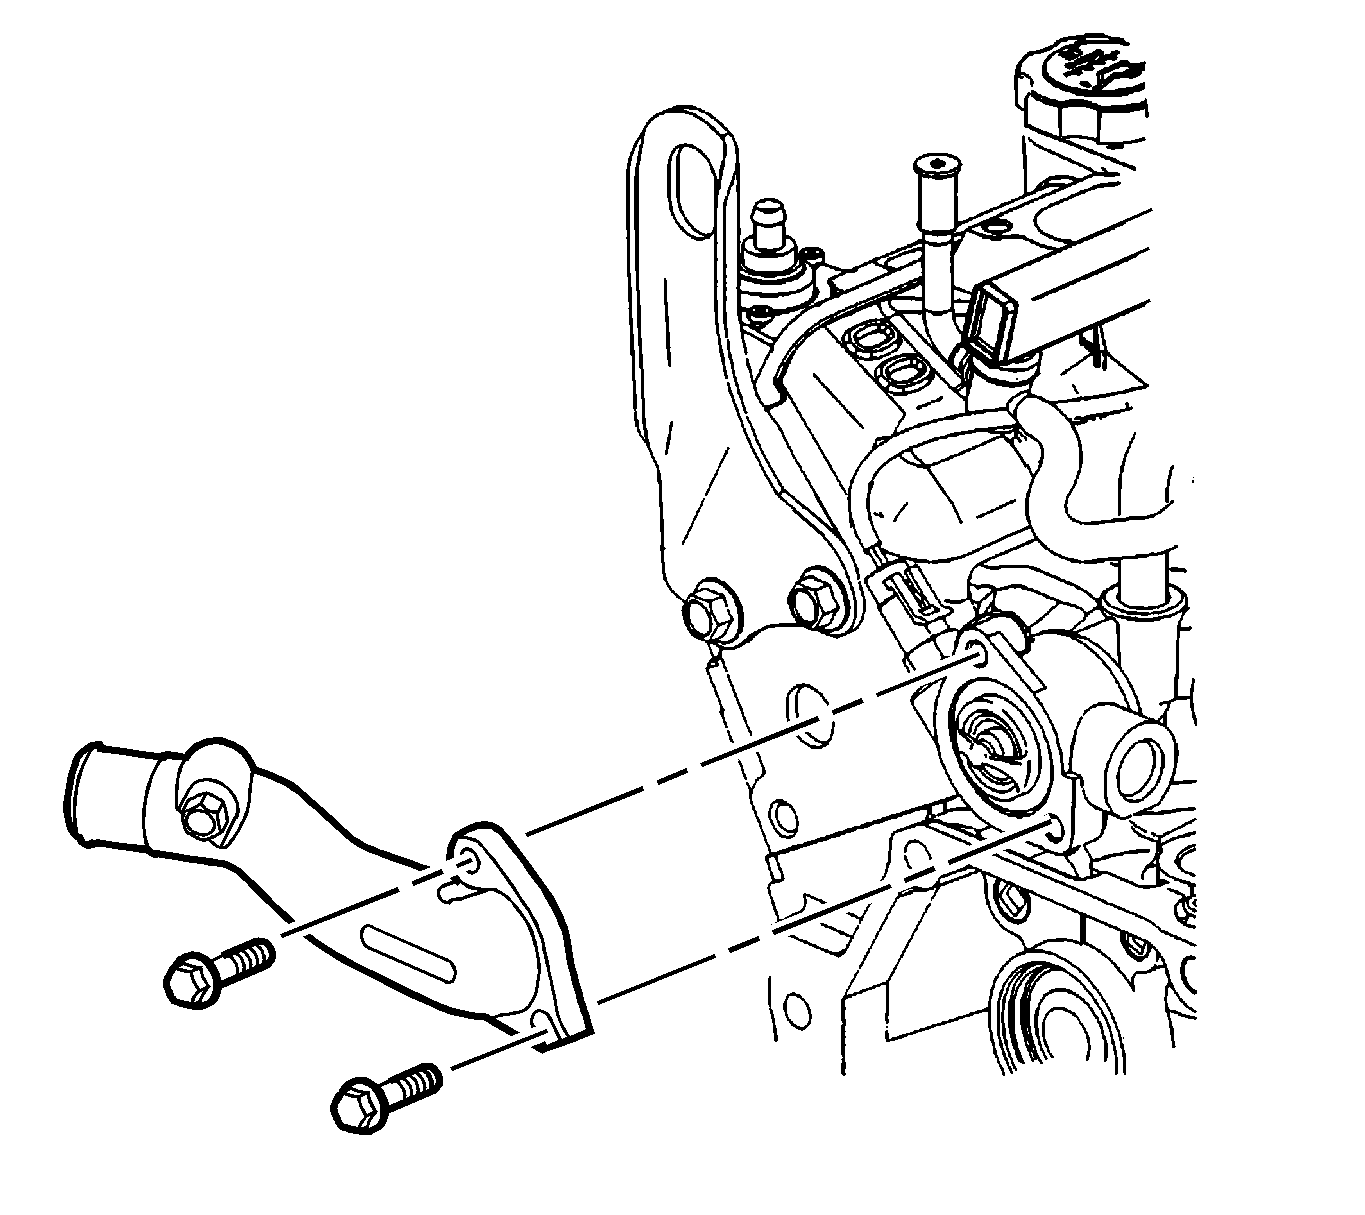
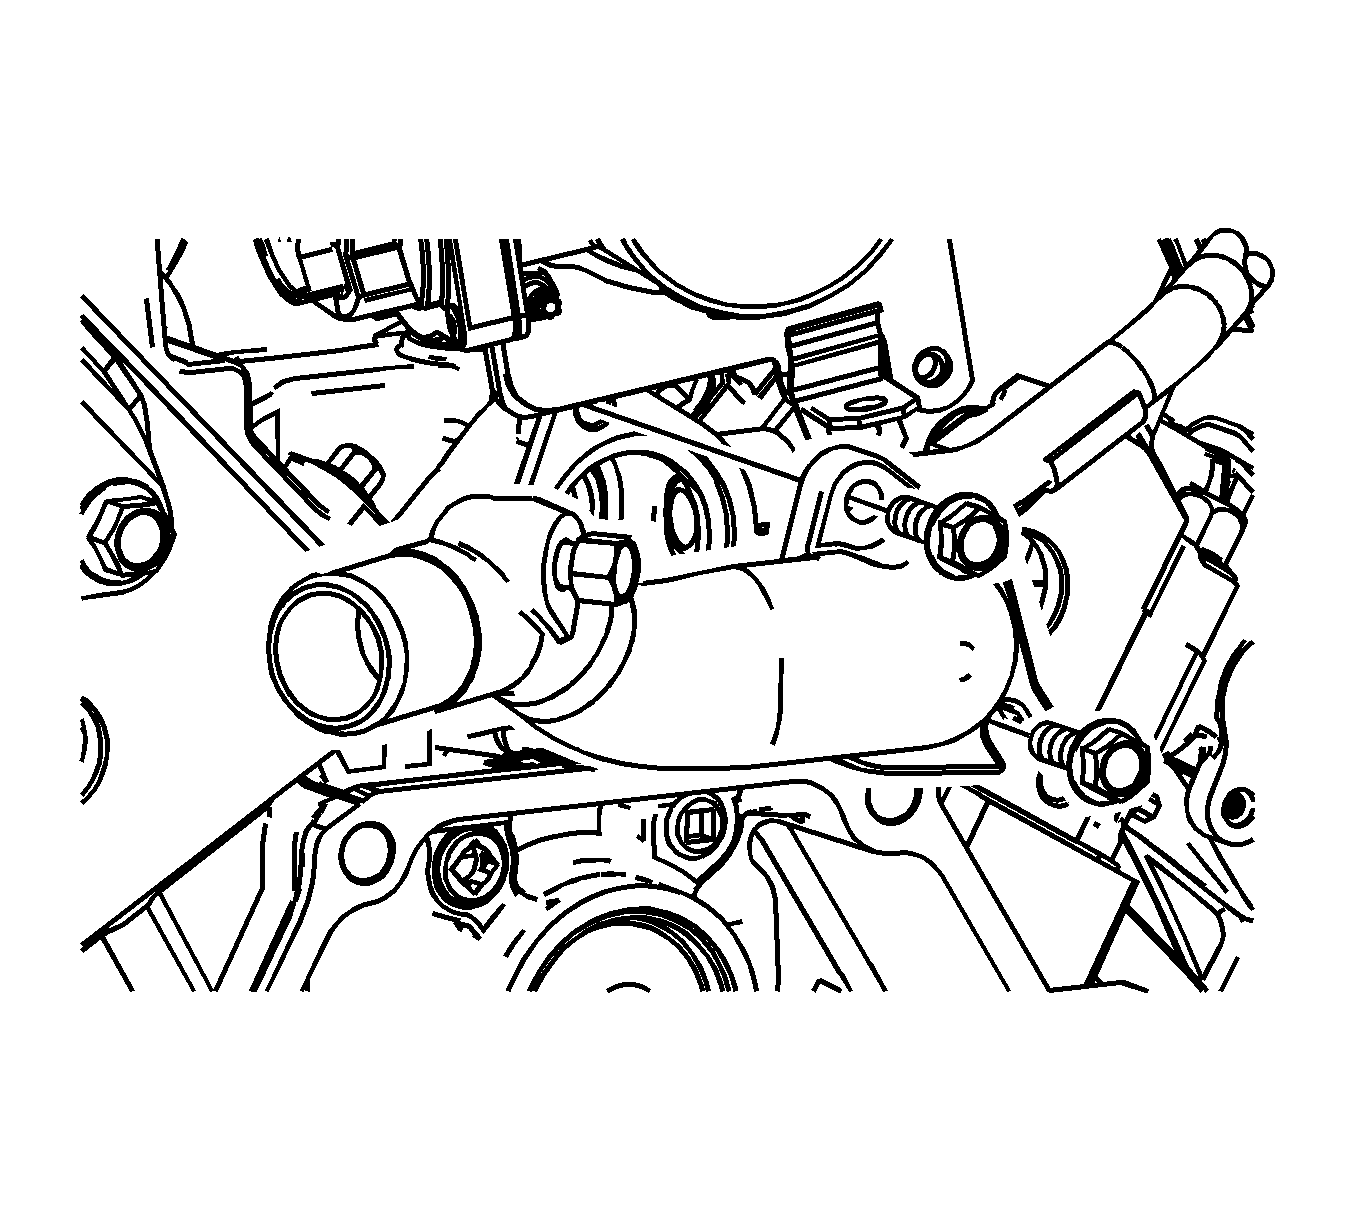
- Remove the water outlet.
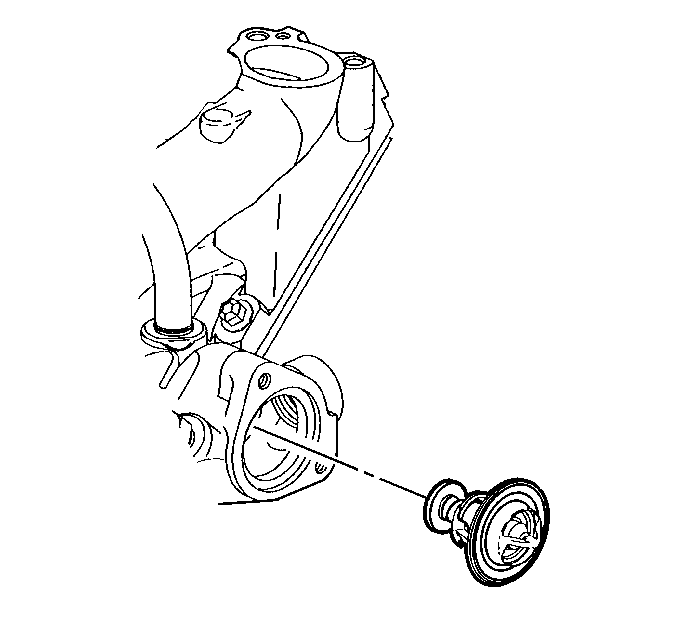
- Remove the thermostat.
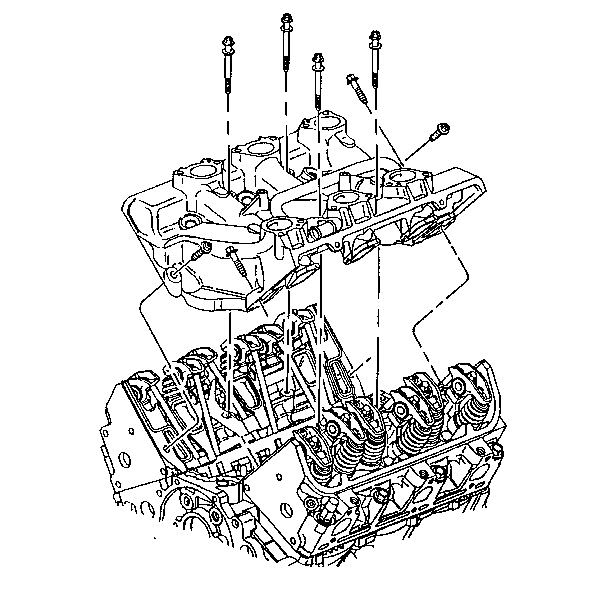
- Remove the lower intake manifold bolts.
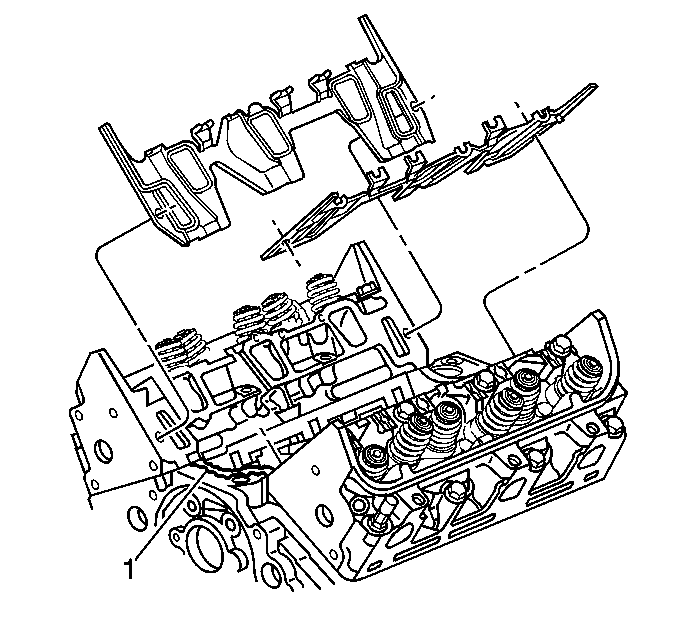
- Remove the lower intake manifold.
- Remove the valve rocker arms and pushrods. Refer to Valve Rocker Arm and Push Rod Replacement .
- Remove the lower intake manifold gaskets and seals.
- Clean the lower intake manifold gasket and seal surfaces on the cylinder heads and the engine block.
- Clean the gasket and seal surfaces on the lower intake manifold with degreaser.
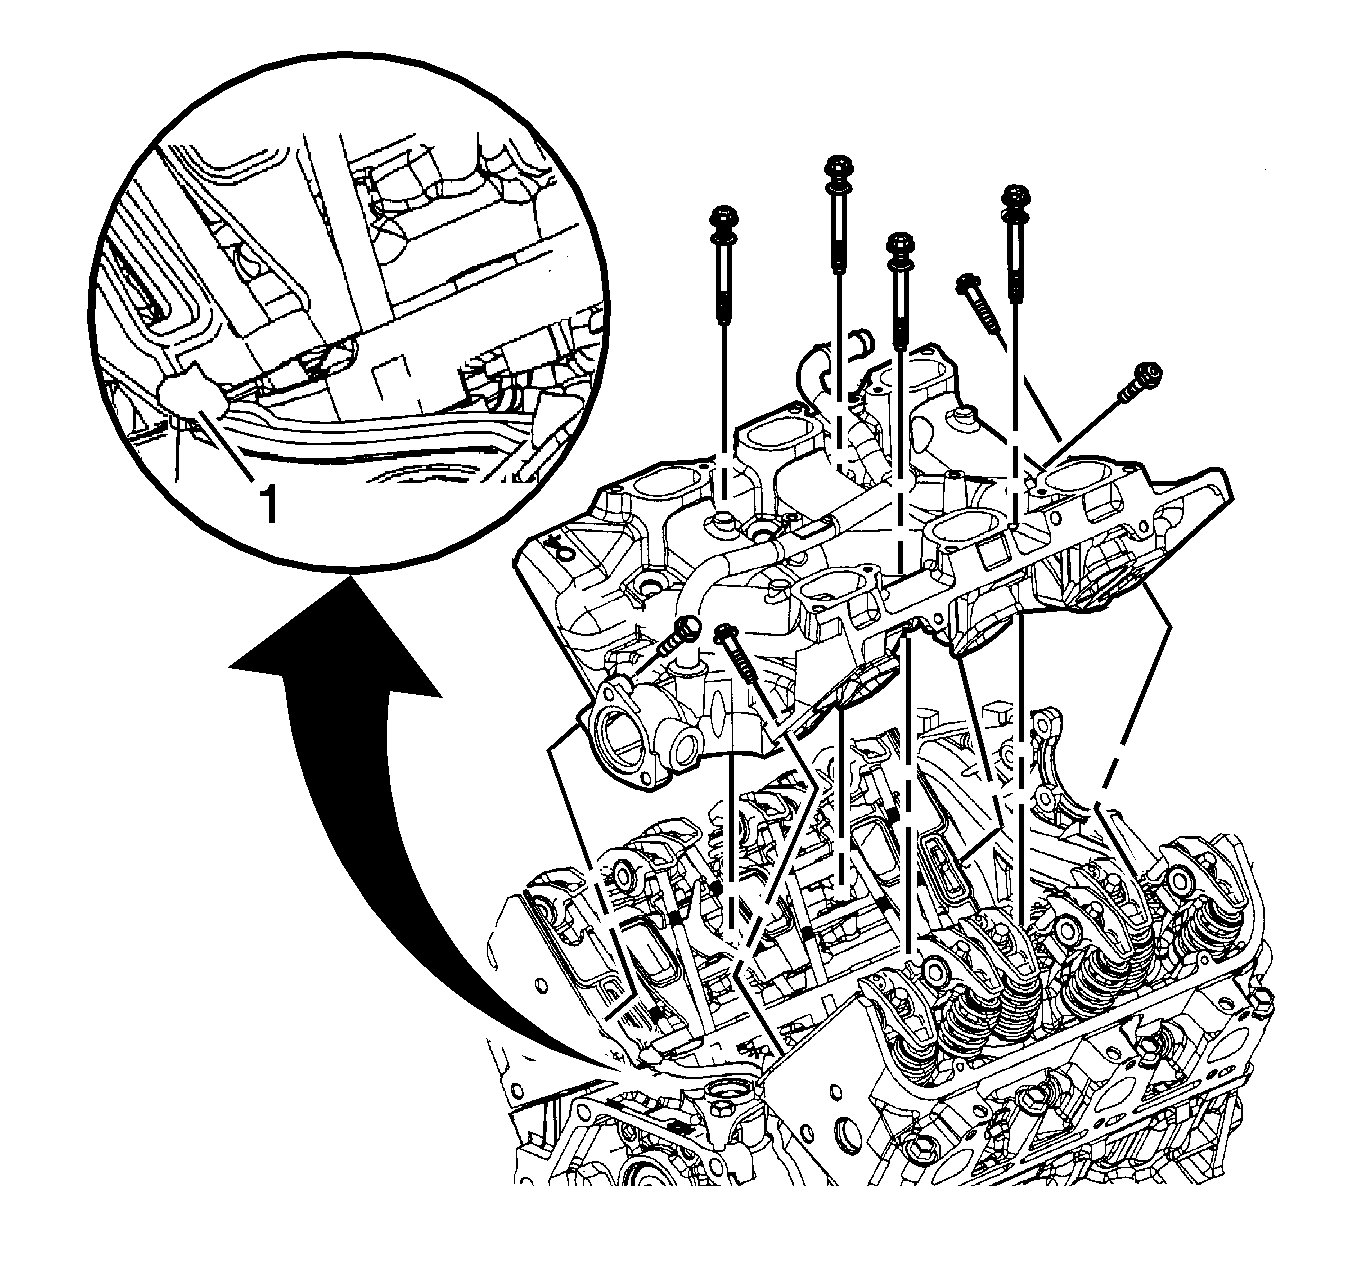
- Remove all the loose room temperature vulcanizing sealer (RTV) (1).
Important: This engine uses a sequential multiport fuel injection system. Injector wiring harness connectors must be connected to their appropriate fuel injector or exhaust emissions and engine performance may be seriously affected.
Installation Procedure
- Install the lower intake manifold gaskets.
- Install the valve rocker arms and pushrods. Refer to Valve Rocker Arm and Push Rod Replacement .
- With gaskets and seals in place apply a small drop 8-10 mm (0.31-0.39 in) of RTV sealer to the 4 corners of the intake manifold to block joints (1). Refer to Adhesives, Fluids, Lubricants, and Sealers for the correct part number.
- Install the lower intake manifold.
- Apply sealer to the lower intake manifold bolt threads. Refer to Adhesives, Fluids, Lubricants, and Sealers for the correct part number.
- Install the new lower intake manifold bolts, if applicable, in sequence.
- Tighten the lower intake manifold bolts in sequence to 13 N·m (115 lb in) on the first pass.
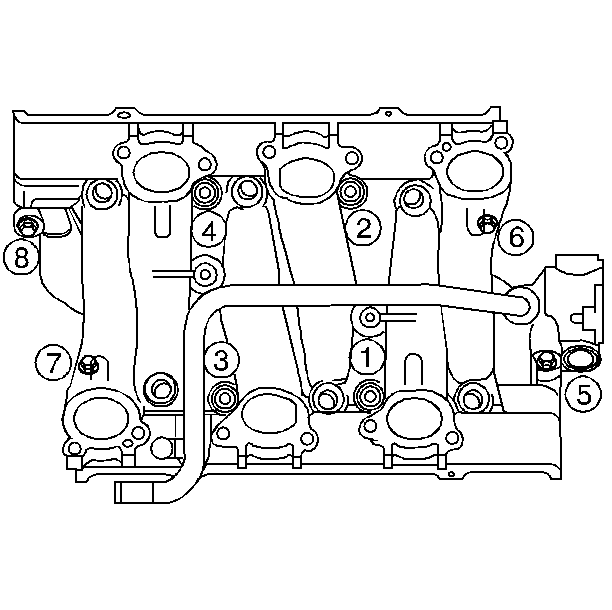
- Tighten the lower intake manifold bolts (1, 2, 3, 4) in sequence to 20 N·m (15 lb ft) on the final pass.
- Tighten the lower intake manifold bolts (5, 6, 7, 8) in sequence to 25 N·m (18 lb ft) on the final pass.
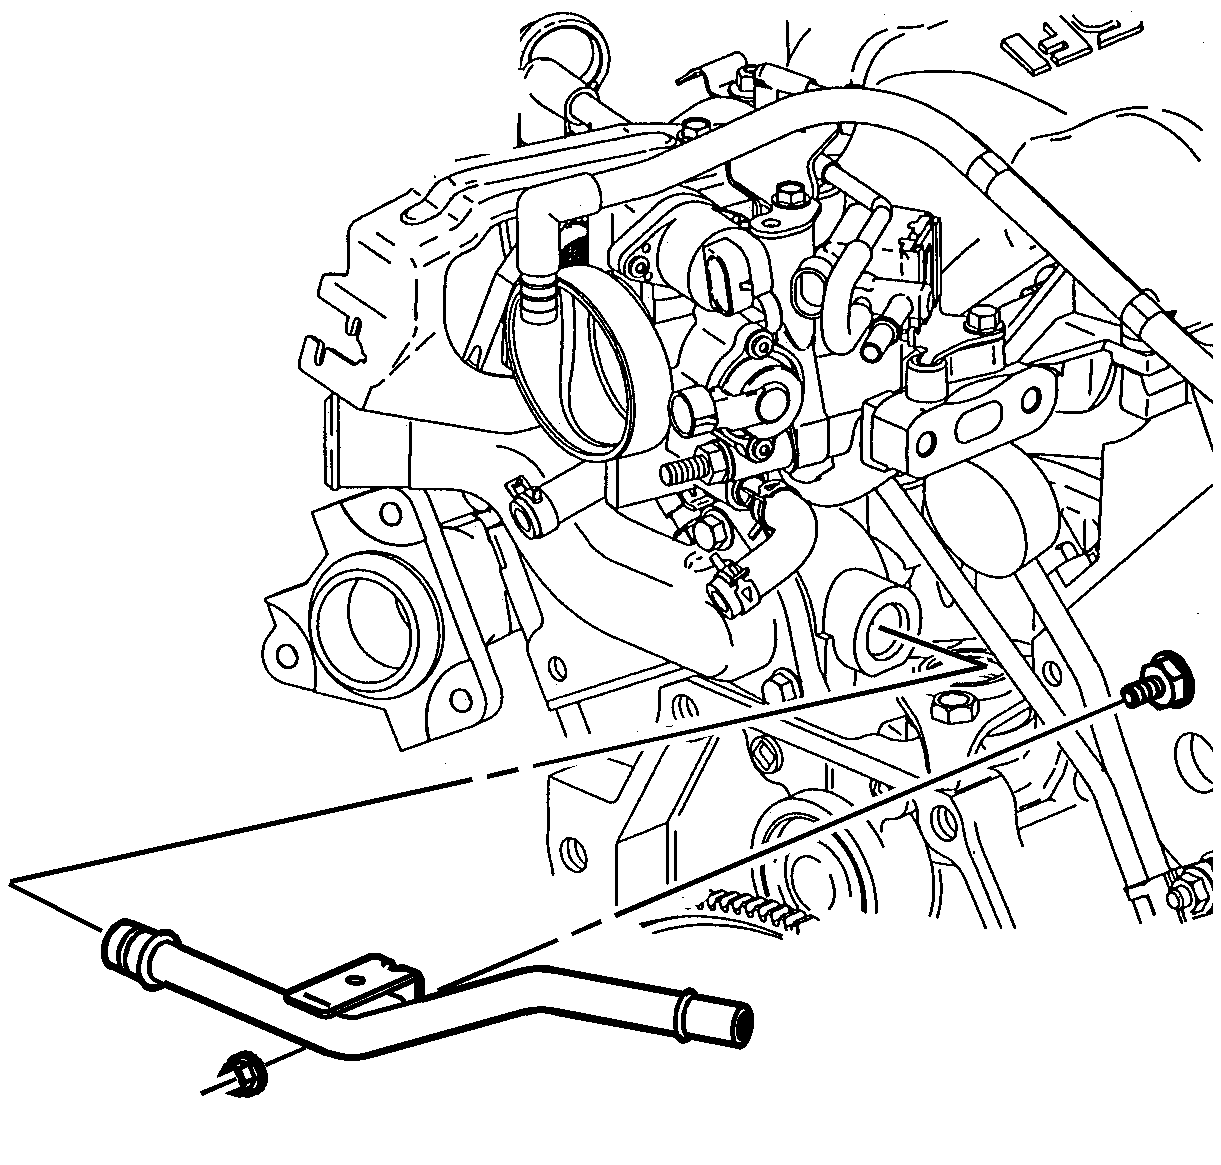
- Install the heater inlet pipe.
- Install the heater inlet pipe nut.
- Install the thermostat.
- Install the water outlet bolts. Refer to Engine Coolant Thermostat Replacement .
- Install the ECT sensor.
- Connect the thermostat bypass hose to the thermostat bypass pipe and lower intake manifold pipe.
- Connect the radiator inlet hose to the engine. Refer to Radiator Inlet Hose Replacement .
- Connect the heater inlet pipe and heater hose to the lower intake manifold.
- Install the power steering pump to the front engine cover.
- Install the fuel injector rail. Refer to Fuel Injection Fuel Rail Assembly Replacement .
- Connect the fuel feed pipe to the fuel injector rail.
- Connect the fuel injector and MAP wiring harness.
- Connect the ECT wiring harness.
- Install the right valve rocker arm cover. Refer to Valve Rocker Arm Cover Replacement - Right Side .
- Install the left valve rocker arm cover. Refer to Valve Rocker Arm Cover Replacement - Left Side .
- Install the upper intake manifold. Refer to Upper Intake Manifold Replacement .
- Connect the battery ground negative cable. Refer to Battery Negative Cable Disconnection and Connection .
Important: All gasket-mating surfaces need to be free of oil and foreign material. Use cleaner to clean the surfaces. Refer to Adhesives, Fluids, Lubricants, and Sealers for the correct part number.
Notice: Maximum gasket performance is achieved when using new fasteners, which contain a thread-locking patch. If the fasteners are not replaced, a thread locking chemical must be applied to the fastener threads. Failure to replace the fasteners or apply a thread-locking chemical MAY reduce gasket sealing capability.
Notice: Failure to tighten vertical bolts before the diagonal bolts may cause an oil leak.
Notice: Refer to Fastener Notice in the Preface section.
Tighten
Tighten
Tighten the heater inlet pipe nut to 25 N·m (18 lb ft).
Tighten
Tighten the ECT sensor to 20 N·m (15 lb ft).