Removal Procedure
- Disable the SIR system. Refer to SIR Disabling and Enabling and to SIR Disabling and Enabling in SIR.
- Disconnect the battery ground cable. Refer to Battery Negative Cable Disconnection and Connection in Engine Electrical.
- Remove the left instrument panel (I/P) insulator fasteners.
- Rotate the courtesy lamp counterclockwise in order to disconnect the courtesy lamp from the left I/P insulator. Remove the left I/P insulator.
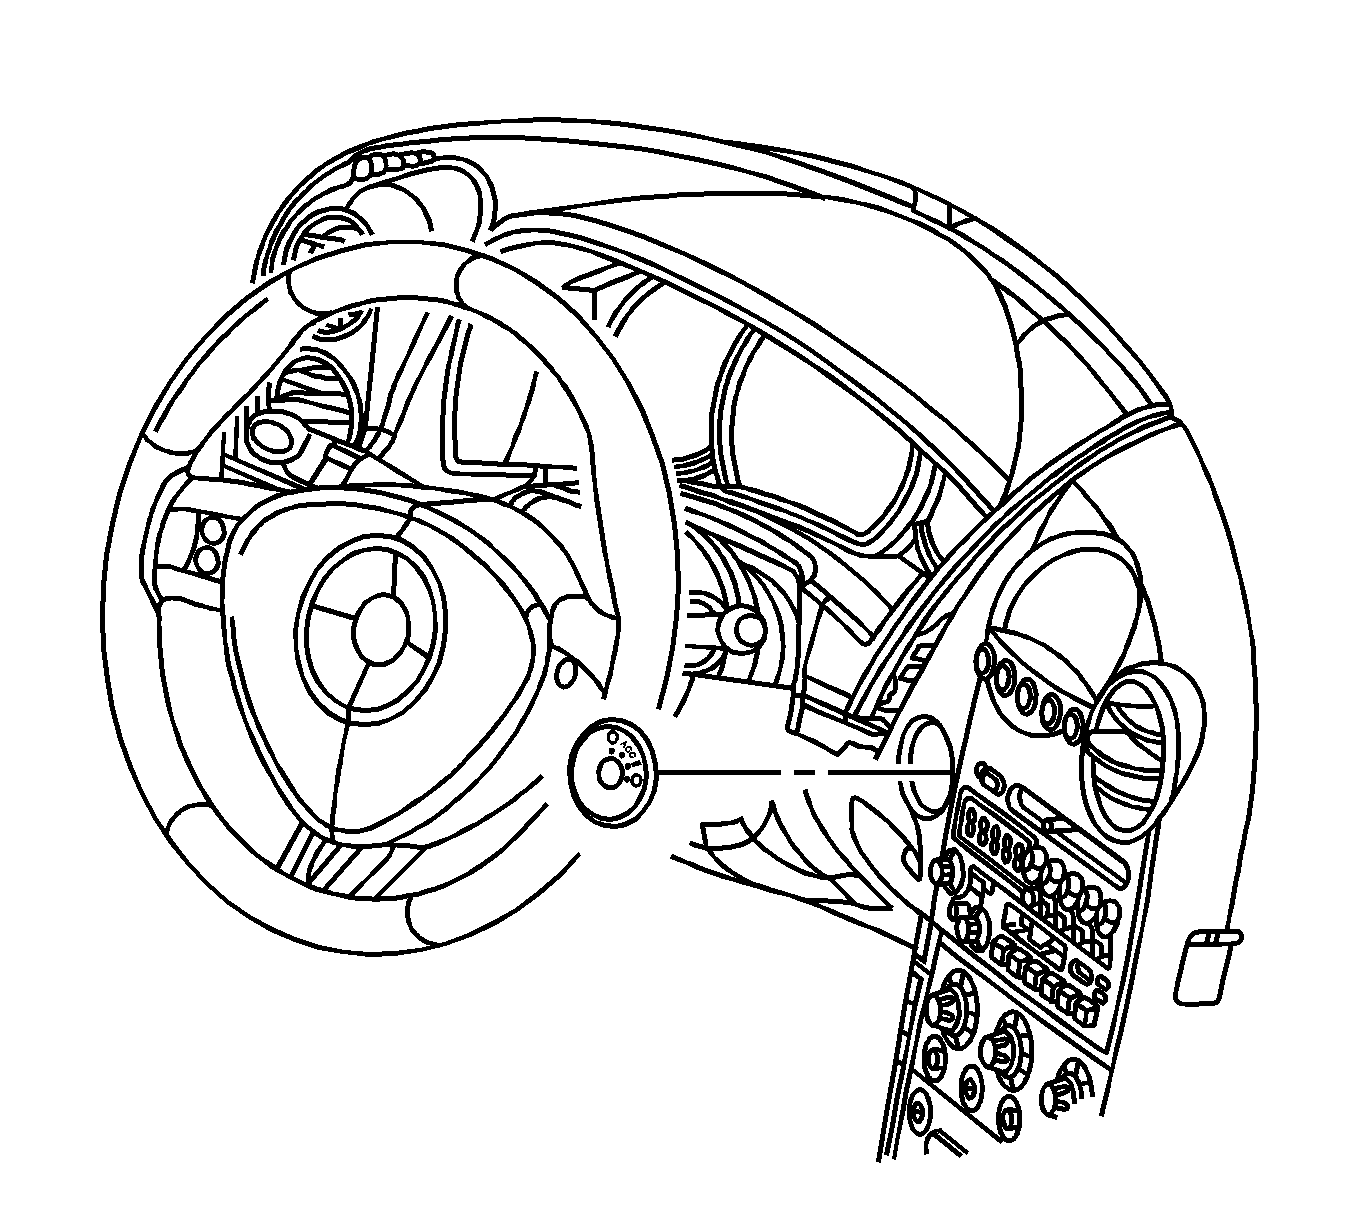
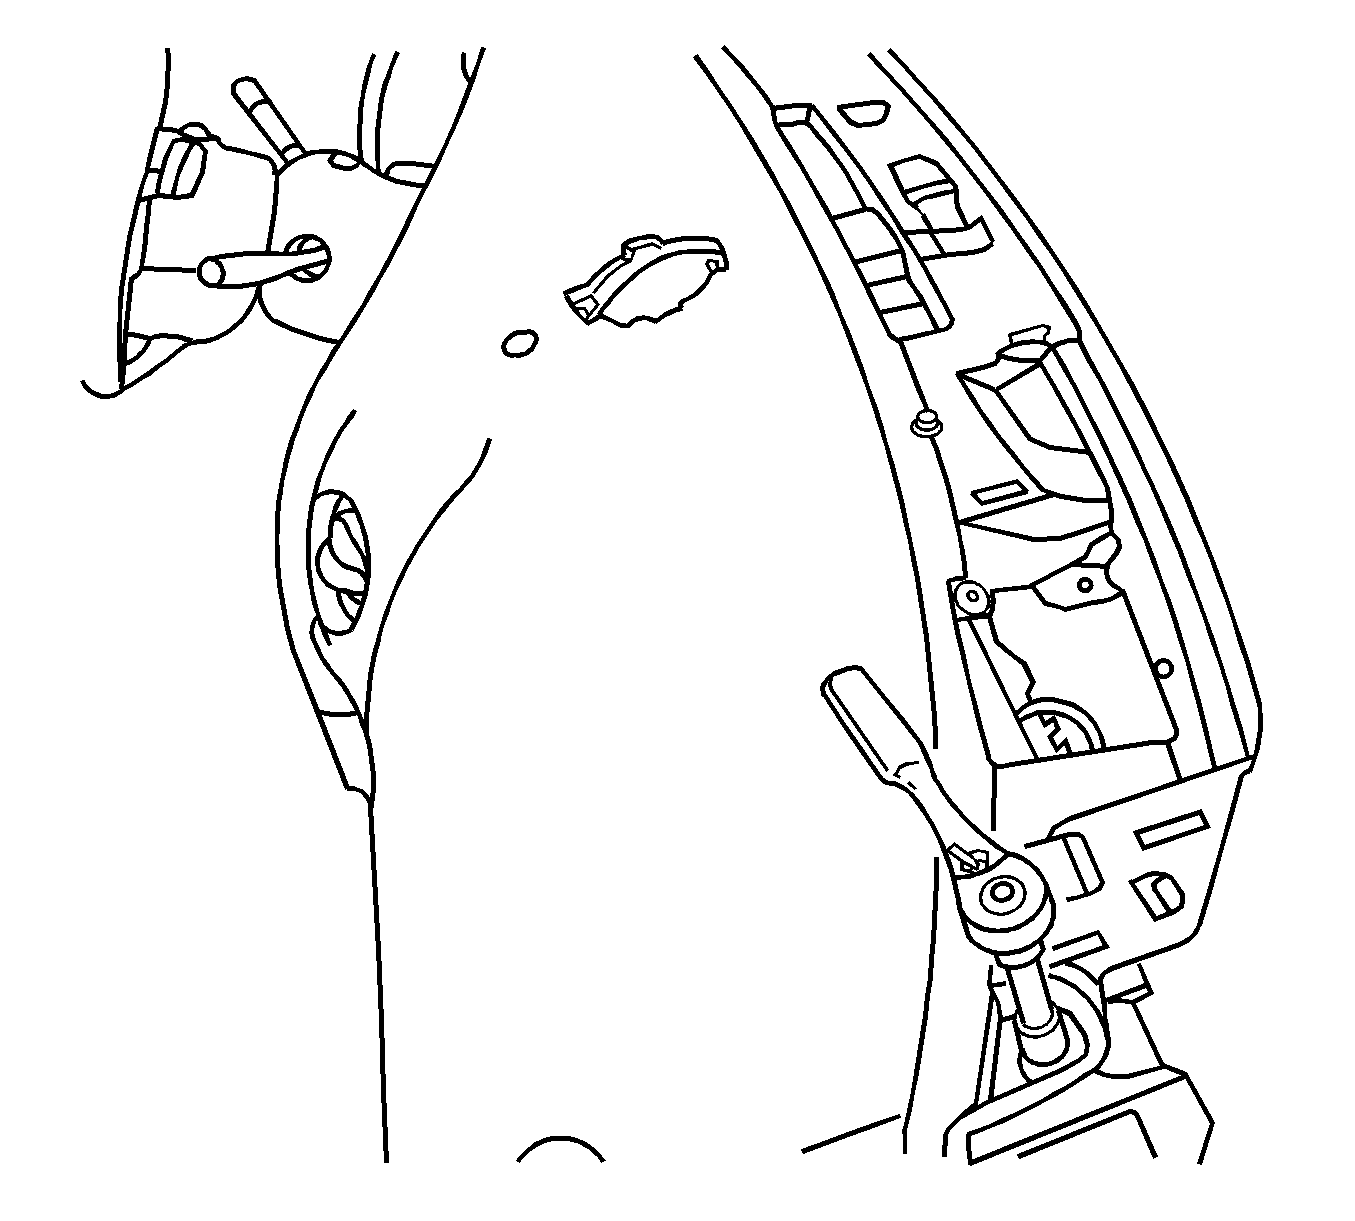
- Use a plastic trim tool to remove the ignition switch bezel.
- Pull the I/P accessory trim plate rearward.
- Disconnect the driver information center (DIC) electrical connector. Remove the I/P accessory trim plate.
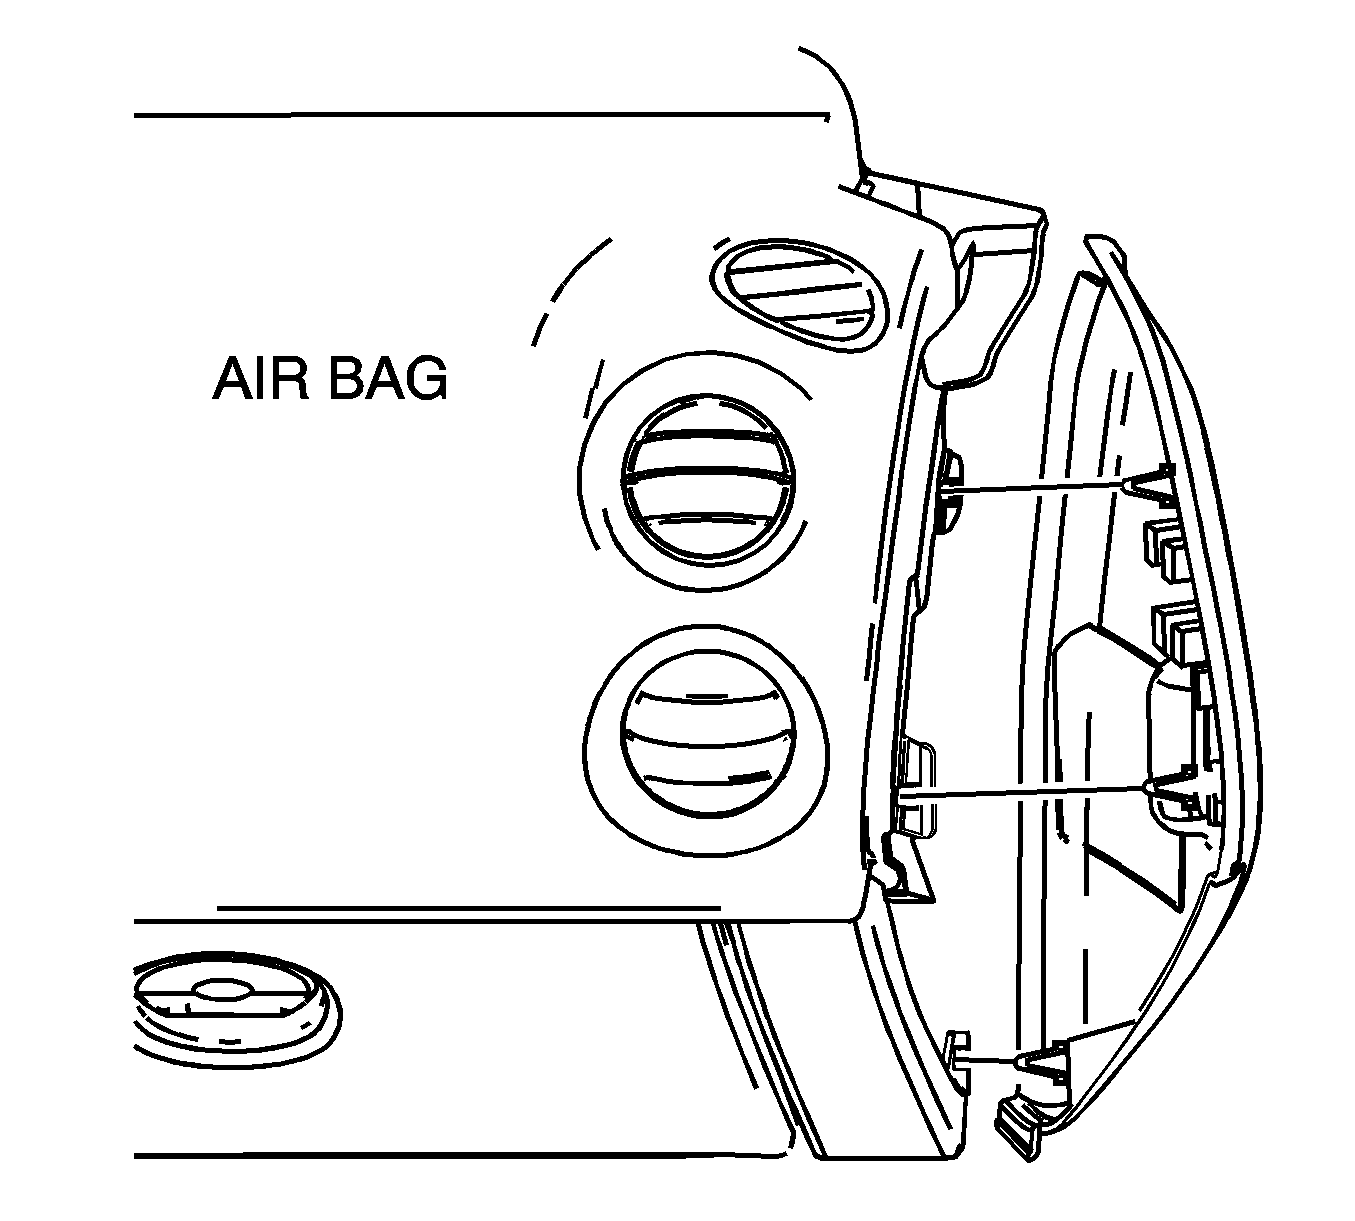
- Pull the left I/P compartment access hole cover from the I/P trim pad. Remove the cover.
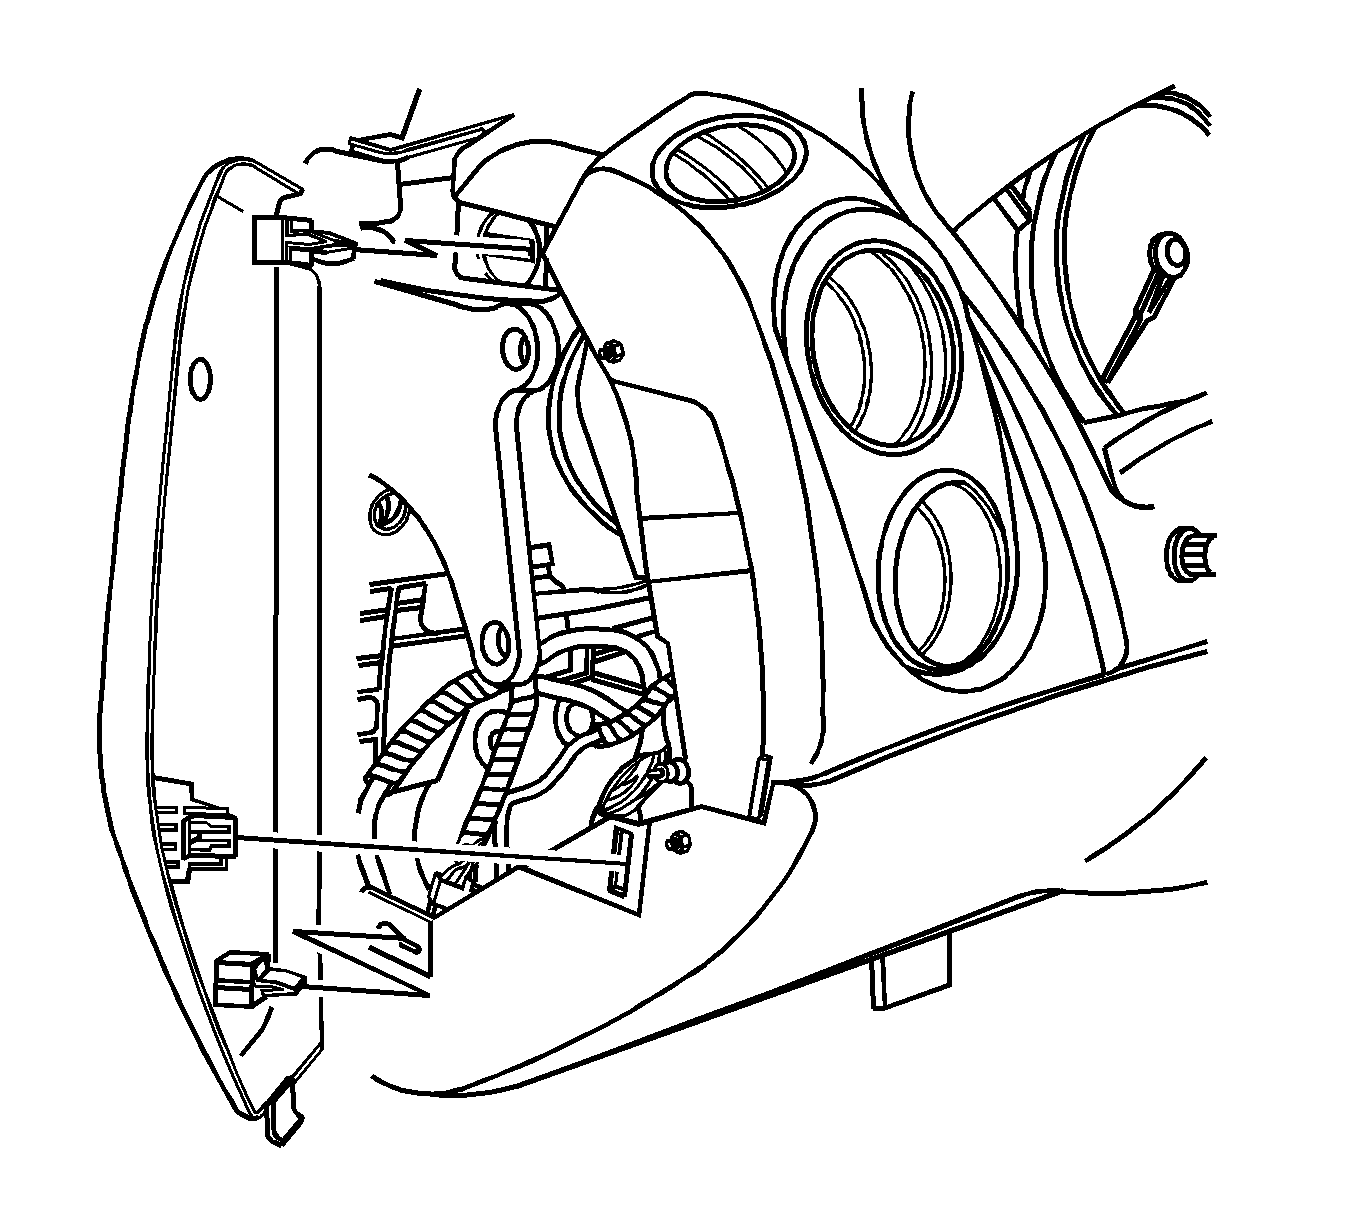
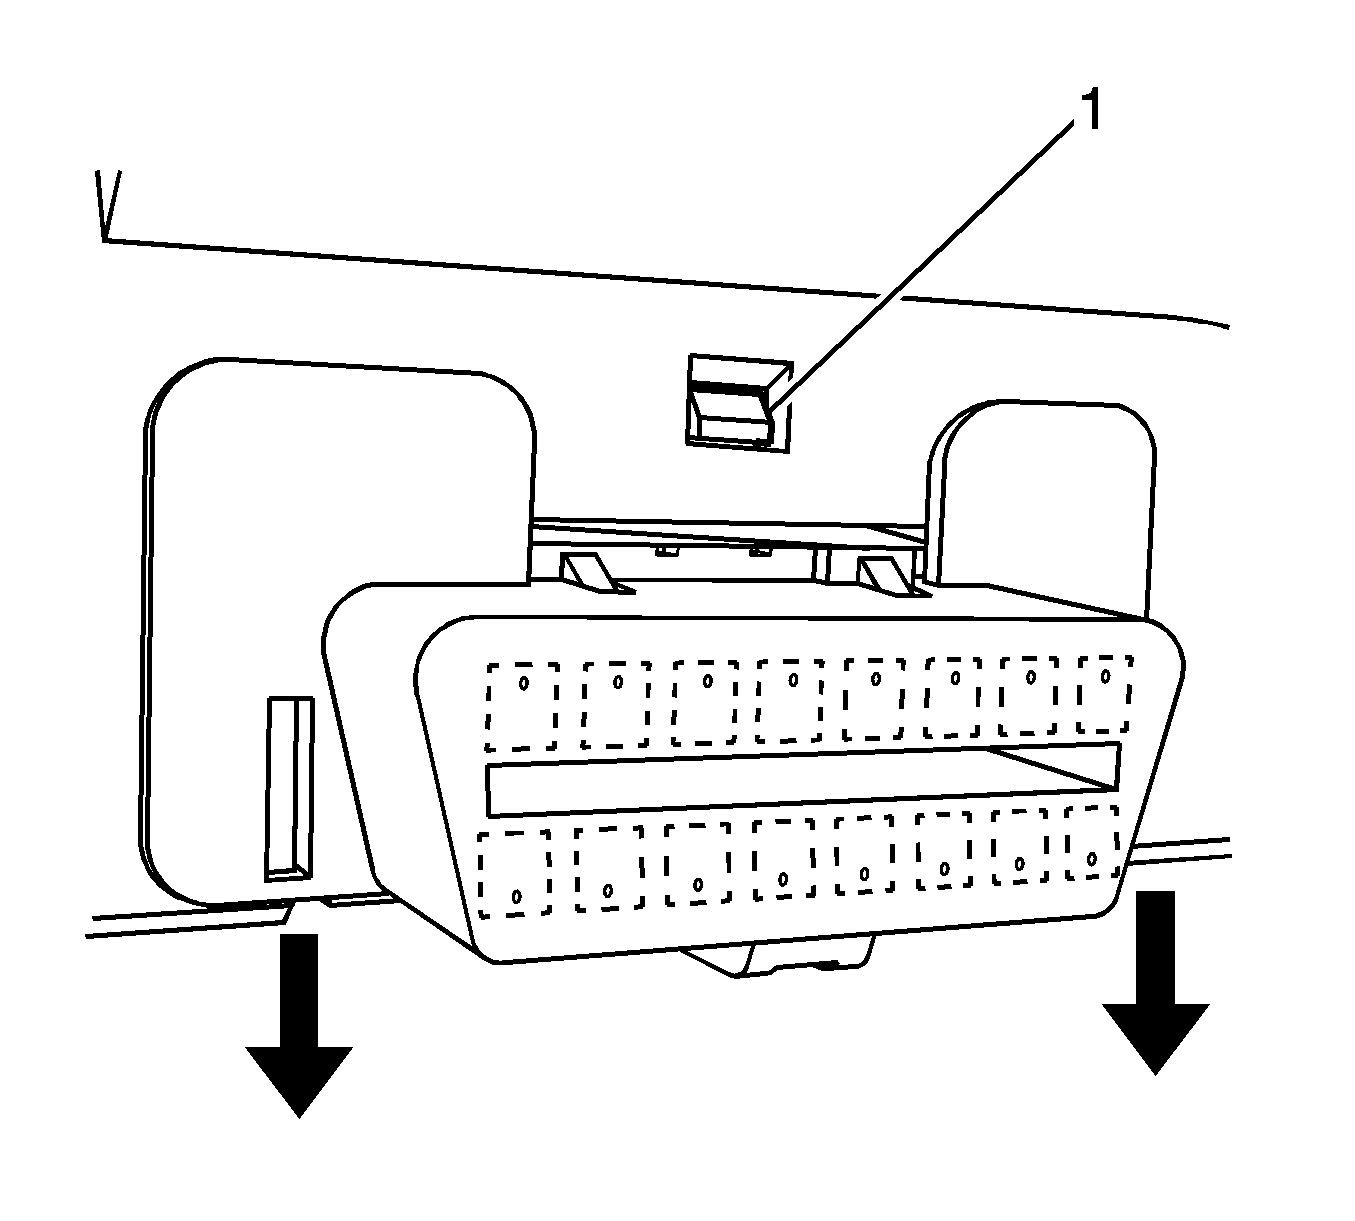
- Disengage the data link connector (DLC) retainers. Press the DLC through the opening.
- Remove the I/P steering column opening filler screws.
- Pull the steering column opening filler rearward to disengage the retainers. Remove the steering column opening filler.
- Remove the I/P driver knee bolster. Refer to Driver Knee Bolster Replacement
- Remove the STAR connector from the I/P trim pad.
- Remove the steering column. Refer to Steering Column Replacement in Steering Wheel and Column.
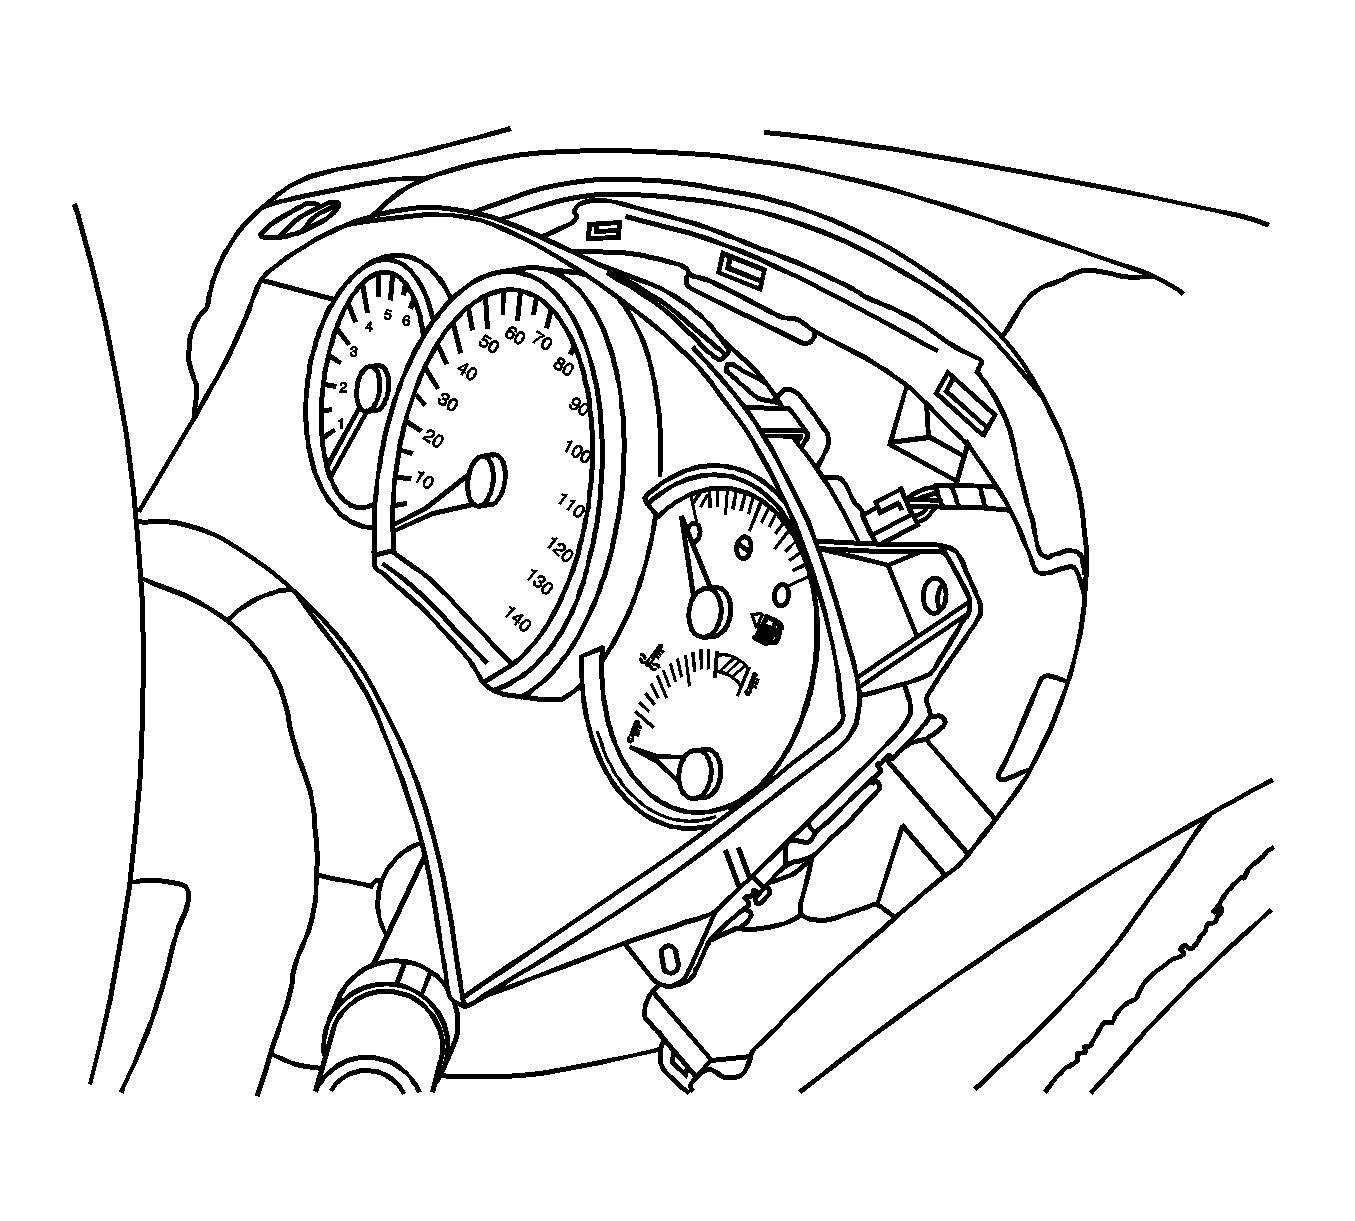
- Pull the I/P cluster trim plate rearward.
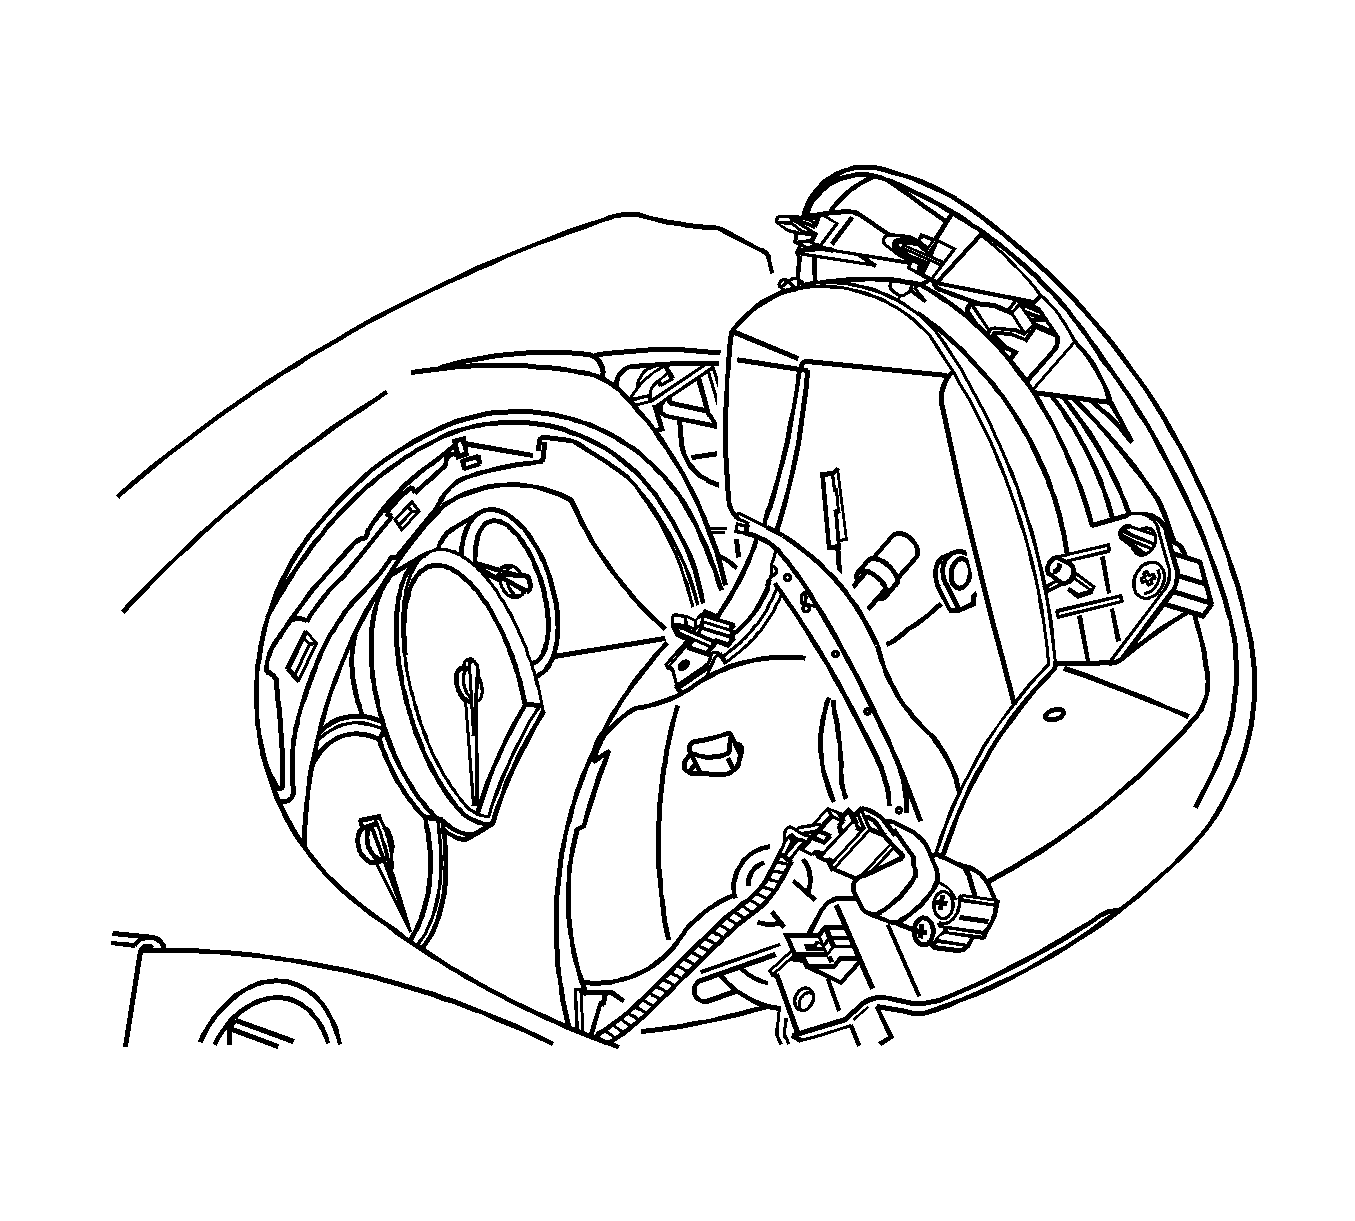
- Disconnect the headlamp dimmer switch electrical connector. Remove the I/P cluster trim plate.
- Remove the instrument cluster screws.
- Pull the instrument cluster towards you and disconnect the electrical connector. Remove the instrument cluster.
- Remove the I/P cluster trim assembly screw.
- Remove the I/P cluster trim assembly.
- Remove the windshield pillar garnish moldings. Refer to Windshield Pillar Garnish Molding Replacement in Interior Trim.
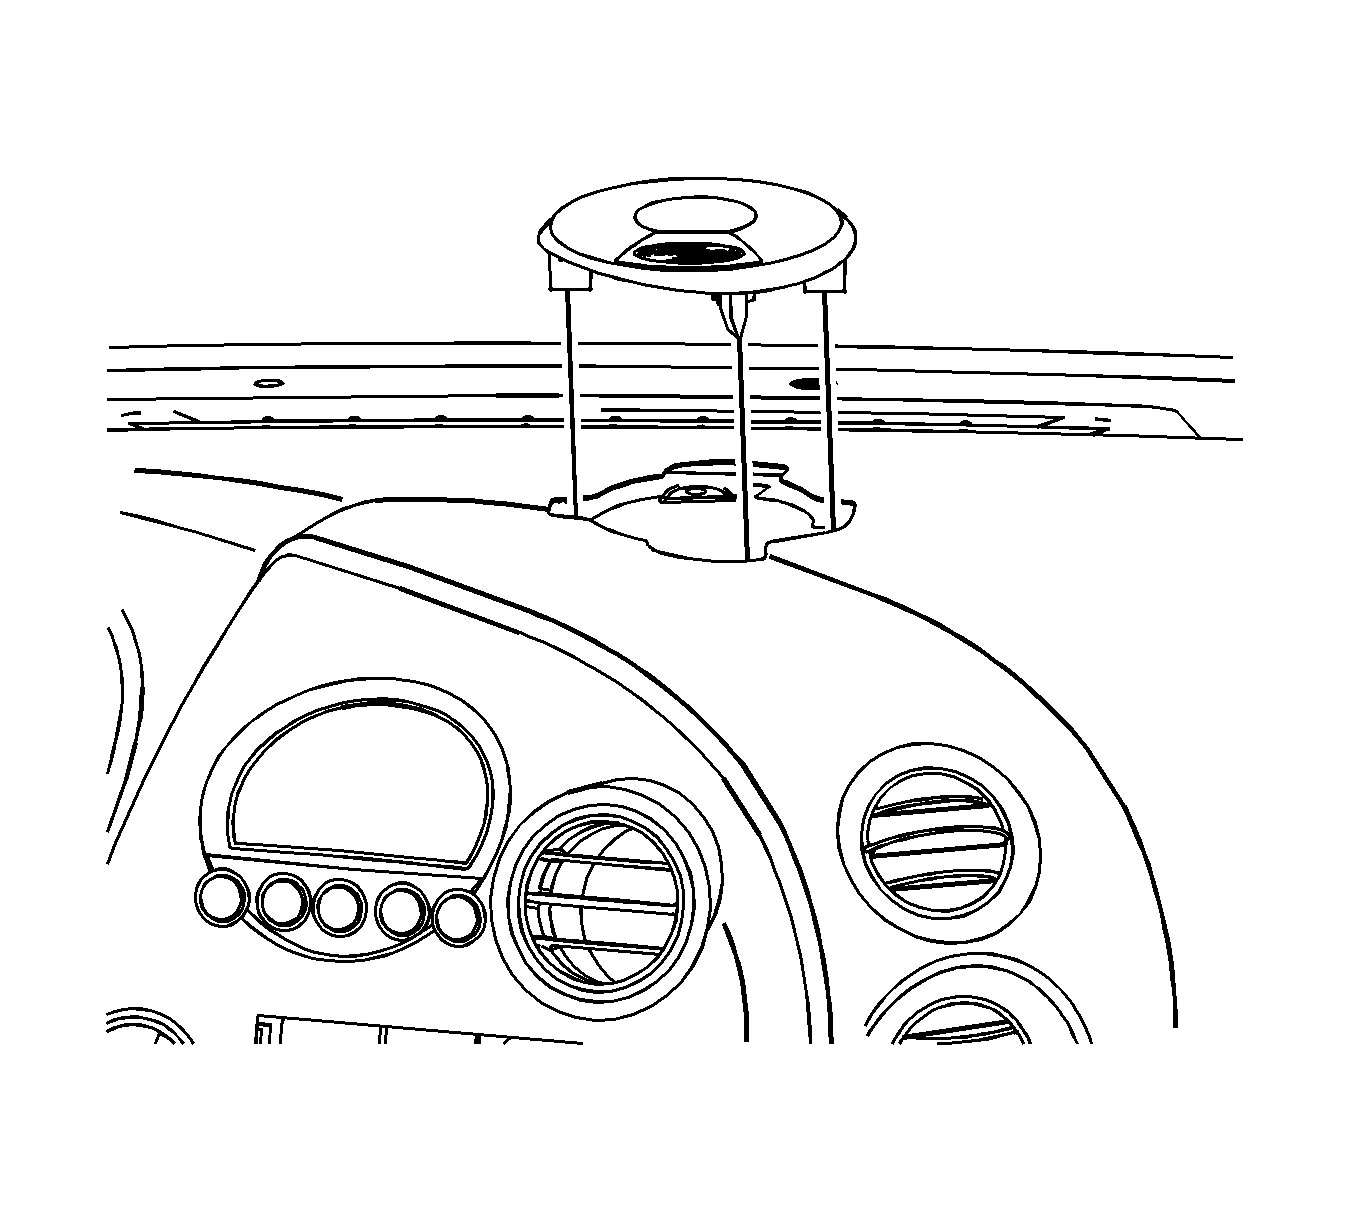
- Disengage the I/P upper trim panel retainers on the sides of the HUD.
- Disengage the retainer rearward of the HUD.
- Remove the I/P upper trim panel. Refer to Instrument Panel Upper Trim Panel Replacement .
- If equipped, remove the head up display (HUD). Refer to Instrument Cluster Head Up Display Replacement .
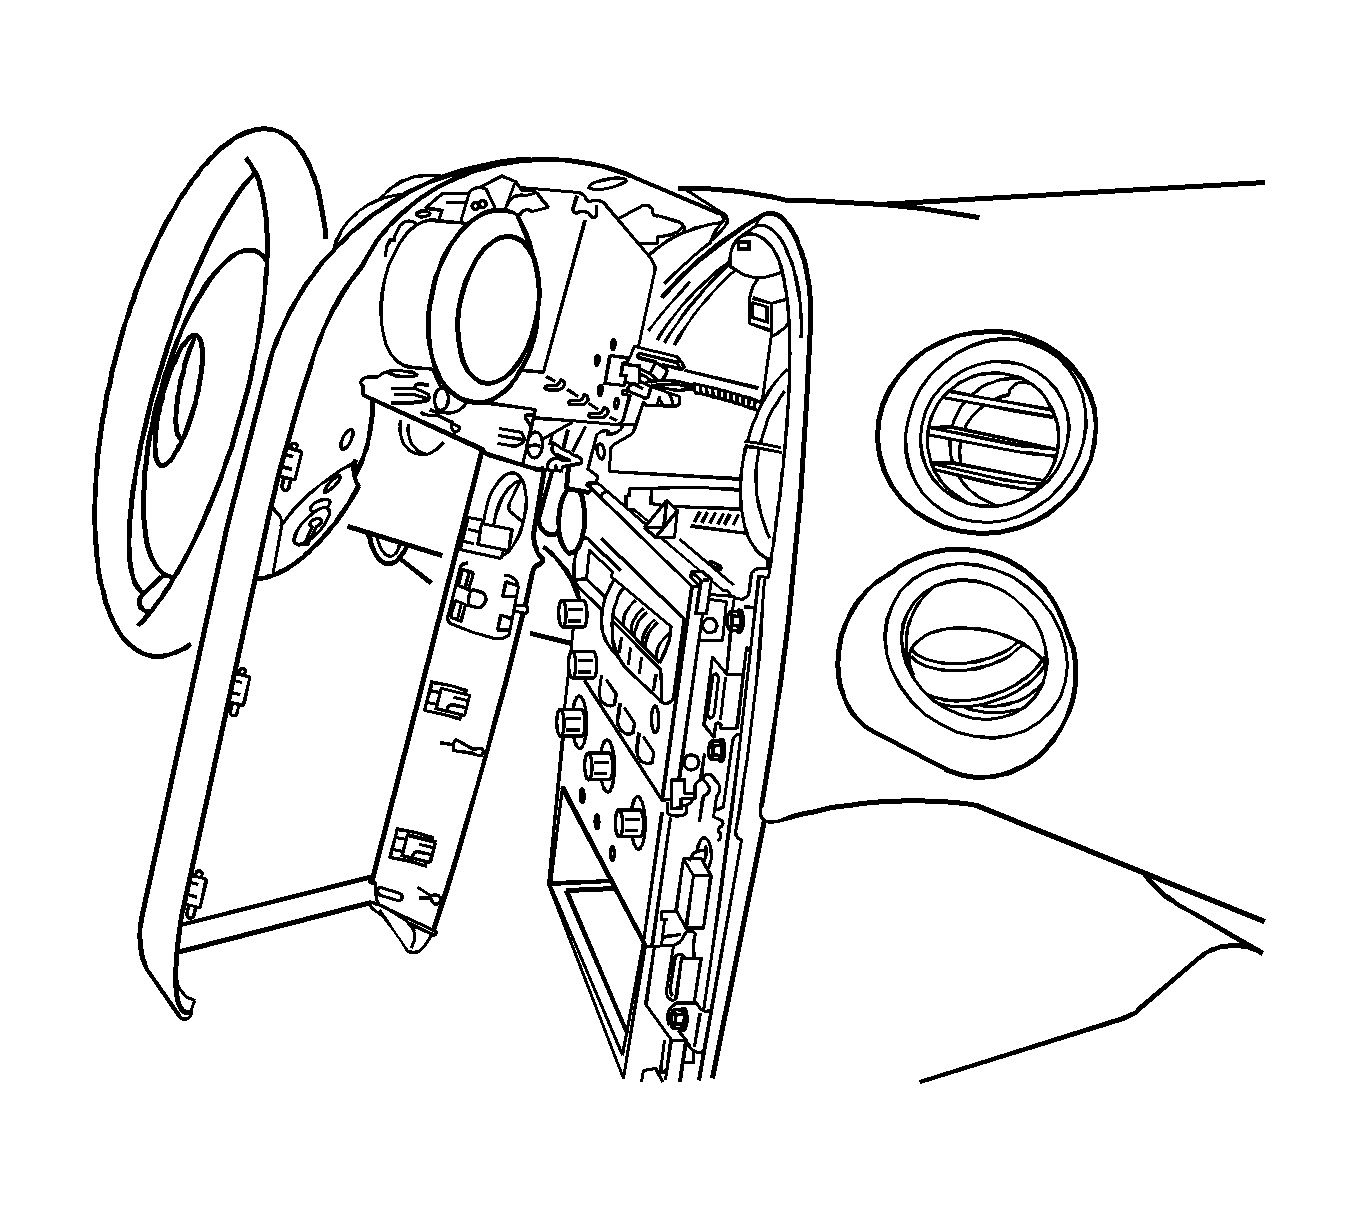
- If equipped, carefully disengage the radio front speaker grille retainers. Remove the speaker grille.
- If equipped, remove the radio front speaker screws.
- Lift the speaker out of the opening. Disconnect the electrical connector. Remove the speaker.
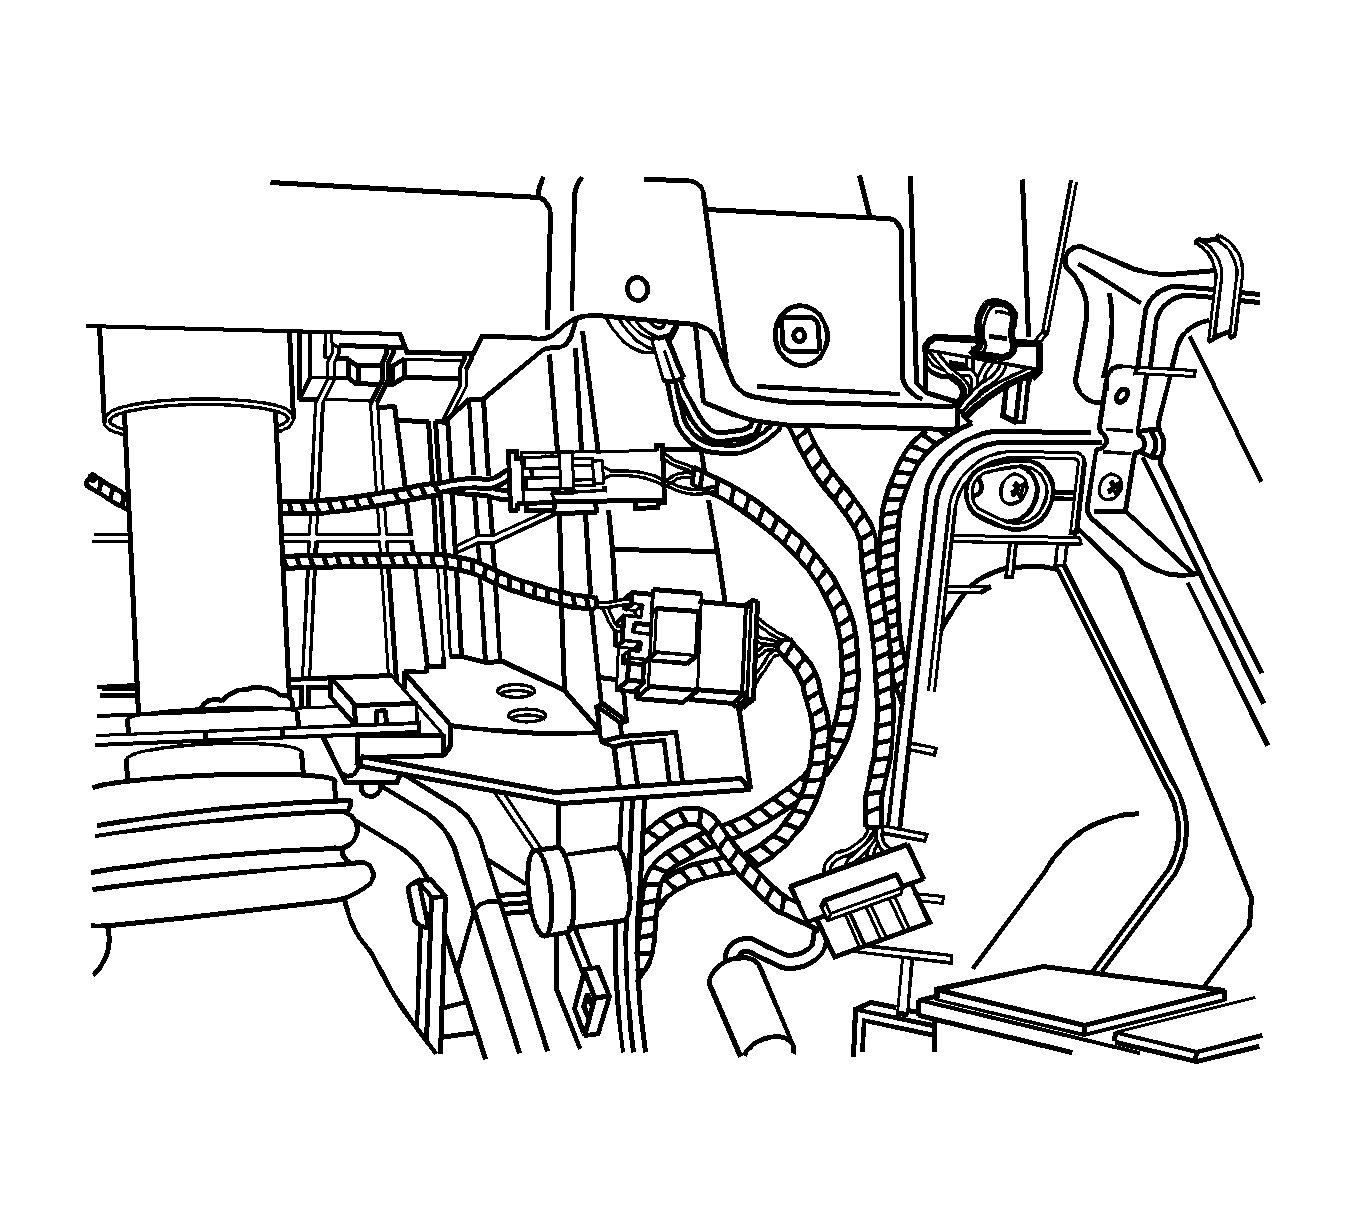
- Remove the I/P center compartment. Refer to Instrument Panel Center Compartment Replacement .
- Remove the HVAC control module. Refer to Heater and Air Conditioning Control Replacement in HVAC Systems - Manual.
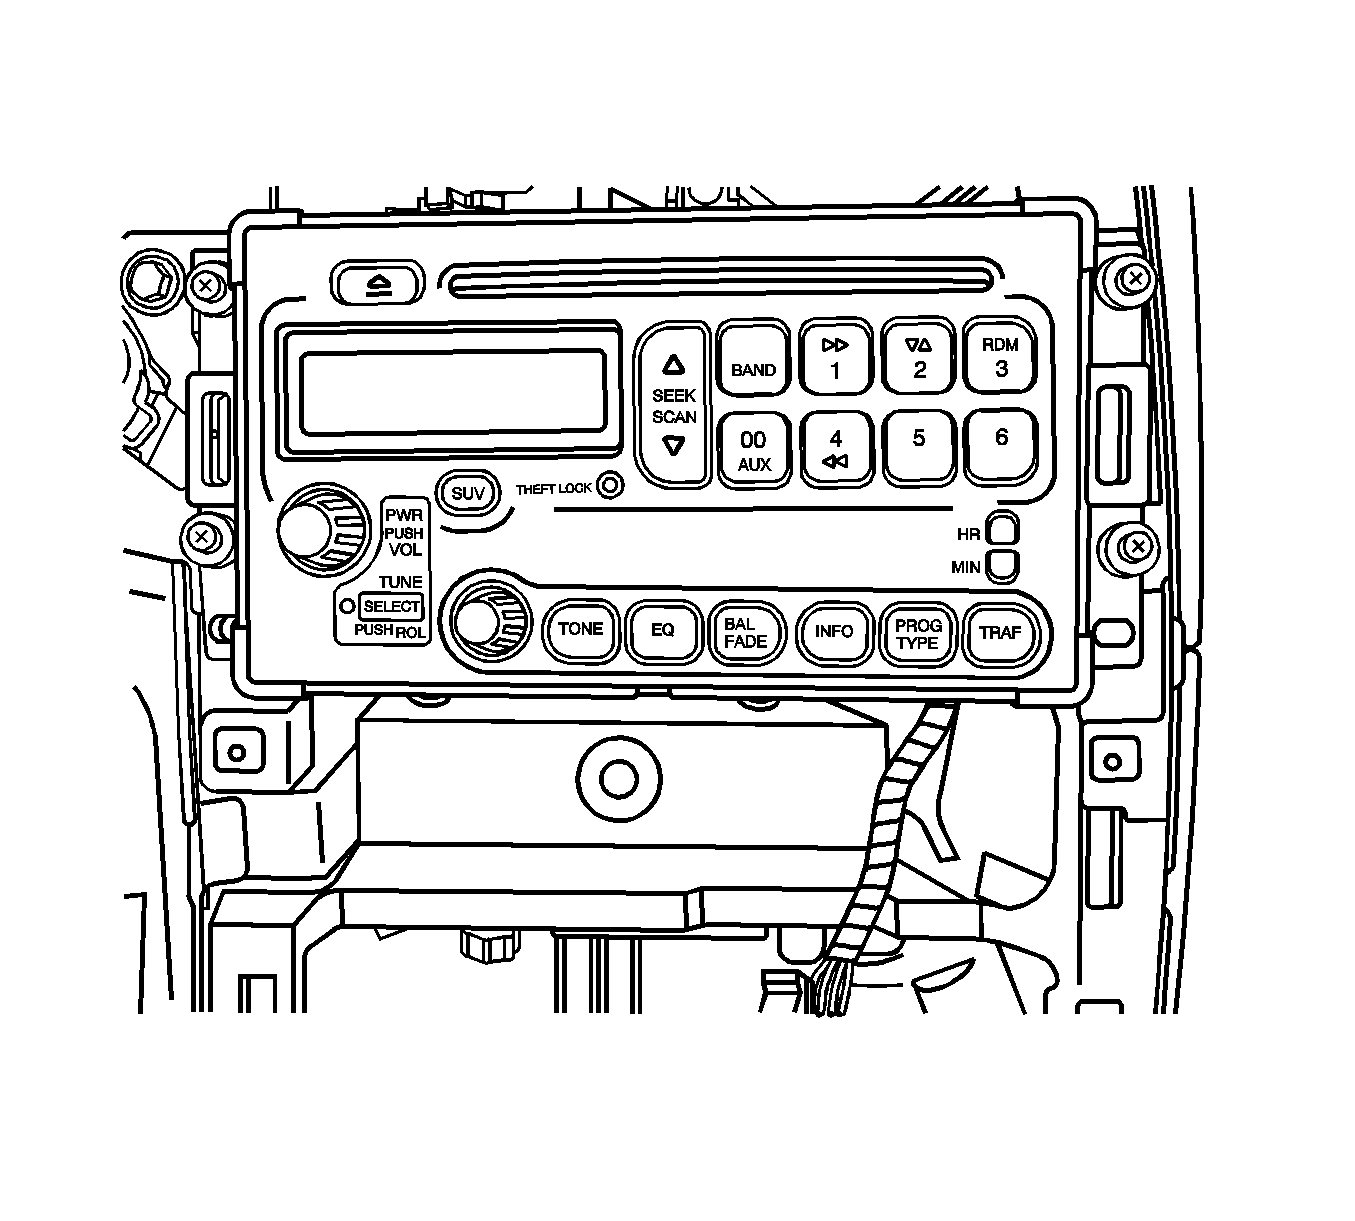
- Remove the radio screws.
- Pull the radio toward you. Disconnect the I/P wiring harness and the antenna cable connector from the radio. Remove the radio.
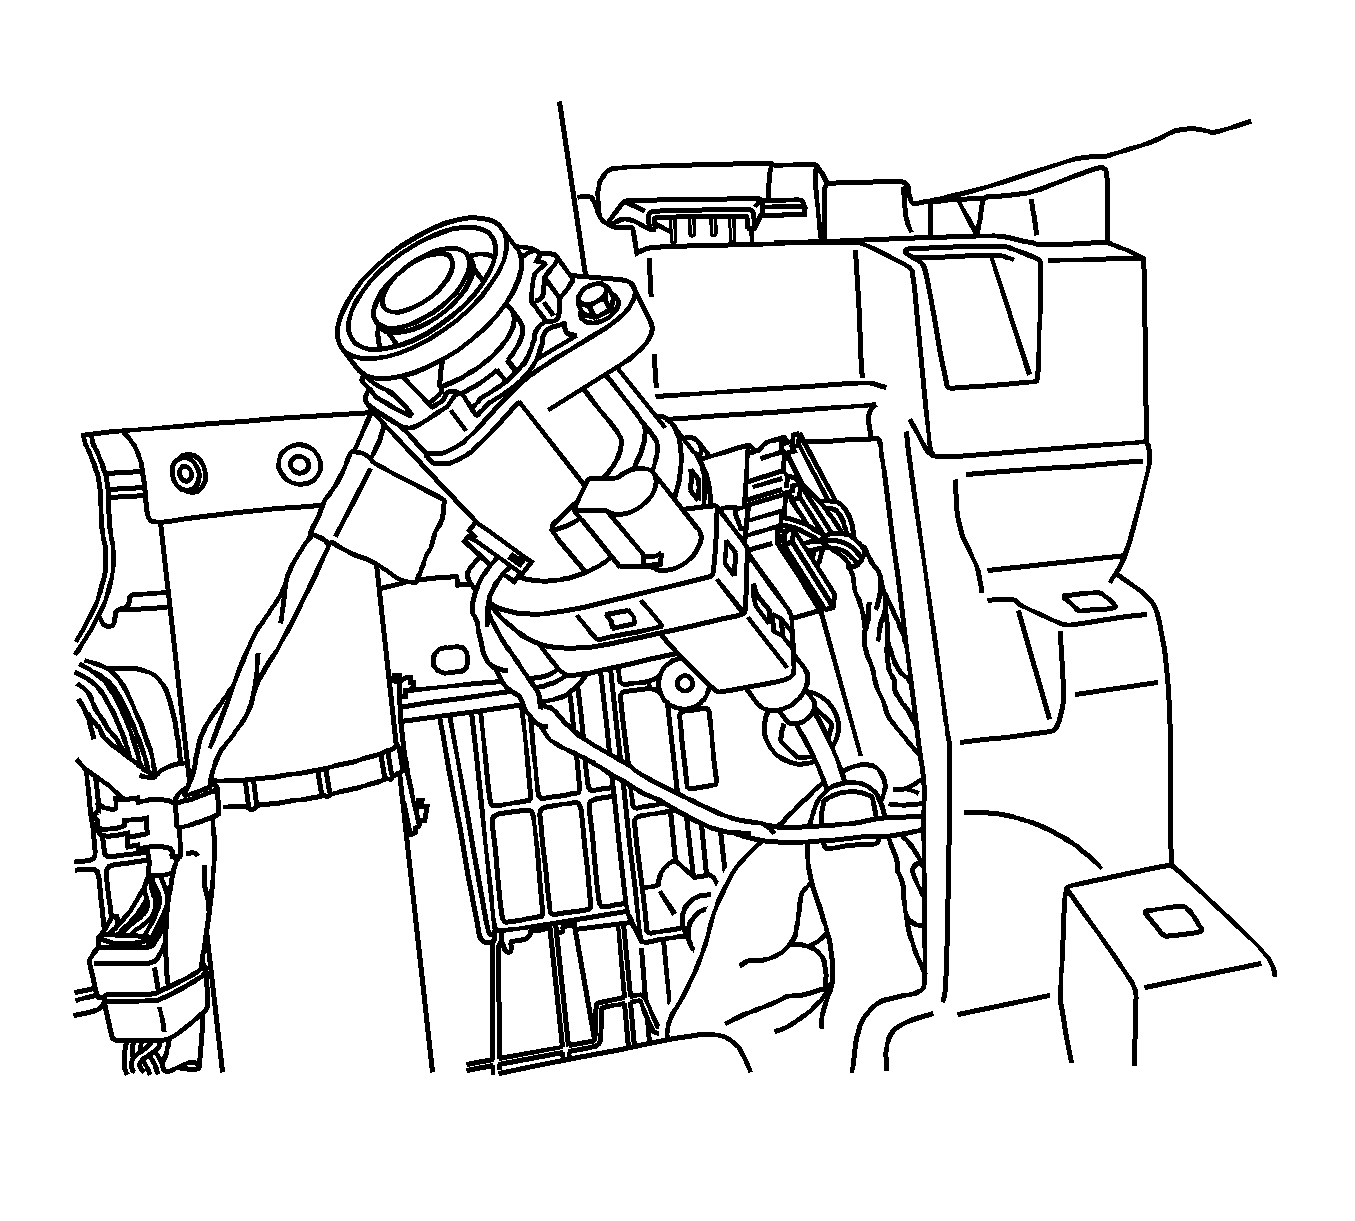
- Remove the ignition switch bolts and reposition the ignition switch.
- Using the finger opening, remove the right I/P compartment access hole cover.
- Remove the right I/P insulator fasteners.
- Rotate the courtesy lamp counterclockwise in order to disconnect the courtesy lamp from the right I/P insulator. Remove the right I/P insulator.
- Remove the I/P trim plate (glove box inboard). Refer to Instrument Panel Trim Plate Replacement .
- Pull the I/P trim plate (glove box outboard) rearward in order to release the retainers. Remove the I/P trim plate.
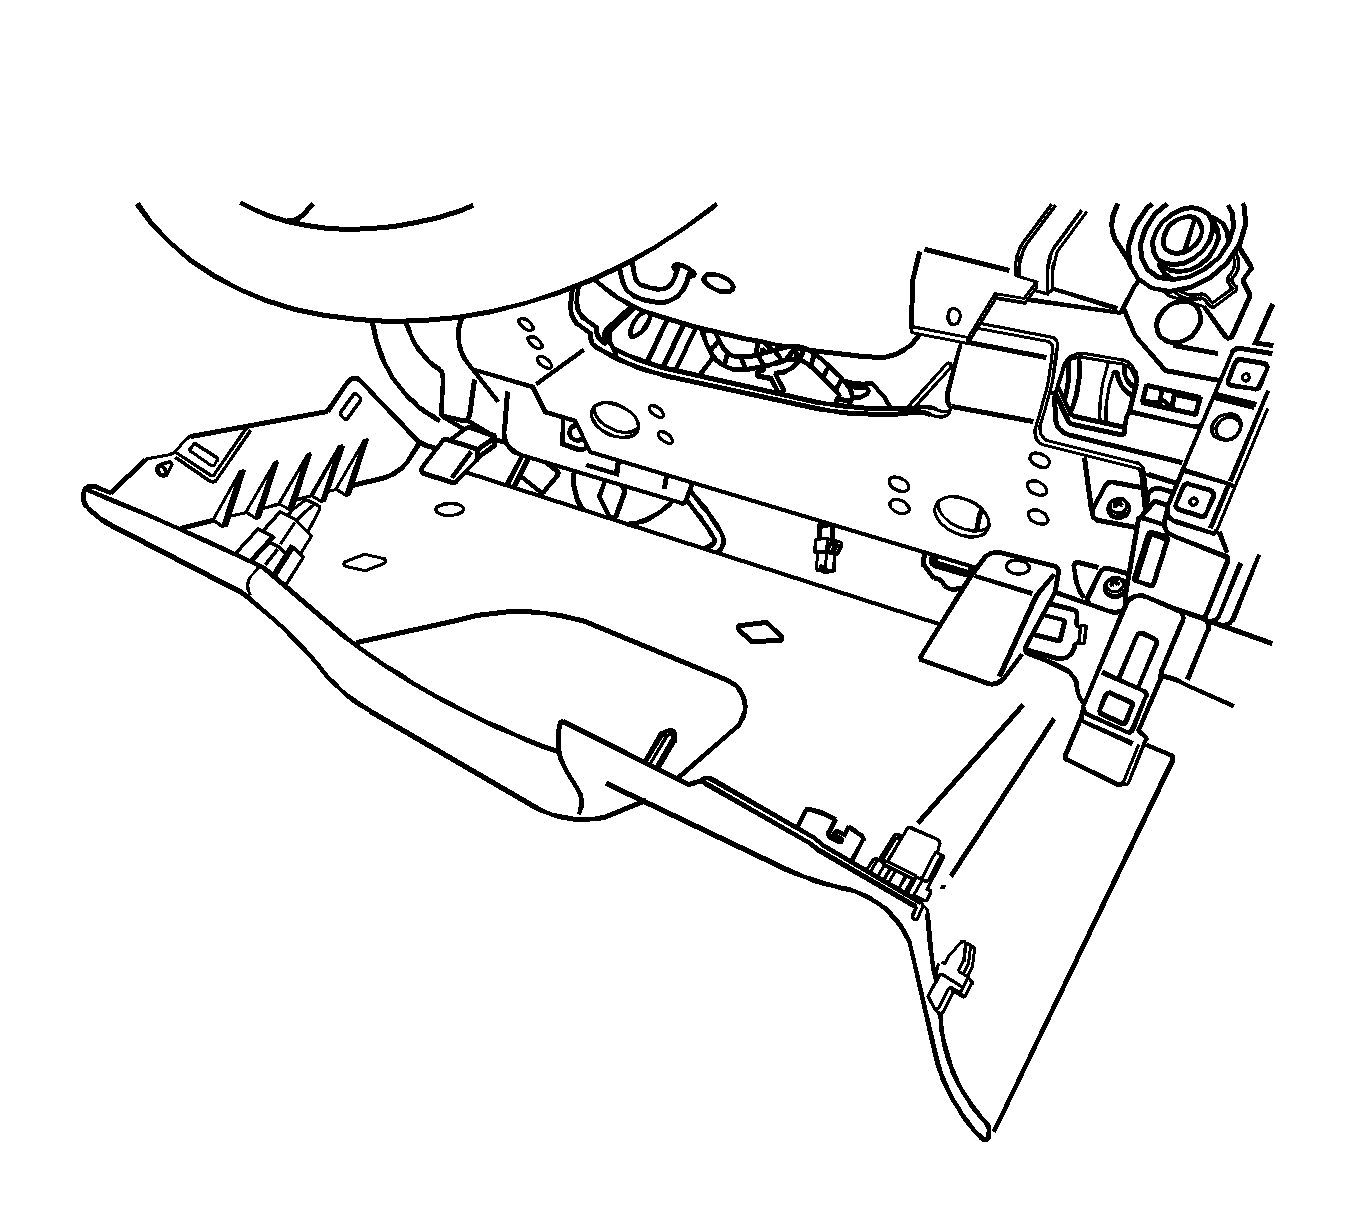
- Remove the I/P compartment. Refer to Instrument Panel Compartment Replacement .
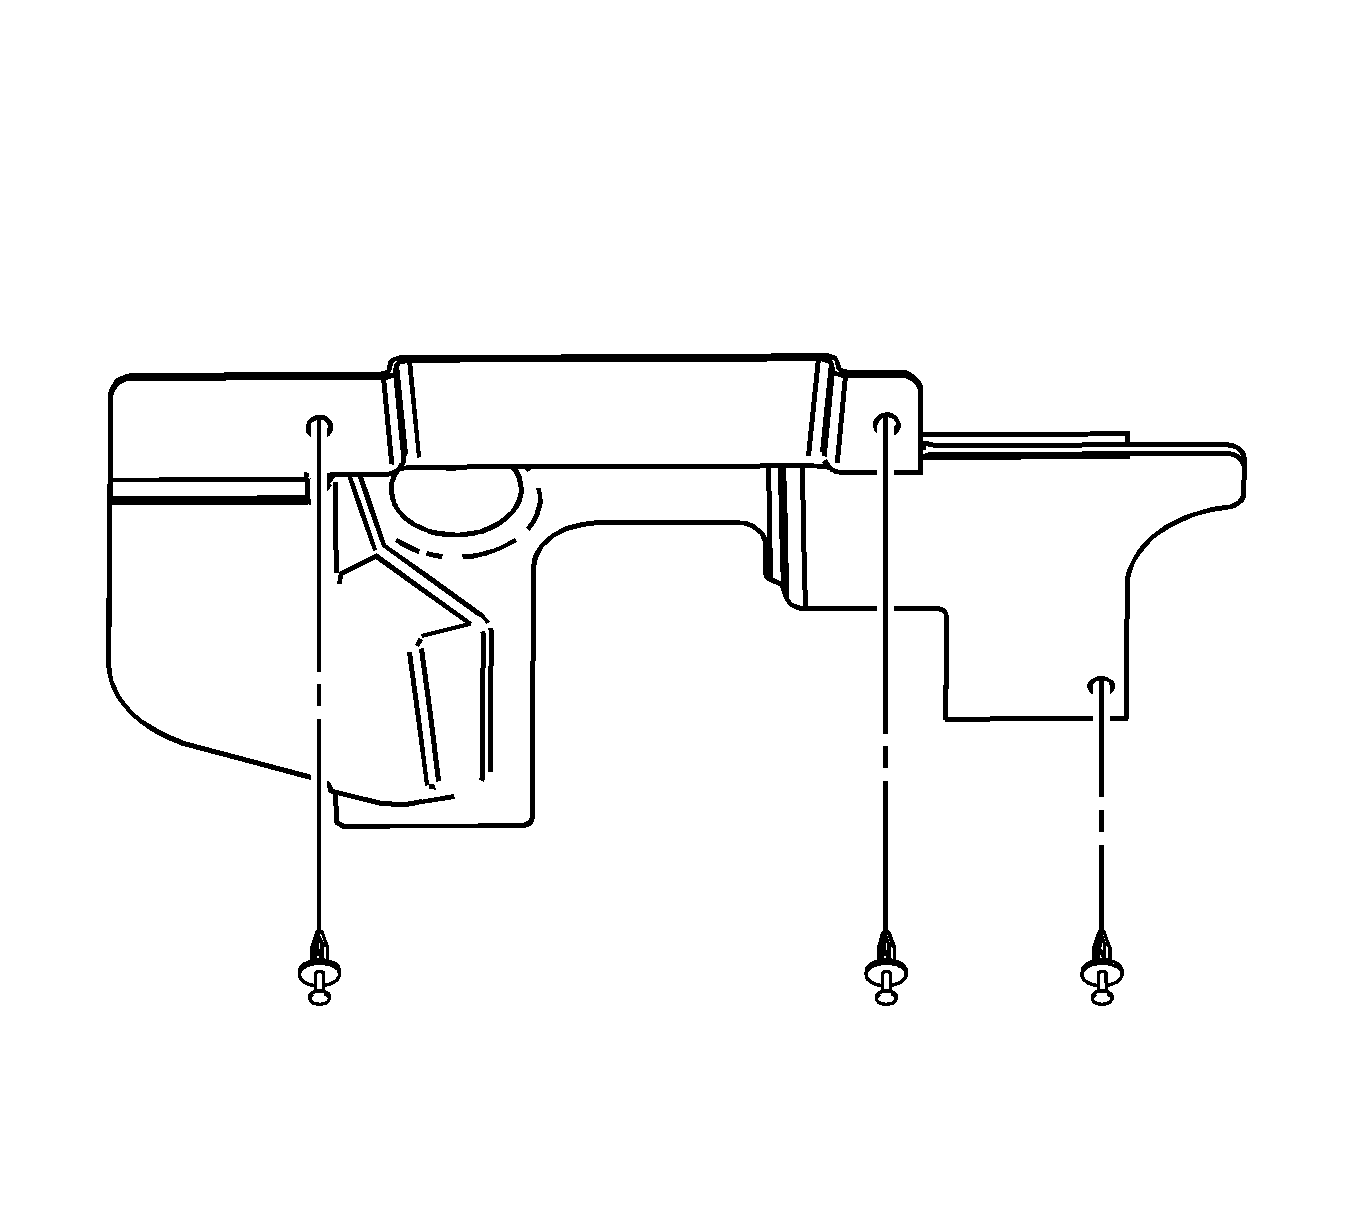
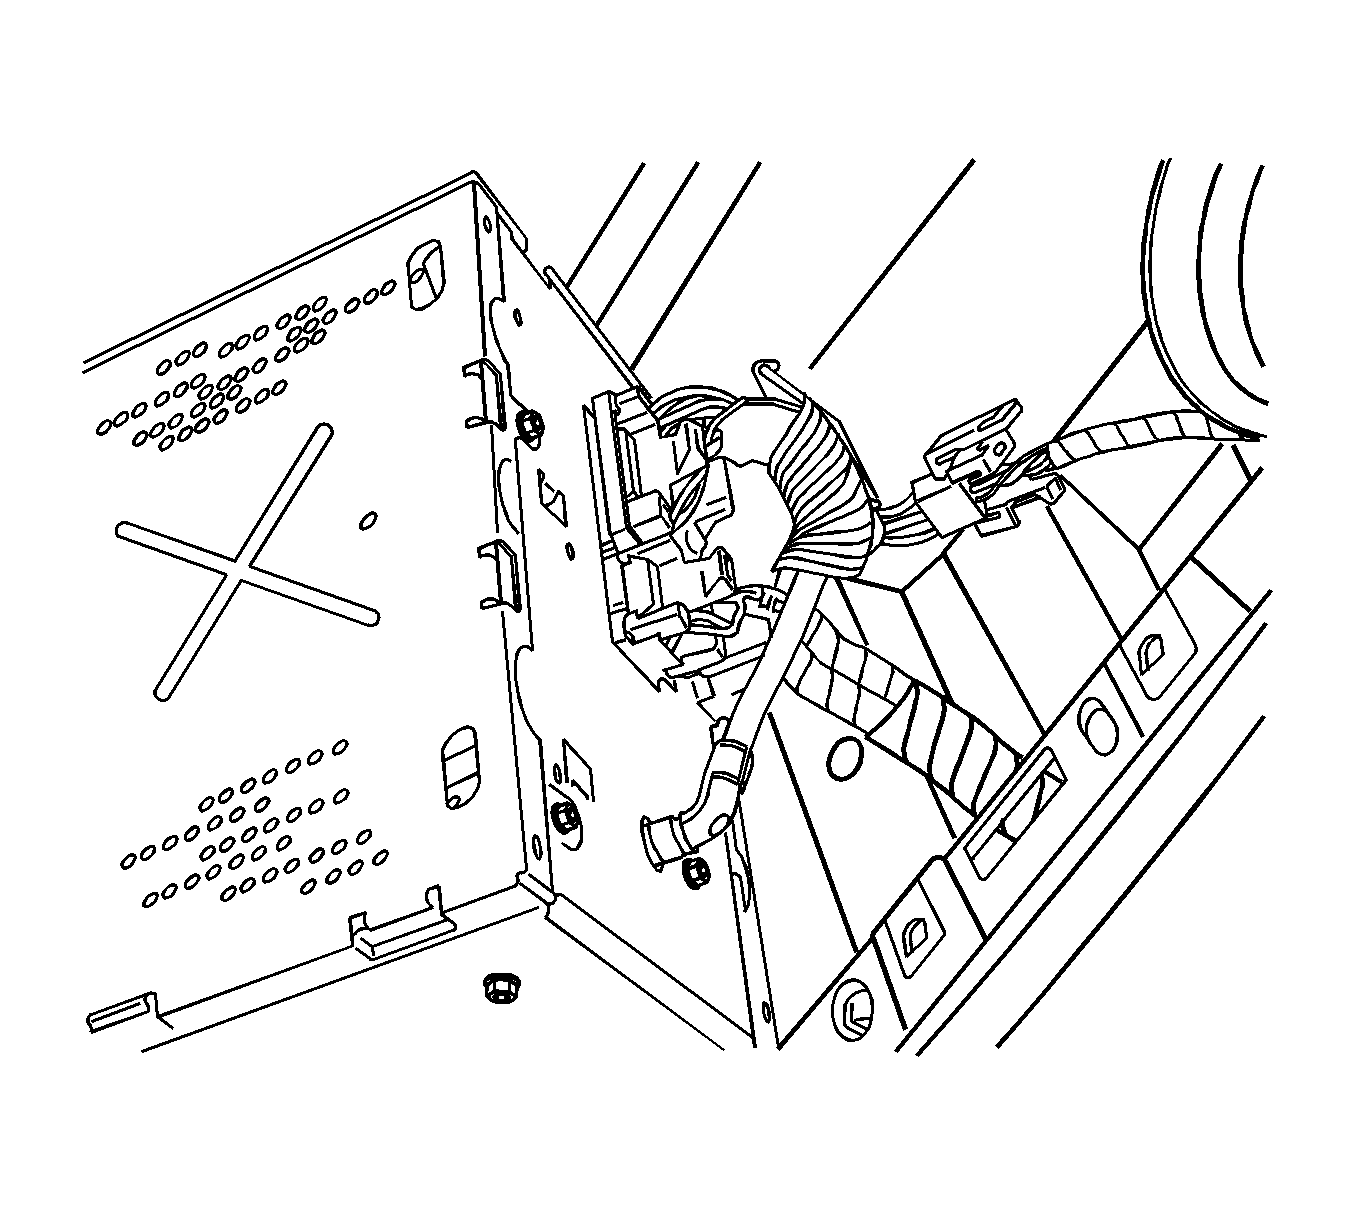
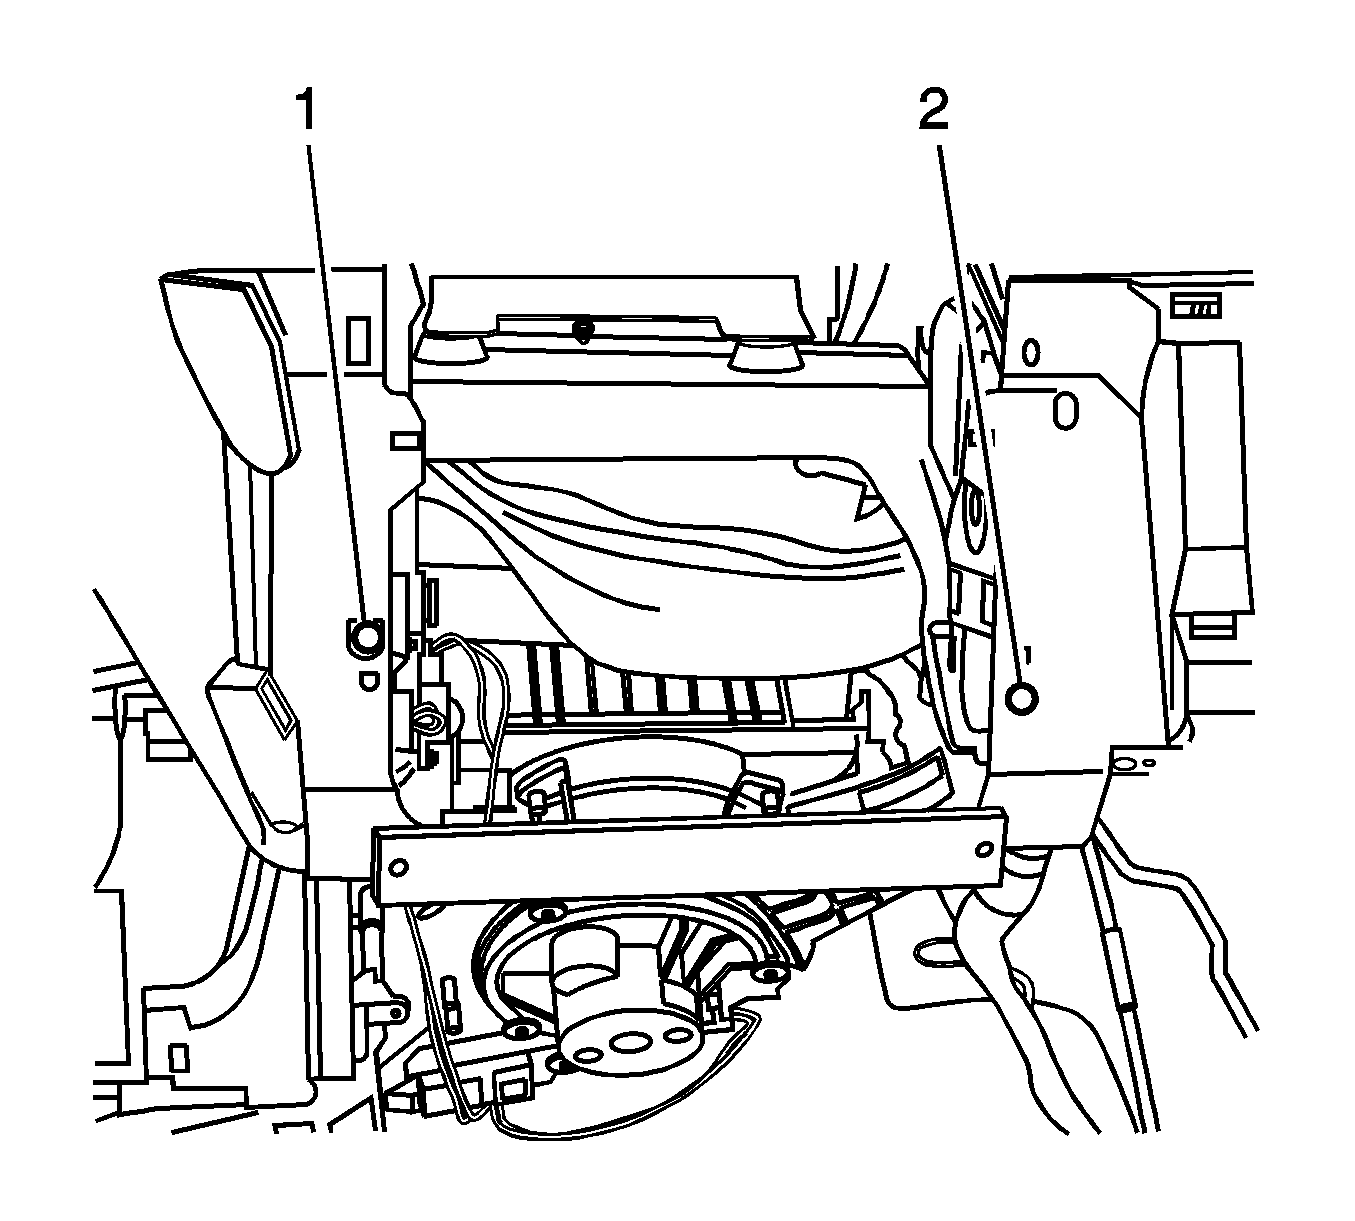
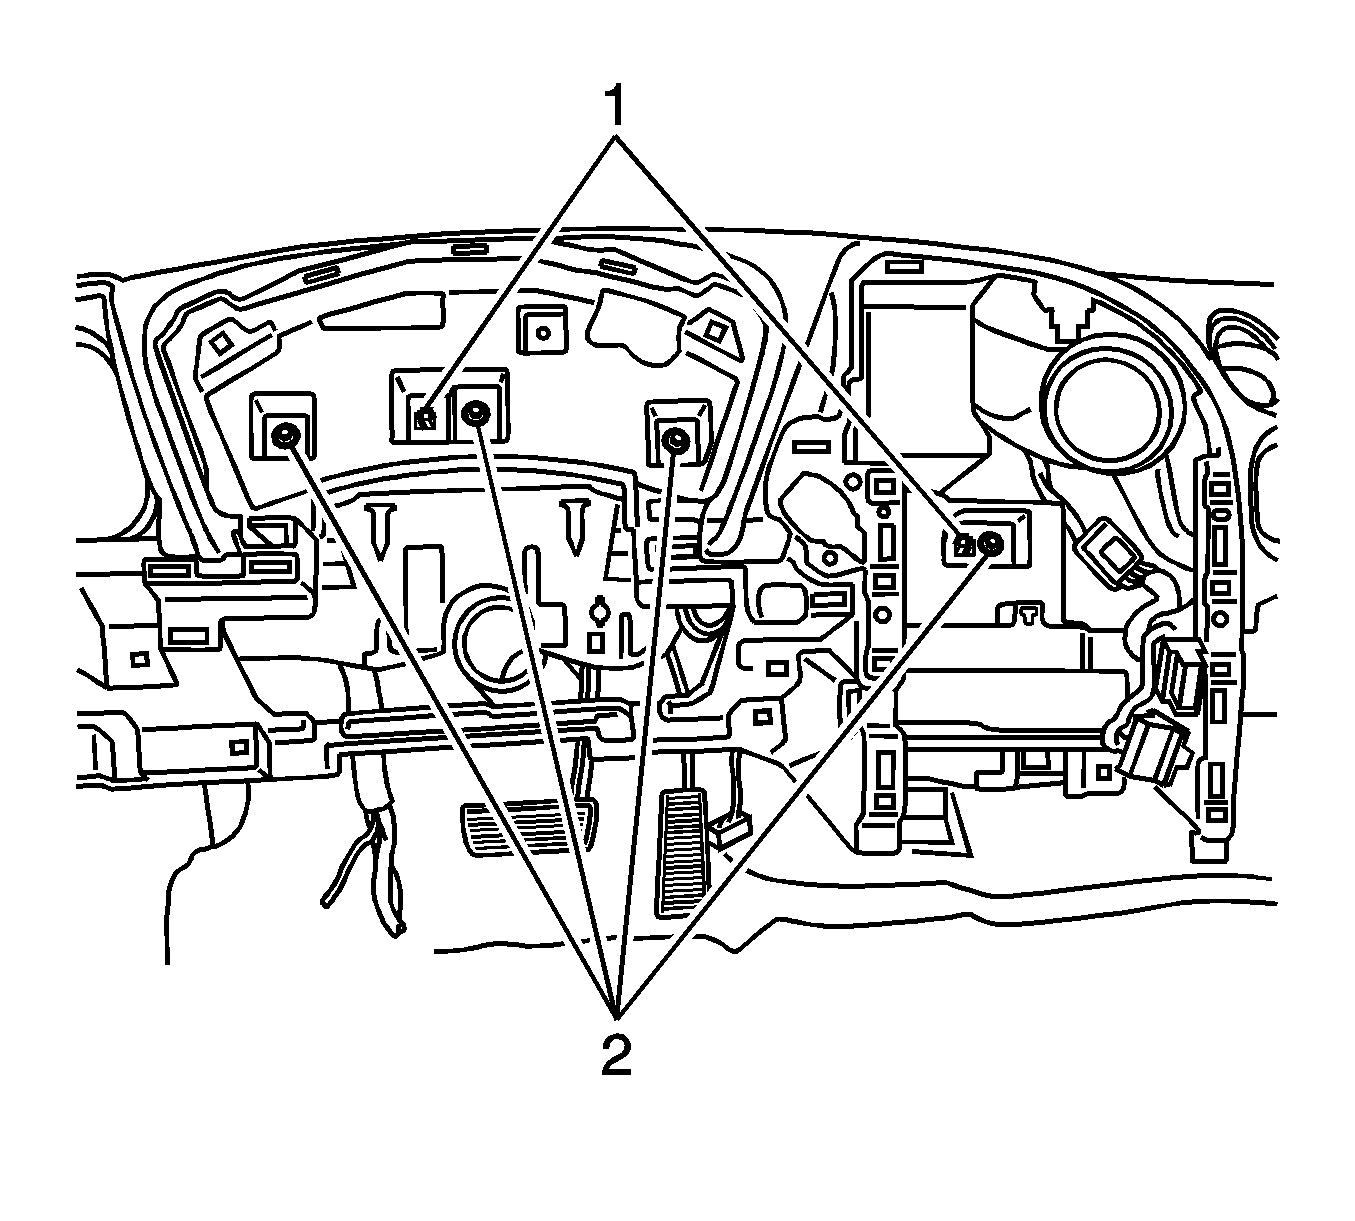
- Remove the fasteners (1, 2) at both sides of the I/P compartment opening.
- If equipped, remove the navigation radio antenna and the bracket from the I/P trim pad.
- Remove the I/P trim pad screws.
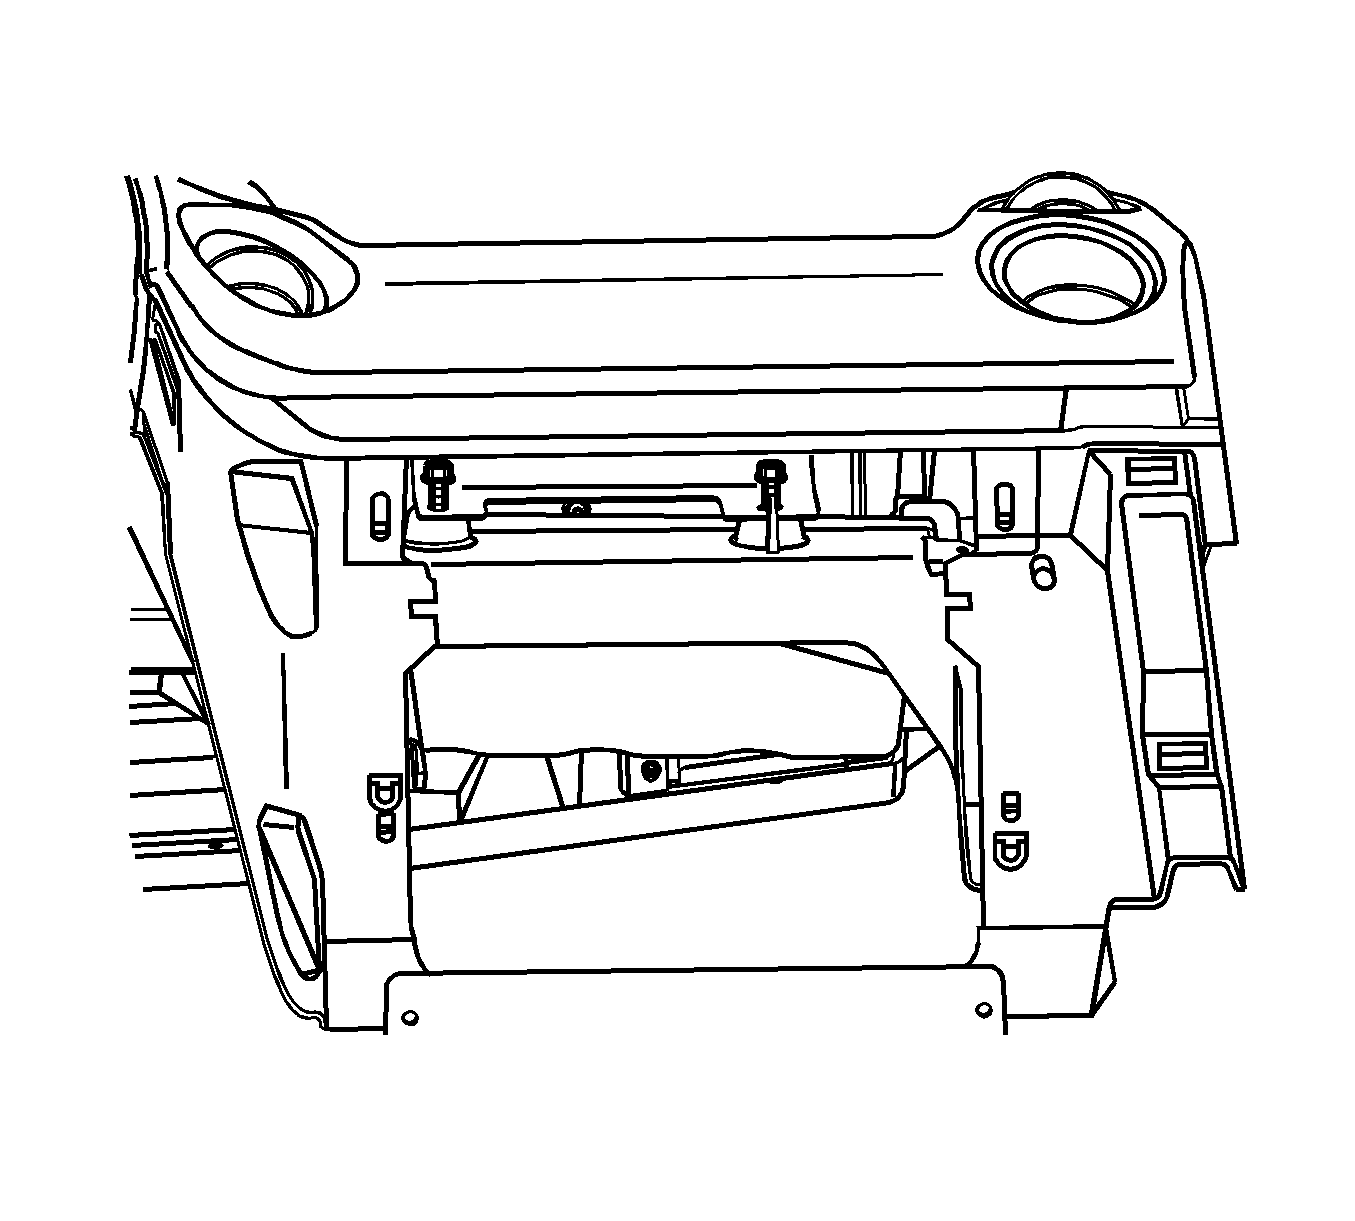
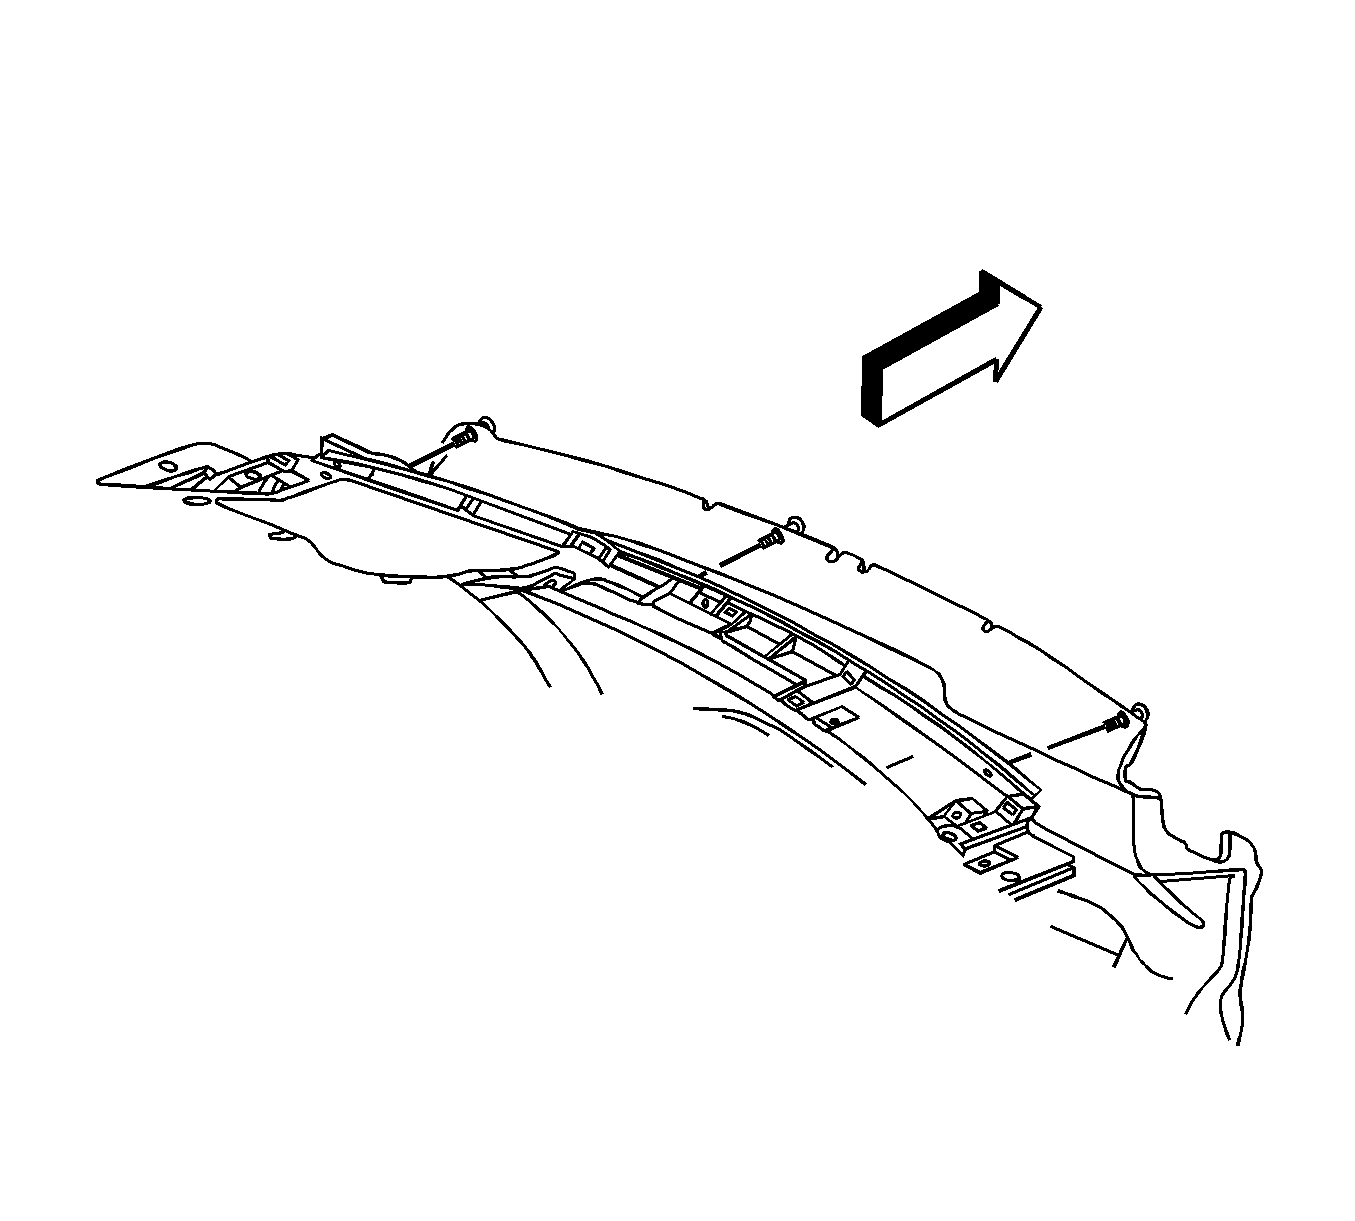
- Remove the I/P trim pad bolts near the windshield
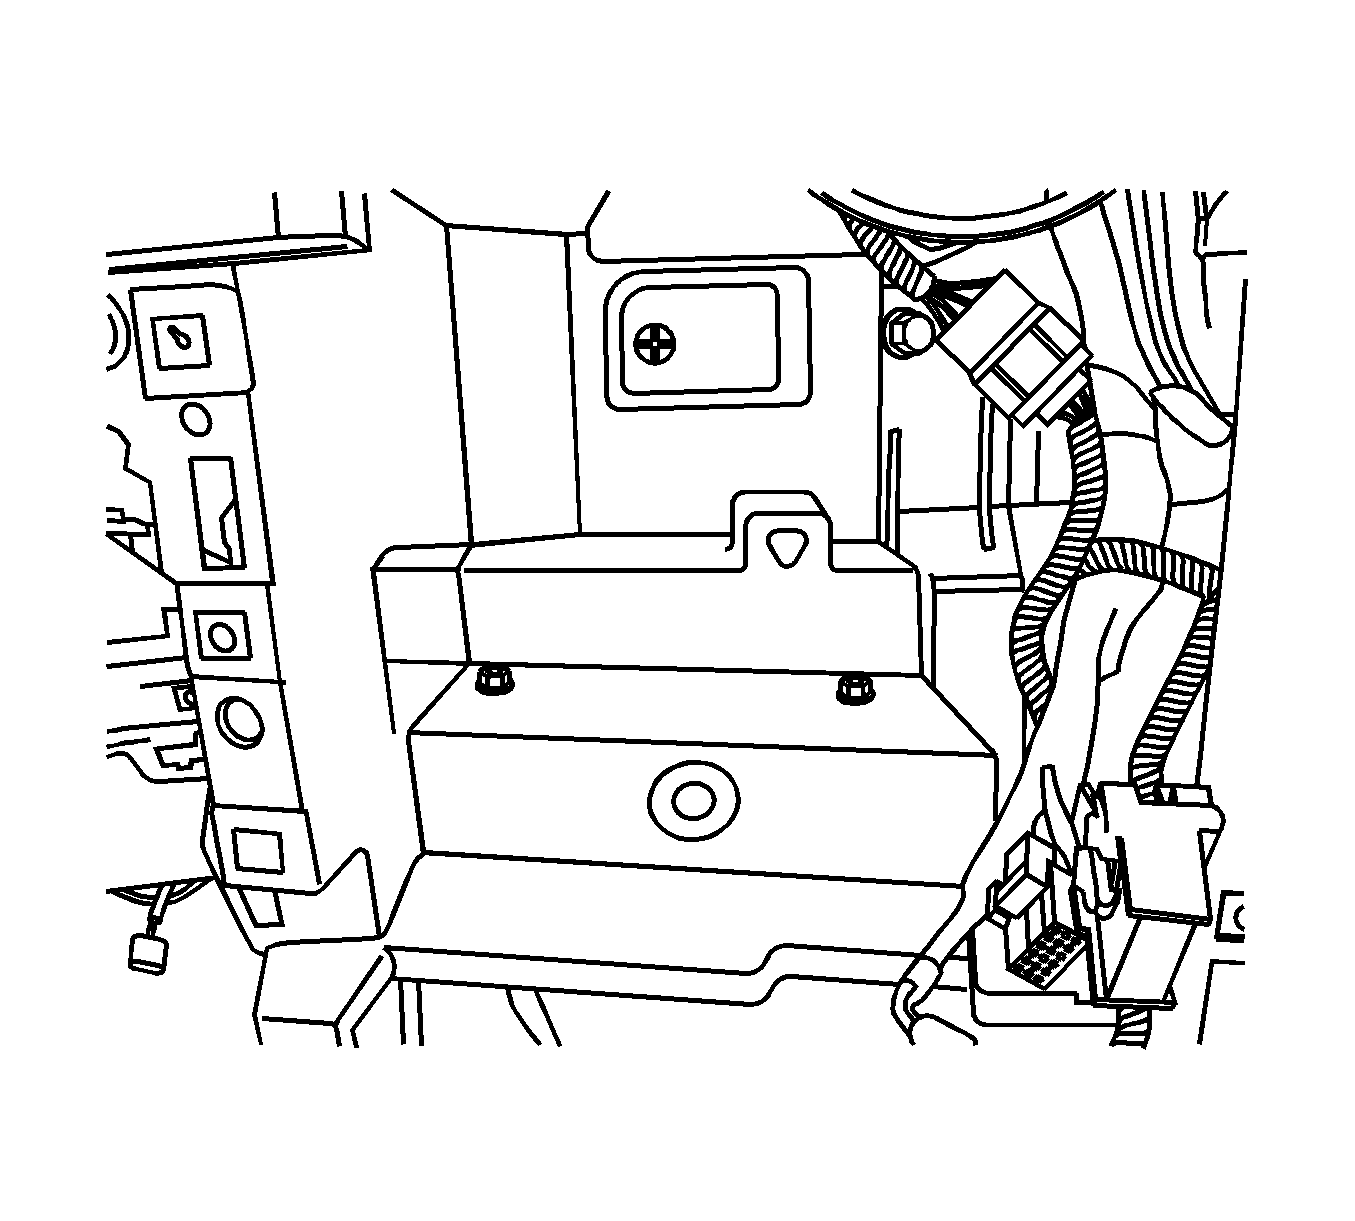
- Remove the inflatable restraint I/P module bracket bolts.
- Remove the I/P trim pad bolts at the cluster pocket.
- Remove the bolt in the center stack area.
- Reposition the I/P wiring harness leads.
- Disengage the dash panel insulator retainers near the windshield.
- Reposition the I/P trim pad.
- Remove the SIR inflator module. Refer to Inflatable Restraint Instrument Panel Module Replacement in SIR.
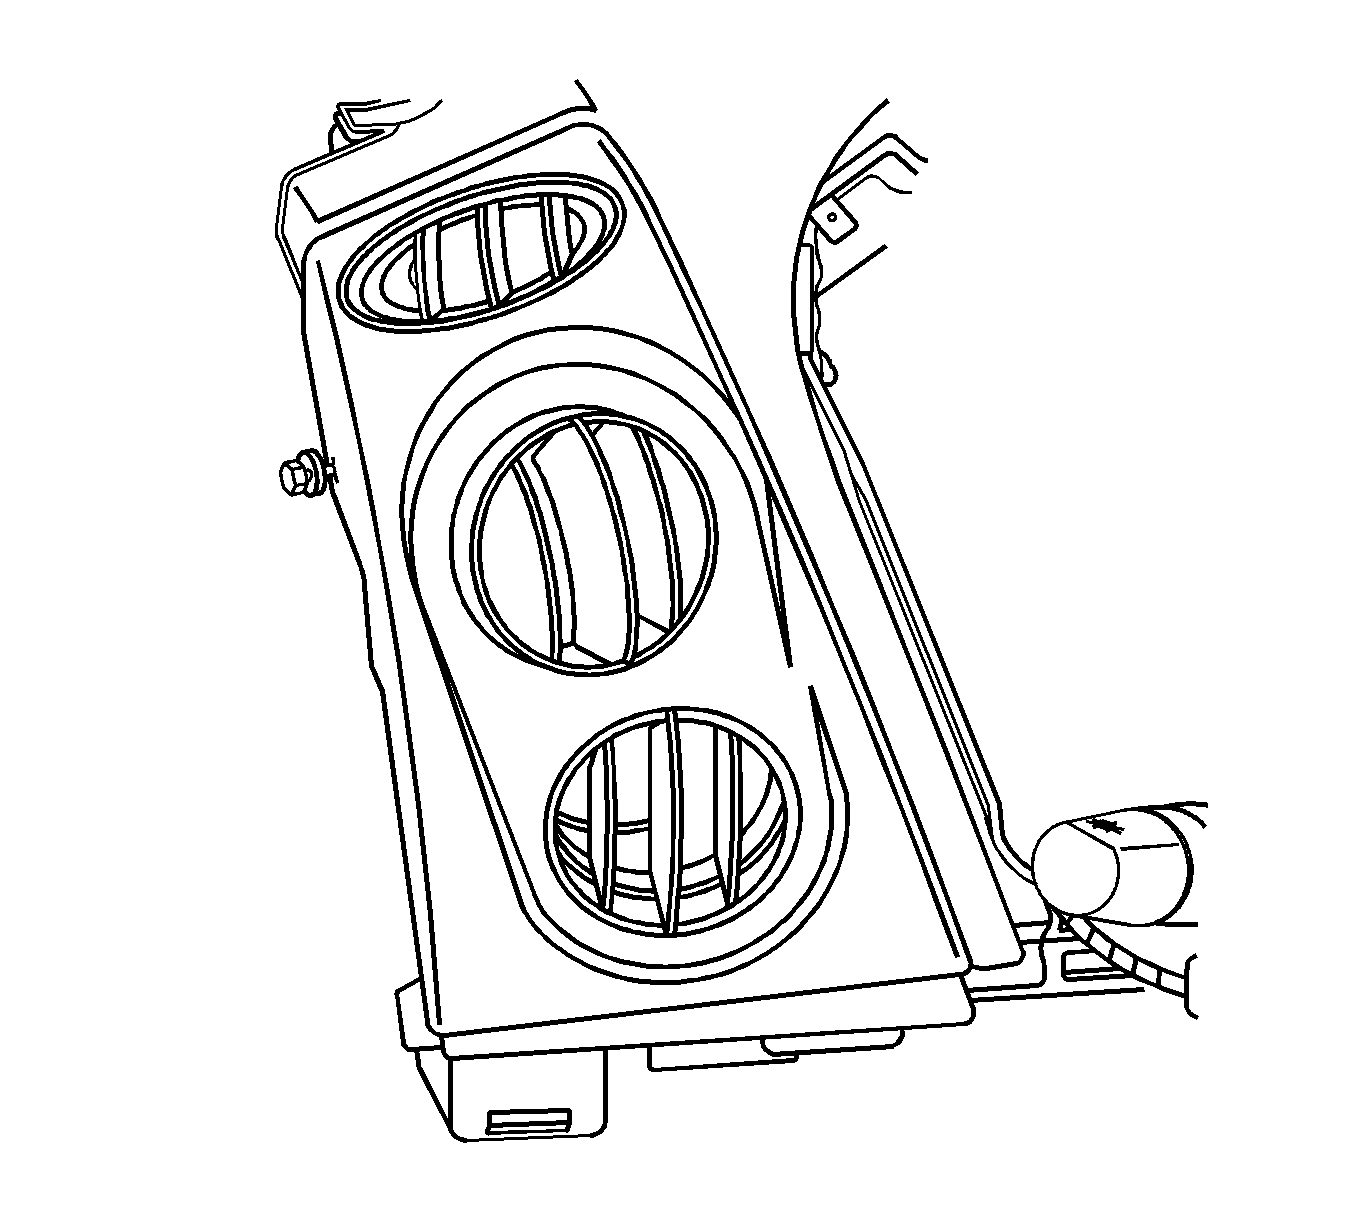
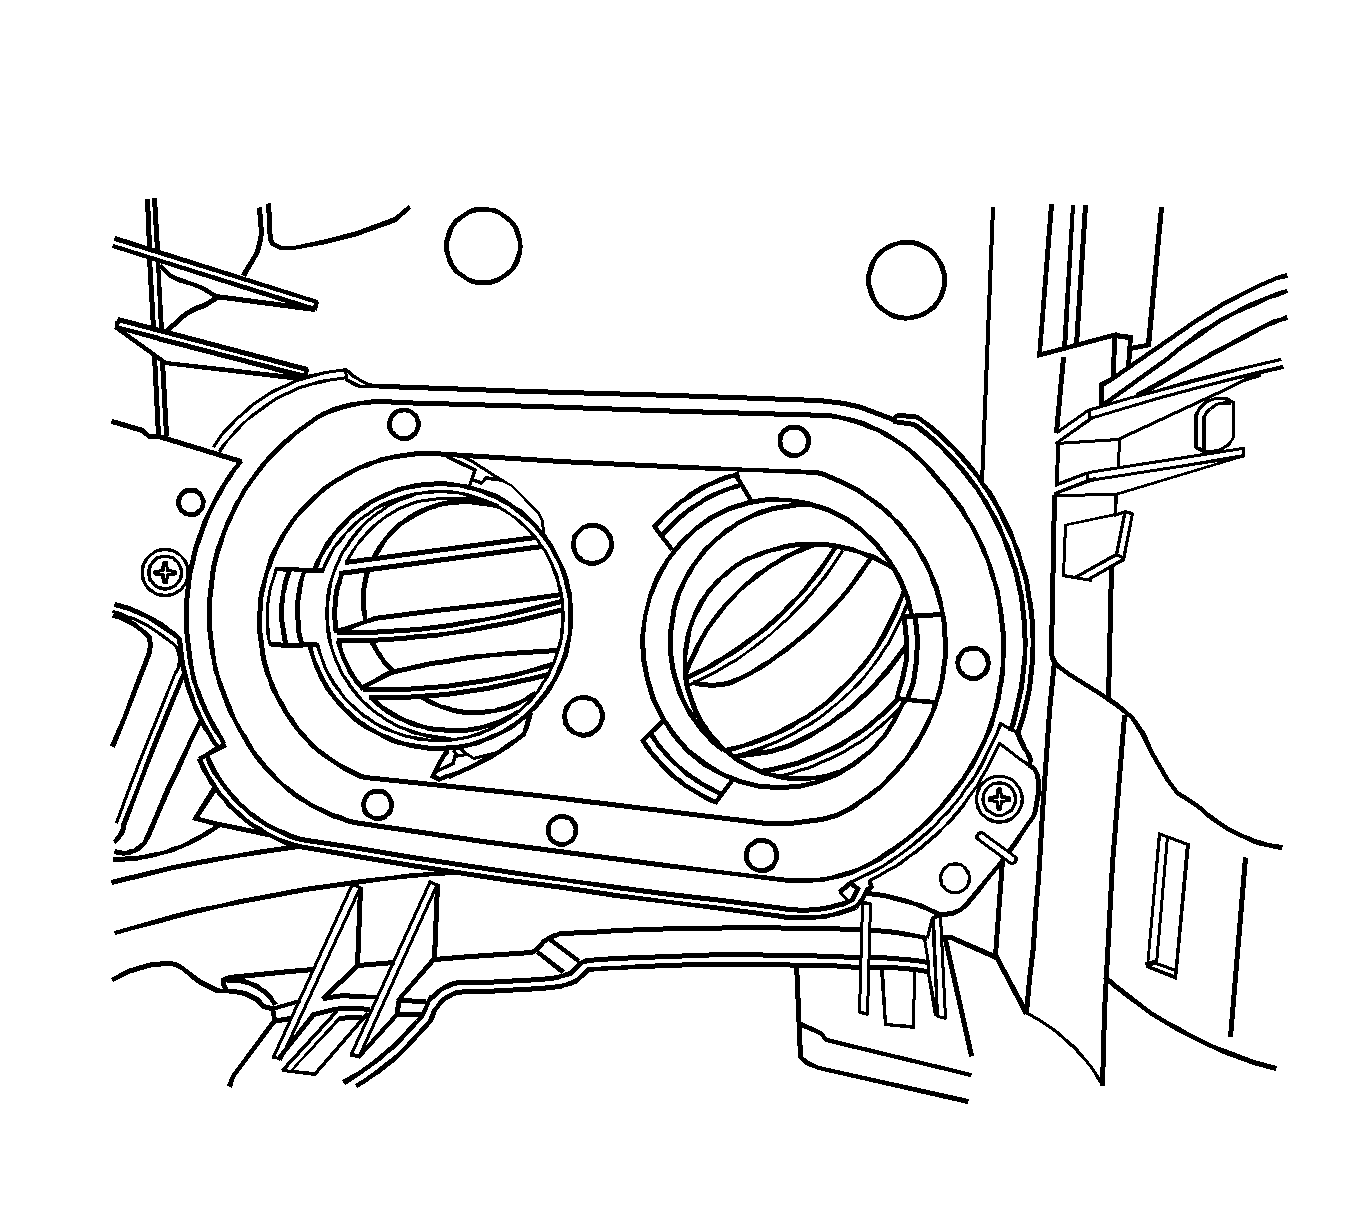
- Disengage the I/P center and outer air outlet retainers. Remove the air outlets.
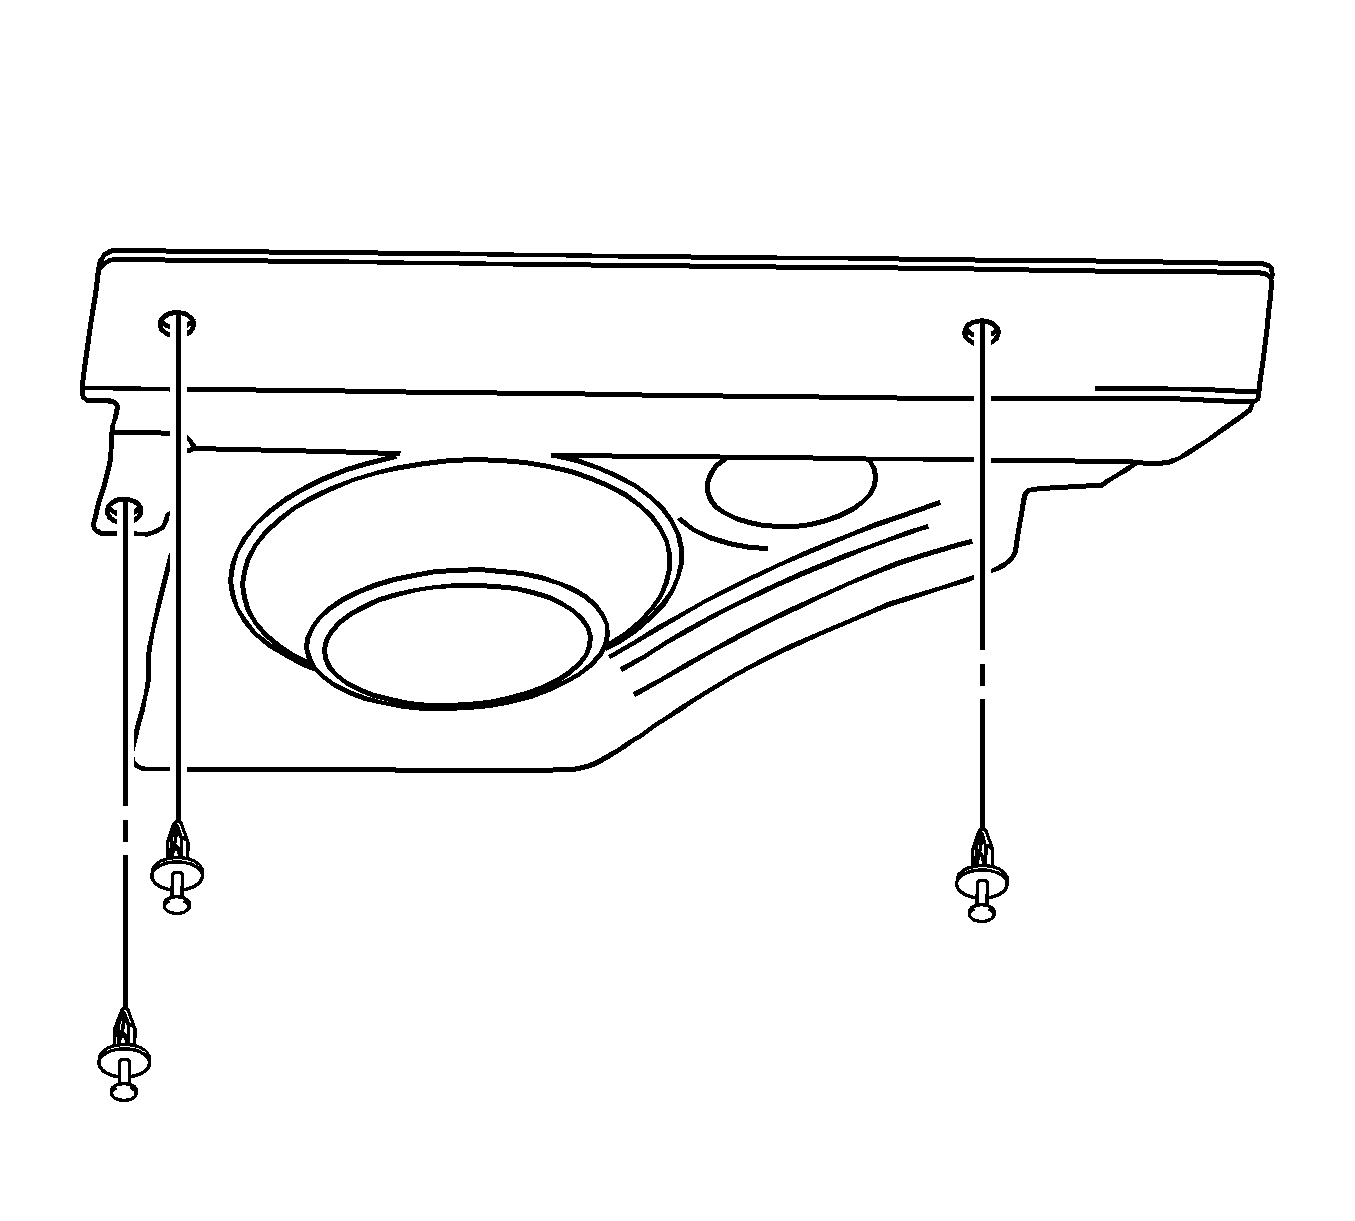
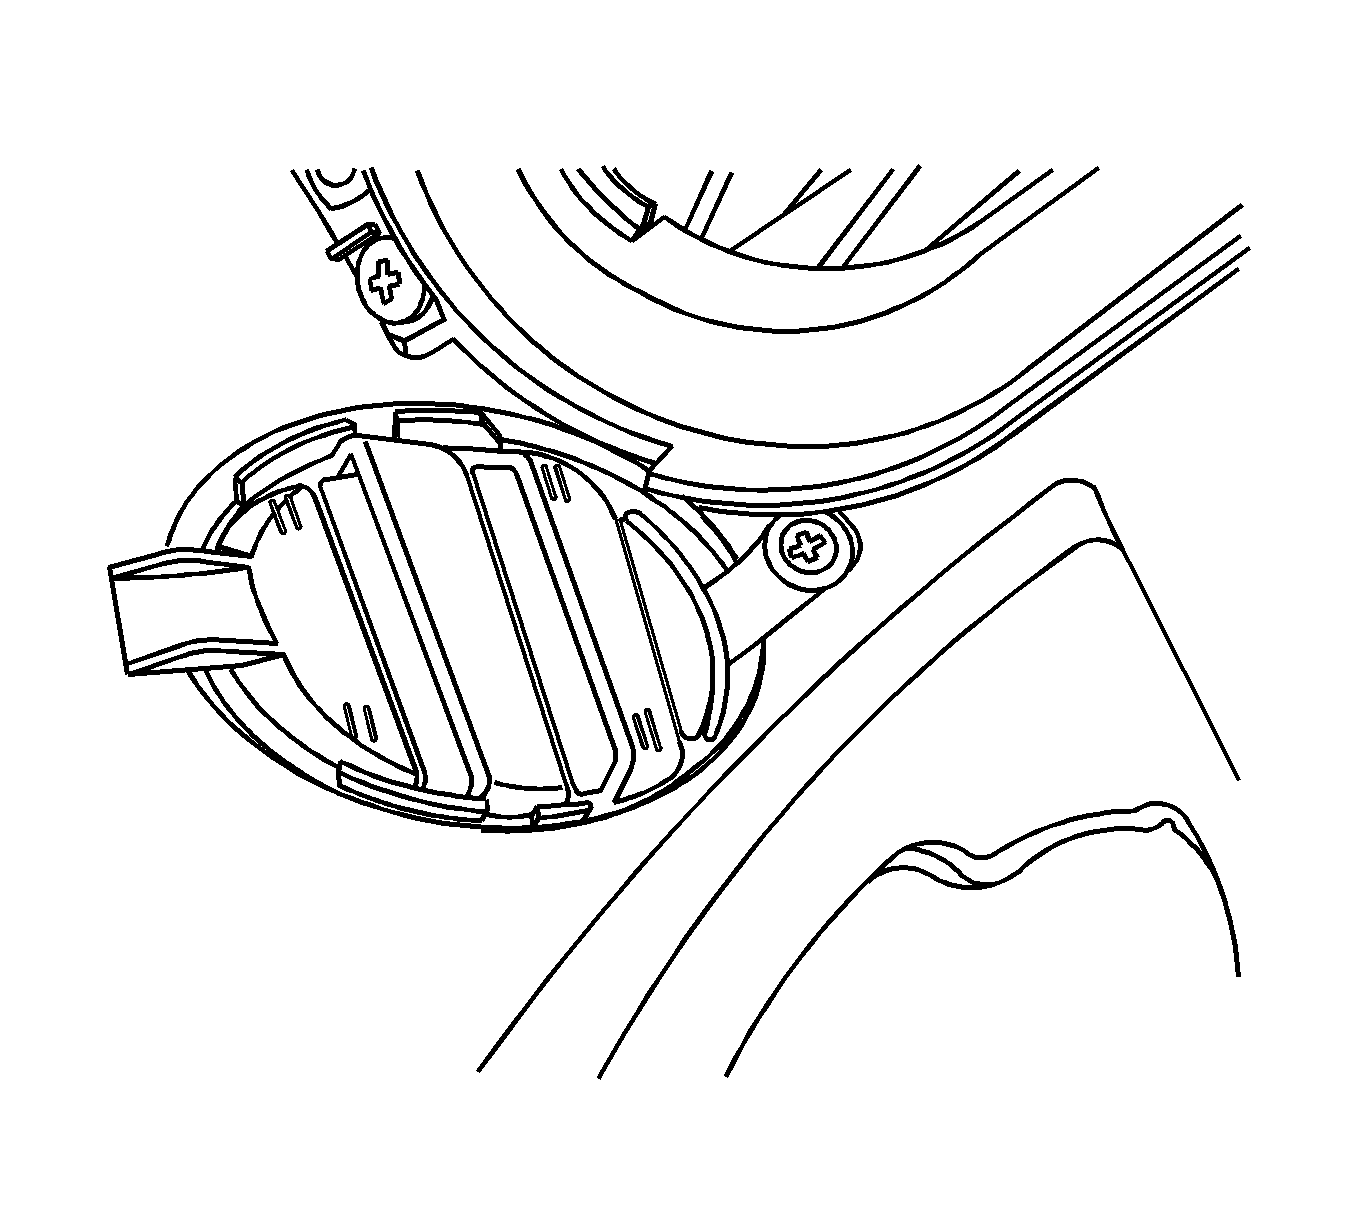
- Remove the side window defog outlet screw.
- Remove the side window defog outlet.
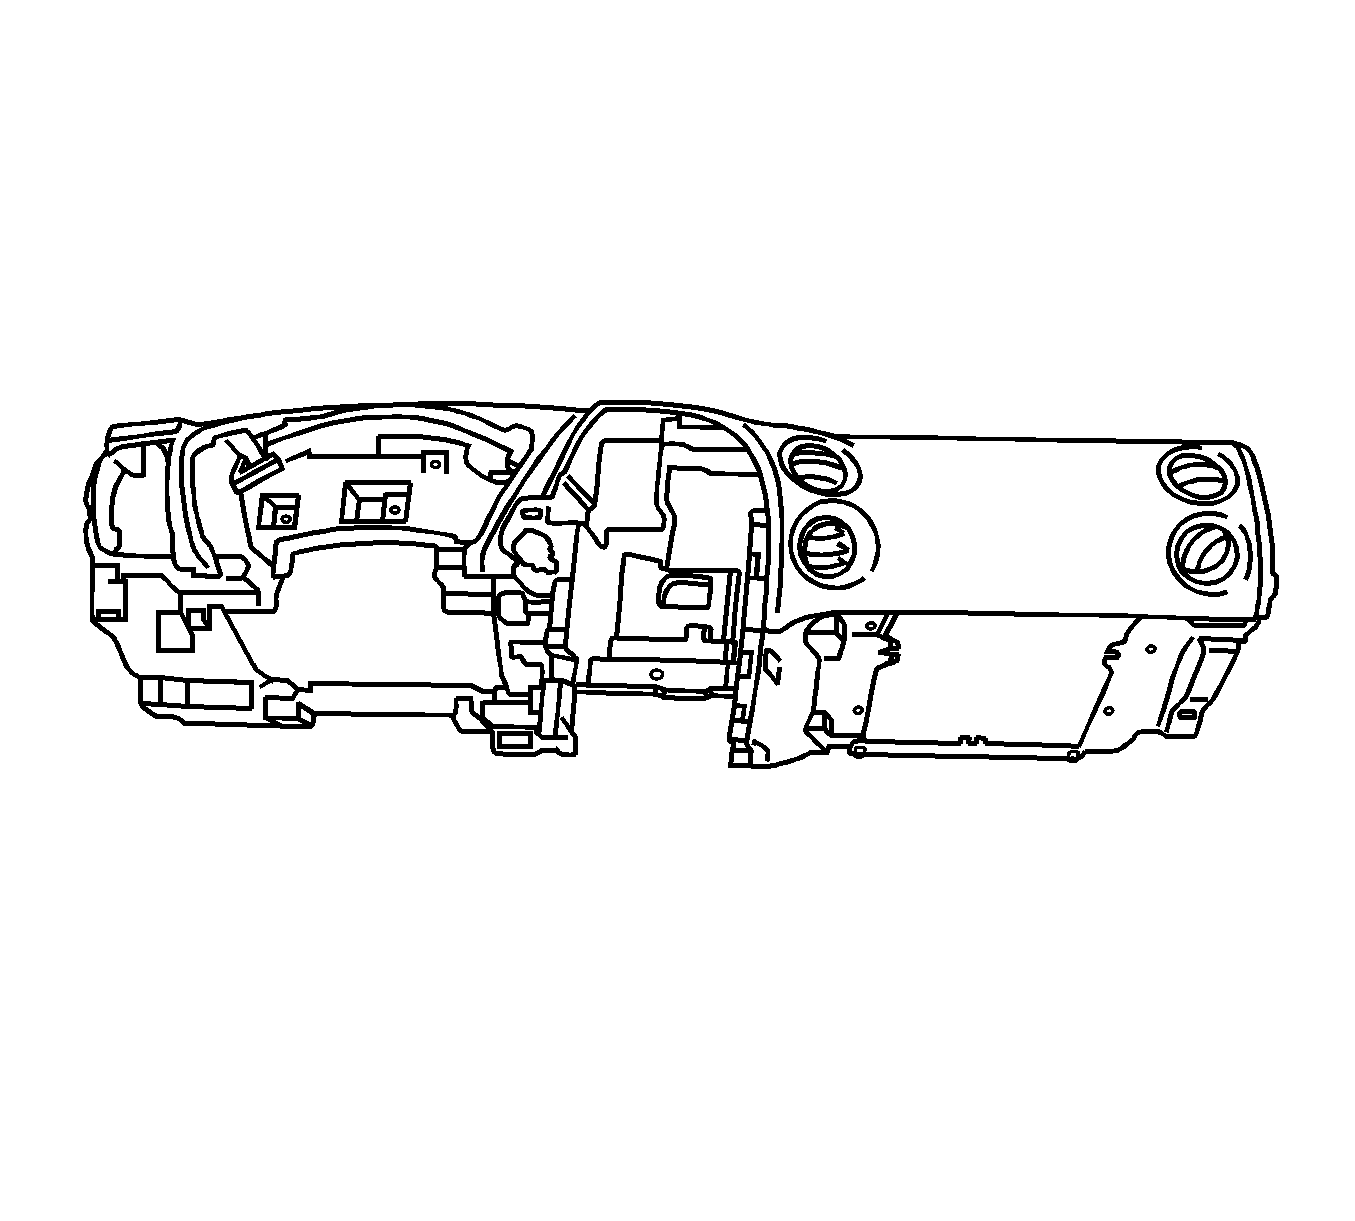
- Remove the I/P trim pad.
Caution: Refer to SIR Caution in the Preface section.
Caution: Refer to Battery Disconnect Caution in the Preface section.
Notice: Use the following method to disengage the Head Up Display (HUD) retainers. Do
NOT pry the retainers with a flat-bladed tool or other similar device.
Failure to follow this method could break the tab on the HUD.


Installation Procedure
- Align the side window defog outlet to the I/P trim pad.
- Install the side window defog outlet screw.
- Align the I/P center and outer air outlet retainers to the I/P trim pad. Press the air outlets into the I/P trim pad.
- Install the SIR inflator module. Refer to Inflatable Restraint Instrument Panel Module Replacement in SIR.
- Align the I/P trim pad to the I/P carrier.
- Reposition the I/P wiring harness.
- Install the dash panel insulator retainers near the windshield.
- Make sure the I/P trim pad is aligned to the locators (1) in the center stack and the instrument cluster pocket.
- Install the I/P trim pad bolt in the center stack area.
- Install the I/P trim pad bolts at the cluster pocket.
- Install the inflatable restraint I/P module bracket bolts.
- Install the I/P trim pad bolts near the windshield.
- Install the I/P trim pad screws.
- If equipped, install the navigation radio antenna and the bracket to the I/P trim pad.
- Install the fasteners (1, 2) at both sides of the I/P compartment opening.
- Install the I/P compartment. Refer to Instrument Panel Compartment Replacement .
- Align the I/P trim plate (glove box outboard) to the slots in the I/P trim pad. Press the trim plate into the trim pad.
- Install the I/P trim plate (glove box inboard). Refer to Driver Knee Bolster Replacement .
- Position the courtesy lamp to the right I/P insulator opening. Rotate the lamp clockwise.
- Align the right I/P insulator to the I/P trim pad. Install the right I/P insulator fasteners.
- Install the right I/P compartment access hole cover.
- Align the ignition switch to the I/P trim pad opening. Install the ignition switch bolts.
- Connect the I/P wiring harness and the antenna cable connector to the radio.
- Align the radio locator at the rear of the radio to the opening in the I/P trim pad while pressing the radio into position.
- Install the radio screws.
- Install the HVAC control module. Refer to Heater and Air Conditioning Control Replacement in HVAC Systems - Manual.
- Install the I/P center compartment. Refer to Instrument Panel Center Compartment Replacement .
- If equipped, connect the radio front speaker electrical connector and align the speaker to the I/P trim pad.
- Install the radio front speaker screws.
- Align the speaker grille to the I/P trim pad. Make sure the logo is facing the driver. Install the speaker grille to the I/P trim pad.
- If equipped, install the HUD. Refer to Instrument Cluster Head Up Display Replacement .
- Install the I/P upper trim panel. Refer to Instrument Panel Upper Trim Panel Replacement .
- Install the windshield pillar garnish moldings. Refer to Windshield Pillar Garnish Molding Replacement in Interior Trim.
- Install the I/P cluster trim assembly.
- Install the I/P cluster trim assembly screw.
- Connect the instrument cluster electrical connector and align the instrument cluster to the I/P trim pad.
- Install the instrument cluster screws.
- Connect the headlamp dimmer switch electrical connector.
- Align the locating pins and the retainers on the I/P cluster trim plate to the openings in the I/P trim pad. Push in the I/P cluster trim plate at each of the retainer locations. Make sure the retainers are completely engaged.
- Install the steering column. Refer to Steering Column Replacement in Steering Wheel and Column.
- Attach the STAR connector to the I/P trim pad.
- Install the driver knee bolster. Refer to Driver Knee Bolster Replacement .
- Align the I/P steering column opening filler to the I/P trim pad. Install the I/P steering column opening filler.
- Install the I/P steering column opening filler screws.
- Align the DLC to the I/P trim pad. Press the DLC through the opening.
- Install the left I/P compartment access hole cover.
- Connect the DIC electrical connector.
- Install the I/P accessory trim plate to the I/P trim pad.
- Install the ignition switch bezel.
- Position the courtesy lamp to the left I/P insulator opening. Rotate the lamp clockwise.
- Align the left I/P insulator to the I/P trim pad. Install the left I/P insulator fasteners.
- Connect the battery ground cable. Refer to Battery Negative Cable Disconnection and Connection in Engine Electrical.
- Enable the SIR system. Refer to SIR Disabling and Enabling and to SIR Disabling and Enabling in SIR.
Notice: Refer to Fastener Notice in the Preface section.
Tighten
Tighten the screws to 2 N·m (18 lb in).
Important: Start the I/P trim pad bolts by hand to avoid cross threading.
Tighten
Tighten the bolt to 10 N·m (89 lb in).
Tighten
Tighten the bolts to 10 N·m (89 lb in).
Tighten
Tighten the bolts to 10 N·m (89 lb in).
Tighten
Tighten the bolts to 10 N·m (89 lb in).
Tighten
Tighten the screws to 2 N·m (18 lb in).
Tighten
Tighten the bolts to 10 N·m (89 lb in).
Tighten
Tighten the screws to 2 N·m (18 lb in).
Tighten
Tighten the screws to 2 N·m (18 lb in).
Tighten
Tighten the screw to 2 N·m (18 lb in).
Tighten
Tighten the screws to 2 N·m (18 lb in).
Tighten
Tighten the screws to 2 N·m (18 lb in).
