Adjustment Procedure
- Close the sunroof window panels.
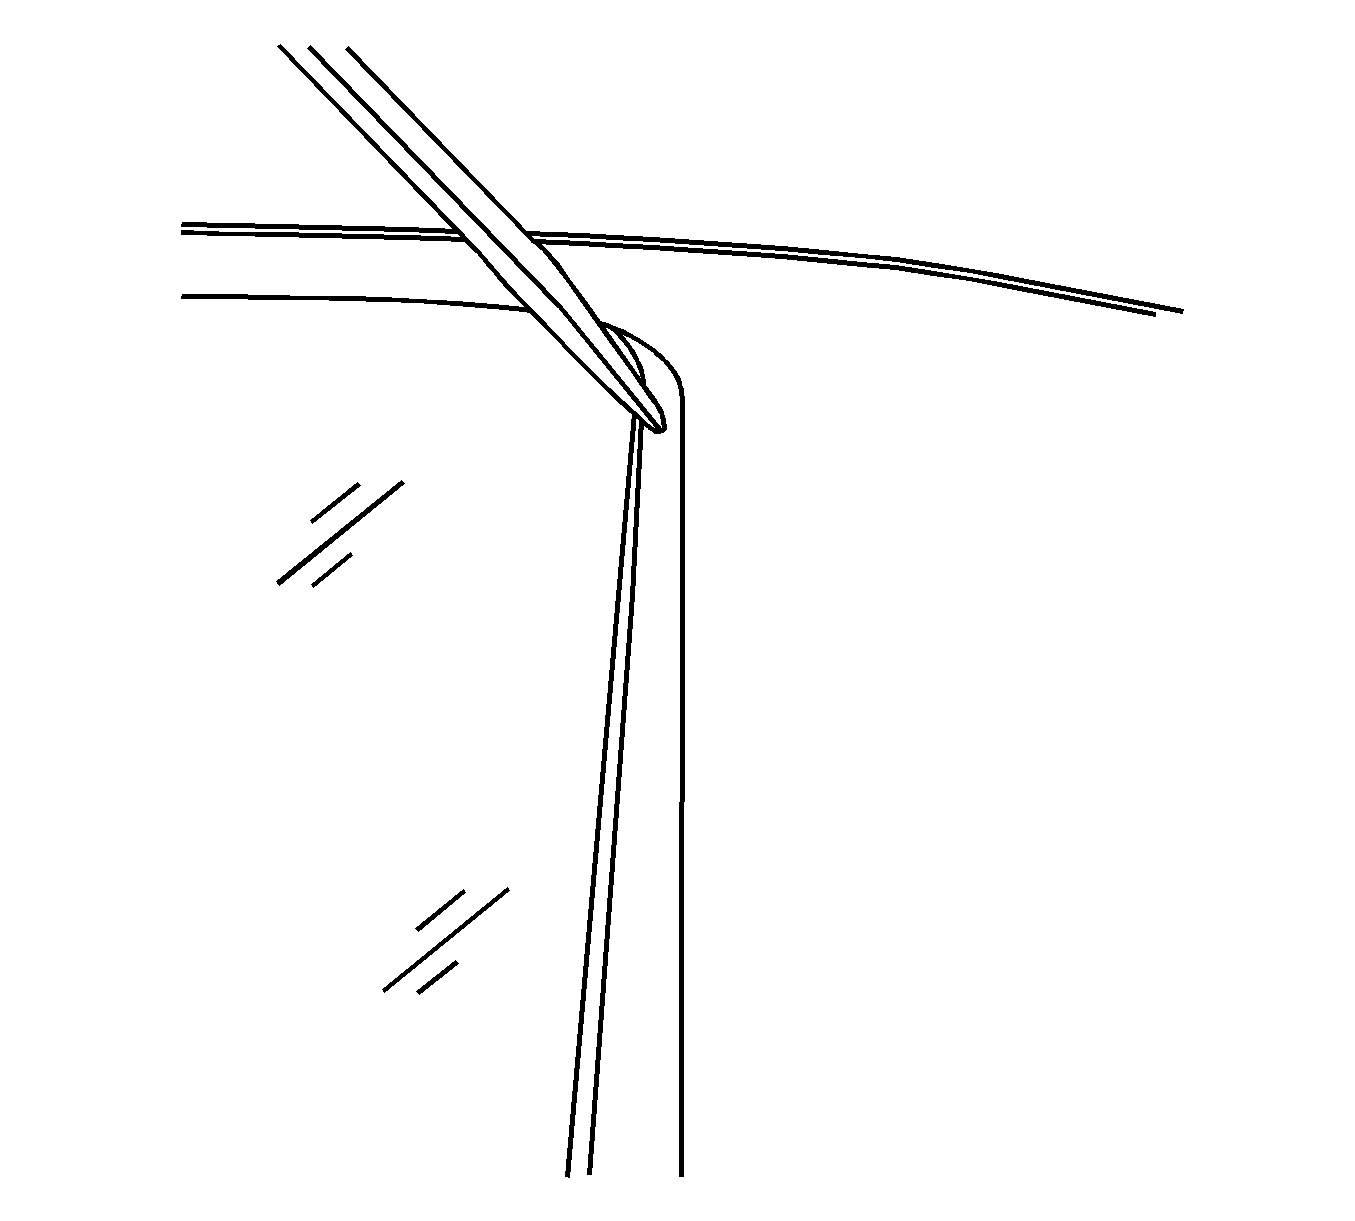
- Inspect the sunroof window seal for being rolled (1) over in area.
- Inspect the sunroof window seal for the incorrect conditions below:
- Rolled up sunroof window seal.
- Rolled out sunroof window seal.
- If the sunroof window seal is rolled over or appear to be low in a location the sunroof window seal will require adjustment.
- Pull the sunroof window seal back from under the roof edge, using a suitable tool, refit sunroof window seal into the gutter.
- Correct position.
- With the sunroof closed, gently pry the sunroof window seal out towards the center of the sunroof opening
- Run a business card or a similar item around the sunroof window seal, look for even tension around the seal.
- The sunroof window seal will un-tuck and expand outward to make a seal.
- If it is found the sunroof window seal is not rolled over, meaning that "fluffing" was ineffective and the sunroof window seal still appears to be low in relation to the metal opening, adjustment to the sunroof module may be necessary. Refer to Sunroof Module Adjustment .
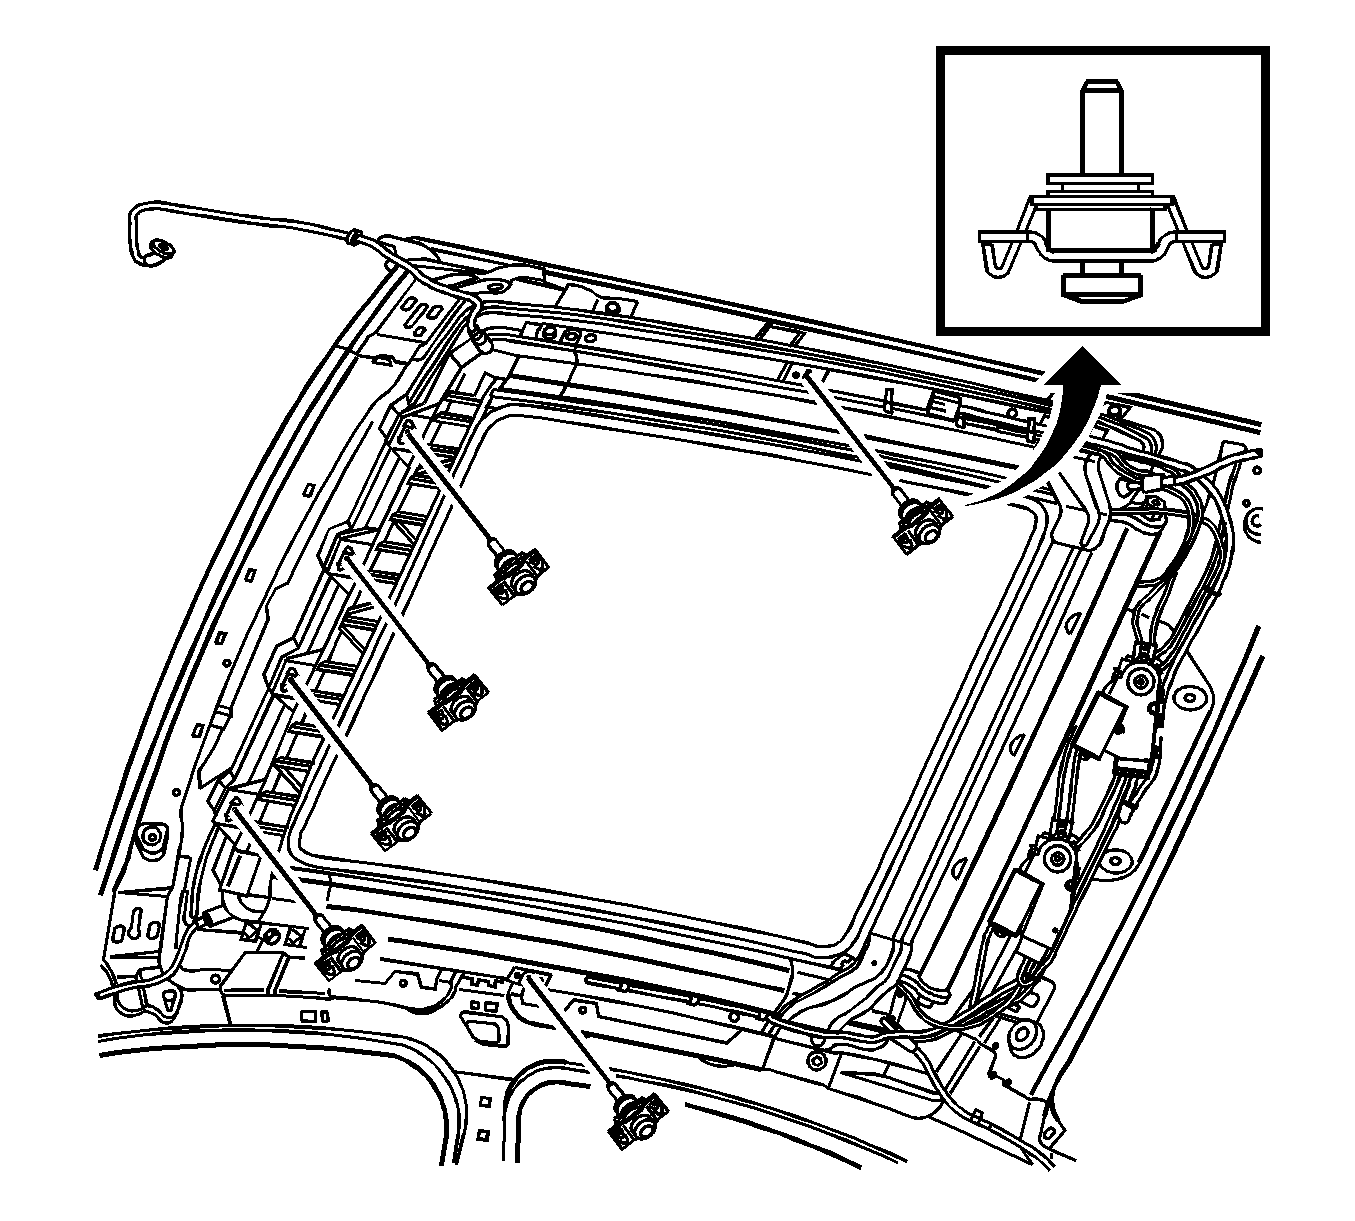
- If the sunroof window seal appears low along the front, adjust the four fasteners/tolerance compensators along the front. Refer to Sunroof Module Assembly Replacement .
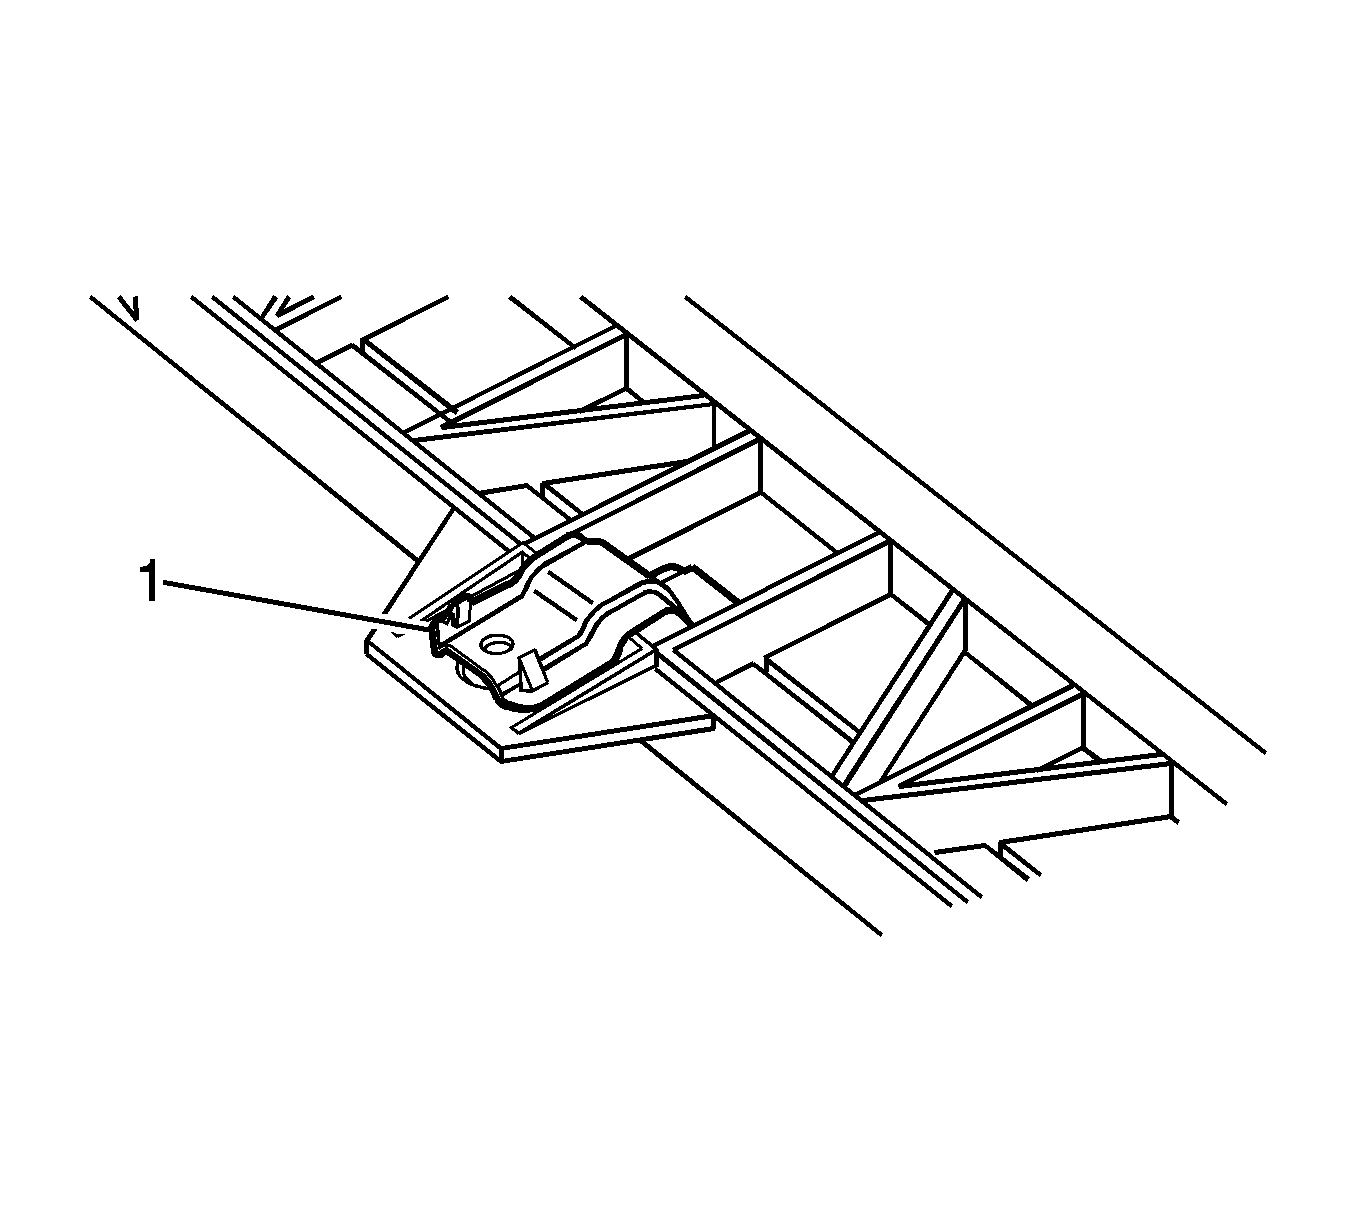
- If vehicle is equipped with the center brackets (1) do following steps. If not refer to step 15.
- If vehicle is not equipped with center brackets (1) the new brackets will need to be installed.
- Remove the material (2), using a pair of tin snips to allow the new brackets (1) to sit flush to the sunroof module.
- Install the new brackets (1).
- Install the fasteners. Do the following steps:
- If the sunroof window seal is low in the rear, adjust the three screws in the rear.
- Close the sunshade to gain access to the screws.
- Loosen the sunroof module bolts. Sunroof Module Assembly Replacement .
- Re-tighten the fasteners.
- If the seal is not repairable, it will be necessary to replace it. Refer to Sunroof Window Seal Replacement .
- Inspect the sunroof for proper operation.
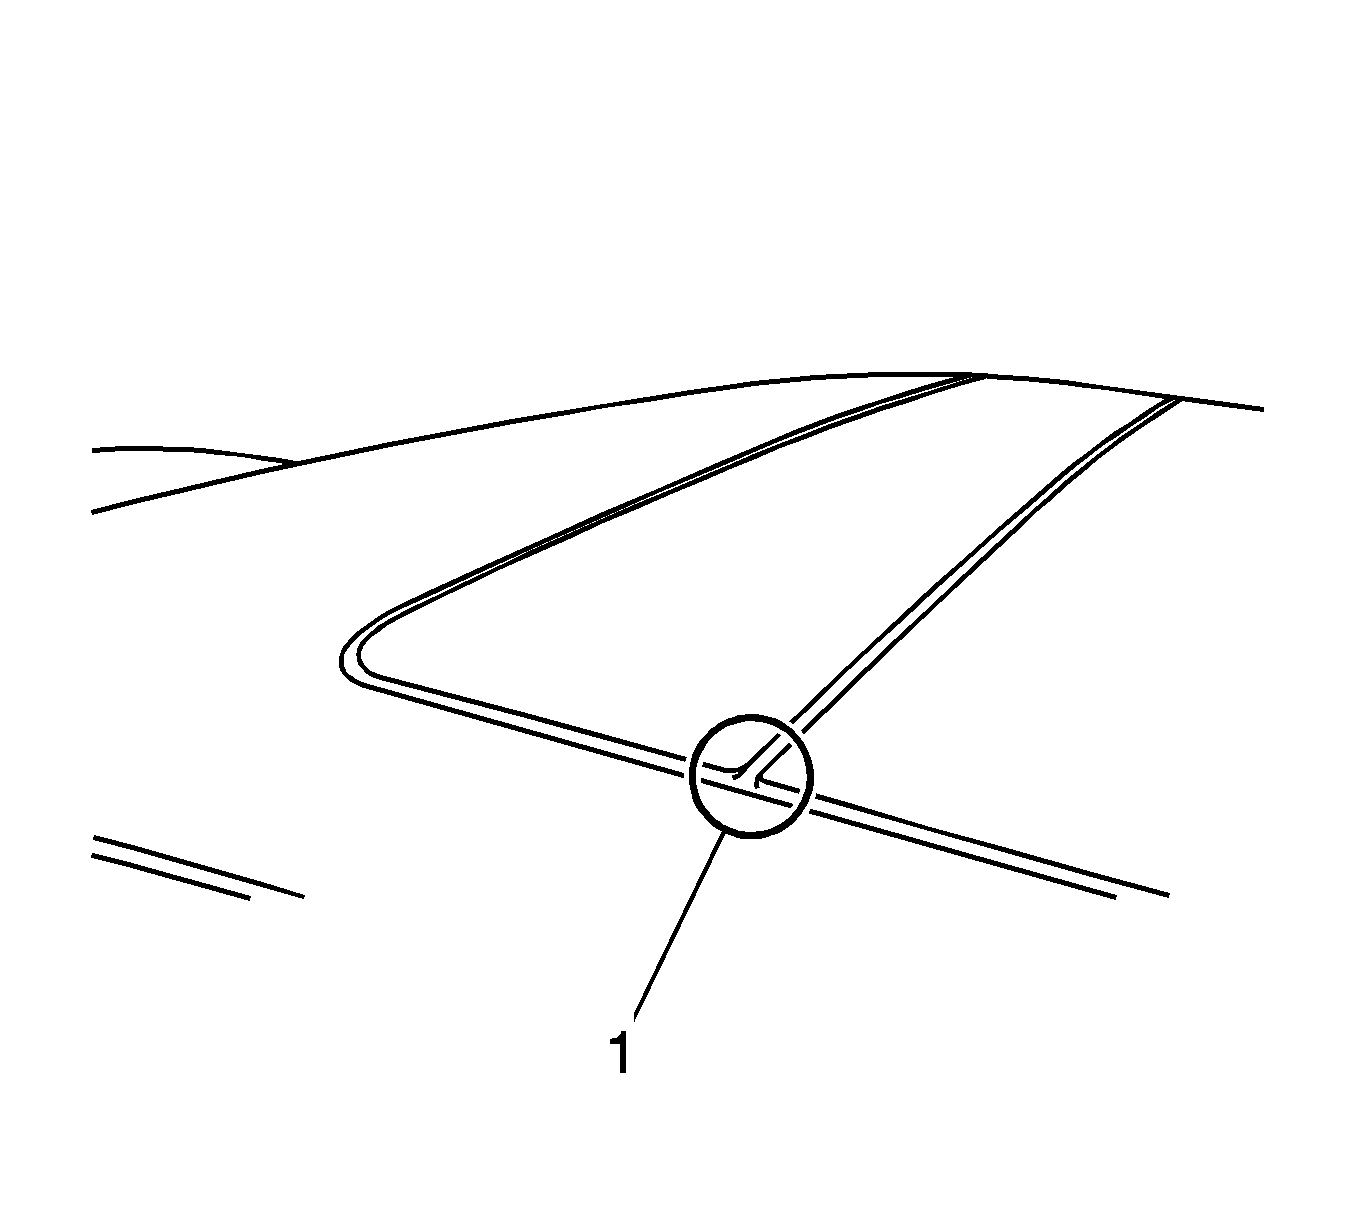
Important: Wind/whistle noise, air leaks and possible water leaks on the C3Y panoramic sunroof when closed. The easiest way to identify the location of the air leak is to use a rubber hose against your ear in order to listen for the air leak. Using a rubber hose, 1/2 inch diameter 3 feet long, listen around all the sunroof window sealing locations while all the door, windows and the sunroof window panels are closed, with the HVAC blower on high. It should be note that some leakage will be heard at the "T" (1) joints on vehicles without a customer complaint.
Important: If the sunroof window seal was rolled over during the installation causing inadequate sealing against the sunroof window opening. This condition can be corrected by "fluffing" the seal.
Important: The sunroof window seal maybe rolled over during the installation causing inadequate sealing against the sunroof window opening. This condition can be corrected by "fluffing" the seal.
Important: Do not adjust the leveling retainers located at the four corners of the module unless the sunroof window panels are not 1 mm lower than the roof line.
| • | Loosen the four fasteners/tolerance compensators along the front. "Back off" the tolerance compensators by turning them down with your finger tips the necessary amount. Sunroof Module Adjustment . |
| • | Push up on the front rail of the module while tightening the front fasteners. |
| • | Pushing up will close the gap and the tolerance compensators will not extend as far thus compressing the seal more. |

Important: If the sunroof is equipped with the old style clip (3) the new style (1) will be needed.
| • | Loosen the four fasteners/tolerance compensators along the front. "Back off" the tolerance compensators by turning them down with your finger tips the necessary amount. Sunroof Module Adjustment . |
| • | Push up on the front rail of the module while tightening the front fasteners. |
| • | Pushing up will close the gap and the tolerance compensators will not extend as far thus compressing the seal more. |

These fasteners do not have tolerance compensators but may need to be tightened more.
Important: If the sunroof module needed adjustment and could not be achieved in the front or the rear, the module may be misaligned to the roof.
It will be necessary to loosen all fasteners except the four leveling retainers in the four corners, this will allow the sunroof module to be align to the roof panel.