For 1990-2009 cars only
Removal Procedure
- Place the folding top in the service position. Refer to Folding Top Retainer Strap Installation Position .
- Remove the left and right sides of the lock pillar upper garnish molding . Refer to Lock Pillar Upper Garnish Molding Replacement .
- Remove the rear compartment front trim panel. Refer to Rear Compartment Front Trim Panel Replacement .
- Turn the hydraulic pump by-pass valve counter clockwise until the pressure is released. Refer to Folding Top Fluid Addition .
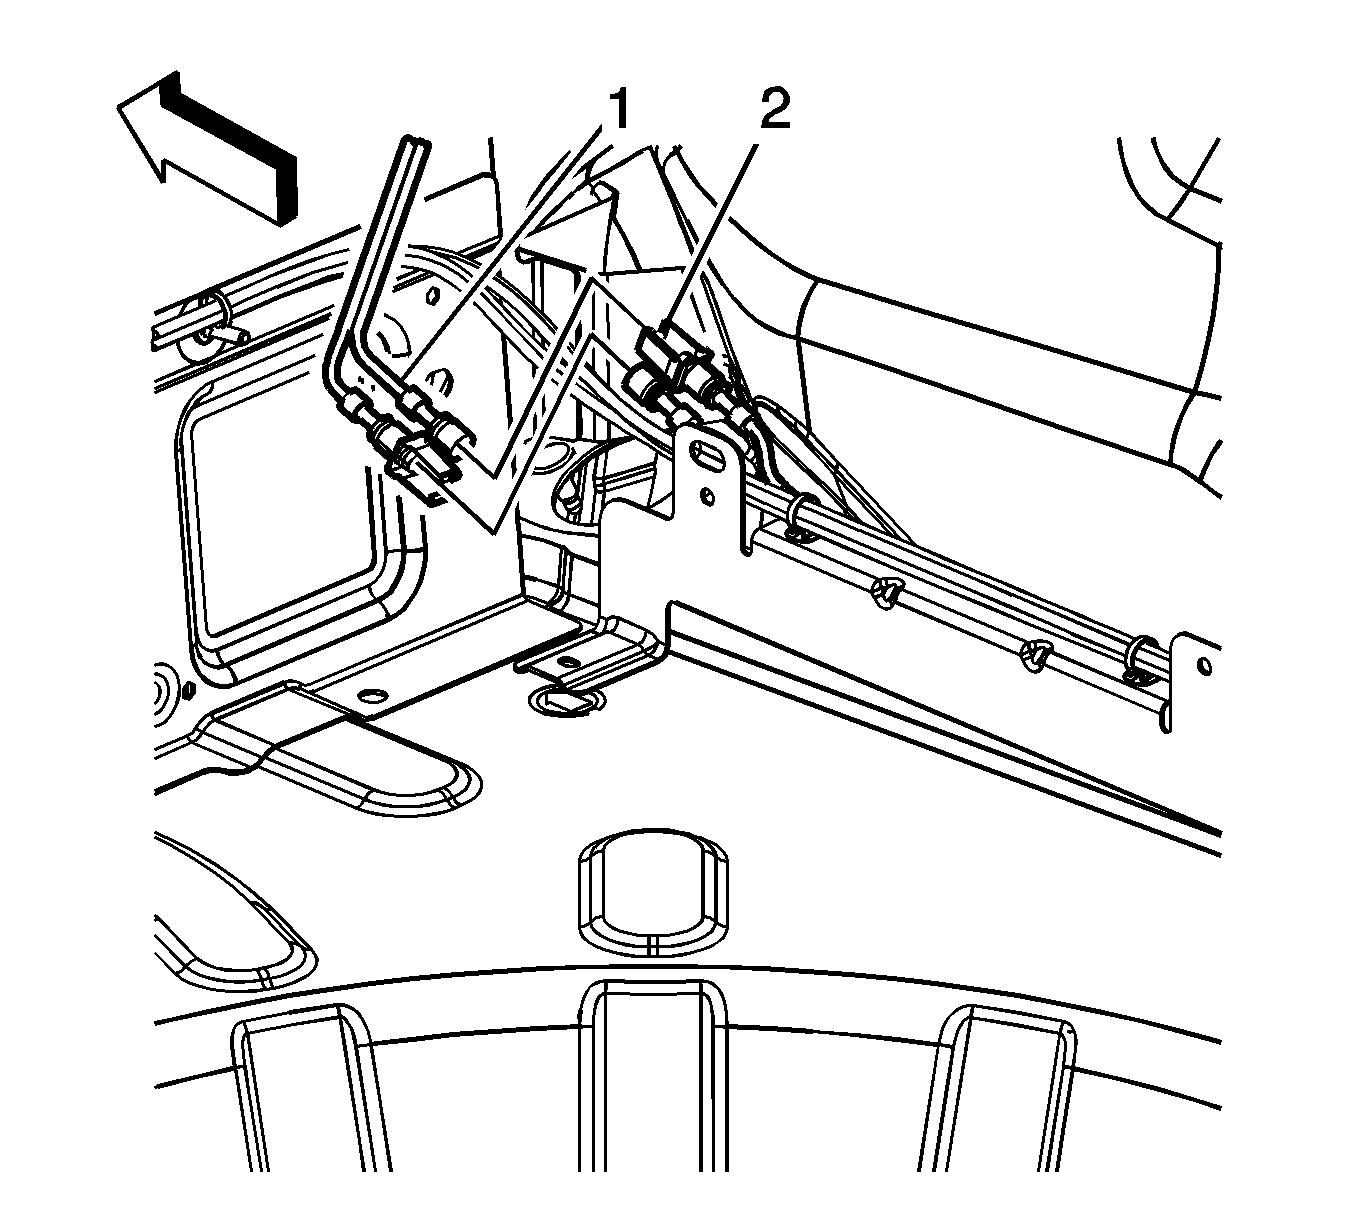
- Disconnect the left side of the hydraulic hoses (2) quick release to the valve (3).
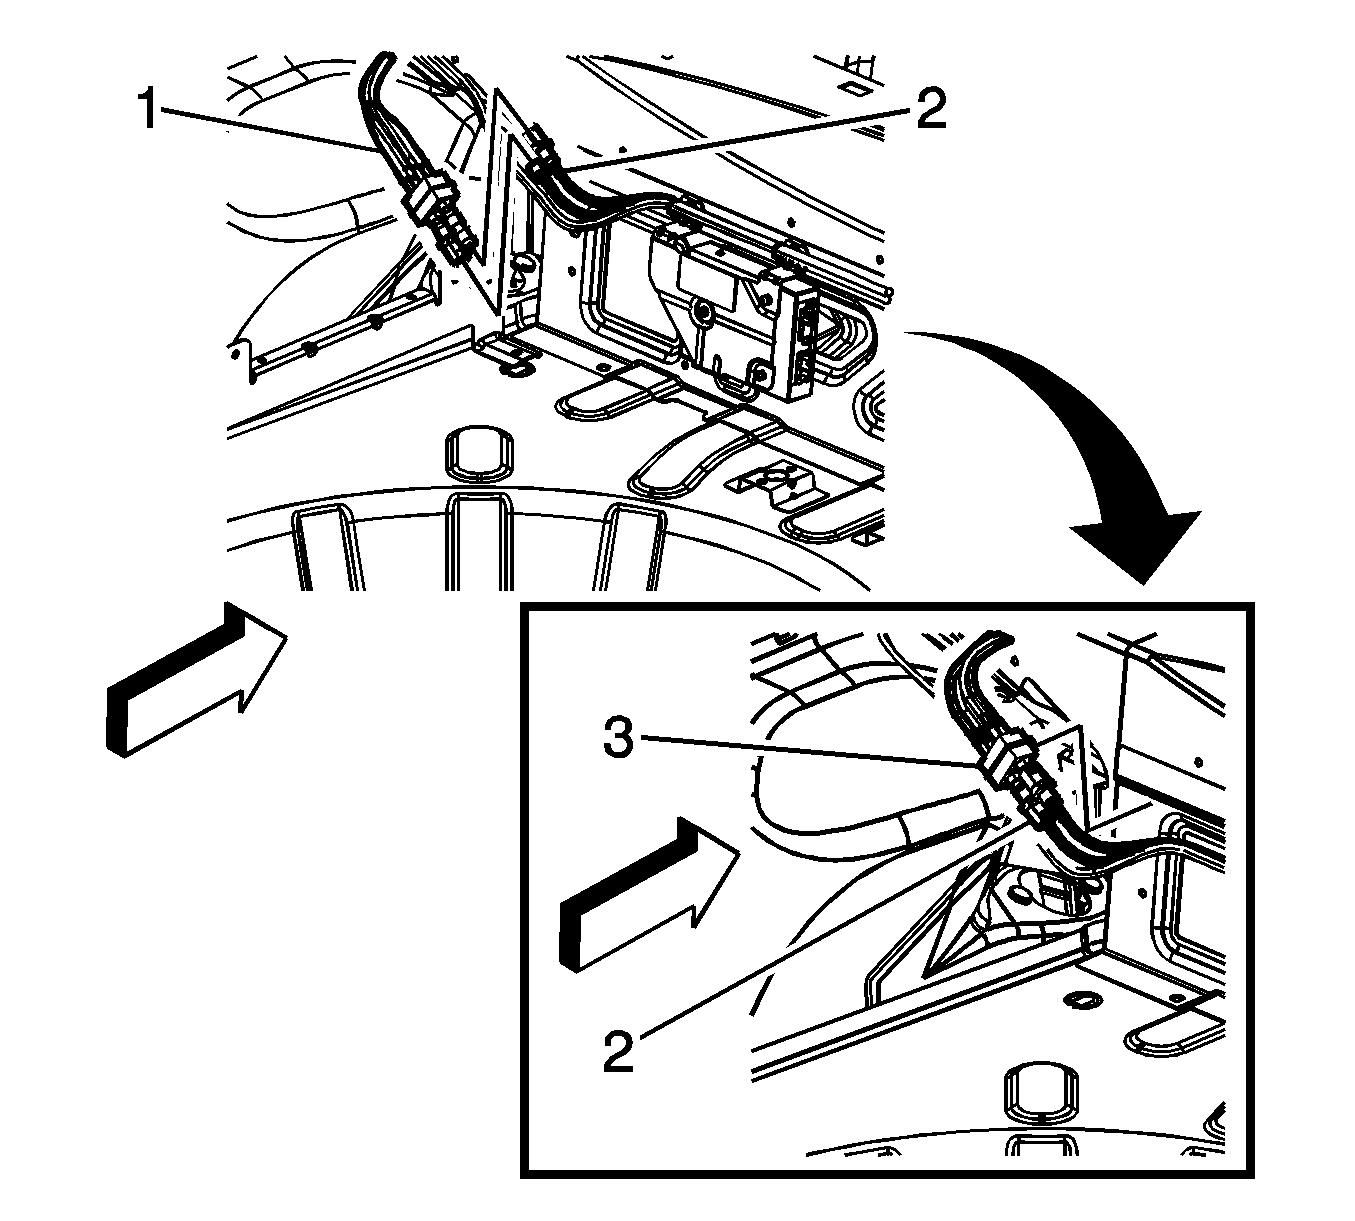
- Disconnect the electrical connectors from the rear window defogger location in the rear compartment.
- Disconnect right side electrical connector from the folding top.
- Disconnect the right side quick releases from the hydraulic line connectors (1, 2).
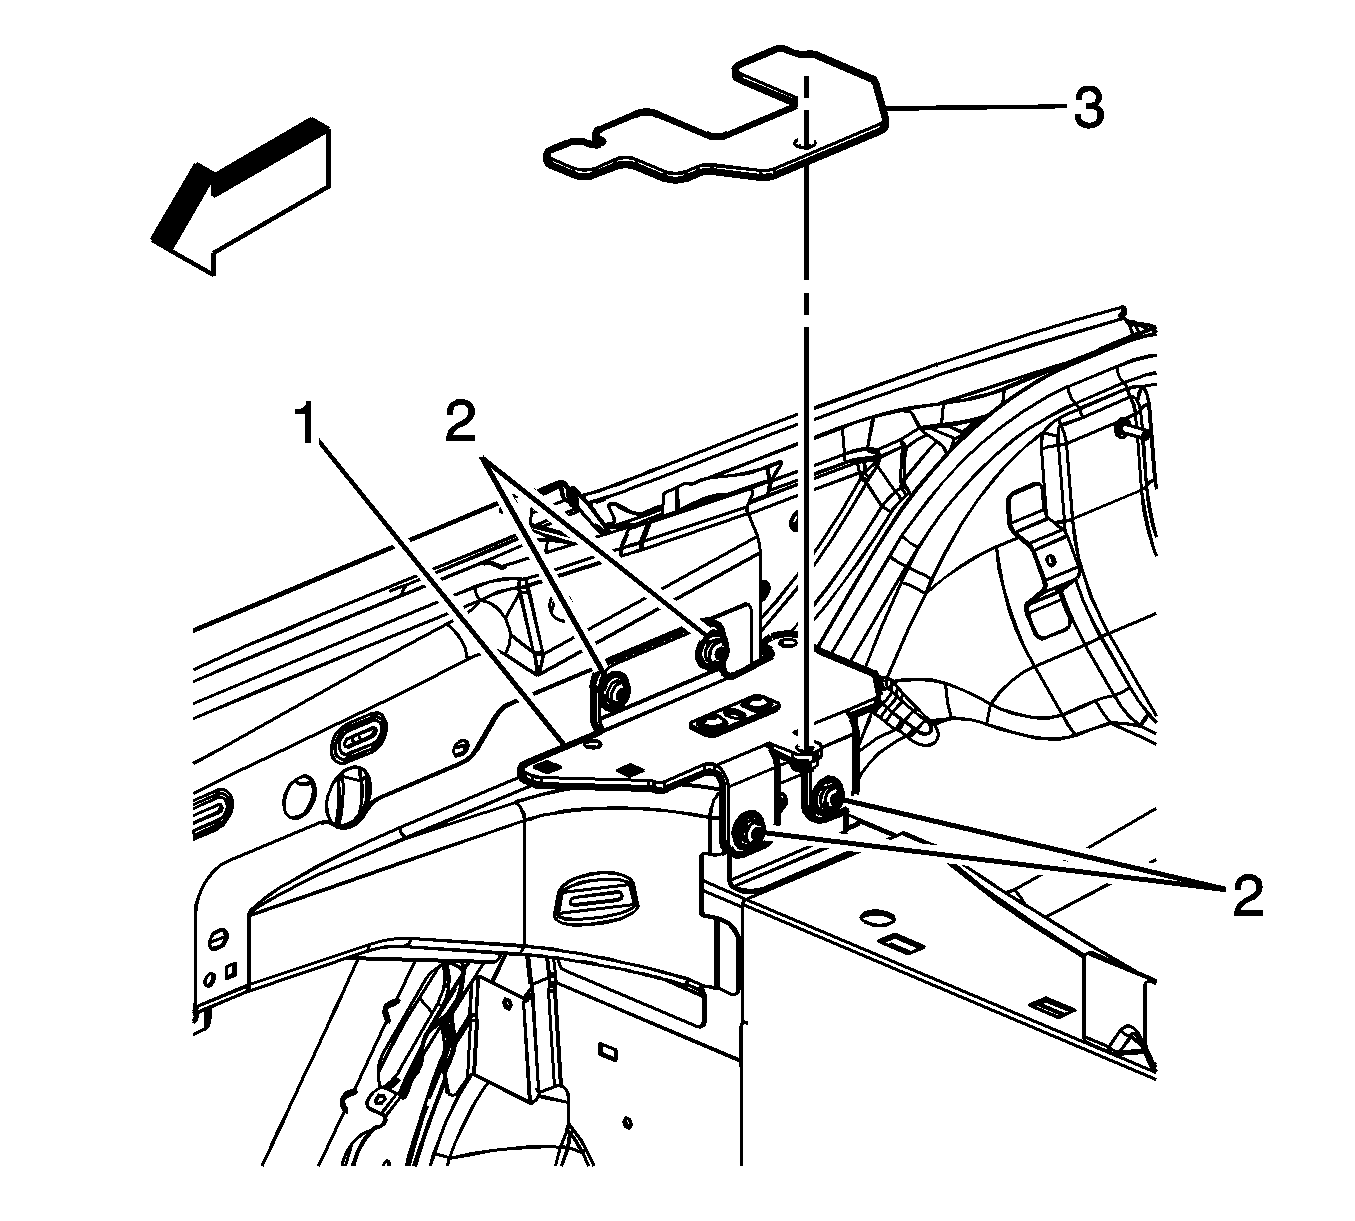
- Ensure that any shims (3) stays with pivot bracket (1) when removing the folding top side rail.
- Remove the bolts (1) from the left and right of the side rail link (2). Refer to Folding Top Side Rail Link Replacement .
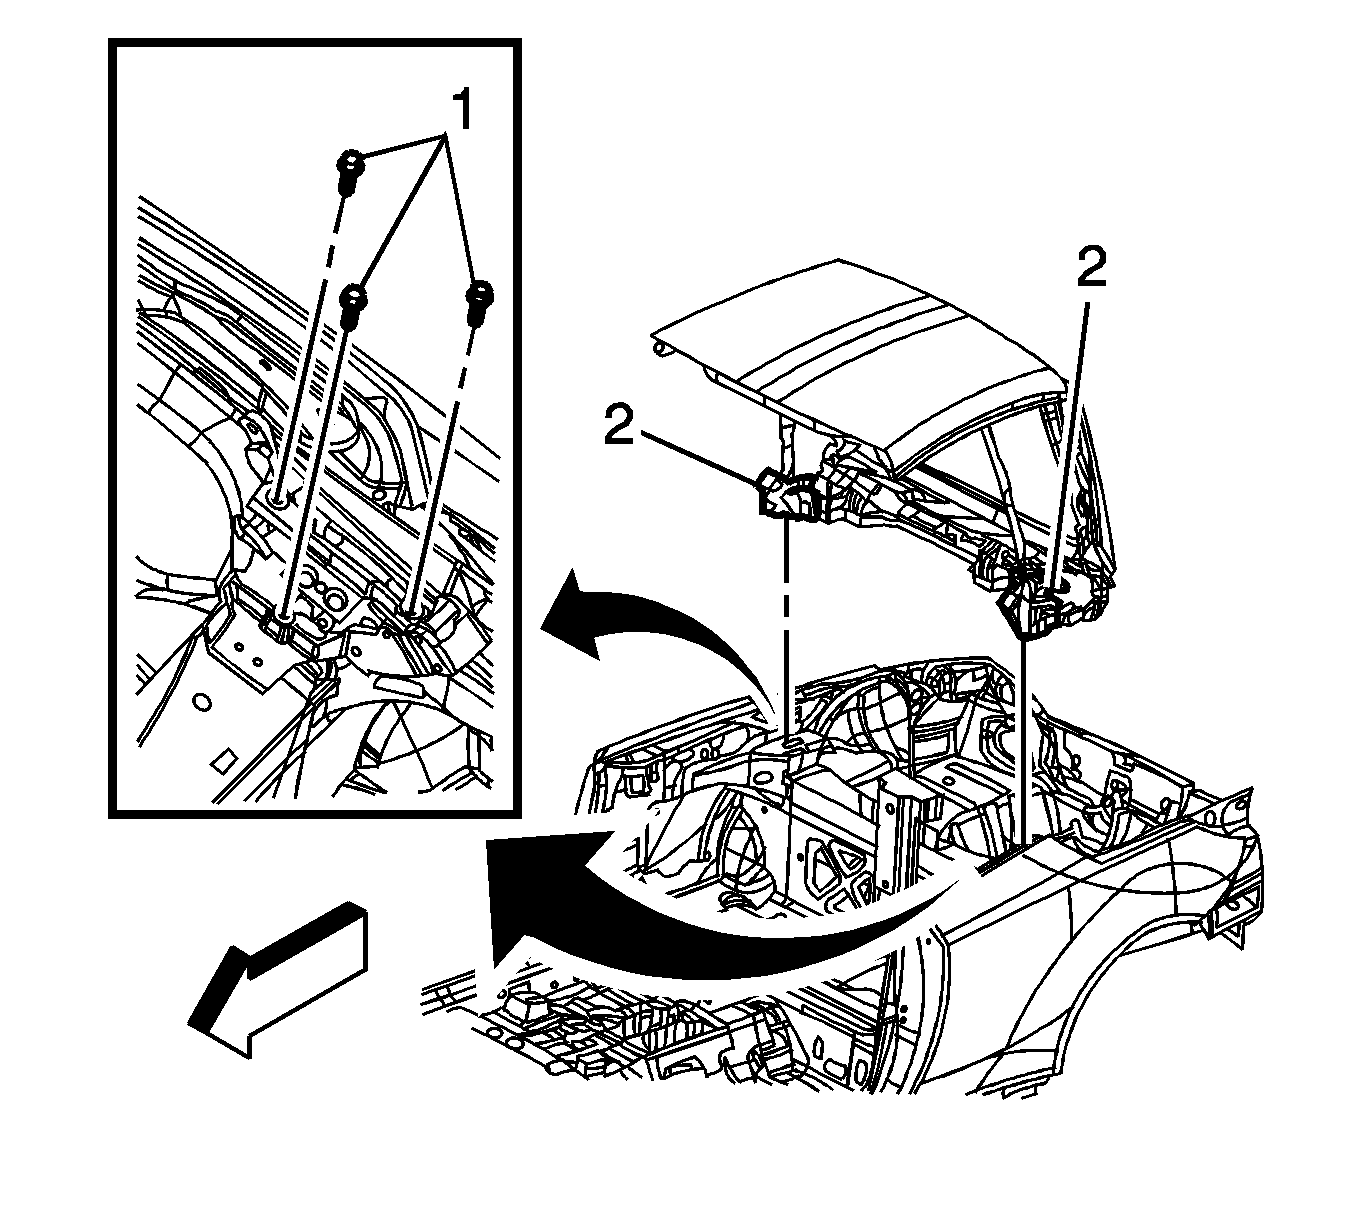
- Remove the folding top from the top pivot bracket.
- With an assistant, remove the folding top module from the vehicle.
Caution: Refer to Servicing Electrical Components Caution in the Preface section.
Important: It will be necessary to transfer or replace all parts to the new folding top.
| • | Place a suitable container under the hydraulic cylinder lines before disconnecting. |
| • | Wait 5 minutes before separating the hydraulic cylinder lines at any connectors. |
Important: Do not remove the bolts (2) from the pivot brackets (1).
Important: Ensure that No electrical connectors or hydraulic cylinder lines are hanging down on the vehicle when removing.
Installation Procedure
- With an assistant, install the folding top module to the vehicle.
- Ensure that the shim (3) is on the pivot bracket (1) before installing the folding top panel.
- Install the folding top to the pivot brackets.
- Install the bolts (1) to the left and right of the side rail link (2) Do Not tighten at this time.
- Connect the right side quick releases to the hydraulic line connectors (1, 2).
- Connect the left side of the hydraulic hoses (2) quick release to the valve (3).
- Manually move the folding top to the service position. Refer to Folding Top Retainer Strap Installation Position .
- Tighten the bolts to the left and right of the side rail link. Refer to Folding Top Side Rail Link Replacement
- When the repair is completed, turn the pump by-pass valve clockwise until tight.
- Connect the electrical connectors to the rear window defogger.
- Connect left and right sides electrical connector to the folding top.
- Remove the folding top straps. Refer to Folding Top Retainer Strap Installation Position .
- Cycle the folding top three time to ensure that there is no leaks.
- Check and add fluid if needed. Refer to Folding Top Fluid Addition .
- Install the left and right sides of the lock pillar upper garnish molding . Refer to Lock Pillar Upper Garnish Molding Replacement .
- Install the rear compartment trim panel. Refer to Rear Compartment Front Trim Panel Replacement .
- Ensure that the folding top is working and is aligned to the side windows.
Important: If reinstalling the original top it will stay in the service position.
If install a new folding top it will come in the fully open position and must be put in the service position before installing it in to vehicle.
Notice: Refer to Fastener Notice in the Preface section.
Tighten
Tighten the bolts to 22 N·m (16 lb ft).
