Driver or Passenger Seat Head Restraint Replacement Base Level
Tools Required
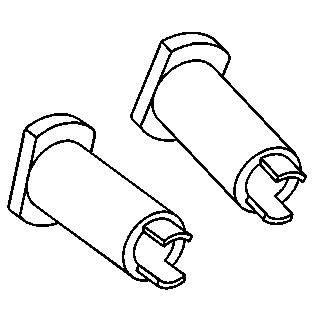
J 39641 Headrest Removal Tool
Removal Procedure
- Remove the seatback release knob.
- Separate the J-retainers at the bottom of the seat.
- Pull the seat cover past the head restraint posts.
- Slide the J 39641 up the head restraint posts with the tool tabs fitting into the open slots between the head restraint guide tabs.
- With the headrest removal tools in place, rotate each tool so the head restraint guide tabs expand outward.
- Remove the head restraint (3).
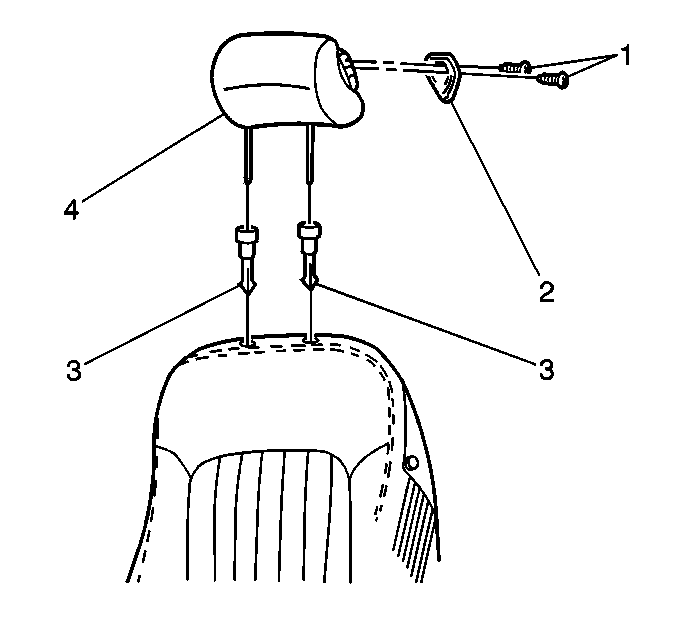
- Remove the shoulder belt guide screws (2), and the shoulder belt guide (1) if required.

Installation Procedure
- Install the head restraint (3).
- Firmly pull down on the seat cover in order to enable the J-retainers at the bottom of the seat to lock together.
- Install the seatback release knob.
- Install the shoulder belt guide (1) if required.
- Install the shoulder belt guide screws (2) to the guide (1).
Notice: Use the correct fastener in the correct location. Replacement fasteners must be the correct part number for that application. Fasteners requiring replacement or fasteners requiring the use of thread locking compound or sealant are identified in the service procedure. Do not use paints, lubricants, or corrosion inhibitors on fasteners or fastener joint surfaces unless specified. These coatings affect fastener torque and joint clamping force and may damage the fastener. Use the correct tightening sequence and specifications when installing fasteners in order to avoid damage to parts and systems.
Tighten
Tighten the screws to 3 N·m (27 lb in).
Driver or Passenger Seat Head Restraint Replacement Up Level
Tools Required
J 39641 Headrest Removal Tool
Removal Procedure
- Remove the seatback trim from the front bucket seat. Refer to Front Seat Back Replacement .
- Remove the cover retainer rings (4) from the seatback cover.
- Raise the cover in order to access the guides.
- Remove the head restraint post retaining rings (5) from the bottom of the posts.
- Slide the J 39641 up the head restraint posts with the tool tabs fitting into the open slots between the head restraint guide tabs.
- With the headrest removal tools in place, rotate each tool in order for the head restraint guide tabs to expand outward.
- Remove the screws (1) and the seat shoulder belt guide (2), if required.
- Remove the head restraint (4).

Installation Procedure
- Install the head restraint post retaining rings (2,5) to the bottom of the posts.
- Install the head restraint (4).
- Install the cover retainer rings (4) to the seatback cover.
- Install the seatback trim to the front bucket seat. Refer to Front Seat Back Replacement .
- Install the shoulder belt guide (2) to the head restraint if required.
- Install the shoulder belt guide screws (1).
Notice: Use the correct fastener in the correct location. Replacement fasteners must be the correct part number for that application. Fasteners requiring replacement or fasteners requiring the use of thread locking compound or sealant are identified in the service procedure. Do not use paints, lubricants, or corrosion inhibitors on fasteners or fastener joint surfaces unless specified. These coatings affect fastener torque and joint clamping force and may damage the fastener. Use the correct tightening sequence and specifications when installing fasteners in order to avoid damage to parts and systems.
Tighten
Tighten the screws to 3 N·m (27 lb in).
