Liftgate Window Replacement Pontiac
Tools Required
| • | J 24402-A Glass
Sealant (Cold Knife) Remover |
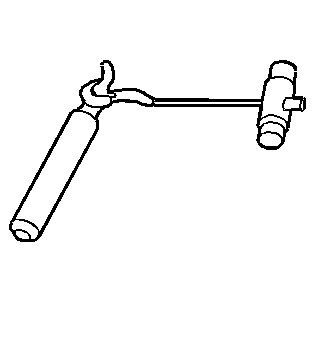
| • | J 39032 Stationary
Glass Removal Tool |
| • | Urethane Adhesive Kit GM P/N 12346392 or Equivalent |
| • | Cartridge-type Caulking Gun |
| • | Commercial-type Utility Knife |
Removal Procedure
Caution: If a window is cracked but still intact, crisscross the window with
masking tape in order to reduce the risk of damage or personal injury.
Important: Before cutting out a stationary window, apply a double layer of masking
tape around the perimeter of the painted surfaces and the interior trim.
- Open the liftgate.
- Remove the liftgate trim. Refer to
Liftgate Trim Panel Replacement
in Body Rear End.
- Remove the rear spoiler. Refer to
Rear Spoiler Replacement
in Body and Accessories-Body Rear End.
Caution: When working with any type of glass or sheet metal with exposed or rough
edges, wear approved safety glasses and gloves in order to reduce
the chance of personal injury.
Important: Care must be taken when cutting out the liftgate window not to damage
the reveal molding, the reveal molding is not serviced separately .
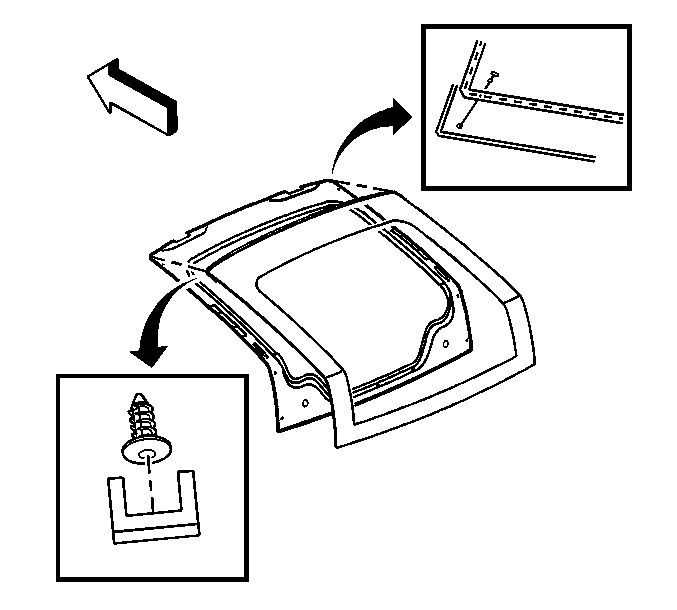
- Place the liftgate window face up on a soft protect cover.
- Remove the liftgate window and frame from the vehicle. Refer to
Liftgate Replacement
in Body Rear End.
Important: The liftgate window has locators at each corner that insert into the
liftgate window frame. The locators aid in the alignment of the liftgate
window.
- If the liftgate window is to be reused tape off the inside of the window
defogger grid and the electrical connectors.
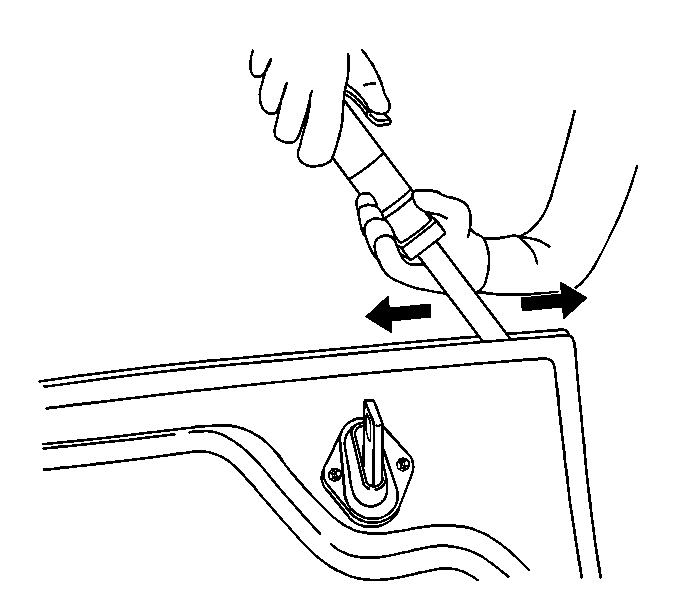
Important: Keep the cutting edge of the tool against the window. Care must be taken
so that the cutting blade doesn't cut through the reveal molding. Check the
depth of the cutting blade before starting.
- This will allow the urethane adhesive to be separated from the window.
| • | Leave a base of urethane on the pinchweld flange. |
| • | The only suitable lubrication is clear water. |
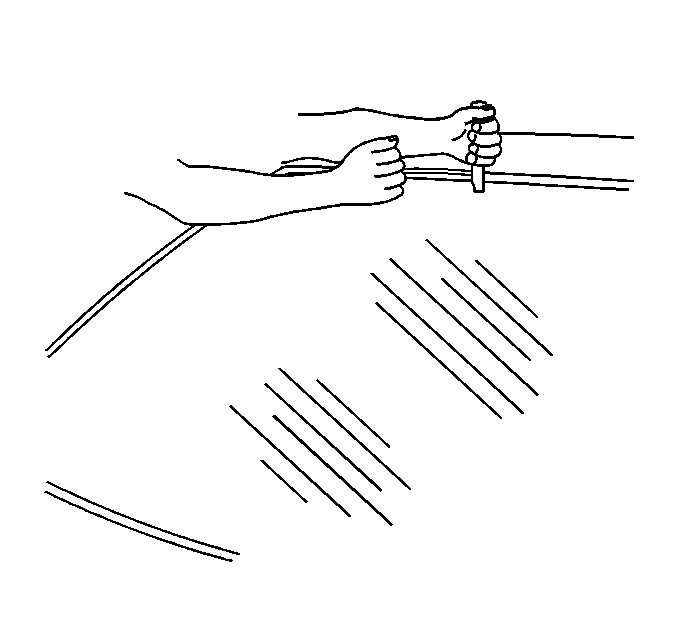
- With the aid of an assistant, remove the liftgate window from
the liftgate frame.
Installation Procedure
- Install a stationary window into the opening. Refer to
Adhesive Installation of Stationary Windows
.
- Install the liftgate window
and frame to the vehicle. Refer to
Liftgate Replacement
in Body Rear End.
- Install the rear spoiler. Refer to
Rear Spoiler Replacement
in Body and Accessories-Body Rear End.
- Install the liftgate trim. Refer to
Liftgate Trim Panel Replacement
in Body Rear End.
- Remove the double layer of masking tape around the perimeter of
the painted surfaces and the interior trim.
- Close the liftgate.
Liftgate Window Replacement Buick
Tools Required
| • | J 39032 Stationary
Glass Removal Tool |
| • | Urethane Adhesive Kit GM P/N 12346392 or Equivalent |
| • | Cartridge-type Caulking Gun |
| • | Commercial-type Utility Knife |
Removal Procedure
Caution: If a window is cracked but still intact, crisscross the window with
masking tape in order to reduce the risk of damage or personal injury.
Important: Before cutting out a stationary window, apply a double layer of masking
tape around the perimeter of the painted surfaces and the interior trim.
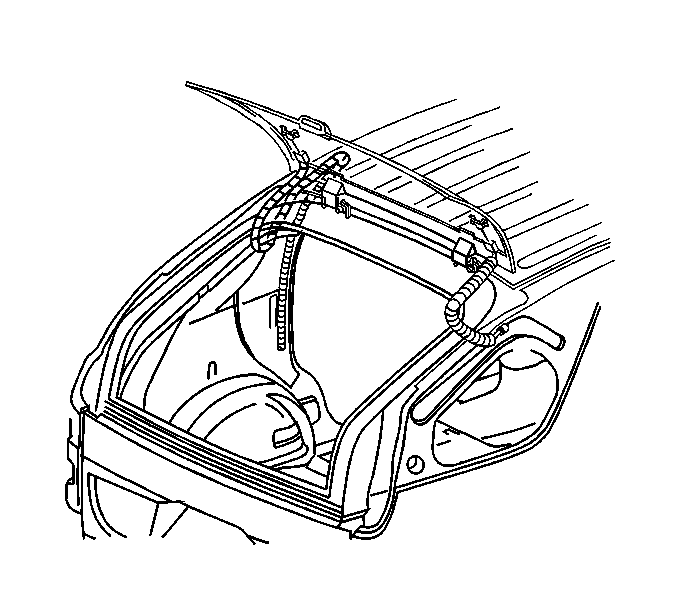
- Remove the rear wiper motor. Refer to
Rear Window Wiper Motor Replacement
in Wipers/Washer Systems.
- Remove the center light applique.
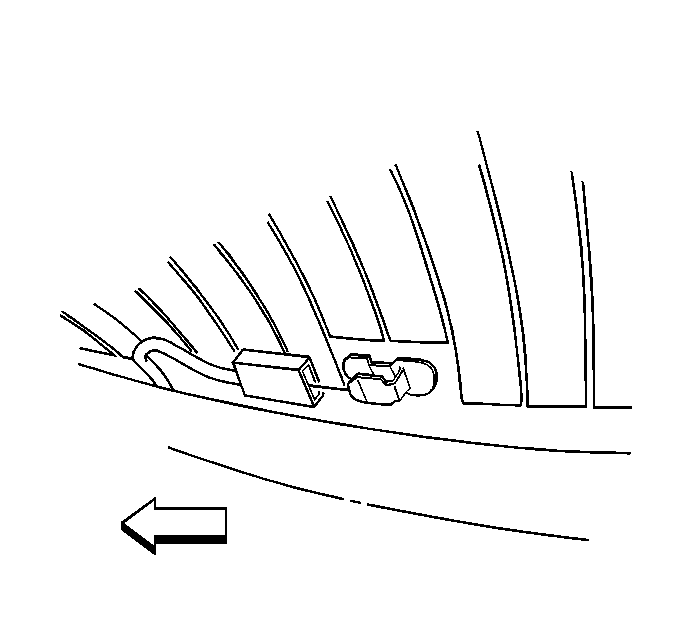
- Disconnect the rear liftgate
window defogger connectors from the right and the left sides.
- Tape off and protect the inner edges of the rear window defogger
grid lines from the window removal tool.
Caution: When working with any type of glass or sheet metal with exposed or rough
edges, wear approved safety glasses and gloves in order to reduce
the chance of personal injury.
Important: Keep the cutting edge of the tool against the window. Inspect the depth
of the cutting blade before starting.
- Separate the urethane adhesive from the window:
| • | Leave a base of urethane on the pinchweld flange. |
| • | The only suitable lubrication is clear water. |
- With the aid of an assistant,
remove the liftgate window from the liftgate.
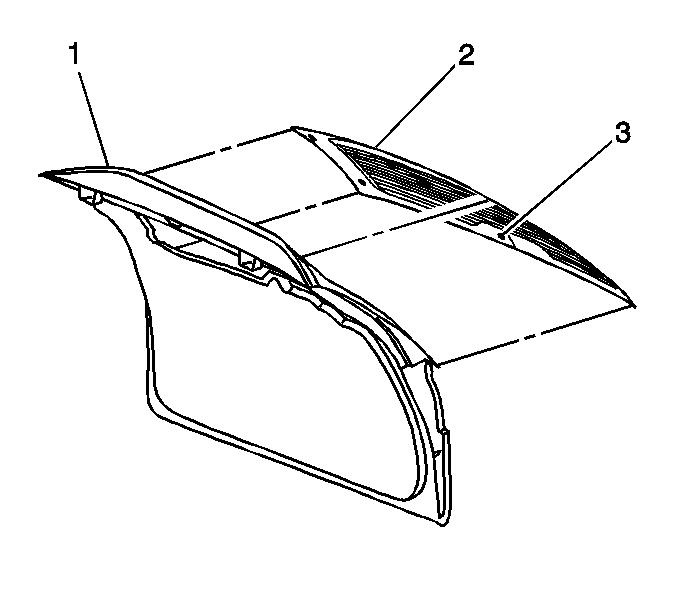
Place the liftgate
window (2) face up on a soft protective cover.
Installation Procedure
- Install a stationary window into the opening. Refer to
Adhesive Installation of Stationary Windows
.
- Connect the rear liftgate
window defogger connectors to the right and left sides.
- Install the center light applique.
- Install the rear wiper motor. Refer to
Rear Window Wiper Motor Replacement
in Wipers/Washer Systems.
- Remove the double layer of masking tape around the perimeter of
the painted surfaces and the interior trim.
- Close the liftgate.
