For 1990-2009 cars only
Tools Required
J 39400-A Halogen Leak Detector
Removal Procedure
- Disconnect the negative battery cable. Refer to Battery Negative Cable Disconnection and Connection in Engine Electrical.
- Recover the A/C system. Refer to Refrigerant Recovery and Recharging .
- Drain the engine coolant. Refer to Cooling System Draining and Filling in Engine Cooling.
- Raise and support the vehicle. Refer to Lifting and Jacking the Vehicle in General Information.
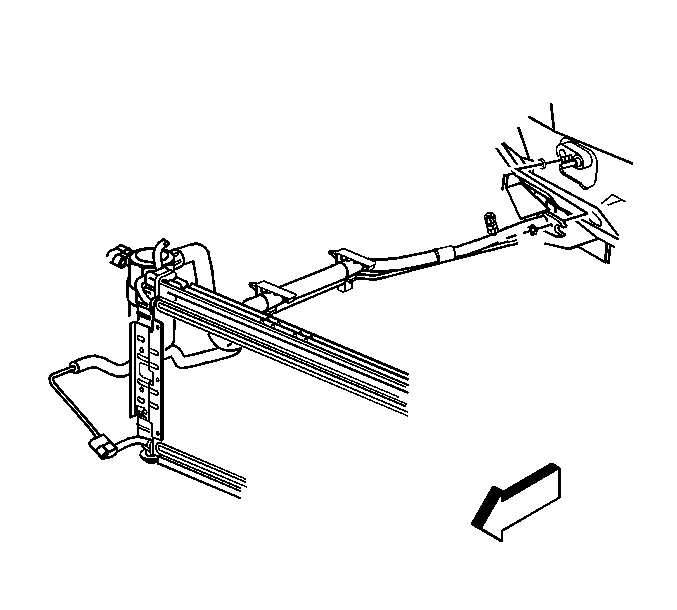
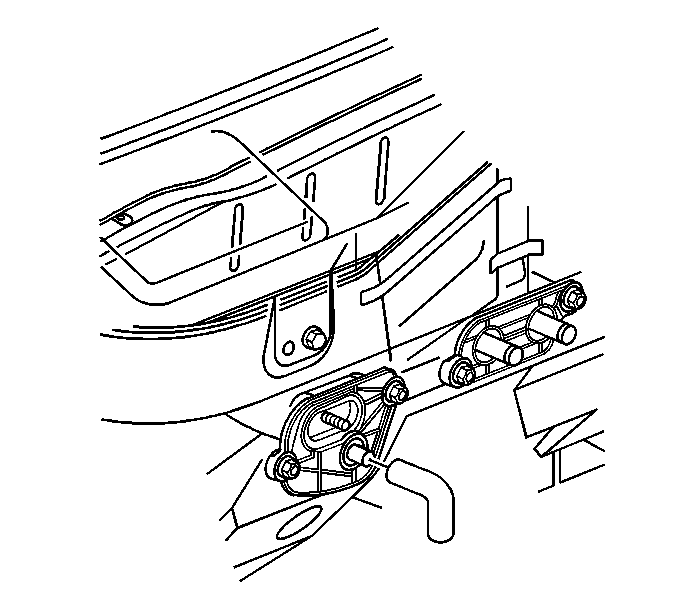
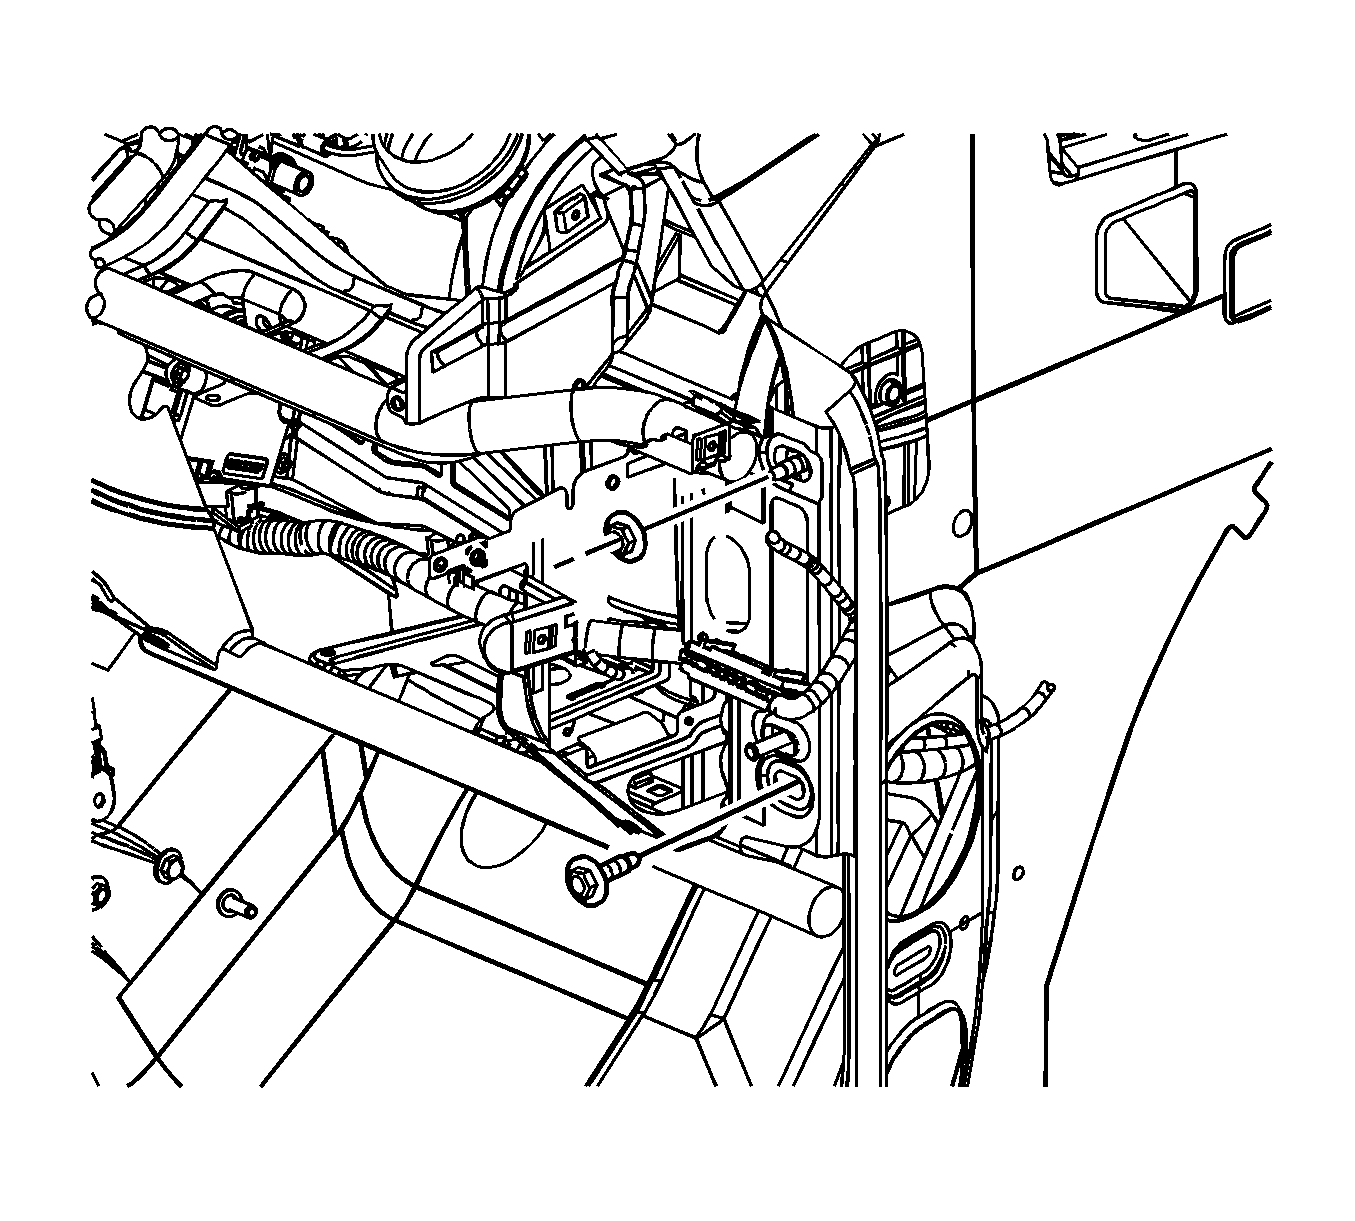
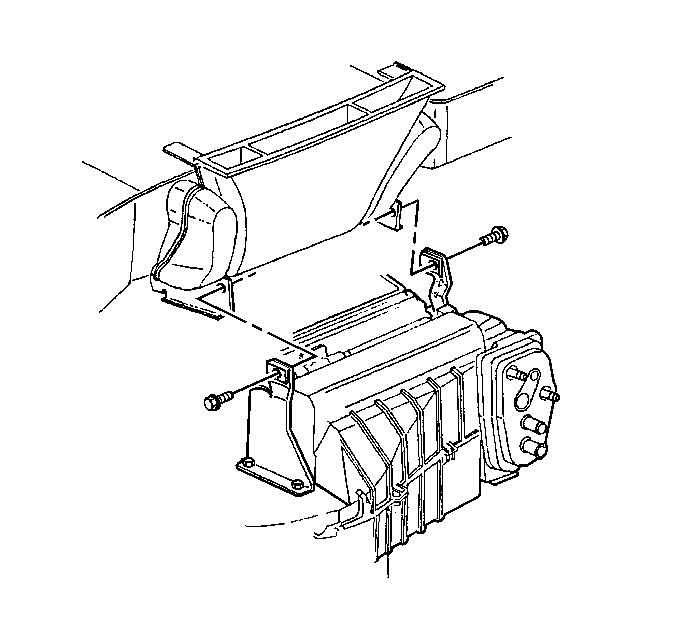
- Remove the evaporator hose assembly nut from the evaporator.
- Remove the evaporator hose assembly from the evaporator.
- Remove and discard the seal washers.
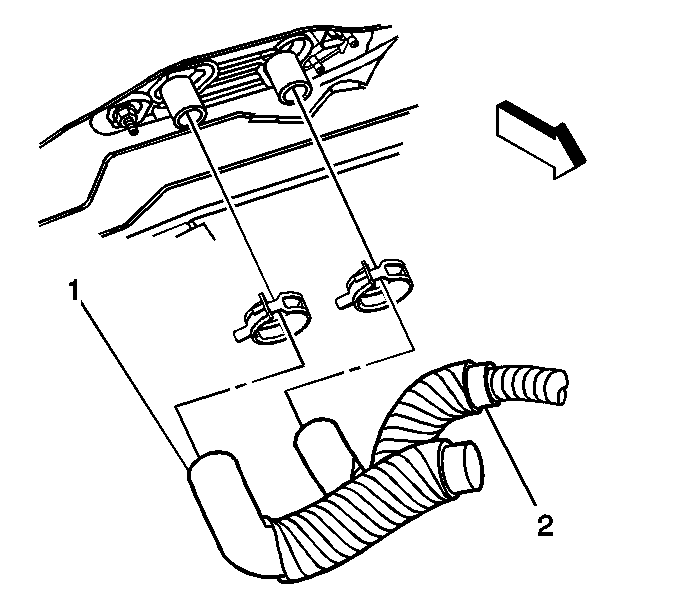
- Remove the inlet heater hose from the heater core.
- Remove the outlet heater hose from the heater core.
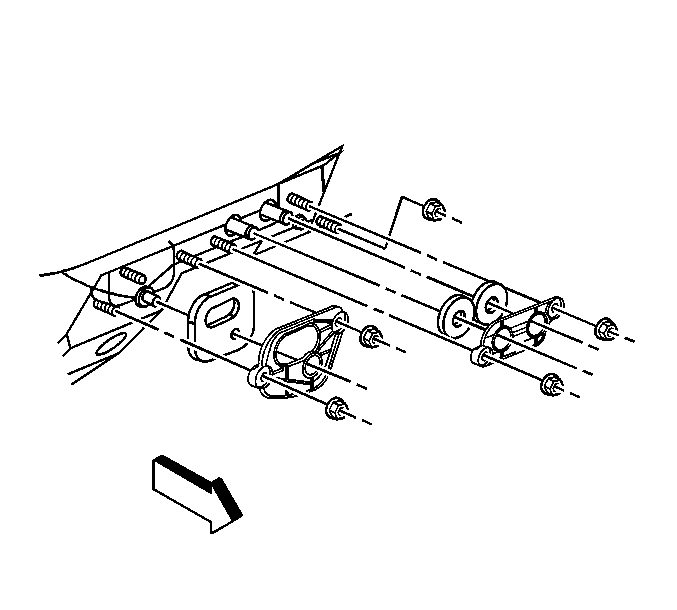
- Remove the drain tube elbow from the evaporator block heater case plate.
- Remove the nuts holding the heater case plate for the heater pipes.
- Remove the heater case plate and the seals for the heater pipes.
- Remove the nuts holding the heater case plate for the evaporator block.
- Remove the heater case plate and seal for the evaporator block.
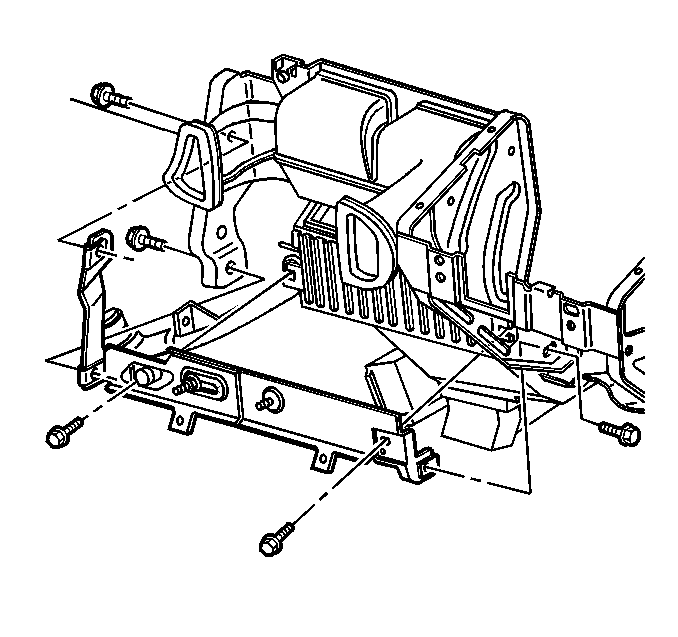
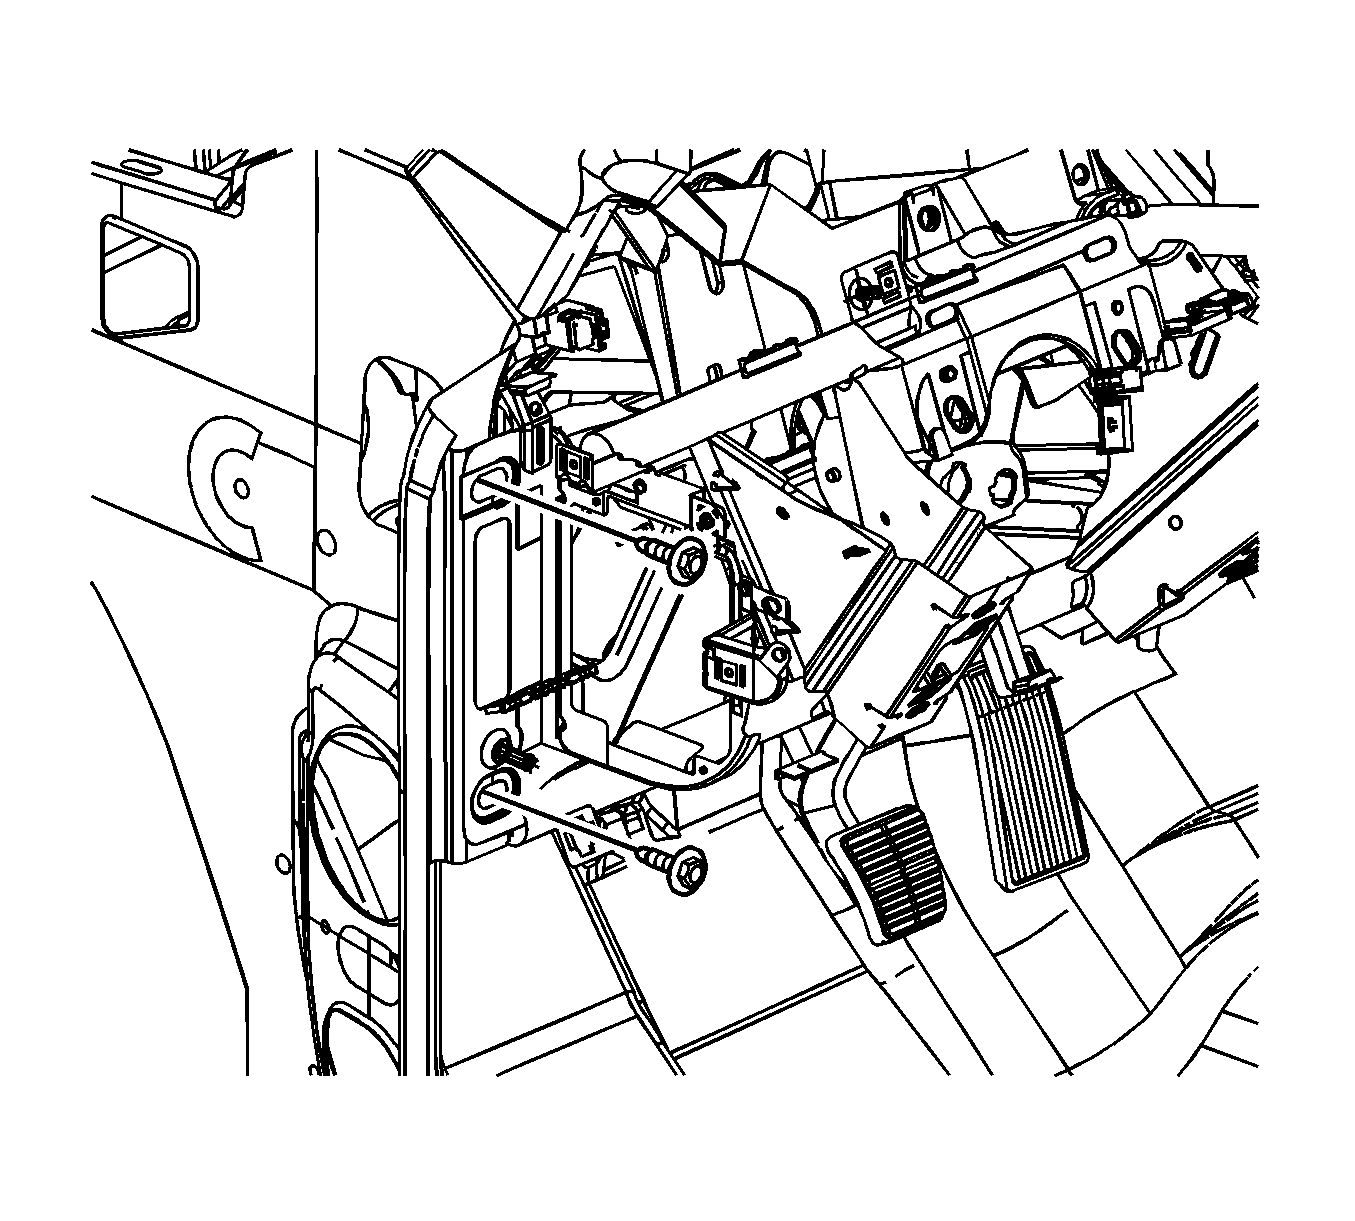
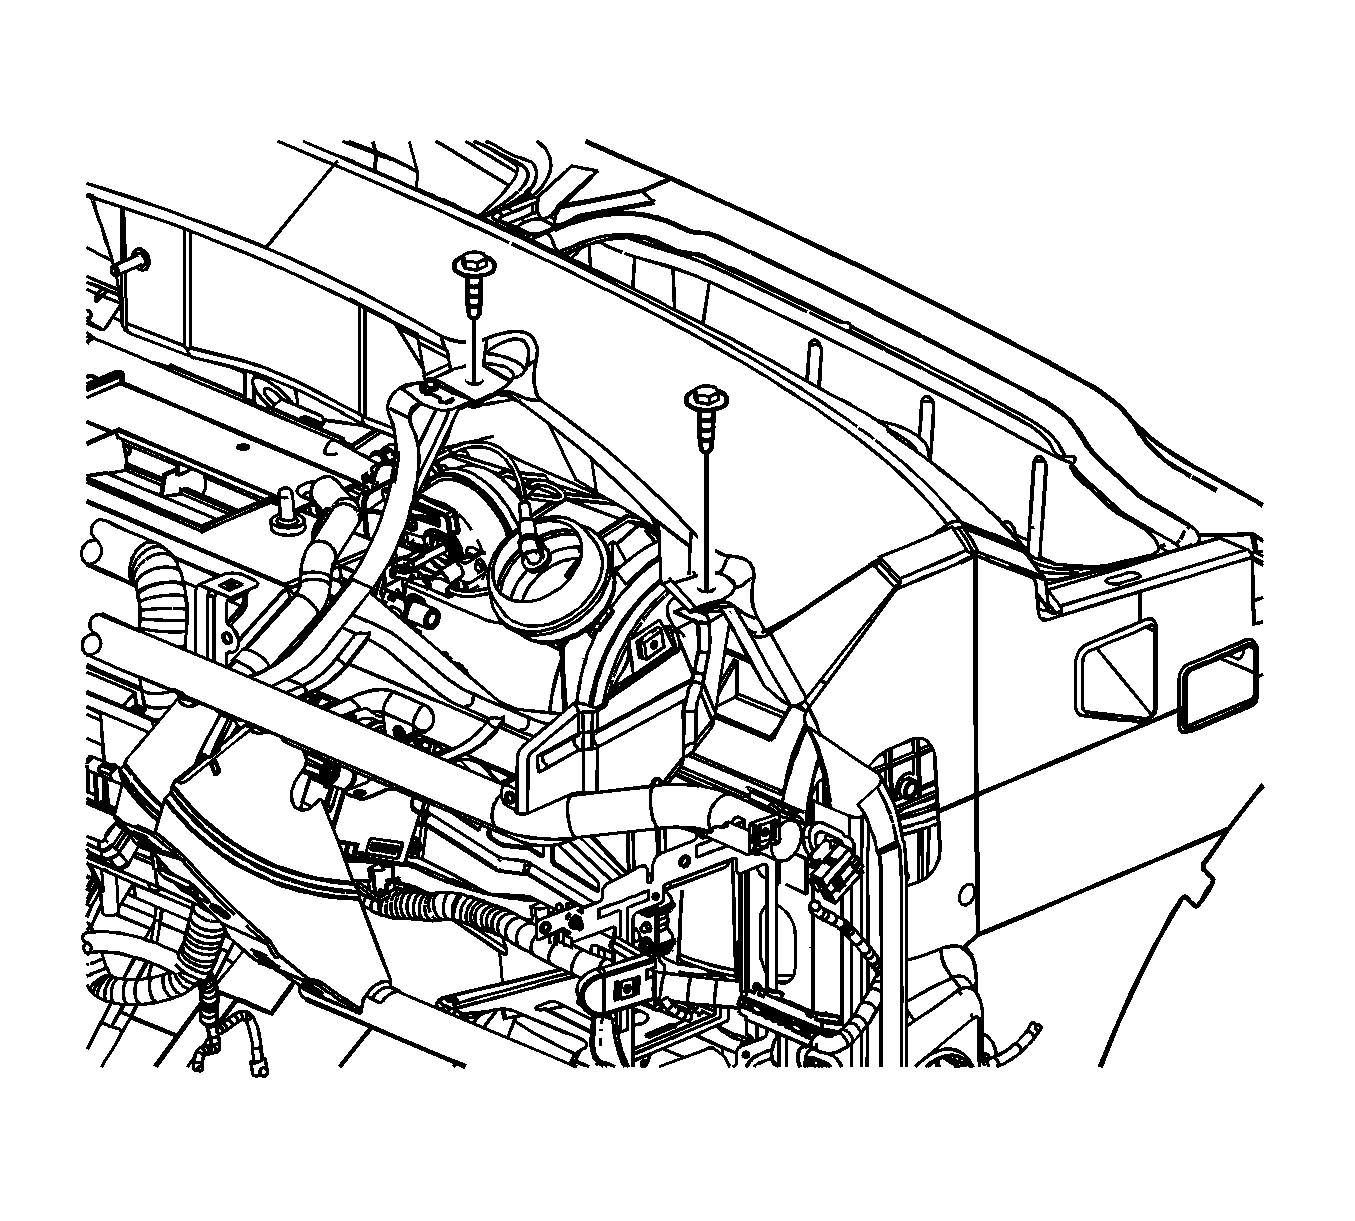
- Remove the nut for the HVAC module assembly bracket.
- Lower the vehicle.
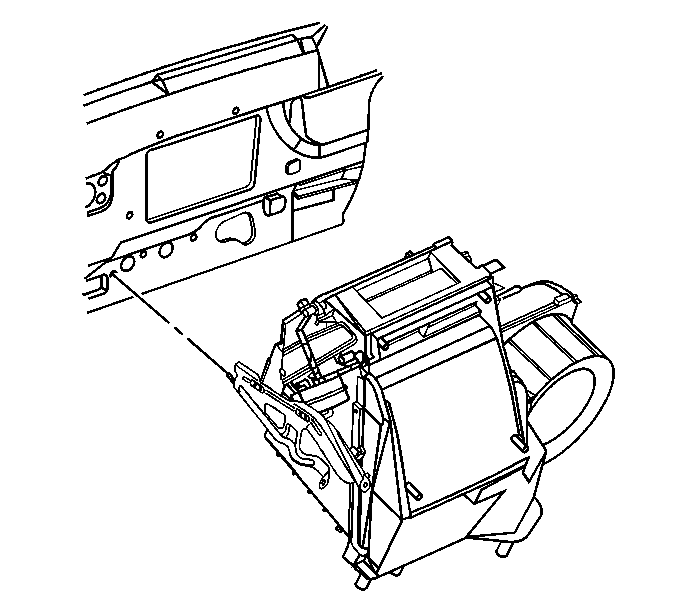
- Remove the air distribution duct. Refer to Air Distributor Duct Replacement .
- Remove the floor air duct from the HVAC module assembly. Refer to Floor Air Outlet Replacement .
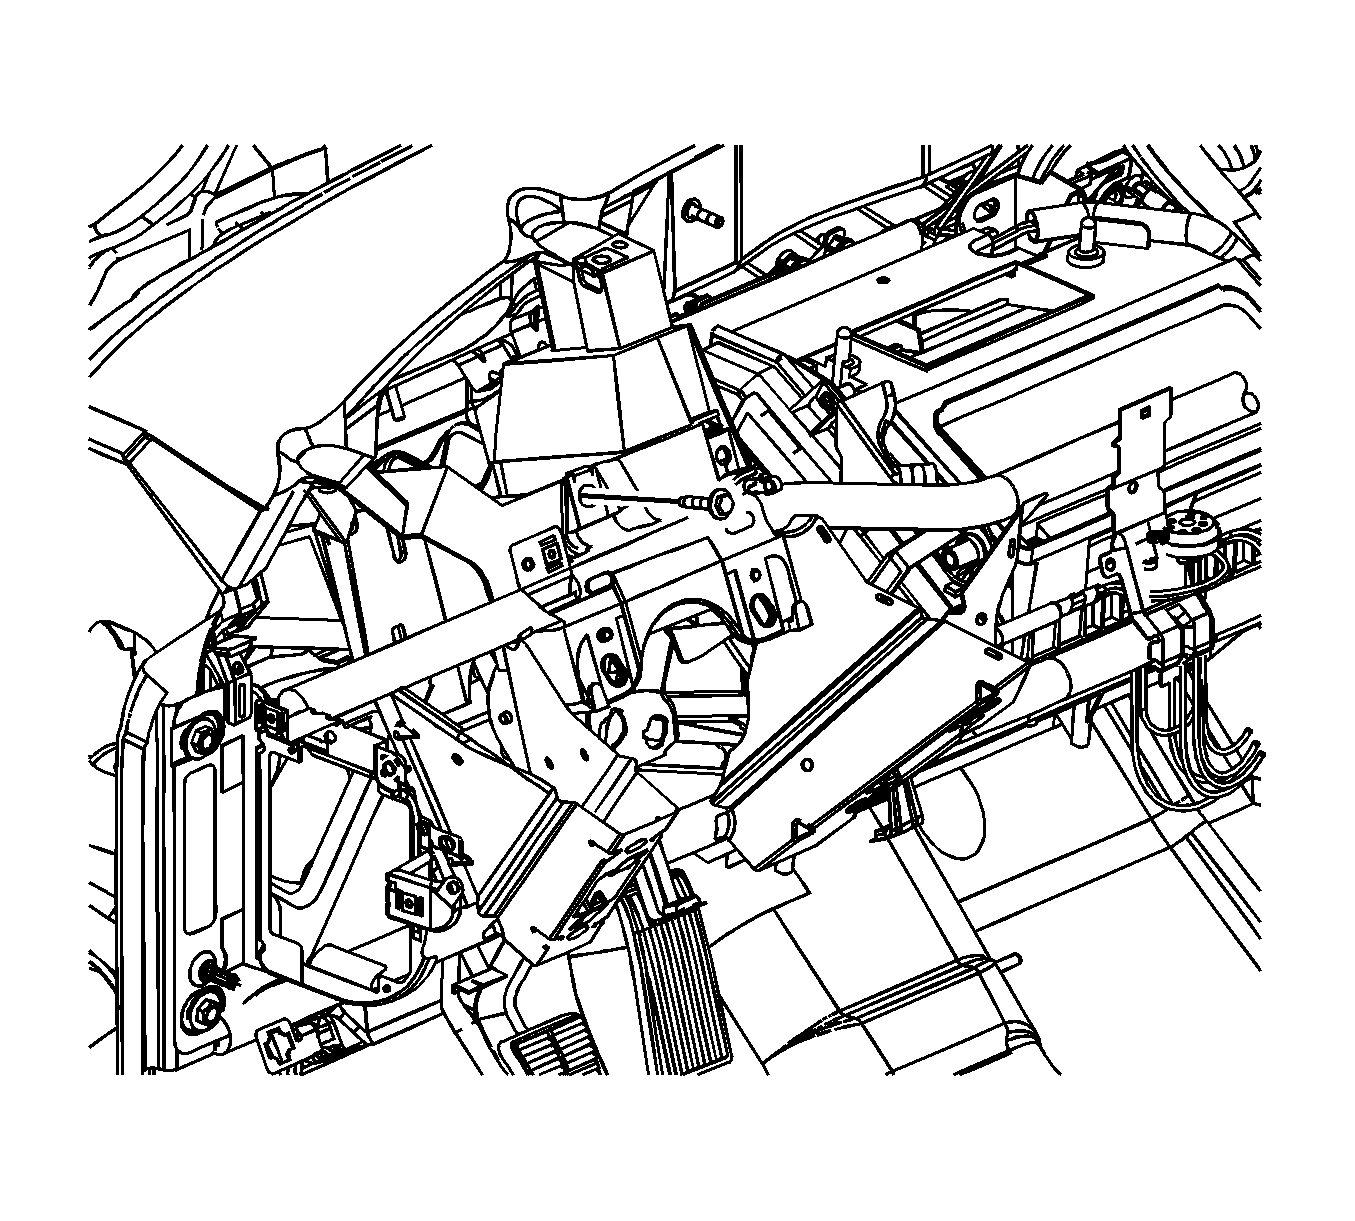
- Disconnect the wiring harness from the cross vehicle beam.
- Remove the steering column. Refer to Steering Column Replacement in Steering Wheel and Column.
- Remove the bolts retaining the cross vehicle beam to the steering column support bracket.
- Remove the HVAC module center support bracket.
- Remove the bolts from the bracket joining the cross vehicle beam to the HVAC module (3).
- Remove the bolts retaining the cross vehicle beam to the LH hinge pillar.
- Remove the bolt and nut retaining the cross vehicle beam to the RH hinge pillar.
- Remove the bolts retaining the cross vehicle beam to the cowl.
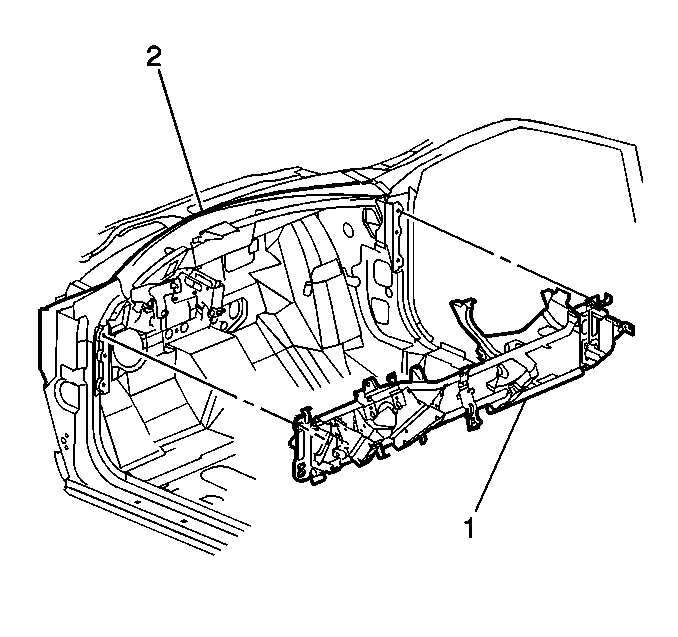
- Remove the cross vehicle beam from the vehicle (1).
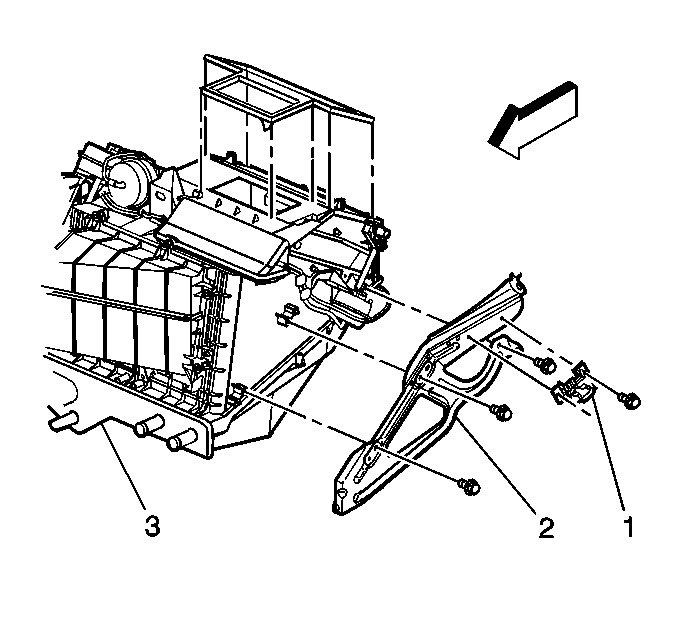
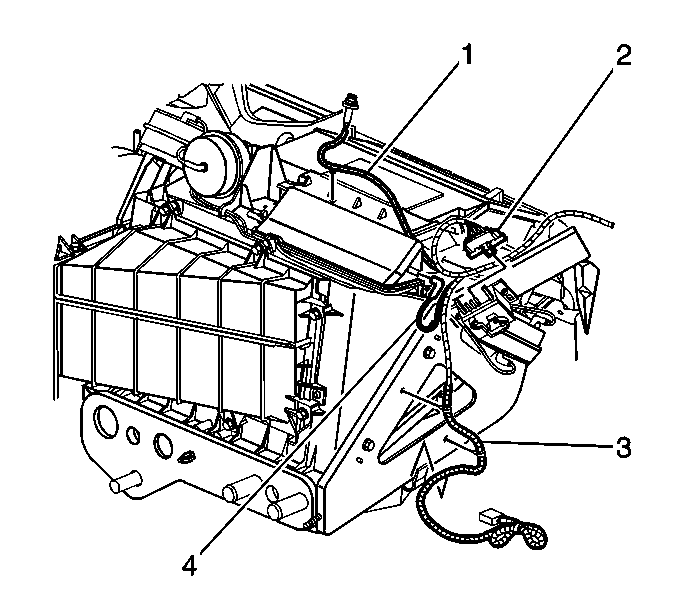
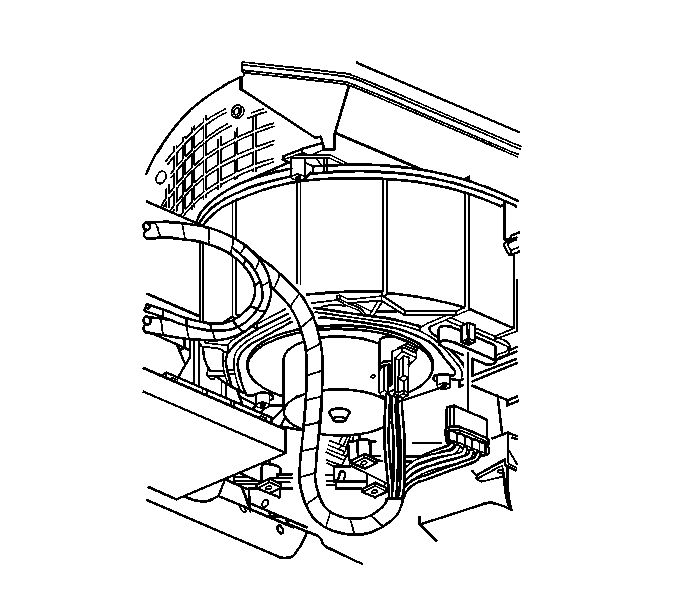
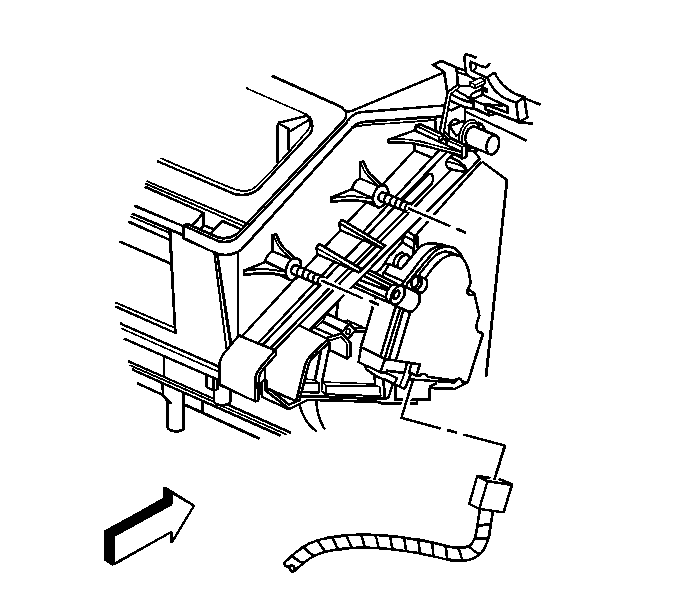
- Remove the daytime running lights (DRL) sensor wiring harness clip (1) from the HVAC module assembly.
- Disconnect the I/P lamp dimmer switch electrical connector (2).
- Remove the wiring harness clips (3) from the HVAC module assembly bracket.
- Disconnect the vacuum hose (4) from the vacuum tank.
- Disconnect the blower motor resistor electrical connector.
- Disconnect the blower motor electrical connector.
- Disconnect the temperature actuator electrical connector.
- Remove the HVAC module assembly.
Important: Note the routing of the wiring harness to ensure proper installation.
Installation Procedure
- Position the HVAC module assembly to the vehicle.
- Connect the temperature actuator electrical connector.
- Connect the blower motor resistor electrical connector.
- Connect the blower motor electrical connector.
- Install the wiring harness clips (3) to the HVAC module assembly bracket.
- Install the daytime running lights (DRL) sensor wiring harness clip (1) from the HVAC module assembly.
- Connect the I/P lamp dimmer switch electrical connector (2).
- Install the vacuum hose (4) to the vacuum tank.
- Position the cross vehicle beam (1) to the hinge pillar.
- Install the cross vehicle beam to the RH hinge pillar retaining bolt and nut; do not tighten.
- Install the cross vehicle beam to cowl retaining bolts.
- Install the cross vehicle beam to steering column bracket retaining bolt.
- Install the cross vehicle beam to the LH hinge pillar retaining bolts.
- Tighten the bolts and nut retaining the cross vehicle beam to the vehicle.
- Install the HVAC module to the cross vehicle beam retaining bolts.
- Install the HVAC module center support bracket.
- Install the HVAC module center support bracket retaining bolts.
- Install the steering column. Refer to Steering Column Replacement in Steering Wheel and Column.
- Install the instrument panel wiring harness into position and secure the retaining clips.
- Install the floor air duct to the HVAC module assembly. Refer to Floor Air Outlet Replacement .
- Install the air distribution duct. Refer to Air Distributor Duct Replacement .
- Raise the vehicle.
- Install the nut for the HVAC module assembly bracket.
- Install the heater core case plate and the seals for the heater pipes.
- Install the nuts holding the heater core case plate for the heater pipes.
- Install the heater core case plate and seal for the evaporator block.
- Install the nuts holding the heater core case plate for the evaporator block.
- Install the drain tube elbow to the heater core case plate for the evaporator block.
- Install new sealing washers.
- Install the evaporator hose to the evaporator.
- Install the evaporator hose nut to the evaporator.
- Install the outlet heater hose to the heater core.
- Install the inlet heater hose to the heater core.
- Lower the vehicle.
- Connect the negative battery cable. Refer to Battery Negative Cable Disconnection and Connection in Engine Electrical.
- Fill the engine cooling system. Refer to Cooling System Draining and Filling in Engine Cooling.
- Evacuate and recharge the refrigerant system. Refer to Refrigerant Recovery and Recharging .
- Leak test the fittings of the component using the J 39400-A .
Important: Do not tighten bolts until step 14.
Notice: Refer to Fastener Notice in the Preface section.
Tighten
| • | Hinge pillar bolts and nut 20 N·m (15 lb ft). |
| • | Cross vehicle beam to cowl 10 N·m (89 lb in). |
| • | Cross vehicle beam to steering column bracket 20 N·m (15 lb ft). |
Tighten
Tighten the bolts to 10 N·m (89 lb in).
Tighten
Tighten the bolts to 10 N·m (89 lb in).
Tighten
Tighten the bracket nut to 10 N·m (88 lb in).
Tighten
Tighten the nuts to 10 N·m (88 lb in).
Tighten
Tighten the nut to 25 N·m (18 lb ft).
