Removal Procedure
- Open the sunshade to the full open position.
- Open the sunroof window to the full open position.
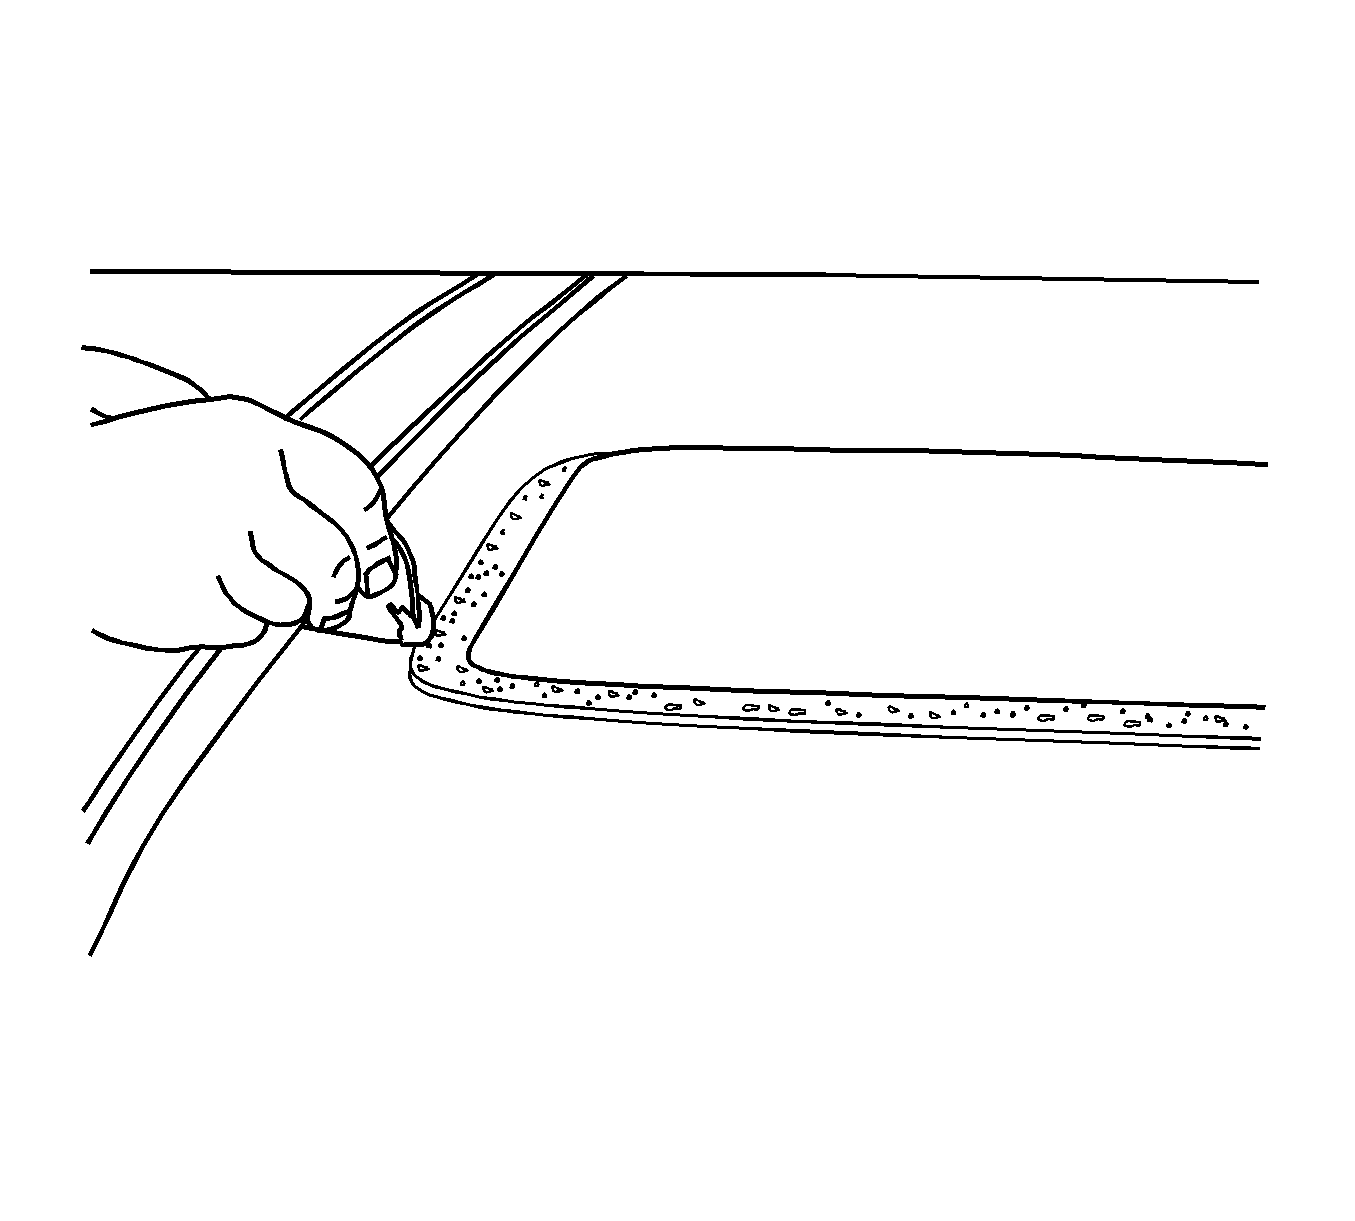
- Remove the sunroof front trim cover. Refer to Sunroof Front Trim Cover Replacement .
- Remove the sunroof motor. Refer to Power Sunroof Motor Replacement .
- Remove the screws from around the lower frame. Refer to Sunroof Frame Replacement - Lower .
- Remove the sunroof module and window from the vehicle.
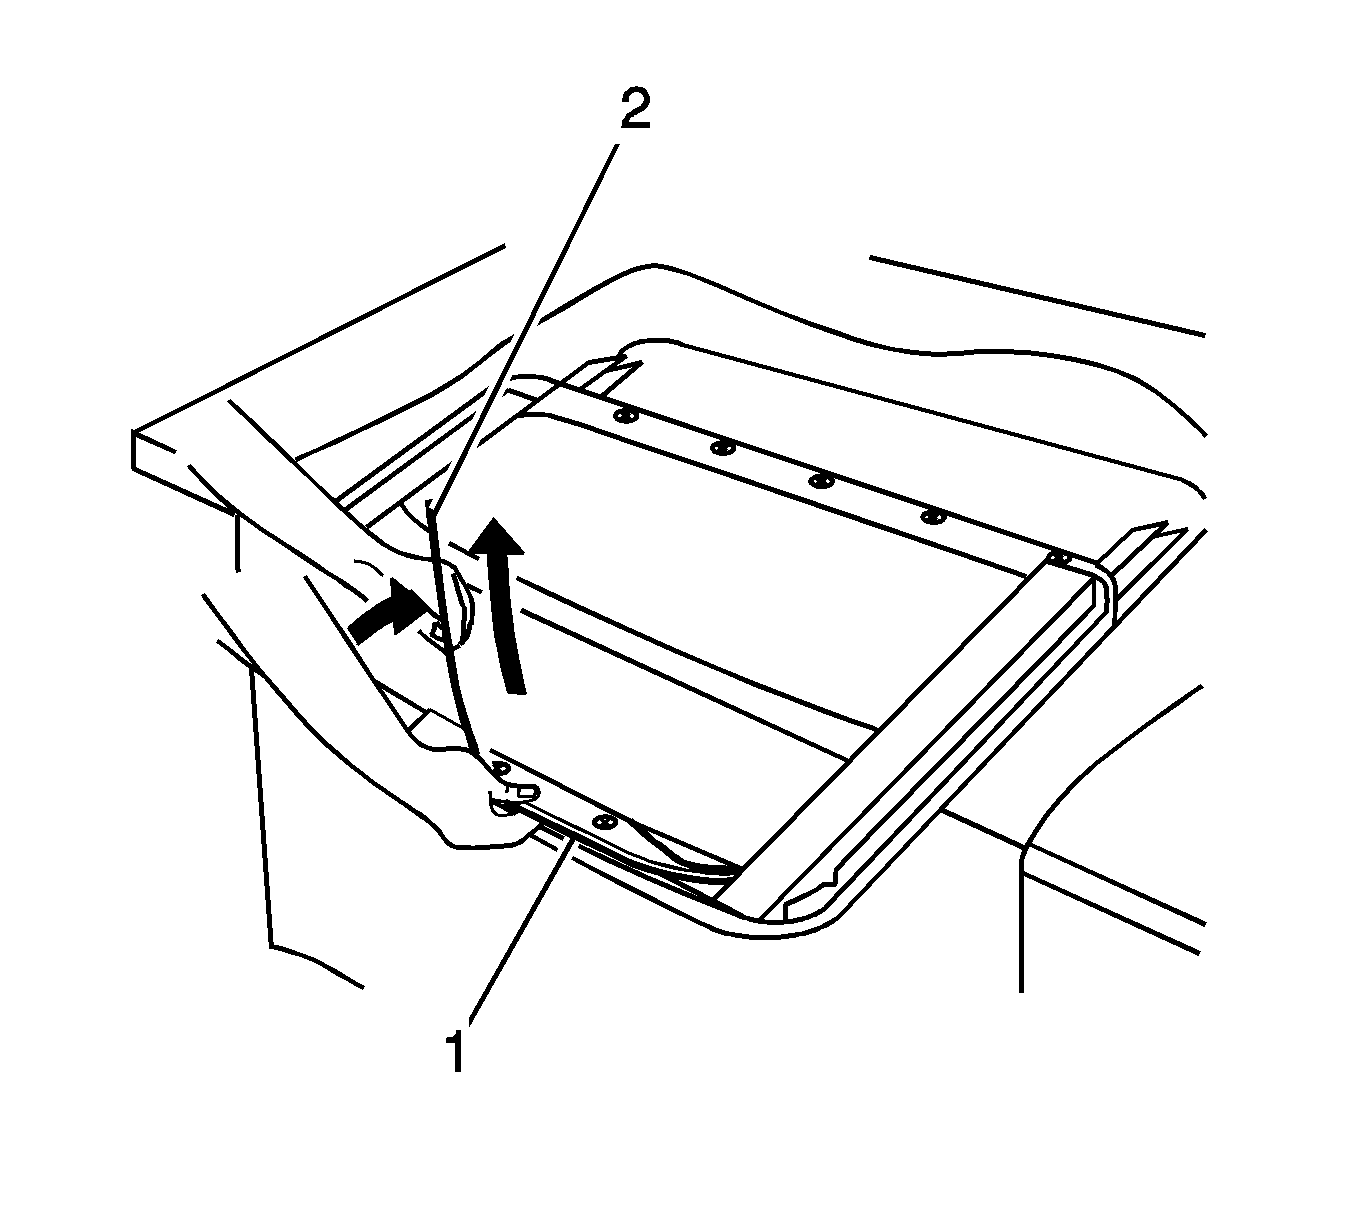
- Remove the cam plate screws (1).
- Remove the cam plate (2).
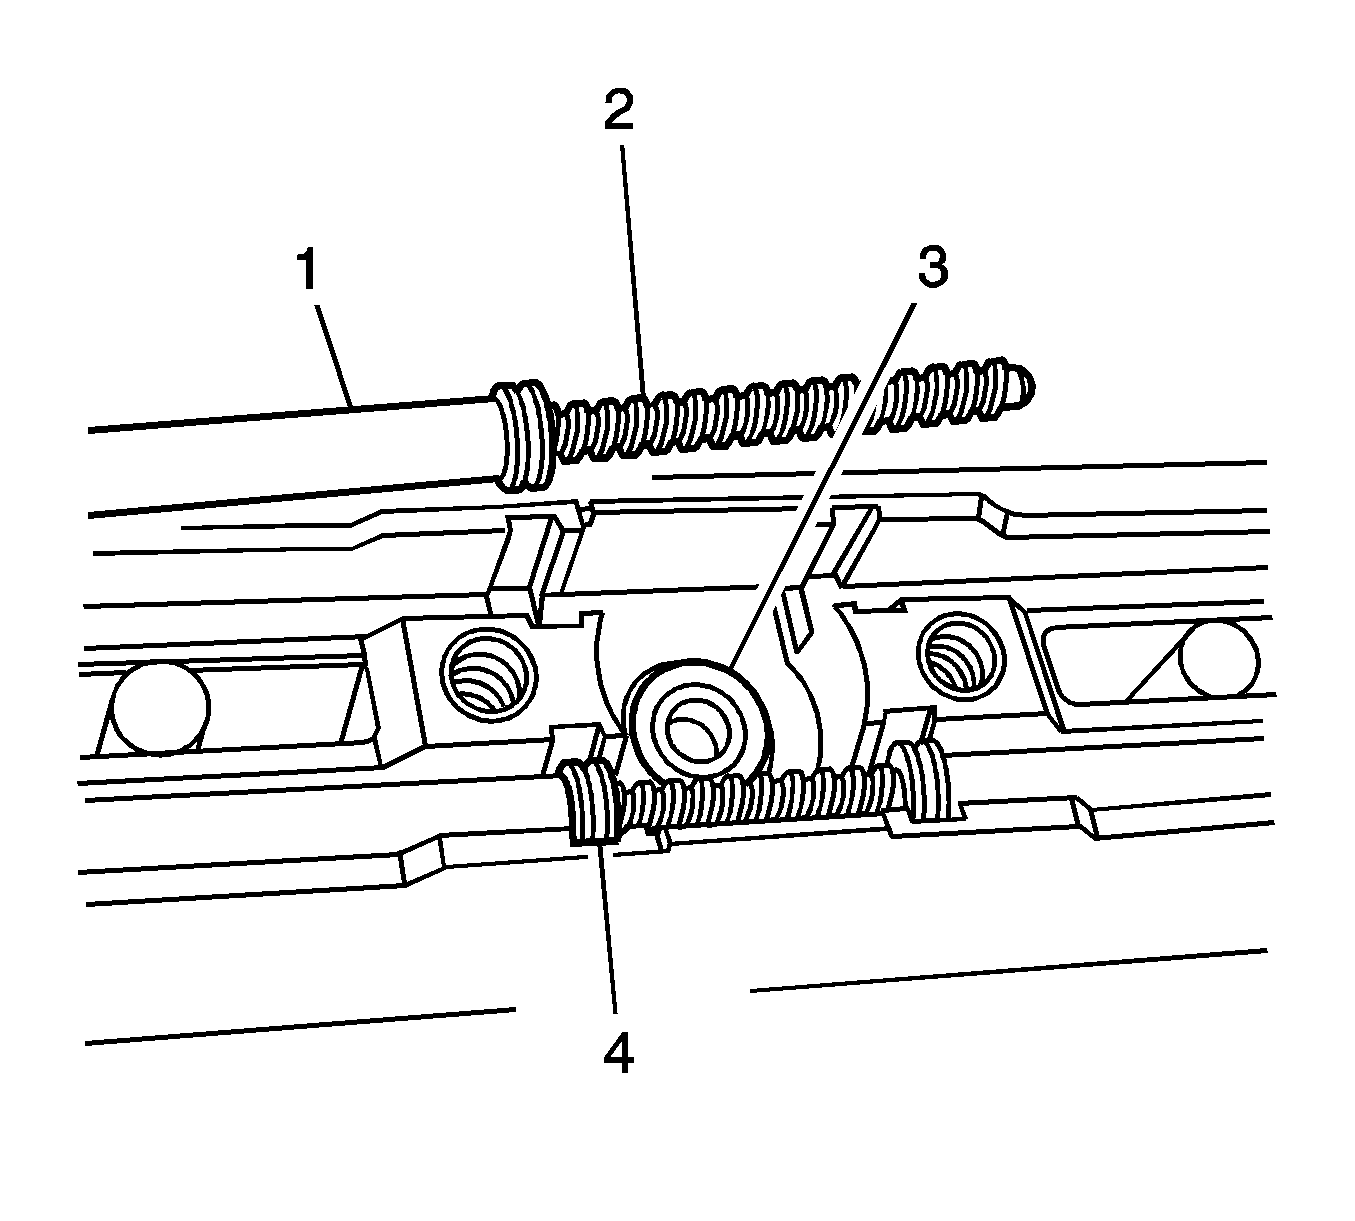
- Lift upward on the drive cables (2) to release the cam (3) from the upper frame.
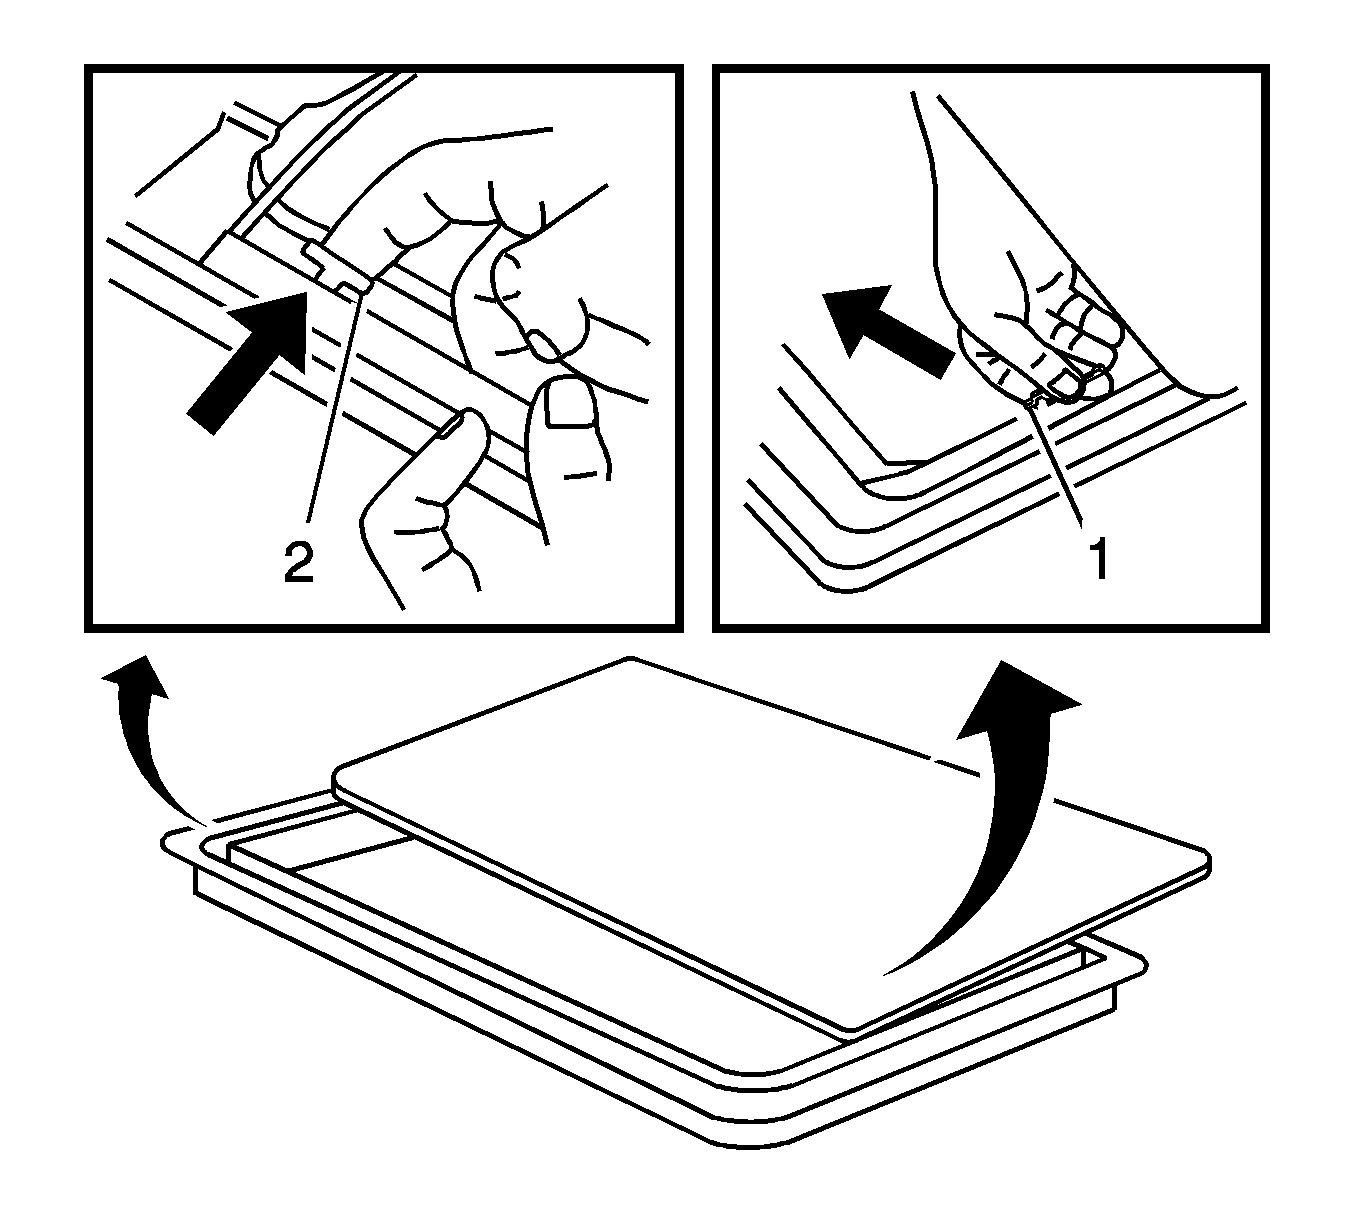
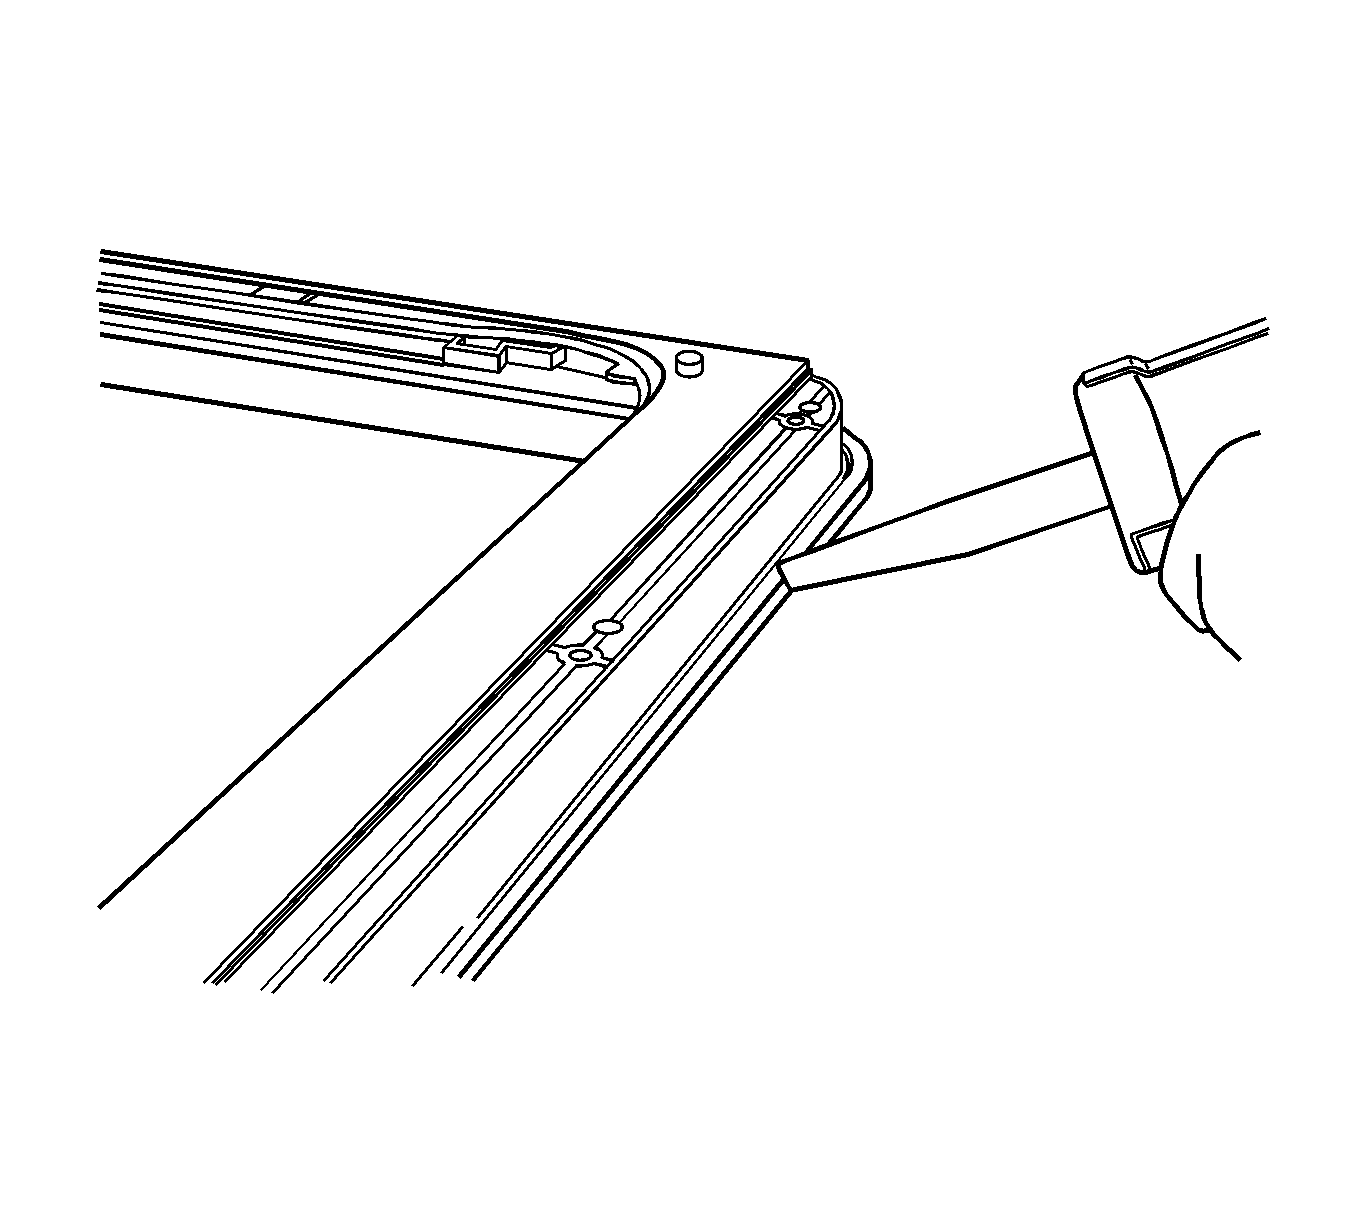
- Remove the left and right side drive cable tube covers (1), two on each side.
- Push the drive cables up into the upper frame, this will allow the window to open manually.
- The sunroof window must be in the full open position to do the following:
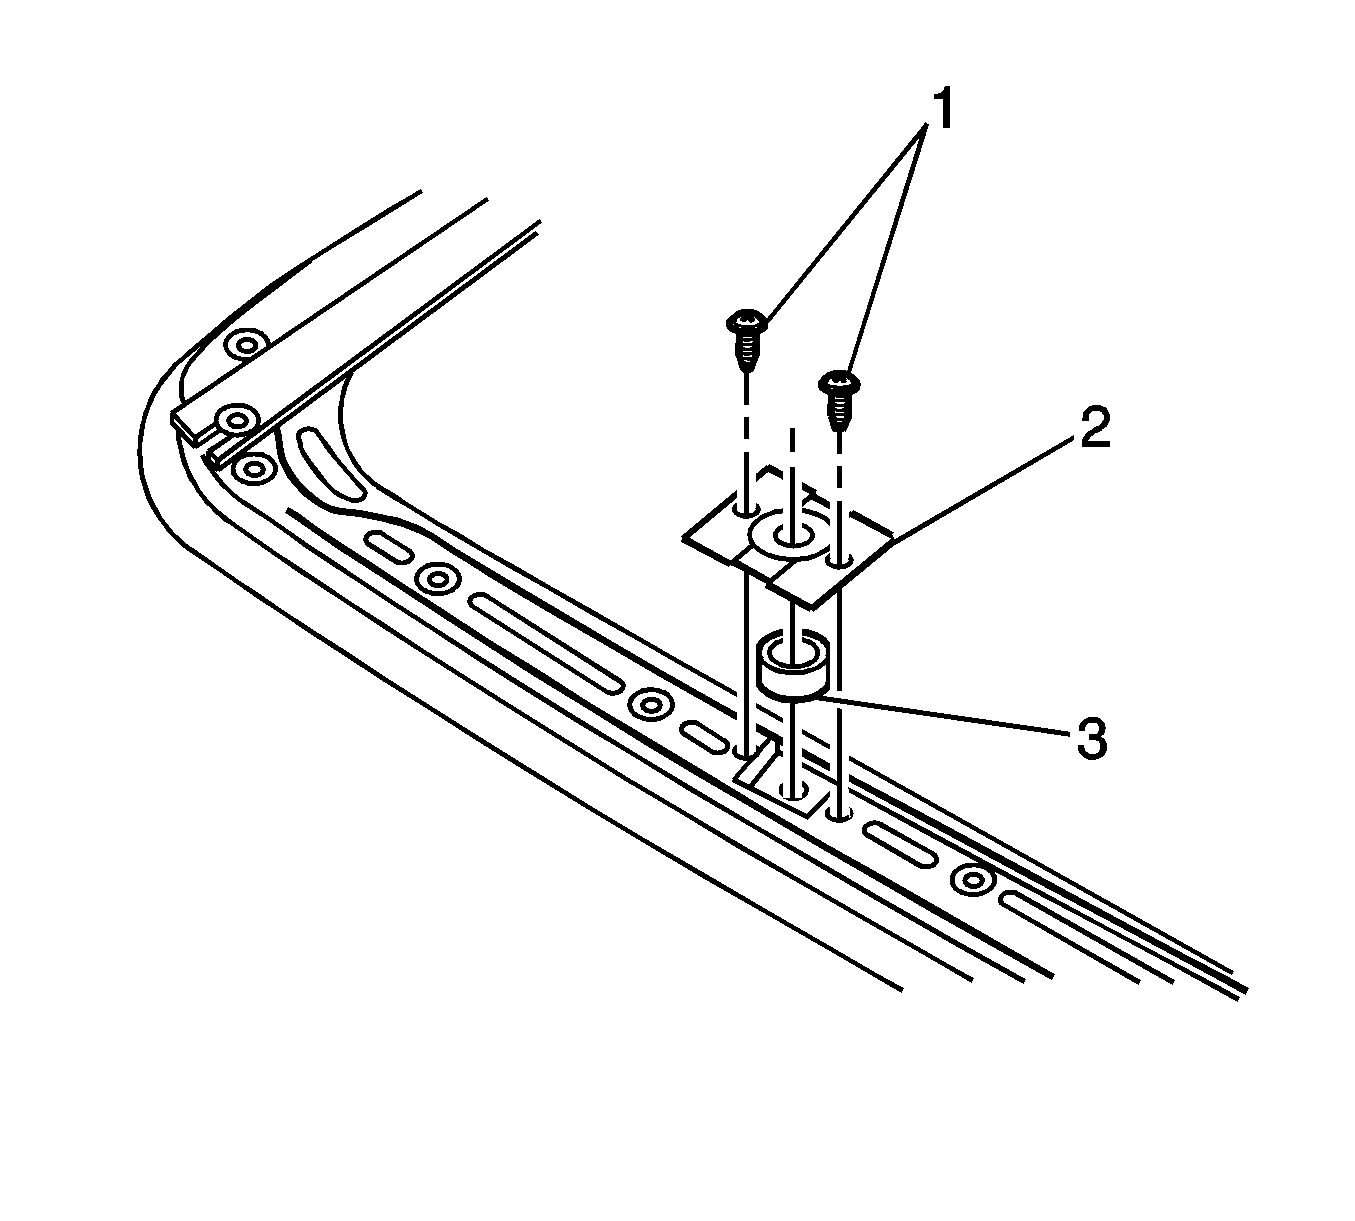
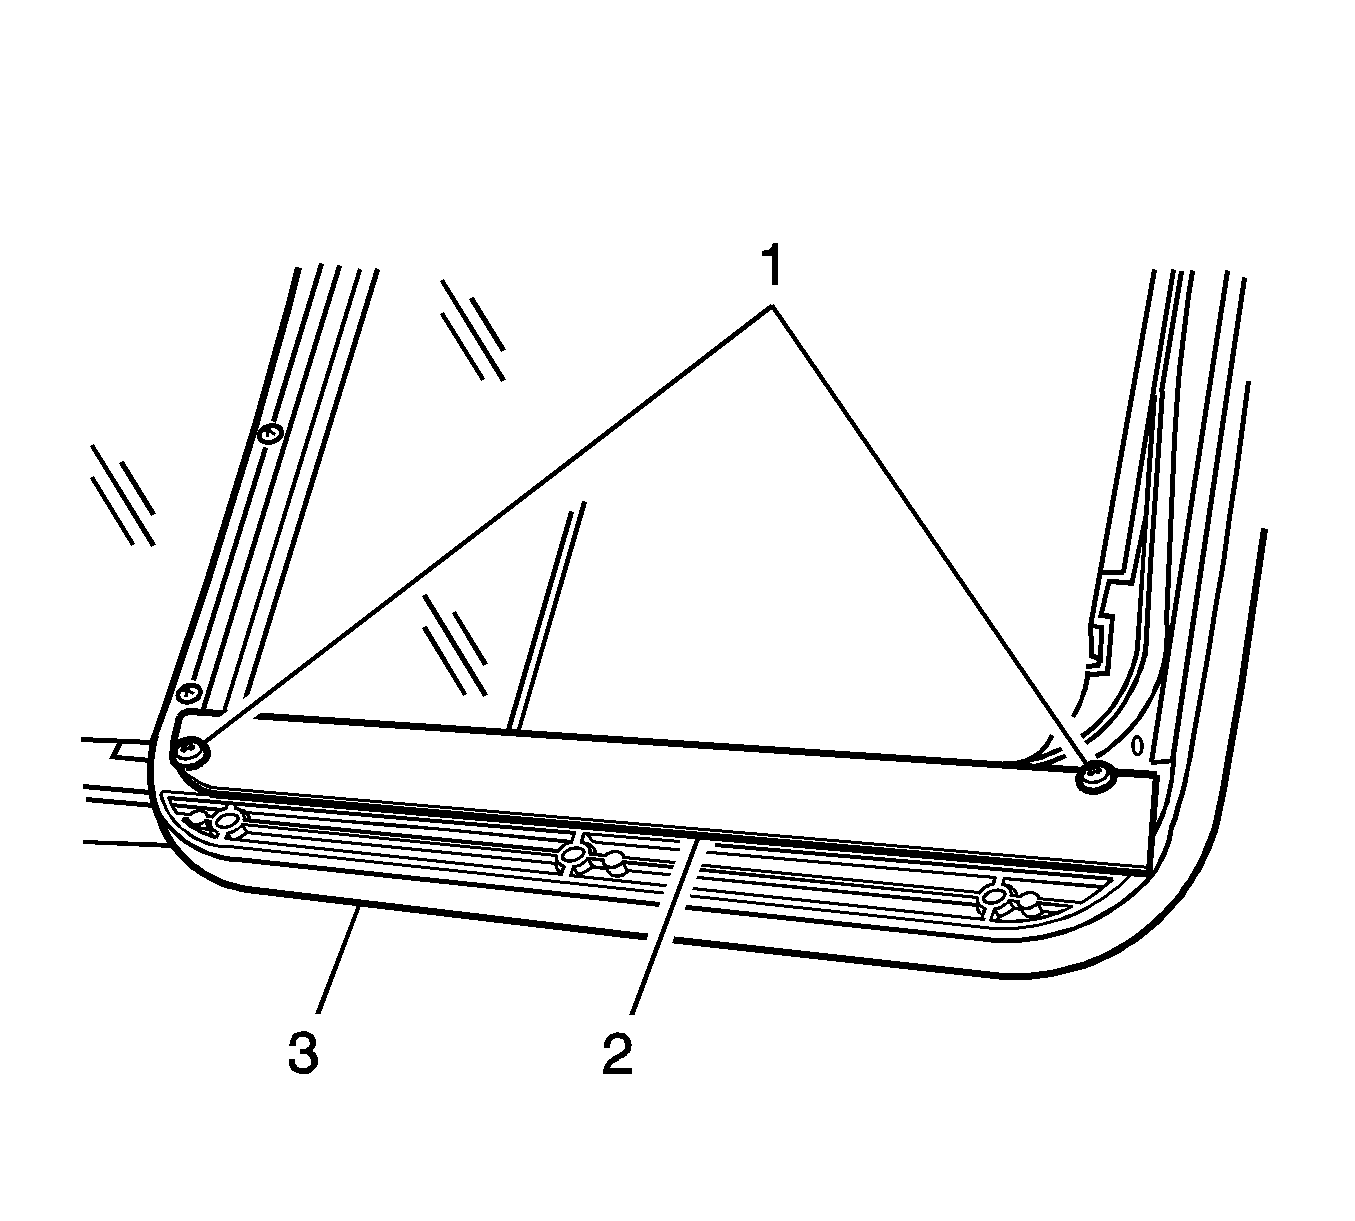
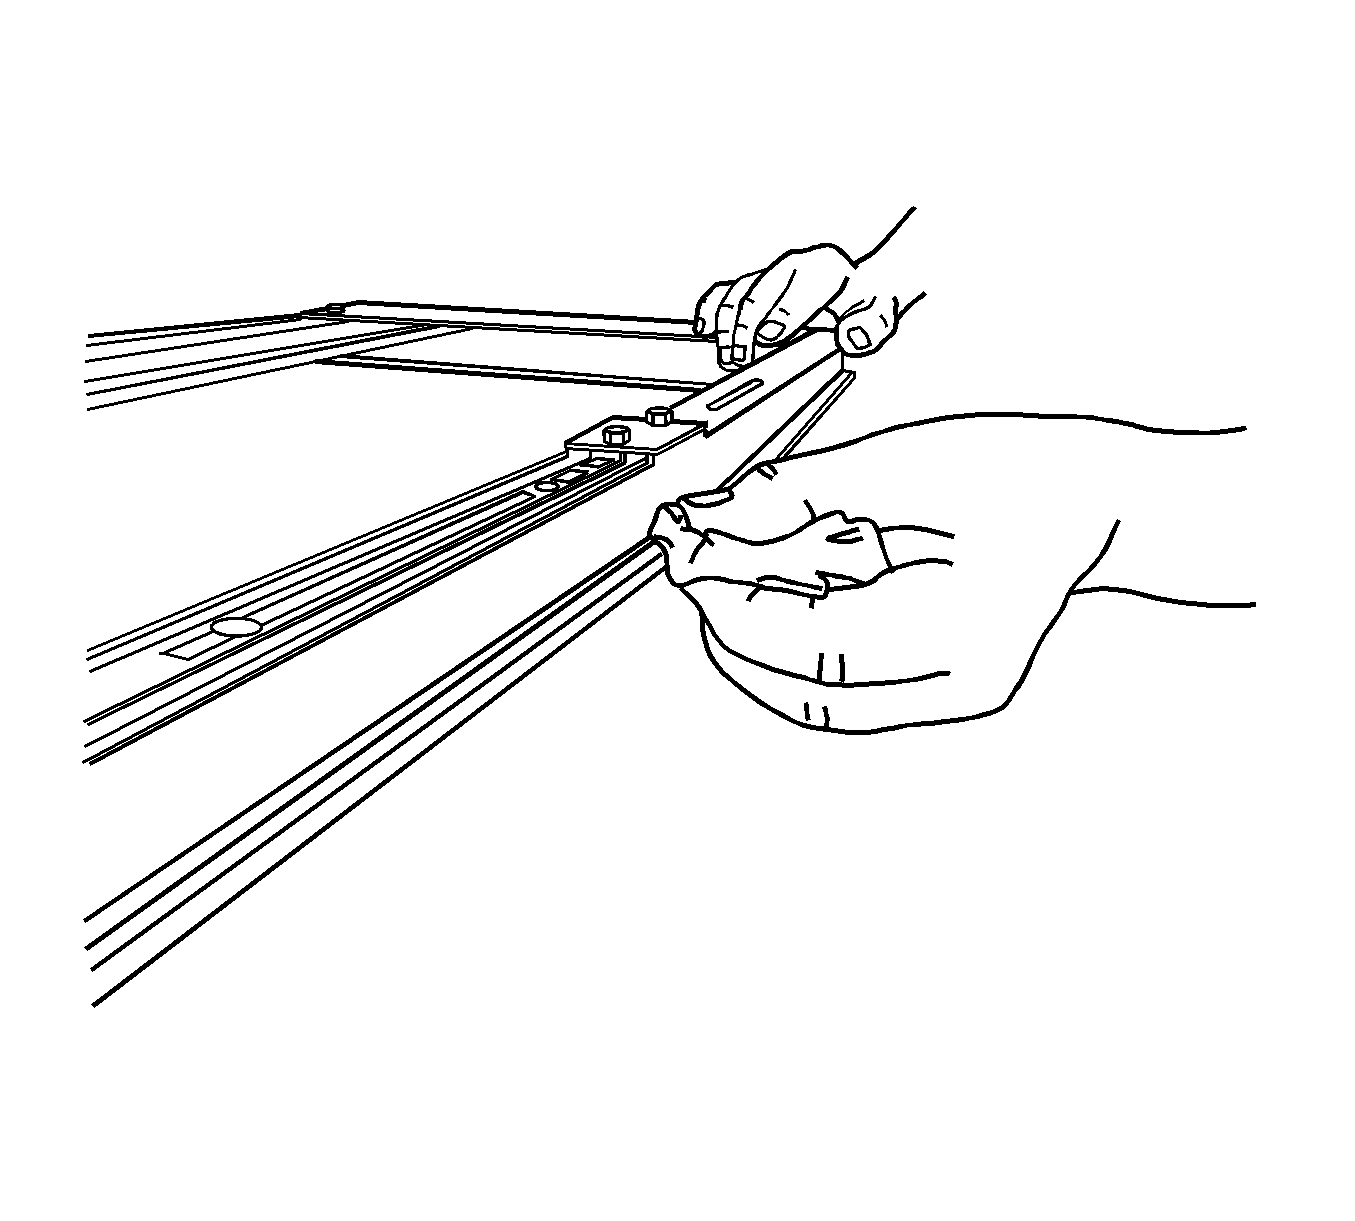
- Remove the two screws (1) on each side of the guides (2).
- Rotate the upper frame back and fourth. Pushing forward on the upper frame until it is over the guides.
- Remove the upper frame (2) from the window and guides (1).

Important: Note the location of the bolts, size and color when removing, for proper installation.
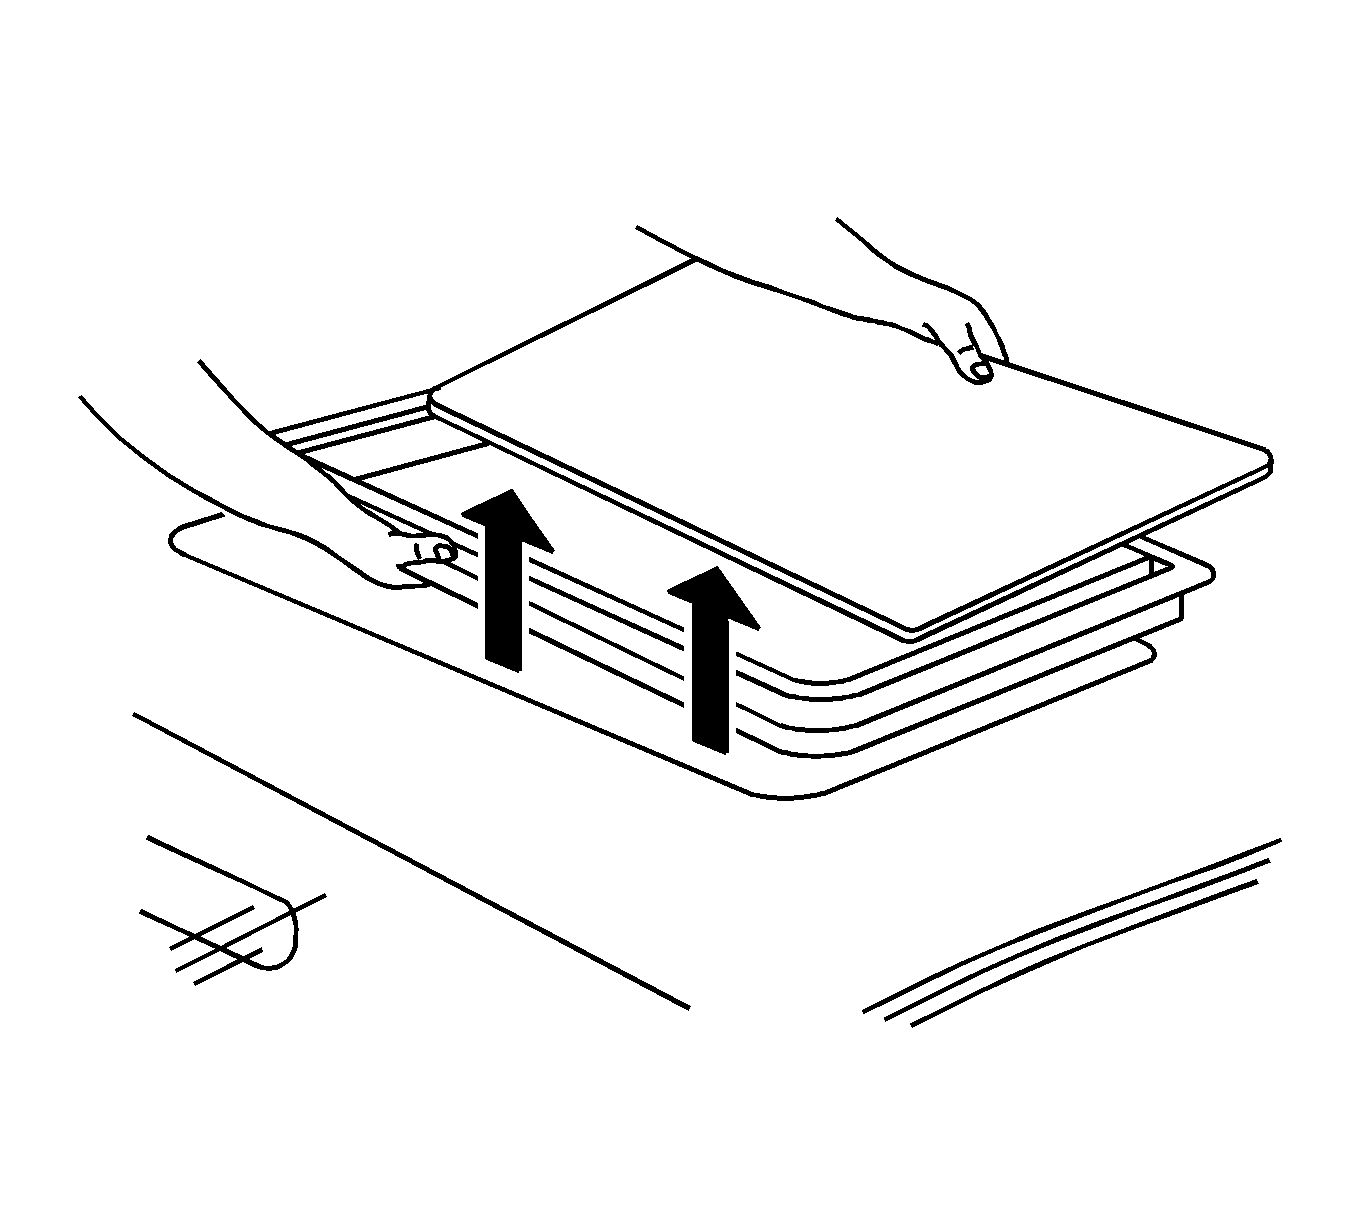
Important: Place the sunroof module on a flat protective cover, face down.
Important: Place the sunroof module on a flat protective cover, face down.
| 12.1. | Unhook the wind deflector slide blocks (1) from each side. |
| 12.2. | Unhook the wind deflector tabs (2) from the center of the upper frame. |
| 12.3. | Remove the wind deflector. |
Important : Mark the left and right sides of the guides in respect to the frame. This will assist in the alignment of the window to the module later.
Note the location of the bolts, size and color when removing, for proper installation.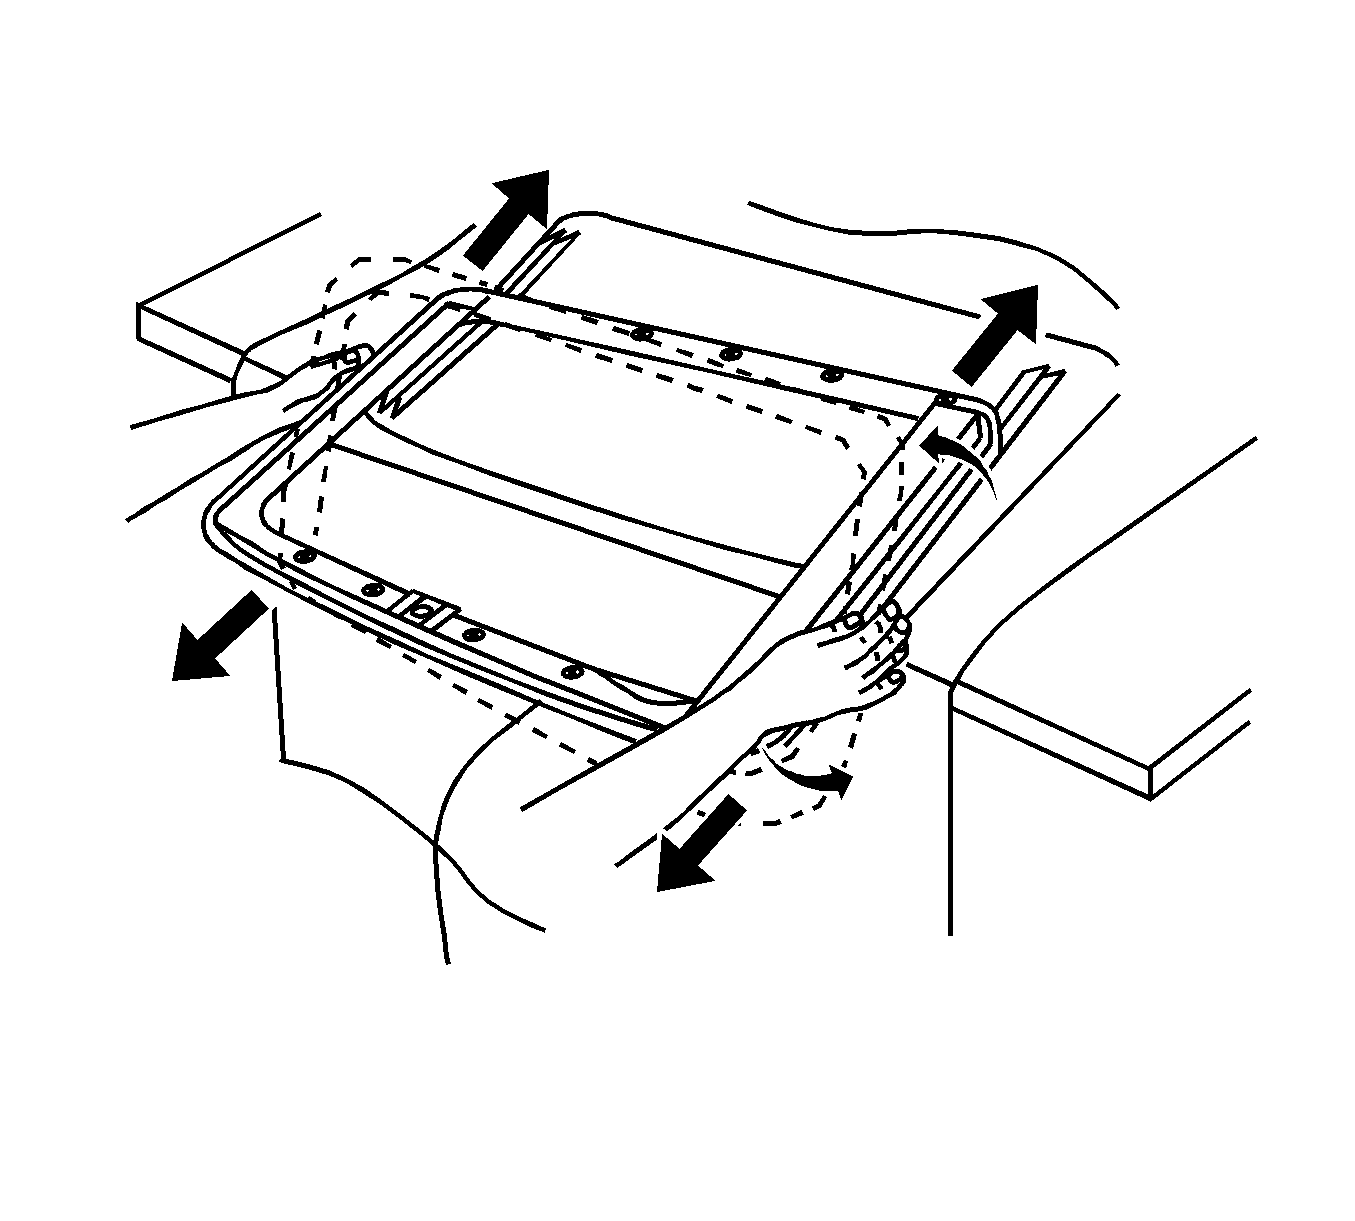
Important : Place the sunroof module on a flat protective cover, face down. It is necessary to slide the guides about 1 cm (1 3/8 in) rearward to release the upper frame.

Do not remove the drive cables or sliders from the guides.
Installation Procedure
- Install the upper frame (2) to the window and guides (1).
- Place the guides about 1 cm (1 3/8 in) rearward to reinstall the upper frame.
- Pull rearward on the upper frame until the screws holes align with the guide holes.
- Install the two screws (1) to each side of the guides (2).
- The window must be in the full open position to do the following:
- Install the left and right side drive cable tube covers (1), two drive cable tube covers to each side
- Install the drive cables (2) with cam (3) to the sunroof module.
- Install the cam plate (2).
- Install the cam plate screws (1).
- Manually close the sunroof window to the sunroof module assembly on the bench.
- Clean the outside area of the upper sunroof frame with GM™ Glass Cleaner for vehicles built without adhesive under the sunroof frame. If the sunroof frame has adhesive applied to the frame, use masking tape to clean the frame and seal.
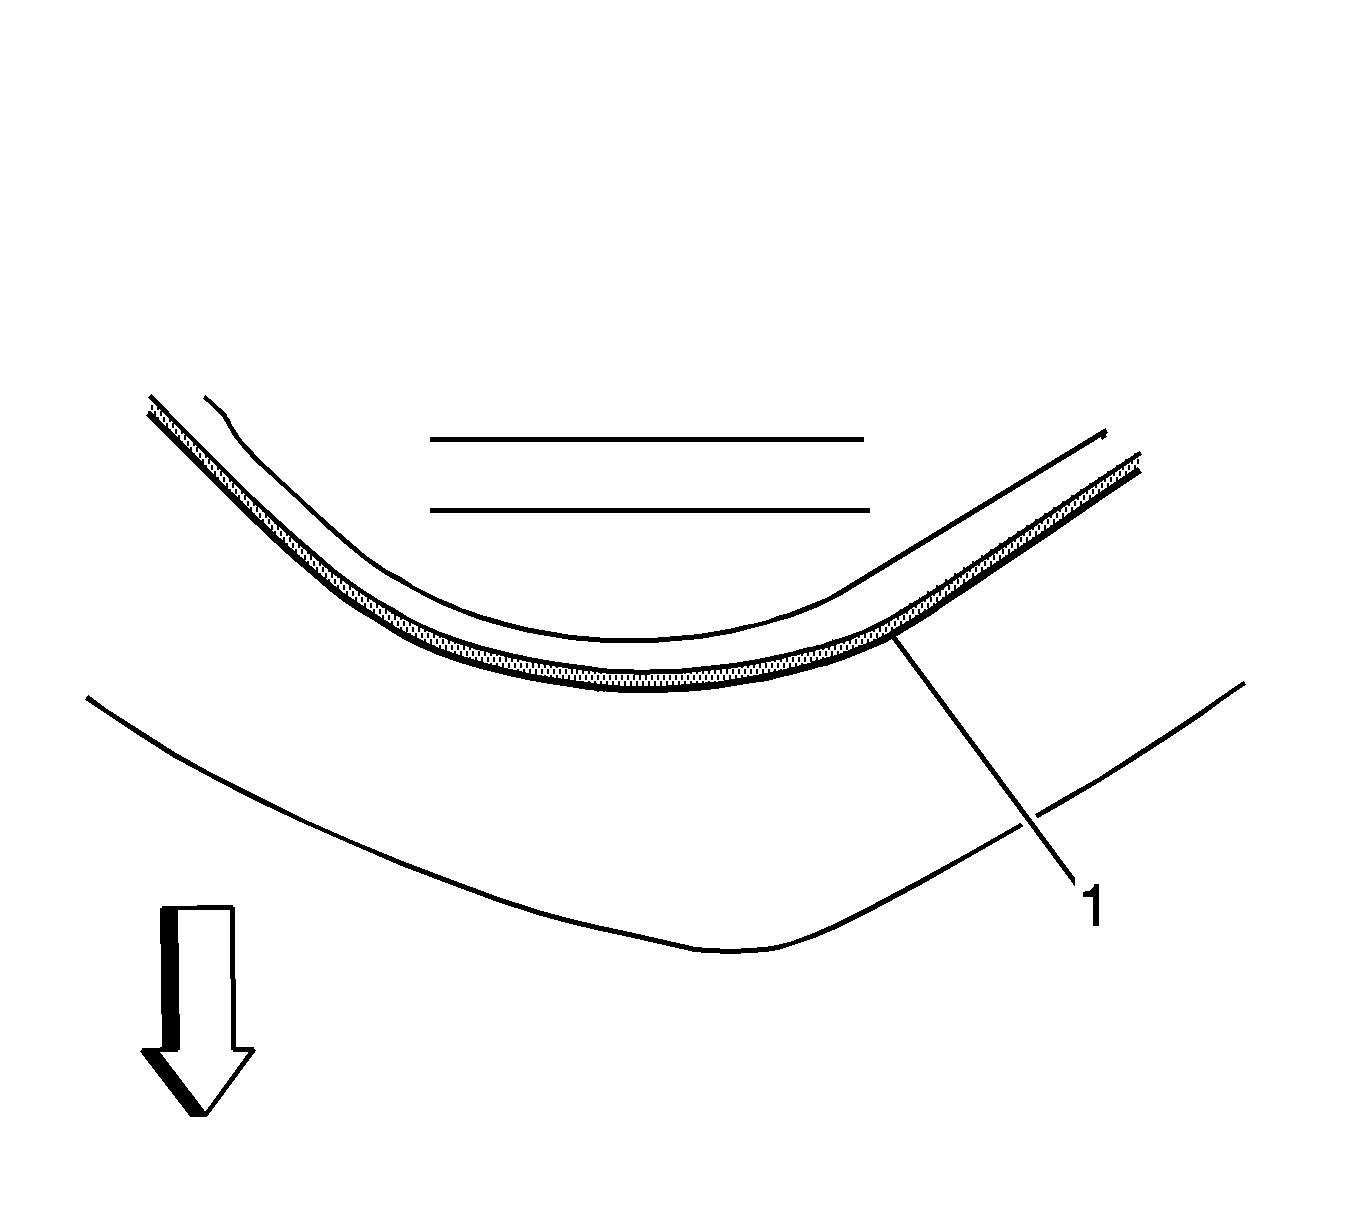
- Clean the old sealer (1) from the opening of the roof outside roof panel area around the sunroof opening with GM™ Glass Cleaner if no adhesive has been used. If adhesive has been used, it may be necessary to use masking tape and a 3M™ General Purpose Adhesive Cleaner P/N 08984 or equivalent to clean the roof panel.
- Apply synthetic lubrication with Teflon GM P/N 12371287 (Canadian P/N 10953437) to the outside bare edges of the roof panel opening for the sunroof module. This grease is recommended for use on any bare edges around the sunroof opening. An acid brush can be used to apply the grease.
- A caulk gun applicator will be needed to apply the adhesive.
- Apply a 2 mm (1 1/16 in) bead of CRL7711 or 3M™ P/N 08506 Clear or P/N 08509 Black sealant around the entire edge of the upper frame assembly and dry seal.
- Install the sunroof module assembly into the vehicle.
- Install the lower sunroof frame to the sunroof module.
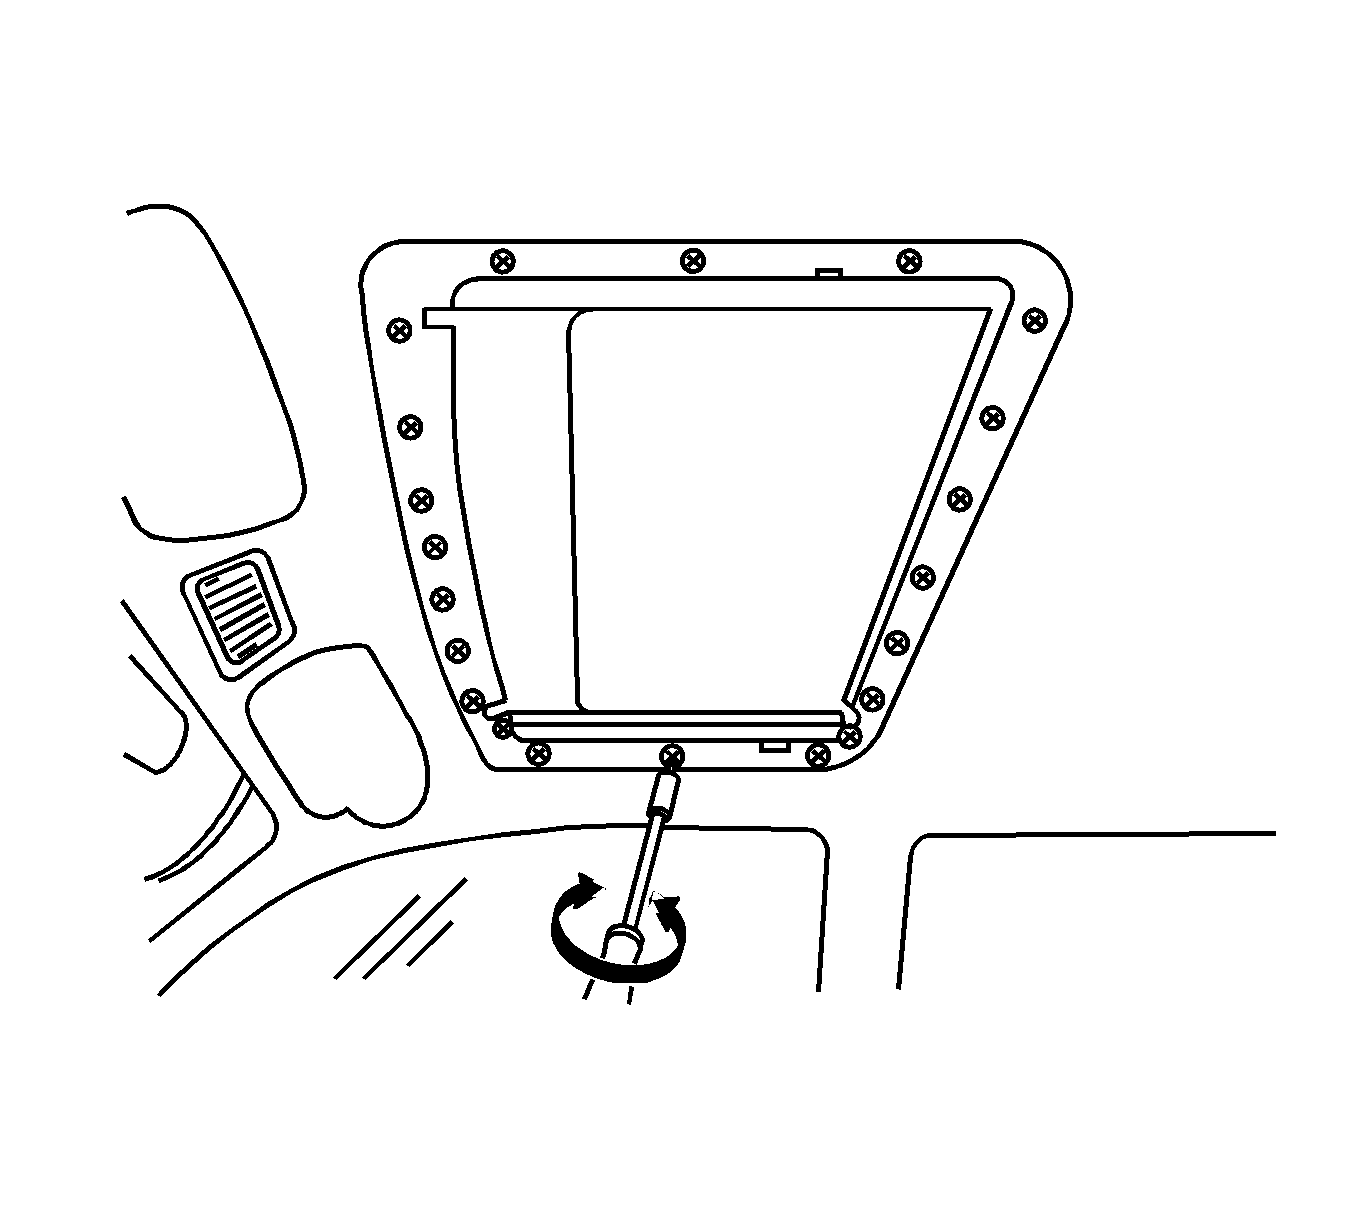
- Install the screws into the proper locations of the lower sunroof frame assembly.
- Tighten the screws in the lower sunroof frame using a cross-tightening sequence.
- Place the sunroof window to the full open position. This will allow the window, motor and cables to be timed. Refer to Sunroof Track Timing/Synchronization .
- Install the sunroof motor. Refer to Power Sunroof Motor Replacement .
- Close the sunroof window fully.
- Verify proper operation of the sunroof.
- Clean any excessive adhesive off the roof panel with a plastic-type scraper/razor blade and a 3M™ General Purpose Cleaner P/N 08984 or equivalent.
- Perform a water test to verify the leak has been fixed.
- Install the sunroof front trim cover. Refer to Sunroof Front Trim Cover Replacement .
Important: Place the sunroof module on a flat protective cover, face down. Rotate the upper frame back and fourth until it is over the guides. Refer to the marked positions on the guides in respect to the frame.
Notice: Refer to Fastener Notice in the Preface section.
Important : Using the marks on the left and right sides of the guides to reinstall the window to the module for alignment.
Install the bolts, size and color to the proper location.
Tighten
Tighten the screw to 3 N·m (27 lb in).
Important: Place the sunroof module on a flat protective cover, face down.
| 5.1. | Install the wind deflector. |
| 5.2. | Hook the wind deflector slide blocks (1) to each side. |
| 5.3. | Hook the wind deflector tabs (2) to the center of the upper frame. |
Important: Ensure that the chamfered edge of the gear is directed upward.
Tighten
Tighten the cam plate screw to 3 N·m (27 lb in).
Important: You may want to use some disposable gloves to keep the adhesive from getting onto your hand.
Tighten
Tighten the screws to 3 N·m (27 lb in).