Removal Procedure
- Disable the SIR system. Refer to SIR Disabling and Enabling in SIR.
- Disconnect the negative battery cable. Refer to Battery Negative Cable Disconnection and Connection.
- Remove the windshield garnish moulding. Refer to Windshield Garnish Molding Replacement.
- Remove the inner rear quarter trim. Refer to Quarter Upper Trim Panel Replacement.
- Remove the inner upper centre trim. Refer to Body Hinge Pillar Trim Panel Replacement.
- Remove the overhead lighting panel. Refer to Dome Lamp Replacement.
- Remove the headliner. Refer to Headlining Trim Panel Replacement in Interior Trim.
- Remove the windshield. Refer to Windshield Replacement.
- Remove the rear window. Refer to Rear Window Replacement.
- Remove the roof weld moulding. Refer to Roof Weld Joint Reveal Molding Replacement.
- Visually inspect the damage. Repair as much of the damage as possible.
- Apply tape to the corners of the panels and adjacent surfaces.
- Remove the sealers and anti-corrosion materials from the repair area, as necessary. Refer to Anti-Corrosion Treatment and Repair.
- Locate, mark and drill all factory welds. Note the number and location of welds for installation of the service assembly.
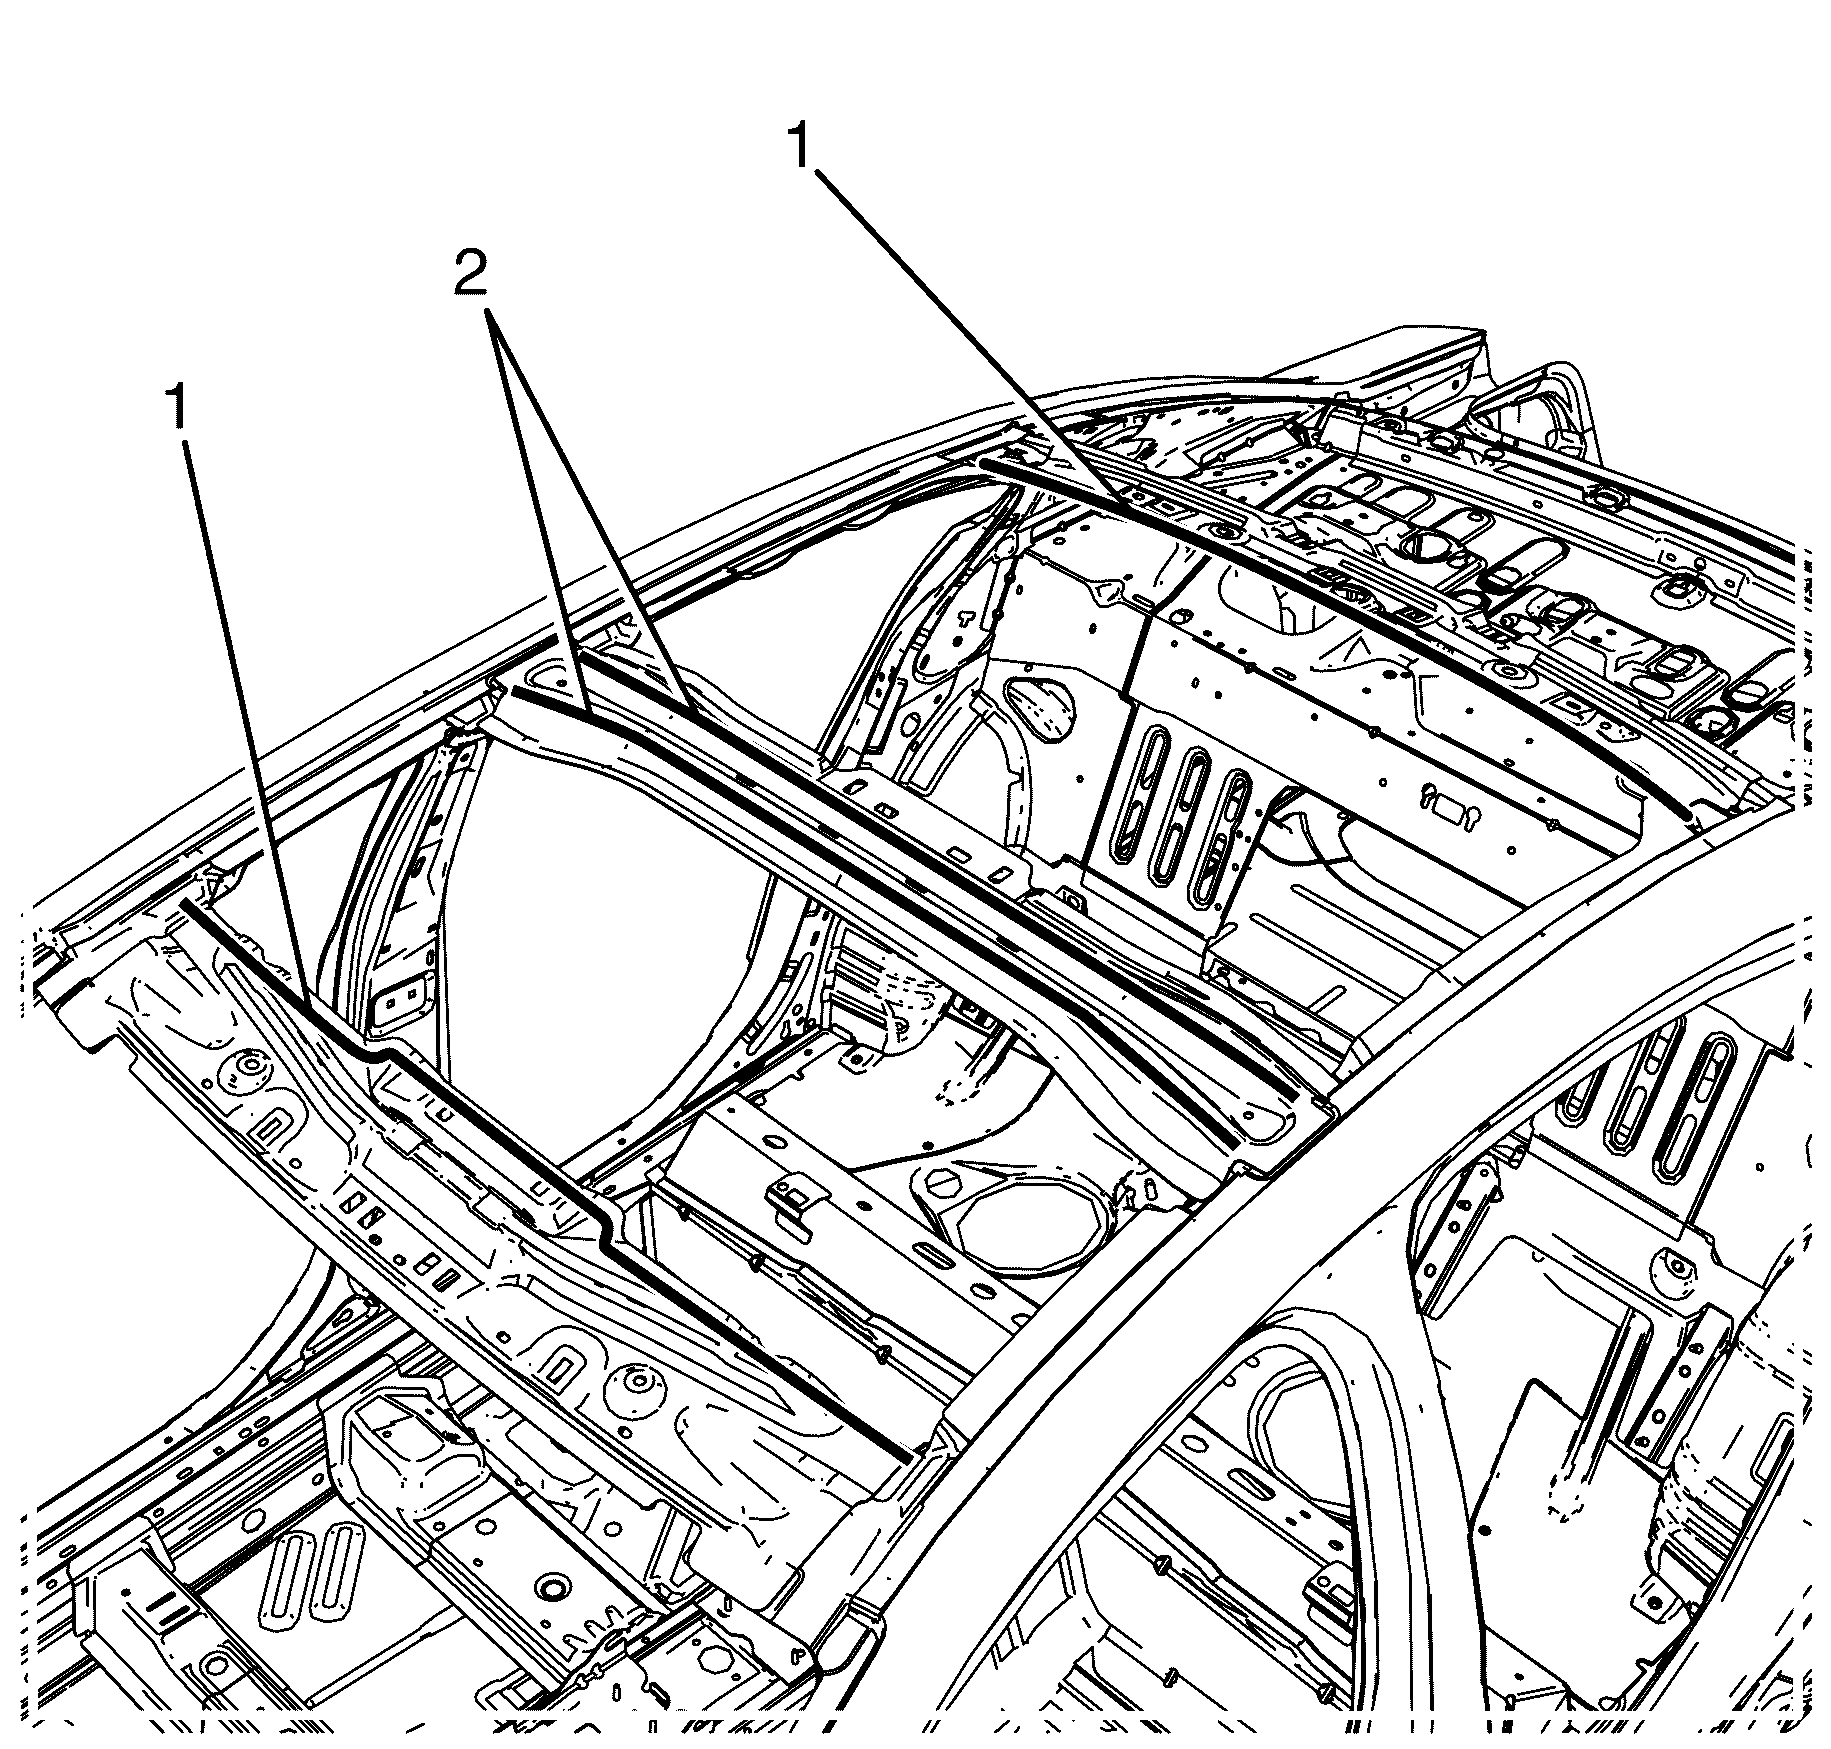
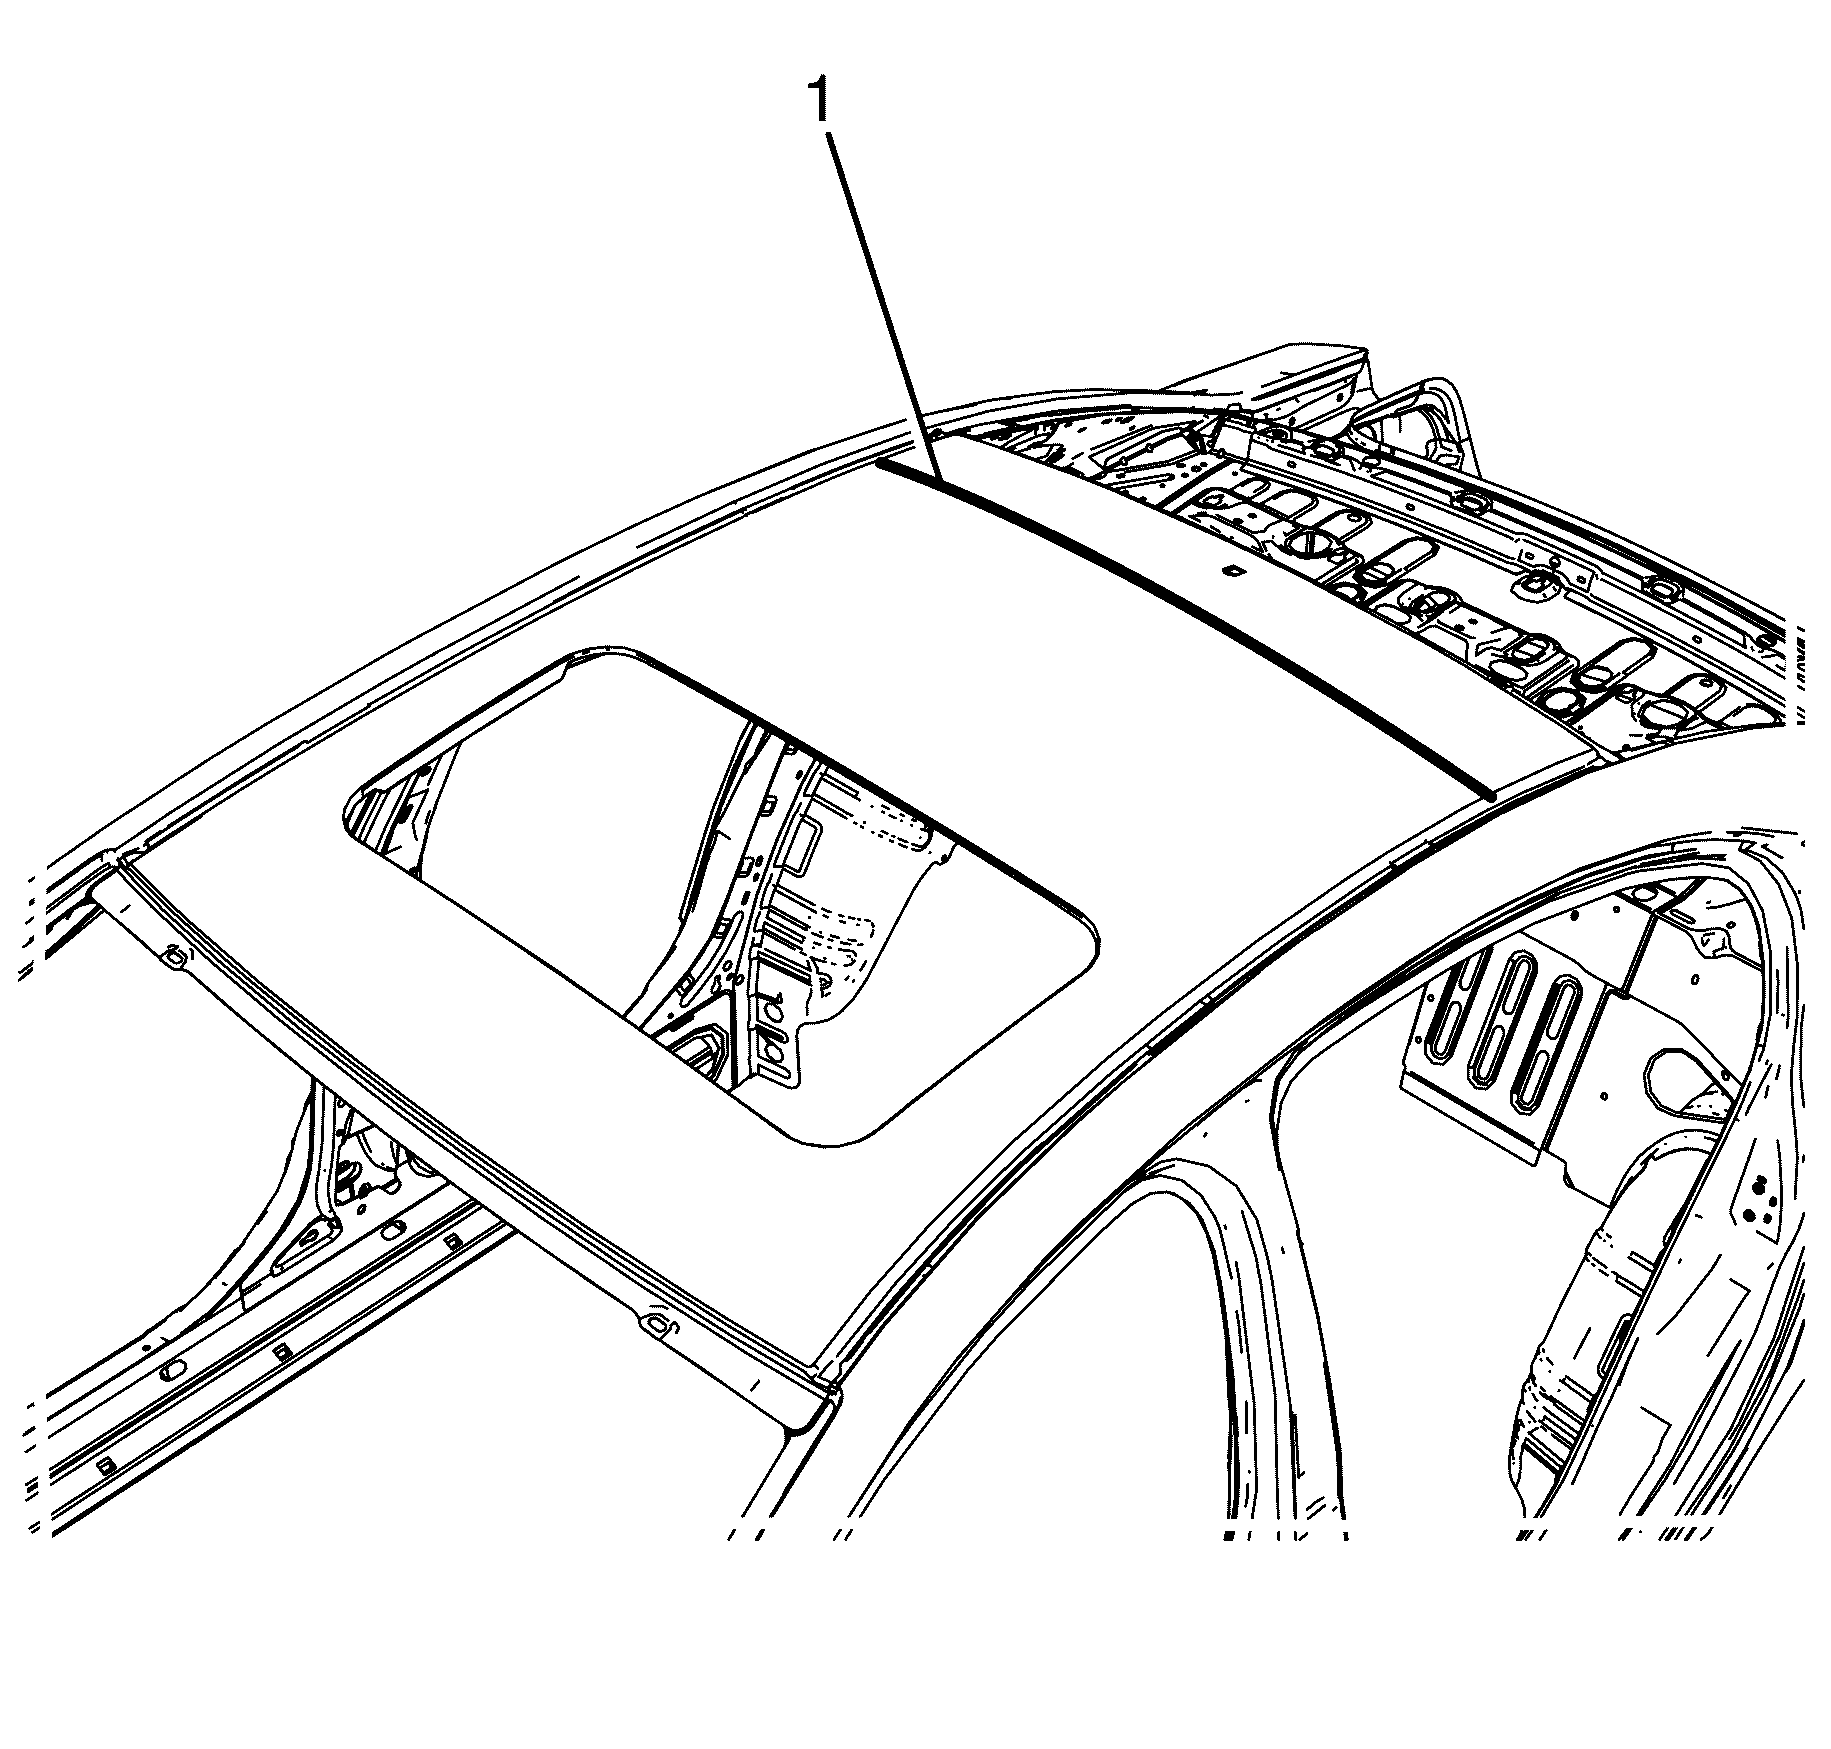
- Using a suitable tool, cut through the roof outer panel along the inner side of the roof channel (1). Repeat for opposite side.
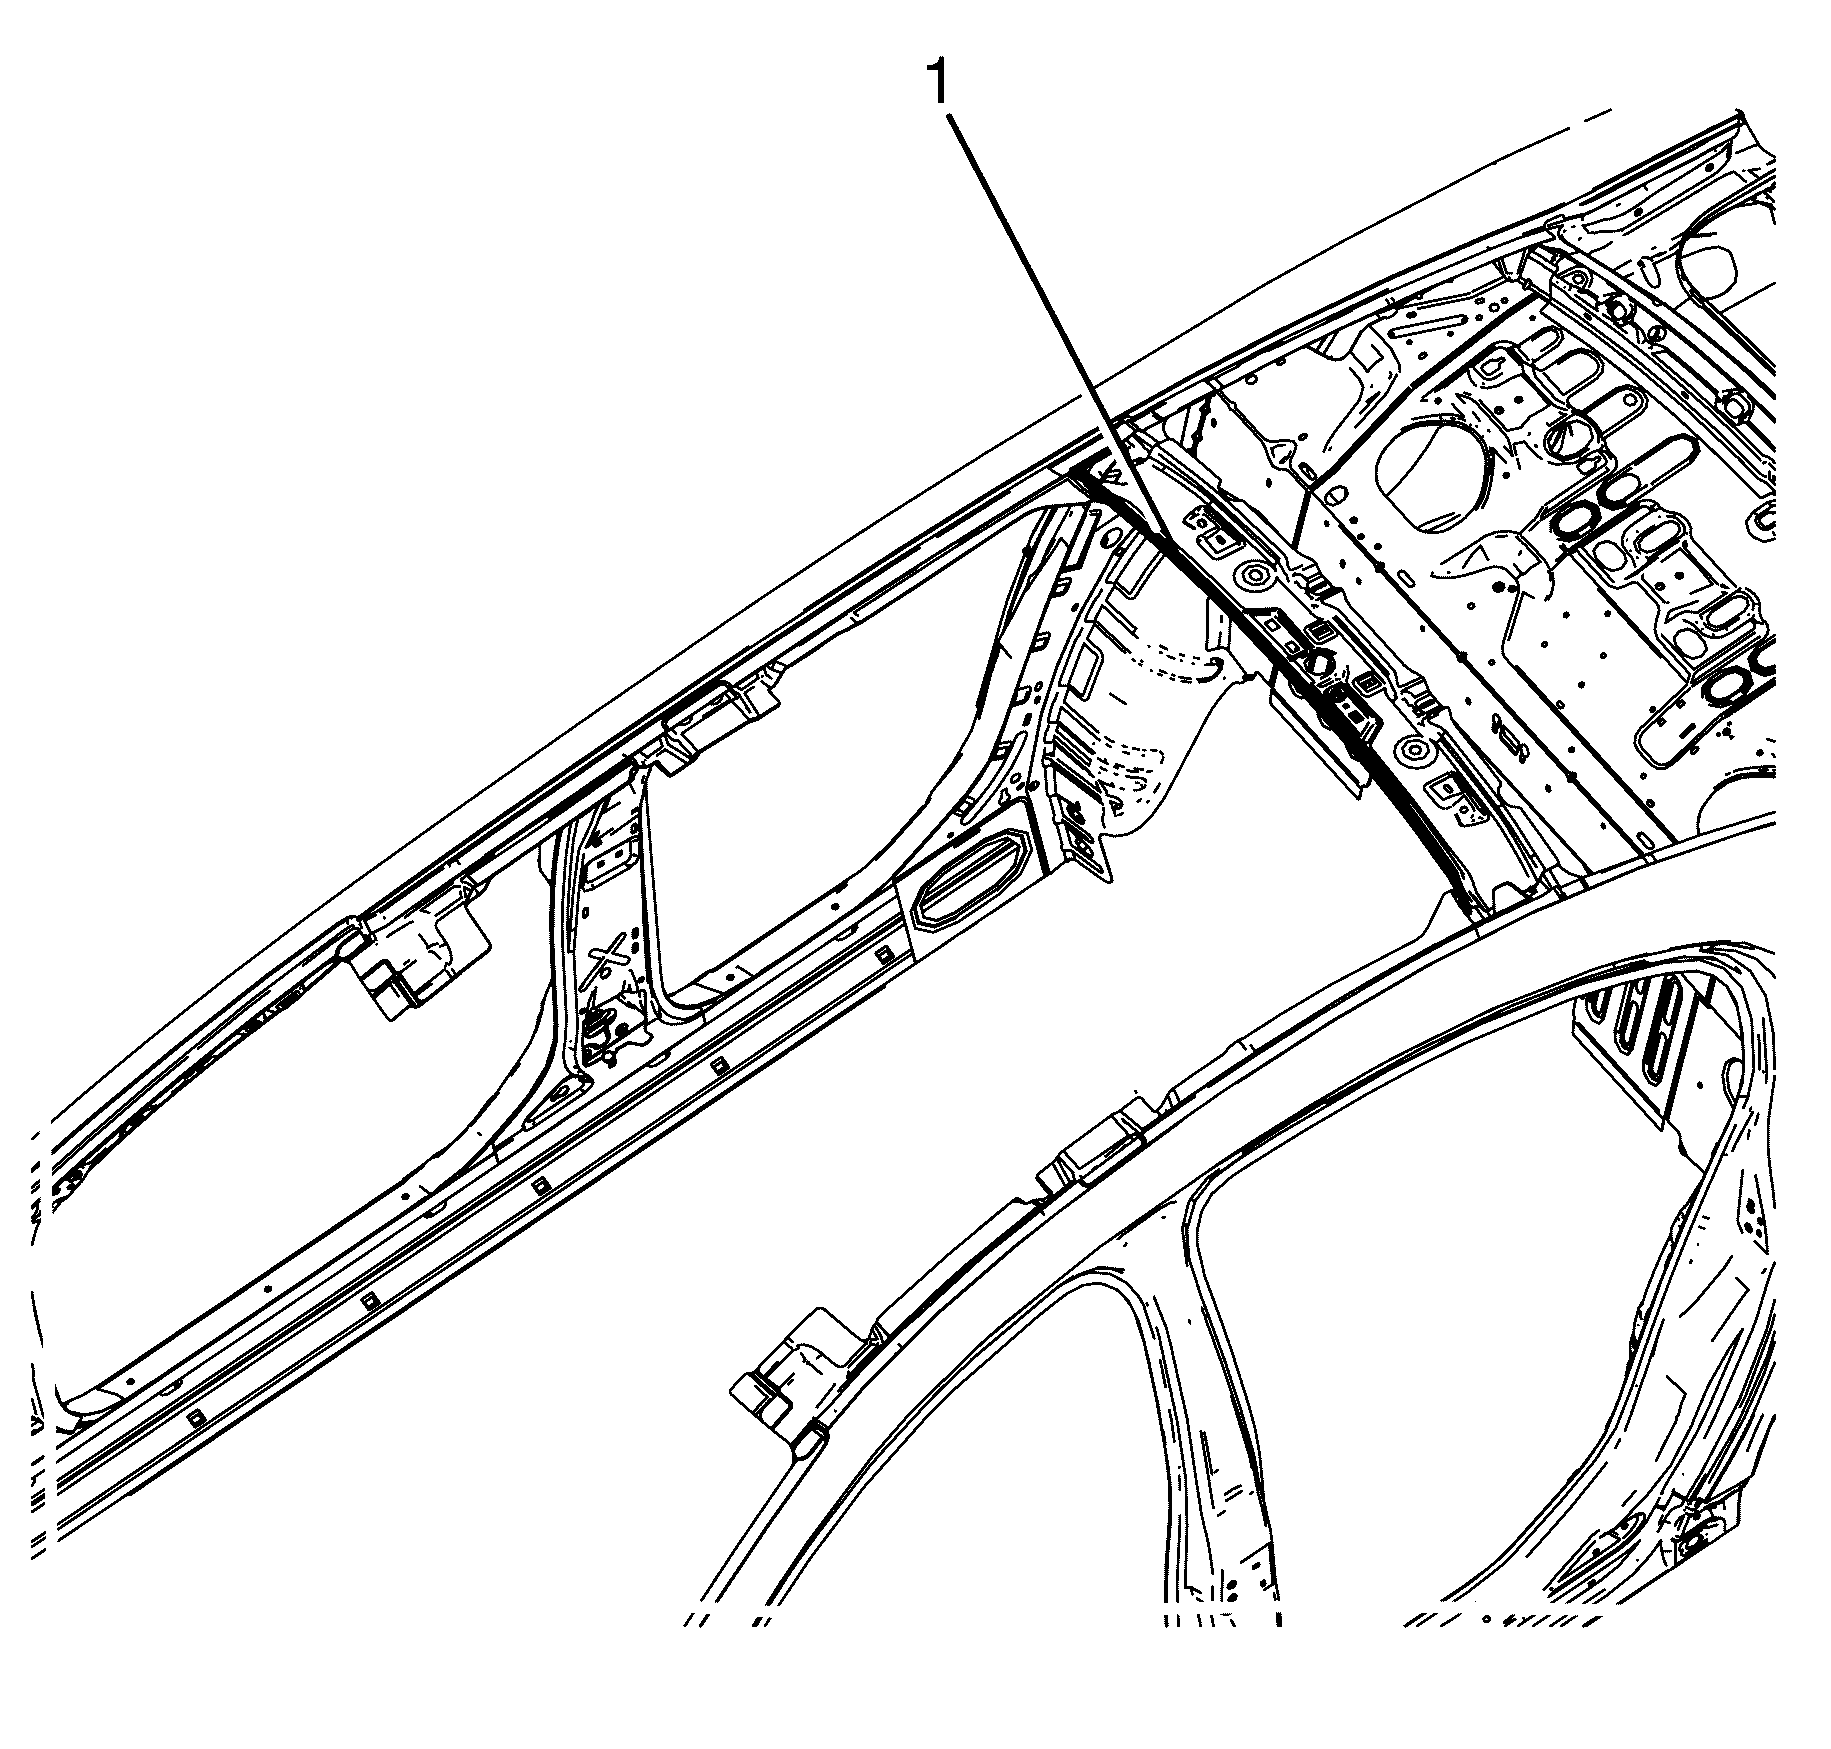
- Heat the 'anti-flutter' adhesive between the roof panel and the roof bows (1).
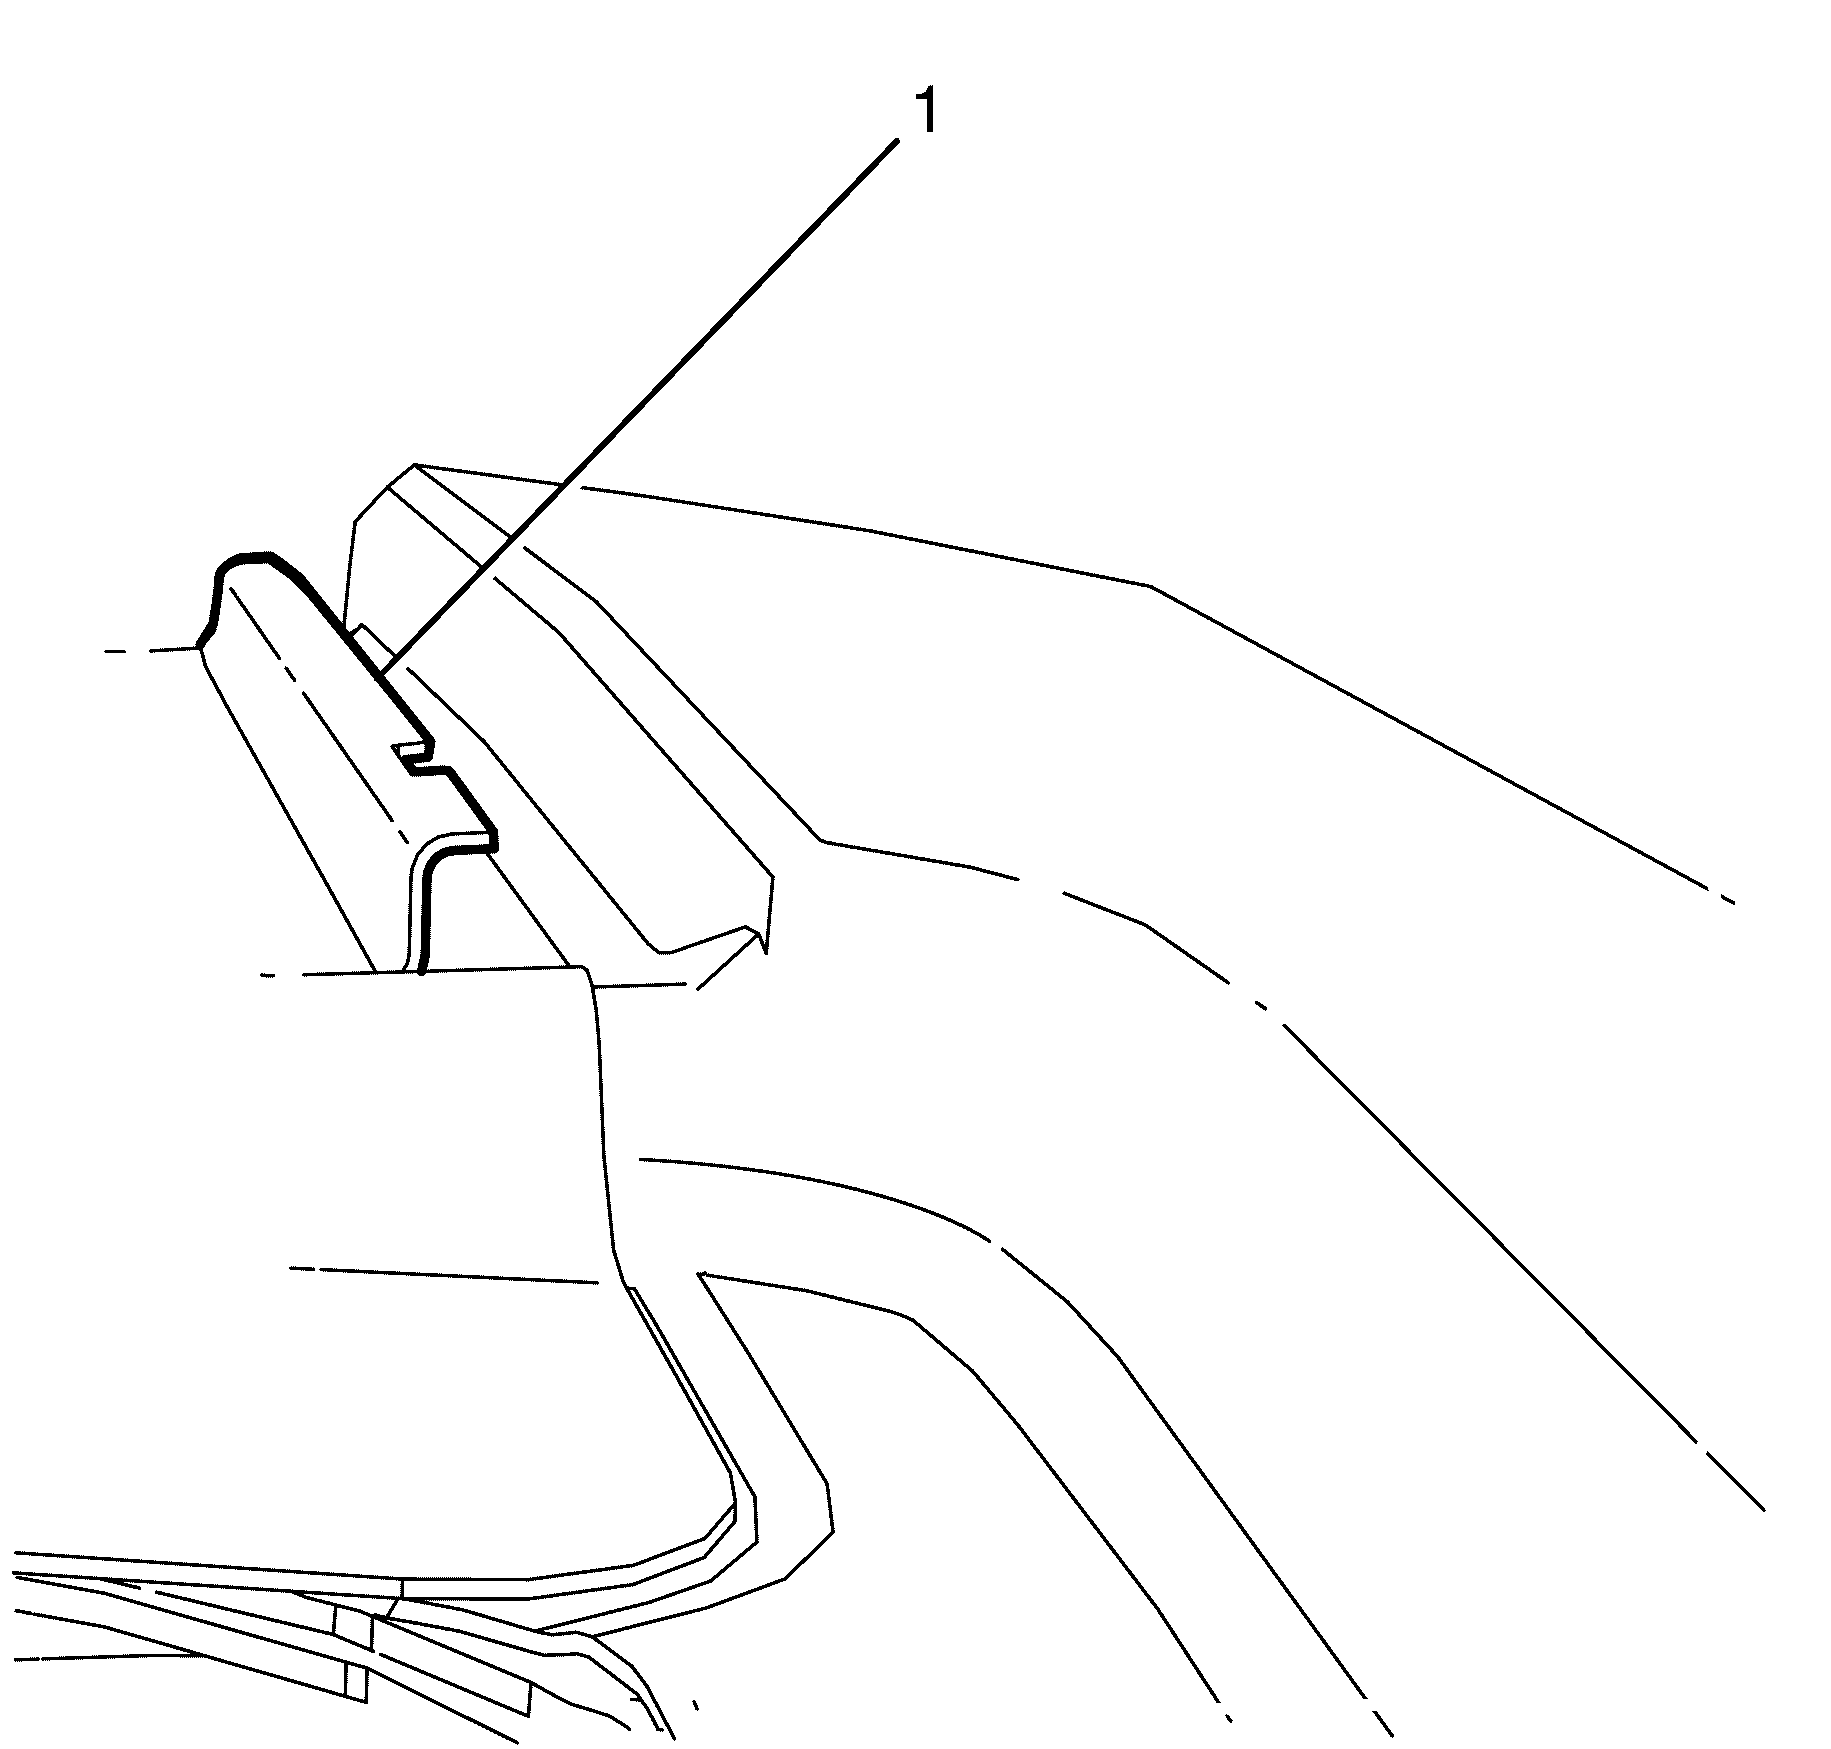
- Cut the 'anti-flutter' adhesive (1) with a suitable tool.
- Remove the roof outer panel from the vehicle.
- Using a suitable tool remove the remaining strip of roof panel (1) from the body side ring. repeat for opposite side.
Caution: Refer to Approved Equipment for Collision Repair Caution in the Preface section.
Caution: Refer to Foam Sound Deadeners Caution in the Preface section.
Caution: Refer to Battery Disconnect Caution in the Preface section.
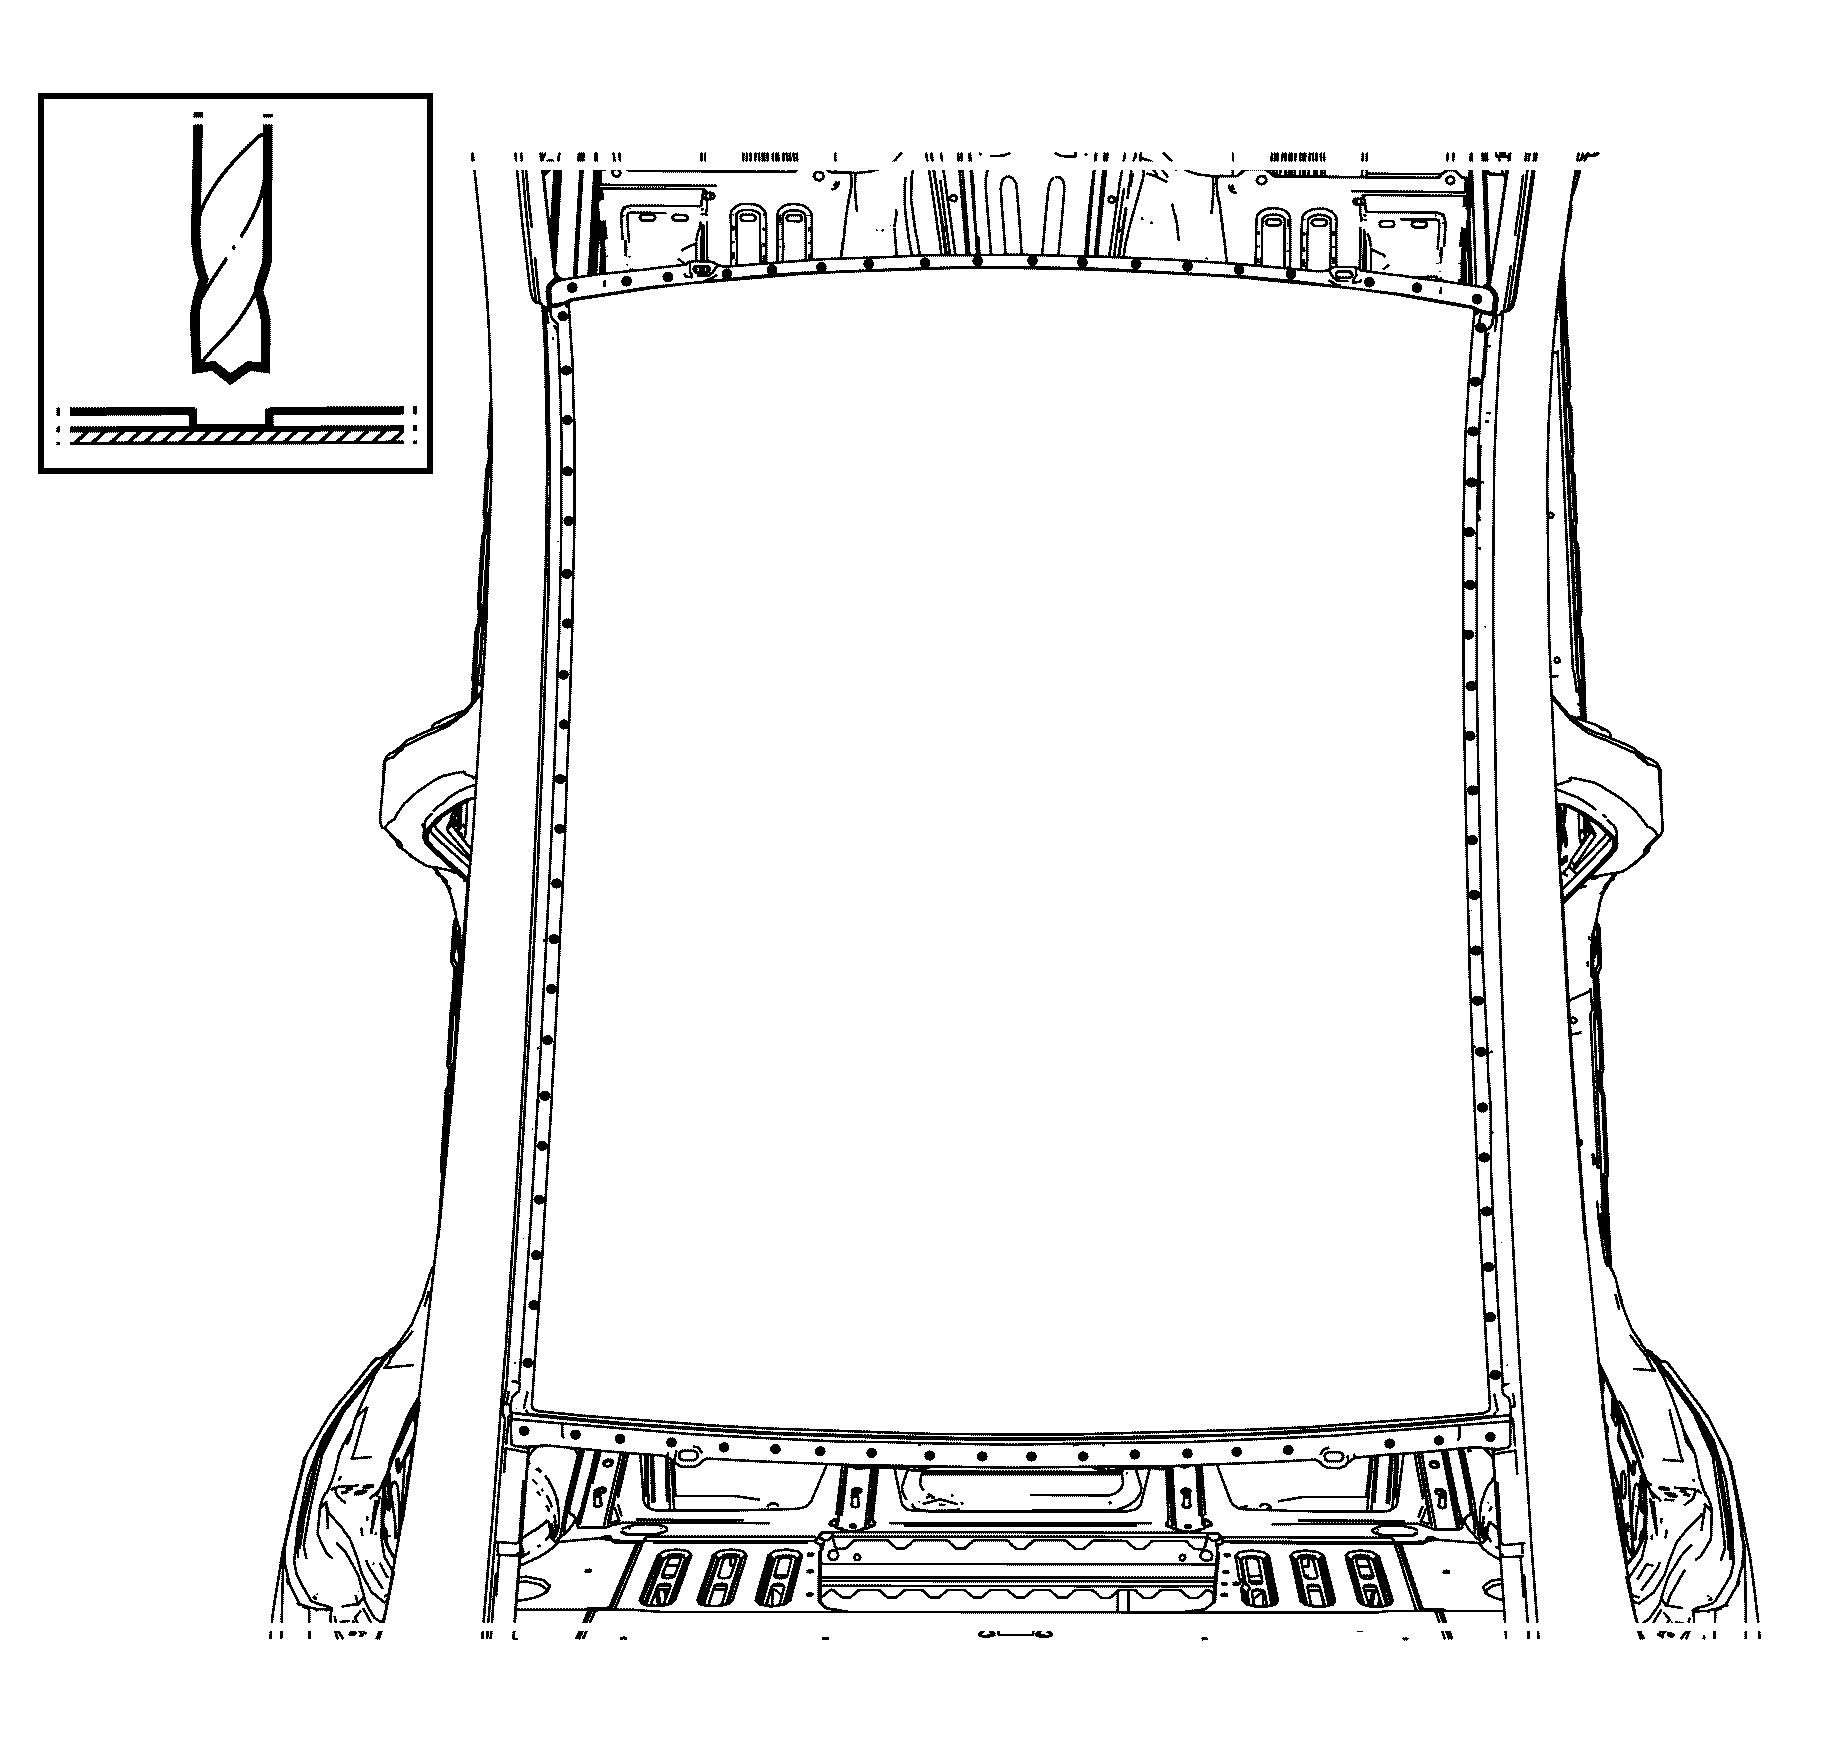
Important: The roof panel is attached to the steel roof structure with beads of adhesive on the sides and spot-welds on the side rail, windshield and back-glass flanges. Replacement of the roof panel can be performed using conventional procedures, however, the windshield and back glass must be removed.
Important: The roof outer panel is secured to the body side panel with adhesive and spot welds, it cannot be removed by cutting the spot welds alone.
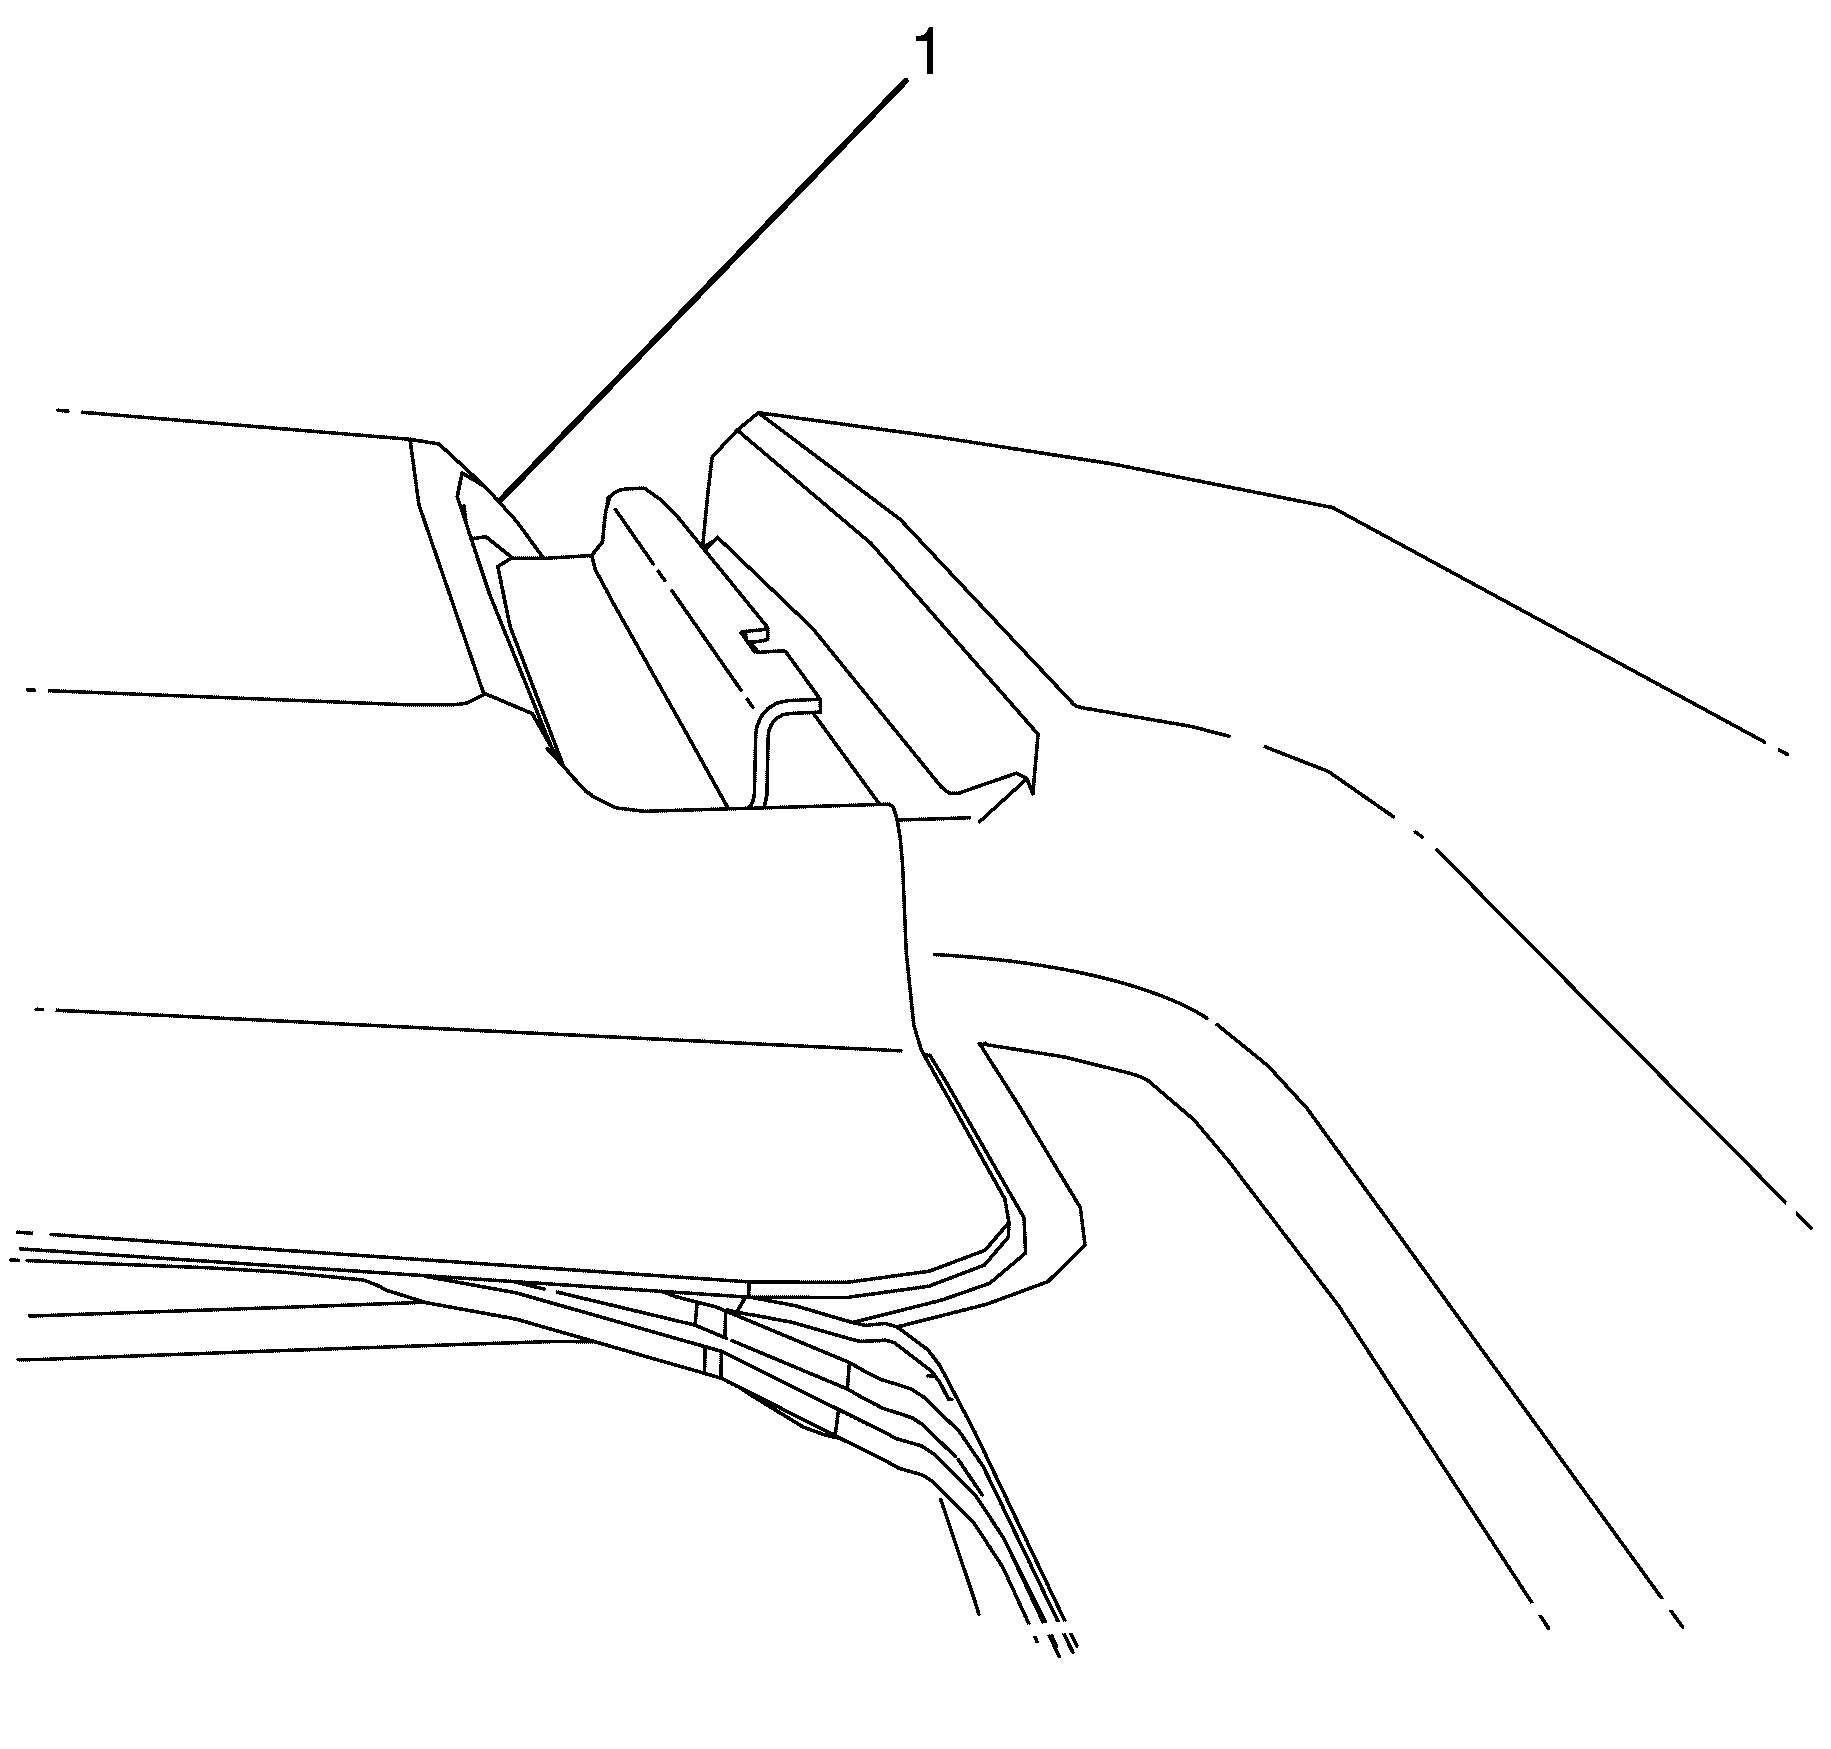
Important: Take care when cutting to protect adjacent panels. Cut inboard of the roof structure.

Important: Heating the 'anti-flutter' adhesive softens it making it easier to cut through.
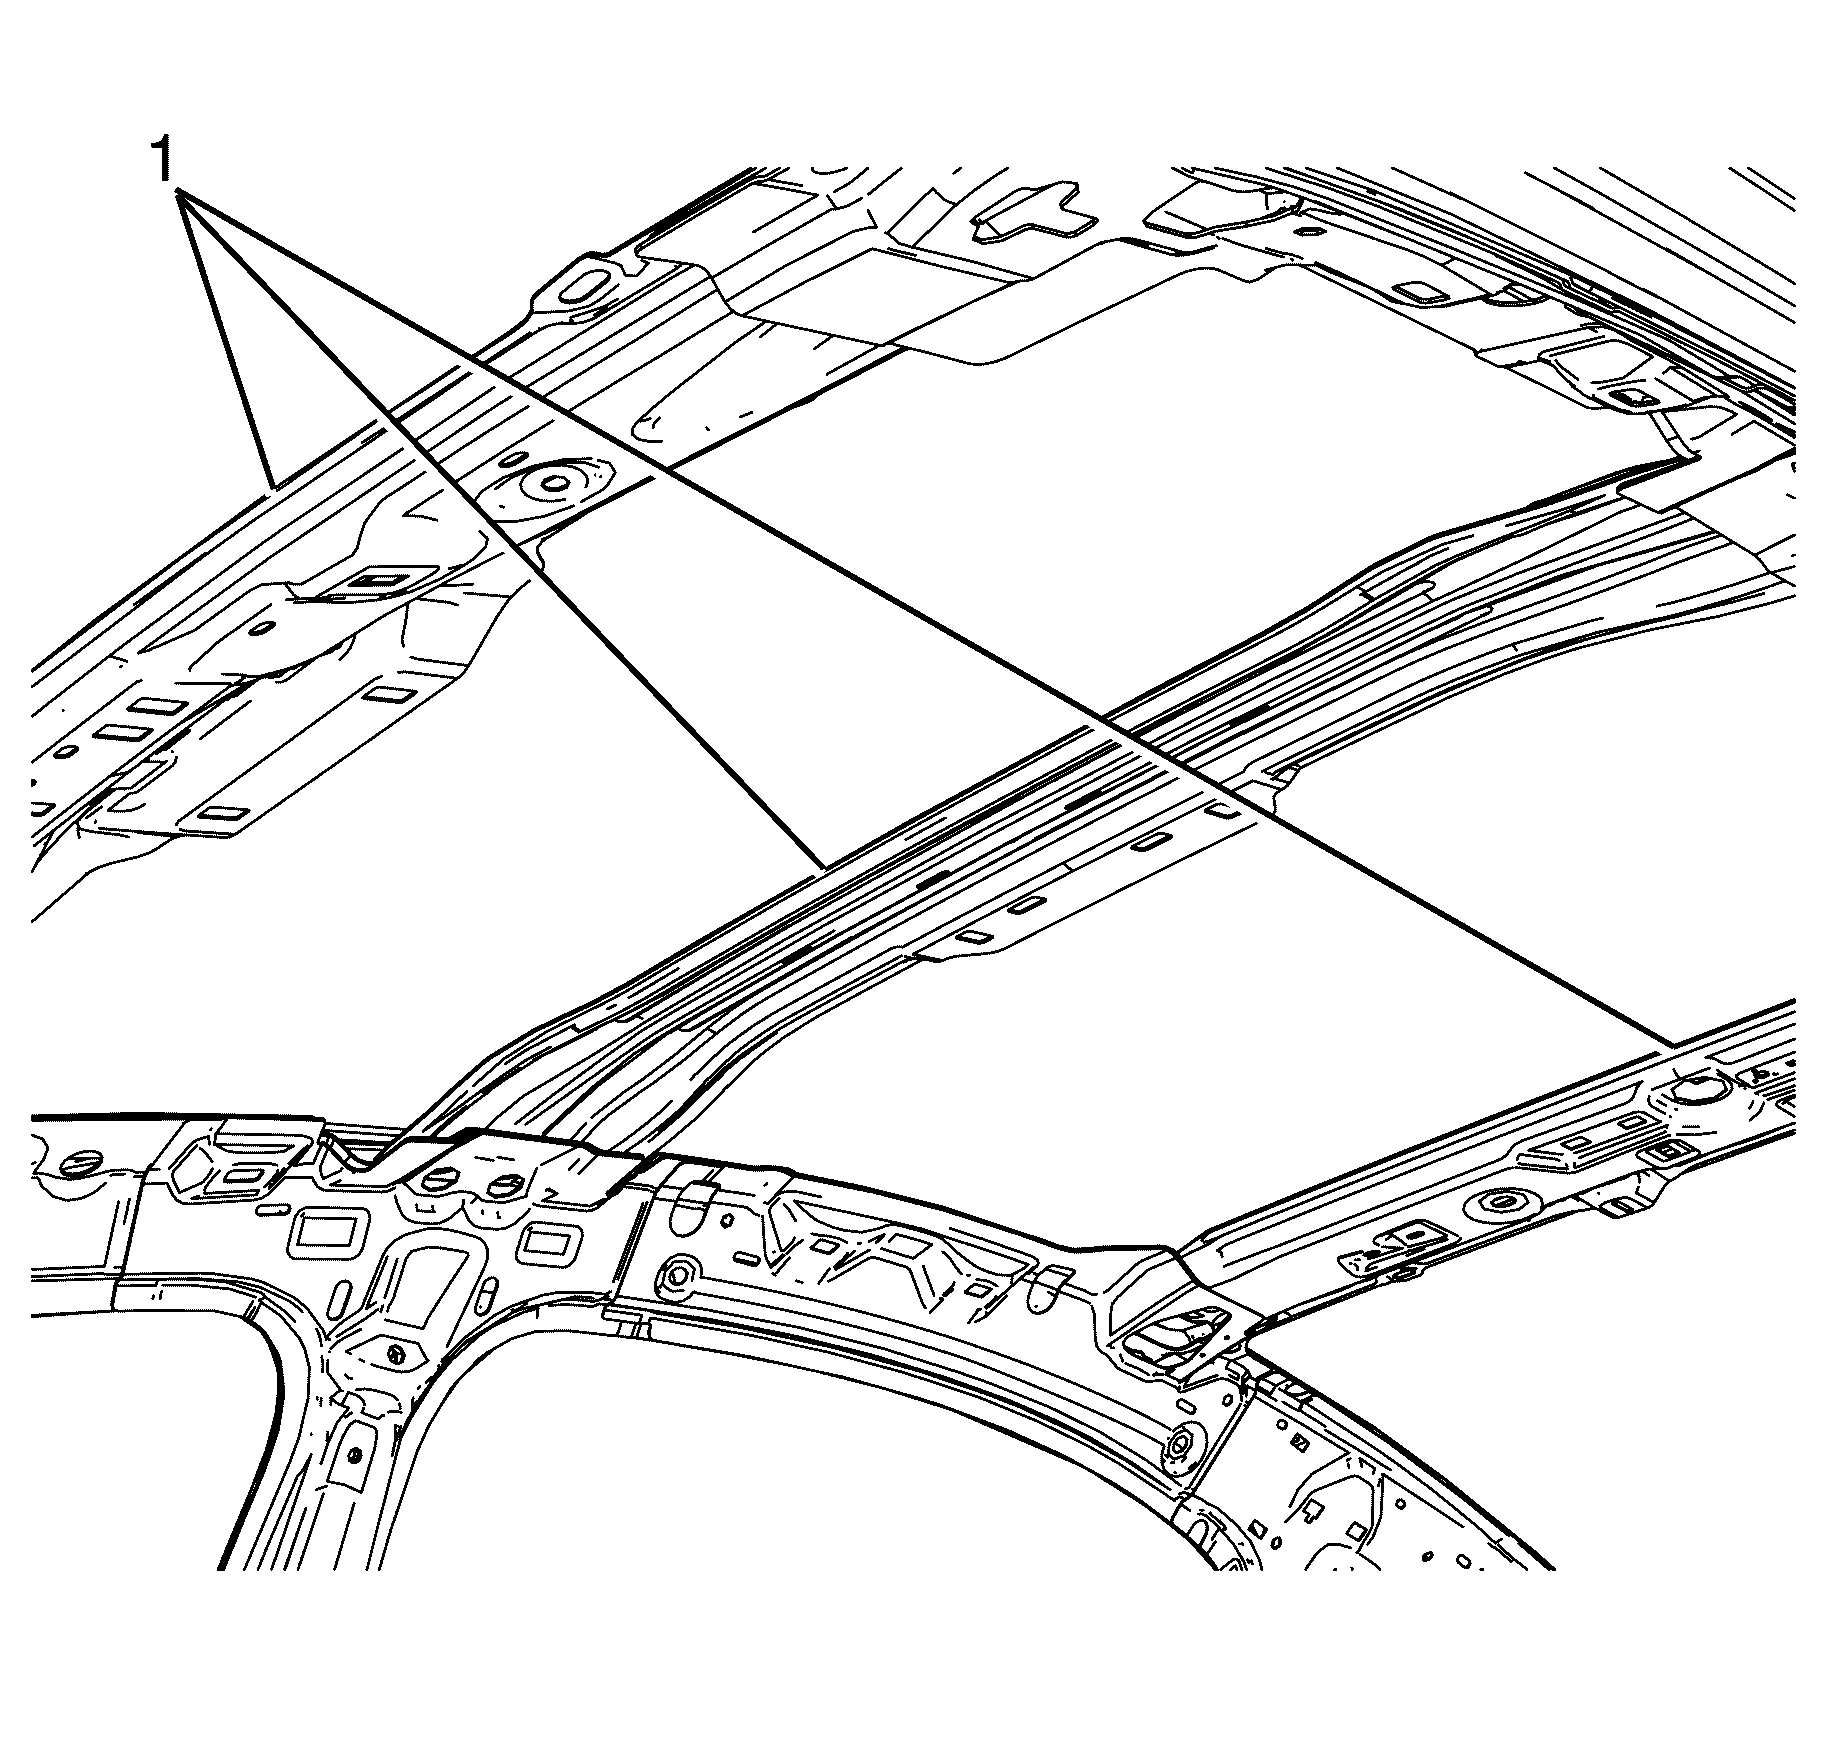
Important: The 'anti-flutter' adhesive (1) is between the roof bows and the roof outer panel.
Installation Procedure
- Clean and prepare the attaching surfaces for welding.
- Clean the remaining anti-flutter adhesive from the front, centre and rear bow surfaces.
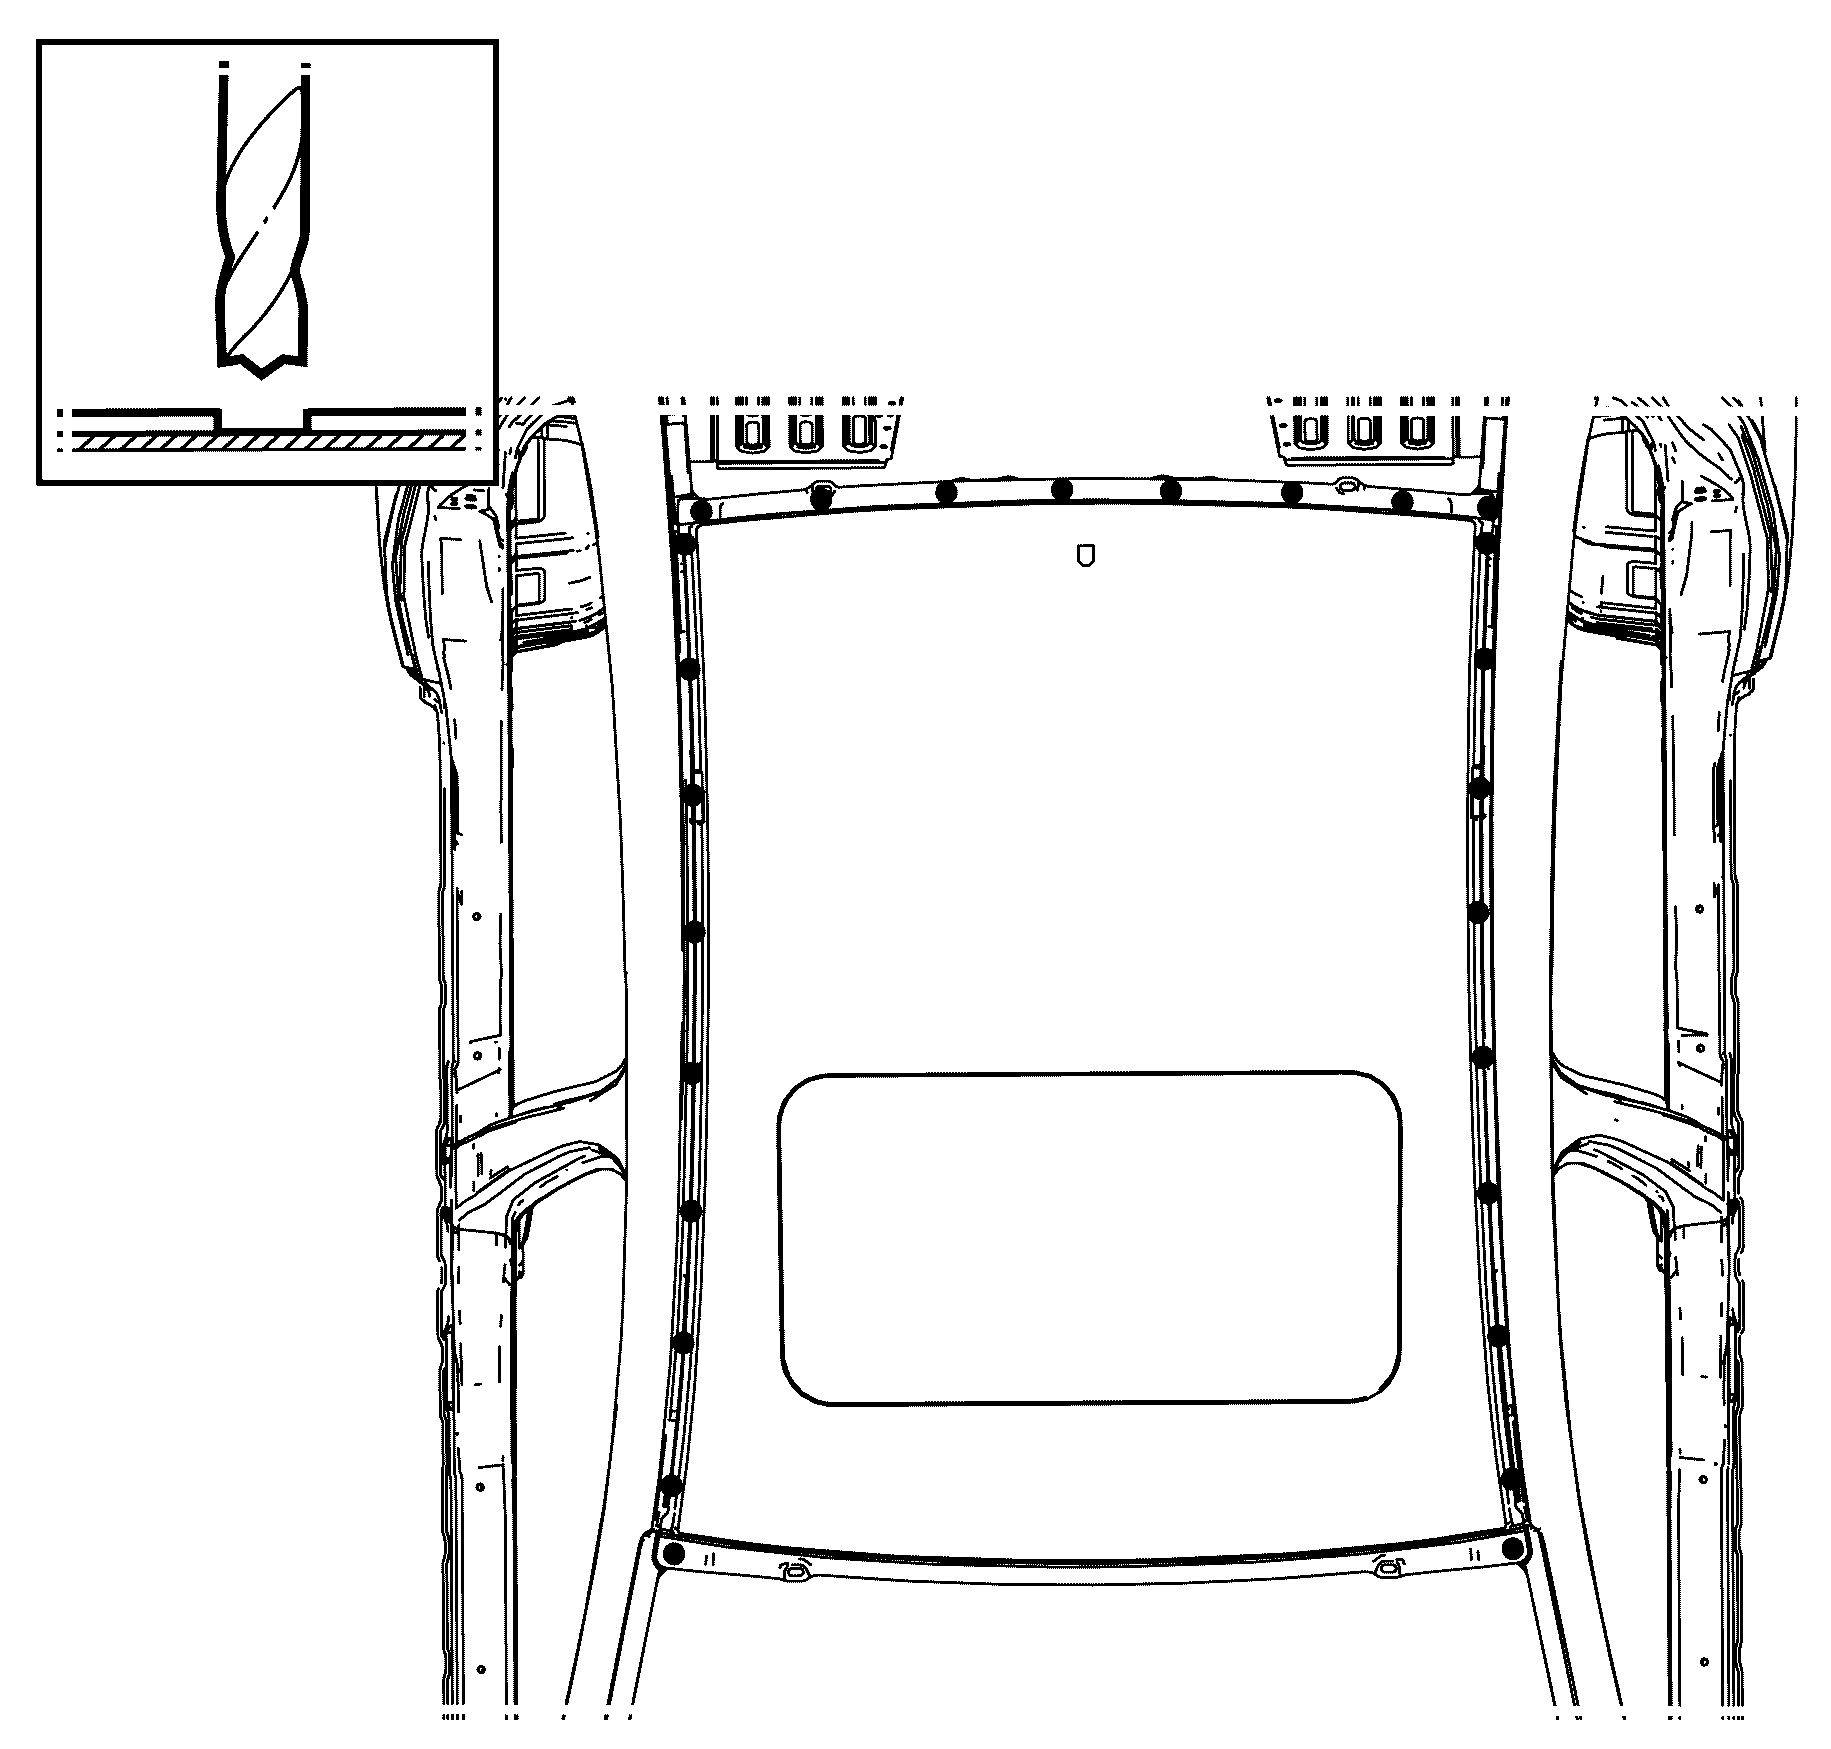
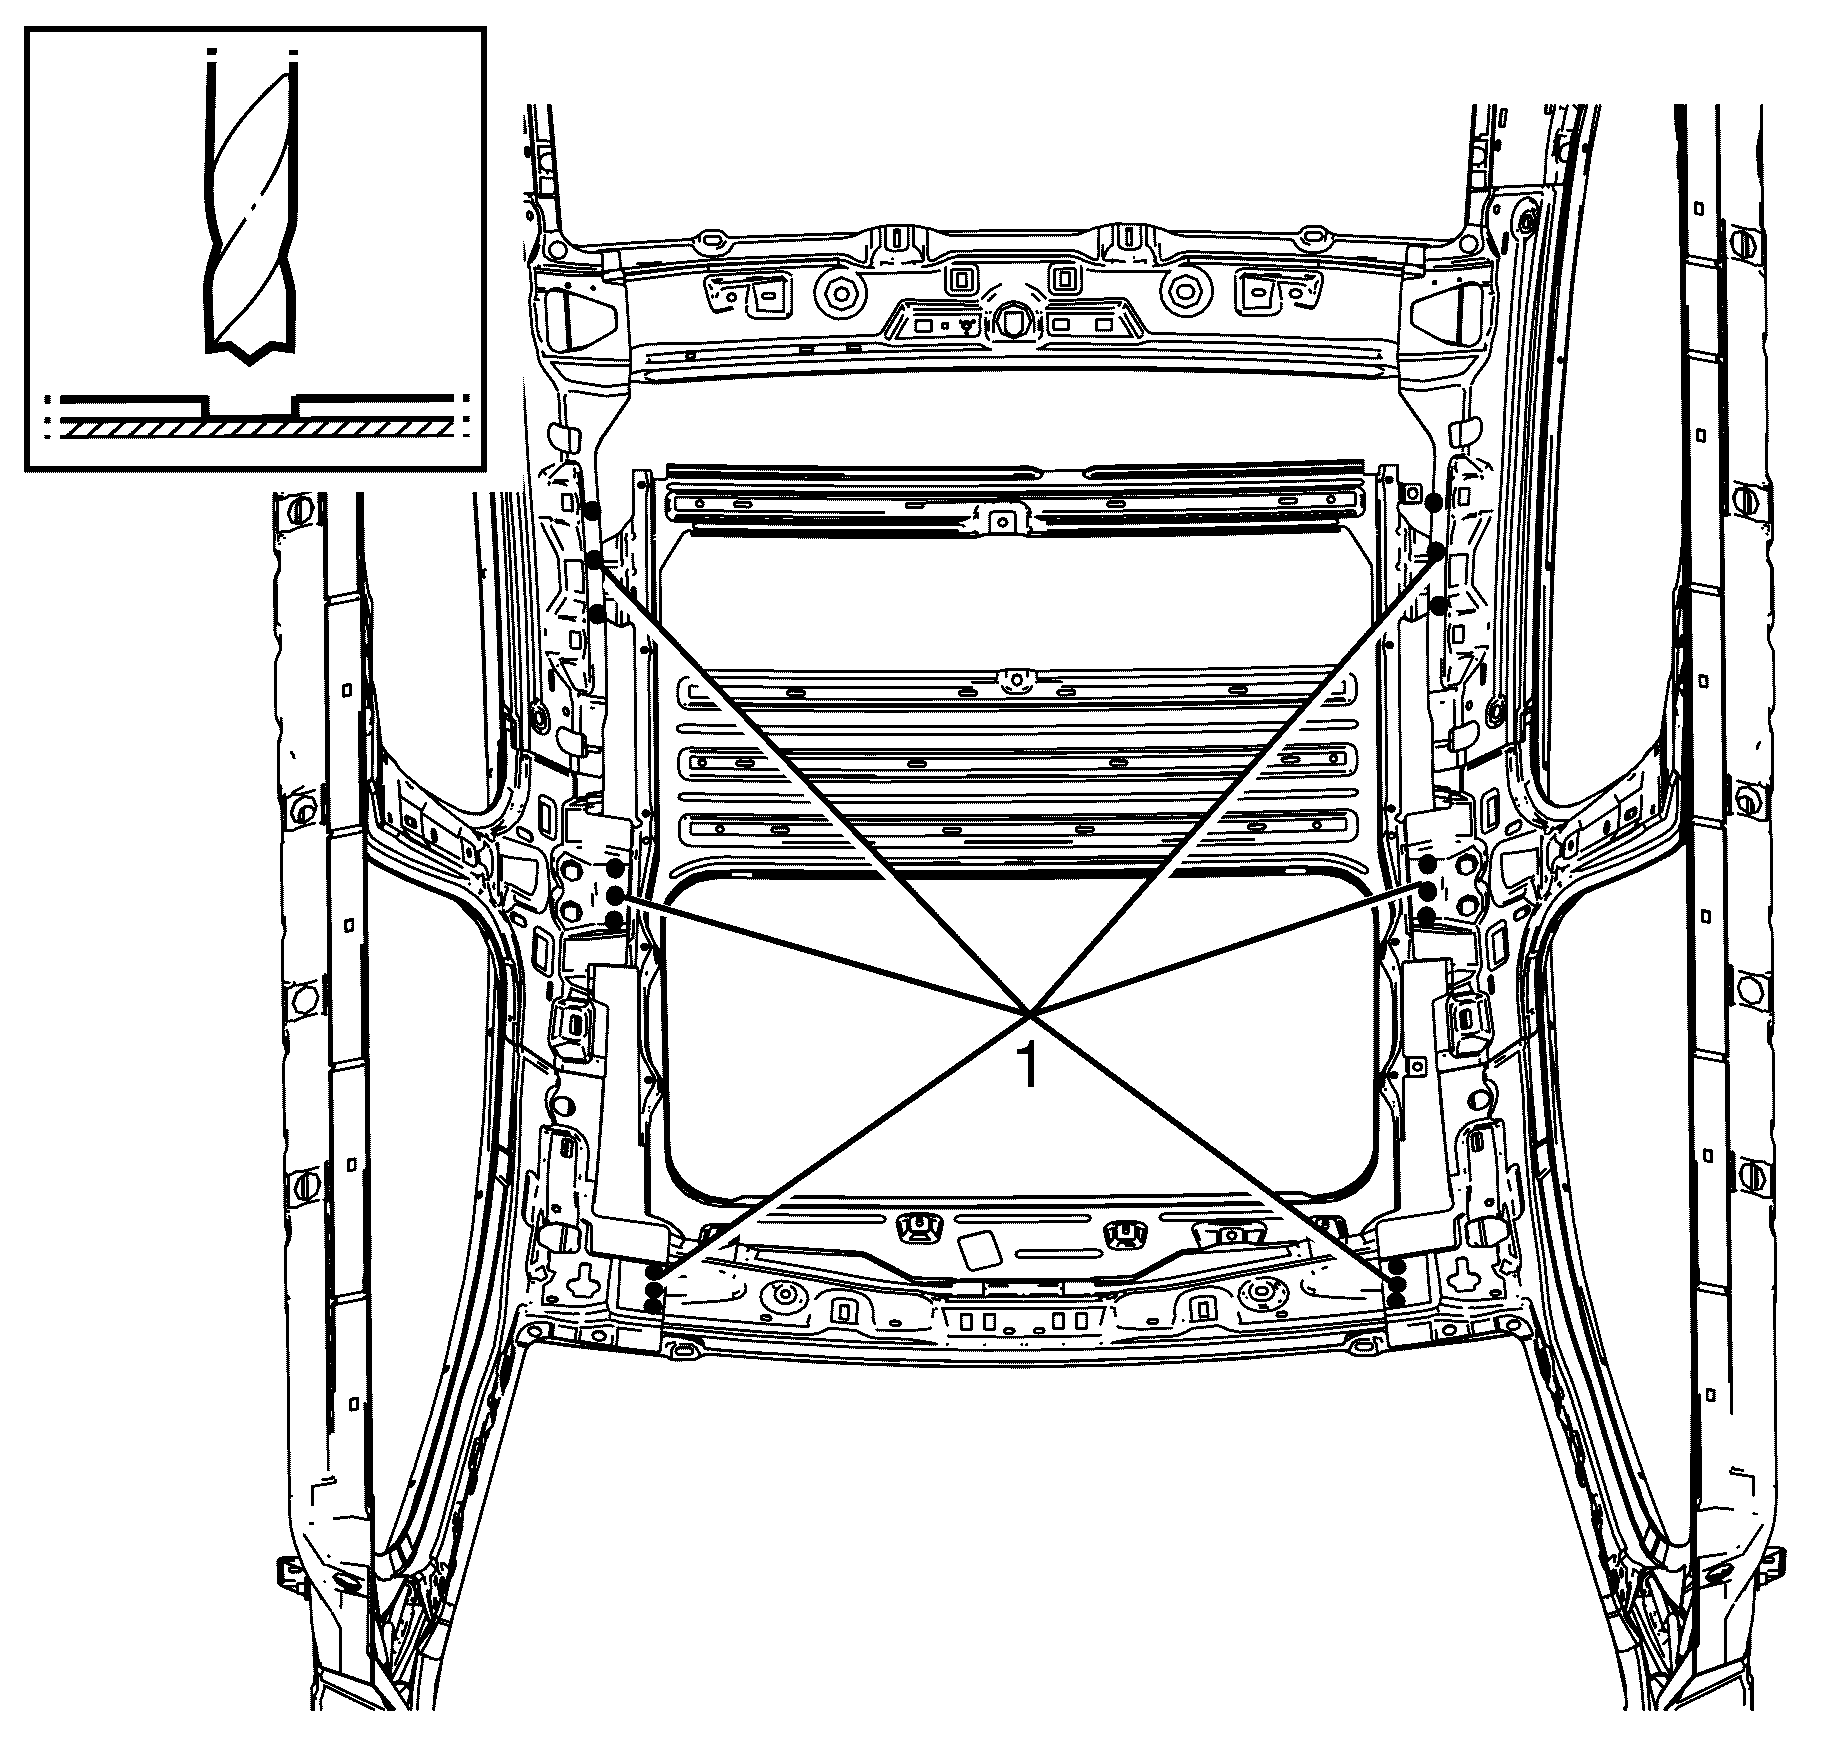
- Drill 8 mm (5/16 in ) puddle weld holes in the NEW roof outer panel in the locations to be puddle welded.
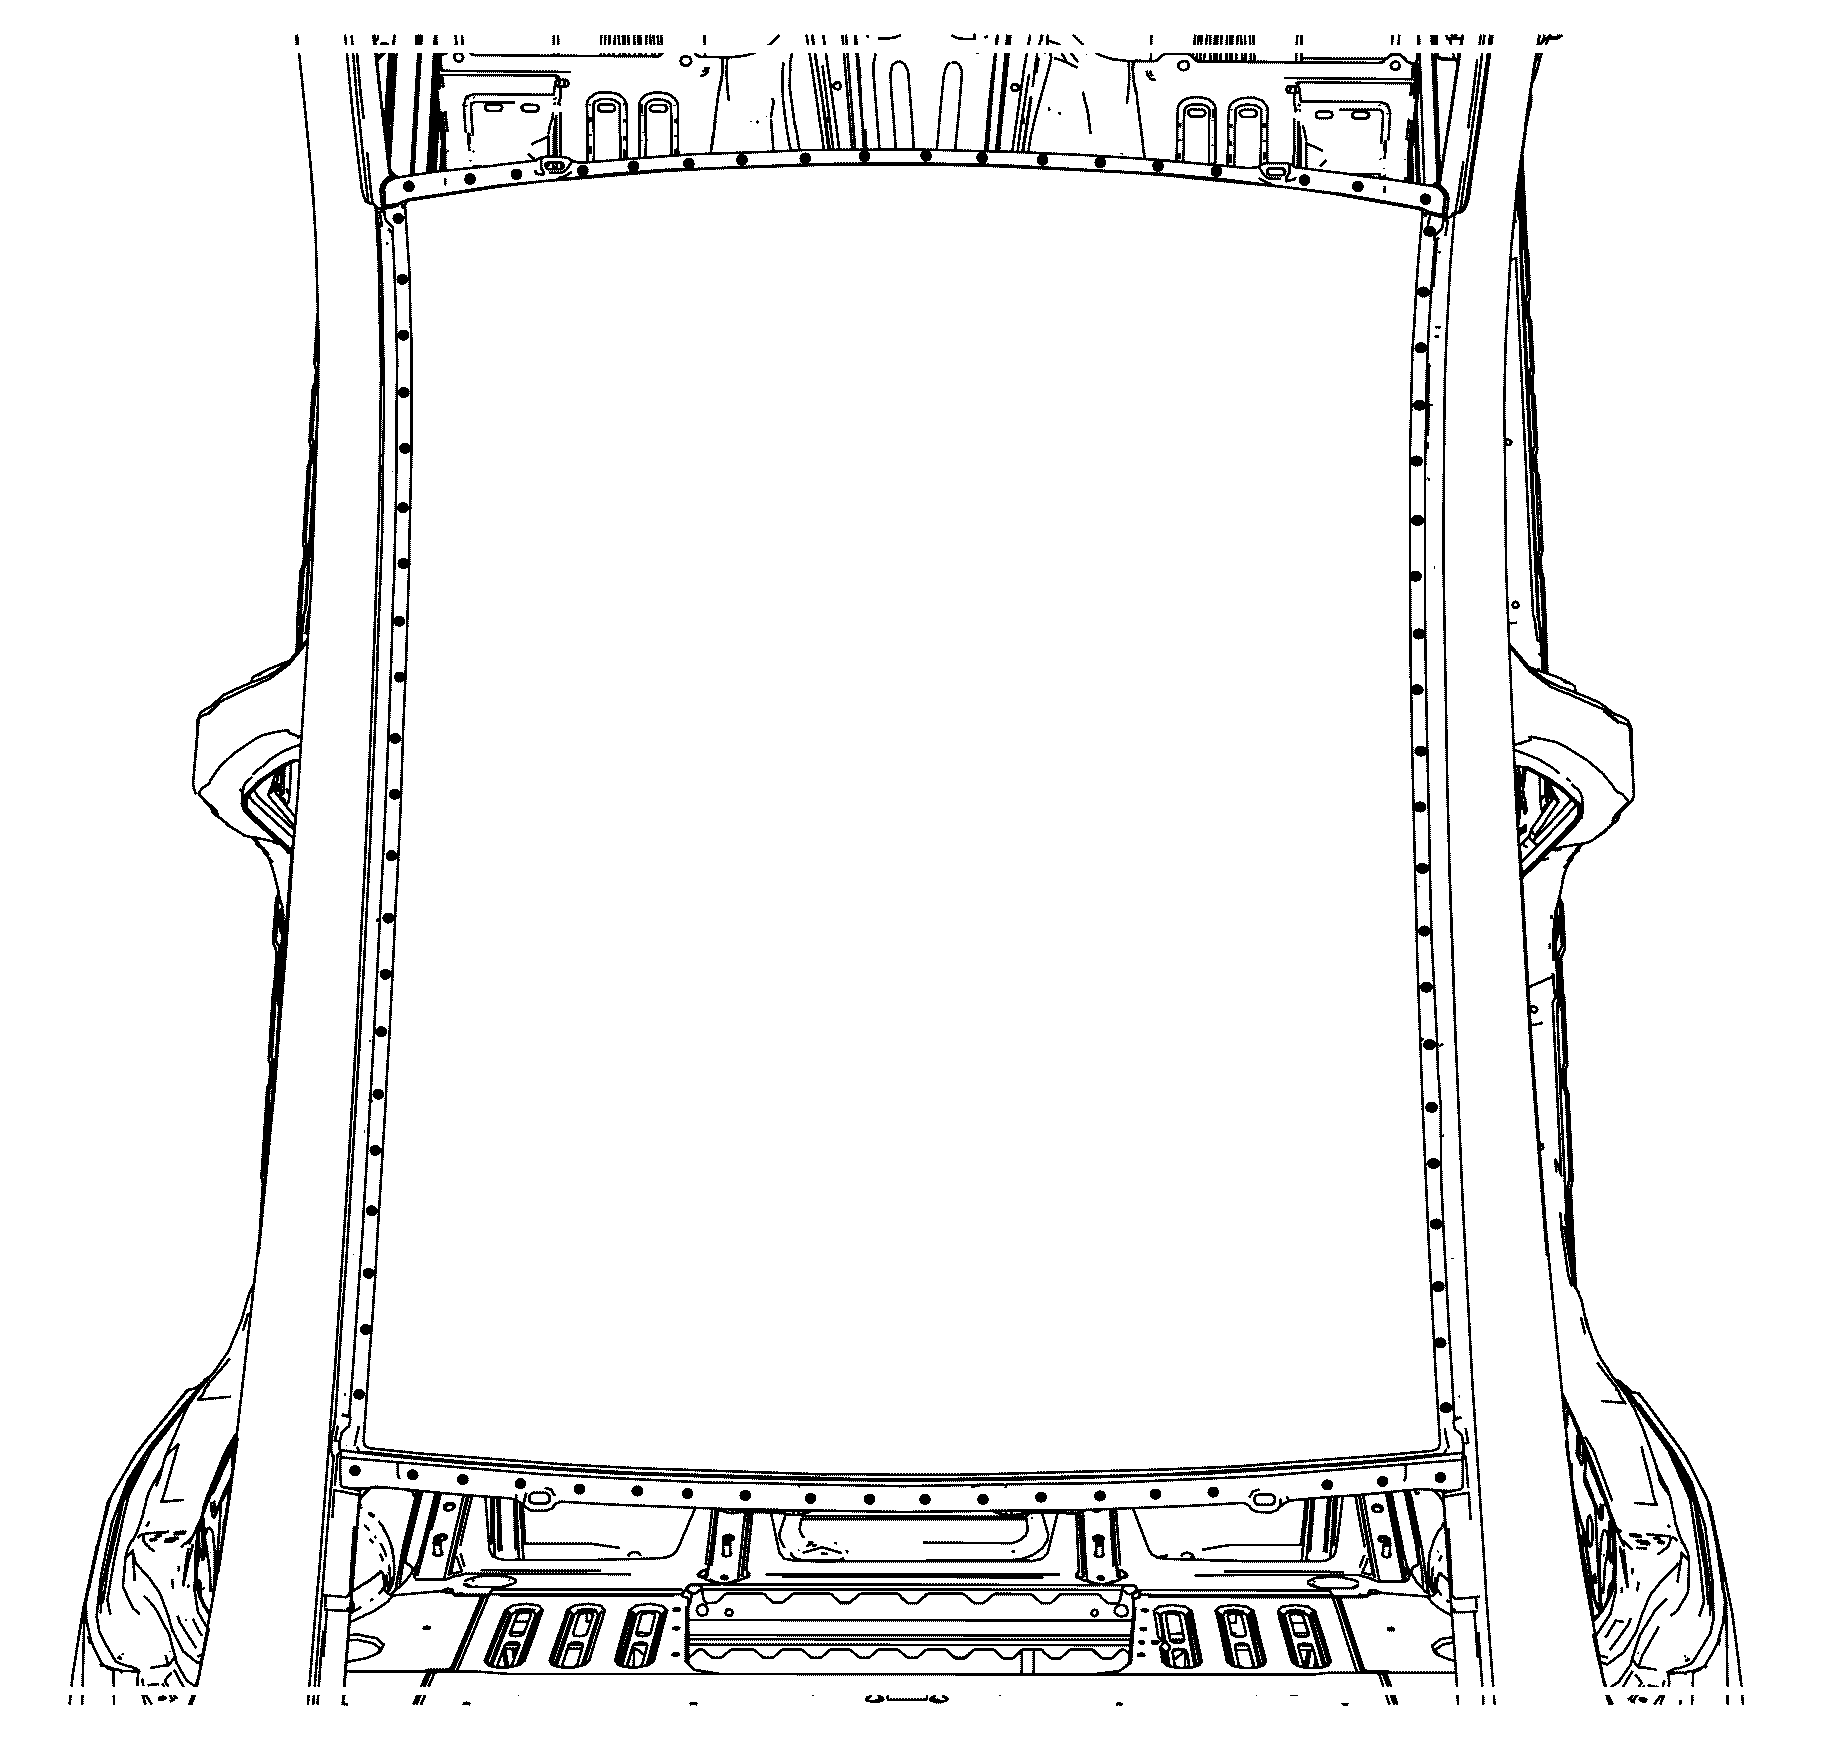
- Apply two full beads of structural adhesive GM6449G or equivalent to the center bow (2).
- Apply a full bead of structural adhesive GM6449G or equivalent to the front and rear bows (1).
- Apply structural adhesive GM6449G or equivalent to the mating surfaces of the roof panel and body side panel (1).
- Position the NEW roof outer panel to the vehicle.
- Inspect the fit.
- Clamp roof outer panel into correct position.
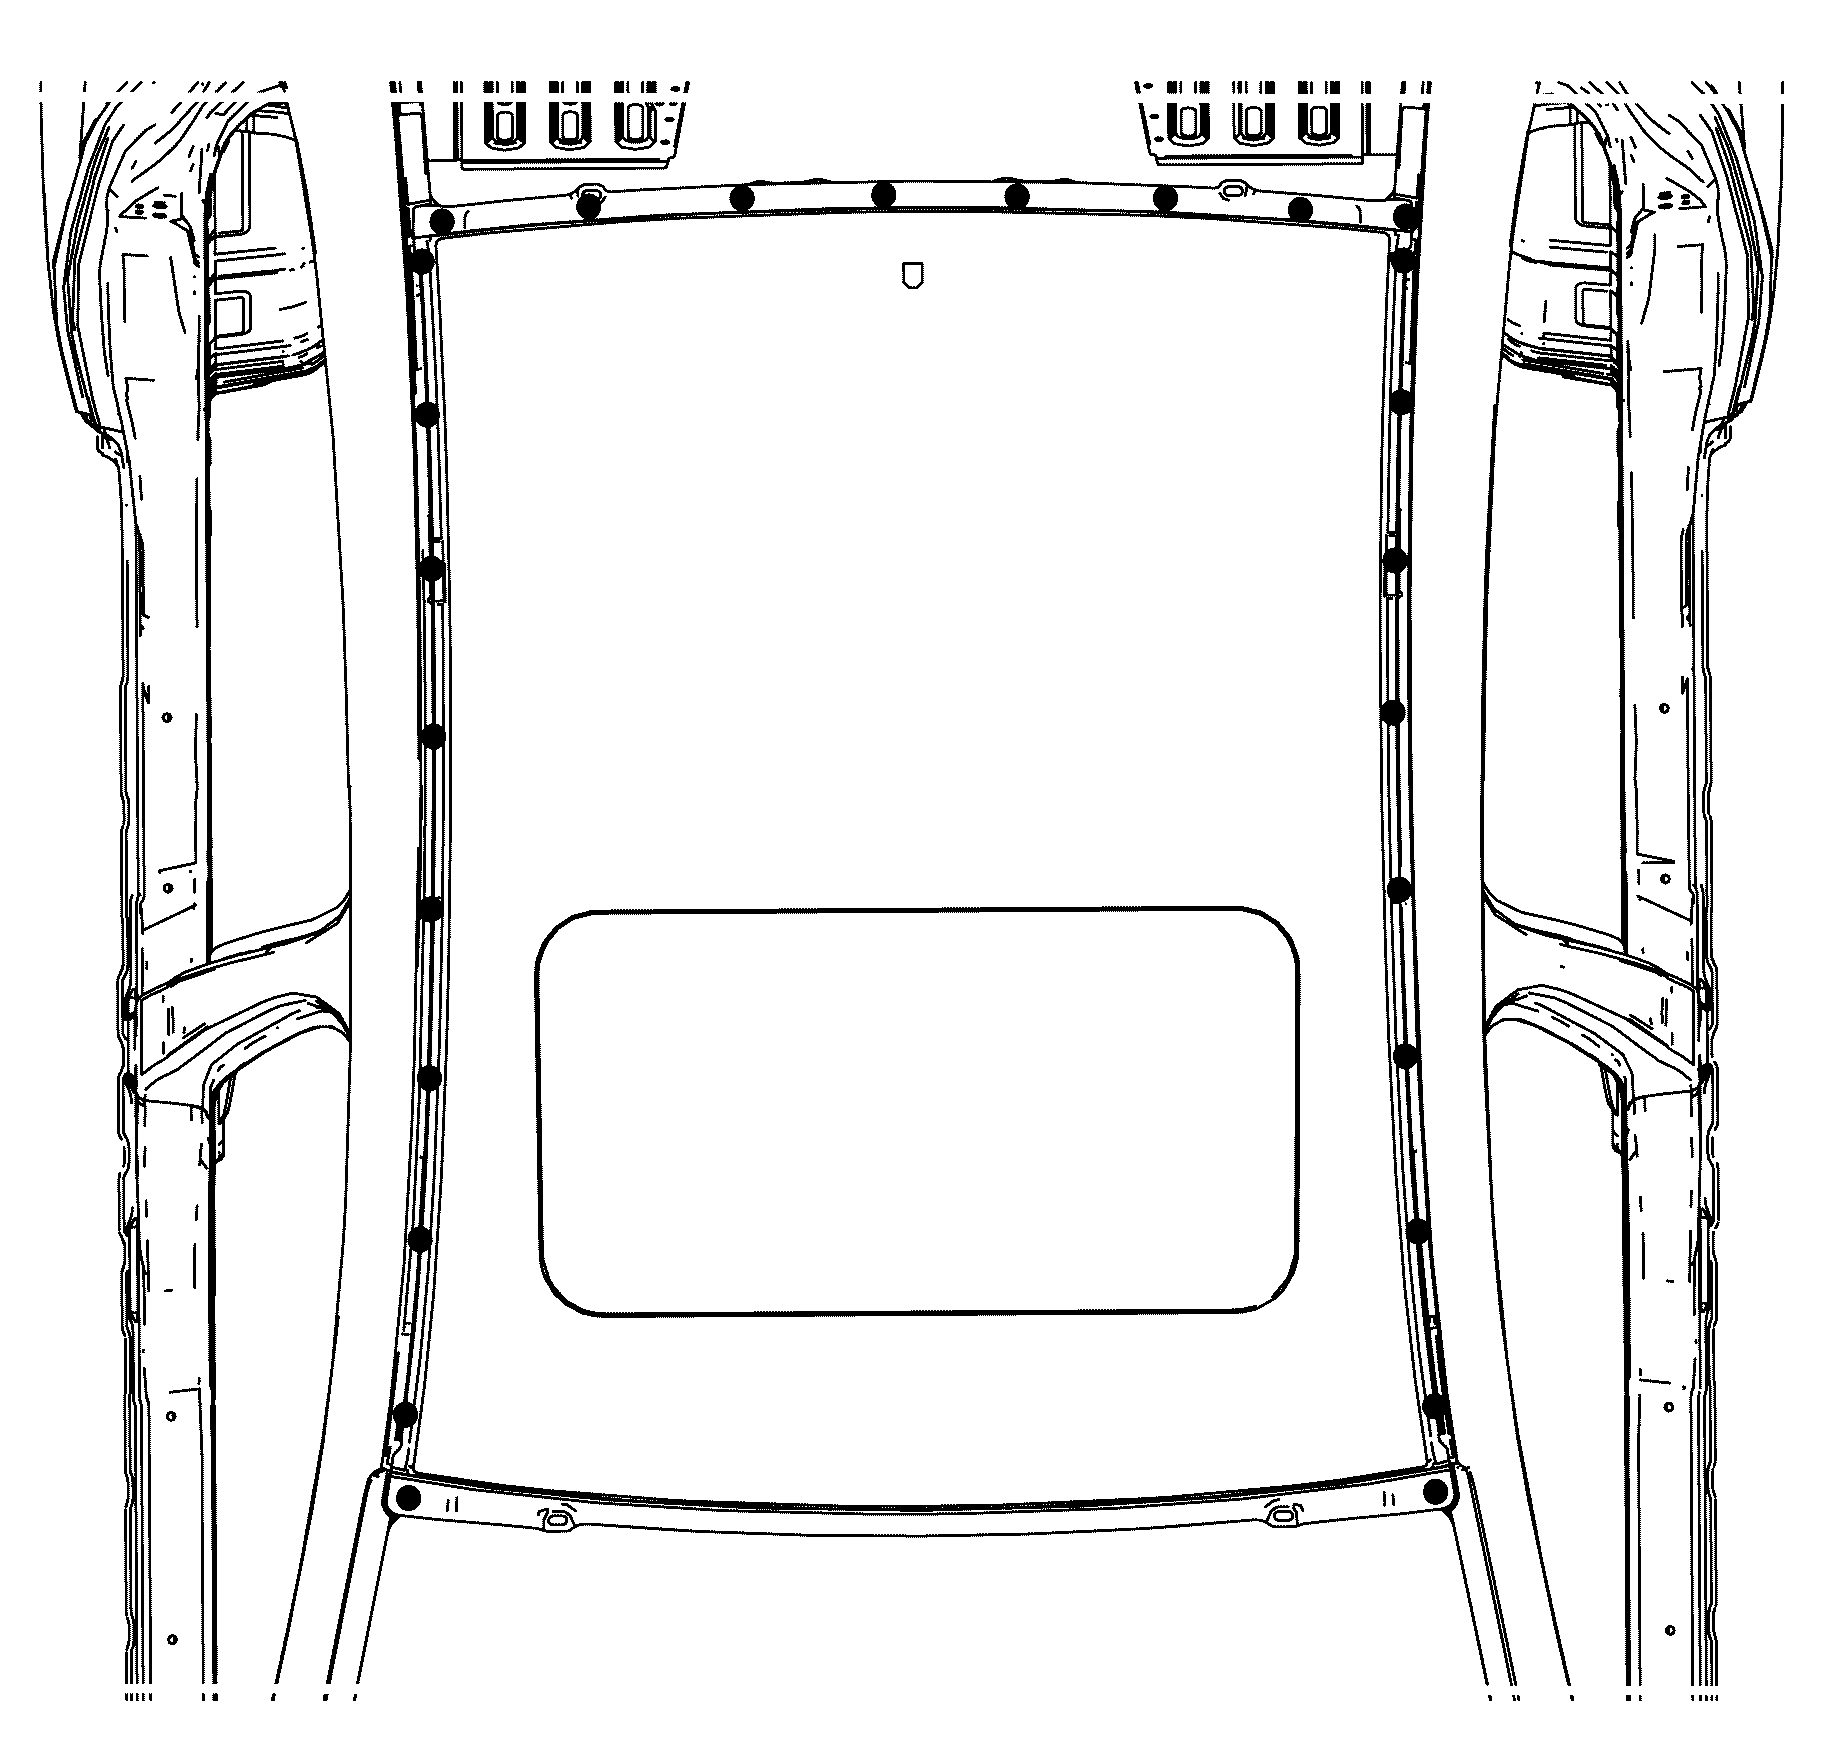
- Spot weld or puddle weld the roof outer panel on both sides using the same number of welds as per original build.
- Apply the sealers and anti-corrosion materials to the repair area, as necessary. Refer to Anti-Corrosion Treatment and Repair.
- Paint the repaired area. Refer to Basecoat/Clearcoat Paint Systems.
- Install the roof weld moulding. Refer to Roof Weld Joint Reveal Molding Replacement.
- Install the rear window. Refer to Rear Window Replacement.
- Install the windshield. Refer to Windshield Replacement.
- Install the headliner. Refer to Headlining Trim Panel Replacement in Interior Trim.
- Install the overhead lighting panel. Refer to Dome Lamp Replacement.
- Install the inner upper centre trim. Refer to Body Hinge Pillar Trim Panel Replacement.
- Install the inner rear quarter trim. Refer to Quarter Upper Trim Panel Replacement.
- Install the windshield pillar moulding. Refer to Windshield Garnish Molding Replacement.
- Remove the tape to the corners of the panels and adjacent surfaces.
- Connect the negative battery cable. Refer to Battery Negative Cable Disconnection and Connection.
- Enable the SIR system. Refer to SIR Disabling and Enabling in SIR.
- If re-programming is required. Refer to Control Module References.
Important: If the location of the original spot weld holes can not be determined, or if structural weld-thru adhesive is present, space the puddle weld holes every 32 mm (1¼ in).
Important: Spot welding is the preferred method for attaching panels and should be used wherever possible. A puddle weld should be performed where your spot welder is unable to reach.
Important: Care must be taken to minimise the heat absorbed by the panel which could lead to panel distortion.
Roof Outer Replacement (With Sunroof) Removal Procedure
- Disable the SIR system. Refer to SIR Disabling and Enabling in SIR.
- Disconnect the negative battery cable. Refer to Battery Negative Cable Disconnection and Connection.
- Apply tape to the corners of the panels and adjacent surfaces.
- Remove the interior windshield garnish moulding. Refer to Windshield Garnish Molding Replacement.
- Remove the inner rear quarter trim. Refer to Quarter Upper Trim Panel Replacement.
- Remove the inner upper centre trim. Refer to Body Hinge Pillar Trim Panel Replacement.
- Remove the over head lighting panel. Refer to Dome Lamp Replacement.
- Remove the headliner. Refer to Headlining Trim Panel Replacement in Interior Trim.
- Remove the windshield. Refer to Windshield Replacement.
- Remove the rear window. Refer to Rear Window Replacement.
- Remove the roof weld moulding. Refer to Roof Weld Joint Reveal Molding Replacement.
- Remove the sunroof module. Refer to Sunroof Module Assembly Replacement.
- Remove the front sunroof drain hose. Refer to Sunroof Housing Front Drain Hose Replacement.
- Remove the rear sunroof drain hose. Refer to Sunroof Housing Rear Drain Hose Replacement.
- Visually inspect the damage. Repair as much of the damage as possible.
- Remove the sealers and anti-corrosion materials from the repair area, as necessary. Refer to Anti-Corrosion Treatment and Repair.
- Locate and mark all factory welds.
- Drill all factory welds. Note the number and location of welds for installation of the service assembly.
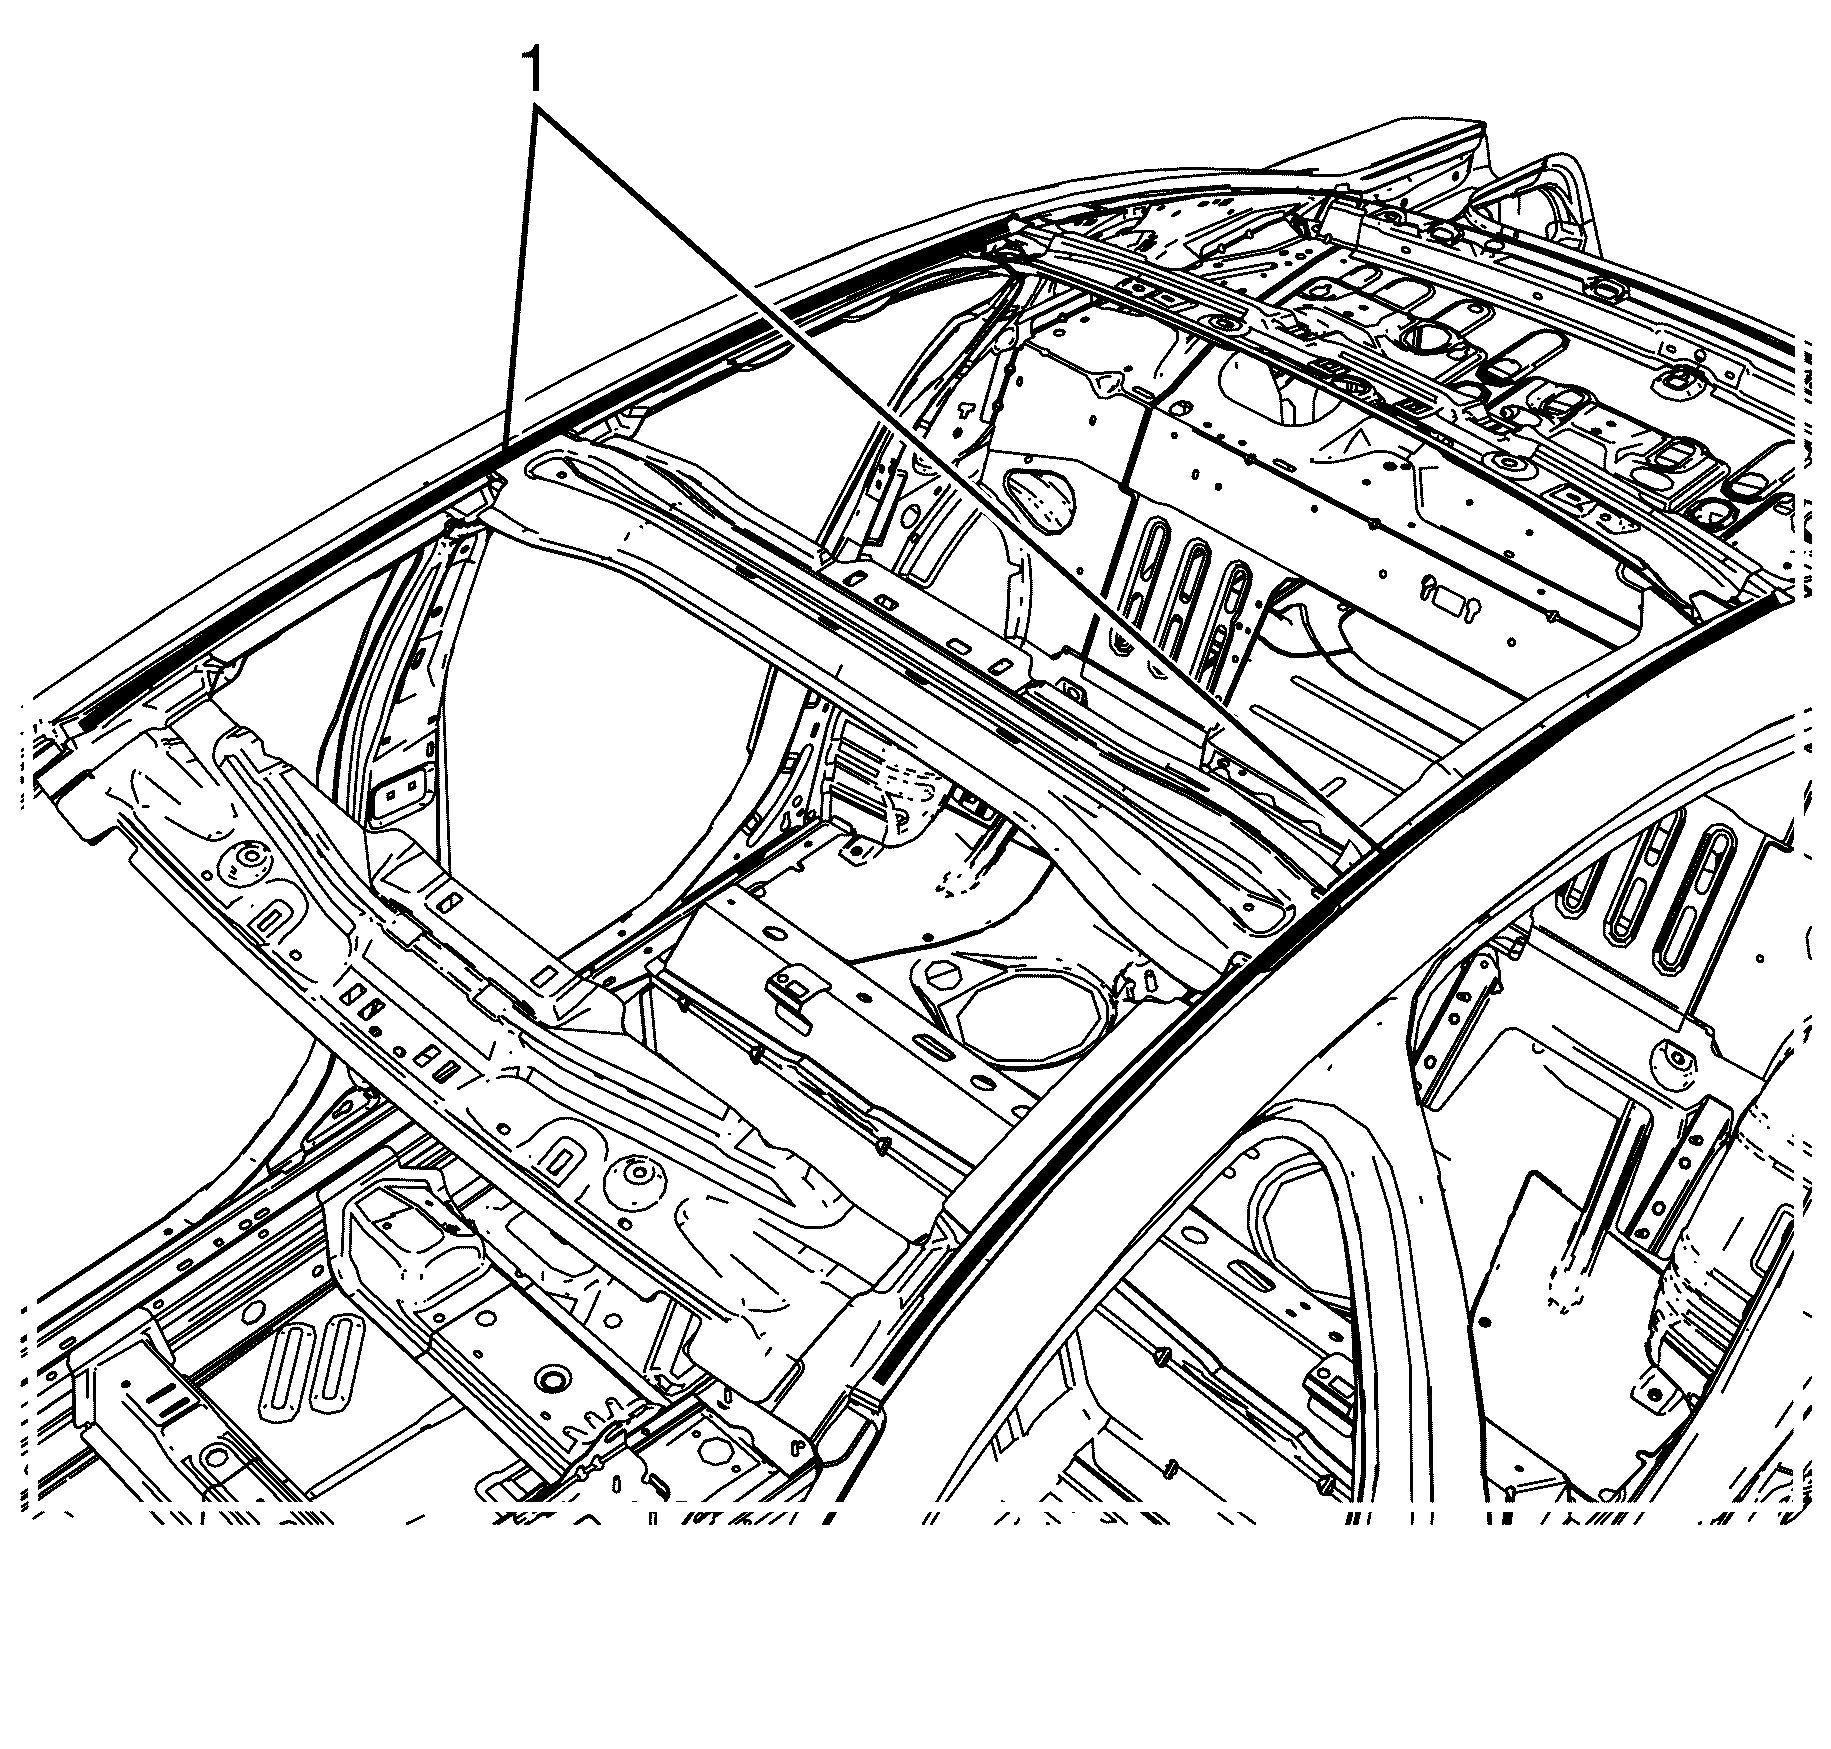
- Using a suitable tool, cut through the roof outer panel along the side of the roof channel (1).
- Heat the 'anti-flutter' adhesive between the roof panel and the rear roof bow (1).
- Locate, mark, and drill out the factory welds (1) attaching the roof panel assembly to the body side rings.
- Remove the roof outer panel assembly from the vehicle.
- Using a suitable tool remove the remaining strip of roof panel (1) from the body side panel.
Caution: Refer to Approved Equipment for Collision Repair Caution in the Preface section.
Caution: Refer to Foam Sound Deadeners Caution in the Preface section.
Caution: Refer to Battery Disconnect Caution in the Preface section.
Important: Use care when cutting to protect adjacent panels. Cut inboard of the roof structure.
Important: The roof panel is attached to the steel roof structure with beads of adhesive on the sides and spot-welds on the side rail, windshield and back-glass flanges. Replacement of the roof panel can be performed using conventional procedures, however, the windshield and back glass must be removed.
Important: The roof outer panel is secured to the body side panel with adhesive and spot welds, it cannot be removed by cutting the spot welds alone.
Important: Heating the 'anti-flutter' adhesive softens it making it easier to cut through.
Roof Outer Replacement (With Sunroof) Installation Procedure
- Clean and prepare the attaching surfaces for welding.
- Clean the remaining anti-flutter adhesive from the front, centre and rear bow surfaces.
- Mark the NEW roof outer panel with drilling locations, where puddle welding is necessary.
- Drill 8 millimetres (5/16 in ) puddle weld holes in the NEW roof outer panel in the locations to be puddle welded.
- Apply a full bead of structural adhesive GM6449G or equivalent to the rear roof bow (1).
- Apply structural adhesive GM6449G or equivalent to the mating surfaces of the roof panel and body side rings (1).
- Position the NEW roof outer panel assembly to the vehicle.
- Inspect for proper fitment.
- Clamp roof outer panel into correct position.
- Spot weld or puddle weld the roof outer panel on both sides using the same number of welds as per original build.
- Apply the sealers and anti-corrosion materials to the repair area, as necessary. Refer to Anti-Corrosion Treatment and Repair.
- Paint the repaired area. Refer to Basecoat/Clearcoat Paint Systems.
- Install the upper rear sunroof drain hose. Refer to Sunroof Housing Rear Drain Hose Replacement.
- Install the front sunroof drain hose. Refer to Sunroof Housing Front Drain Hose Replacement.
- Install the sunroof module. Refer to Sunroof Module Assembly Replacement.
- If re-programming is required. Refer to Control Module References.
- Install the roof weld moulding. Refer to Roof Weld Joint Reveal Molding Replacement.
- Install the rear window. Refer to Rear Window Replacement.
- Install the windshield. Refer to Windshield Replacement.
- Install the headliner. Refer to Headlining Trim Panel Replacement in Interior Trim.
- Install the over head lighting panel. Refer to Dome Lamp Replacement.
- Install the inner upper centre trim. Refer to Body Hinge Pillar Trim Panel Replacement.
- Install the inner rear quarter trim. Refer to Quarter Upper Trim Panel Replacement.
- Install the interior windshield pillar moulding. Refer to Windshield Garnish Molding Replacement.
- Remove the tape to the corners of the panels and adjacent surfaces.
- Connect the negative battery cable. Refer to Battery Negative Cable Disconnection and Connection.
- Enable the SIR system. Refer to SIR Disabling and Enabling in SIR.
- If re-programming is required. Refer to Control Module References.
Important: If the location of the original spot weld holes can not be determined, or if structural weld-thru adhesive is present, space the puddle weld holes every 32 millimetres (1¼ in).
Important: Spot welding is the preferred method for attaching panels and should be used wherever possible. A puddle weld should be performed where your spot welder is unable to reach.

Important: Care must be taken to minimise the heat absorbed by the panel which could lead to panel distortion.
