For 1990-2009 cars only
Removal Procedure
- Disable the SIR system. Refer to SIR Disabling and Enabling.
- Disconnect the negative battery cable. Refer to Battery Negative Cable Disconnection and Connection.
- Remove the cargo liner. Refer to Customer Concern Verification Sheets .
- Remove the fuel tank. Refer to Fuel Tank Replacement or Customer Concern Verification Sheets .
- Remove the front seats. Refer to Front Seat Replacement - Bucket.
- Remove the front seat belts. Refer to Front Seat Belt Replacement.
- Remove the battery. Refer to Battery Replacement.
- Remove the rear window shelf trim panel. Refer to Rear Window Shelf Trim Panel Replacement.
- Remove the headliner. Refer to Customer Concern Verification Sheets .
- Remove the remote function actuator. Refer to Customer Concern Verification Sheets .
- Remove the positive battery cable from the vehicle. Refer to Battery Positive Cable Replacement.
- Remove the rocker panel moulding. Refer to Customer Concern Verification Sheets .
- Remove the rear header trim. Refer to Customer Concern Verification Sheets .
- Remove the body side roof drip moulding. Refer to Body Side Roof Drip Molding Replacement.
- Remove the body lock pillar trim. Refer to Customer Concern Verification Sheets .
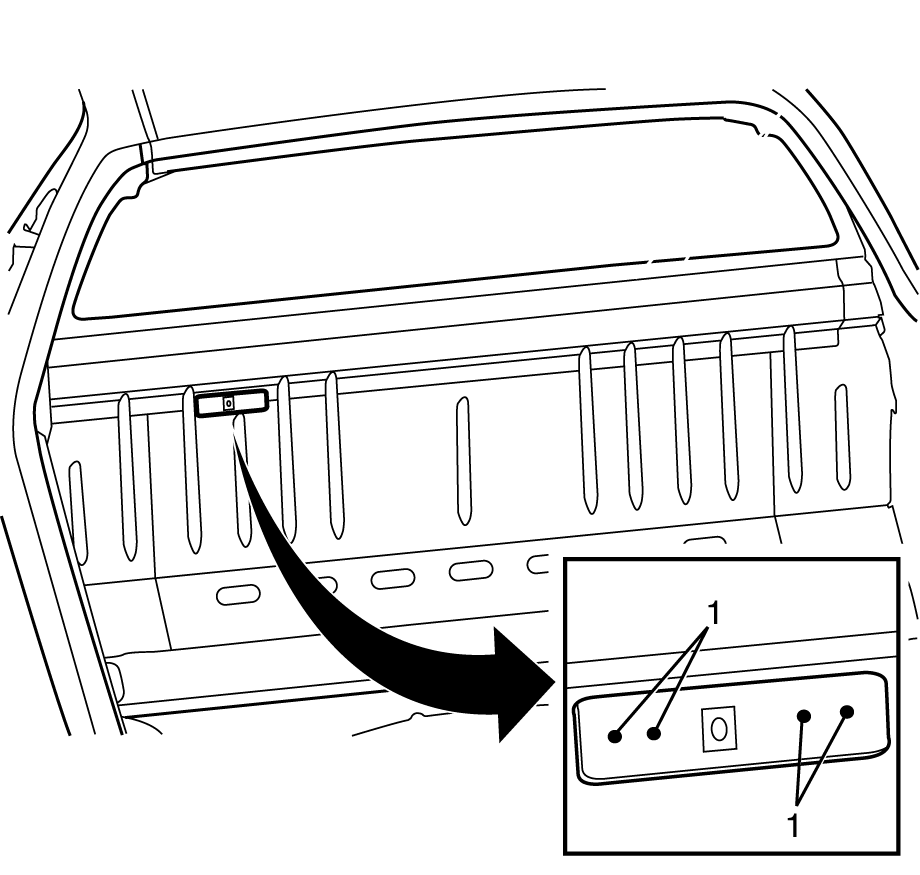
- Note the location and remove the sealers and anti-corrosion materials from the repair area, as necessary. Refer to Anti-Corrosion Treatment and Repair.
- Locate, mark and drill out the spot welds attaching the child restraint tether anchor to the rear window panel reinforcement (1).
Caution: Refer to Approved Equipment for Collision Repair Caution in the Preface section.
Caution: Refer to Safety Glasses Caution in the Preface section.
Caution: Refer to Foam Sound Deadeners Caution in the Preface section.
Caution: Refer to Battery Disconnect Caution in the Preface section.
Important: Note the number and location of the factory welds for installation of the child restraint tether anchor.
Installation Procedure
- Clean and prepare the mating surfaces of both parts of the panel.
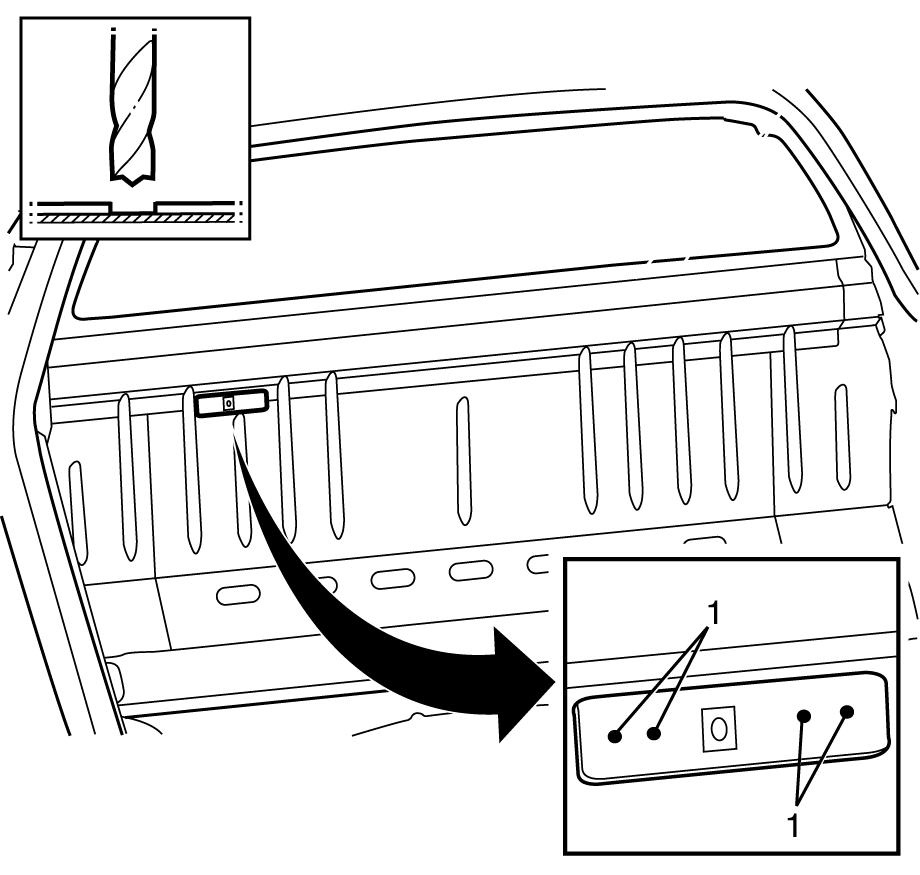
- Align the child restraint tether anchor to the rear window panel reinforcement.
- Weld the child restraint tether anchor to the rear window panel reinforcement (1).
- Apply the sealers and anti-corrosion materials to the repair area, as necessary. Refer to Anti-Corrosion Treatment and Repair.
- Paint the repaired area. Refer to Basecoat/Clearcoat Paint Systems.
- Install the body lock pillar trim. Refer to Customer Concern Verification Sheets .
- Install the body side roof drip moulding. Refer to Body Side Roof Drip Molding Replacement.
- Install the rear header trim. Refer to Customer Concern Verification Sheets .
- Install the rocker panel moulding. Refer to Rocker Panel Molding Replacement.
- Install the positive battery cable to the vehicle. Refer to Battery Positive Cable Replacement.
- Install the rear window shelf trim panel. Refer to Rear Window Shelf Trim Panel Replacement.
- Install the battery. Refer to Battery Replacement.
- Install the remote function actuator. Refer to Customer Concern Verification Sheets .
- Install the headliner. Refer to Customer Concern Verification Sheets .
- Install the front seat belts. Refer to Front Seat Belt Replacement.
- Install the fuel tank. Refer to Fuel Tank Replacement or Customer Concern Verification Sheets .
- Install the cargo liner. Refer to Customer Concern Verification Sheets .
- Connect the negative battery cable. Refer to Battery Negative Cable Disconnection and Connection.
- Enable the SIR system. Refer to SIR Disabling and Enabling.
Important: Spot welding is the preferred method for attaching panels and should be used whenever possible. A plug weld should only be performed where spot welding is not possible.