Exhaust Manifold Replacement - Left Side RPO LD8
Removal Procedure
Caution: In order to avoid being burned, do not service the exhaust system while it is still hot. Service the system when it is cool.
Caution: Always wear protective goggles and gloves when removing exhaust parts as falling rust and sharp edges from worn exhaust components could result in serious personal injury.
- Remove the front engine mount bracket. Refer to Engine Front Mount Bracket Replacement .
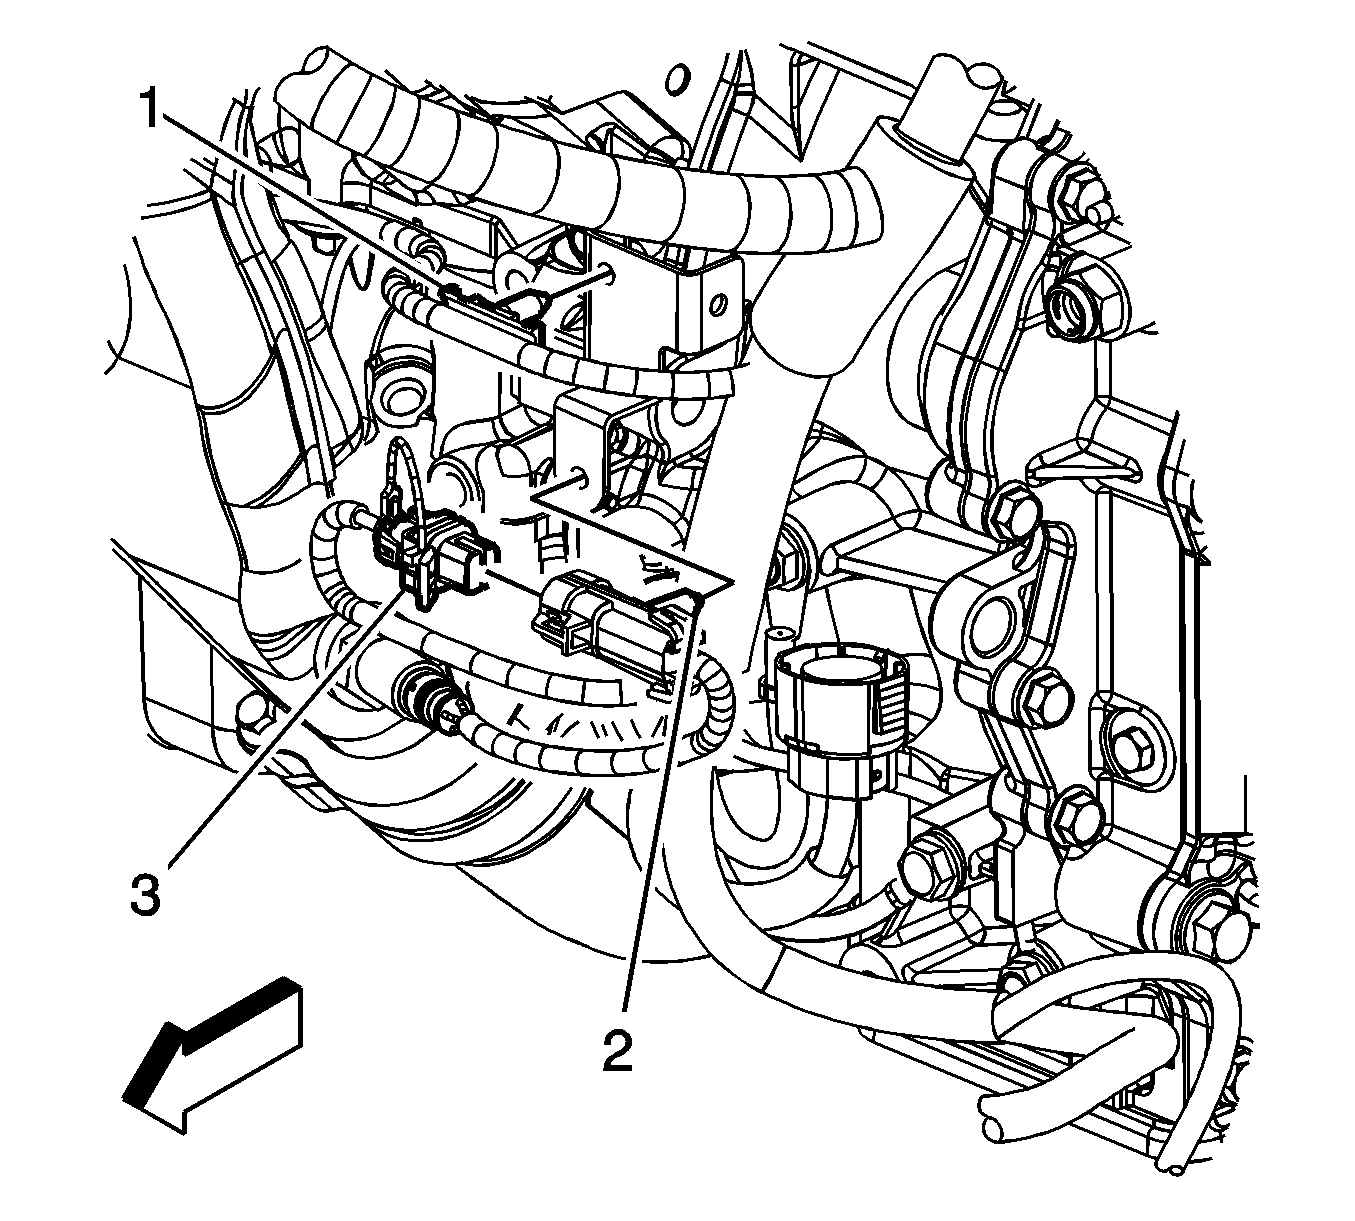
- Remove the connector position assurance (CPA) retainer.
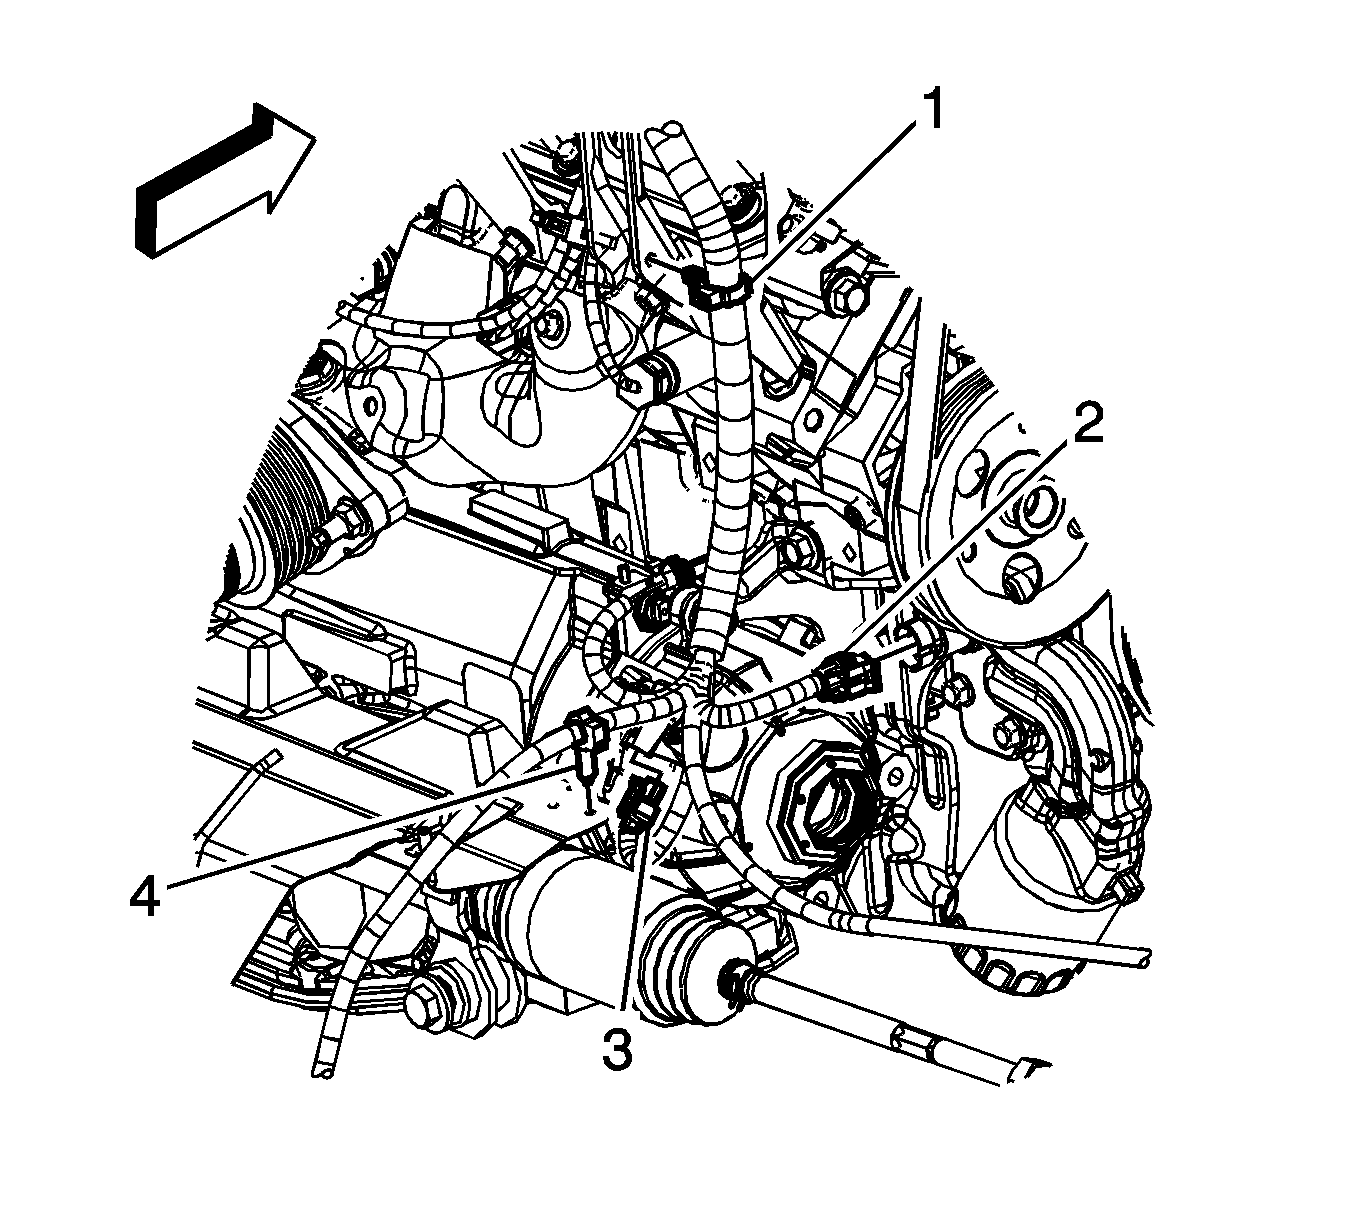
- Disconnect the engine harness electrical connector (3) from the heated oxygen sensor (HO2S).
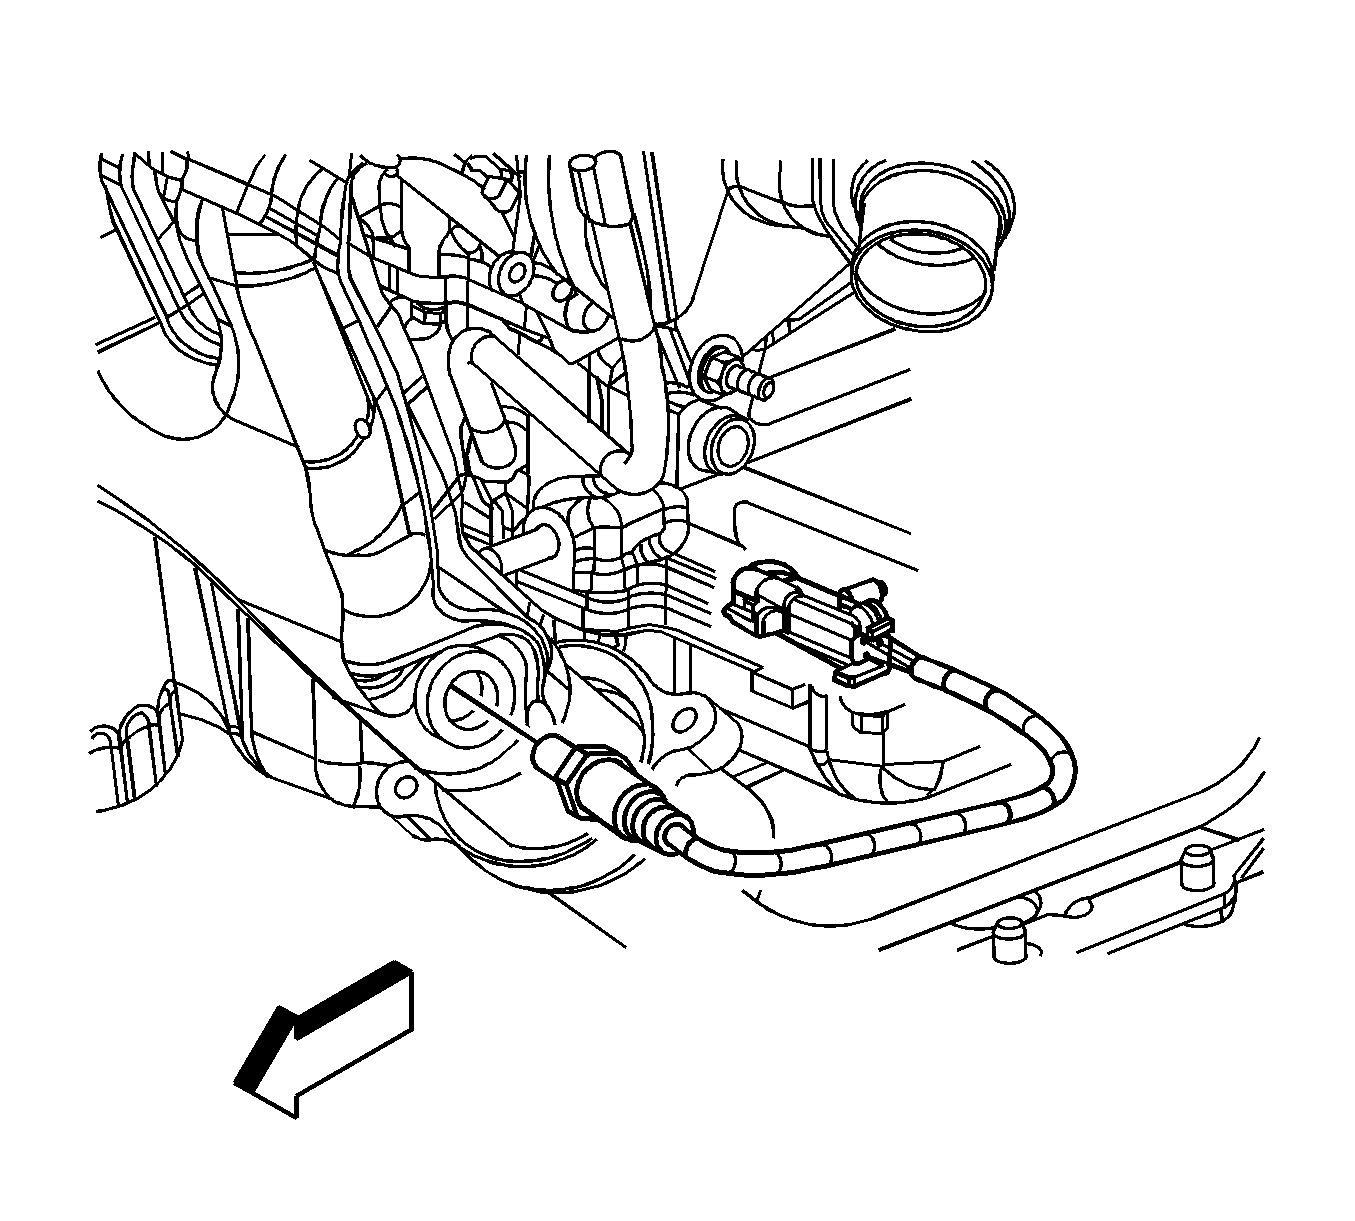
- Remove the HO2S.
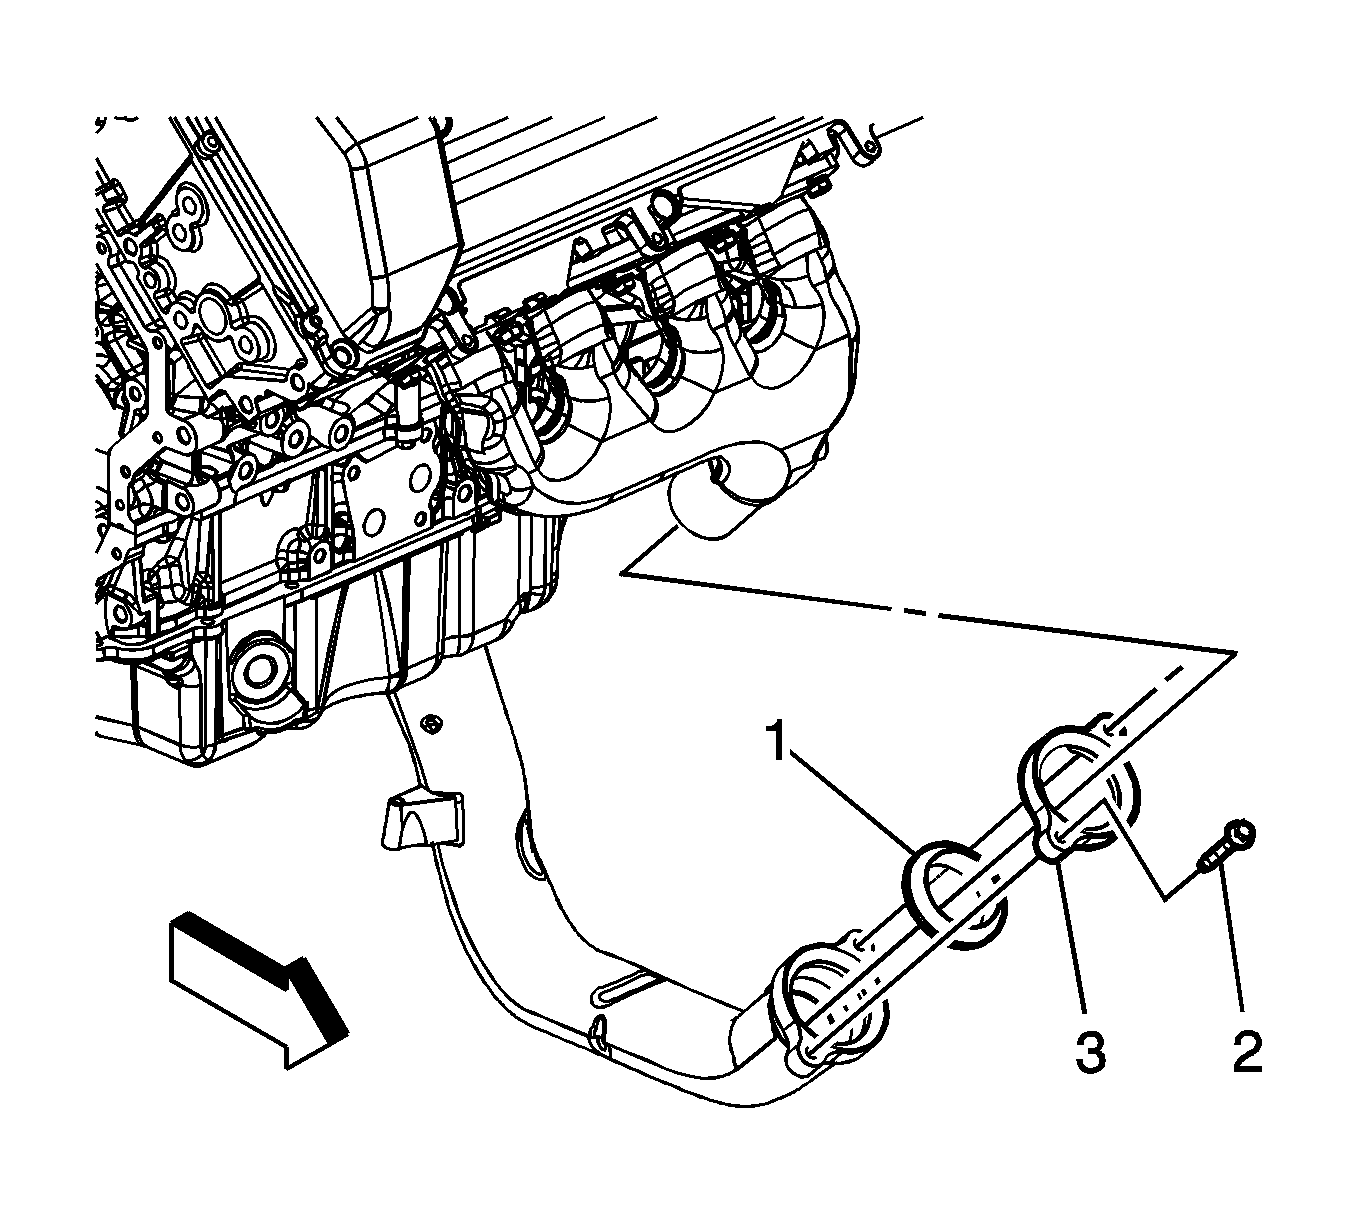
- Remove the exhaust manifold front pipe bolts (2).
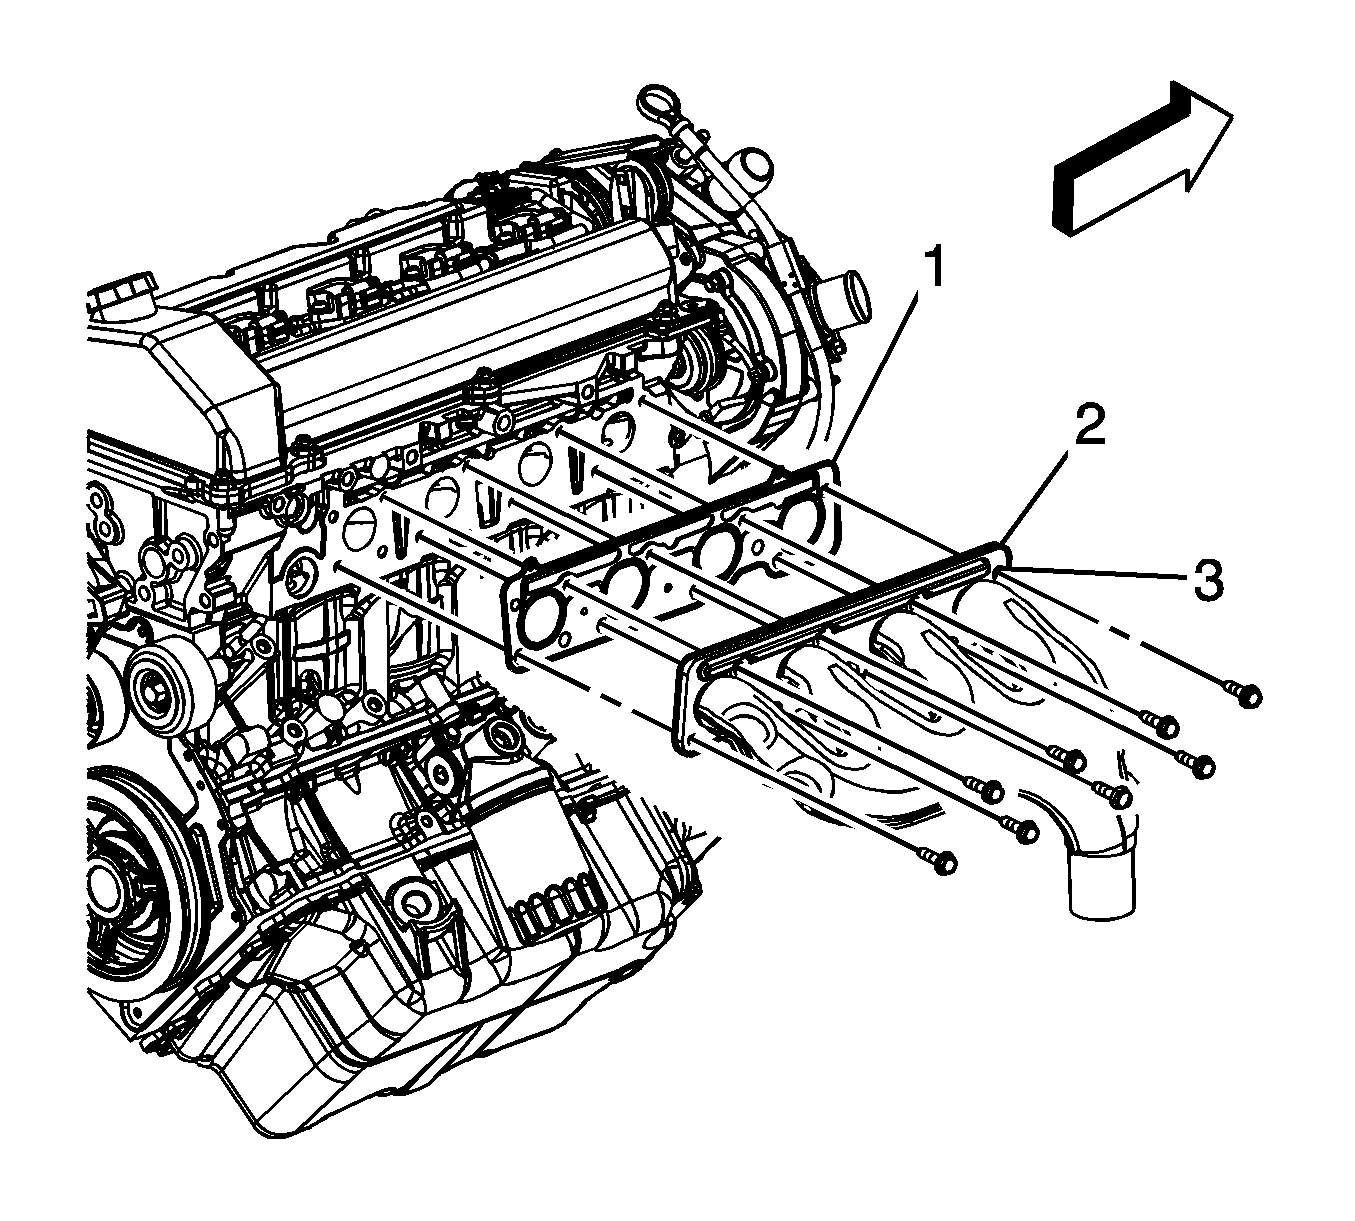
- Remove the exhaust manifold bolts.
- Remove the exhaust manifold (2).
- Remove and discard the exhaust manifold gasket (1).
- Remove and discard the front exhaust manifold pipe seal.
- Remove the front exhaust manifold pipe flange.
Installation Procedure
- Install the front exhaust manifold pipe flange and a NEW seal onto the exhaust manifold.
- Insert the upper right exhaust manifold bolt to the manifold in this location (2).
- Place the NEW exhaust manifold gasket over the bolt and against the manifold.
- Insert the exhaust manifold into the front exhaust manifold pipe and against the cylinder head.
- Finger start the exhaust manifold bolt.
- Install the remaining exhaust manifold bolts and tighten all exhaust manifold bolts starting from right to left beginning with the bolt in this location (2).
- Install the exhaust manifold front pipe bolts (2).
- If reusing the old HO2S, coat the threads with anti-sieze compound, GM P/N 12377953 or equivalent.
- Install the HO2S.
- Connect the engine harness electrical connector (3) to the HO2S.
- Install the CPA retainer.
- Install the front engine mount bracket. Refer to Engine Front Mount Bracket Replacement .

Notice: Refer to Fastener Notice in the Preface section.
Tighten
Tighten the bolts to 25 N·m (18 lb ft).


Tighten
Tighten the sensor to 41 N·m (30 lb ft).

Exhaust Manifold Replacement - Left Side RPO L26
Removal Procedure
Caution: In order to avoid being burned, do not service the exhaust system while it is still hot. Service the system when it is cool.
Caution: Always wear protective goggles and gloves when removing exhaust parts as falling rust and sharp edges from worn exhaust components could result in serious personal injury.
- Remove the oil level indicator and tube. Refer to Oil Level Indicator and Tube Replacement .
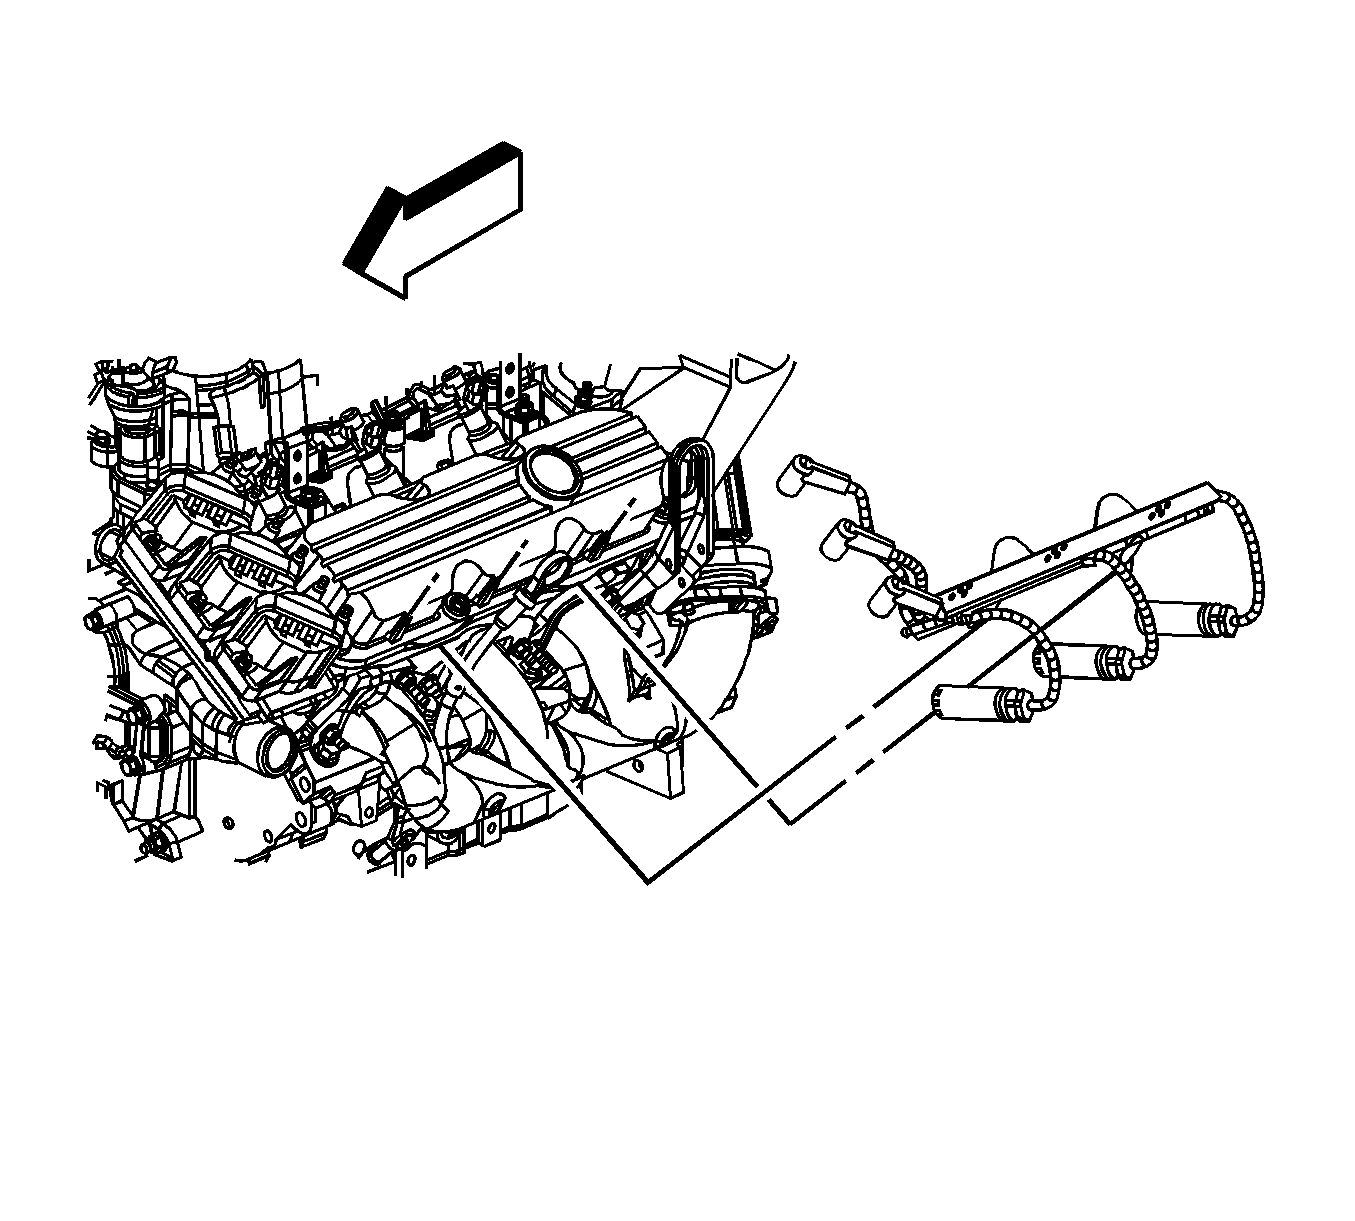
- Disconnect the spark plug wires from the spark plugs.
- Remove the spark plug wire channel from the rocker cover.
- Remove the engine harness clip (1) from the engine lift bracket.
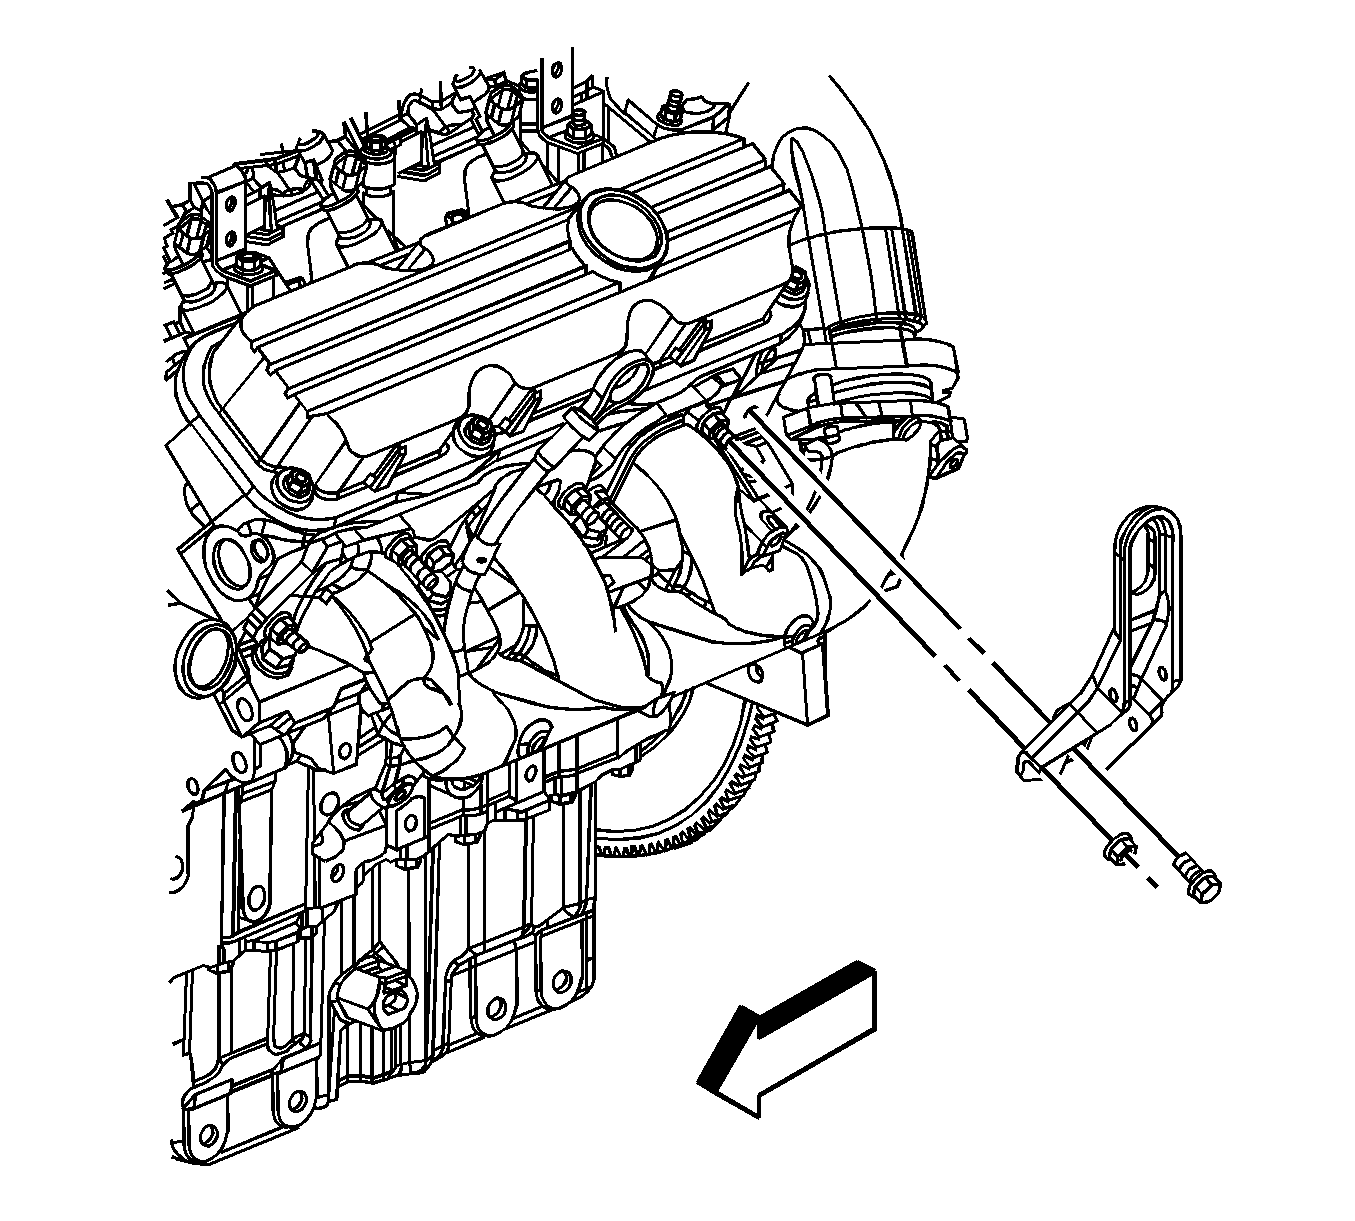
- Remove the engine lift bracket bolt and nut.
- Remove the engine lift bracket.
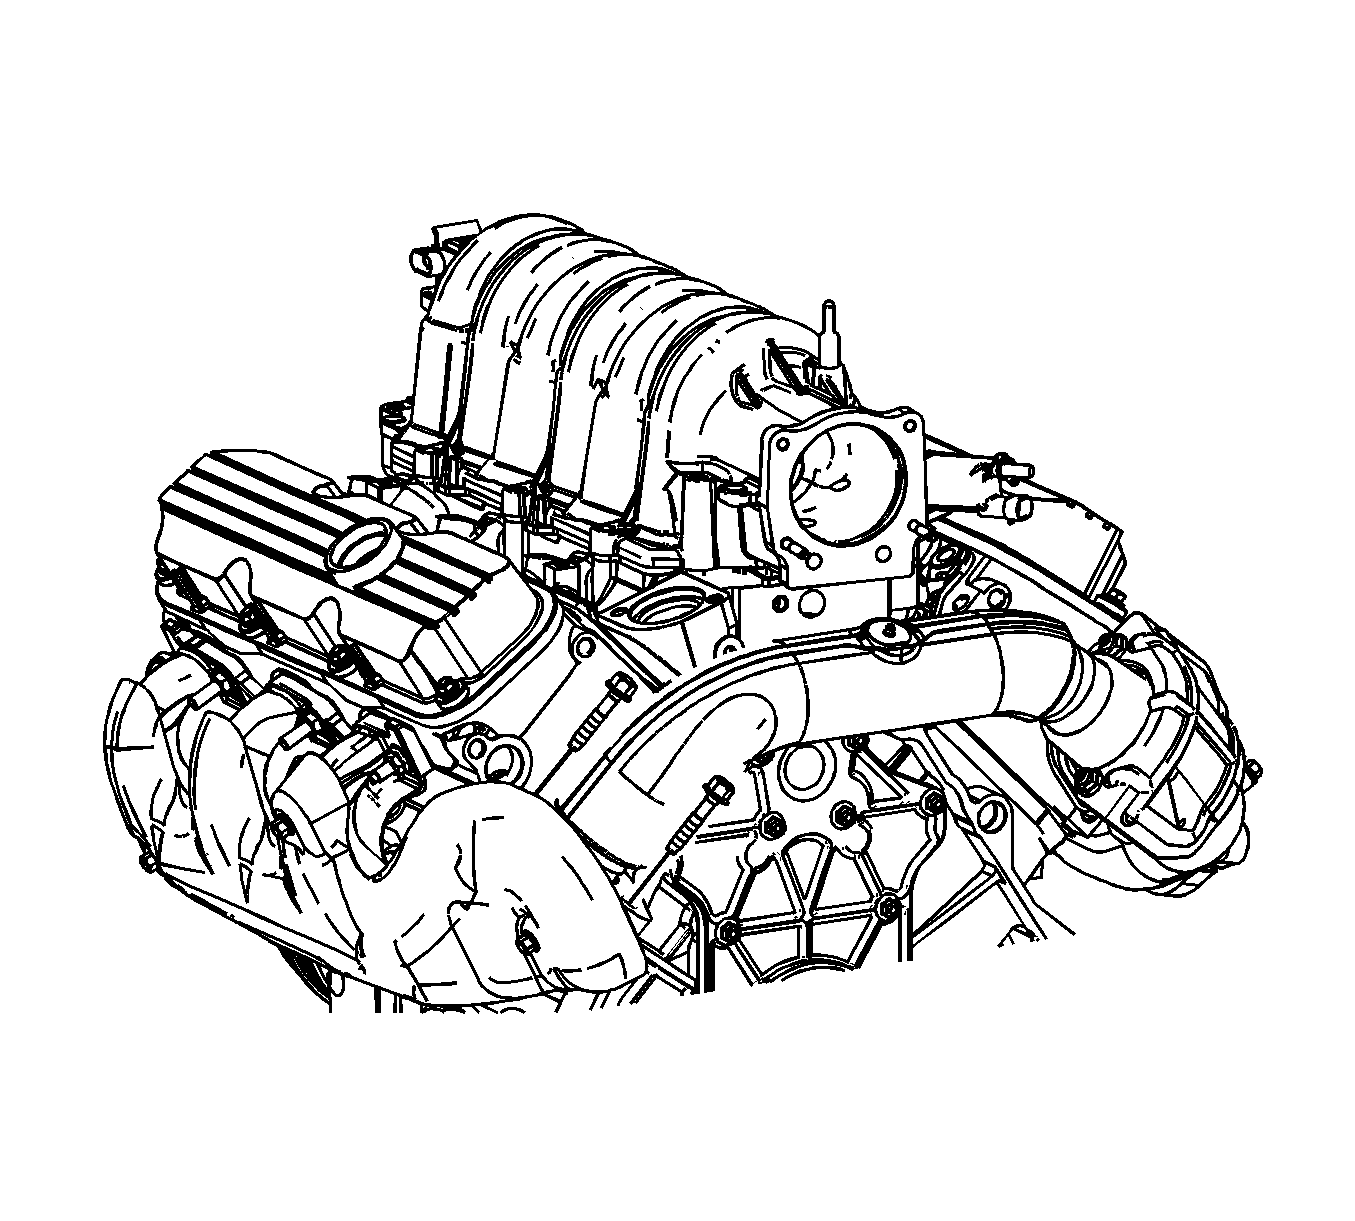
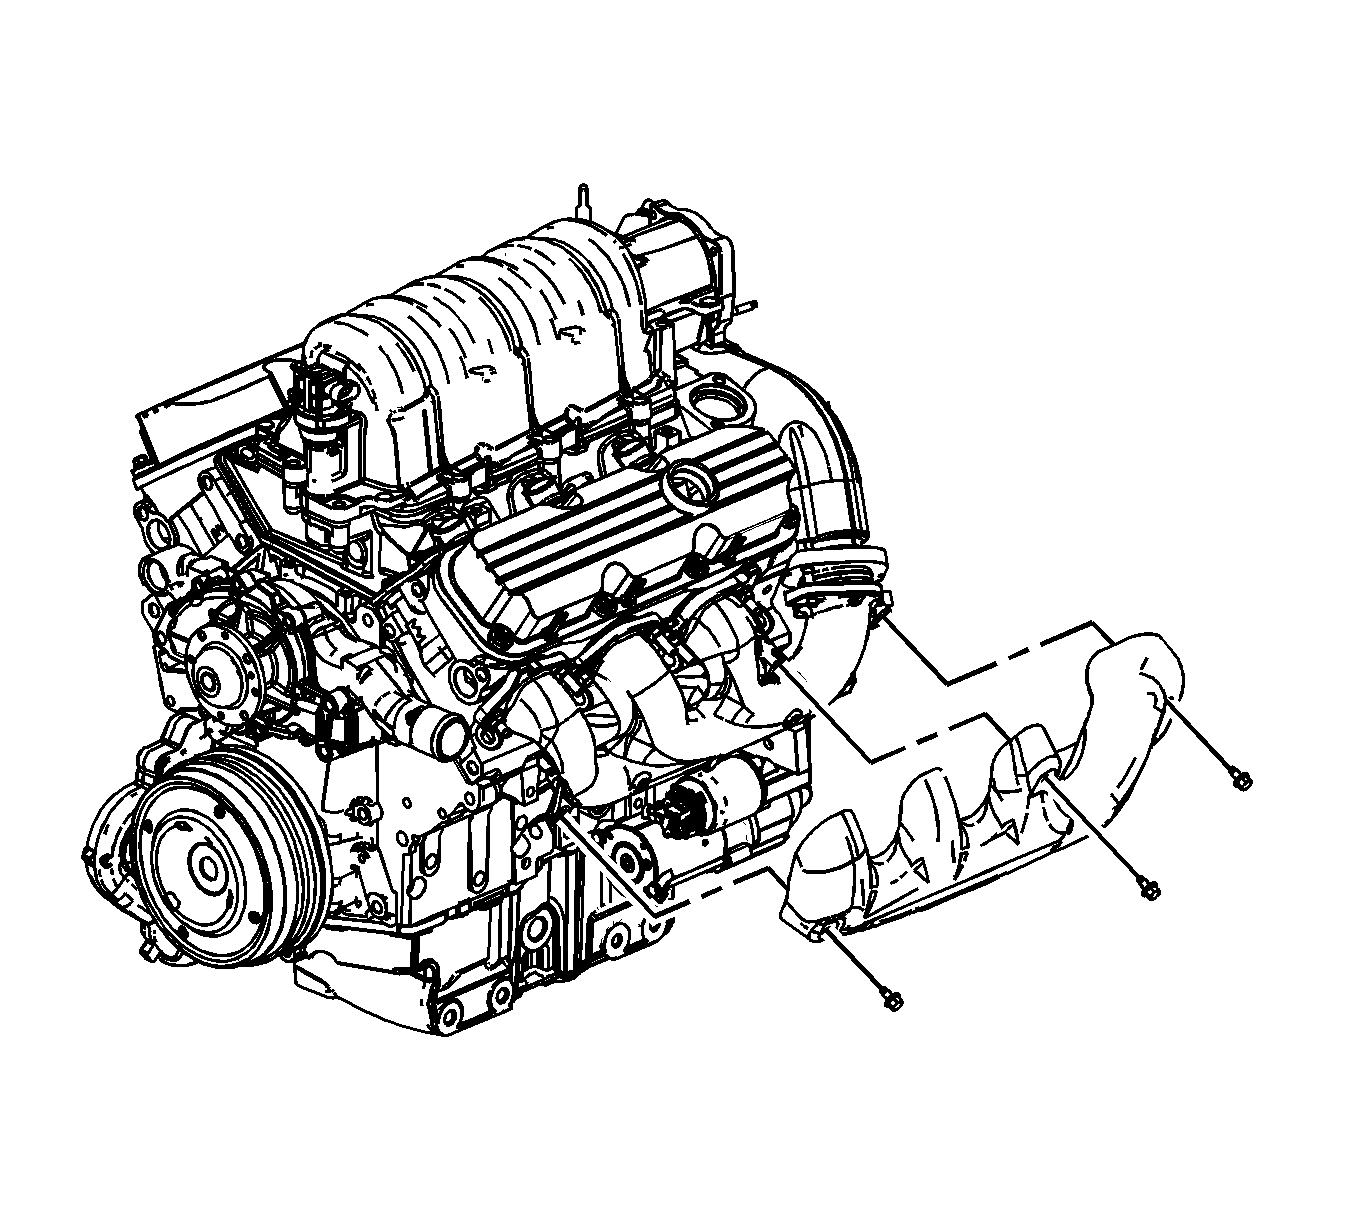
- Remove the 2 bolts attaching the exhaust crossover to the left exhaust manifold.
- Remove the exhaust manifold heat shield bolts and shield.
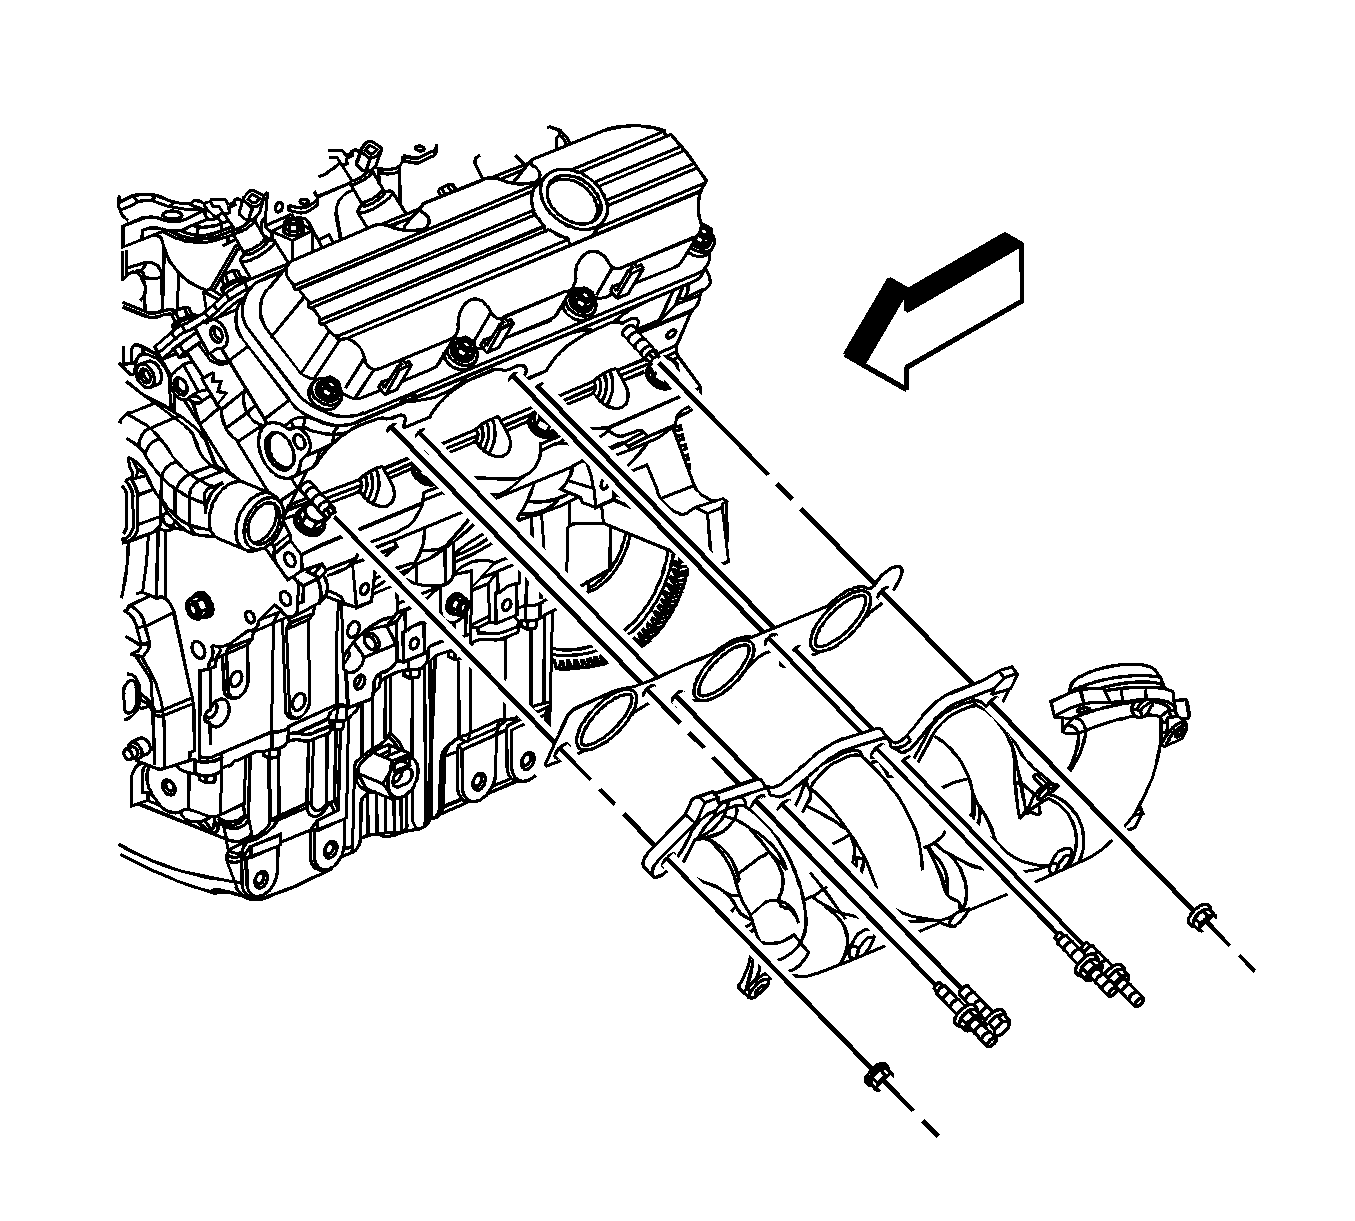
- Remove the exhaust manifold bolt, studs and nuts.
- Remove the exhaust manifold.
- Remove and discard the exhaust manifold gasket.
.
Installation Procedure
- Install a NEW exhaust manifold gasket onto the studs.
- Install the exhaust manifold.
- Install the exhaust manifold nuts, studs and bolt.
- Position the exhaust manifold heat shield to the manifold.
- Install the exhaust manifold heat shield bolts.
- Install the 2 bolts attaching the exhaust crossover to the left exhaust manifold.
- Install the engine lift bracket.
- Install the engine lift bracket bolt and nut.
- Install the engine harness clip (1) to the engine lift bracket.
- Install the spark plug wire channel to the rocker cover.
- Connect the spark plug wires to the spark plugs.
- Install the oil level indicator and tube. Refer to Oil Level Indicator and Tube Replacement .

Notice: Refer to Fastener Notice in the Preface section.
Tighten
Tighten the bolt, studs, and nuts to 30 N·m (22 lb ft).

Tighten
Tighten the bolts to 10 N·m (89 lb in).

Tighten
Tighten the bolts to 18 N·m (13 lb ft).

Tighten
Tighten the bolt/nut to 25 N·m (18 lb ft).


