For 1990-2009 cars only
Special Tools
DW010-010 Assembly Support Remover/Installer
Removal Procedure
- Discharge the air condition (A/C) system, if equipped.
- Drain the power steering oil, if equipped.
- Drain the engine coolant. Refer to Cooling System Draining and Filling.
- Remove the battery and battery tray. Refer to Battery Tray Replacement.
- Remove the air cleaner assembly. Refer to Air Cleaner Assembly Replacement.
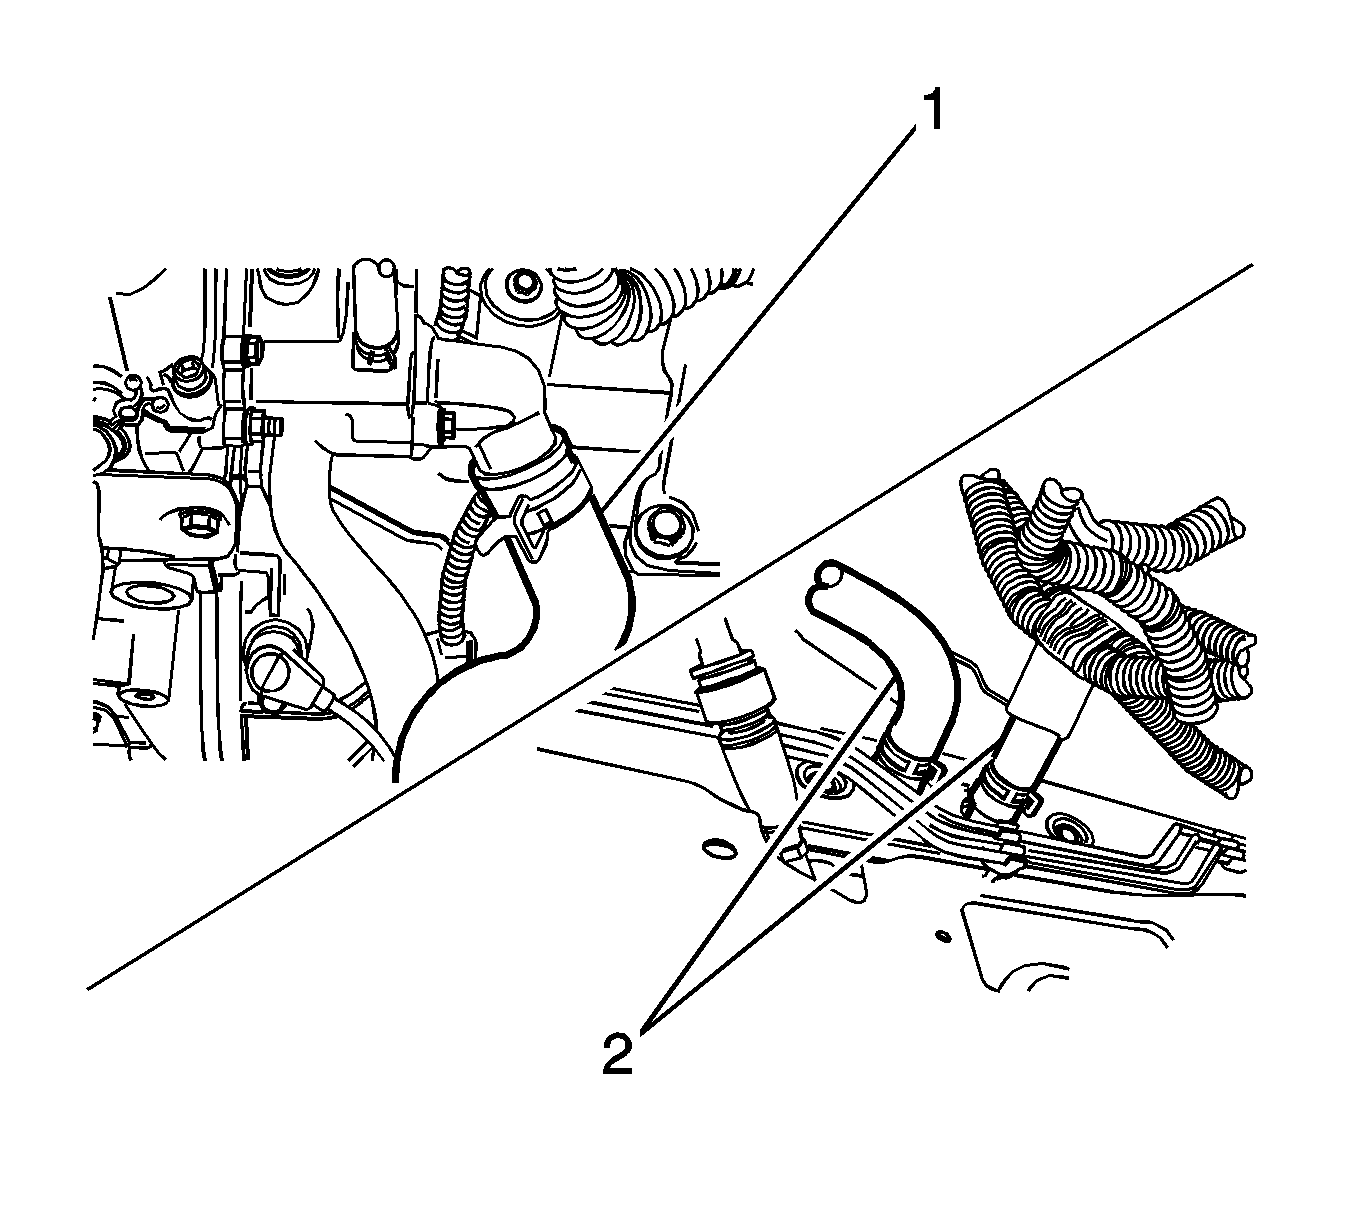
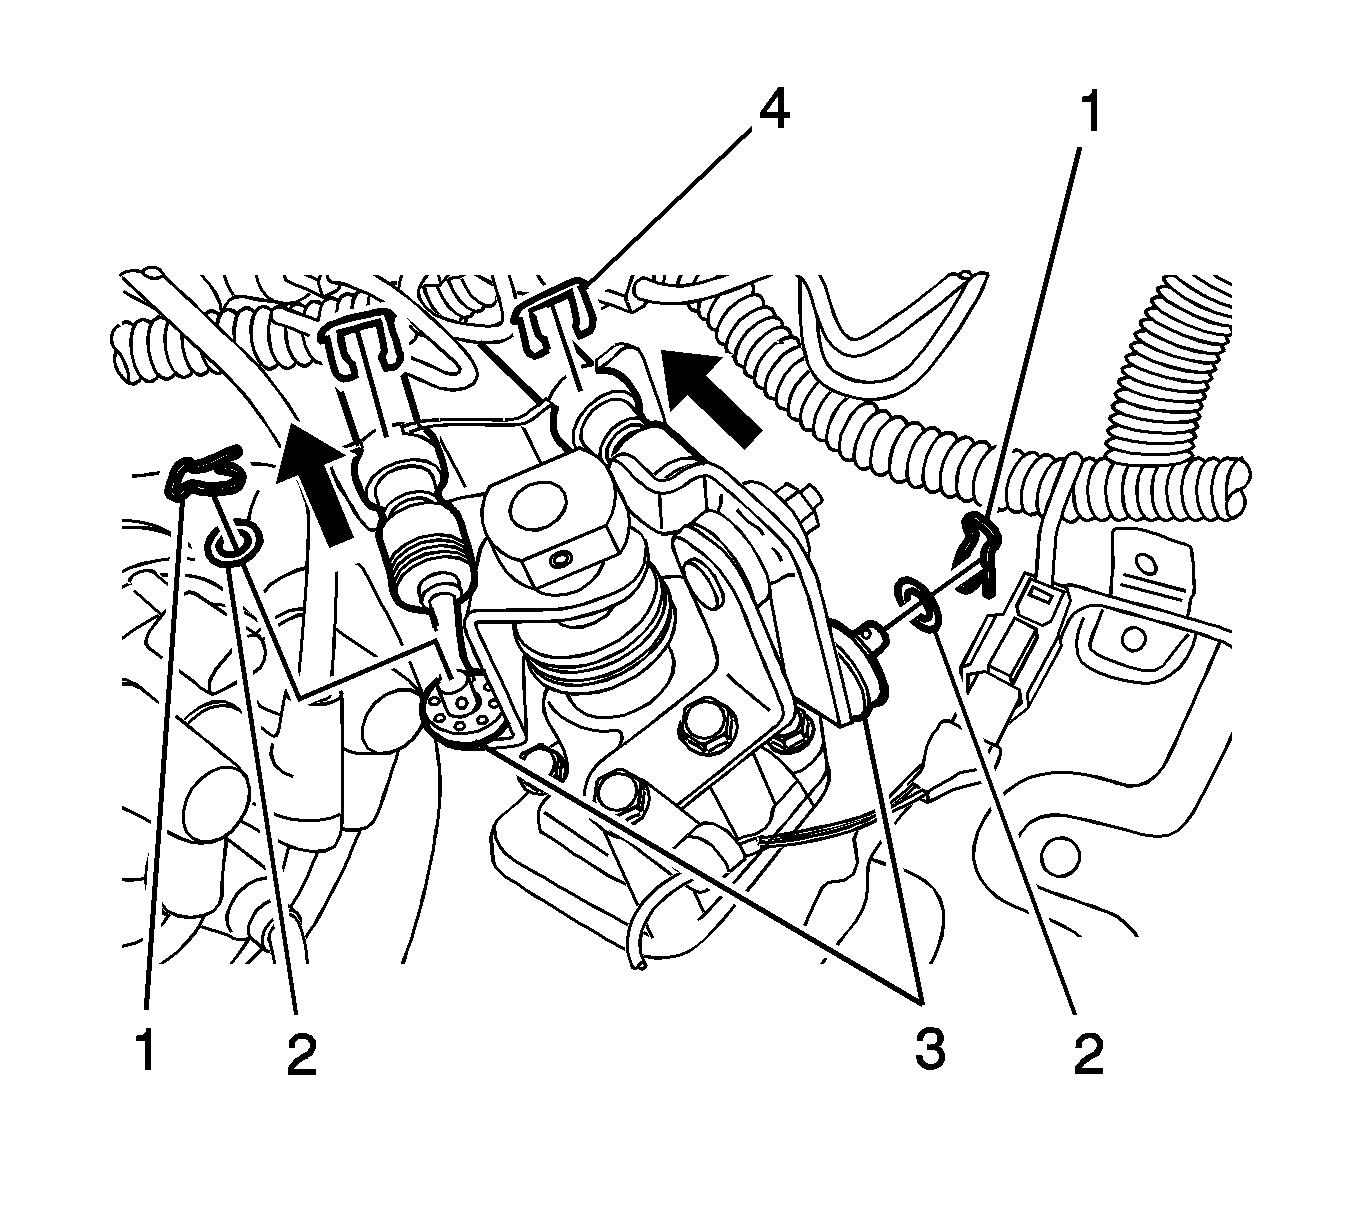
- Disconnect the radiator inlet and outlet hose (1).
- Disconnect the heater core inlet and outlet hose (2).
- Remove the power steering hose from the power steering pump. Refer to Power Steering Pump Replacement.
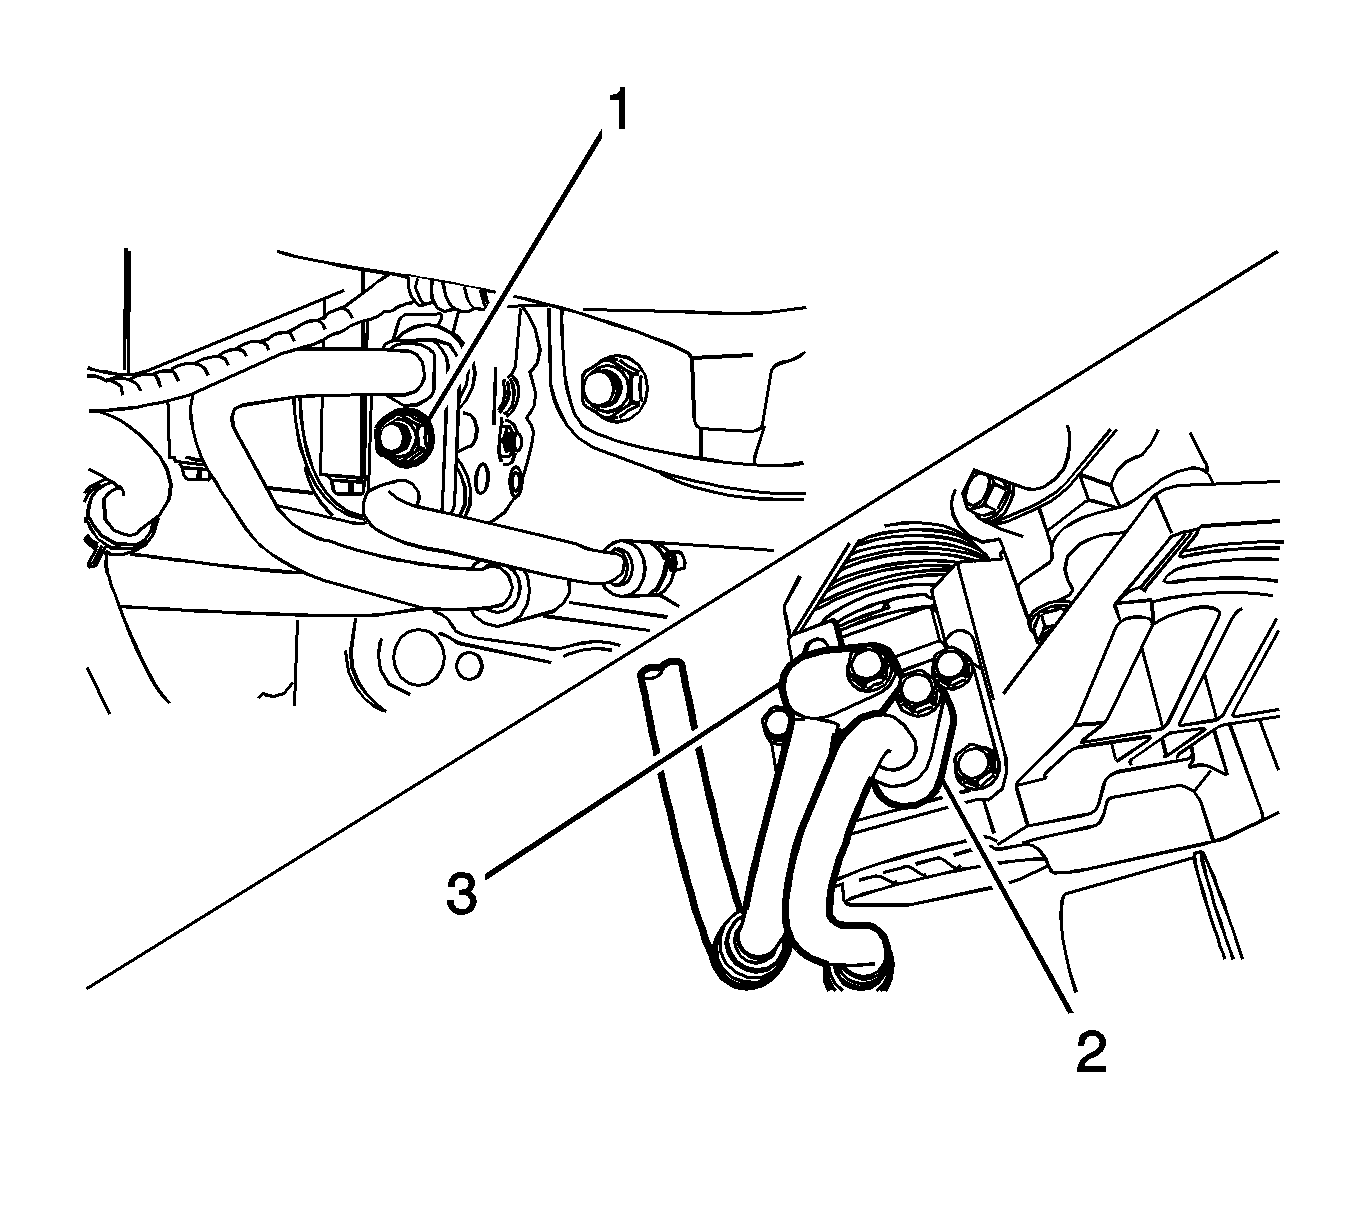
- Remove the A/C compressor hose (2, 3) from the compressor.
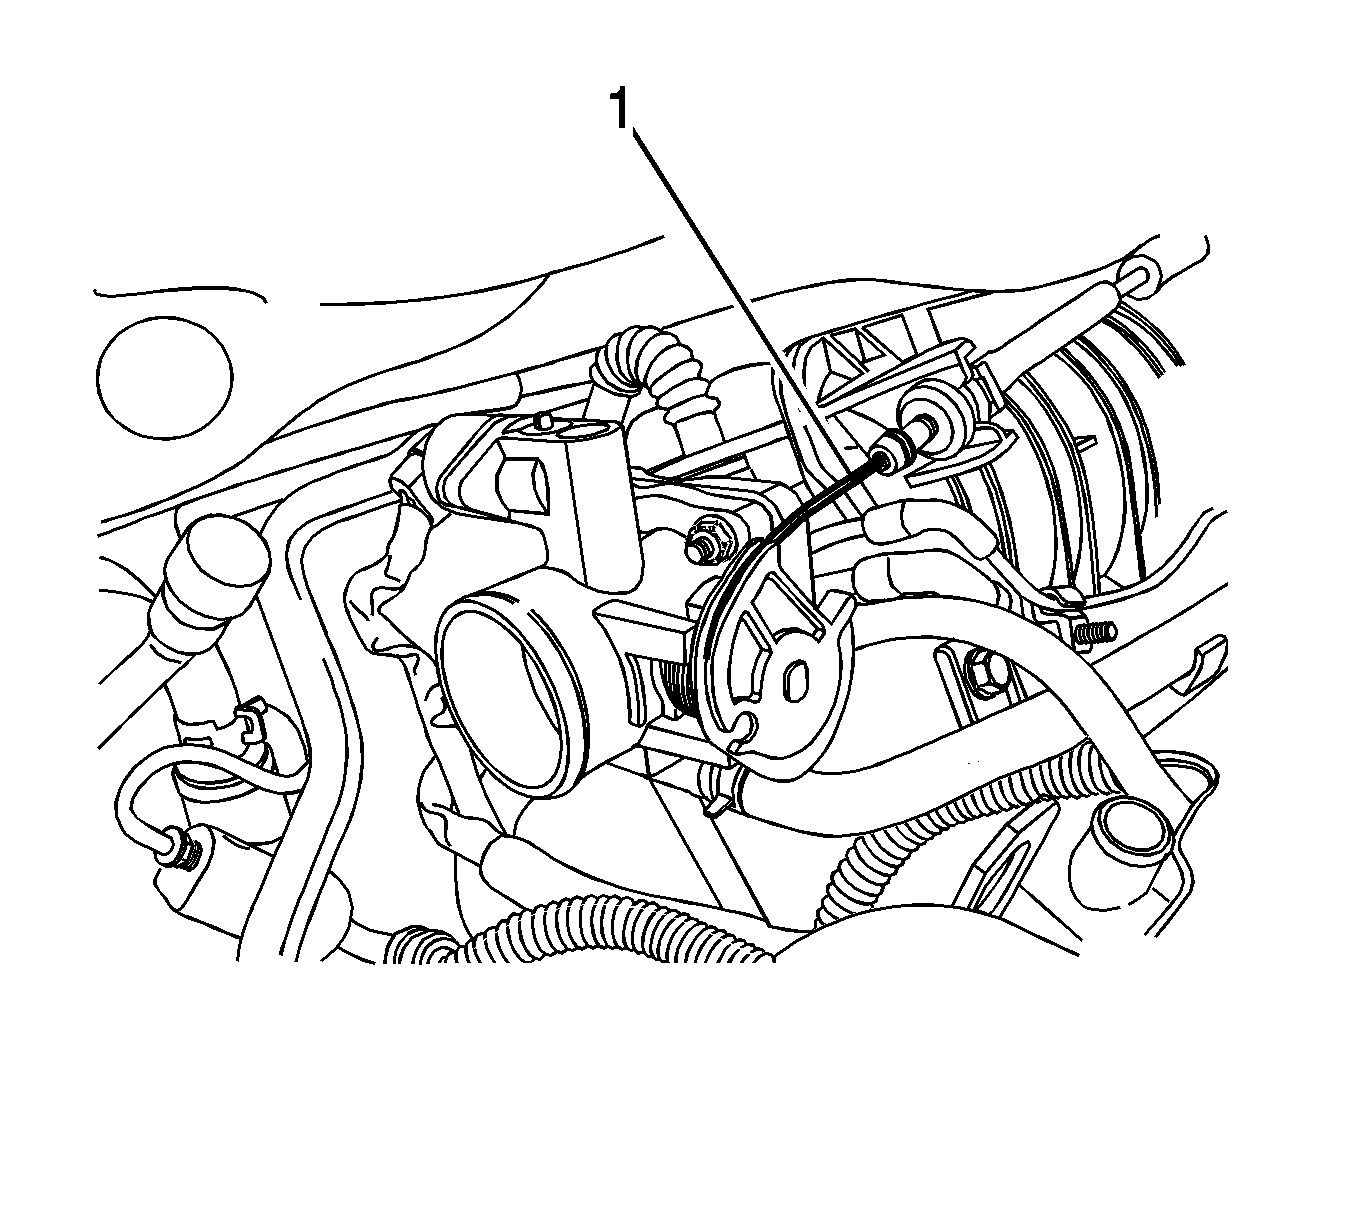
- Disconnect the accelerator cable (1).
- Disconnect the TPS connector.
- Disconnect the IACV connector.
- Disconnect the A/C pressure sensor connector.
- Disconnect the power steering oil pressure switch cable.
- Disconnect the coolant temperature sensor connector.
- Disconnect the EGR valve connector.
- Disconnect the camshaft sensor connector.
- Disconnect the ignition coil connector.
- Disconnect the oxygen sensor connector.
- Disconnect the crank position sensor connector.
- Disconnect the injector main connector.
- Disconnect the canister solenoid connector.
- Disconnect the VGIS solenoid connector.
- Disconnect the starter connector.
- Disconnect the alternator connector.
- Remove the clutch cable (3) and connectors on manual transmission vehicles.
- Remove the shift control cable from the auto transaxle.
- Support the engine assembly using the DW010-010 remover/installer (1).
- Remove the engine mount bracket. Refer to Engine Mount Replacement.
- Remove the transaxle mount bracket.
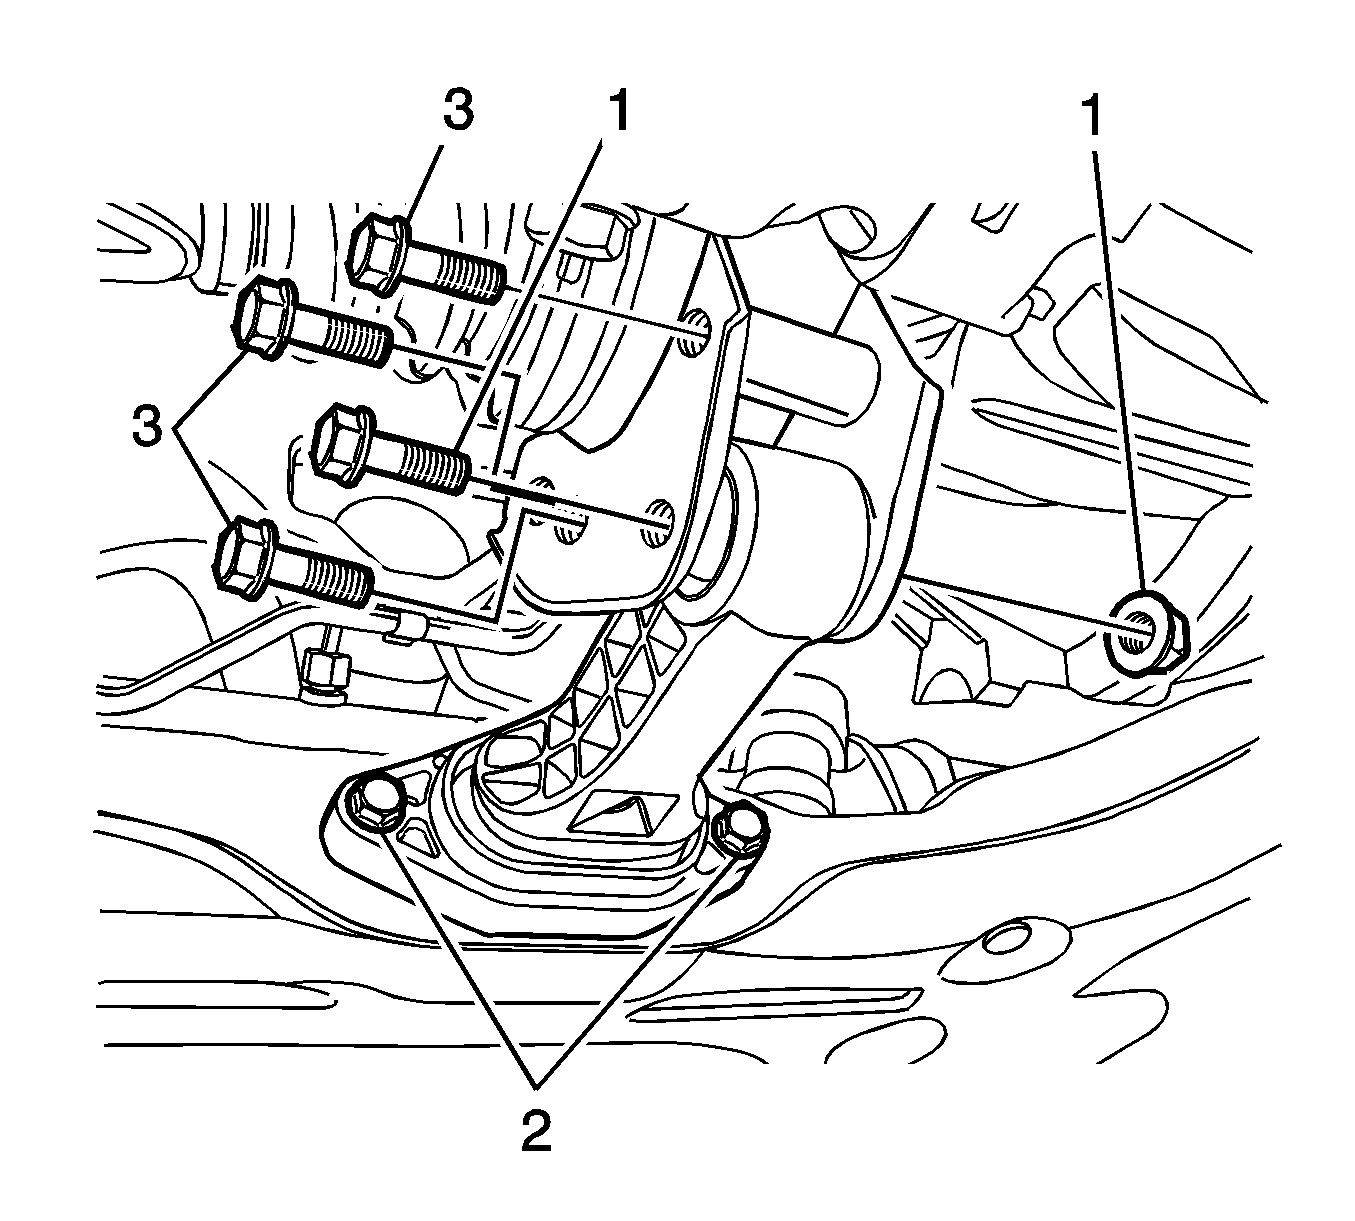
- Remove the transaxle rear mount bolts (1,2, 3) and the rear mount.
- Remove the engine assembly.
- Remove the transmission from the engine assembly.
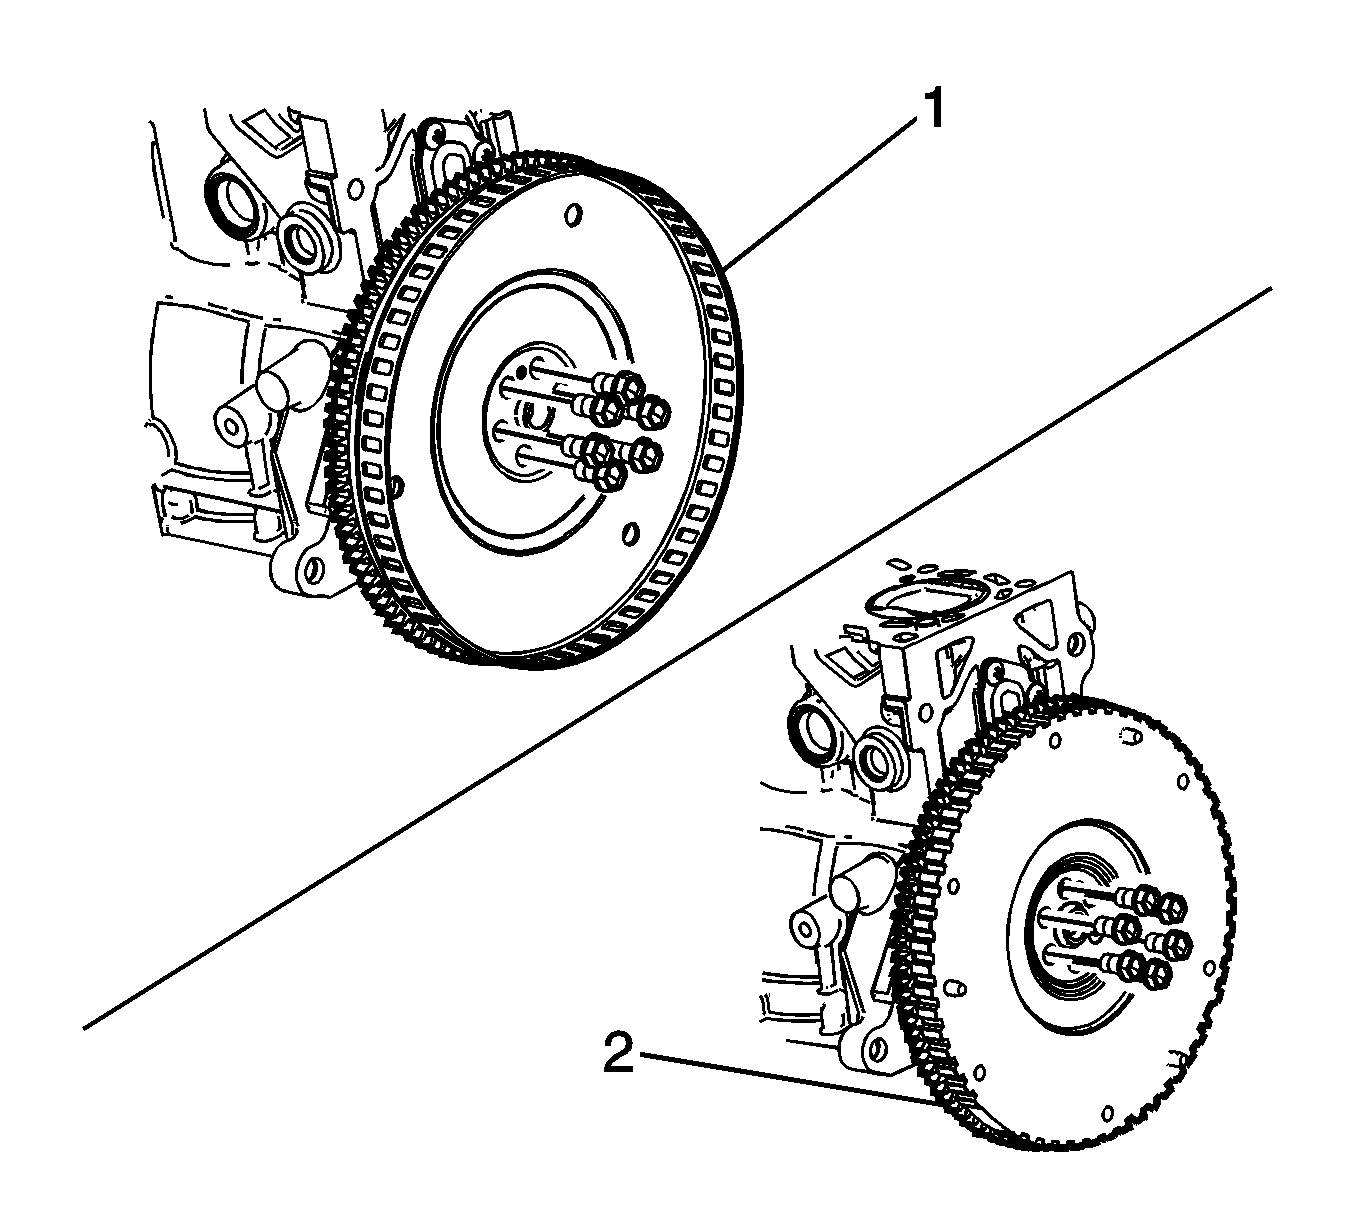
- Remove the flywheel (2) (manual transmission) or flexible plate (1) (auto transmission).


Installation Procedure
- Install the flywheel (2) (manual transmission) or flexible plate (1) (auto transmission).
- Install the transmission to the engine assembly.
- Support the engine assembly using the DW010-010 remover/installer (1).
- Install the engine mount bracket. Refer to Engine Mount Replacement.
- Install the transaxle mount bracket. Refer to Engine Mount Replacement.
- Install the transaxle rear mount secure with bolts (1, 2, 3).
- Connect the clutch cable (3) and connectors on manual transmission vehicles.
- Connect the shift control cable from the auto-transaxle.
- Connect the injector main connector.
- Connect the canister solenoid connector.
- Connect the VGIS solenoid connector.
- Connect the starter connector.
- Connect the alternator connector.
- Connect the coolant temperature sensor connector.
- Connect the EGR valve connector.
- Connect the camshaft sensor connector.
- Connect the ignition coil connector.
- Connect the oxygen sensor connector.
- Connect the crank position sensor connector.
- Connect the accelerator cable (1).
- Connect the TPS connector.
- Connect the IACV connector.
- Connect the A/C pressure sensor connector.
- Connect the power steering oil pressure switch cable.
- Install the power steering hose from the power steering pump.
- Install the A/C compressor hose (2, 3) from the compressor.
- Connect the radiator inlet and outlet hose (1).
- Connect the heater core inlet and outlet hose (2).
- Refill the engine coolant system. Refer to Cooling System Draining and Filling.
- Install the battery and battery tray. Refer to Battery Tray Replacement
- Install the air cleaner assembly. Refer to Air Cleaner Assembly Replacement.
Caution: Refer to Fastener Caution in the Preface section.
Tighten
Tighten the flywheel/flexible plate bolts to 45 N·m (33.2 lb ft).
Tighten
Tighten the transmission assembly bolts to 60 N·m (44.2 lb ft).
