For 1990-2009 cars only
Front Pipe Replacement 2.4L AWD
Removal Procedure
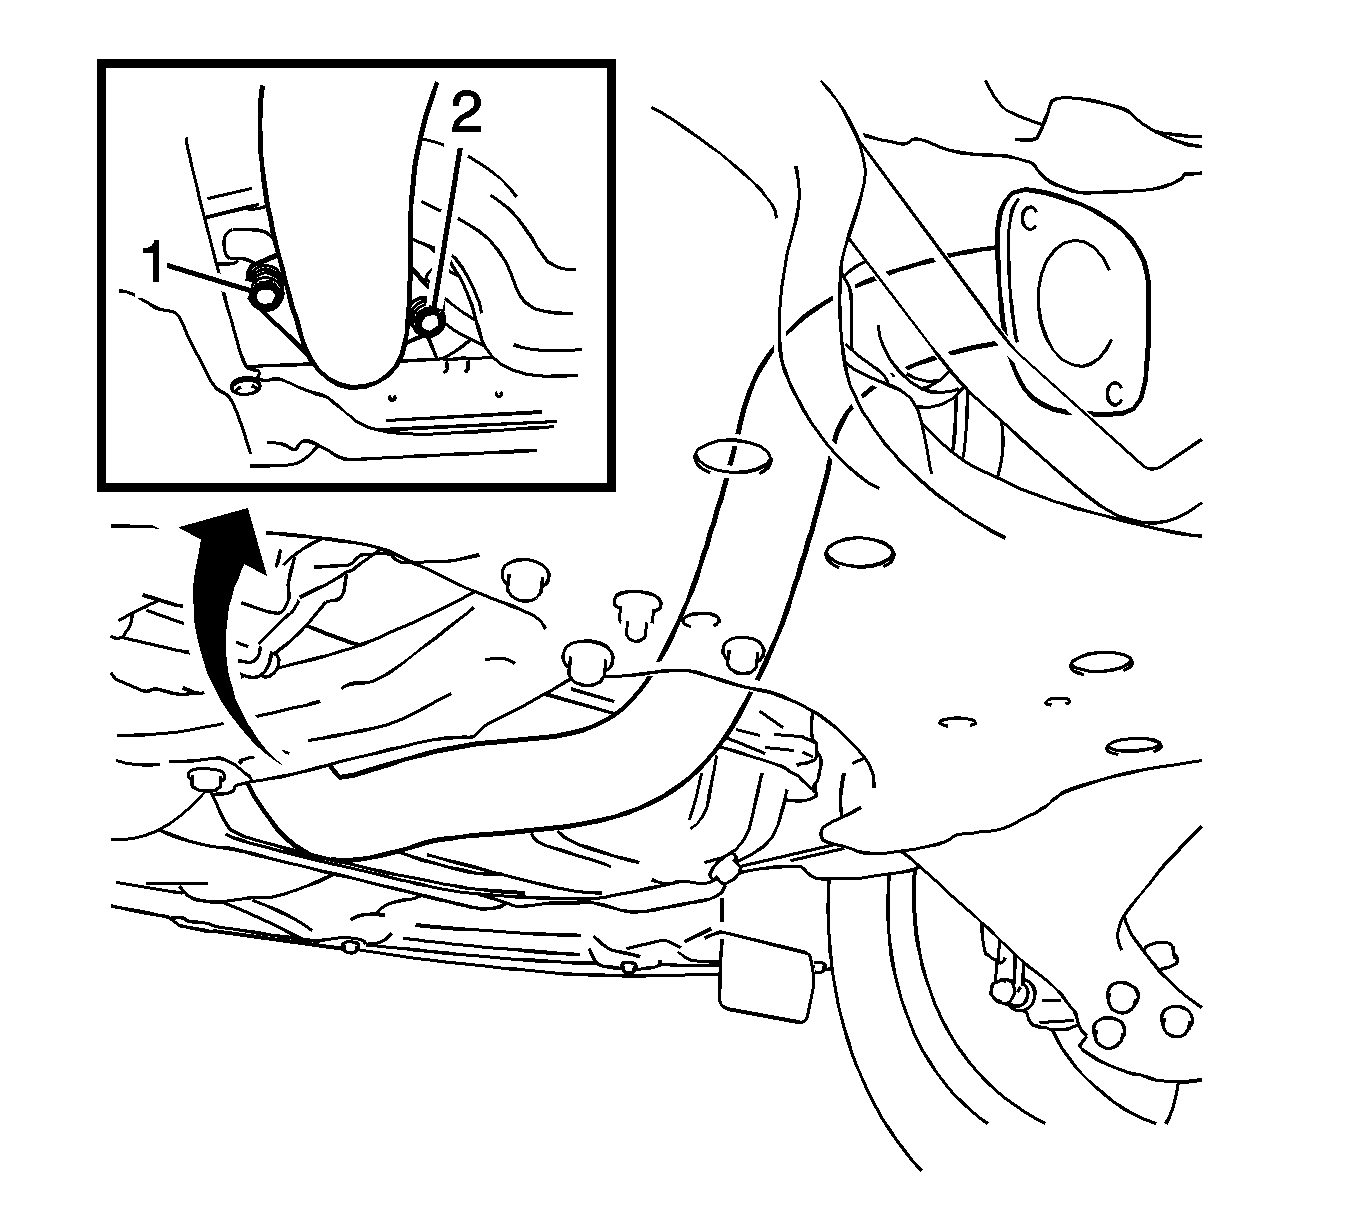
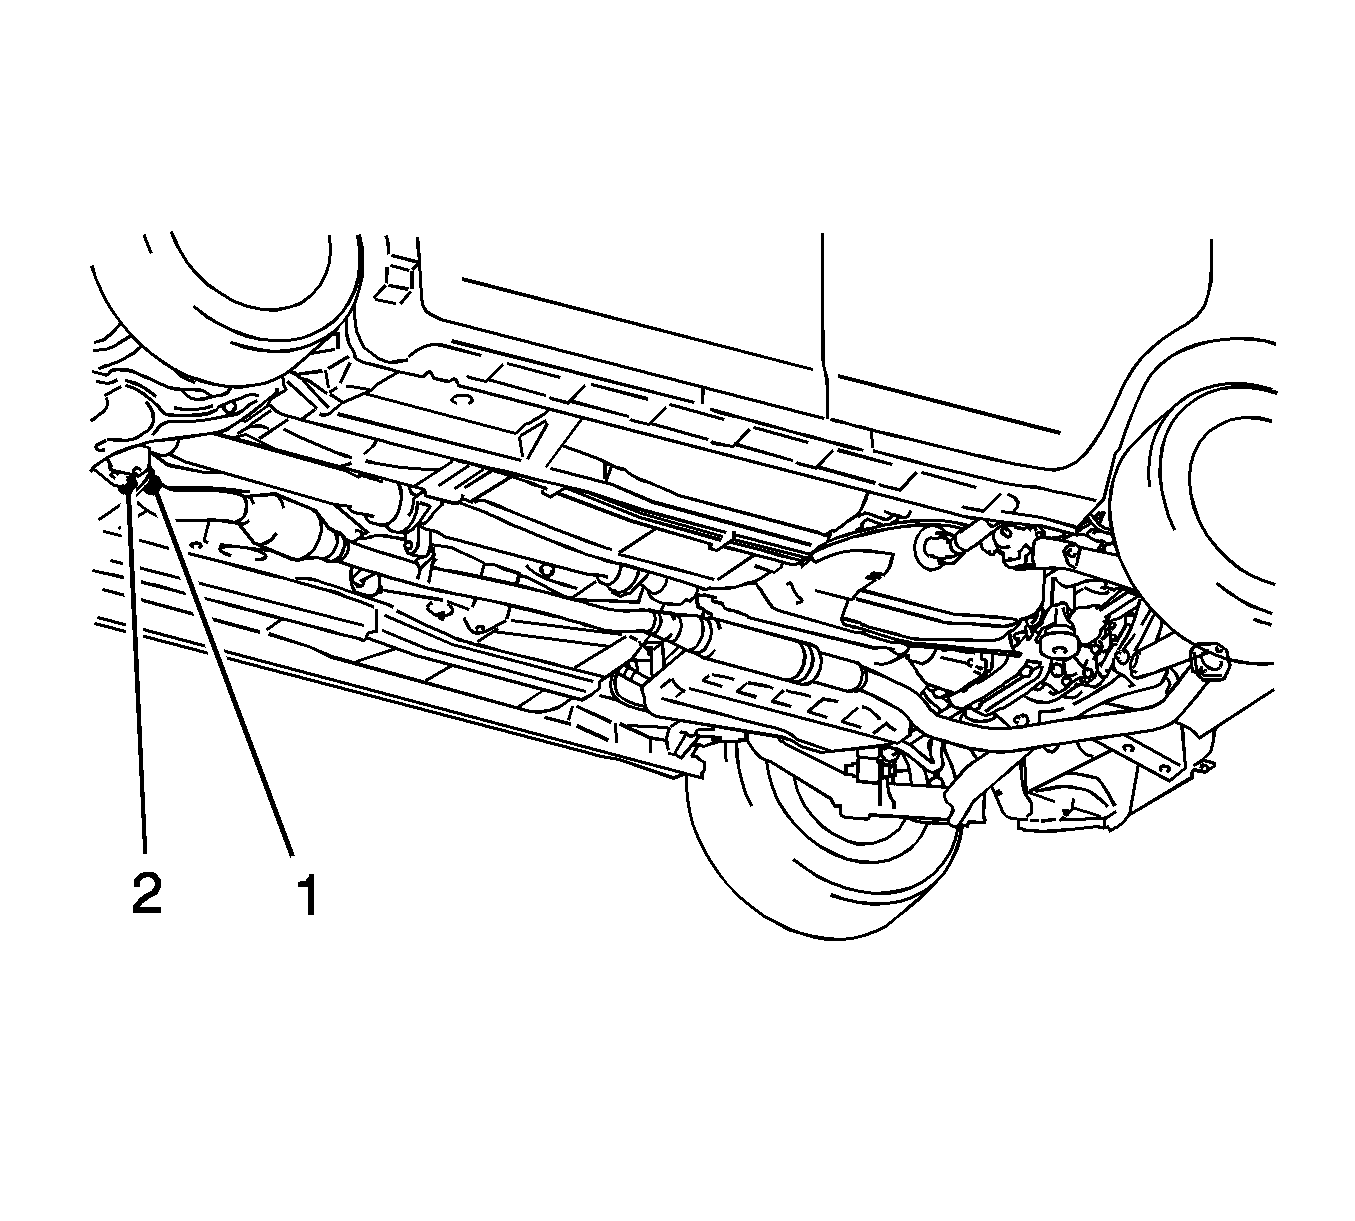
- Remove the 2 bolts (2), 2 compression springs (1) and front exhaust pipe assembly.
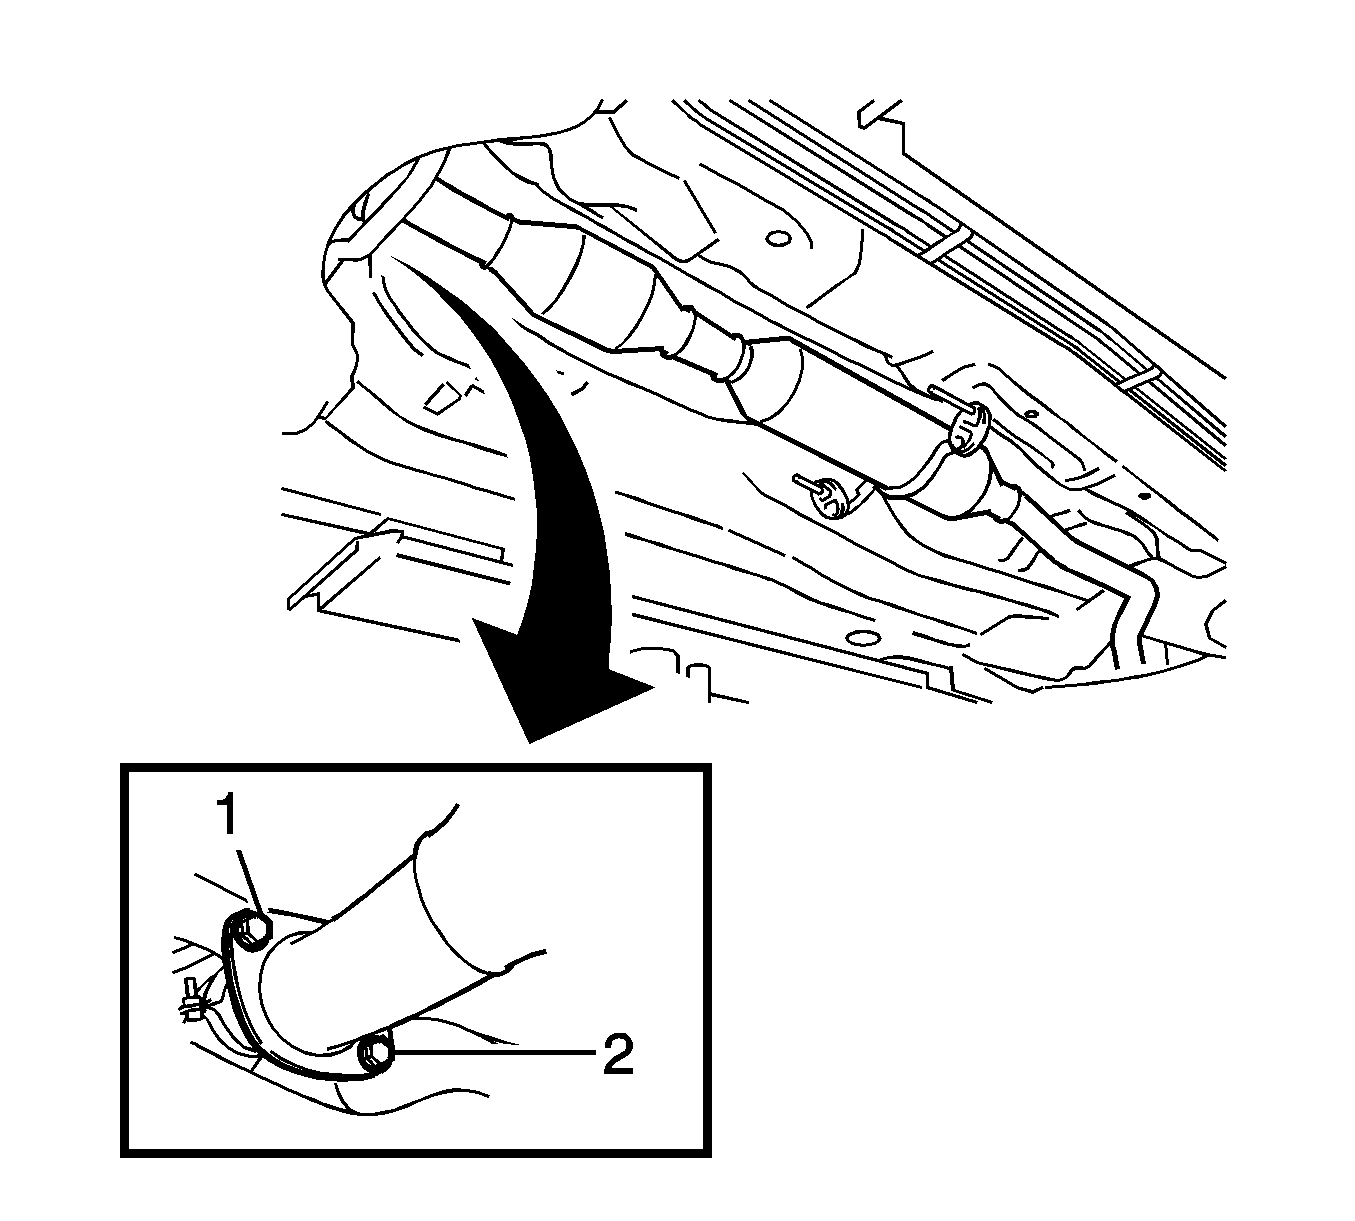
- Remove the 2 bolts (1) from the catalytic converter pipe.
- Remove the front exhaust pipe.
- Remove the gasket from the exhaust manifold.
Installation Procedure
- Using a vernier caliper, measure the free length of the compression springs.
- Fully insert a new gasket to the exhaust manifold.
- Using a plastic hammer and wooden block (2) , tap in the new gasket (3) until its surface is flush with the exhaust manifold (1).
- Install the front exhaust pipe assembly with the 2 bolts (1) and the 2 compression springs (2). Tighten the bolts to 43 N·m (32 lb ft).
- Install the 2 bolts (1) into the catalytic converter pipe and tighten to 43 N·m (32 lb ft).
- Inspect for exhaust gas leaks.
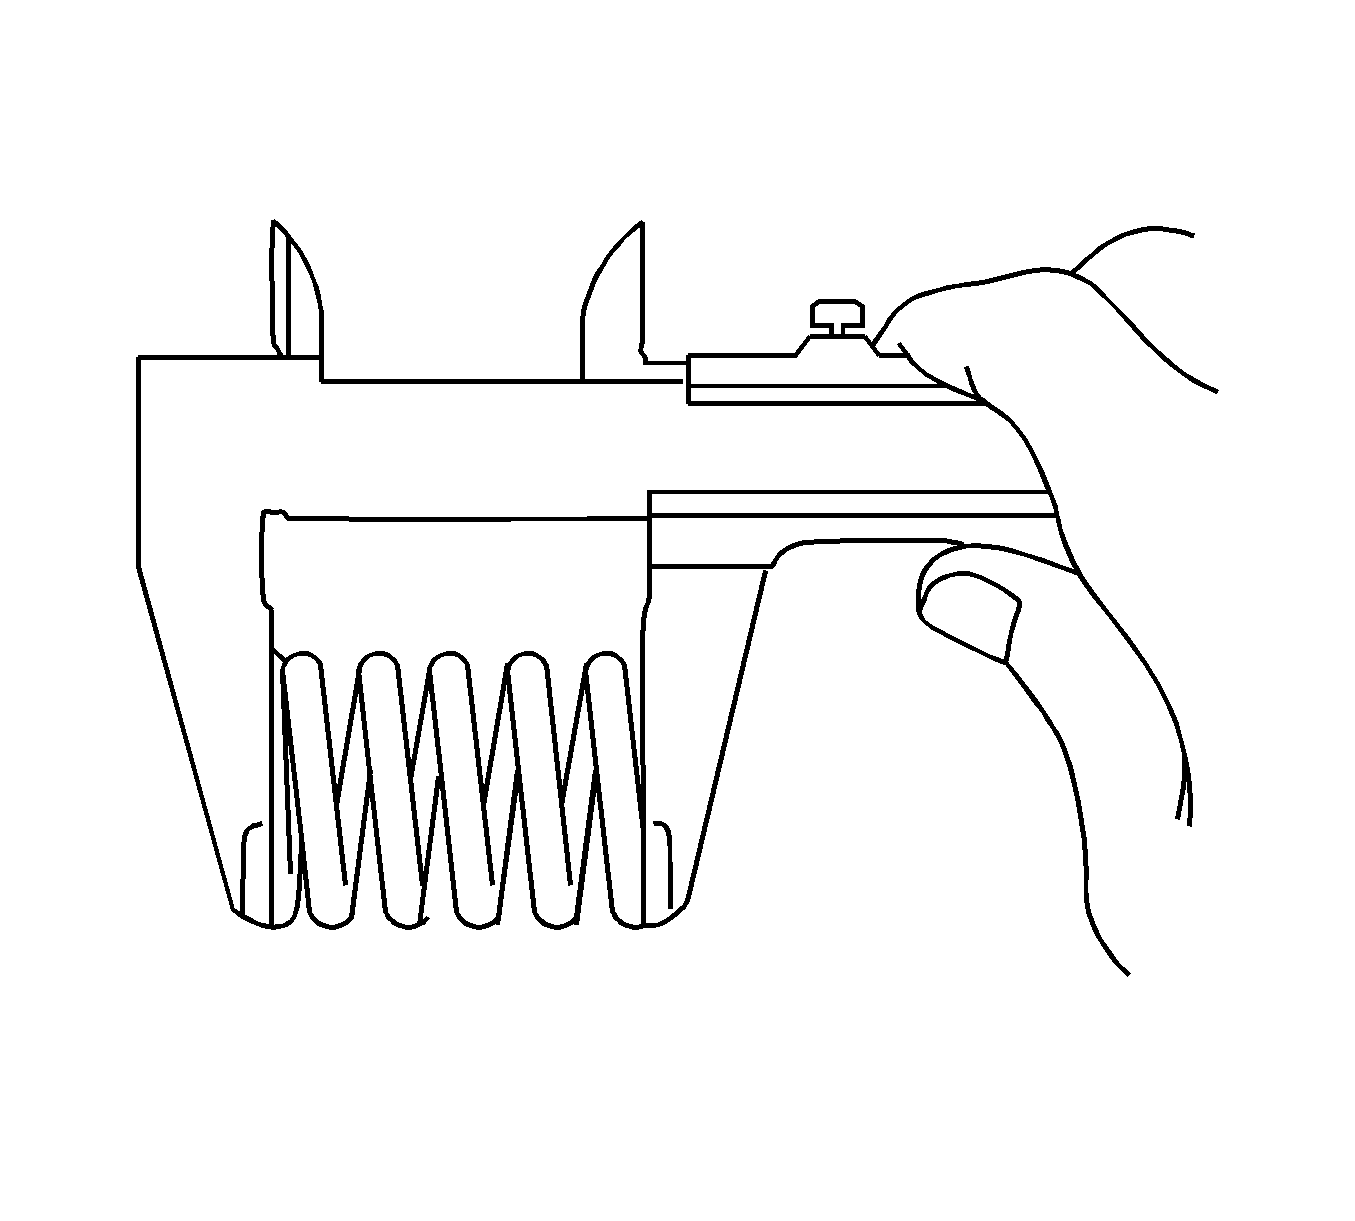
Note: If the free length is less than the minimum 41.5 mm (1.63 in), replace the compression spring.
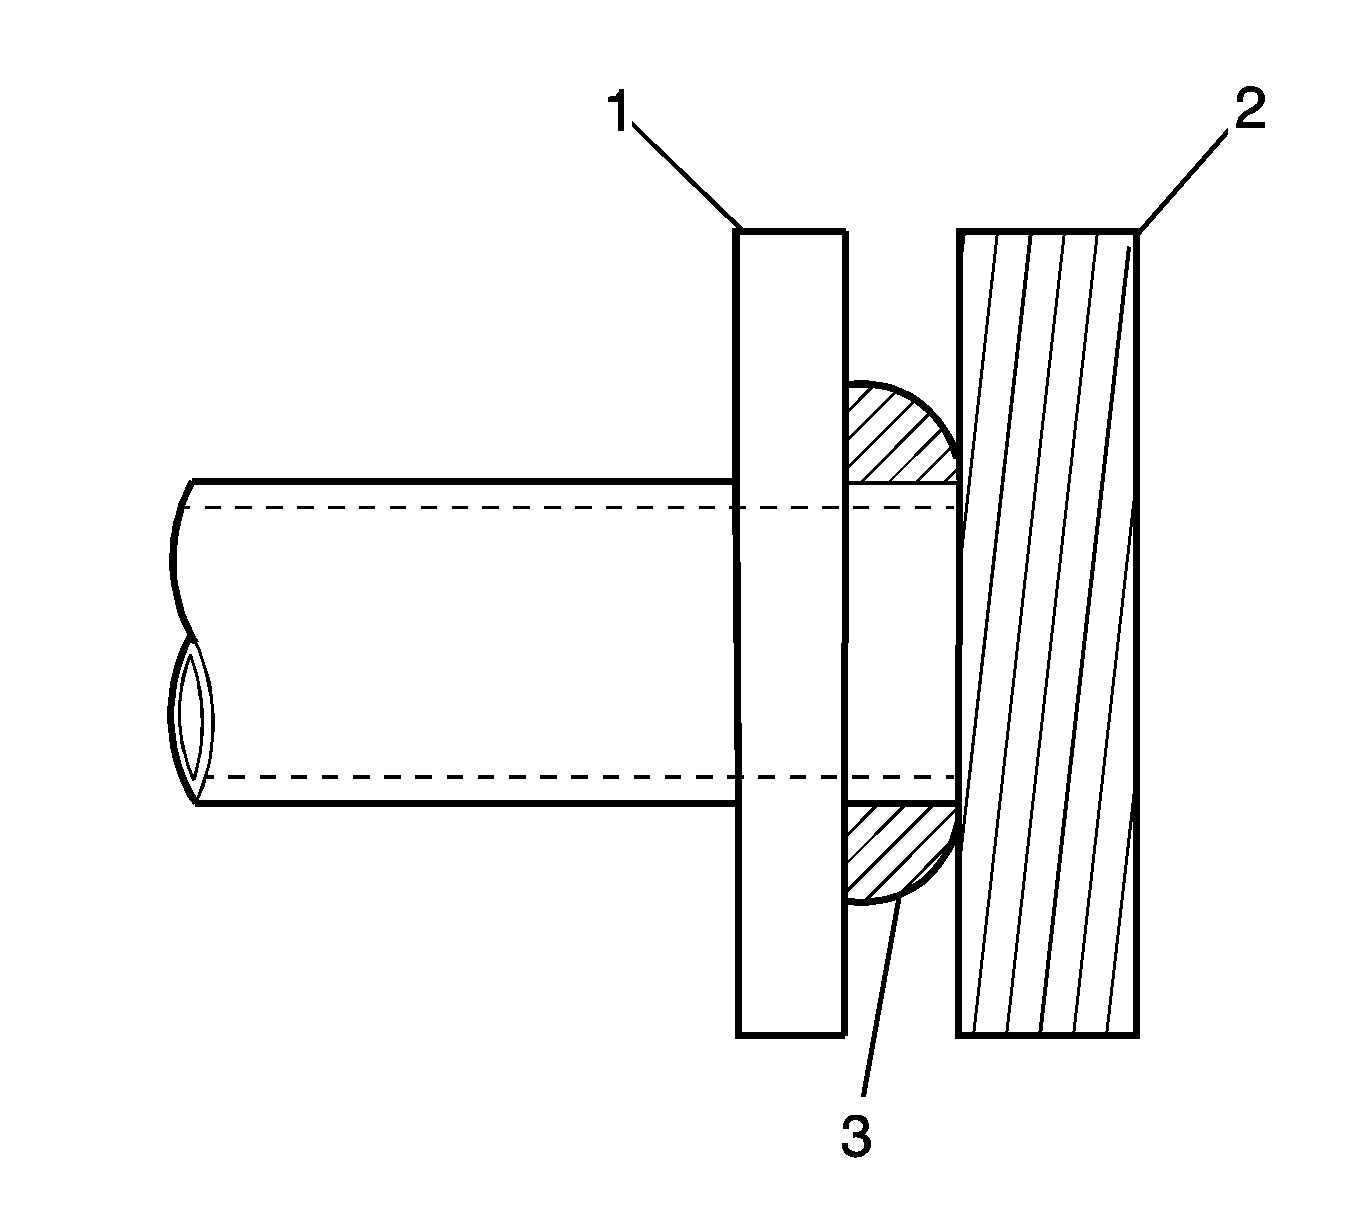
Note: Be sure to install the gasket in the correct direction. Do not reuse the gasket.
Caution: Refer to Fastener Caution in the Preface section.
Front Pipe Replacement 2.4L FWD
Removal Procedure
- Remove the 2 bolts (1) and the 2 compression springs (2) from the exhaust manifold.
- Remove the gasket from the exhaust manifold.
- Remove the 2 bolts (1) from the front exhaust pipe assembly.
- Remove front exhaust pipe assembly.
Installation Procedure
- Using a vernier caliper, measure the free length of the compression springs.
- Fully insert a new gasket to the exhaust manifold.
- Using a plastic hammer and wooden block (2), tap in the new gasket (3) until its surface is flush with the exhaust manifold (1).
- Install the front exhaust pipe assembly with the 2 bolts (1) and the 2 compression springs (2). Tighten the bolts to 43 N·m (32 lb ft)
- Inspect for exhaust gas leaks.
Note: If the free length is less than the minimum 41.5 mm (1.63 in), replace the compression spring.
Note: Be sure to install the gasket in the correct direction. Do not reuse the gasket.
Caution: Refer to Fastener Caution in the Preface section.
