Tool Required
J 36660-A Torque Angle Meter
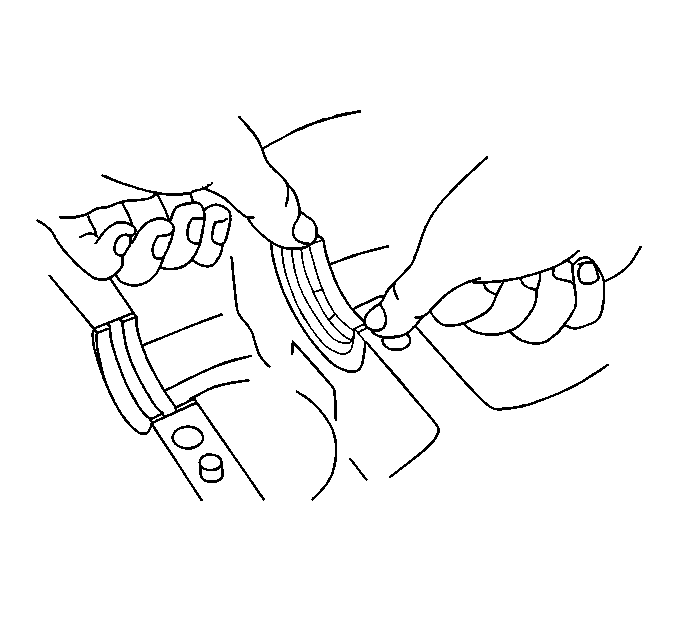
- Install the upper main bearings into the cylinder block and lubricate with engine oil.
- Install the lower main bearings into the lower crankcase and lubricate with engine oil.
- Install the 2 upper thrust bearing washers into the cylinder block and lubricate with engine oil.
- Carefully place the crankshaft on to the main bearings in the cylinder block.
- Thoroughly clean and remove any oil residue from the cylinder block mating surfaces.
- Apply a continuous bead of GM P/N 12346240 (Canadian P/N 10953493) or equivalent sealant to the cylinder block mating rails.
- Carefully place the lower crankcase assembly on to the cylinder block.
- Gently tap the lower crankcase into place with a suitable tool.
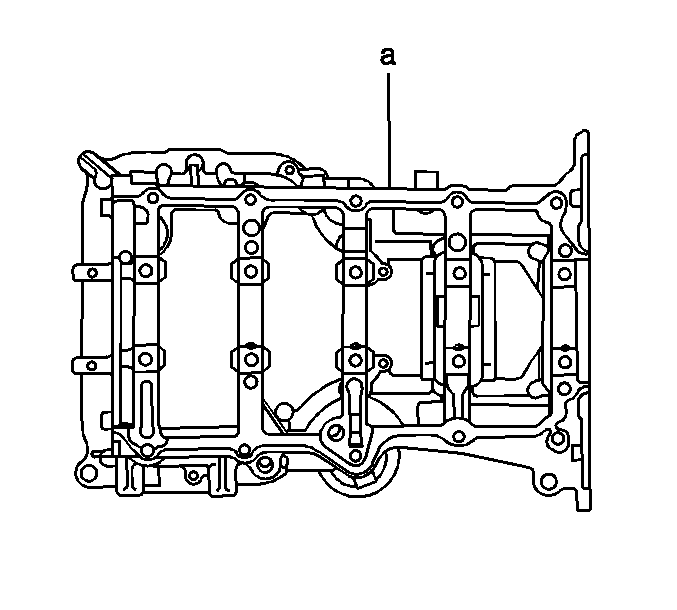
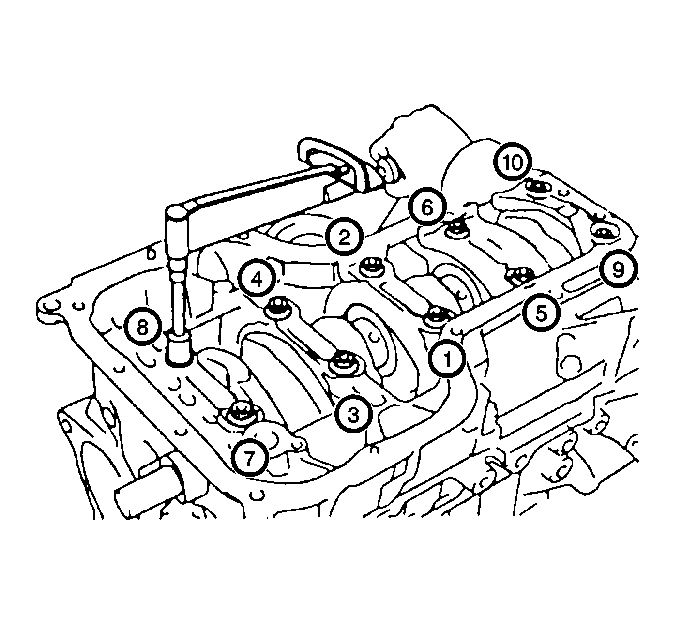
- Install the 10 main bearing cap bolts. Finger tighten.
- Progressively torque the main bearing cap bolts using 3 steps in the sequence shown.
- 1st Pass - Tighten the main bearing cap bolts to 22 N·m (16 lb ft).
- 2nd Pass - Tighten the main bearing cap bolts to 44 N·m (32 lb ft).
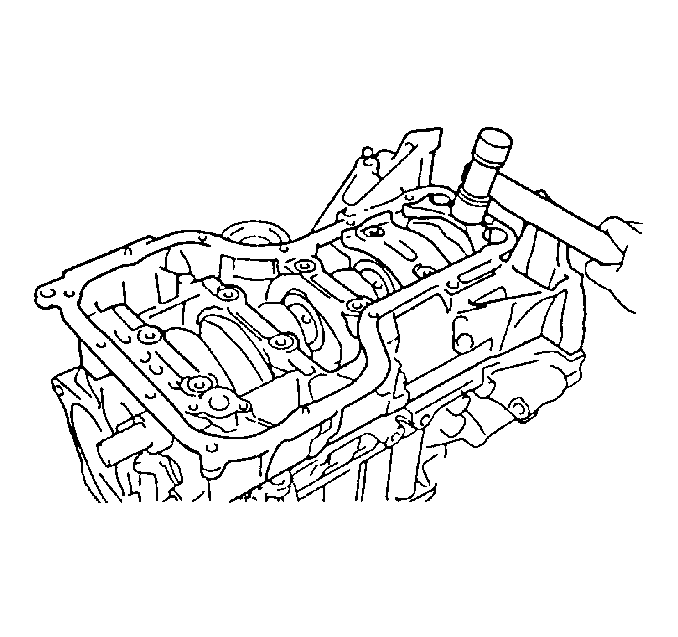
- 3rd Pass - After reaching the torque of 43 N·m (32 lb ft). Use a J 36660-A and tighten the main bearing cap bolts an additional 90 degrees.
- Install the 10 lower crankcase bolts.
Important: The upper main bearings have an oil groove and oil holes, the lower bearings do not have oil grooves or oil holes.
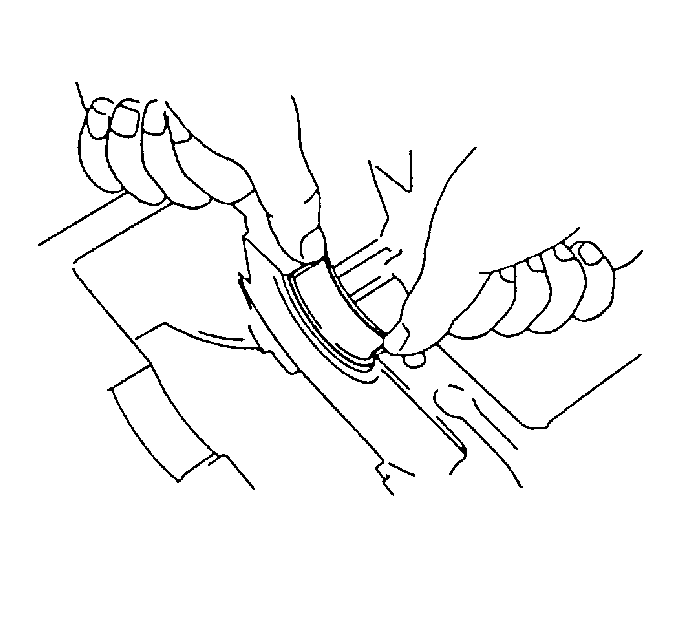
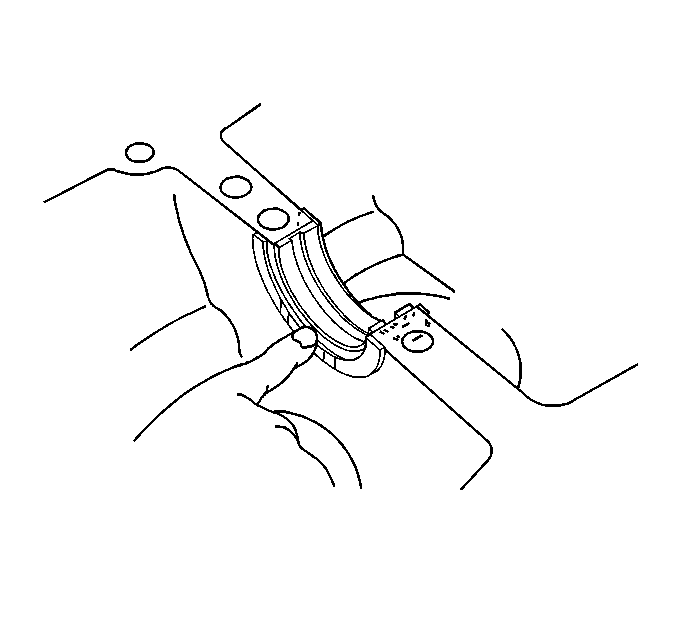
Important: Install the upper thrust bearing washers with the oil groove facing outward.
Important: Try to avoid applying an excessive amount of sealant to the surface.
Notice: In order to prevent the possibility of cylinder block or crankshaft bearing cap damage, the crankshaft bearing caps are tapped into the cylinder block cavity using a brass, lead, or a leather mallet before the attaching bolts are installed. Do not use attaching bolts to pull the crankshaft bearing caps into the seats. Failure to use this process may damage a cylinder block or a bearing cap.
Notice: This bolt is designed to permanently stretch when tightened, and therefore MUST be replaced anytime it is removed. The correct part number fastener must be used to replace this type of fastener. Do not use a bolt that is stronger in this application. If the correct bolt is not used, the parts will not be tightened correctly. The system or the components may be damaged.
Notice: Refer to Fastener Notice in the Preface section.
Tighten
Tighten
Tighten the 10 lower crankcase bolts to 18 N·m (13 lb ft).
