For 1990-2009 cars only
- Remove the oil filter adapter fitting.
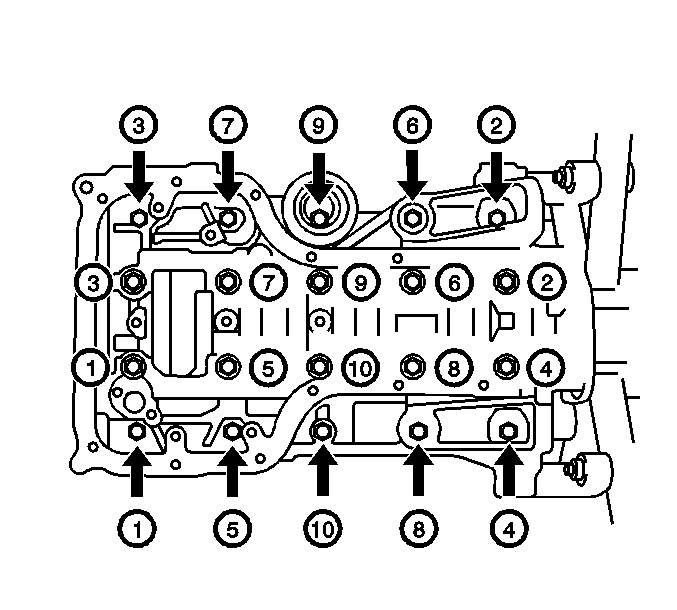
- Remove the 10 hexagon head lower crankcase bolts.
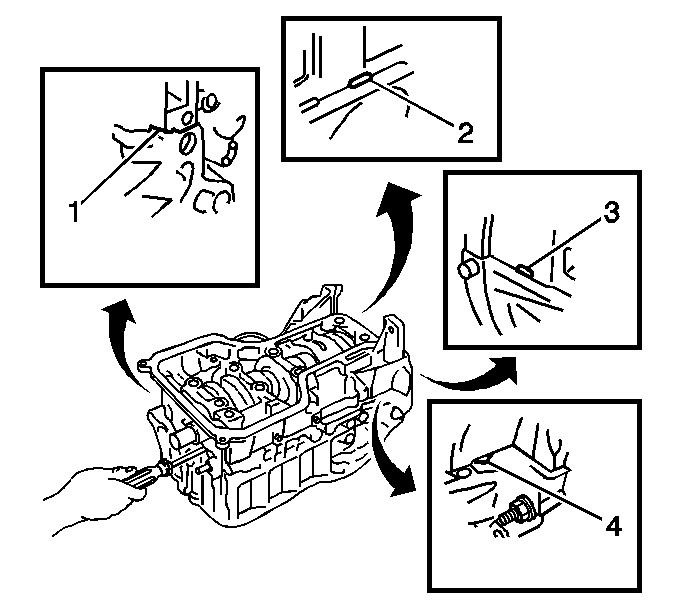
- Using a screwdriver, pry the lower crankcase apart from the cylinder block at the areas noted (1-4).
- Carefully remove the lower crankcase.
- Remove the crankshaft from the block.
- Remove the bearing inserts from the block.
- Clean the oil, sludge, and carbon.
- Inspect the oil passages for obstructions.
- Inspect the keyway.
- Inspect the bearing journals and the thrust surfaces for the following conditions:
- Inspect the corresponding bearing inserts for imbedded foreign material. If foreign material exists, find the cause and repair it.
- Measure the crankshaft journals. Use a micrometer or dial indicator to measure the taper and runout. Note the result for the later selection of bearing inserts. If not within limits the crankshaft must be replaced.

Remove the 10 main bearing cap bolts in the sequence shown.

Important: Use caution not to gouge the sealing surfaces of the 2 halves of the cylinder block during disassembly.
Notice: Remove the crankshaft carefully in order to avoid damaging the crankshaft journals, the rod, the main bearing inserts, or the connecting rods.
| • | Cracks |
| • | Chips |
| • | Gouges |
| • | Roughness |
| • | Grooves |
| • | Overheating, discoloration |
Important: Replace the crankshaft if cracks, severe gouges or burned spots are found. Slight roughness may be removed with a fine polishing cloth soaked in clean engine oil. Burrs may be removed with a fine oil stone.
Note the location of the main bearing high spots. If they are not in line, the crankshaft is bent and must be replaced.
