Exhaust Manifold Replacement 2.4L
Removal Procedure
- Disconnect the Oxygen sensor (O2S) connector.
- Raise and support the vehicle. Refer to Lifting and Jacking the Vehicle in General Information.
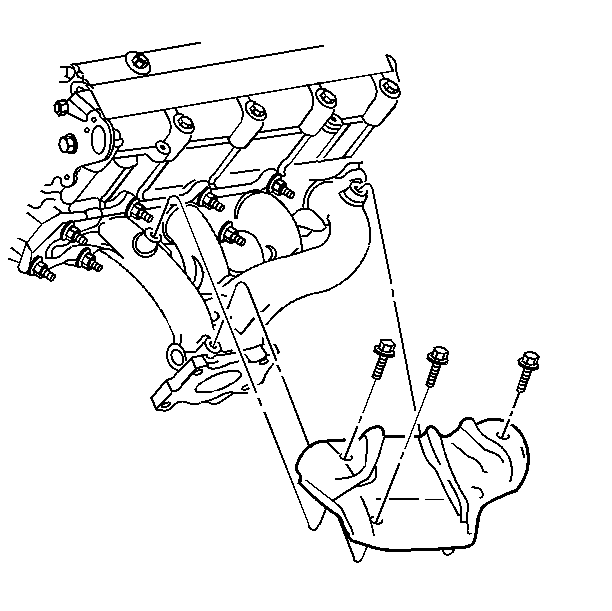
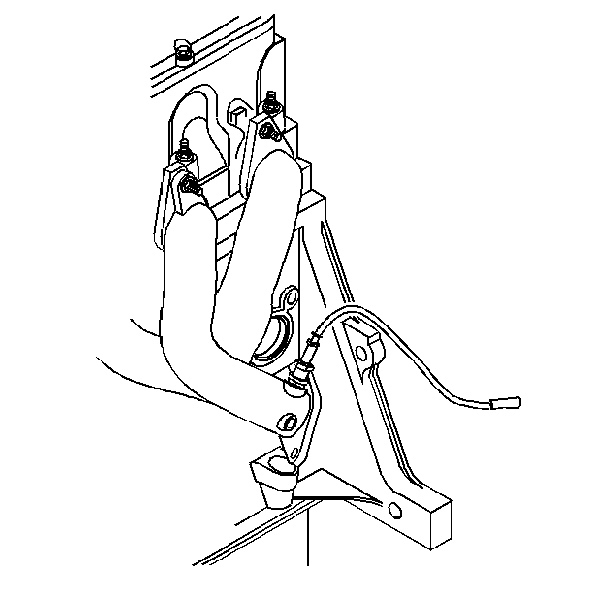
- Remove the flex decoupler to exhaust manifold bolts.
- Pull down and back on the exhaust pipe to disengage it from the exhaust manifold.
- Lower the vehicle.
- Remove cruise control module and position aside. Refer to Cruise Control Module Replacement in Cruise Control.
- Remove the exhaust manifold heat shield bolts and shield.
- Remove oil level indicator. Refer to Oil Level Indicator and Tube Replacement in Engine Mechanical.
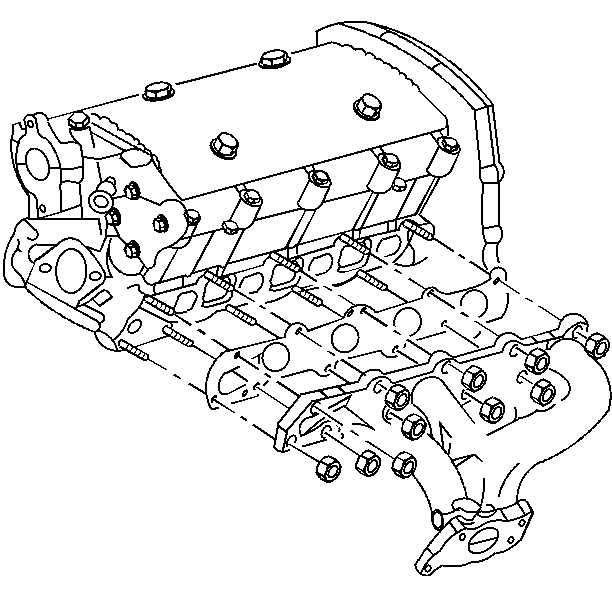
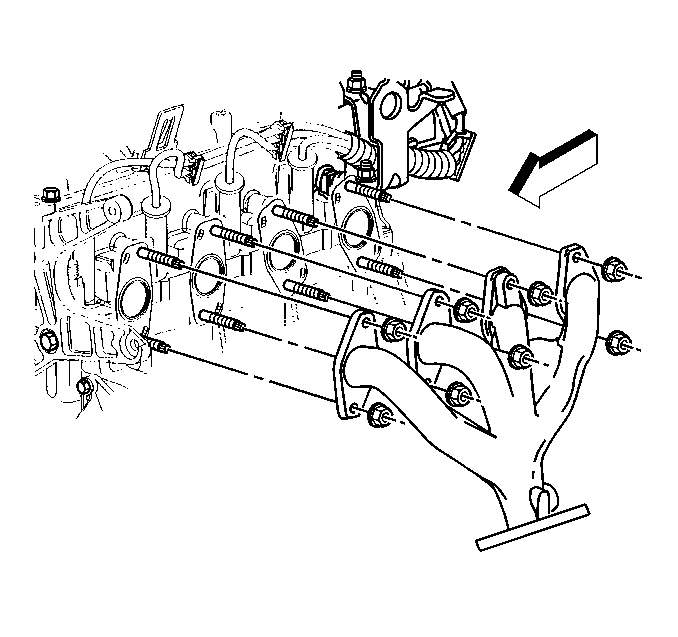
- Remove the exhaust manifold nuts.
- Remove the exhaust manifold and gasket.
- Clean all sealing surfaces.
Notice: Do not bend the exhaust flex decoupler more than 3 degrees in any direction. Movement of more than 3 degrees will damage the exhaust flex decoupler.
Installation Procedure
- Install a new exhaust manifold gasket.
- Install the exhaust manifold.
- Install the exhaust manifold nuts.
- Install oil level indicator tube and indicator. Refer to Oil Level Indicator and Tube Replacement in Engine Mechanical.
- Install the exhaust manifold heat shield and bolts.
- Install cruise control module. Refer to Cruise Control Module Replacement in Cruise Control.
- Raise and support the vehicle. Refer to Lifting and Jacking the Vehicle in General Information.
- Install the flex decoupler to exhaust manifold bolts.
- Lower the vehicle.
- Connect the Oxygen sensor (O2S) connector.
Notice: Use the correct fastener in the correct location. Replacement fasteners must be the correct part number for that application. Fasteners requiring replacement or fasteners requiring the use of thread locking compound or sealant are identified in the service procedure. Do not use paints, lubricants, or corrosion inhibitors on fasteners or fastener joint surfaces unless specified. These coatings affect fastener torque and joint clamping force and may damage the fastener. Use the correct tightening sequence and specifications when installing fasteners in order to avoid damage to parts and systems.
Tighten
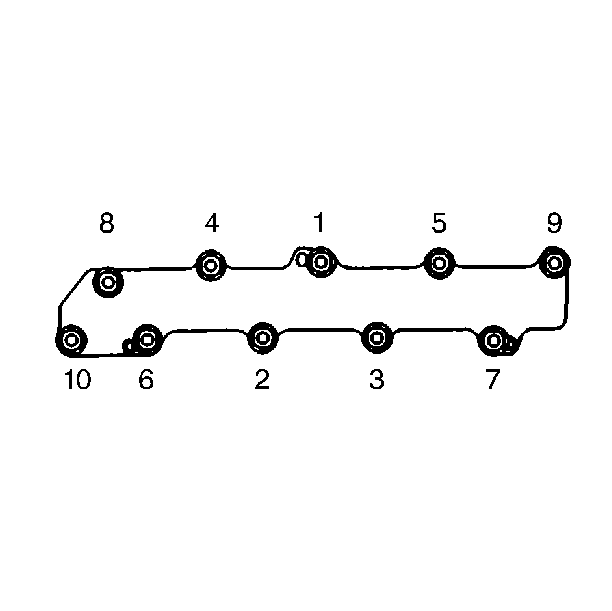
Tighten the exhaust manifold nuts to 13 N·m (115 lb in).
Tighten
Tighten the exhaust manifold heat shield bolts to 14 N·m
(124 lb in).
Tighten
Tighten the flex decoupler to exhaust manifold bolts to 35 N·m
(26 lb ft).
Exhaust Manifold Replacement 2.2L
Removal Procedure
- Remove the oxygen sensor lead.
- Remove the generator. Refer to Generator Replacement in Engine Electrical.
- Remove the generator rear brace.
- Raise and support the vehicle. Refer to Lifting and Jacking the Vehicle in General Information.
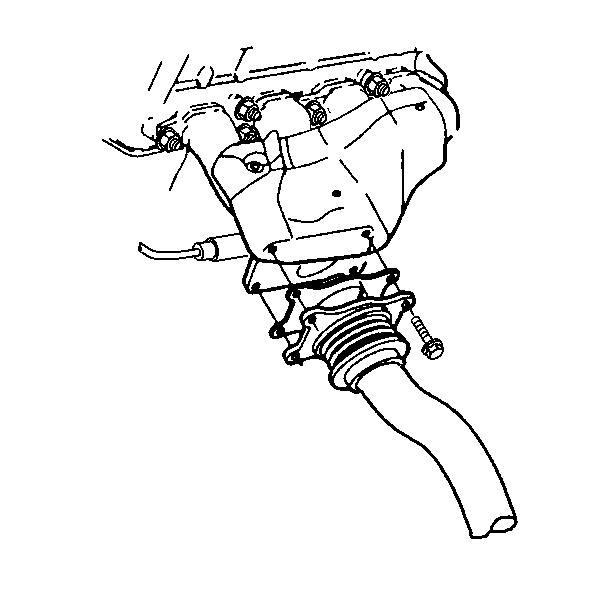
- Remove the exhaust pipe to the exhaust manifold.
- Lower the vehicle.
- Remove the oil fill tube. Refer to Oil Level Indicator and Tube Replacement .
- Remove the exhaust manifold nuts.
- Remove the exhaust manifold and the gasket.
- Clean the mating surfaces at the cylinder head and the exhaust manifold.
- Inspect the manifold for cracks, broken flanges and gasket surface damage.
- Check the alignment of the exhaust manifold mating surfaces. Use a straight edge and a feeler gauge. If the flanges or the mating surfaces do not align, the manifold is warped and should be replaced.
Installation Procedure
- Install the exhaust manifold gasket.
- Install the exhaust manifold.
- Install the exhaust manifold nuts.
- Install the oil fill tube. Refer to Oil Level Indicator and Tube Replacement .
- Raise the vehicle.
- Install the exhaust pipe to the manifold. Refer to Intermediate Pipe Replacement .
- Lower the vehicle.
- Install the generator rear brace.
- Install the generator. Refer to Generator Replacement in Engine Electrical.
- Install the oxygen sensor lead.
Notice: Use the correct fastener in the correct location. Replacement fasteners must be the correct part number for that application. Fasteners requiring replacement or fasteners requiring the use of thread locking compound or sealant are identified in the service procedure. Do not use paints, lubricants, or corrosion inhibitors on fasteners or fastener joint surfaces unless specified. These coatings affect fastener torque and joint clamping force and may damage the fastener. Use the correct tightening sequence and specifications when installing fasteners in order to avoid damage to parts and systems.
Tighten
Tighten the exhaust manifold nuts to 13 N·m (115 lb in).
