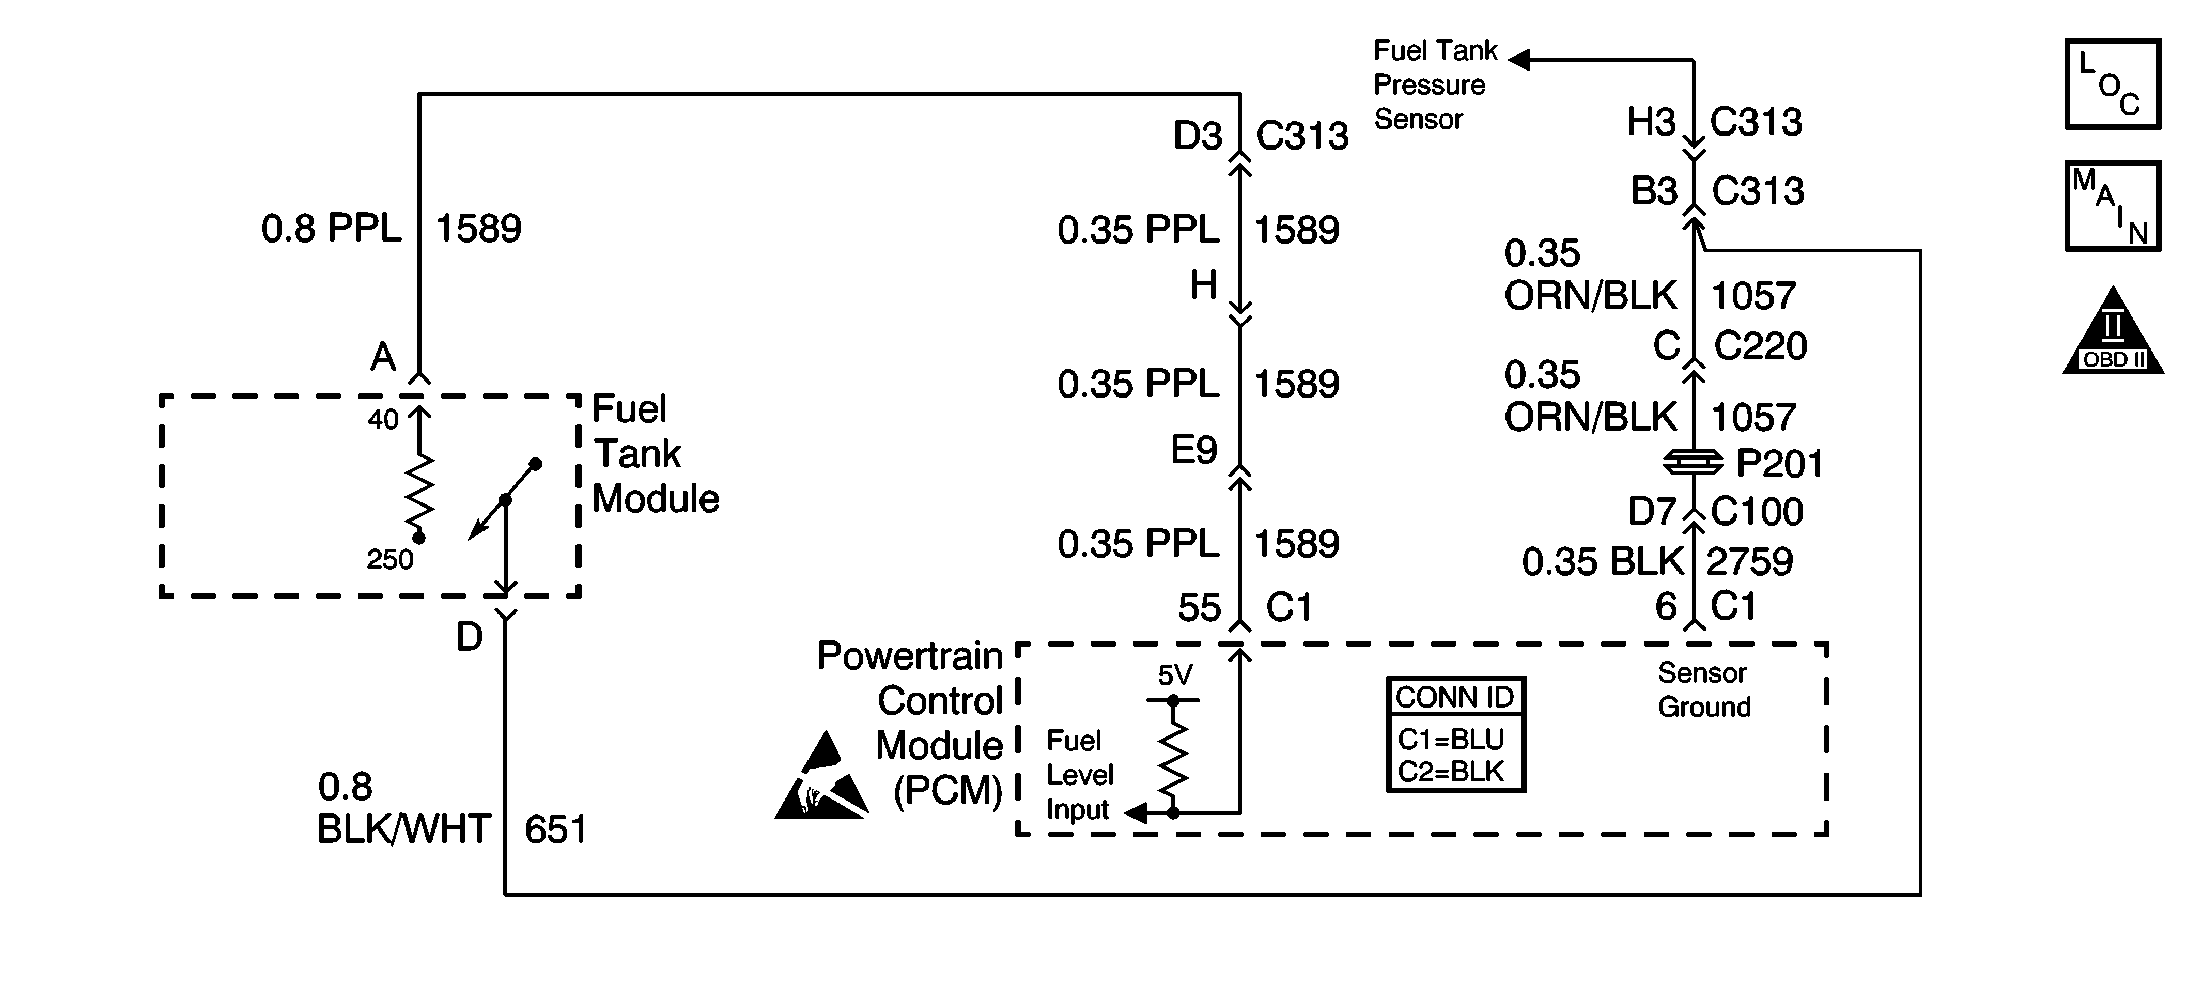
Circuit Description
The Powertrain Control Module (PCM) uses a fuel level input in order to calculate the expected vapor pressures within the fuel system. These vapor pressures vary as the fuel level changes. The vapor pressure is critical in determining if the evaporative emission (EVAP) system is operating properly. The PCM also uses the fuel level in order to determine if the fuel level is too high or too low to be able to accurately detect an EVAP system malfunction.
Conditions for Running the DTC
| • | The ignition is ON. |
| • | The system voltage is between 11 and 16 volts. |
Conditions for Setting the DTC
The fuel level has not changed more than 1.6 percent in 193 km (120 miles).
Action Taken When the DTC Sets
| • | The PCM will record the operating conditions during the time which the diagnostic fails. This information will store in the Failure Records buffer. |
| • | A history DTC stores. |
| • | The fuel level will default to 40 percent. |
Conditions for Clearing the DTC
| • | A history DTC clears after 40 consecutive warm up cycles without a fault. |
| • | Use a scan tool to clear the DTCs. |
Diagnostic Aids
| • | Inspect for the following conditions that may cause intermittents: |
| - | Faulty electrical connections |
| - | Rubbed-through wire insulation |
| - | A wire that is broken inside the wire insulation |
| • | Thoroughly inspect any circuitry that is suspected of causing the intermittent complaint. Inspect for the following conditions: |
| - | Backed-out terminals |
| - | Improper mating |
| - | Broken locks |
| - | Improperly formed or damaged terminals |
| - | Faulty terminal-to-wire connections |
| • | Before replacing the PCM, inspect the PCM electrical connector terminals for the following conditions: |
| - | Improper mating |
| - | Broken locks |
| - | Physical damage to the wiring harness |
Test Description
The numbers below refer to the step numbers on the diagnostic table:
-
The fuel level display on the scan tool is displayed as a percentage of fuel in the fuel tank. It is also important to know approximately how much fuel is in the tank prior to performing this step.
-
The replacement PCM must be programmed and the Crankshaft Position System Variation Learn Procedure must be performed.
Step | Action | Values | Yes | No | ||||
|---|---|---|---|---|---|---|---|---|
1 | Did you perform the Powertrain On-Board Diagnostic (OBD) System Check? | -- | ||||||
Important:
Does the fuel level value read either specified value? | 0%, 100% | Go to Diagnostic Aids | ||||||
3 |
Does the fuel level value read at the specified level? | 100% | ||||||
4 |
Does the fuel level value read at the specified level? | 0% | ||||||
5 |
Did you find and correct the condition? | -- | ||||||
6 |
Does the test lamp illuminate? | -- | ||||||
7 |
Did you find and correct the condition? | -- | ||||||
8 |
Did you find and correct the condition? | -- | ||||||
|
Important:: Refer to Powertrain Control Module Replacement/Programming . If the circuit is OK, replace the PCM. Refer to Powertrain Control Module Replacement . Did you complete the replacement? | -- | -- | ||||||
10 |
Did you find and correct the condition? | -- | ||||||
11 | Replace the fuel level sensor. Refer to Fuel Level Sensor Replacement . Did you complete the replacement? | -- | -- | |||||
12 |
Does the DTC reset? | -- | System OK |
