Removal Procedure
- Relieve fuel system pressure. Refer to Fuel Pressure Relief .
- Disconnect the negative battery cable.
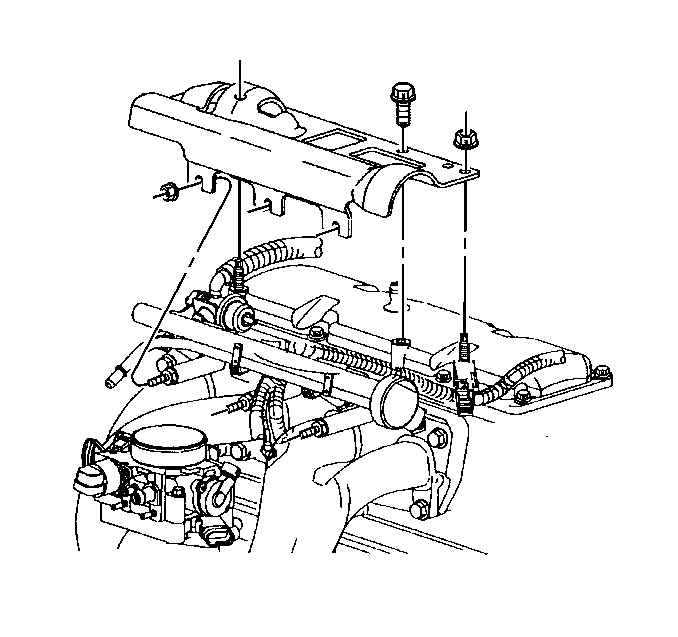
- Remove the air cleaner resonator. Refer to Air Cleaner Outlet Resonator Replacement
- Remove air cleaner resonator bracket.
- Remove the fuel rail. Refer to Fuel Injection Fuel Rail Assembly Replacement .
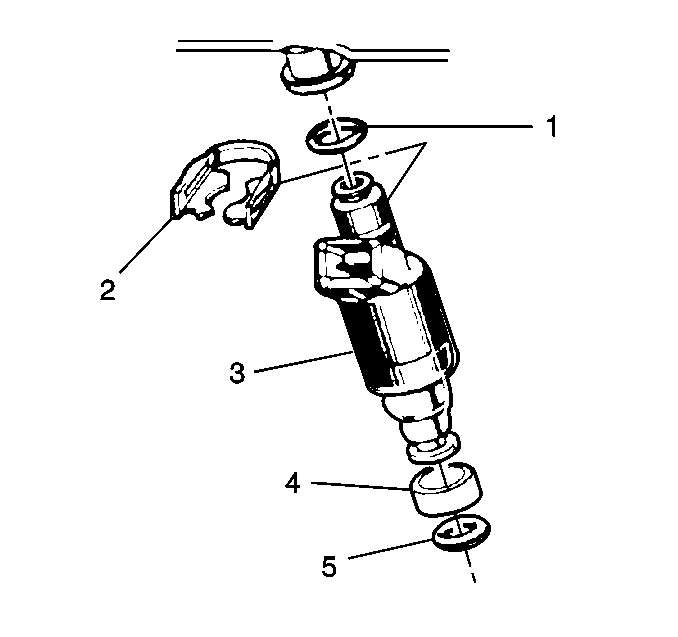
- Remove the fuel injector retaining clip (2).
- Remove the fuel injector (3).

Caution: Remove the fuel tank cap and relieve the fuel system pressure before servicing the fuel system in order to reduce the risk of personal injury. After you relieve the fuel system pressure, a small amount of fuel may be released when servicing the fuel lines, the fuel injection pump, or the connections. In order to reduce the risk of personal injury, cover the fuel system components with a shop towel before disconnection. This will catch any fuel that may leak out. Place the towel in an approved container when the disconnection is complete.
Caution: Unless directed otherwise, the ignition and start switch must be in the OFF or LOCK position, and all electrical loads must be OFF before servicing any electrical component. Disconnect the negative battery cable to prevent an electrical spark should a tool or equipment come in contact with an exposed electrical terminal. Failure to follow these precautions may result in personal injury and/or damage to the vehicle or its components.

Installation Procedure
- Lubricate new fuel injector O-ring seals (1) (4) and (5) with clean engine oil, and install on fuel injector assembly (3).
- Install the fuel injector upper O-ring (1).
- Install the fuel injector lower back-up O-ring (4).
- Install the fuel injector lower O-ring (5).
- Install the fuel injector (3) to the fuel rail.
- Install the fuel injector retaining clip (2).
- Install the fuel rail. Refer to Fuel Injection Fuel Rail Assembly Replacement .
- Install the air cleaner resonator bracket.
- Install the air cleaner resonator. Refer to Air Cleaner Outlet Resonator Replacement .
- Connect the negative battery cable.
- Inspect for leaks through the following steps:

Important: Each fuel injector is calibrated for a specific flow rate. When replacing fuel injectors, be sure to order the correct fuel injector for the application being serviced.
Important: When installing the fuel injector, care should be taken not to tear or misalign the fuel injector O-rings.

| 11.1. | Turn the ignition switch ON for two seconds. |
| 11.2. | Turn the ignition switch OFF for ten seconds. |
| 11.3. | Turn the ignition switch ON. |
| 11.4. | Inspect for fuel leaks. |
