For 1990-2009 cars only
Removal Procedure
- Partially open and support the folding top.
- Remove the right or left side front weatherstrips and retainers. Refer to Folding Top Side Front Weatherstrip Replacement and Folding Top Side Front Weatherstrip Retainer Replacement.
- Remove the right or left side rear weatherstrips and retainers. Refer to Folding Top Side Rear Weatherstrip Replacement and Folding Top Side Rear Weatherstrip Retainer Replacement.
- Position the folding top to the closed position with the rear compartment lid open.
- Remove the folding top cover rear fabric retainer and seal.
- Remove the folding top rear locating pin. Refer to Folding Top Rear Locating Pin Replacement.
- Remove the elastic straps from the upstop on the folding top side rail assembly.
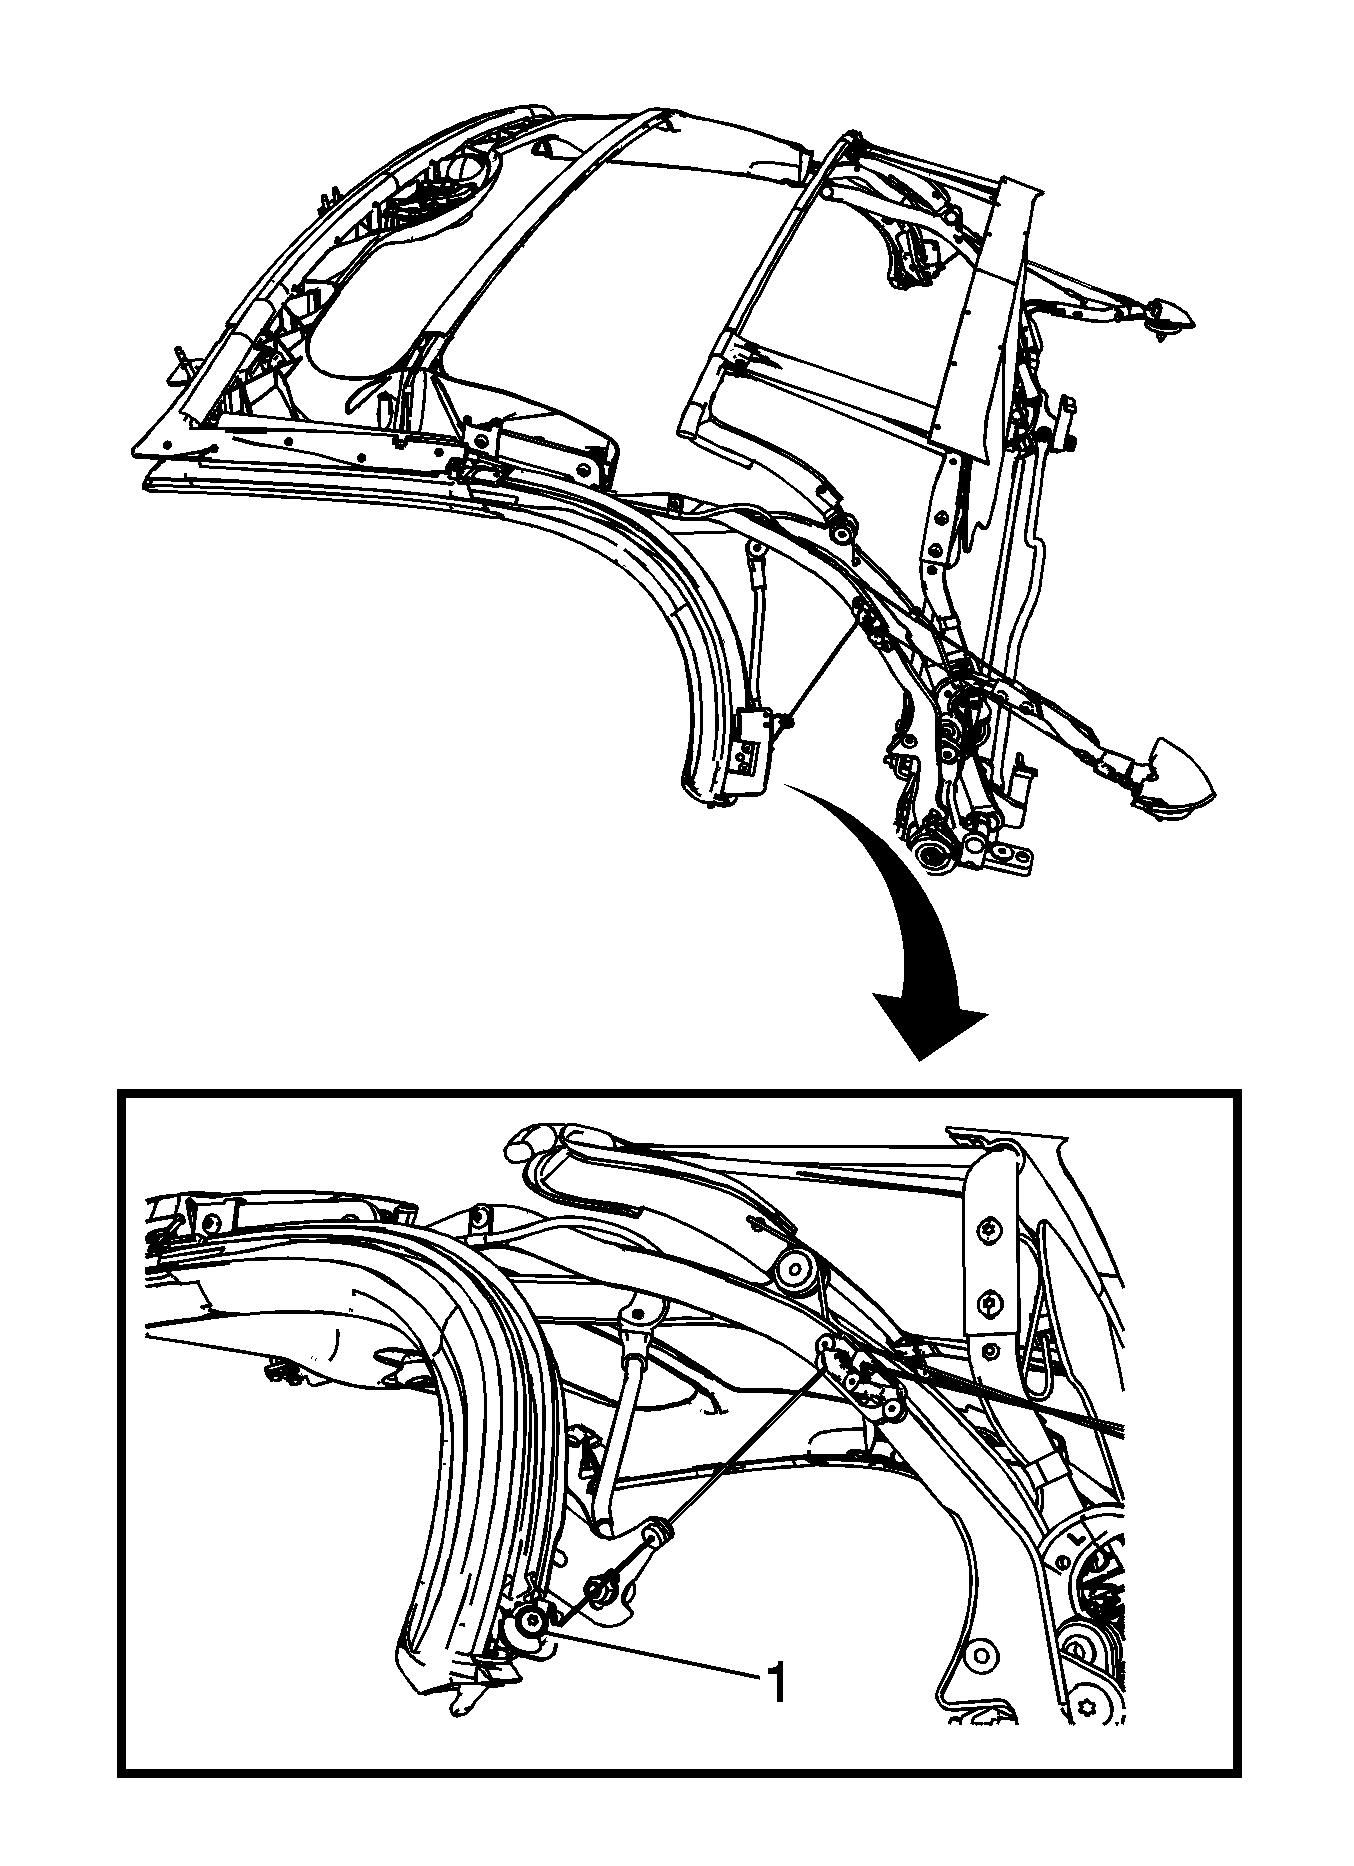
- Remove the cable roller (1) from the side rail by removing the screw.
- Slide the outer layer of the folding top cover fabric off the folding top rear latch striker retainer.
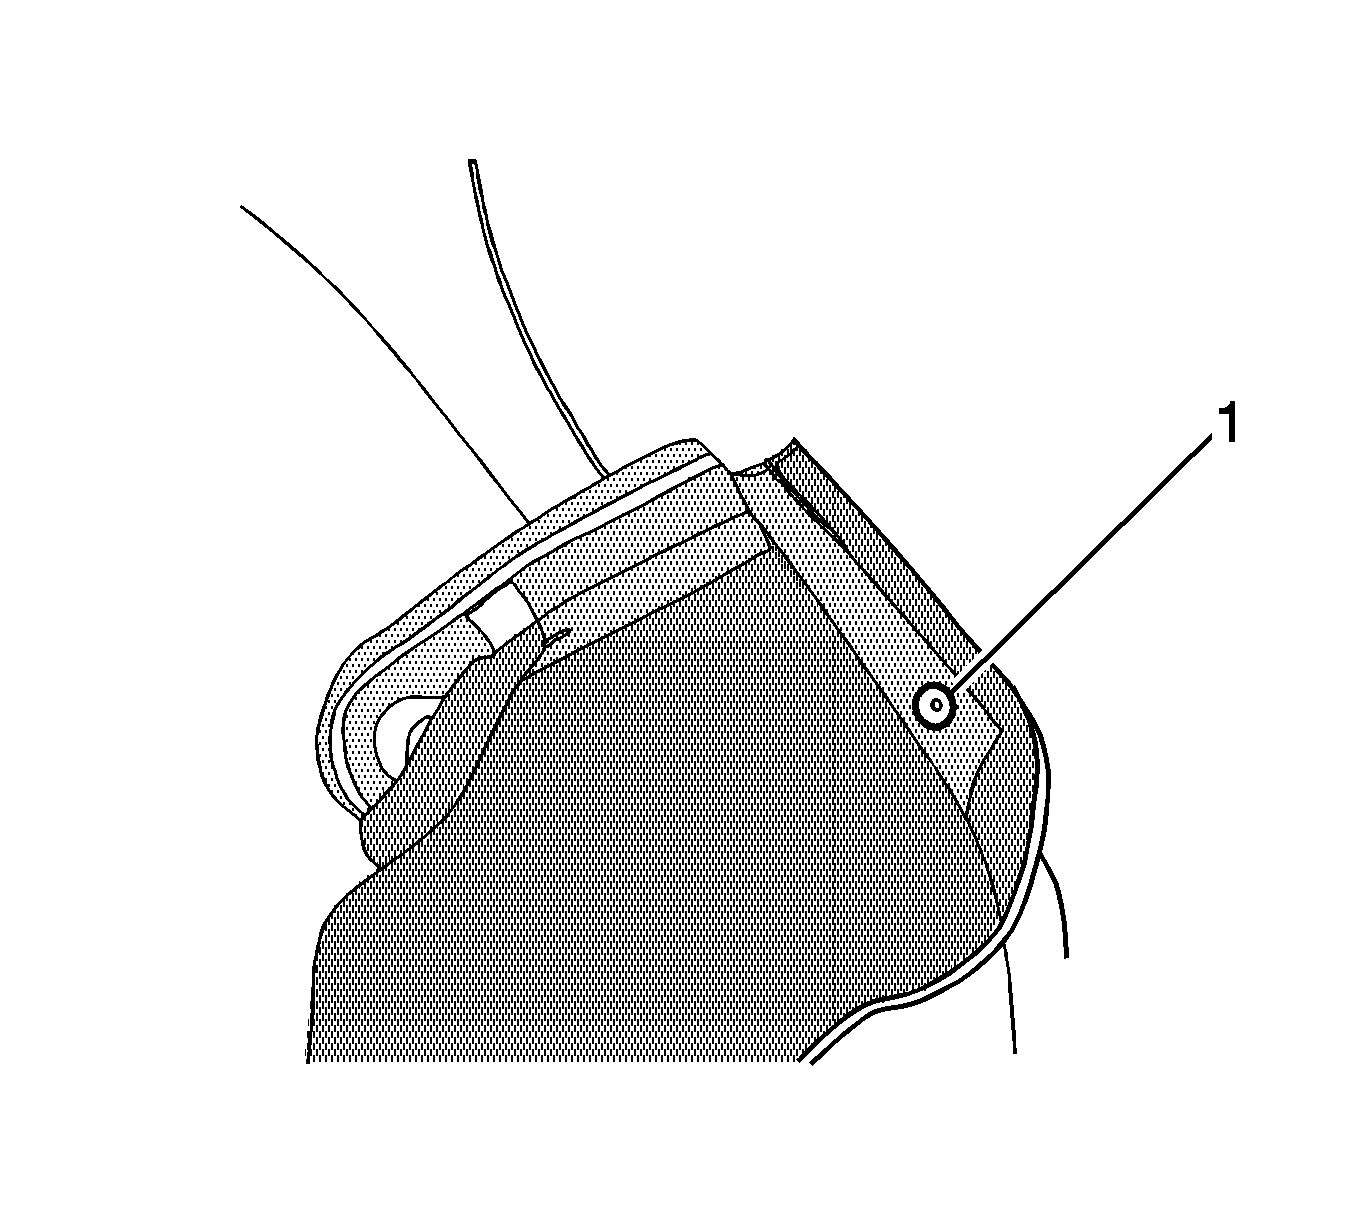
- Drill out the rivet holding the inner layer of the folding top cover fabric to the folding top rear latch striker retainer.
- Remove the 2 fasteners that secure the folding top cover rear retainer to the seat back panel to loosen the fabric. Refer to Folding Top Cover Rear Retainer Replacement.
- Remove the inner layer of folding top cover fabric from the folding top rear latch striker retainer.
- If replacing the rear spring only, perform the following procedure:
- In order to provide access to the fasteners, fold back the folding top cover fabric by detaching the glued section from the front and side rails as necessary.
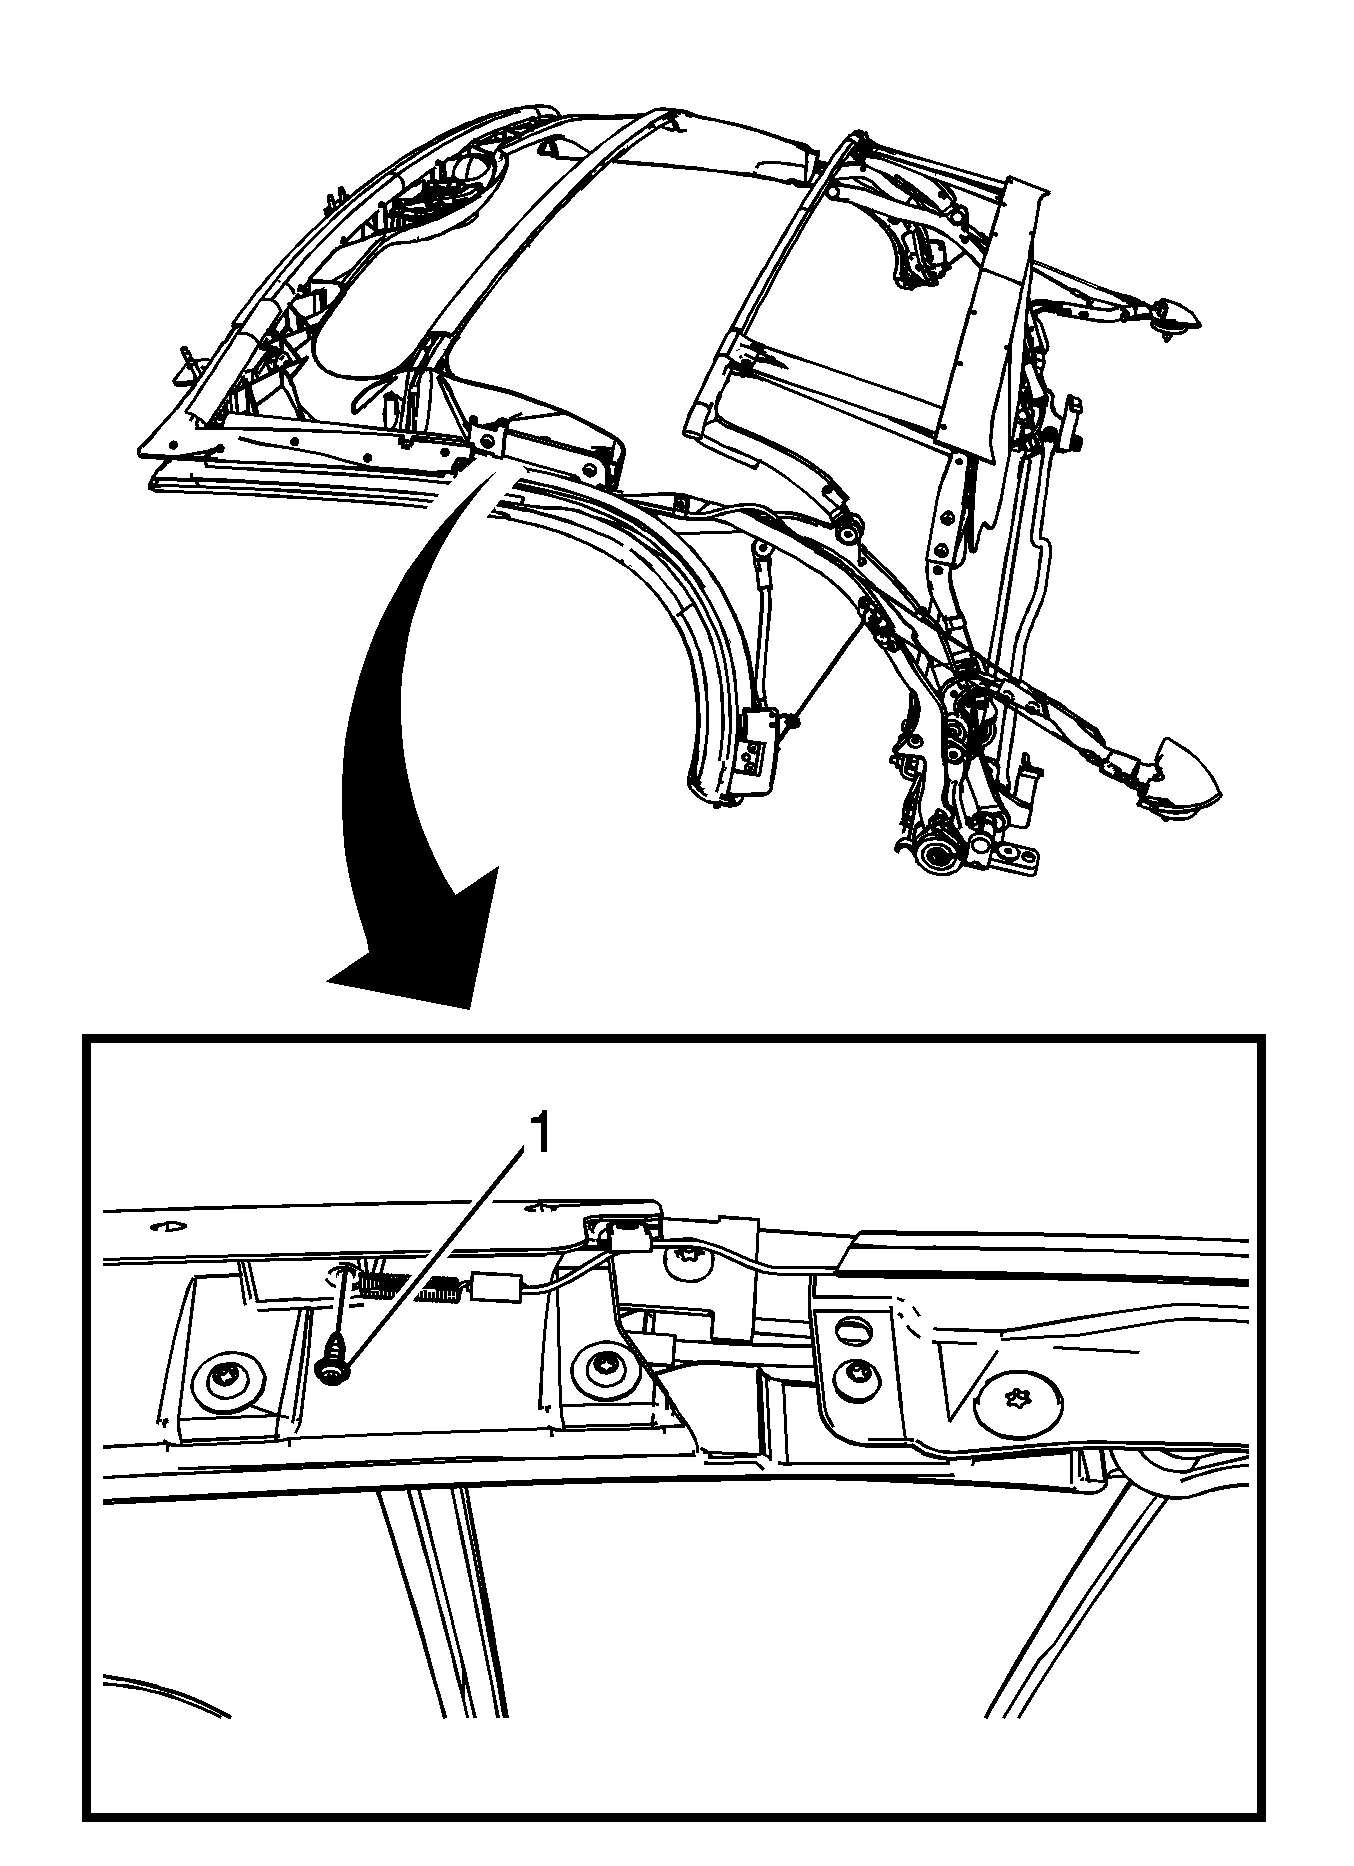
- Remove the screw (1) that secures the front side tension spring to the underside of the number 1 bow.
- Remove the P-clip that secures the side tension cable to the number 1 bow by drilling out the rivet.
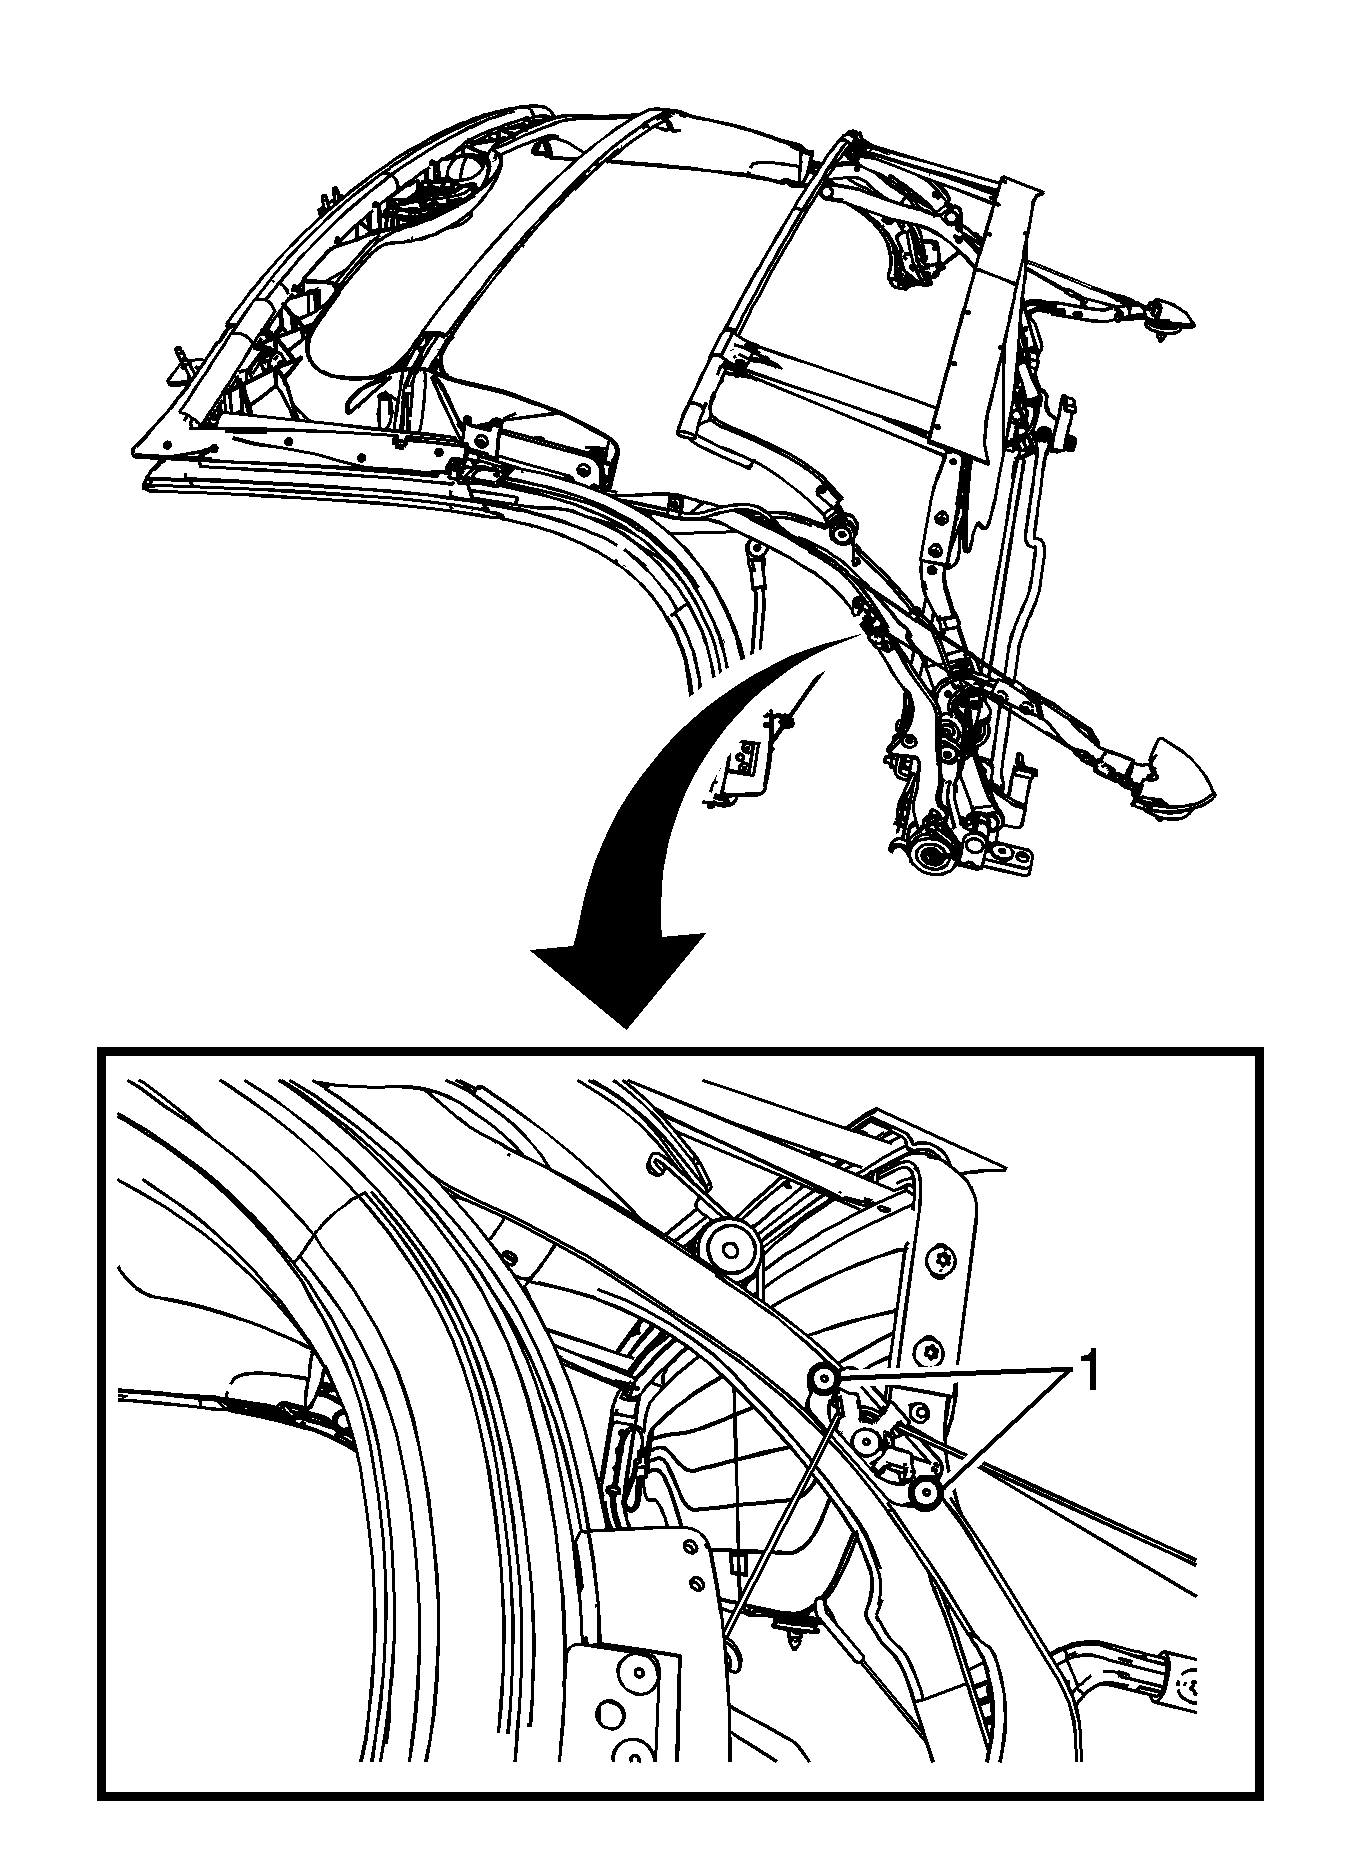
- Remove the guide bracket (1) attached to the side rail assembly by drilling out the rivets.
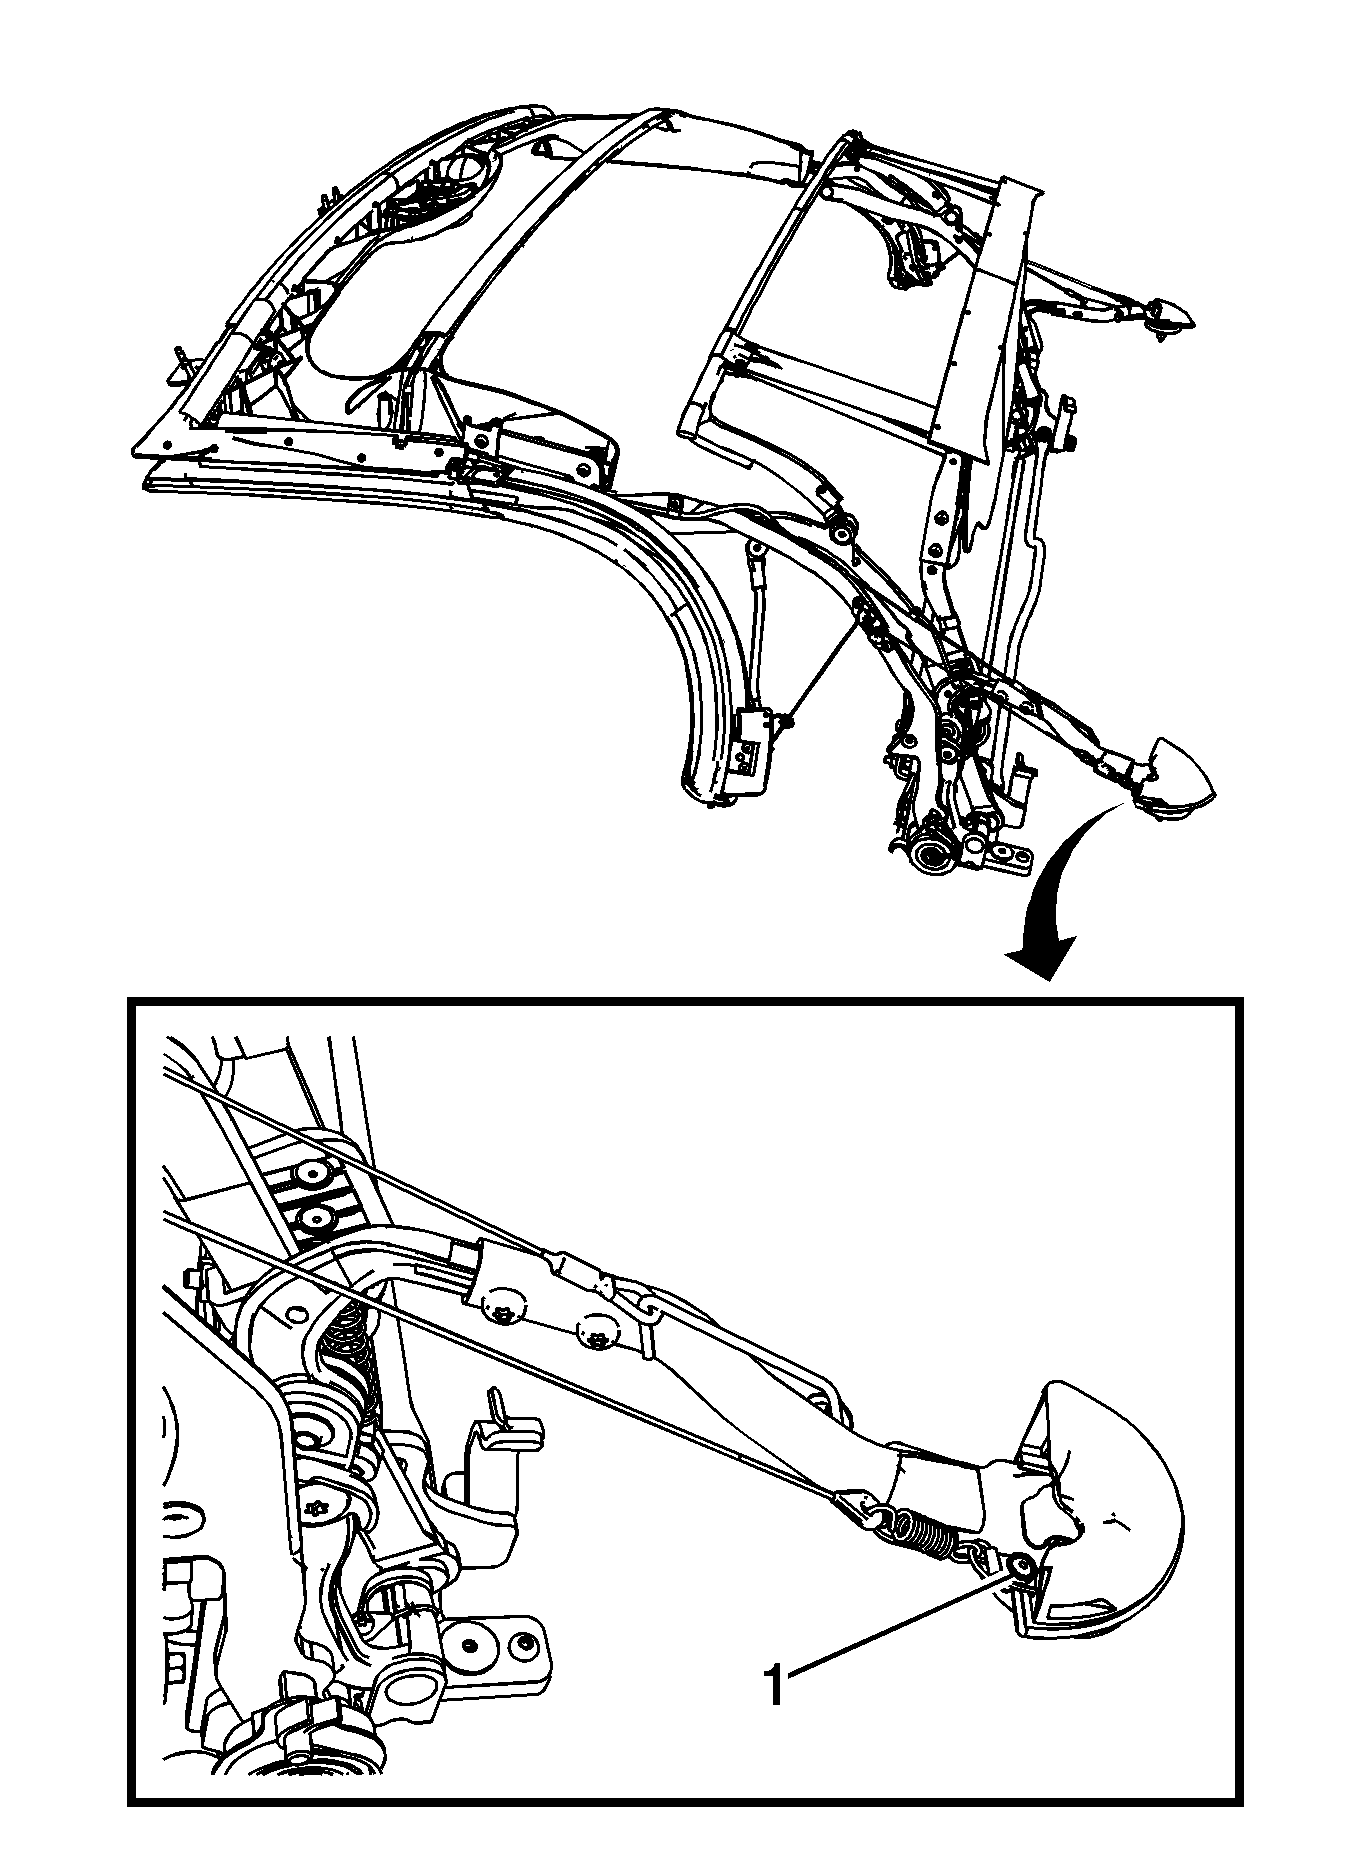
- Remove the D-ring (1) that attaches the rear spring to the end of the side rail assembly arm by drilling out the rivet.
- Detach the slider (2) from the top cover fabric pocket (1) by removing the stitching.
- Remove the slider by drilling out the rivet (1).
| 13.1. | Peel the foam off the spring and bend the end of the spring to remove the spring from the D-ring and cable. |
| 13.2. | Remove the spring from the new cable assembly and install the spring in place of the old spring. |
| 13.3. | Ensure the end of the spring is bent back in place and the foam is repositioned. |
Proceed to step 8 of the installation procedure.
Note: The folding top fabric is secured to the front and side rails by glue.
Note: Use the short rivet provided in the installation kit for this location. The longer rivets will not allow the rear fabric retainers to be installed.
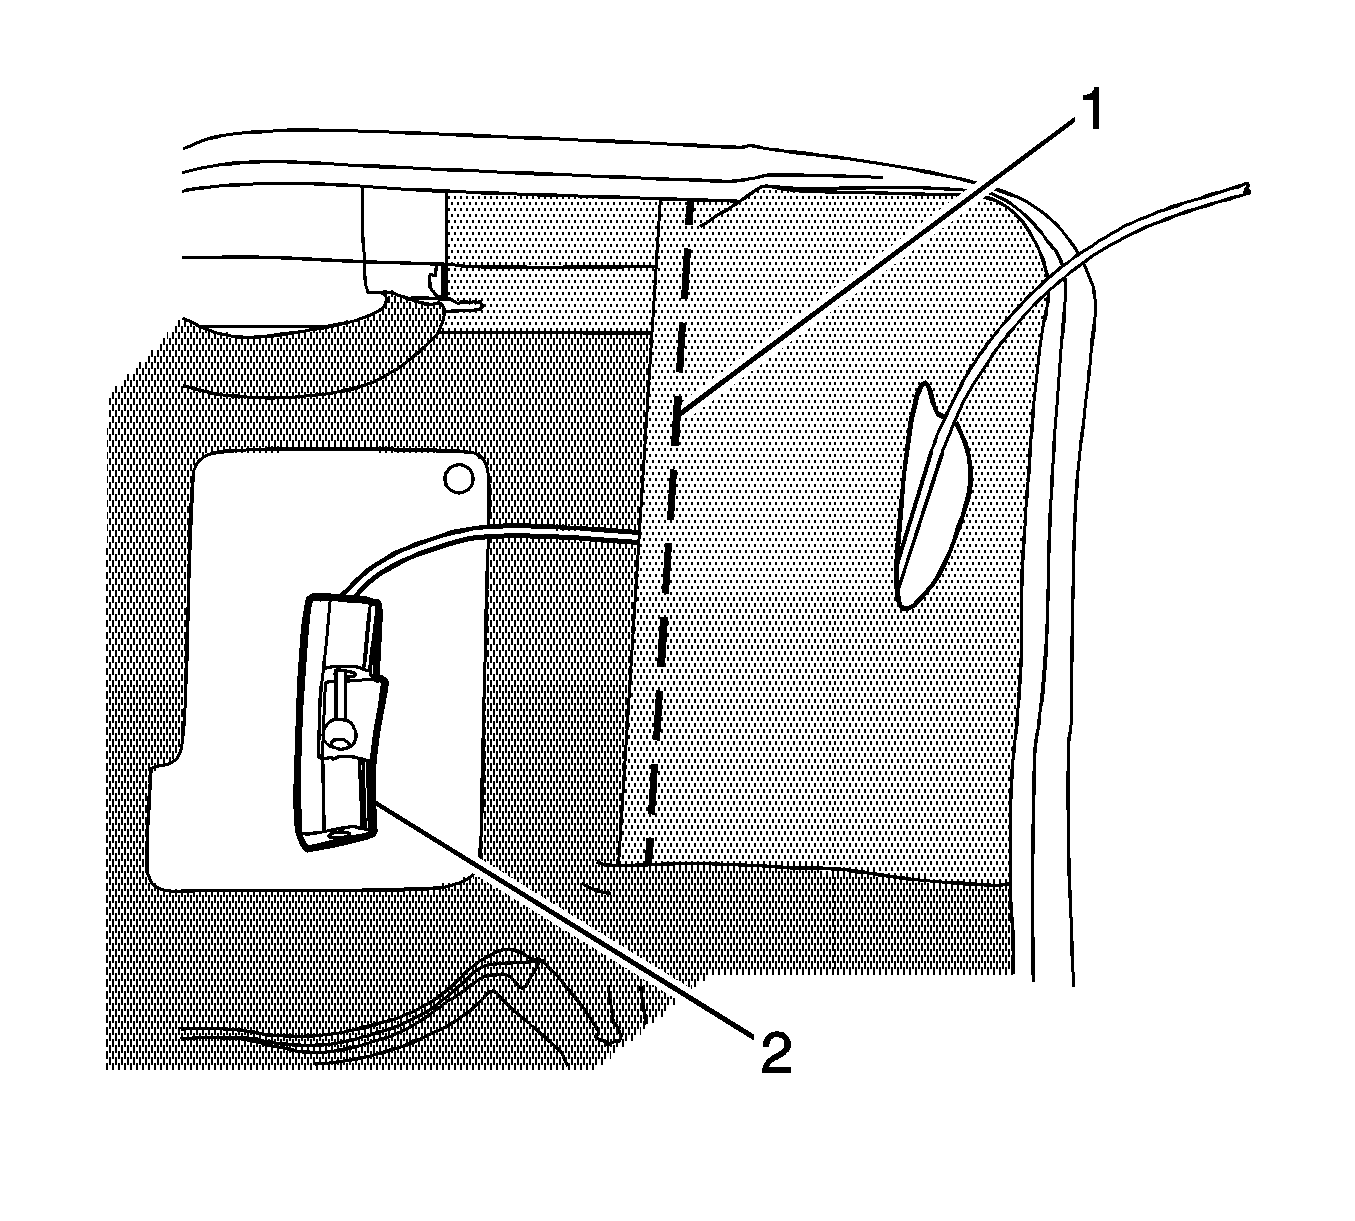
Note: The slider is sewn into the folding top cover fabric. In order to remove the slider and cable assemblies, the top cover must be opened up and the slider pocket stitching removed.
Installation Procedure
- Install the rivet (1) which positions the slider in the top cover fabric pocket.
- Re-stitch the slider (2) to the top cover fabric pocket (1).
- Install the rivet retaining the D-ring (1) that attaches the spring to the end of the side rail assembly arm.
- Install the rivets retaining the guide bracket (1) to the side rail assembly.
- Install the rivet retaining the P-clip that secures the side tension cable to the number 1 bow.
- Install the screw (1) that secures the front side tension spring to underside of the number 1 bow and tighten to 2 N·m (18 lb in).
- Install the folding top cover fabric to the front and side of the number 1 bow and glue in position using standard 3M trim cement.
- Position the inner layer of the folding top cover fabric to the folding top rear latch striker retainer.
- Install the folding top cover rear retainer to the seat back panel. Refer to Folding Top Cover Rear Retainer Replacement.
- Install the rivet retaining the inner layer of folding top cover fabric to the folding top rear latch striker retainer.
- Slide the outer layer of folding top cover fabric onto the folding top rear latch striker retainer.
- Install the cable roller (1) to the side rail and tighten the screws to 3 N·m (26 lb in).
- Install the elastic straps to the upstop on the folding top side rail assembly.
- Install the folding top rear locating pin. Refer to Folding Top Rear Locating Pin Replacement.
- Install the folding top cover rear fabric retainer and seal.
- Partially open and support the folding top.
- Install the right or left side rear weatherstrips and retainers. Refer to Folding Top Side Rear Weatherstrip Replacement and Folding Top Side Rear Weatherstrip Retainer Replacement.
- Install the right or left side front weatherstrips and retainers. Refer to Folding Top Side Front Weatherstrip Replacement and Folding Top Side Front Weatherstrip Retainer Replacement.
- Inspect the folding top for proper fit and operation. Refer to Folding Top Adjustment.


Note: Use the short rivet provided in the installation kit for this location. The longer rivets will not allow the rear fabric retainers to be installed.

Caution: Refer to Fastener Caution in the Preface section.

Tighten the screws to 9 N·m (80 lb in).

