For 1990-2009 cars only
Exhaust Muffler Replacement LE5
Removal Procedure
- Open the hood.
- Remove the connector position assurance (CPA) retainer.
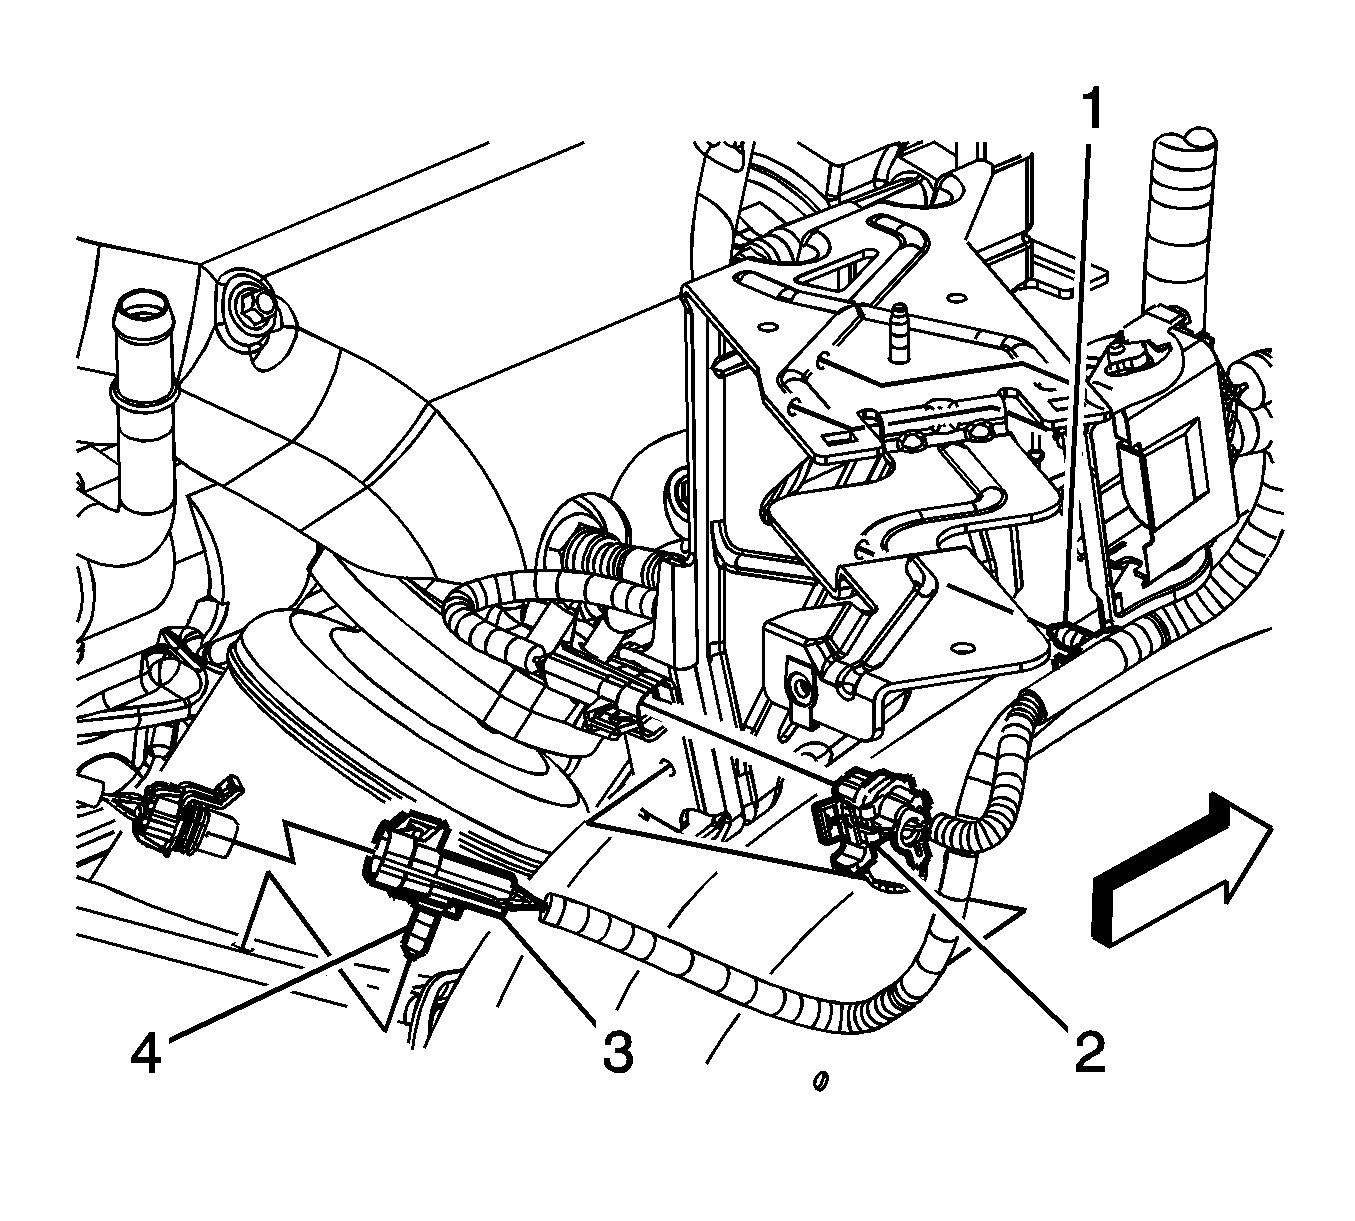
- Disconnect the heated oxygen sensor (HO2S) electrical connector (3).
- Raise and suitably support the vehicle. Refer to Lifting and Jacking the Vehicle .
- Remove the HO2S (2). Refer to Heated Oxygen Sensor 1 Replacement .
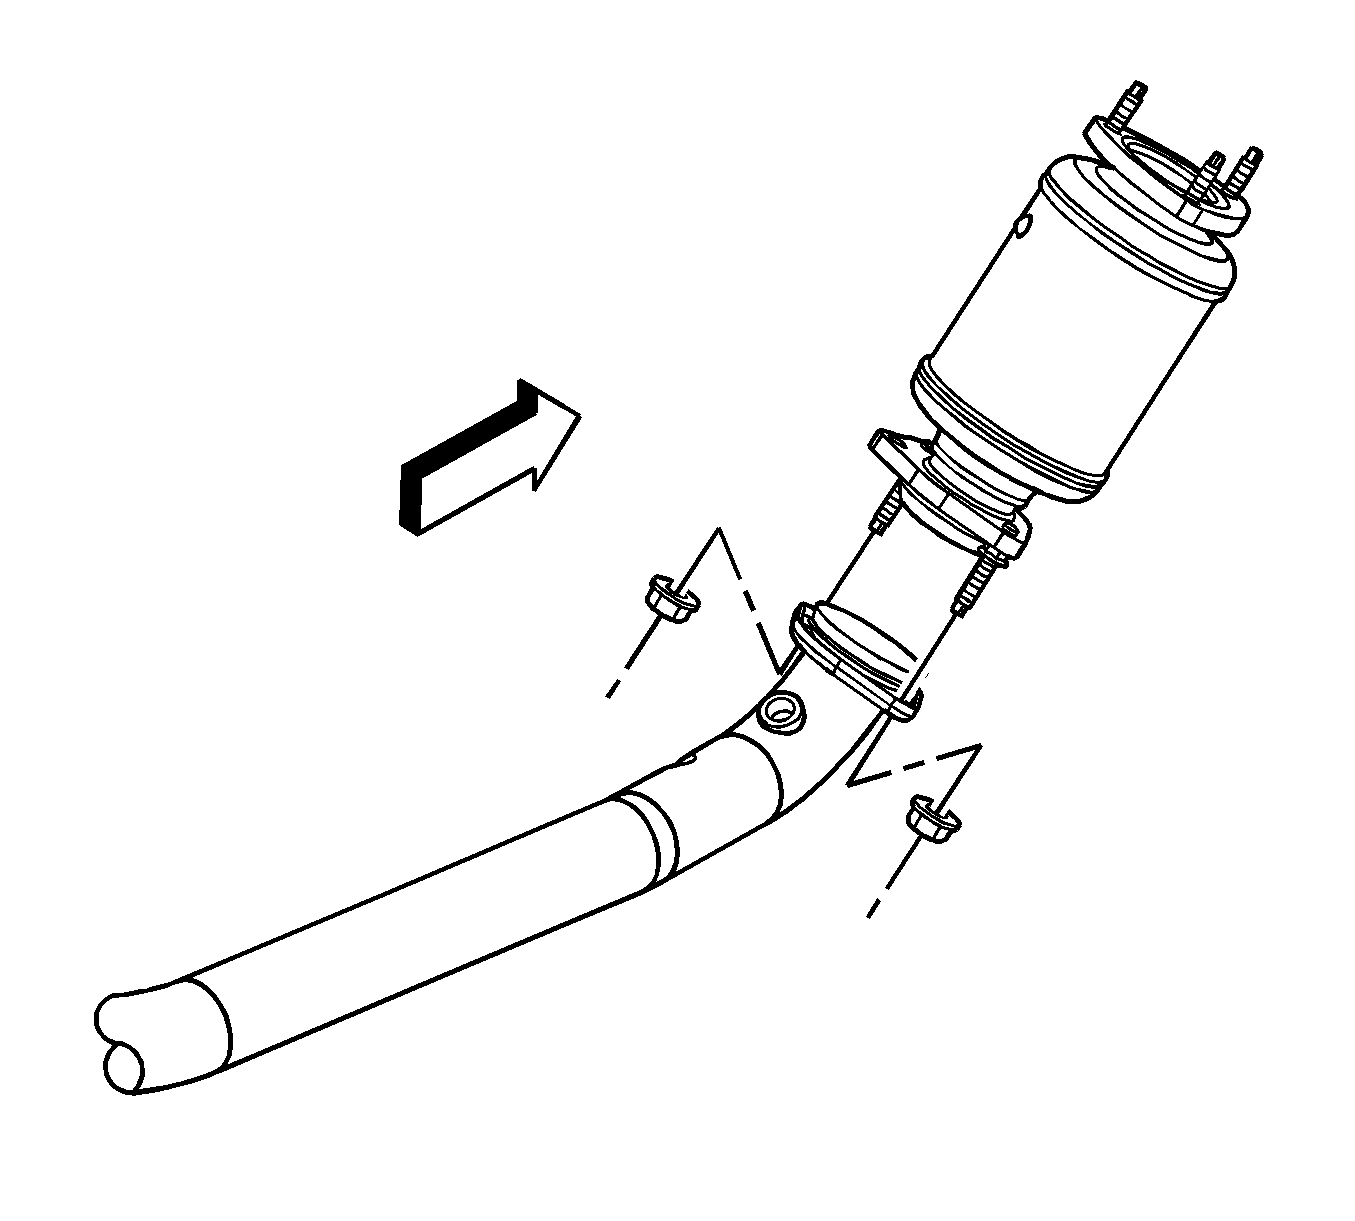
- Remove the catalytic converter to muffler nuts.
- Have an assistant support the muffler assembly.
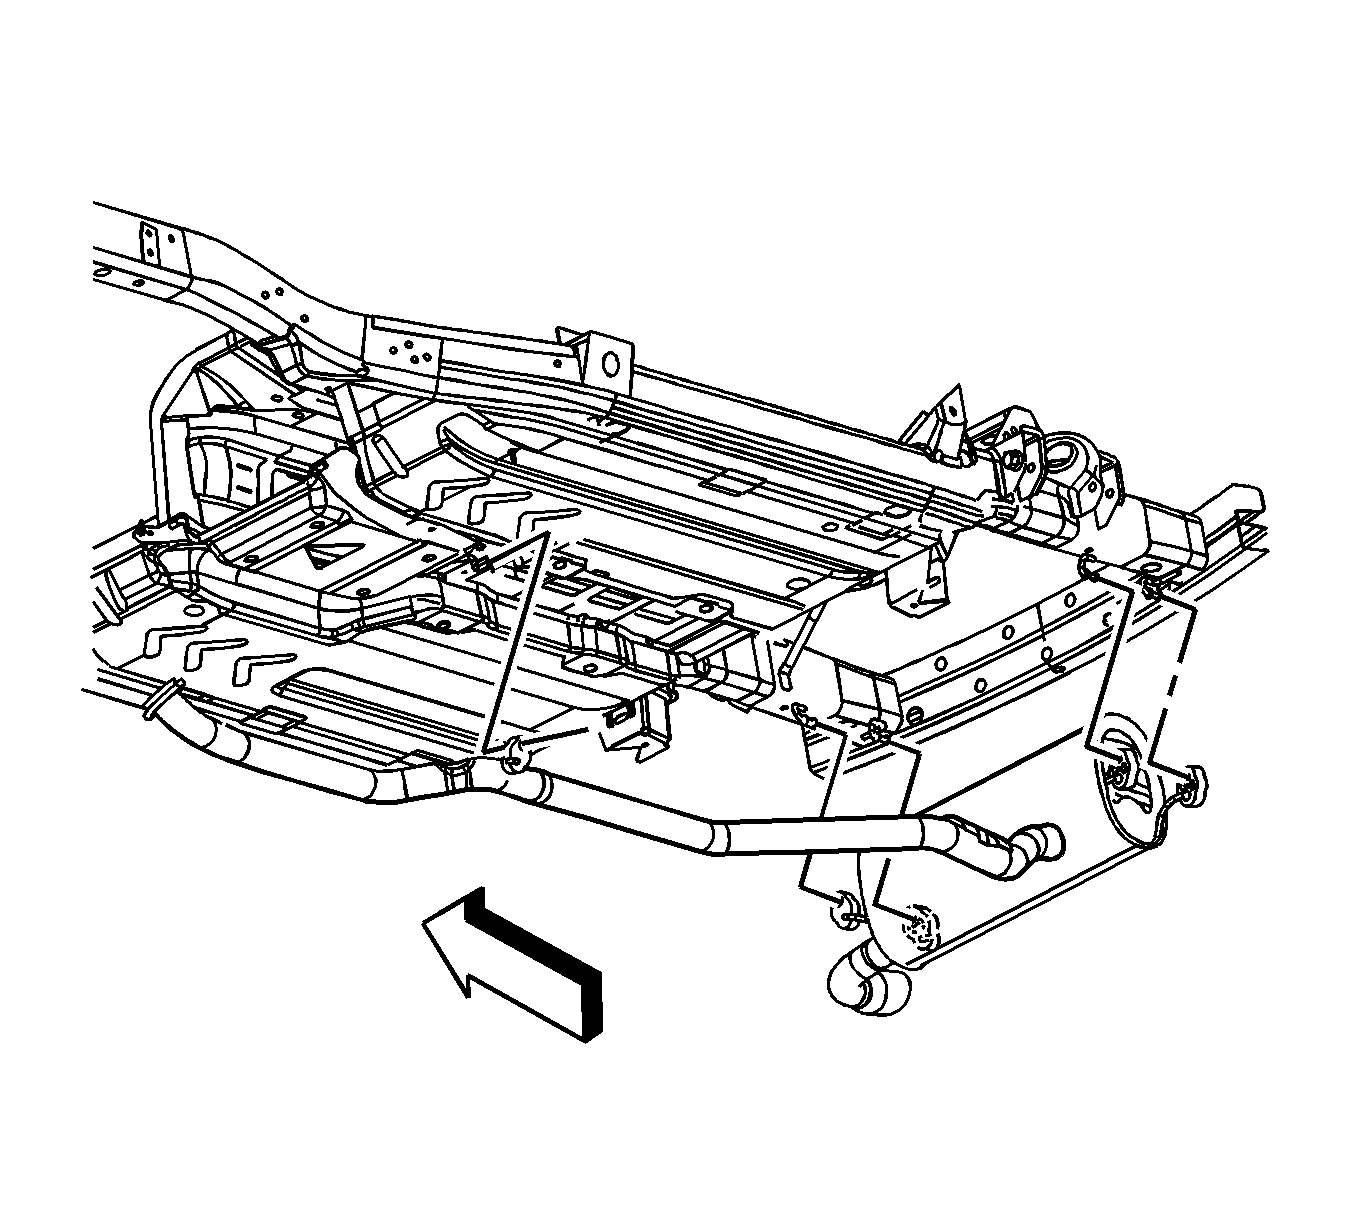
- Separate the muffler insulators from the hangers.
- With the aid of an assistant, remove the muffler assembly.
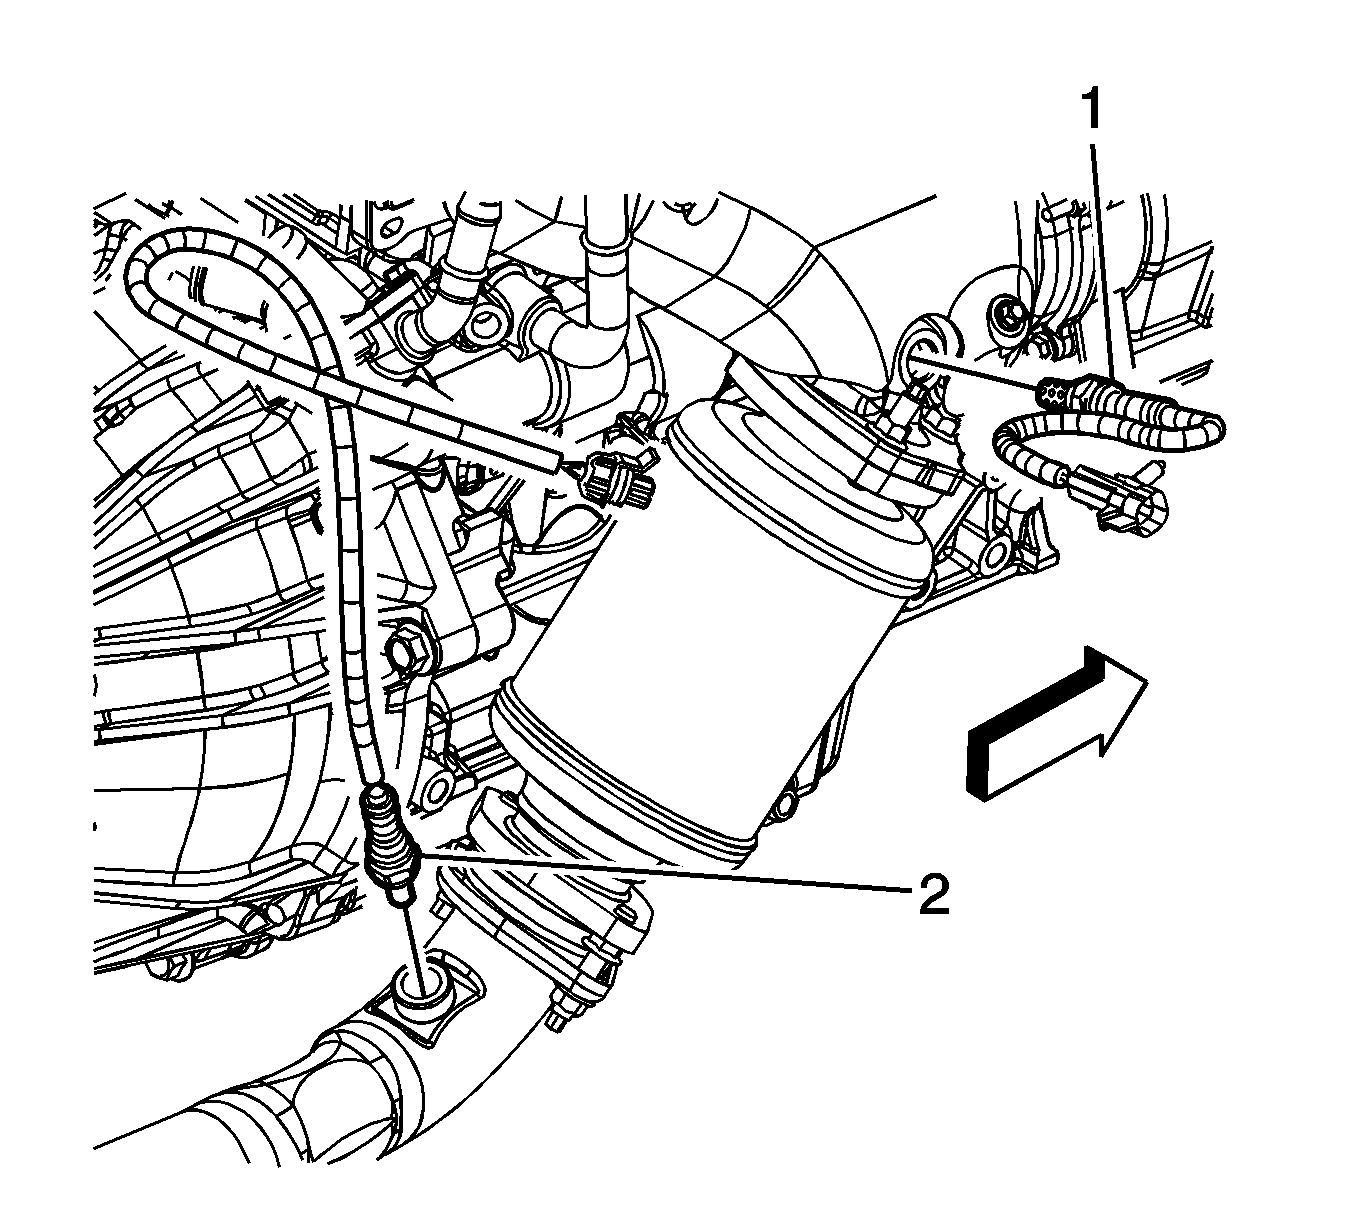
Important: The HO2S uses a permanently attached pigtail and connector. This pigtail should not be removed from the sensor. Damage or removal of the pigtail or connector will affect proper operation of the sensor.
Installation Procedure
- With the aid of an assistant, position the muffler assembly.
- Install the muffler insulators onto the hangers.
- Install the catalytic converter to muffler nuts.
- Install the HO2S (2). Refer to Heated Oxygen Sensor 1 Replacement .
- Lower the vehicle.
- Connect the HO2S electrical connector (3).
- Install the CPA retainer.
- Close the hood.

Notice: Refer to Fastener Notice in the Preface section.

Tighten
Tighten the nuts to 17 N·m (13 lb ft).


Exhaust Muffler Replacement LNF
Removal Procedure
- Open the hood.
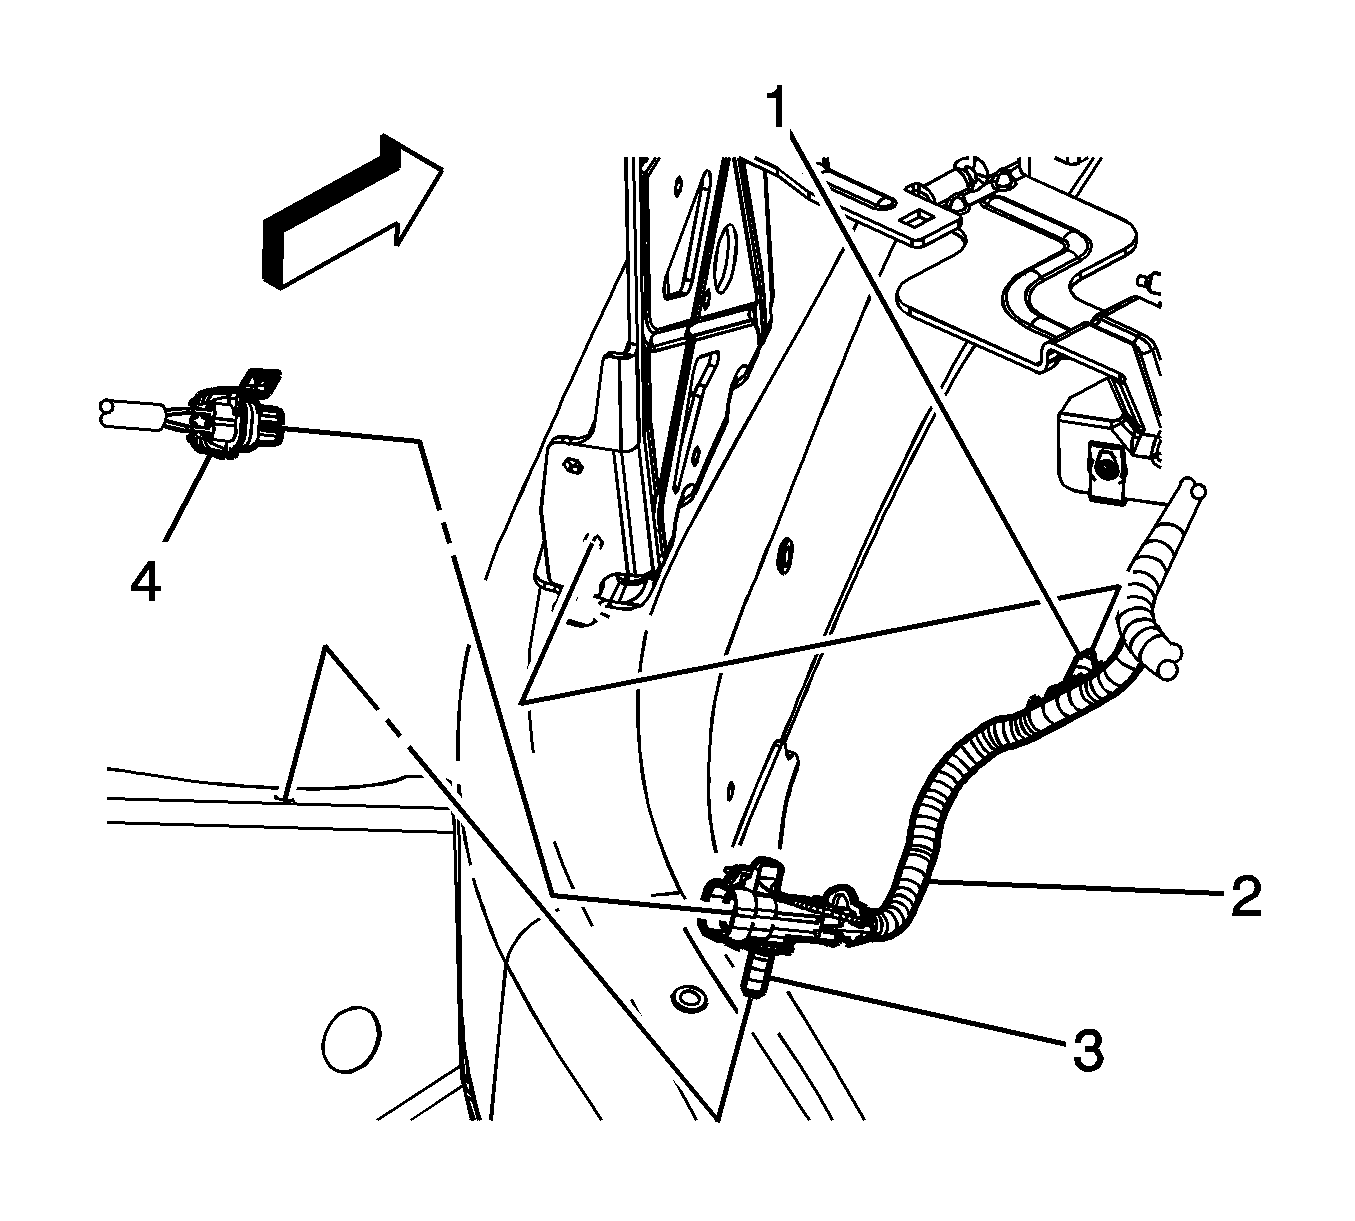
- Remove the heat shielding from the heated oxygen sensor (HO2S) electrical connector, if necessary.
- Remove the connector position assurance (CPA) retainer.
- Disconnect the position 2 HO2S electrical connector (4) from the engine wiring harness electrical connector (2).
- Raise and support the vehicle. Refer to Lifting and Jacking the Vehicle .
- Remove the HO2S. Refer to Heated Oxygen Sensor 1 Replacement .
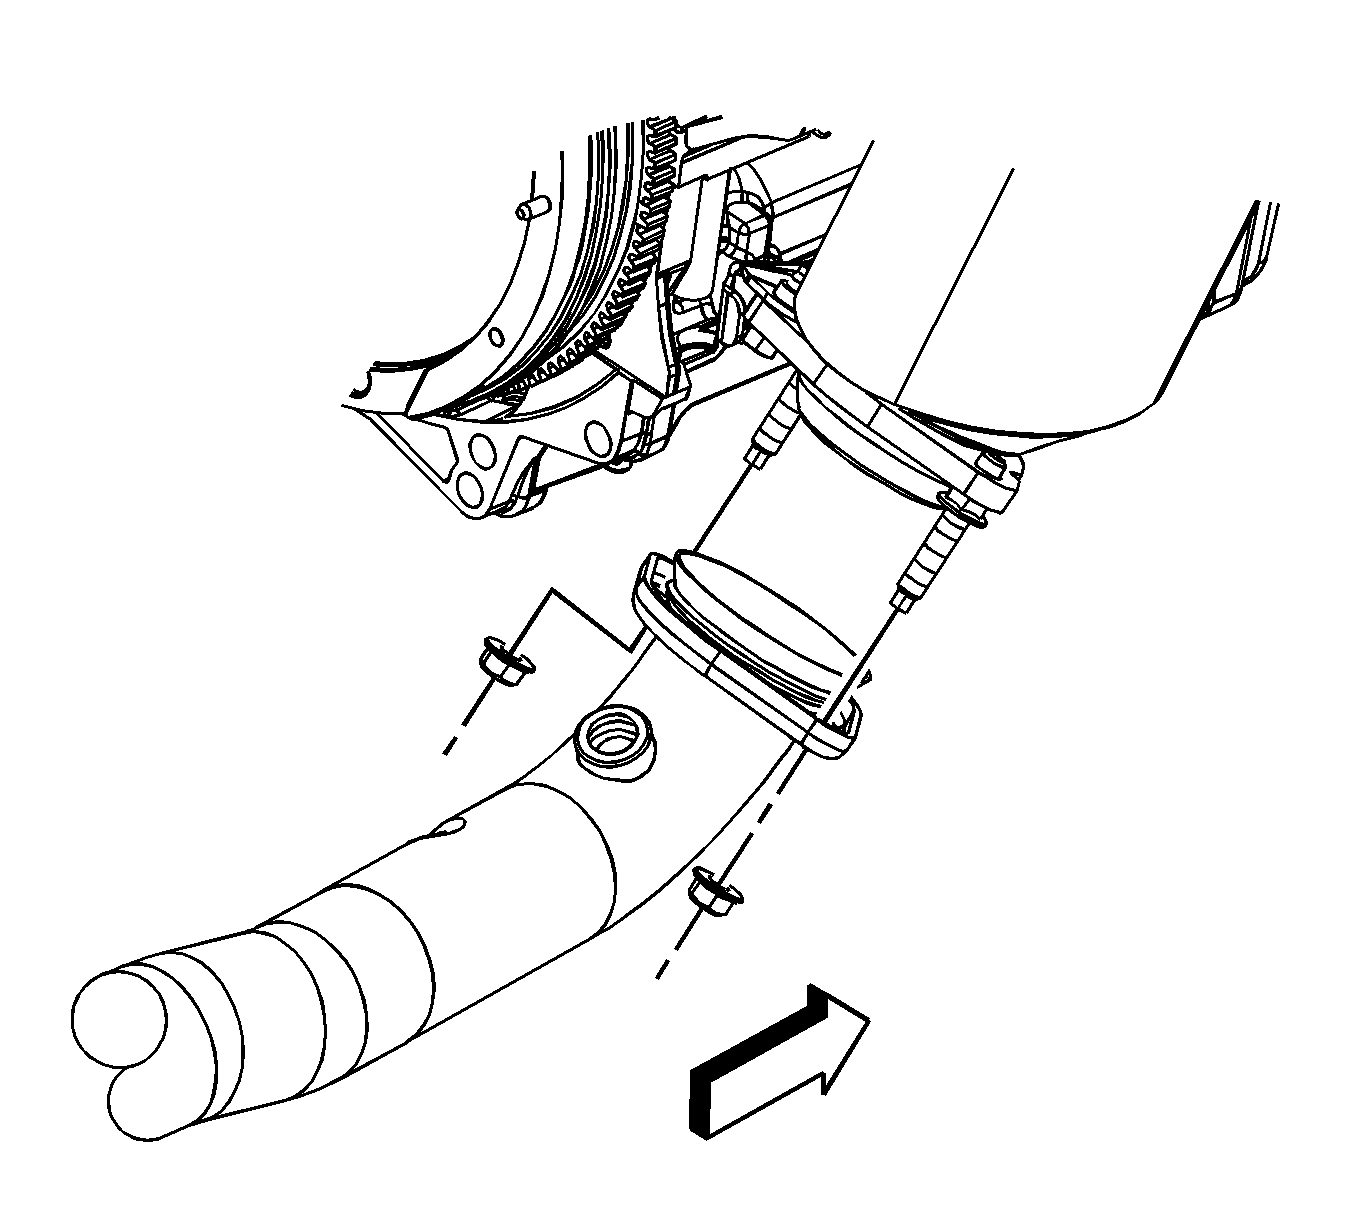
- Remove the catalytic converter to muffler nuts.
- Have an assistant support the muffler assembly.
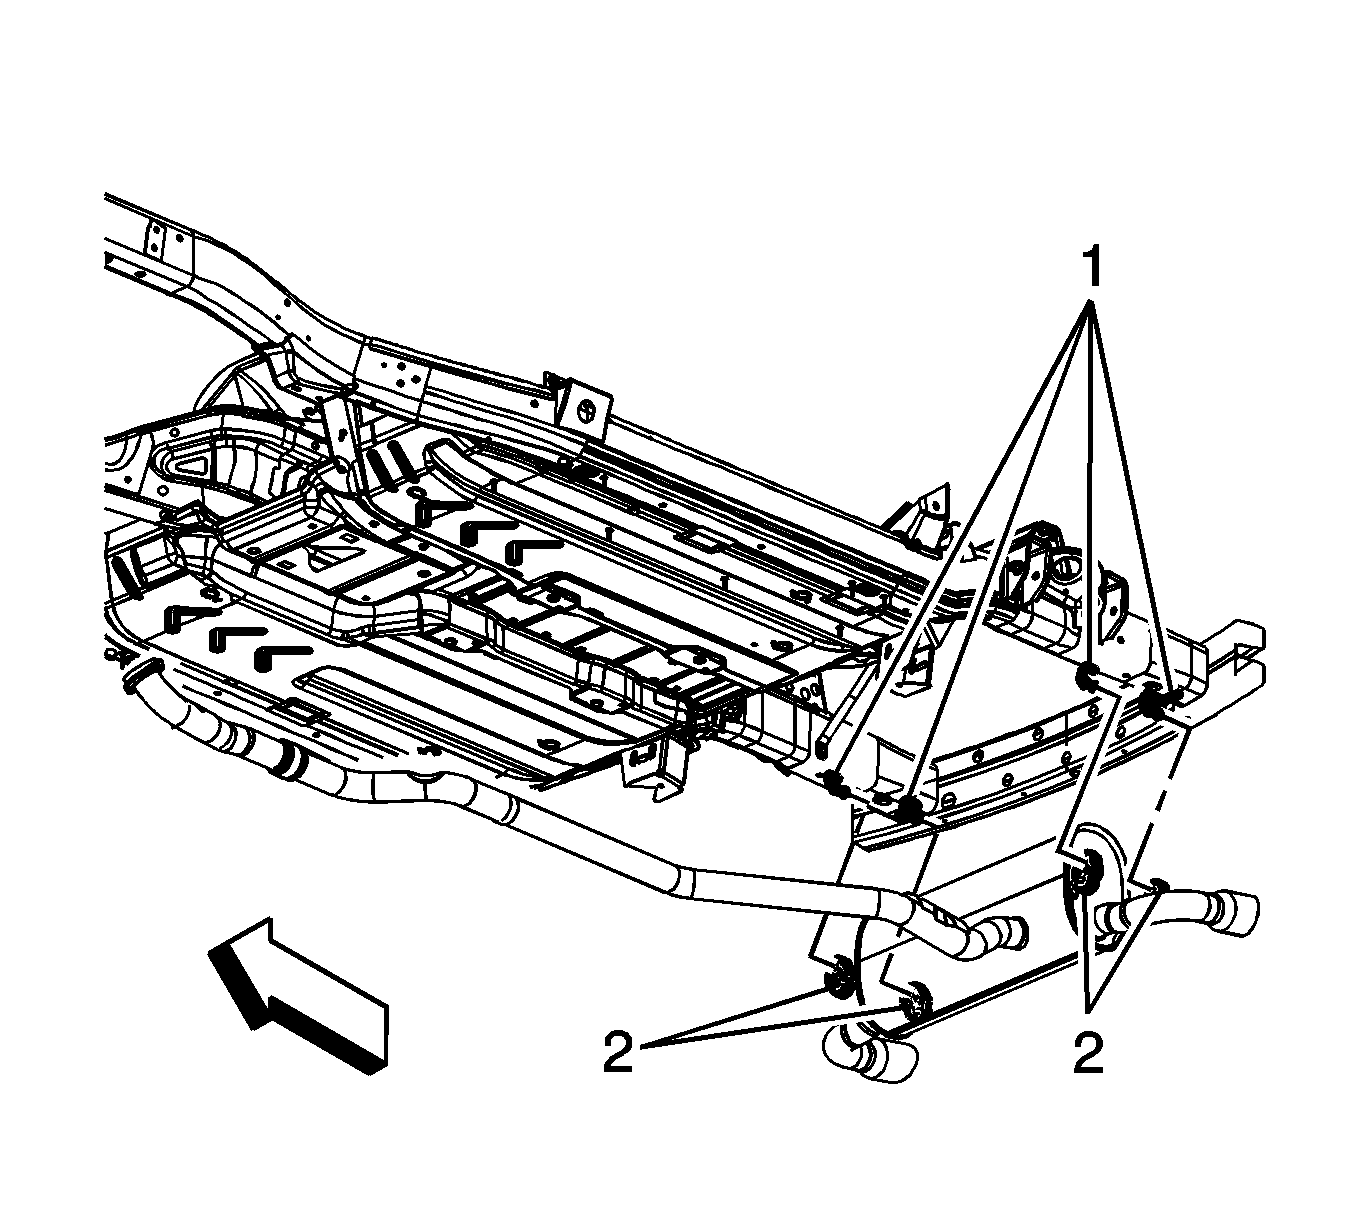
- Separate the muffler insulators (2) from the hangers (1).
- With the aid of an assistant, remove the muffler assembly.

Important: The HO2S uses a permanently attached pigtail and connector. This pigtail should not be removed from the sensor. Damage or removal of the pigtail or connector will affect proper operation of the sensor.
Installation Procedure
- With the aid of an assistant, position the muffler assembly.
- Install the muffler insulators (2) onto the hangers (1).
- Install the catalytic converter to muffler nuts.
- Install the HO2S. Refer to Heated Oxygen Sensor 1 Replacement .
- Lower the vehicle.
- Connect the position 2 HO2S electrical connector (4) to the engine wiring harness electrical connector (2).
- Install the CPA retainer.
- Install the heat shielding to the HO2S electrical connector, if necessary.
- Close the hood.

Notice: Refer to Fastener Notice in the Preface section.

Tighten
Tighten the nuts to 17 N·m (13 lb ft).


