- Insert approximately 60 percent of the grease from the service
kit into the outer joint.
| 1.1. | Spread the grease onto the ball tracks, the balls, the cage, and the inner
race. |
| 1.2. | Spread the remainder of the grease into the bottom of the outer race. |
- Remove the inner joint from the bench vise.
- Wrap a shop towel around the axle shaft.
- Place the wheel drive shaft horizontally in a bench vise.
- Install a new small seal retaining clamp onto the axle shaft.
- Install the seal onto the axle shaft.
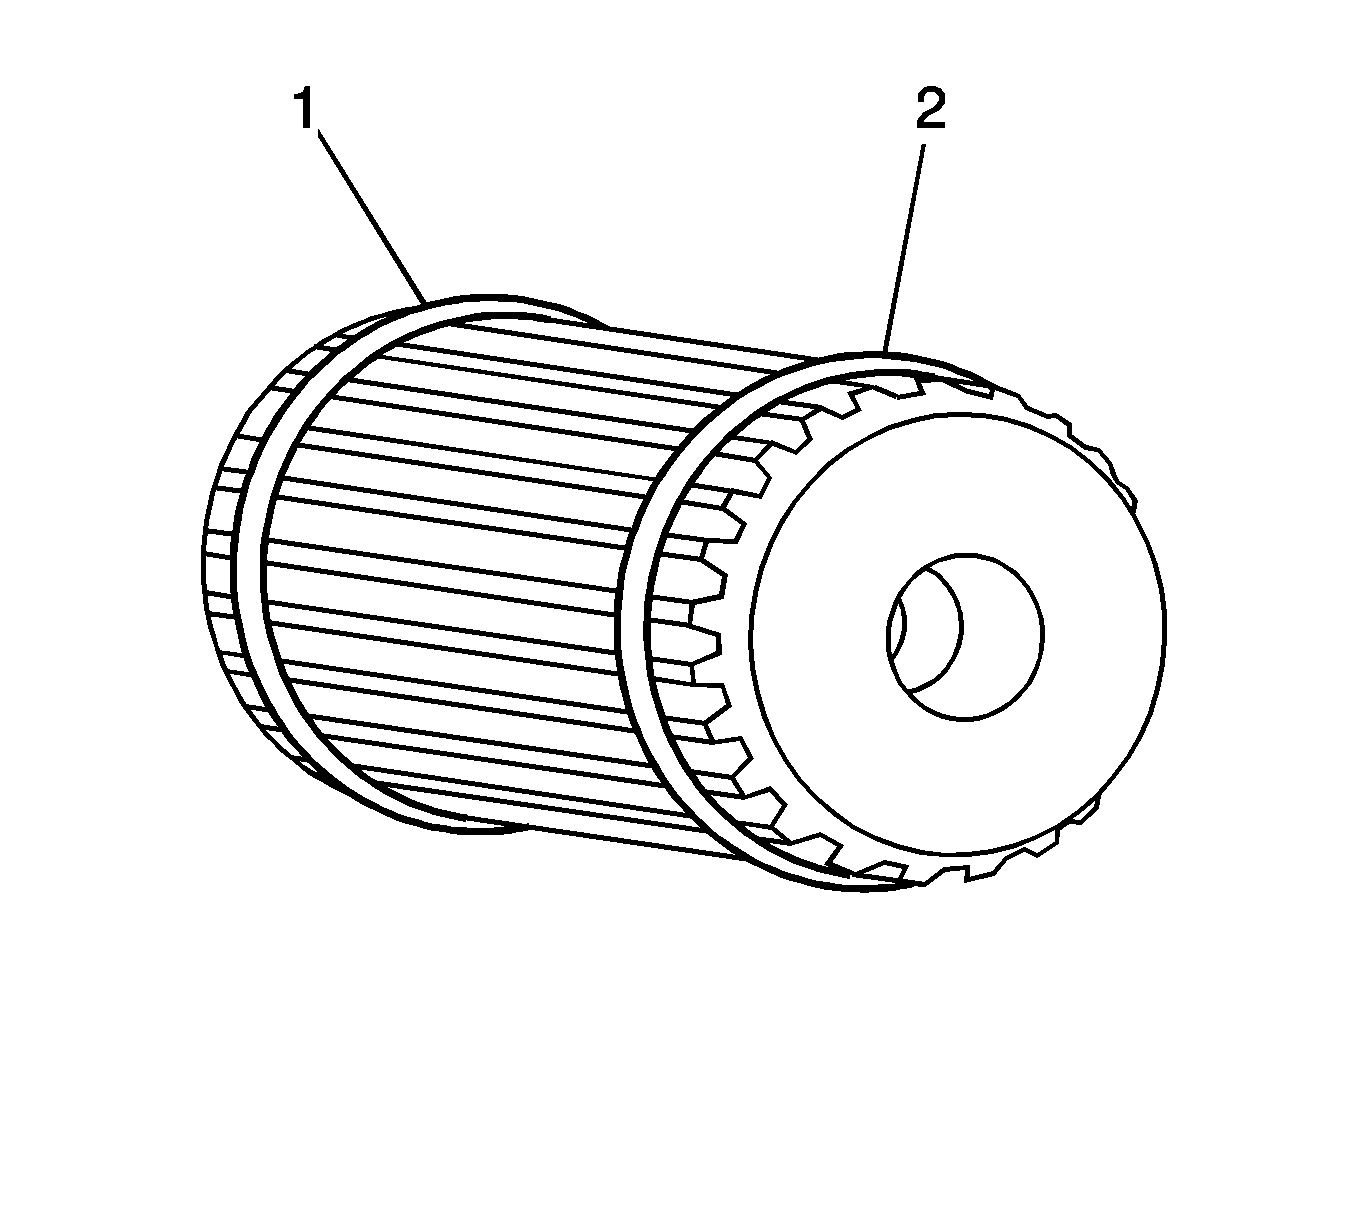
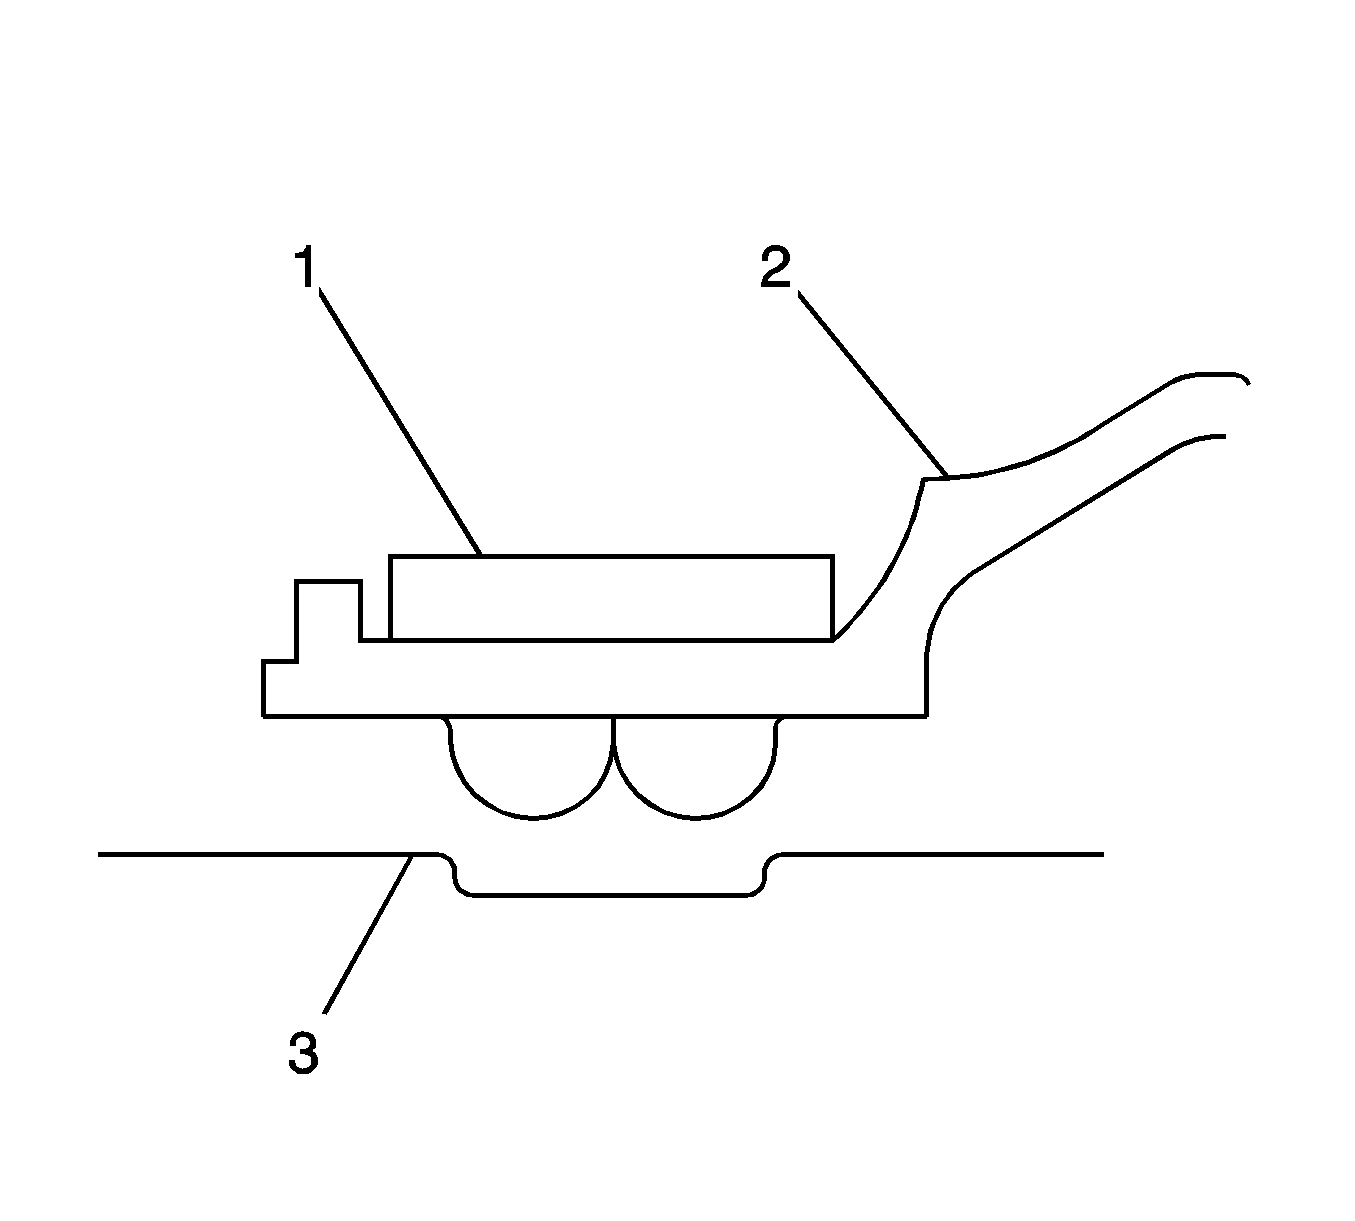
- Install the New narrow retaining ring to the outer
narrow ring groove (2) at the end of the wheel drive shaft.
- Install the New wide spacer ring to the wide ring groove of the wheel
drive shaft (1).
- Position the outer joint horizontally.
- Engage the inner race splines onto the axle shaft splines.
- Compress the axle shaft ring spacer.
| 11.1. | Press the end of the retaining ring, using a flat-bladed tool, into the
axle shaft groove while firmly pressing the inner joint onto the axle shaft. |
| 11.2. | Continue to work around the retaining ring, until it is compressed. |
Important: The axle shaft and
inner race must be fully seated to each other.
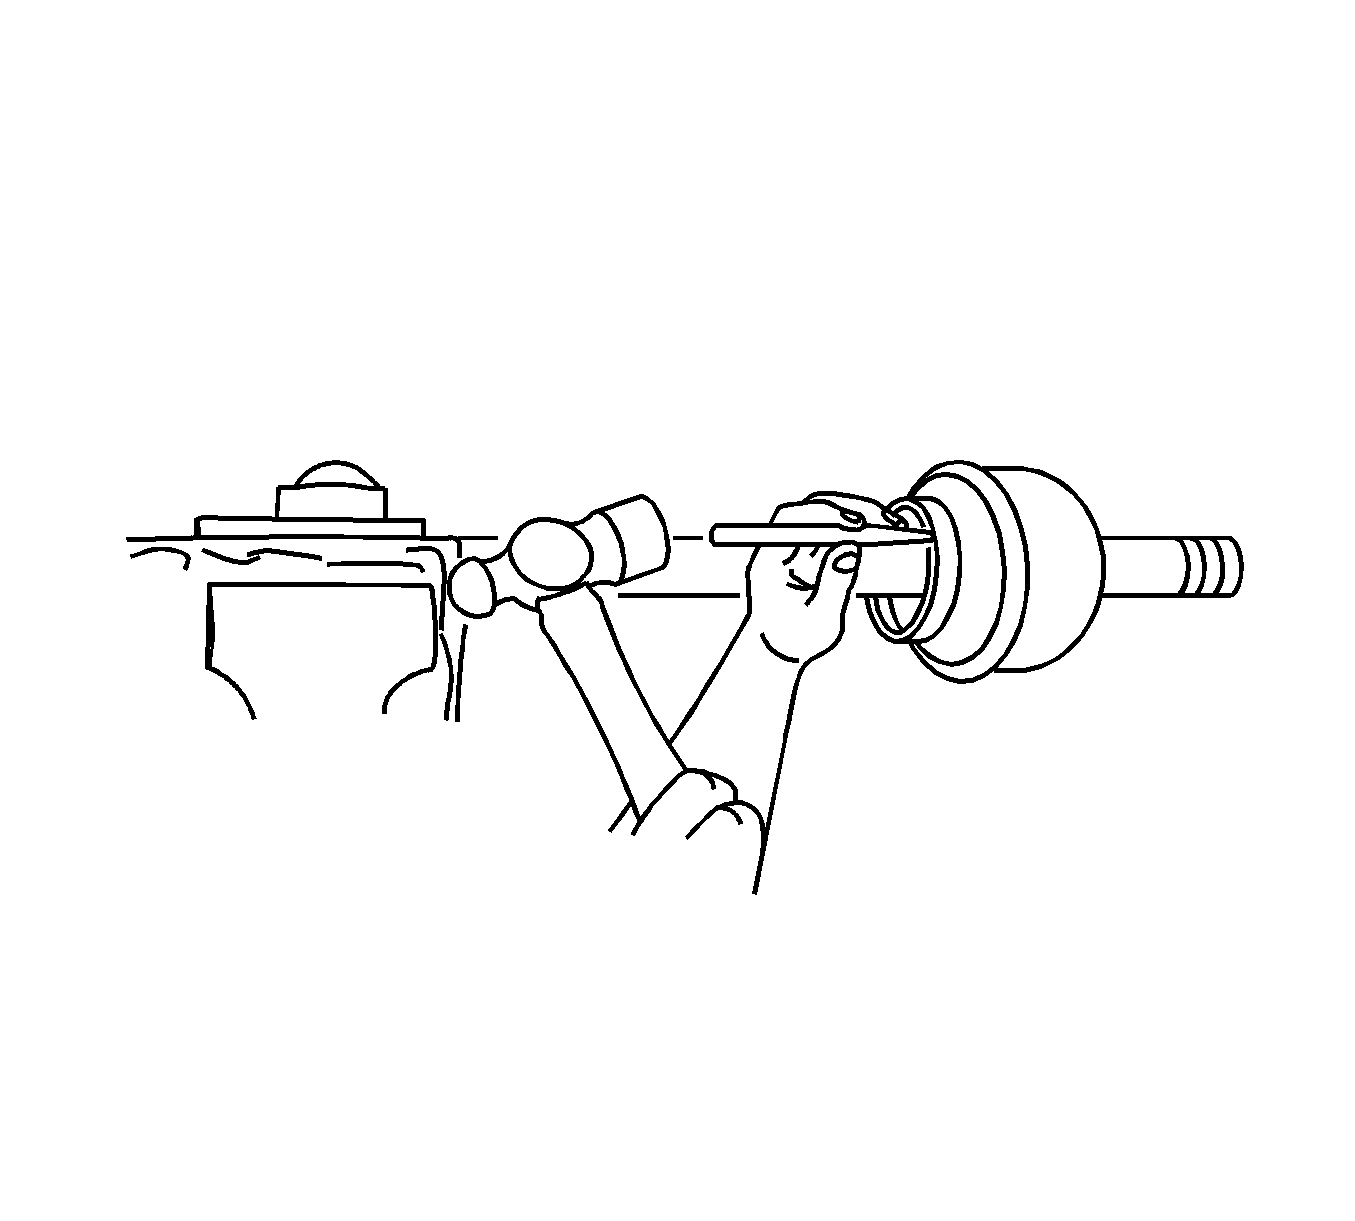
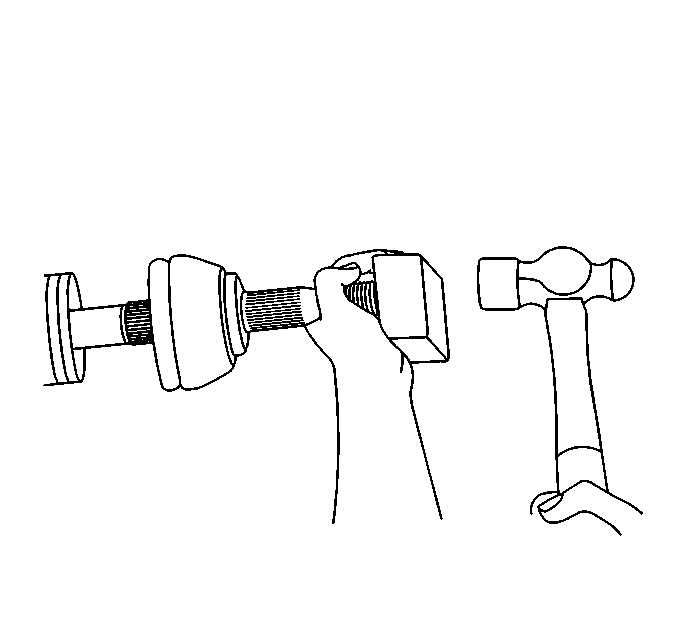
- Install the outer joint to the axle shaft.
| 12.1. | Position a wood block over the end of the outer joint threaded shaft. |
| 12.2. | Use a hammer to drive the outer joint onto the shaft. |
| 12.3. | Continue to drive the outer joint until the inner joint seats fully onto
the axle shaft. |
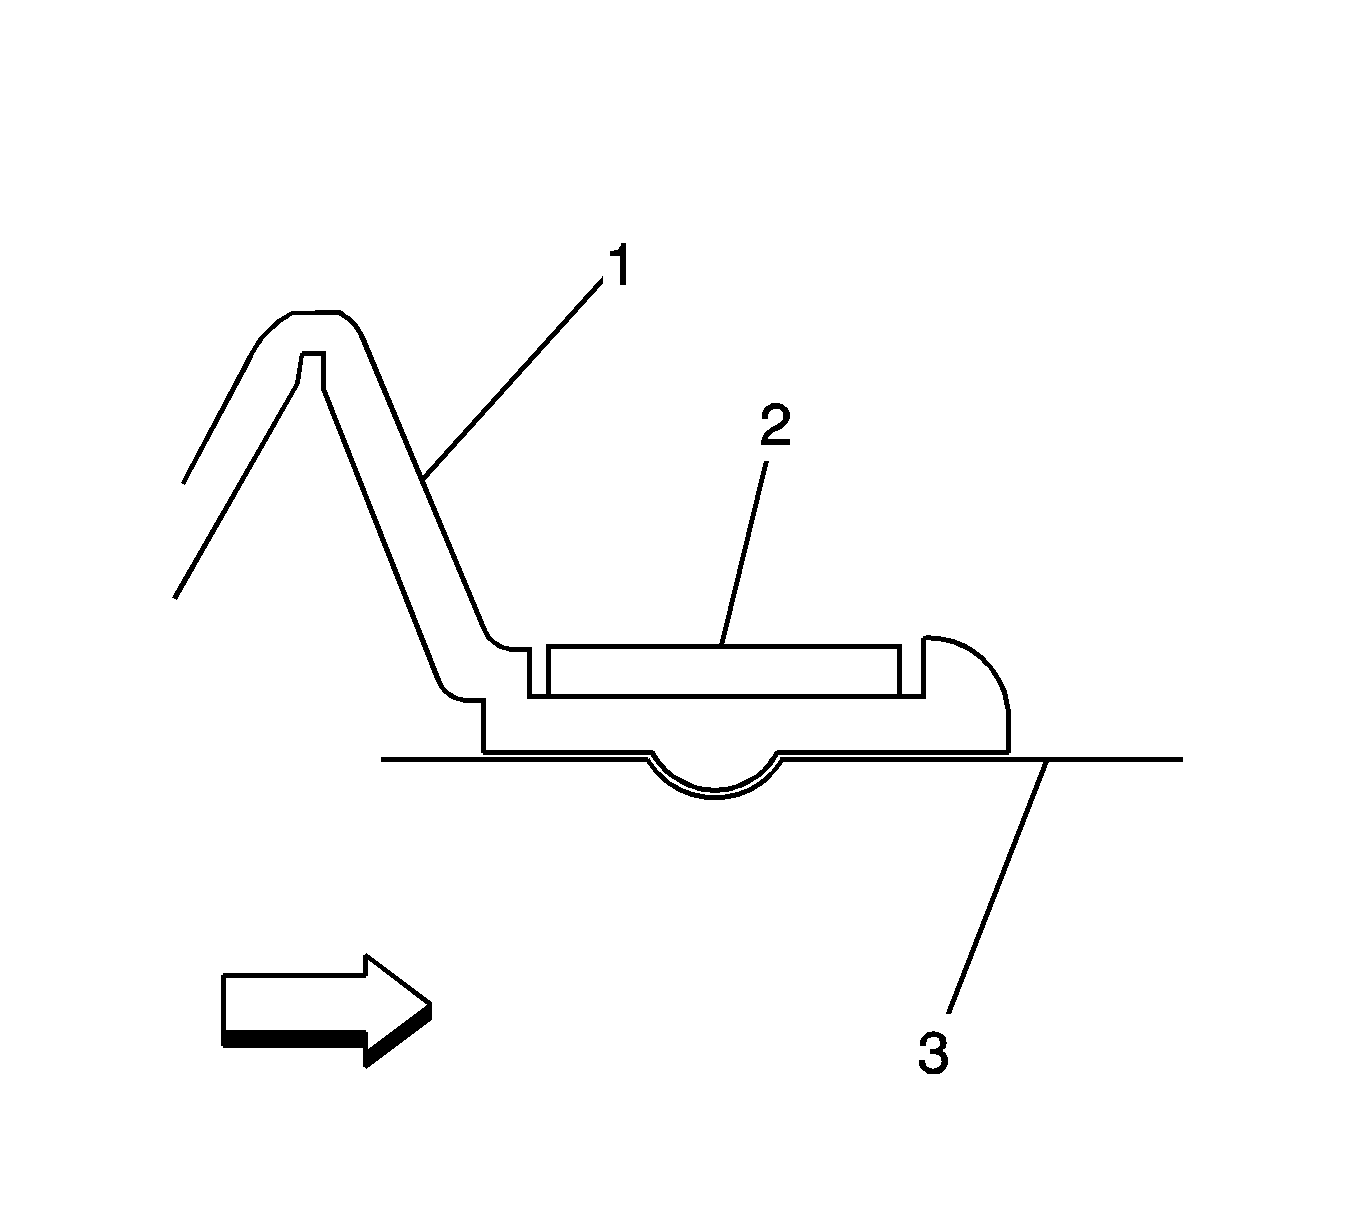
- Position the small seal retaining clamp (2)
into the seal boot groove.
- Position the seal and small retaining clamp to the axle shaft boot groove (3)
as shown.
Important: The seal retaining
clamp must not be over-tightened or under-tightened.
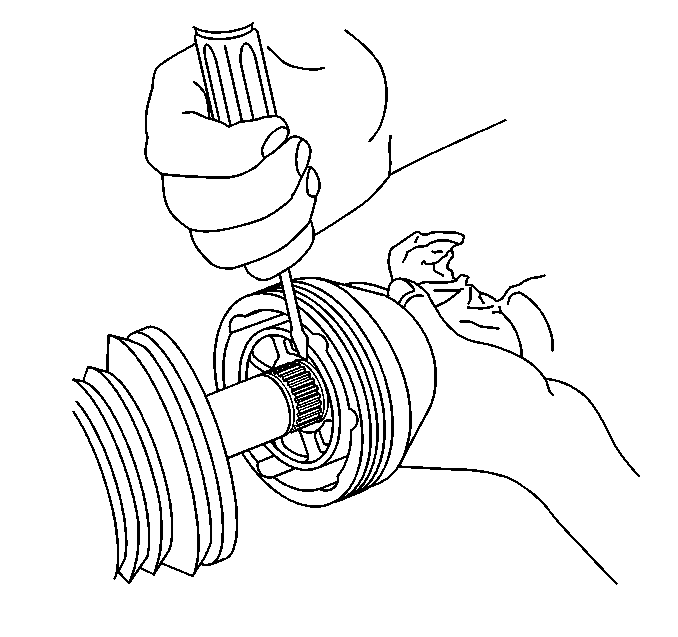
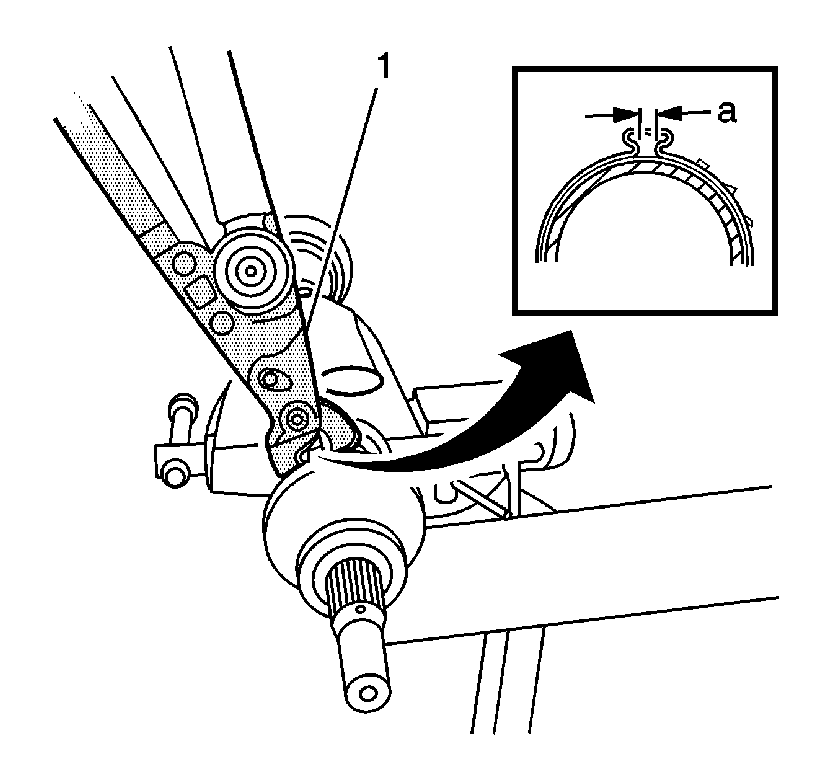
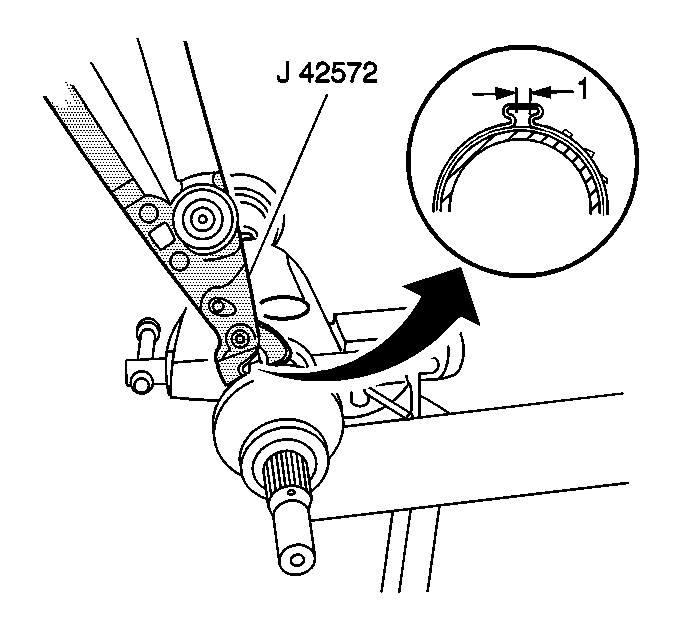
- Using the
J 42572 (1), crimp
the small seal retaining clamp.
Tighten
Tighten the small seal clamp until the base of the
omega ohms shape has a gap of 1 mm (0.039 in).
The clamping hold time must be no less than 2 seconds.
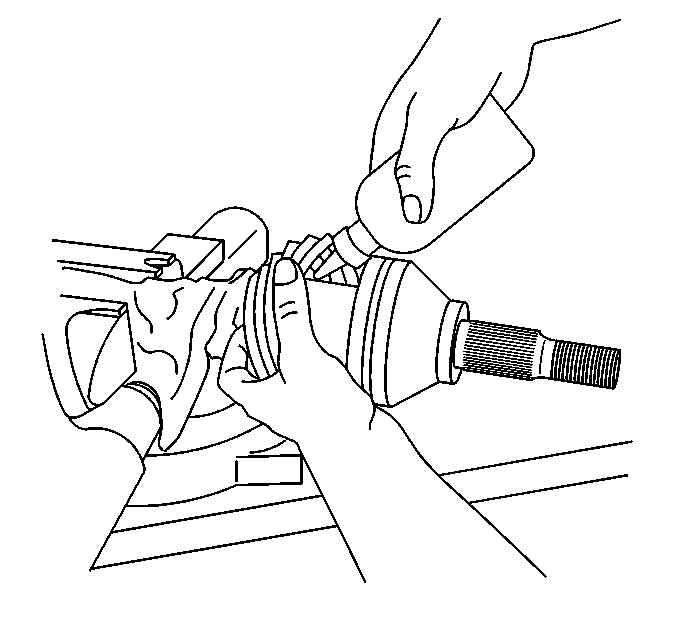
- Insert the remaining grease from the service kit into
the seal.
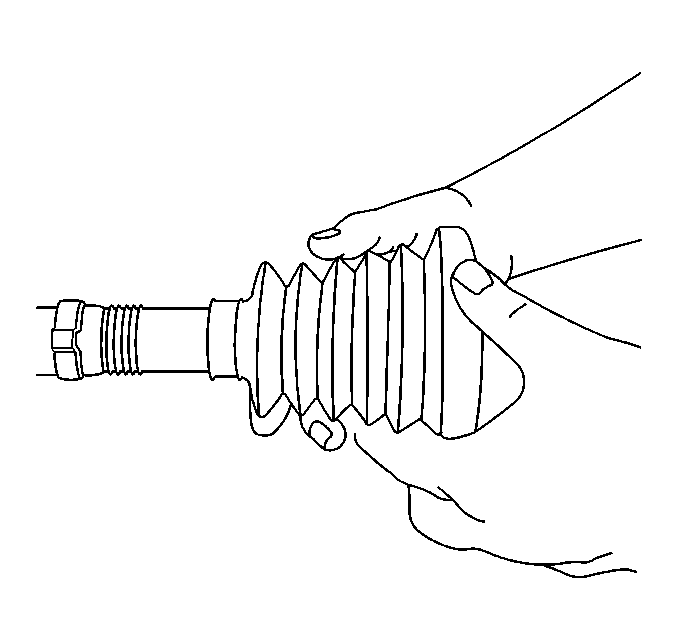
- Position the large seal retaining clamp (1)
onto the seal (2).
- Position the seal and large retaining clamp to the joint outer race (3)
as shown.
Important: The seal must not
be dimpled, stretched, or otherwise deformed.
- Inspect the seal for proper shape.
If the seal is not shaped correctly,
equalize the pressure in the seal by lifting the seal edge slightly and shape the
seal properly by hand.
- Inspect the seal for damage.
If the seal has been cut or punctured
during assembly, you must discard and replace the seal.
Important: The seal retaining clamp must not be
over-tightened or under-tightened.
- Using the
J 42572 , crimp the large
seal retaining clamp.
Tighten
Tighten the large seal clamp until the base of the
omega ohms shape has a gap of 1 mm (0.039 in).
The clamping hold time must be no less than 2 seconds.
- Inspect the outer joint for smooth operation. This will also distribute
the grease within the joint.
| 22.1. | Hold the wheel drive shaft vertically, with the outer joint at the bottom. |
| 22.2. | Rotate the wheel drive shaft 4 or 5 times in a circular
motion. |