Catalytic Converter Replacement LE5
Removal Procedure
- Open the hood.
- Remove the exhaust manifold heat shield bolts and shield.
- Remove the catalytic converter to exhaust manifold nuts (1).
- Remove the connector position assurance (CPA) retainer.
- Disconnect the engine wiring harness electrical connector (3) from the position 2 heated oxygen sensor (HO2S).
- Raise and support the vehicle. Refer to Lifting and Jacking the Vehicle .
- Remove the catalytic converter to catalytic converter brace bracket bolt.
- Remove the catalytic converter to muffler nuts.
- Separate the exhaust pipe from the catalytic converter studs.
- Position and support the exhaust pipe out of the way.
- Remove the catalytic converter and gasket (2).

Installation Procedure
- Install the catalytic converter along with a NEW gasket (2) to the exhaust manifold.
- Position and join the exhaust pipe to the catalytic converter studs.
- Loosely install the catalytic converter to muffler nuts.
- Install the catalytic converter to catalytic converter brace bracket bolt.
- Lower the vehicle
- Connect the engine wiring harness electrical connector (3) to the position 2 HO2S.
- Install the CPA retainer.
- Install the catalytic converter to exhaust manifold nuts (1).
- Install the exhaust manifold heat shield and bolts.
- Close the hood.
Notice: Refer to Fastener Notice in the Preface section.
Tighten
| • | Tighten the catalytic converter to muffler nuts to 17 N·m (13 lb ft). |
| • | Tighten the catalytic converter to catalytic converter brace bracket bolt to 50 N·m (37 lb ft). |
Tighten
Tighten the nuts to 50 N·m (37 lb ft).
Tighten
Tighten the bolts to 10 N·m (89 lb in).
Catalytic Converter Replacement LNF
Removal Procedure
- Open the hood.
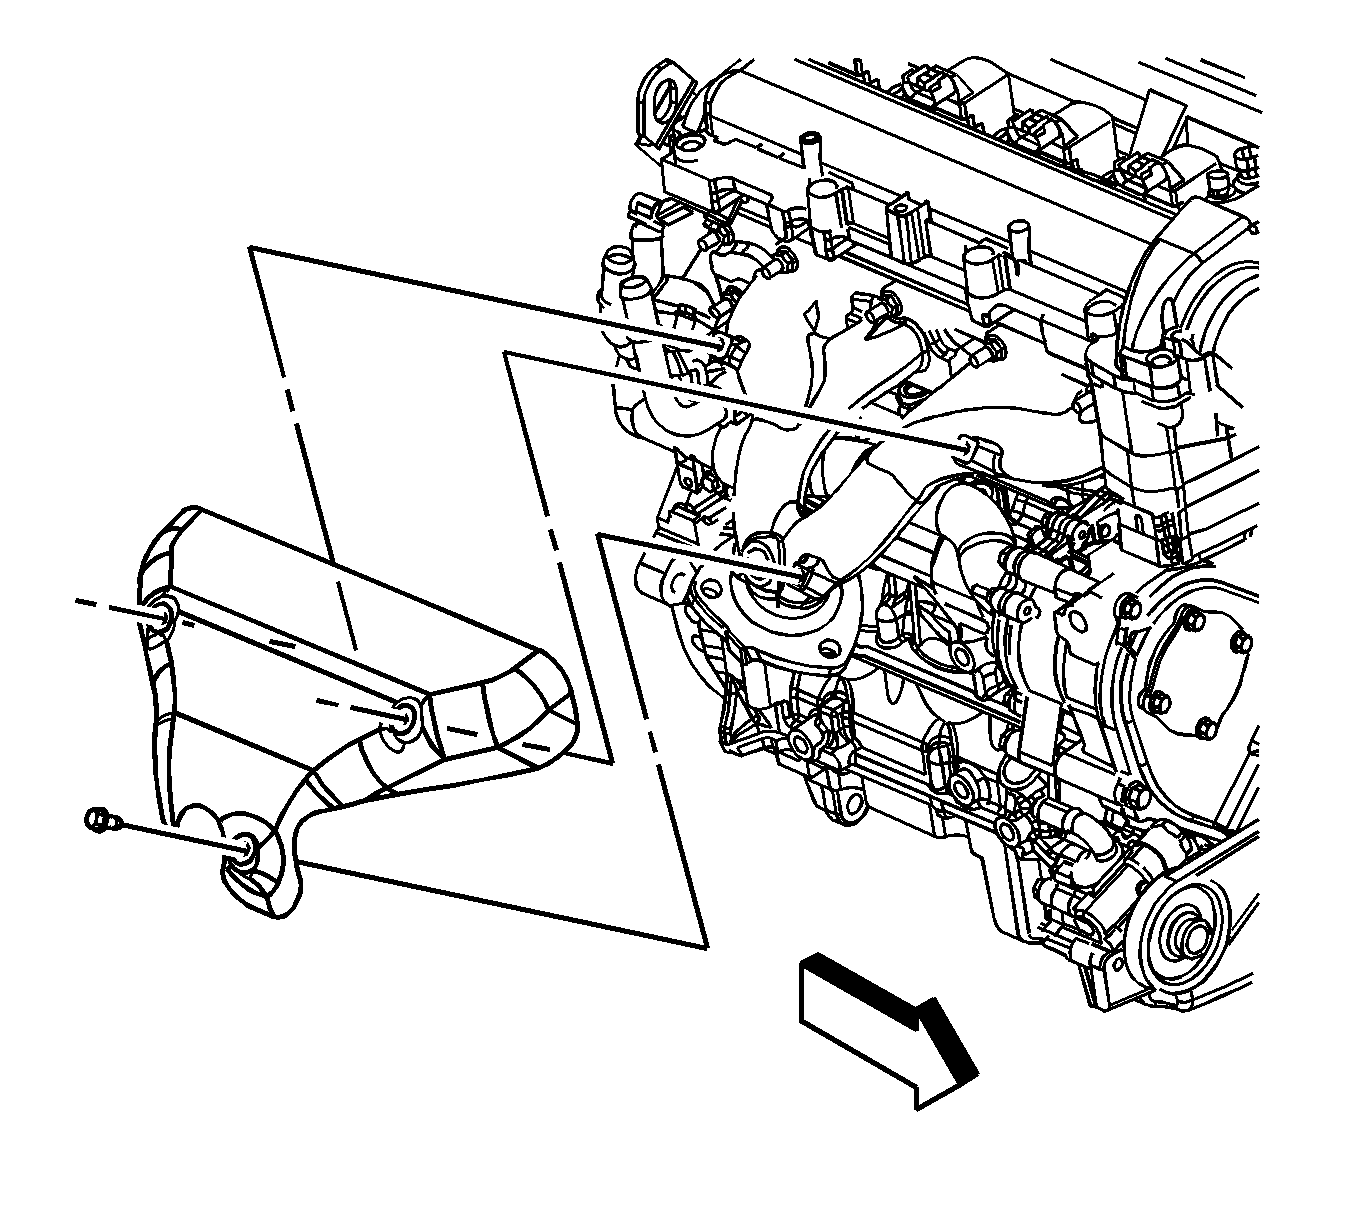
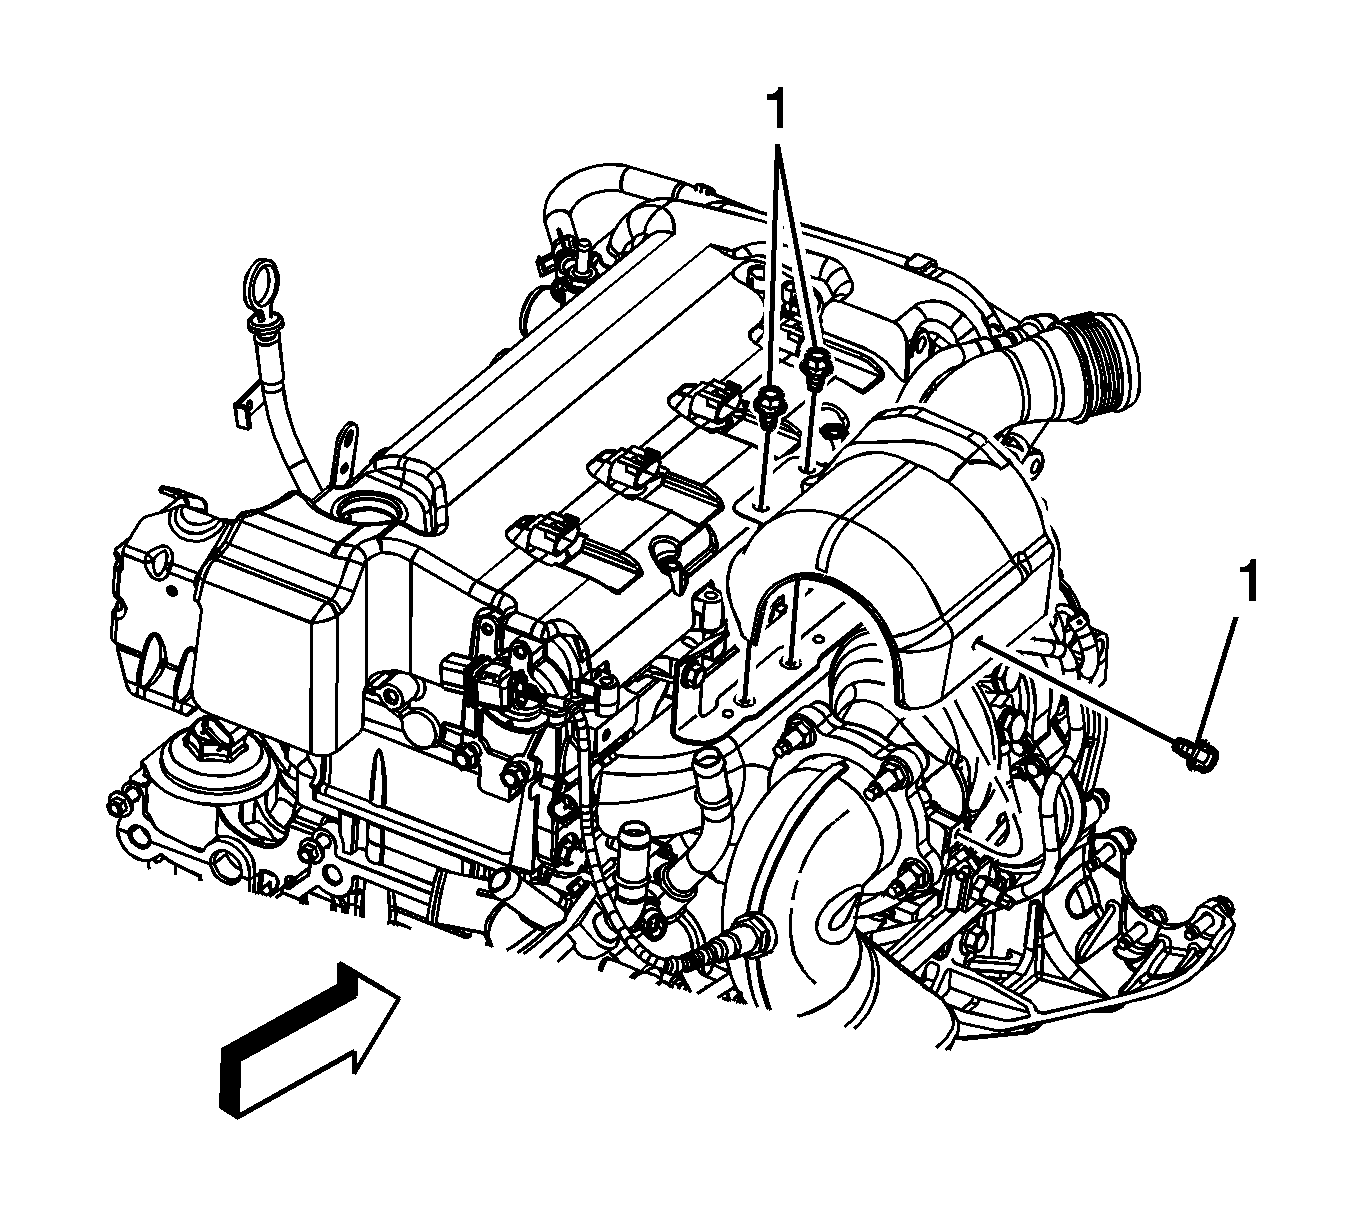
- Remove the turbocharger heat shield bolts (1) and shield.
- Remove the position 1 heated oxygen sensor (HO2S). Refer to Heated Oxygen Sensor 1 Replacement .
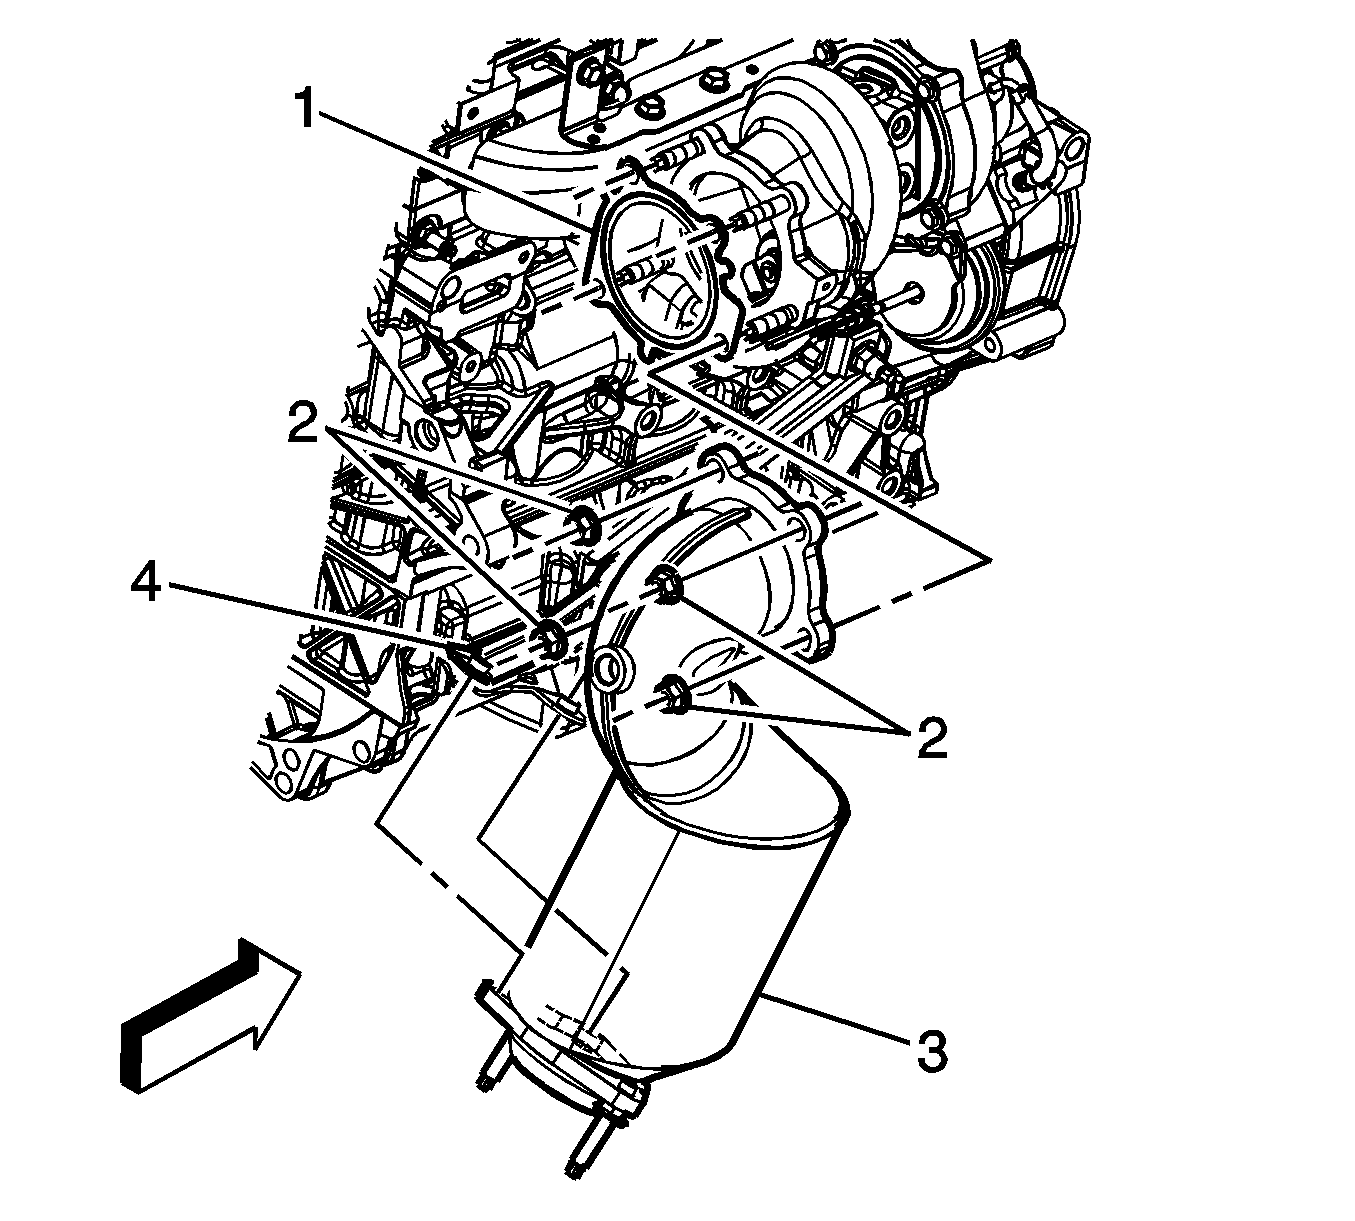
- Remove the catalytic converter to turbocharger nuts (2).
- Remove the connector position assurance (CPA) retainer.
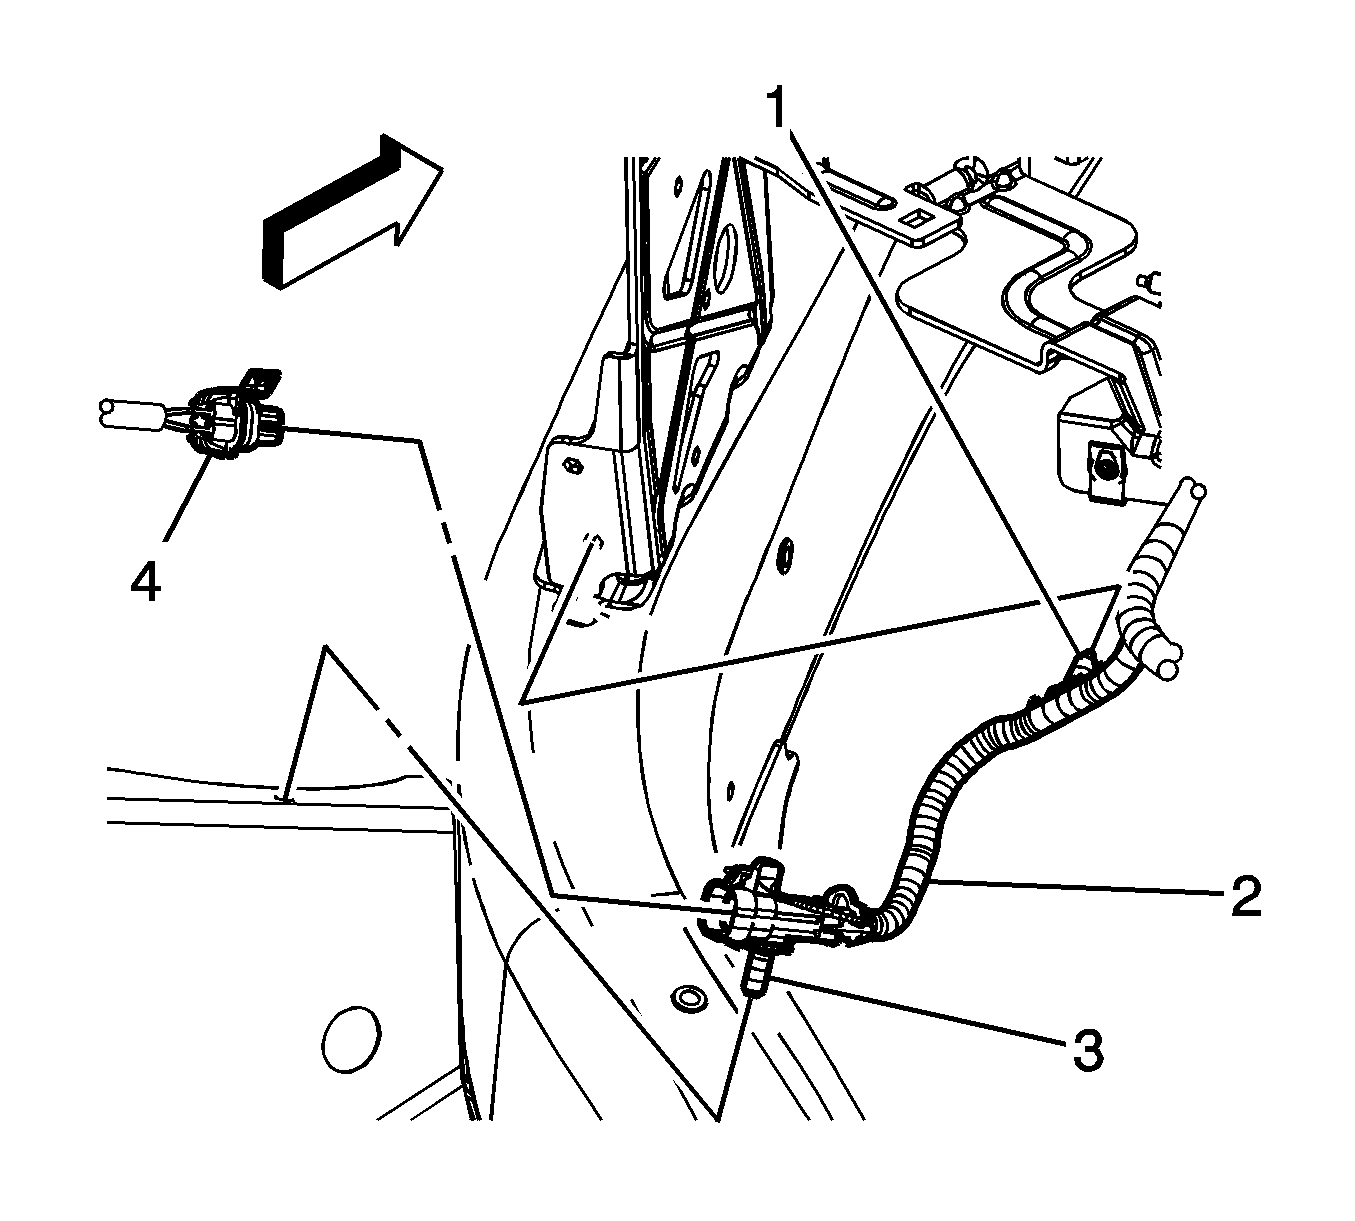
- Disconnect the position 2 HO2S electrical connector (4) from the engine wiring harness electrical connector (2).
- Raise and support the vehicle. Refer to Lifting and Jacking the Vehicle .
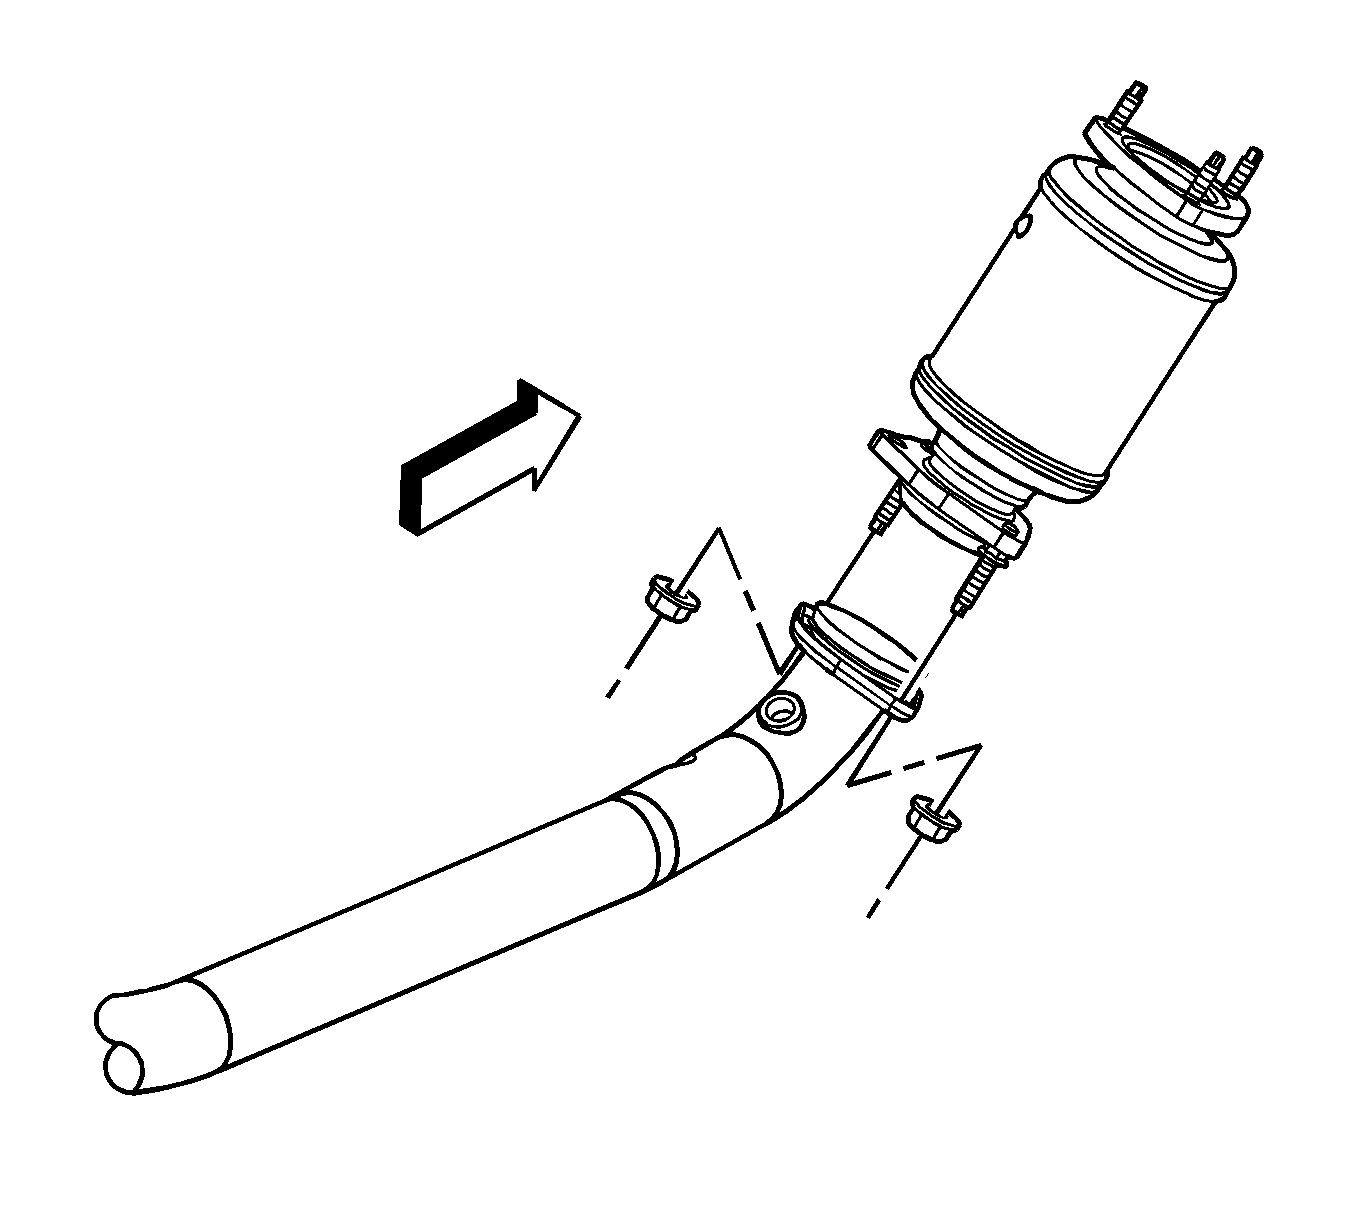
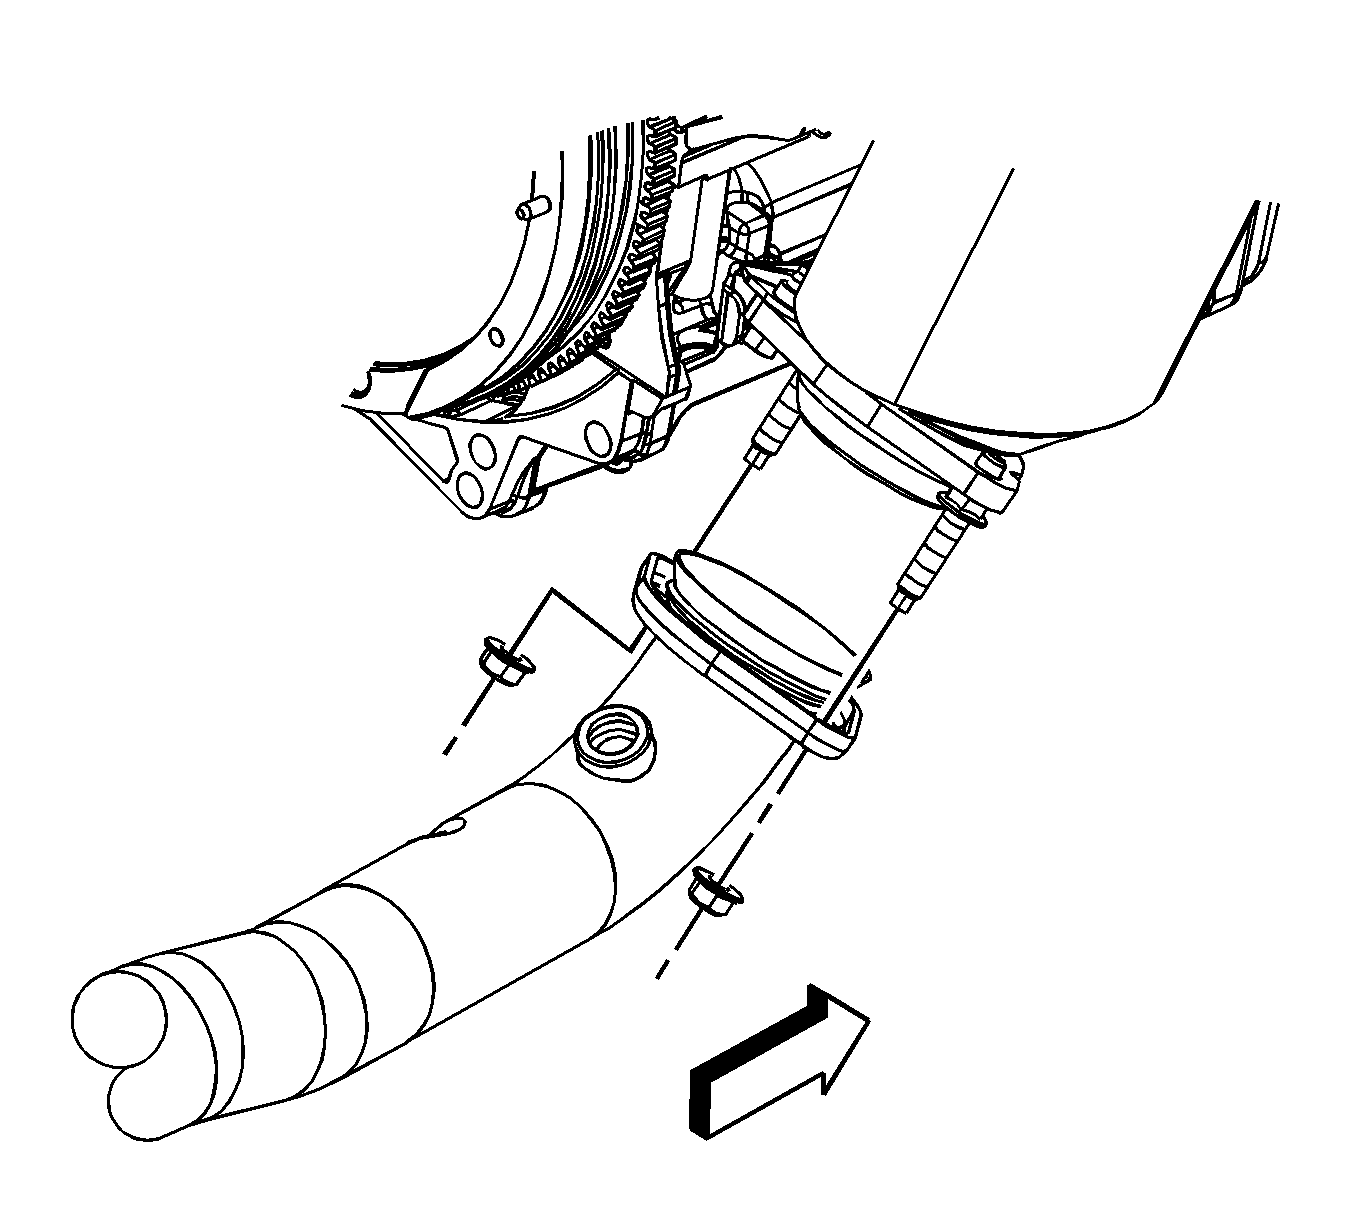
- Remove the catalytic converter to muffler nuts.
- Separate the exhaust pipe from the catalytic converter studs.
- Position and support the exhaust pipe out of the way.
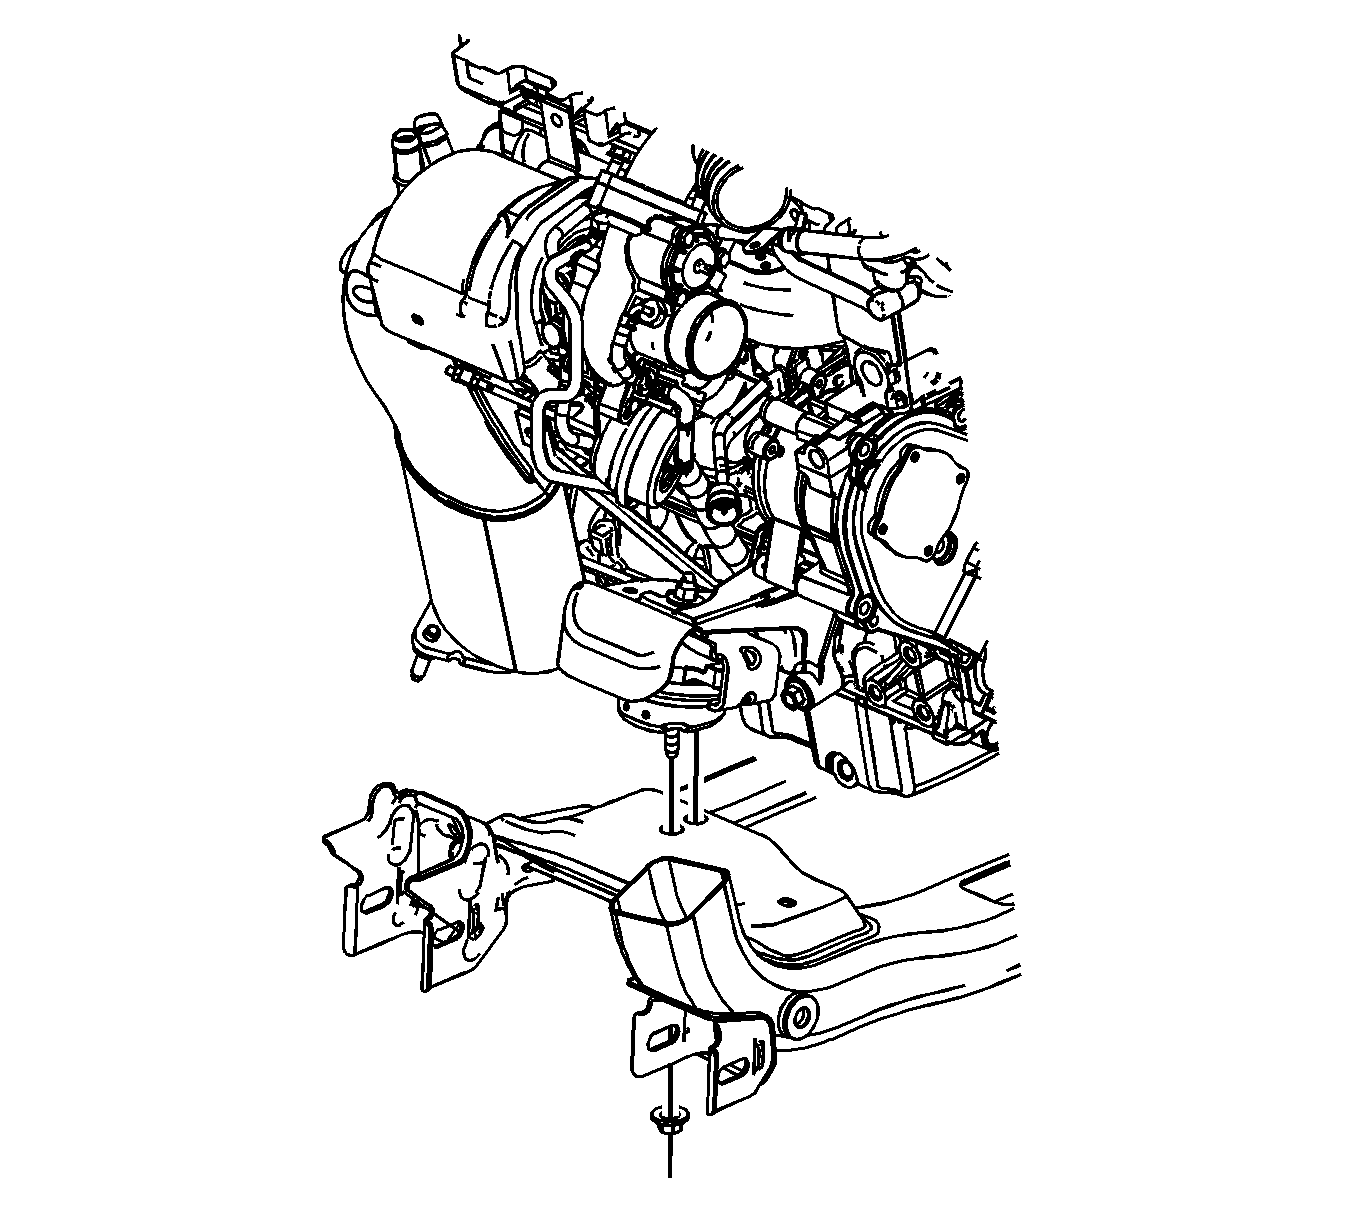
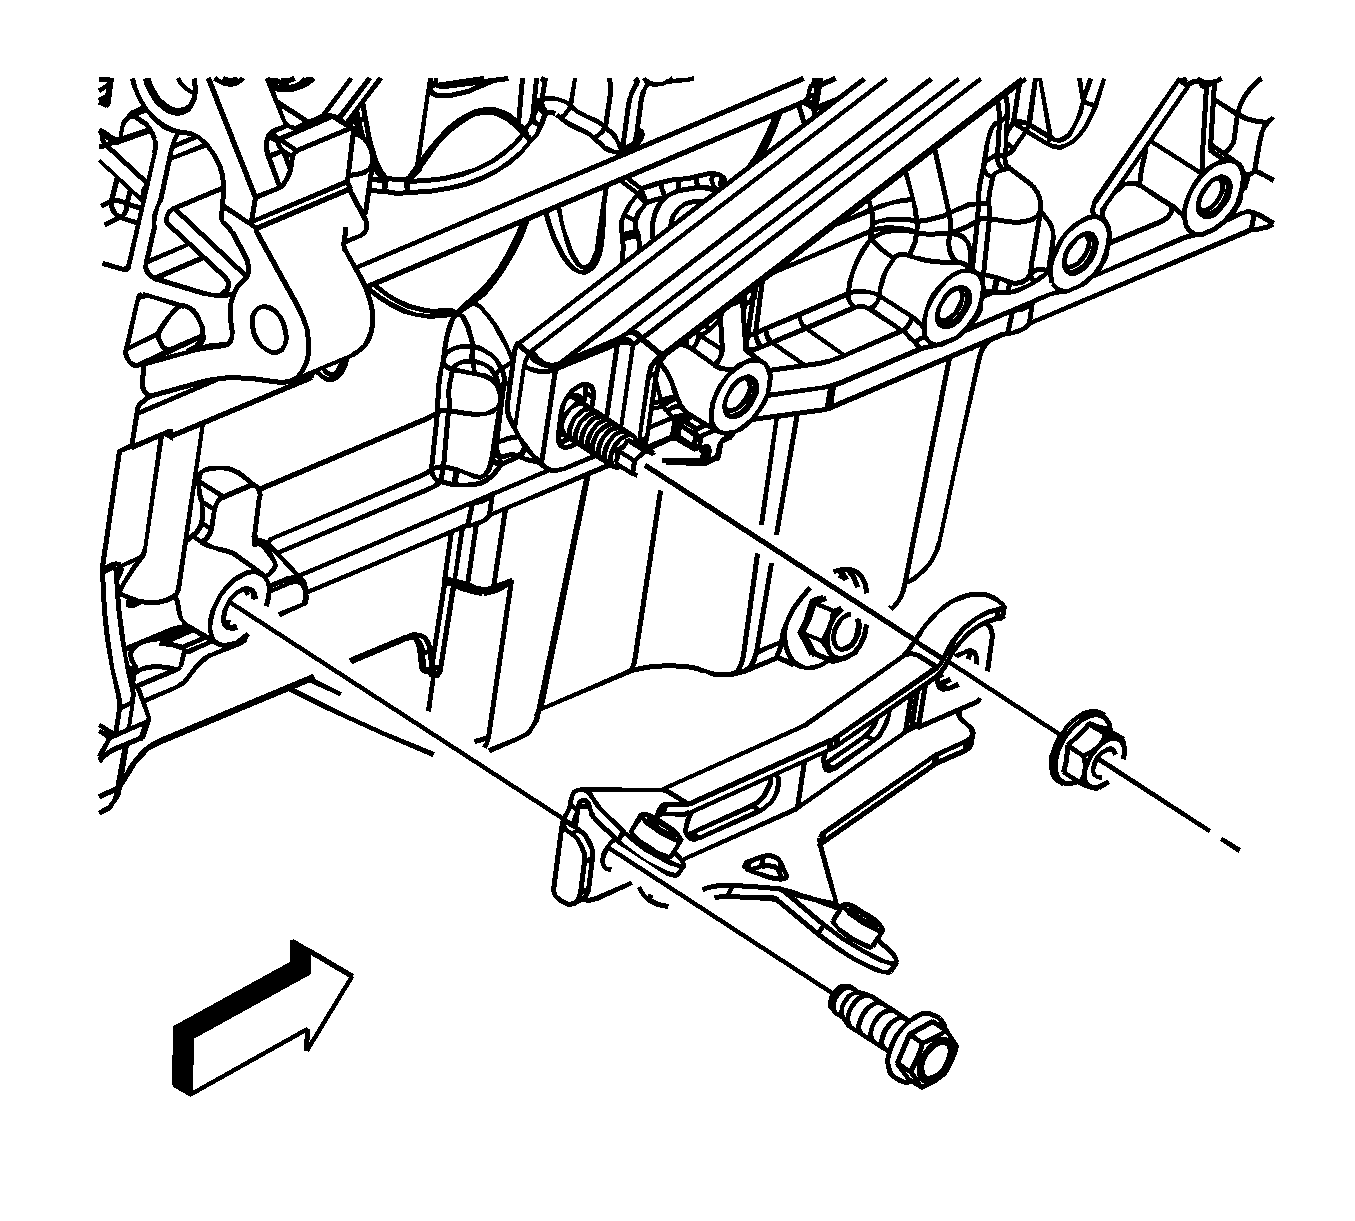
- Loosen, DO NOT REMOVE the driver side engine mount to frame lower nut.
- Remove the passenger side engine mount to frame lower nut.
- Place an adjustable jack and a block of wood under the oil pan. Using the adjustable jack, raise the oil pan slightly.
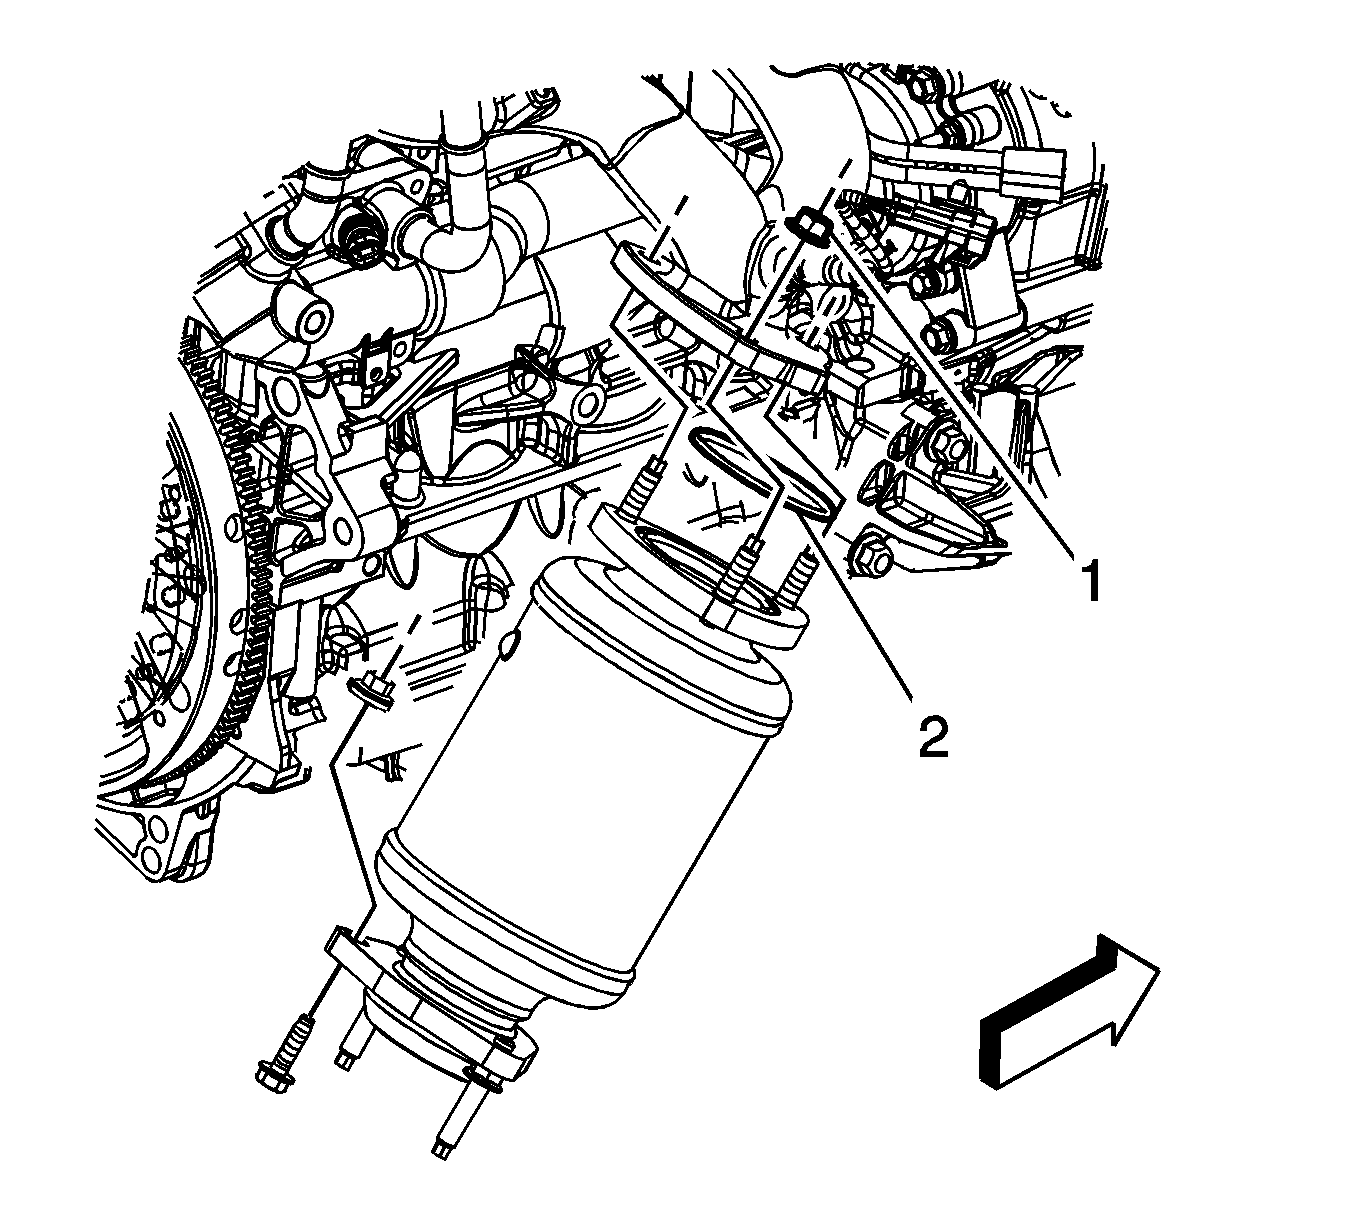
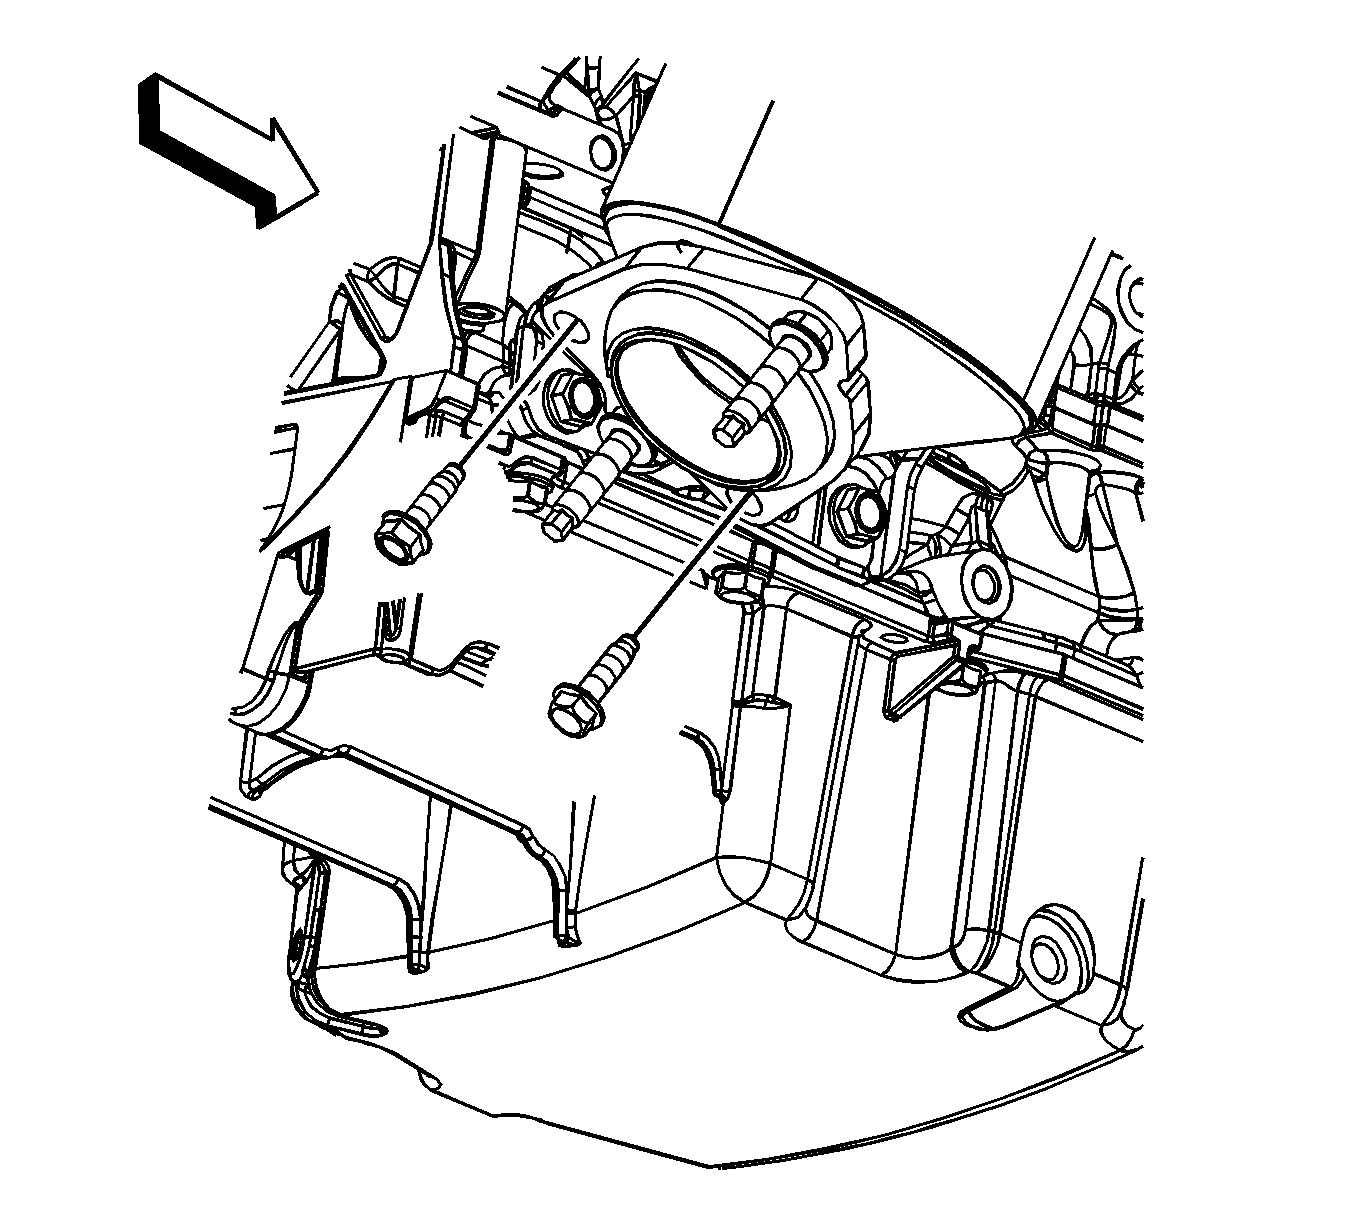
- Remove the catalytic converter to catalytic converter bracket bolts.
- Reposition the catalytic converter out of the way.
- Remove the catalytic converter bracket bolt and nut.
- Remove the catalytic converter bracket.
- Rotate and remove the catalytic converter (3).
- Remove and discard the catalytic converter gasket (2).

Installation Procedure
- Install a NEW catalytic converter gasket (2) onto the turbocharger studs.
- Install, rotate, and position the catalytic converter (3).
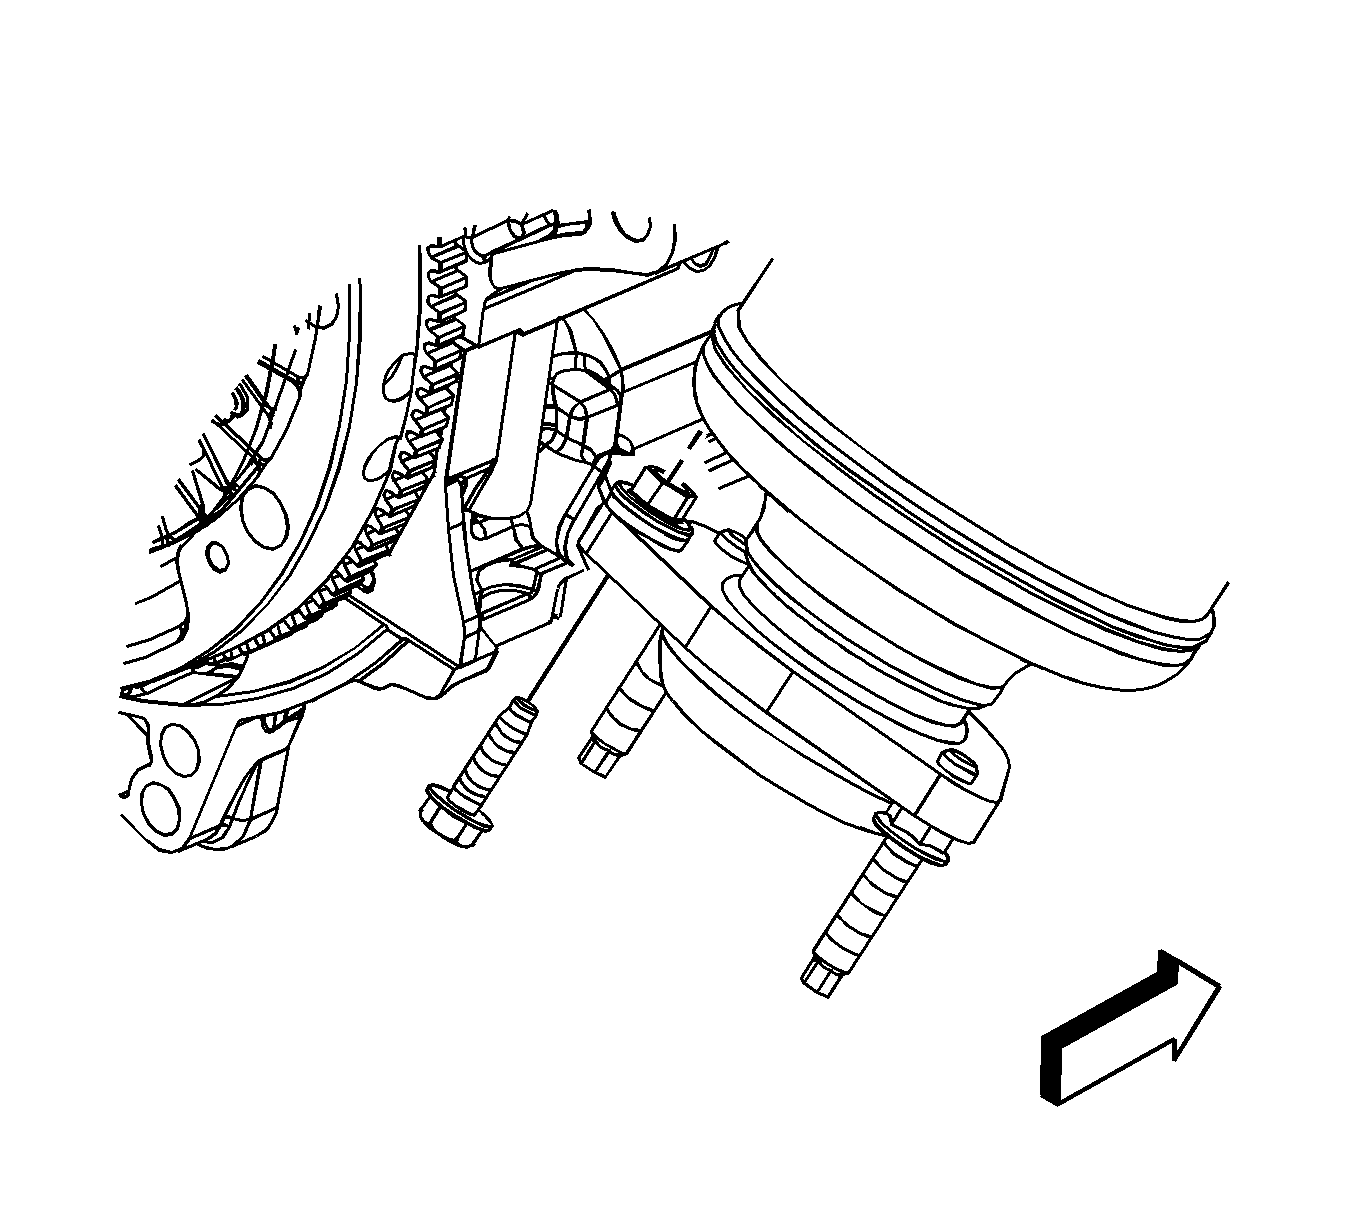
- Position the catalytic converter bracket to the engine block.
- Install the catalytic converter bracket bolt and nut.
- Install the catalytic converter onto the turbocharger studs.
- Install the catalytic converter to catalytic converter bracket bolts.
- Using the adjustable jack, lower the oil pan.
- Install the passenger side engine mount to frame lower nut.
- Tighten the driver side engine mount to frame lower nut.
- Position and install the exhaust pipe to the catalytic converter studs.
- Install the catalytic converter to muffler nuts.
- Lower the vehicle.
- Connect the position 2 HO2S electrical connector (4) to the engine wiring harness electrical connector (2).
- Install the CPA retainer.
- Install the catalytic converter to turbocharger nuts (2).
- Install the position 1 HO2S. Refer to Heated Oxygen Sensor 1 Replacement .
- Install the turbocharger heat shield and bolts (1).
- Close the hood.
Notice: Refer to Fastener Notice in the Preface section.
Tighten
Tighten the bolt/nut to 58 N·m (43 lb ft).
Tighten
Tighten the bolts to 22 N·m (16 lb ft).
Tighten
Tighten the nut to 55 N·m (41 lb ft).
Tighten
Tighten the nut to 55 N·m (41 lb ft).
Tighten
Tighten the nuts to 17 N·m (13 lb ft).
Tighten
Tighten the nuts to 58 N·m (43 lb ft).
Tighten
Tighten the bolts to 10 N·m (89 lb in).
Removal Procedure
- Open the hood.
- Remove the turbocharger heat shield bolts (1) and shield.
- Remove the position 1 heated oxygen sensor (HO2S). Refer to Heated Oxygen Sensor 1 Replacement .
- Remove the catalytic converter to turbocharger nuts (2).
- Remove the connector position assurance (CPA) retainer.
- Disconnect the position 2 HO2S electrical connector (4) from the engine wiring harness electrical connector (2).
- Raise and support the vehicle. Refer to Lifting and Jacking the Vehicle .
- Remove the catalytic converter to muffler nuts.
- Separate the exhaust pipe from the catalytic converter studs.
- Position and support the exhaust pipe out of the way.
- Loosen, DO NOT REMOVE the driver side engine mount to frame lower nut.
- Remove the passenger side engine mount to frame lower nut.
- Place an adjustable jack and a block of wood under the oil pan. Using the adjustable jack, raise the oil pan slightly.
- Remove the catalytic converter to catalytic converter bracket bolts.
- Reposition the catalytic converter out of the way.
- Remove the catalytic converter bracket bolt and nut.
- Remove the catalytic converter bracket.
- Rotate and remove the catalytic converter (3).
- Remove and discard the catalytic converter gasket (2).
Installation Procedure
- Install a NEW catalytic converter gasket (2) onto the turbocharger studs.
- Install, rotate, and position the catalytic converter (3).
- Position the catalytic converter bracket to the engine block.
- Install the catalytic converter bracket bolt and nut.
- Install the catalytic converter onto the turbocharger studs.
- Install the catalytic converter to catalytic converter bracket bolts.
- Using the adjustable jack, lower the oil pan.
- Install the passenger side engine mount to frame lower nut.
- Tighten the driver side engine mount to frame lower nut.
- Position and install the exhaust pipe to the catalytic converter studs.
- Install the catalytic converter to muffler nuts.
- Lower the vehicle.
- Connect the position 2 HO2S electrical connector (4) to the engine wiring harness electrical connector (2).
- Install the CPA retainer.
- Install the catalytic converter to turbocharger nuts (2).
- Install the position 1 HO2S. Refer to Heated Oxygen Sensor 1 Replacement .
- Install the turbocharger heat shield and bolts (1).
- Close the hood.
Notice: Refer to Fastener Notice in the Preface section.
Tighten
Tighten the bolt/nut to 58 N·m (43 lb ft).
Tighten
Tighten the bolts to 22 N·m (16 lb ft).
Tighten
Tighten the nut to 55 N·m (41 lb ft).
Tighten
Tighten the nut to 55 N·m (41 lb ft).
Tighten
Tighten the nuts to 17 N·m (13 lb ft).
Tighten
Tighten the nuts to 58 N·m (43 lb ft).
Tighten
Tighten the bolts to 10 N·m (89 lb in).
