Exhaust Manifold Replacement LE5
Removal Procedure
- Remove the intake manifold cover. Refer to Intake Manifold Cover Replacement .
- Remove the exhaust manifold heat shield (1). Refer to Exhaust Manifold Heat Shield Replacement .
- Remove the heated oxygen sensor (HO2S). Refer to Heated Oxygen Sensor 1 Replacement .
- Raise and support the vehicle. Refer to Lifting and Jacking the Vehicle .
- Remove the catalytic converter. Refer to Catalytic Converter Replacement .
- Lower the vehicle.
- Remove the exhaust manifold nuts.
- Remove the exhaust manifold and discard the gasket.
- Clean and inspect all of the gasket mating surfaces.
Notice: Do not bend the exhaust flex decoupler more than 3 degrees in any direction. Movement of more than 3 degrees will damage the exhaust flex decoupler.
Installation Procedure
- Install the NEW exhaust manifold gasket onto the studs.
- Install the exhaust manifold to the engine.
- Install the NEW exhaust manifold nuts.
- Raise and support the vehicle.
- Install the catalytic converter . Refer to Catalytic Converter Replacement .
- Lower the vehicle.
- Install the heated oxygen sensor (HO2S). Refer to Heated Oxygen Sensor 1 Replacement .
- Install the exhaust manifold heat shield (1). Refer to Exhaust Manifold Heat Shield Replacement .
- Install the intake manifold cover. Refer to Intake Manifold Cover Replacement .
Notice: Refer to Fastener Notice in the Preface section.
Tighten
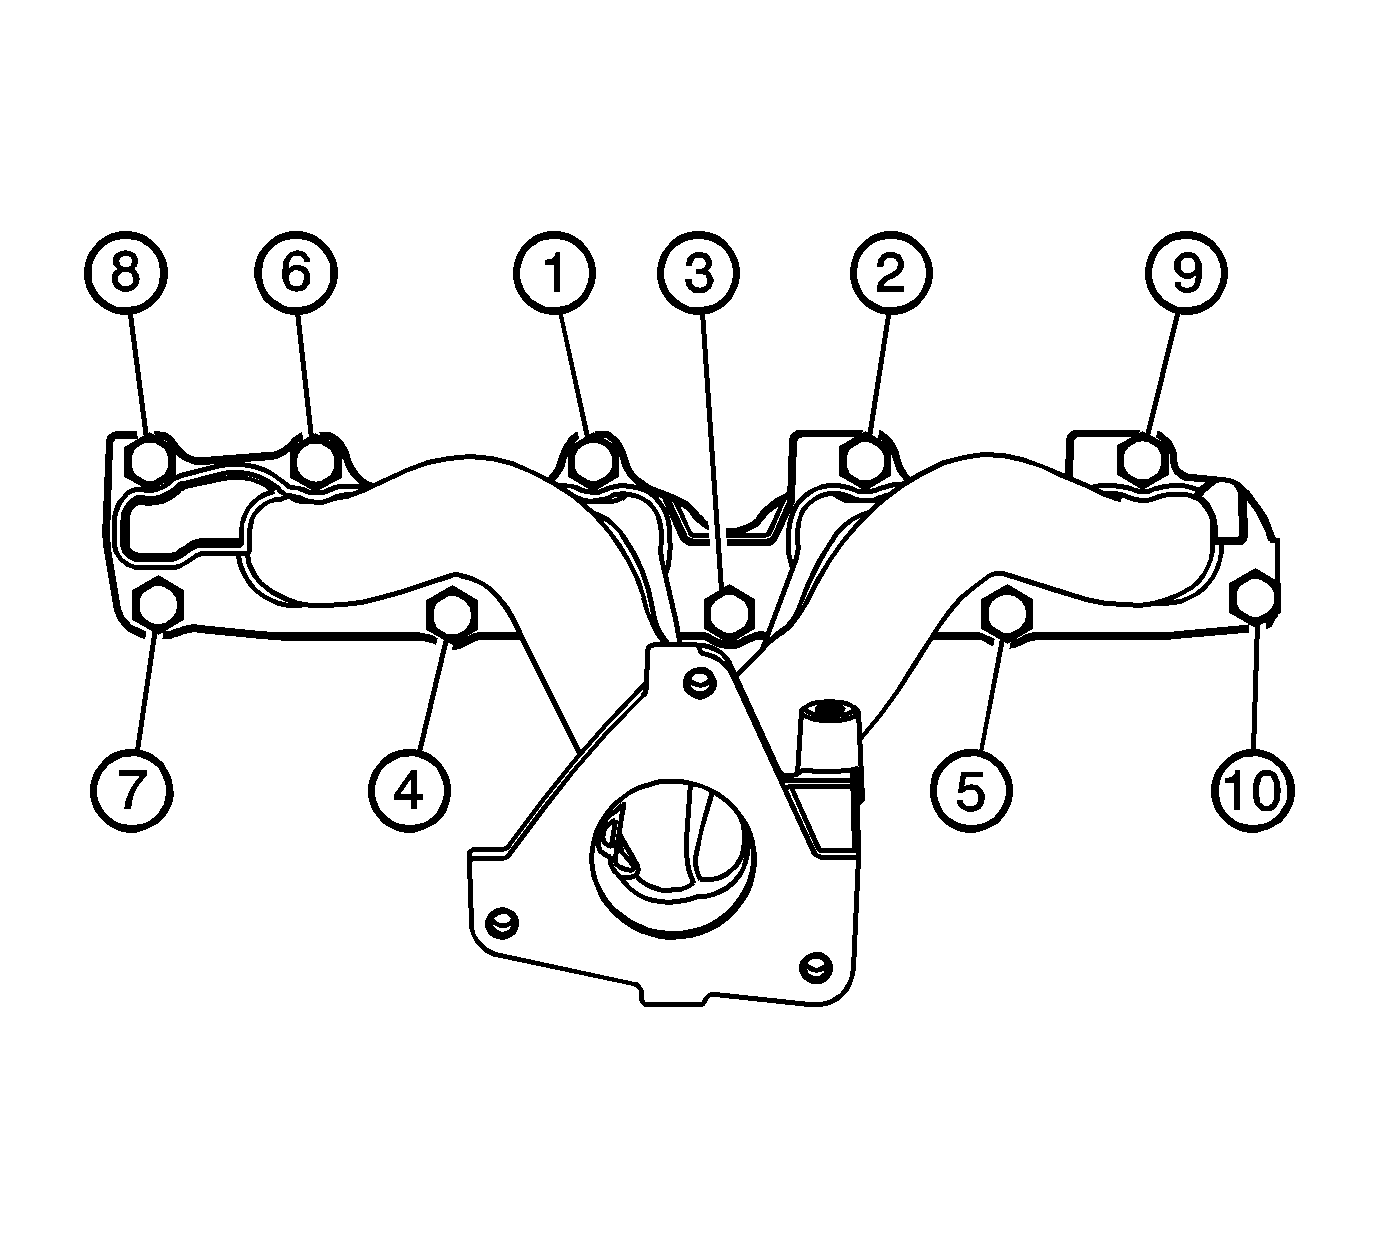
Tighten the exhaust manifold nuts in sequence to 14 N·m (10 lb ft).
Exhaust Manifold Replacement RPO LSJ
Removal Procedure
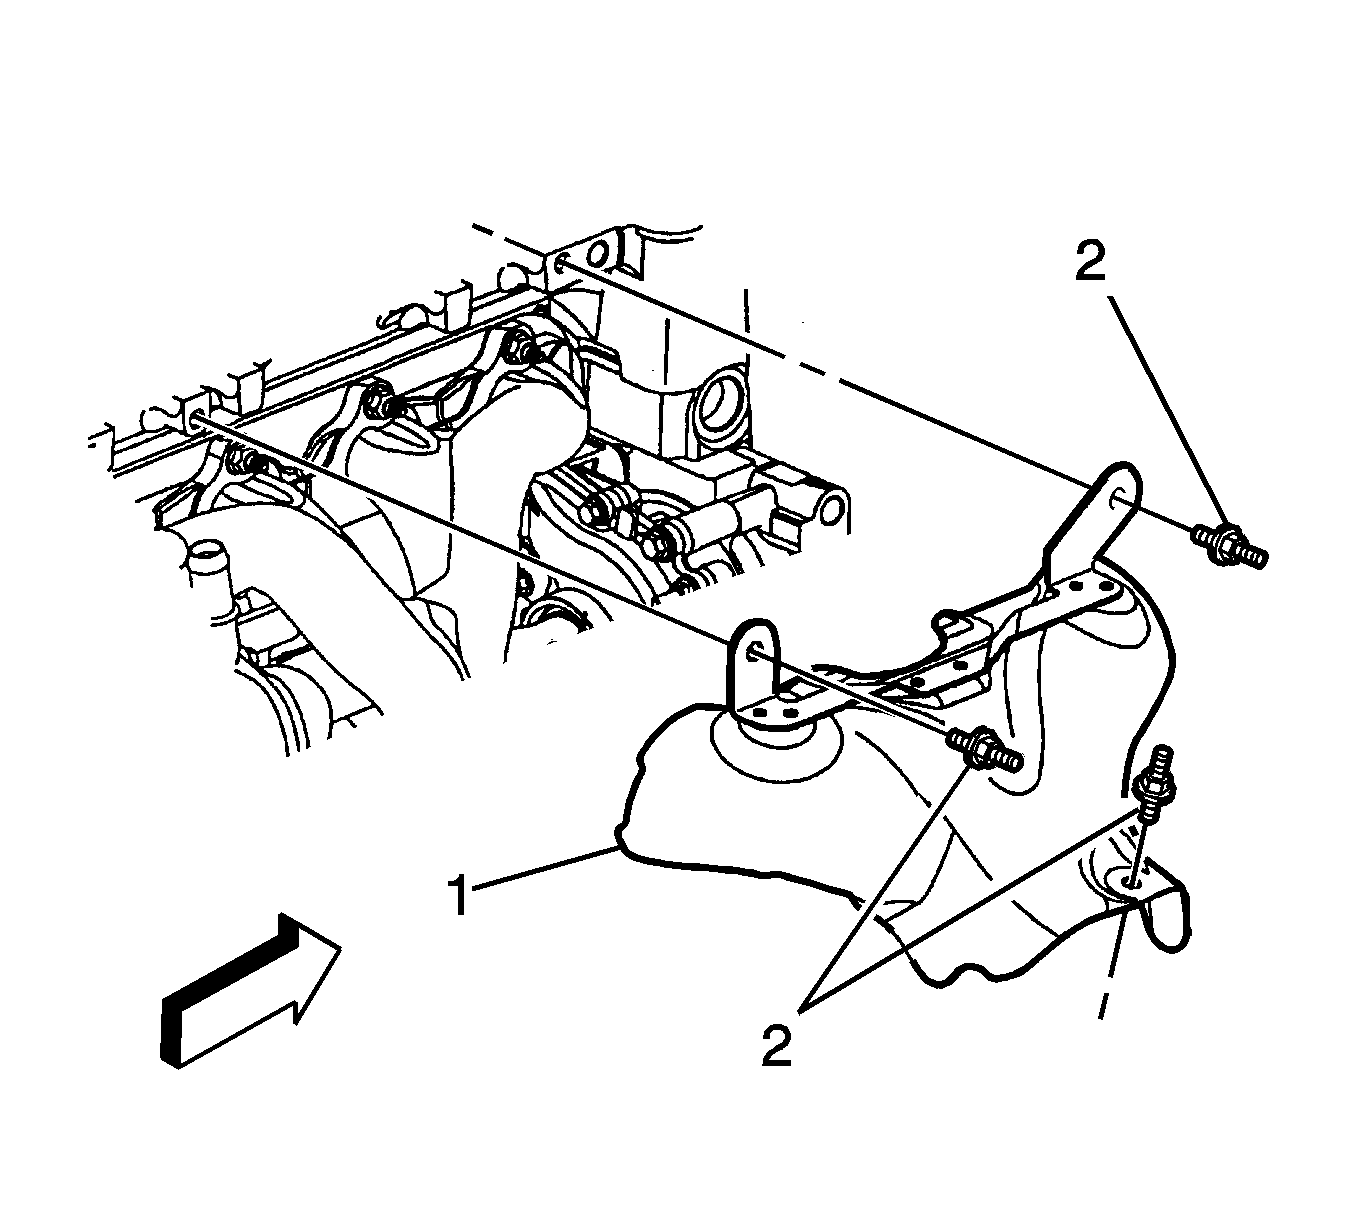
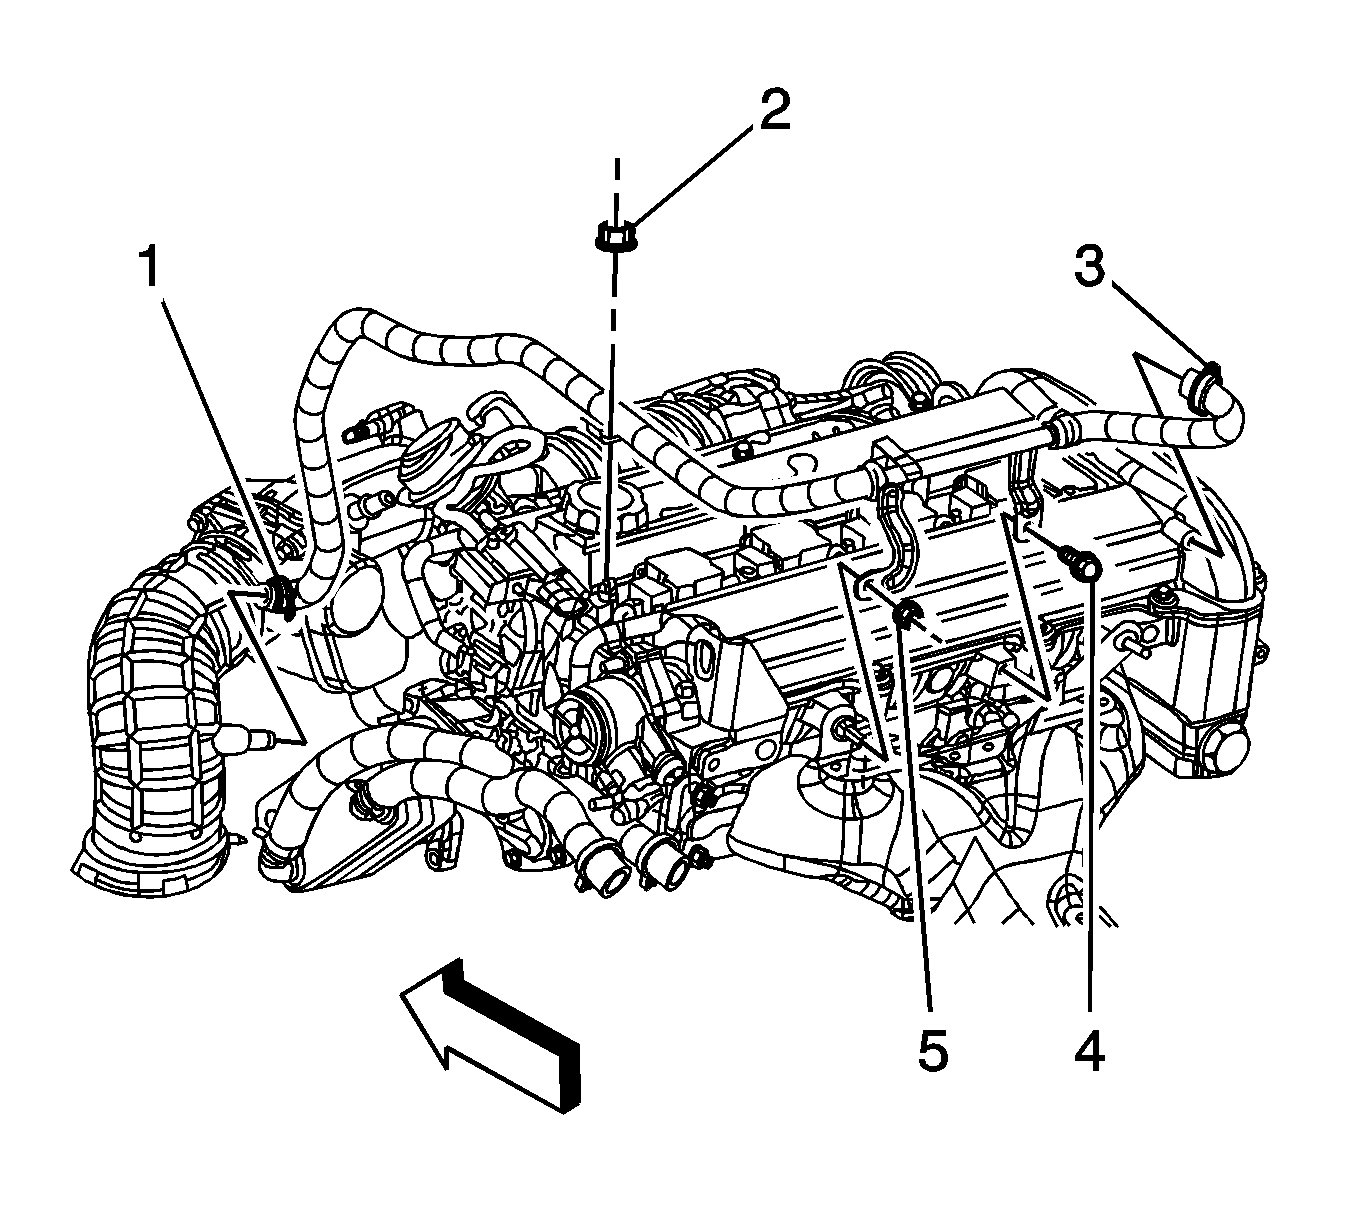
- Reposition the positive crankcase ventilation (PCV) vent hose clamps (1, 3) at the air cleaner outlet duct and the camshaft cover.
- Remove the PCV vent hose ends from the outlet duct and cover.
- Remove the PCV vent tube bolt (4) and nut (5).
- Remove the PCV vent hose/tube.
- Remove the exhaust manifold heat shield studs (2).
- Remove the exhaust manifold heat shield (1).
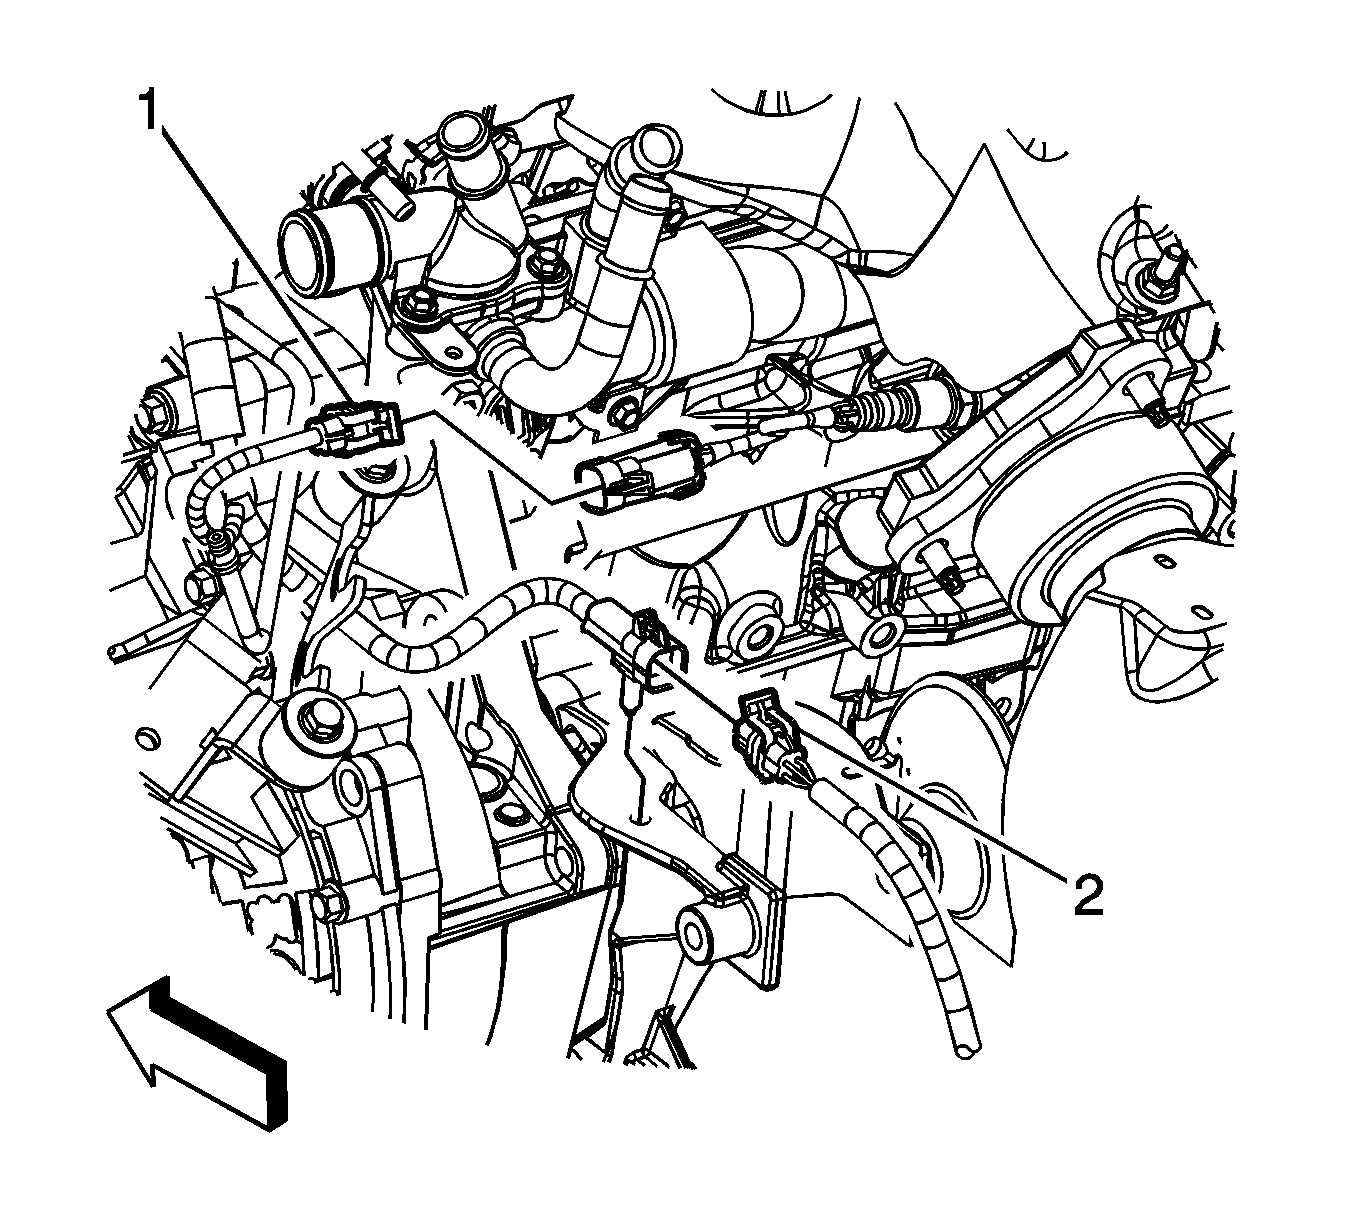
- Remove the heated oxygen sensor (HO2S) connector position assurance (CPA) retainer.
- Disconnect the engine harness electrical connector (1) from the HO2S.
- Remove the HO2S clip from the bracket on the thermostat housing.
- Remove the HO2S.
- Raise and support the vehicle. Refer to Lifting and Jacking the Vehicle .
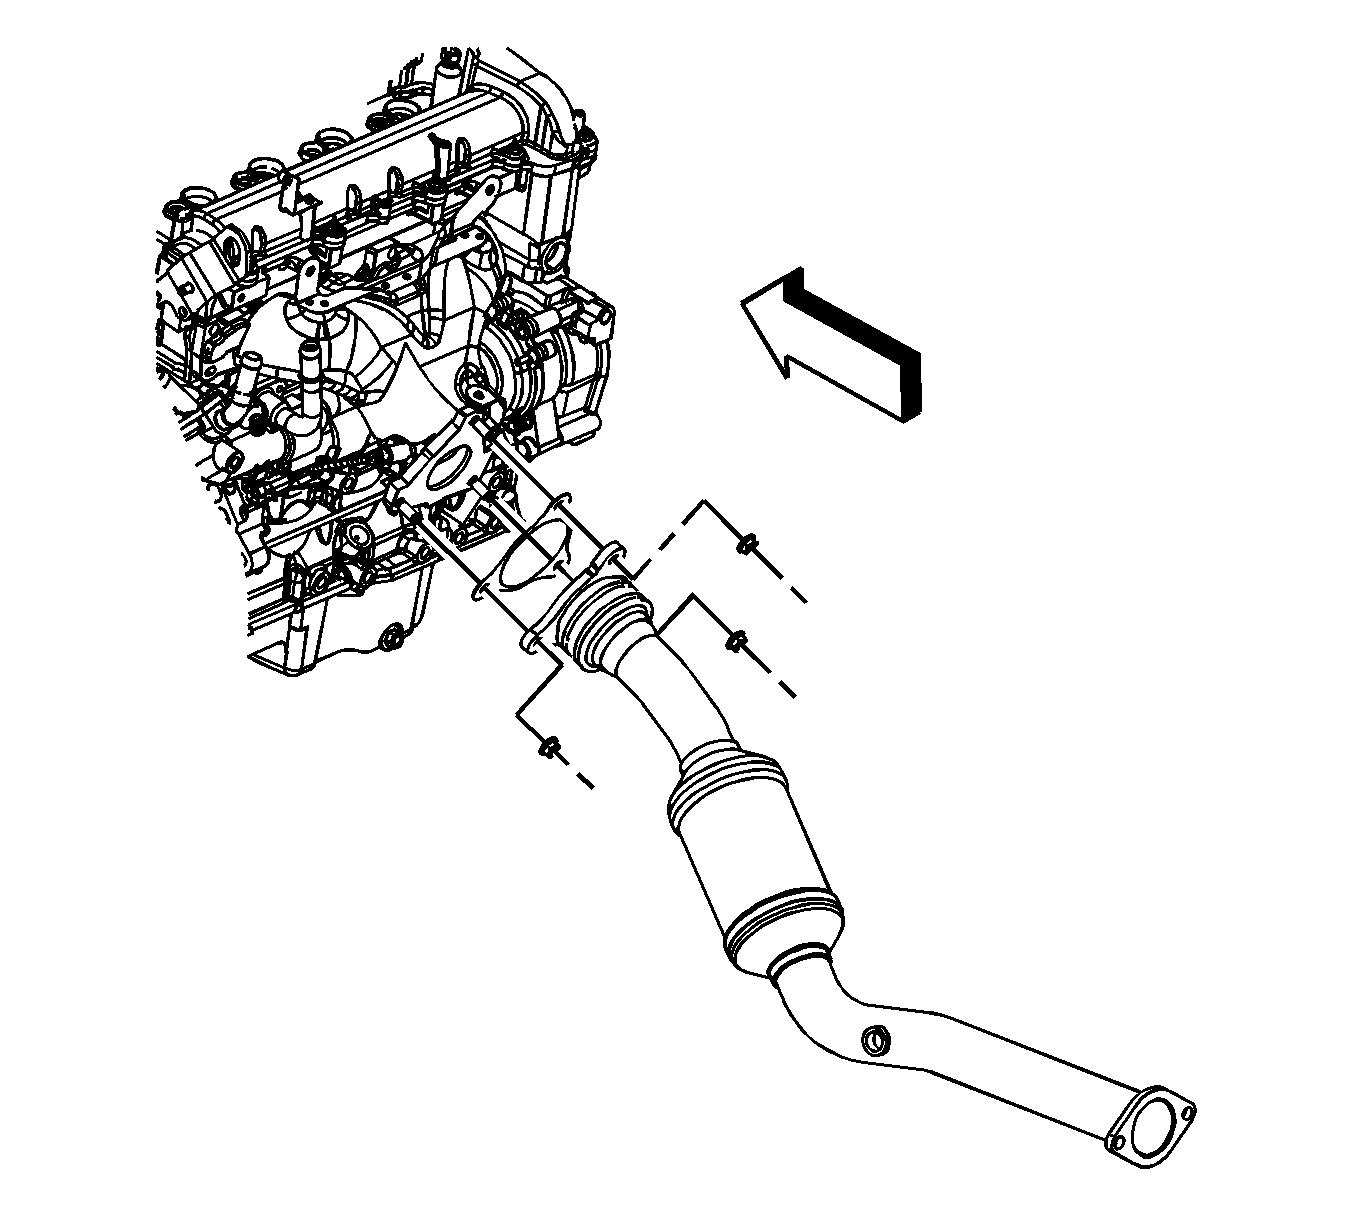
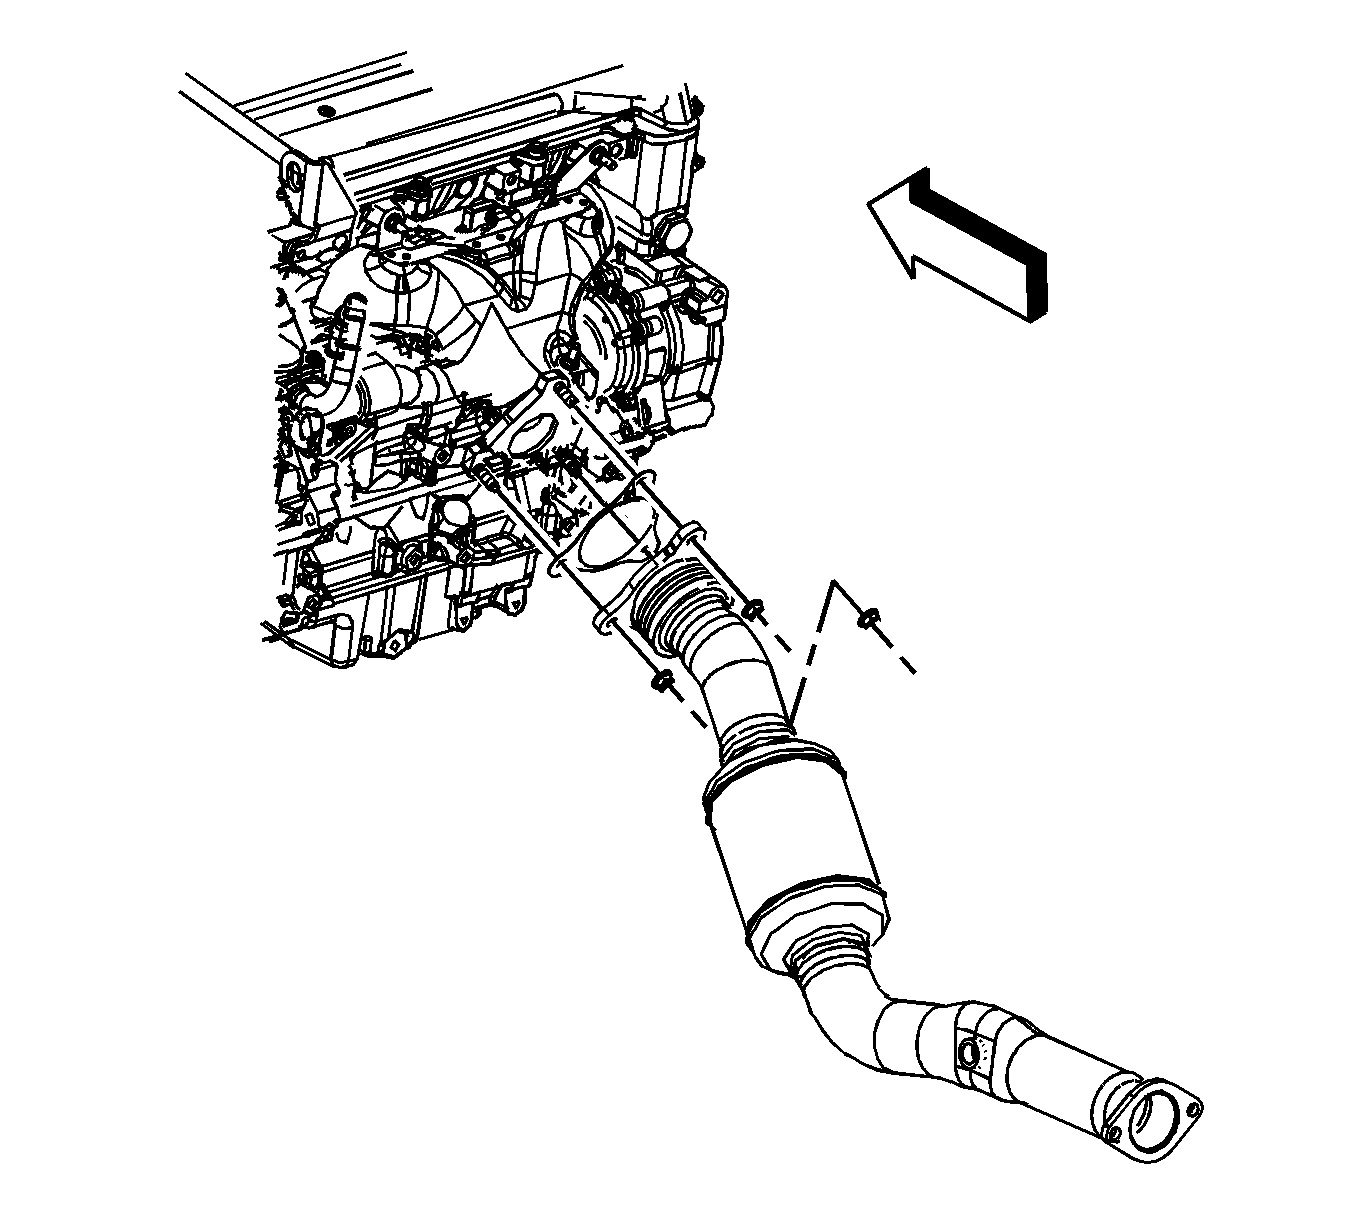
- Remove the catalytic converter to exhaust manifold nuts.
- Pull down and back on the exhaust pipe in order to separate the catalytic converter from the exhaust manifold.
- Remove and discard the catalytic converter gasket.
- Lower the vehicle.
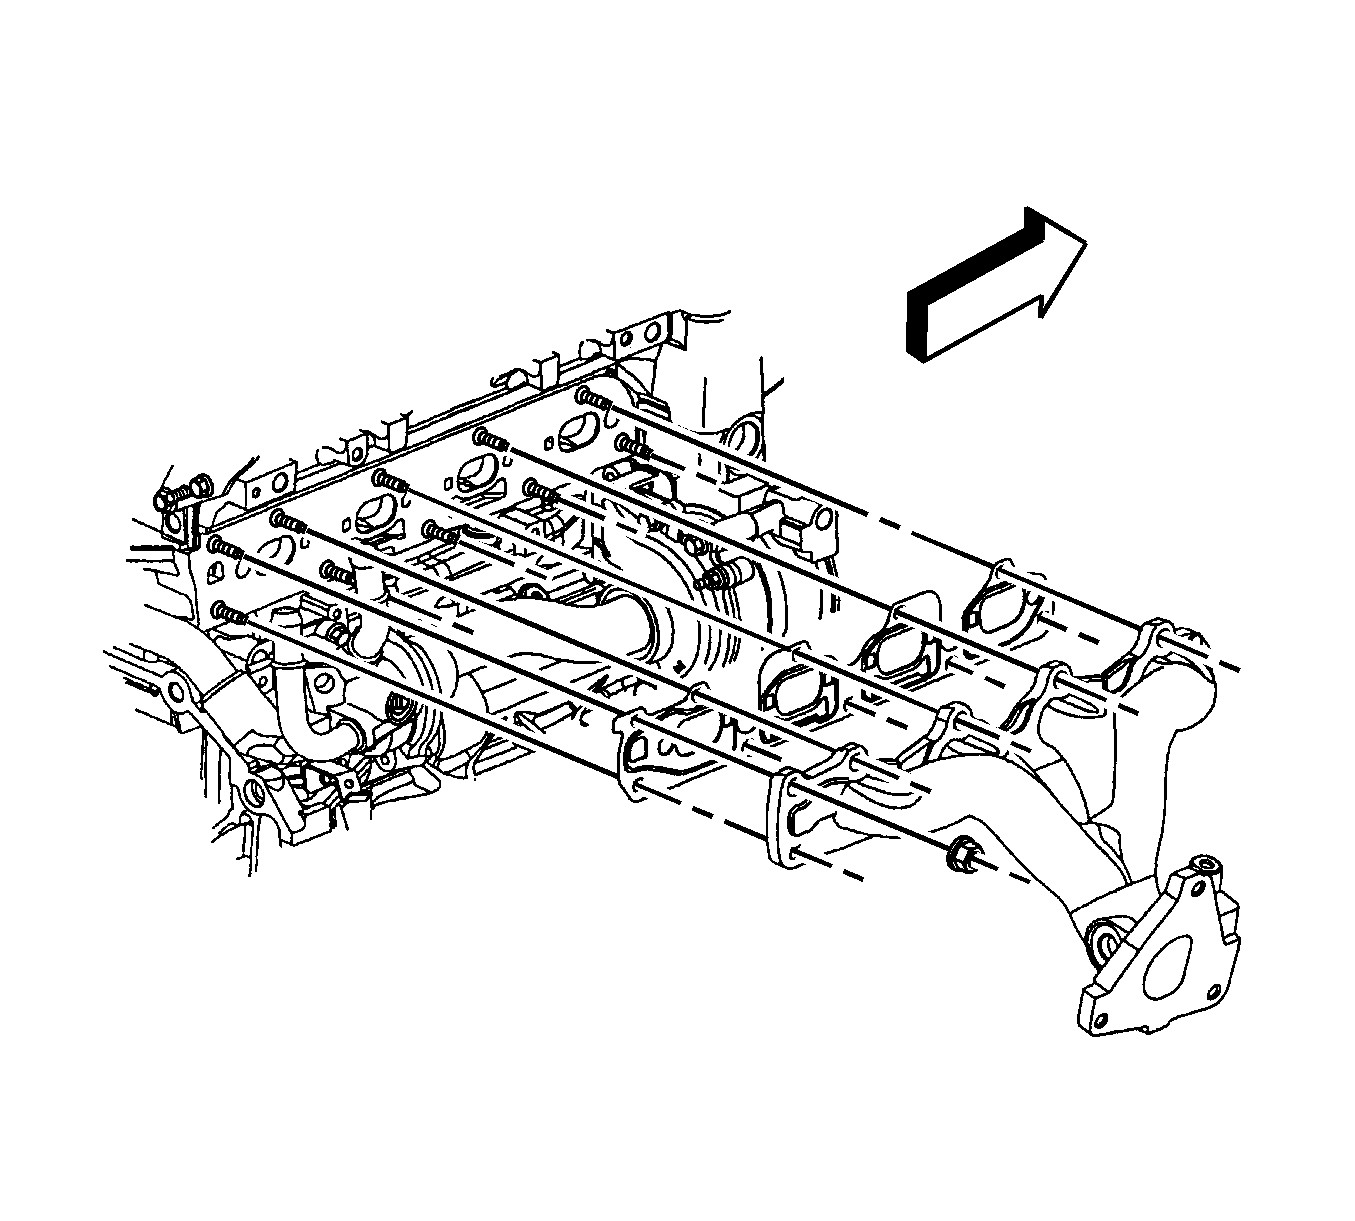
- Remove the exhaust manifold nuts.
- Remove the exhaust manifold.
- Remove and discard the exhaust manifold gasket.
- Clean and inspect all gasket mating surfaces.
Notice: Do not bend the exhaust flex decoupler more than 3 degrees in any direction. Movement of more than 3 degrees will damage the exhaust flex decoupler.
Installation Procedure
- Install a NEW exhaust manifold gasket onto the studs.
- Install the exhaust manifold.
- Install NEW exhaust manifold nuts.
- Raise and support the vehicle.
- Install a NEW catalytic converter gasket .
- Install the catalytic converter to the exhaust manifold studs.
- Install the catalytic converter to exhaust manifold nuts.
- Lower the vehicle.
- If reinstalling the old HO2S, coat the threads with anti-seize compound, Saturn P/N 21485279 or equivalent.
- Install the HO2S.
- Connect the engine harness electrical connector (1) to the HO2S.
- Install the HO2S clip to the bracket on the thermostat housing.
- Install the HO2S CPA retainer.
- Install the exhaust manifold heat shield (1).
- Install the exhaust manifold heat shield studs (2).
- Install the PCV vent hose/tube.
- Install the PCV vent tube bolt (4) and nut (5).
- Install the PCV vent hose ends to the outlet duct and cover.
- position the PCV vent hose clamps (1, 3) at the air cleaner outlet duct and the camshaft cover.
Notice: Refer to Fastener Notice in the Preface section.
Tighten
Tighten the nuts in the sequence shown to 14 N·m (10 lb ft).
Tighten
Tighten the nuts to 50 N·m (37 lb ft).
Tighten
Tighten the sensor to 30 N·m (22 lb ft).
Tighten
Tighten the studs to 22 N·m (16 lb ft).
Tighten
Tighten the bolt/nut to 10 N·m (89 lb in).
Exhaust Manifold Replacement L61
Removal Procedure
- Remove the intake manifold cover. Refer to Intake Manifold Cover Replacement .
- If equipped with RPO NU3, remove the secondary air injection (AIR) check valve. Refer to Secondary Air Injection Check Valve Replacement .
- Remove the exhaust manifold heat shield. Refer to Exhaust Manifold Heat Shield Replacement .
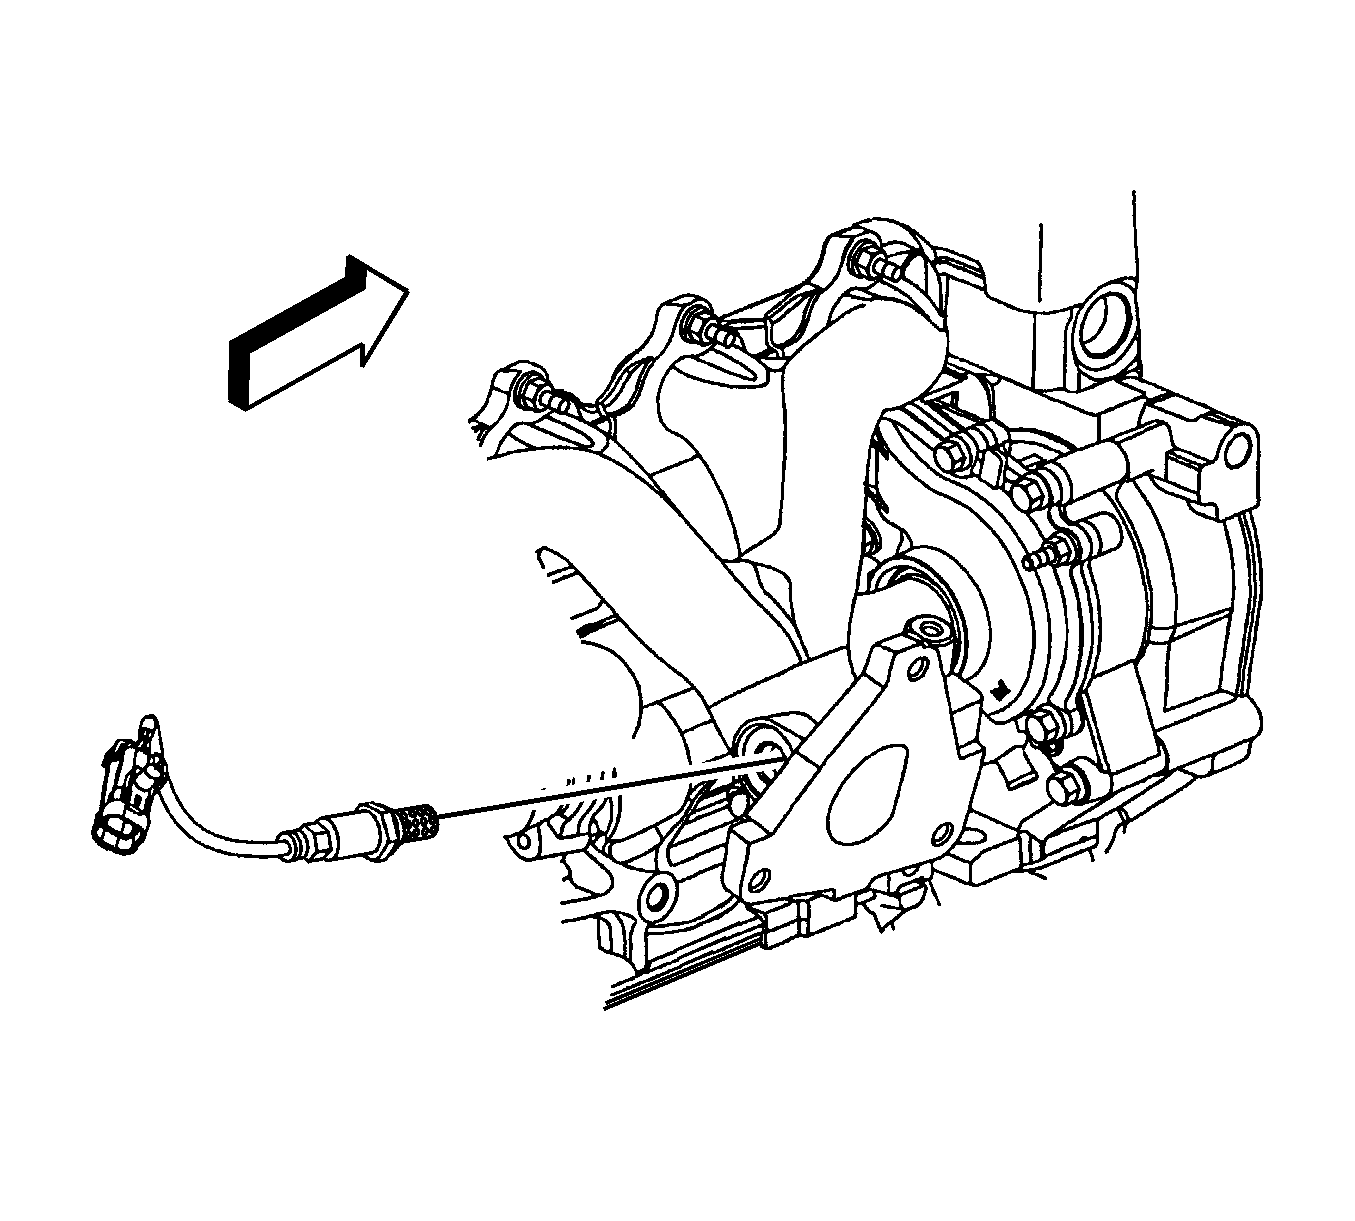
- Remove the heated oxygen sensor (HO2S). Refer to Heated Oxygen Sensor 1 Replacement .
- Raise and support the vehicle. Refer to Lifting and Jacking the Vehicle .
- Remove the catalytic converter assembly. Refer to Catalytic Converter Replacement .
- Lower the vehicle.
- Remove the exhaust manifold nuts.
- Remove the exhaust manifold and discard the exhaust manifold gasket.
- Clean and inspect all gasket mating surfaces.
Installation Procedure
- Install a NEW exhaust manifold gasket onto the studs.
- Install the exhaust manifold to the engine.
- Install NEW exhaust manifold nuts.
- Raise and support the vehicle.
- Install the catalytic converter assembly. Refer to Catalytic Converter Replacement .
- Lower the vehicle.
- Install the heated oxygen sensor HO2S. Refer to Heated Oxygen Sensor 1 Replacement .
- If equipped with RPO NU3, install the AIR check valve. Refer to Secondary Air Injection Check Valve Replacement .
- Install the intake manifold cover. Refer to Intake Manifold Cover Replacement .
- Inspect the exhaust system for leaks.
Notice: Refer to Fastener Notice in the Preface section.
Tighten
Tighten the exhaust manifold nuts in sequence to 14 N·m (10 lb ft).
