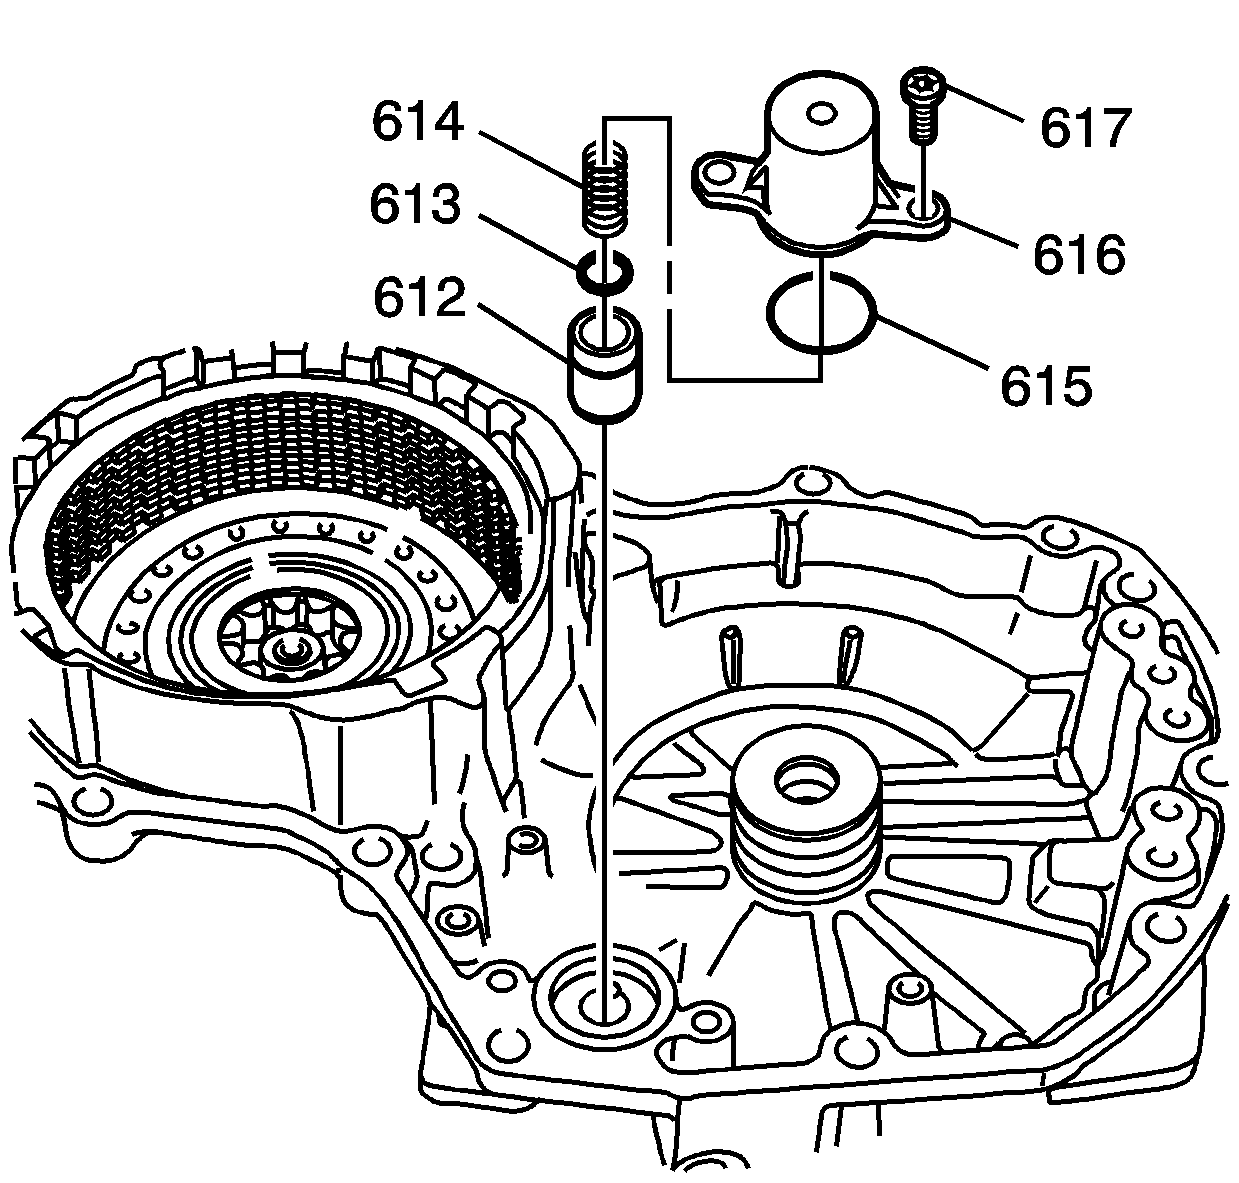
- Apply automatic transmission fluid to the new forward clutch accumulator piston fluid seal ring (613).
- Install the new forward clutch accumulator piston fluid seal ring (613) onto forward clutch accumulator piston (612).
- Install the forward clutch accumulator piston spring (614) and the forward clutch accumulator piston (612) into the forward clutch accumulator cover (616).
- Apply automatic transmission fluid to the new forward clutch accumulator cover seal (615).
- Install the new forward clutch accumulator cover seal (615) onto forward clutch accumulator cover (616).
- Install the forward clutch accumulator cover assembly onto the transmission case cover.
- Install and tighten 1 of the 2 forward clutch accumulator cover bolts (617).
- Apply automatic transmission fluid to the 3 new forward clutch housing fluid seal rings (607).
- Install the forward/direct clutch housing thrust selective bearing race (628) without any markings. This is the 0.81 mm (0.032 in) thick race and will determine the correct thickness for the forward/direct clutch end play measurement.
- Apply automatic transmission fluid to the 2 new 4-5 clutch apply pipe seals (608).
- Install the 2 pipe seals (608) onto the 4-5 clutch apply pipe (609).
- Using a plastic hammer if needed, install the 4-5 clutch apply pipe (609) into the transmission case cover.
- Install the two, 4-5 clutch apply pipe retainers (610).
- Install the four, 4-5 clutch apply pipe bolts (611).
Notice: Use the correct fastener in the correct location. Replacement fasteners must be the correct part number for that application. Fasteners requiring replacement or fasteners requiring the use of thread locking compound or sealant are identified in the service procedure. Do not use paints, lubricants, or corrosion inhibitors on fasteners or fastener joint surfaces unless specified. These coatings affect fastener torque and joint clamping force and may damage the fastener. Use the correct tightening sequence and specifications when installing fasteners in order to avoid damage to parts and systems.
Tighten
Tighten the forward clutch accumulator cover bolt (617) to 10 N·m (89 lb in).
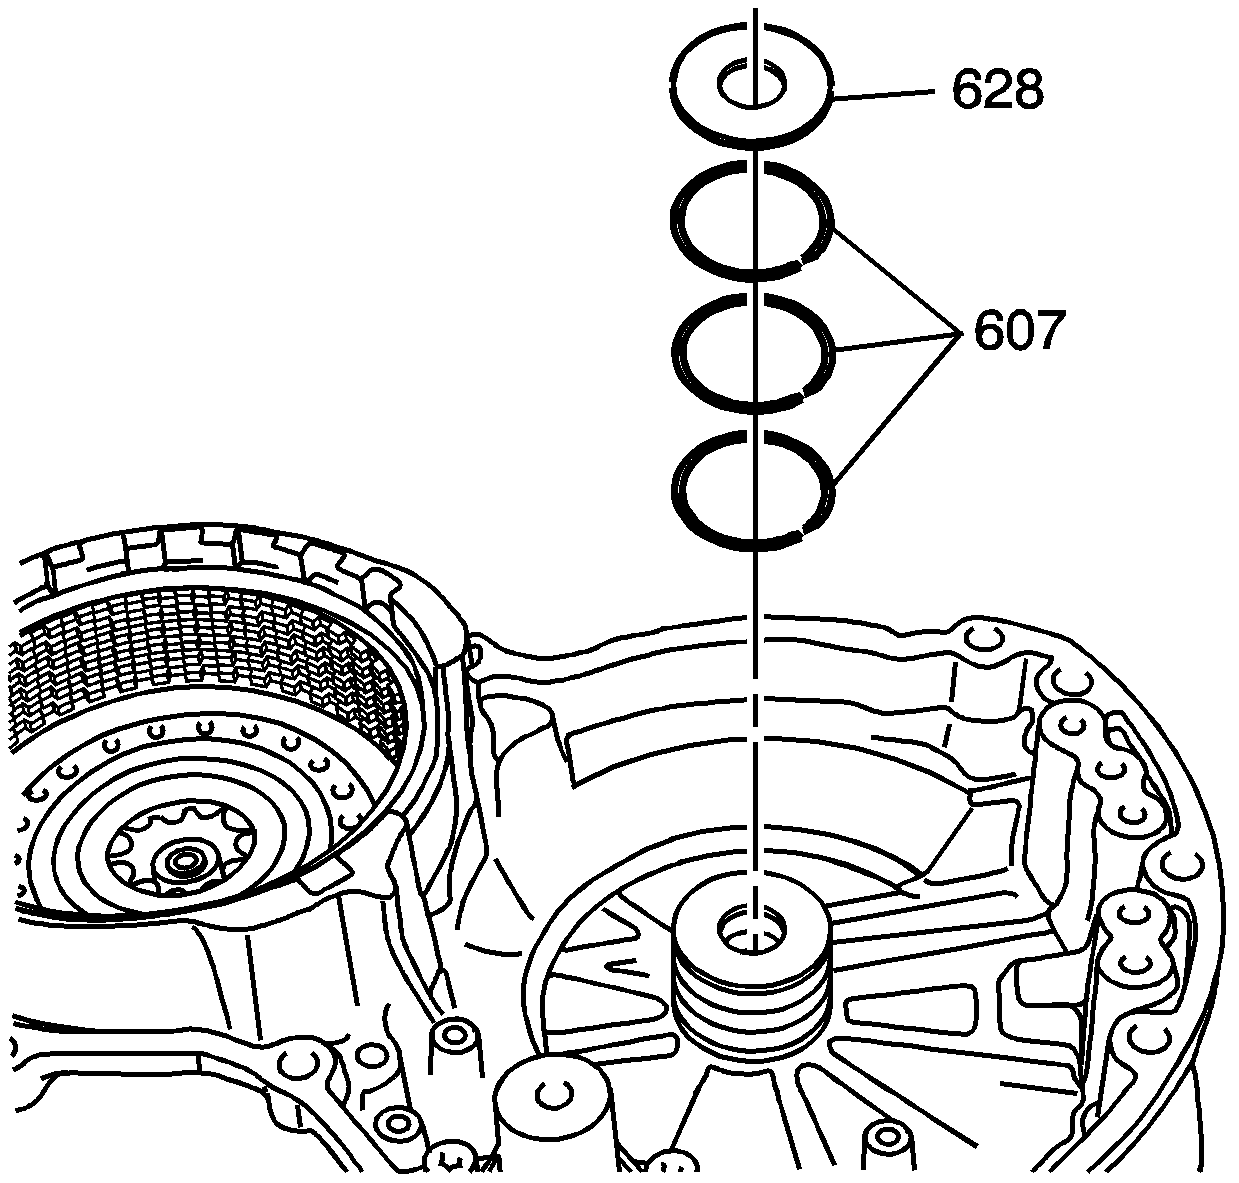
Install the 3 new forward clutch housing fluid seal rings (607).
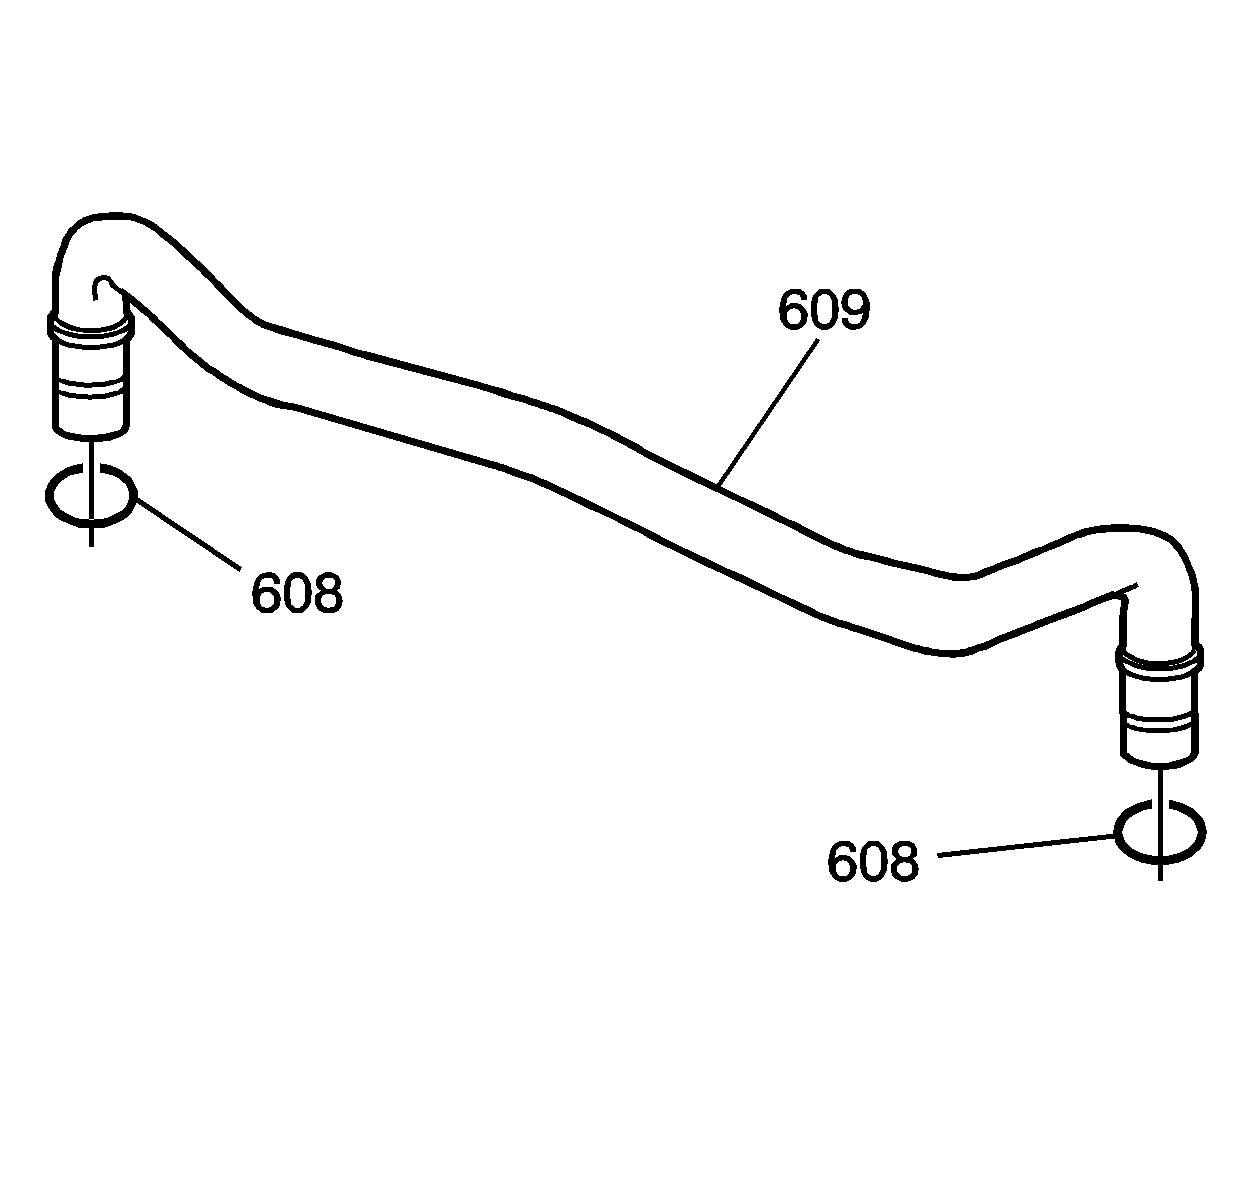
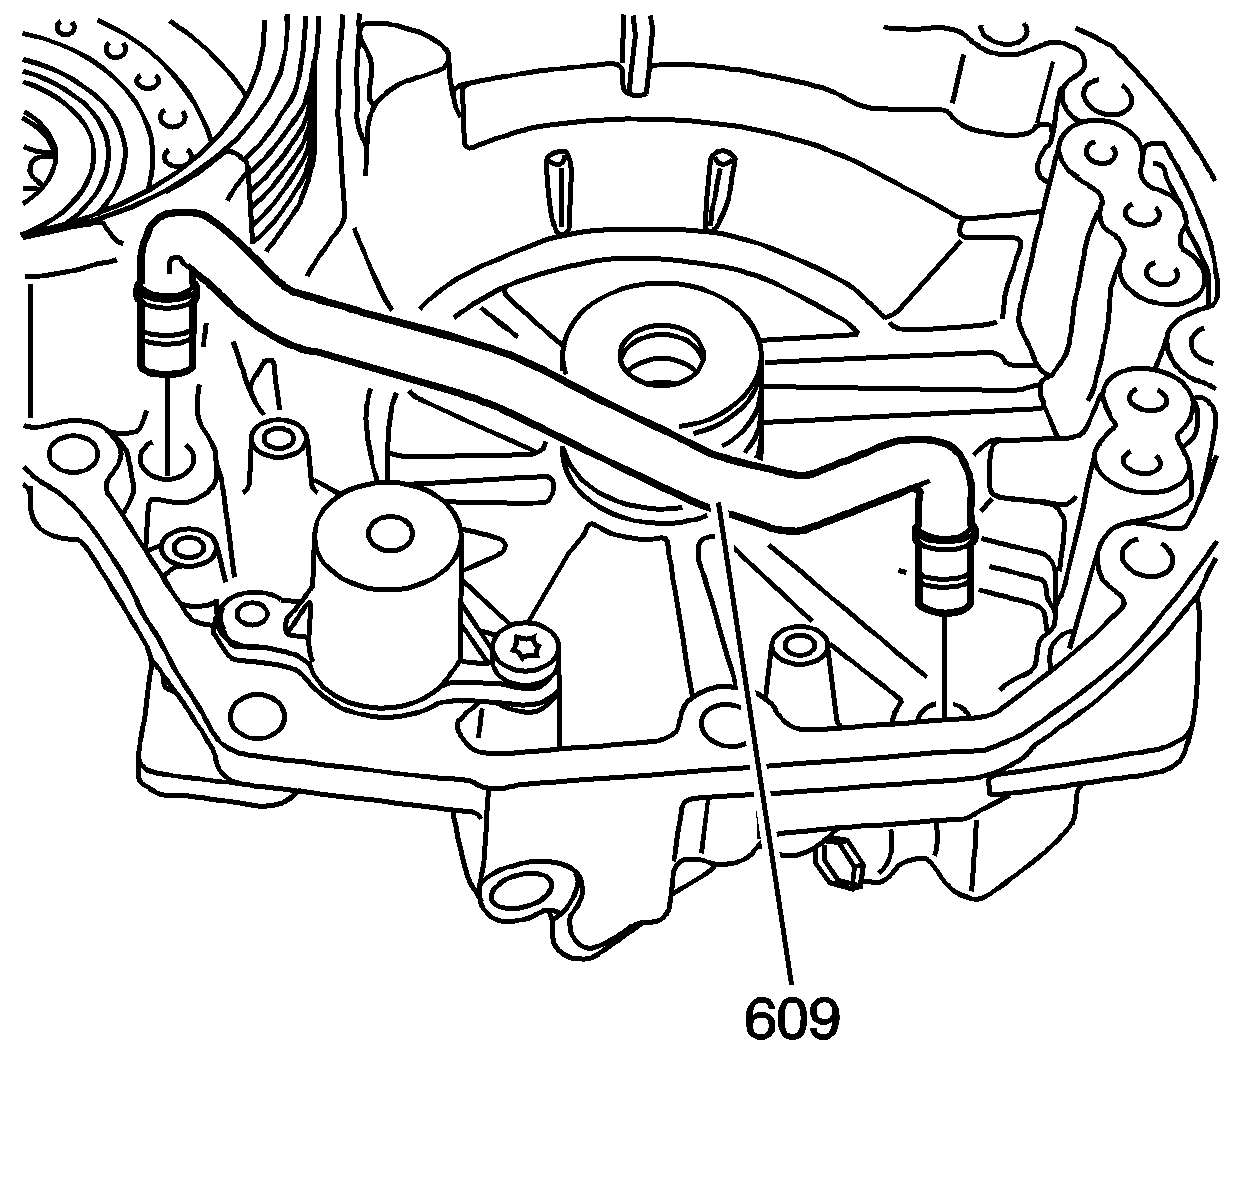
Important: Do not damage the pipe seals or the 4-5 clutch apply pipe.
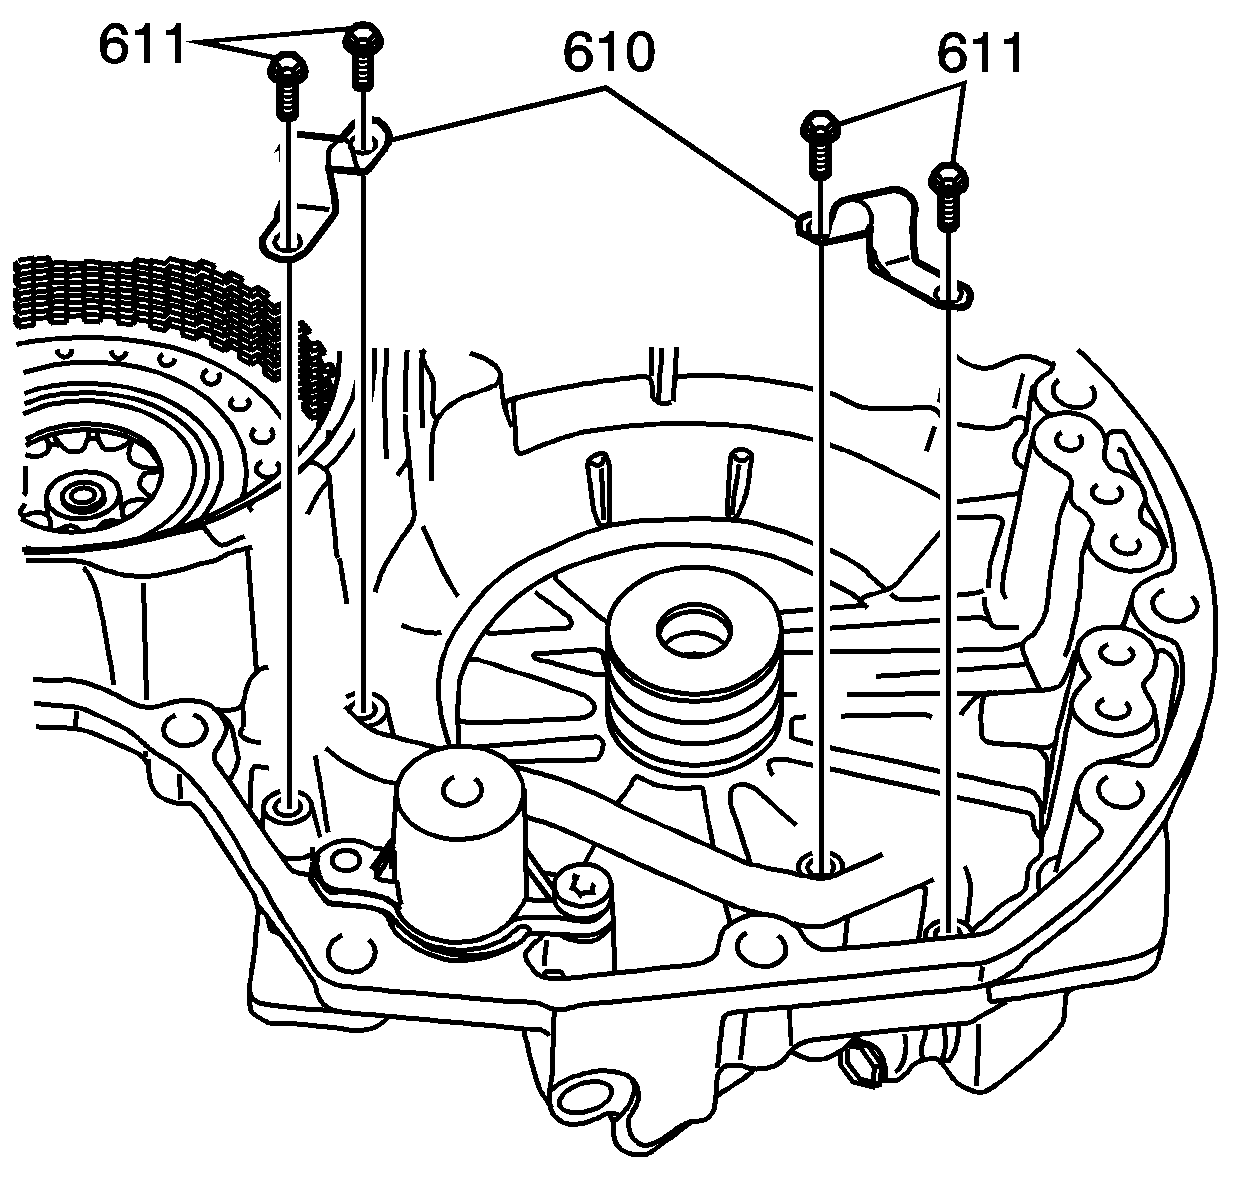
Tighten
Tighten the 4-5 clutch apply pipe bolts to 7 N·m (62 lb in).
