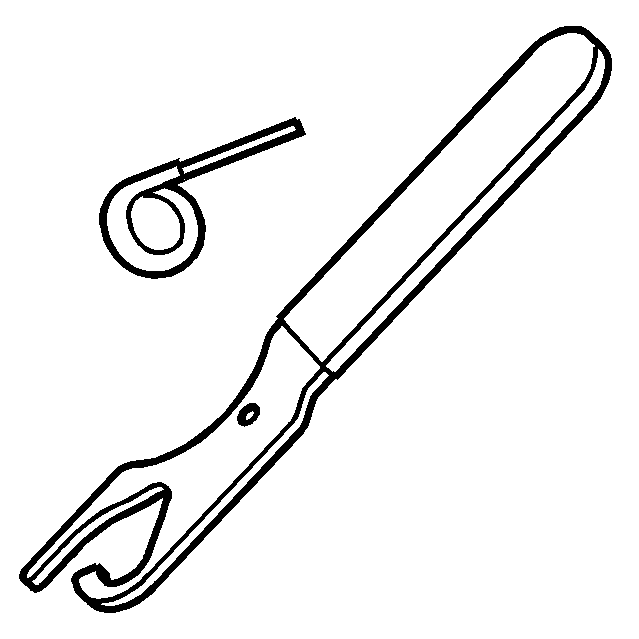
Tools Required
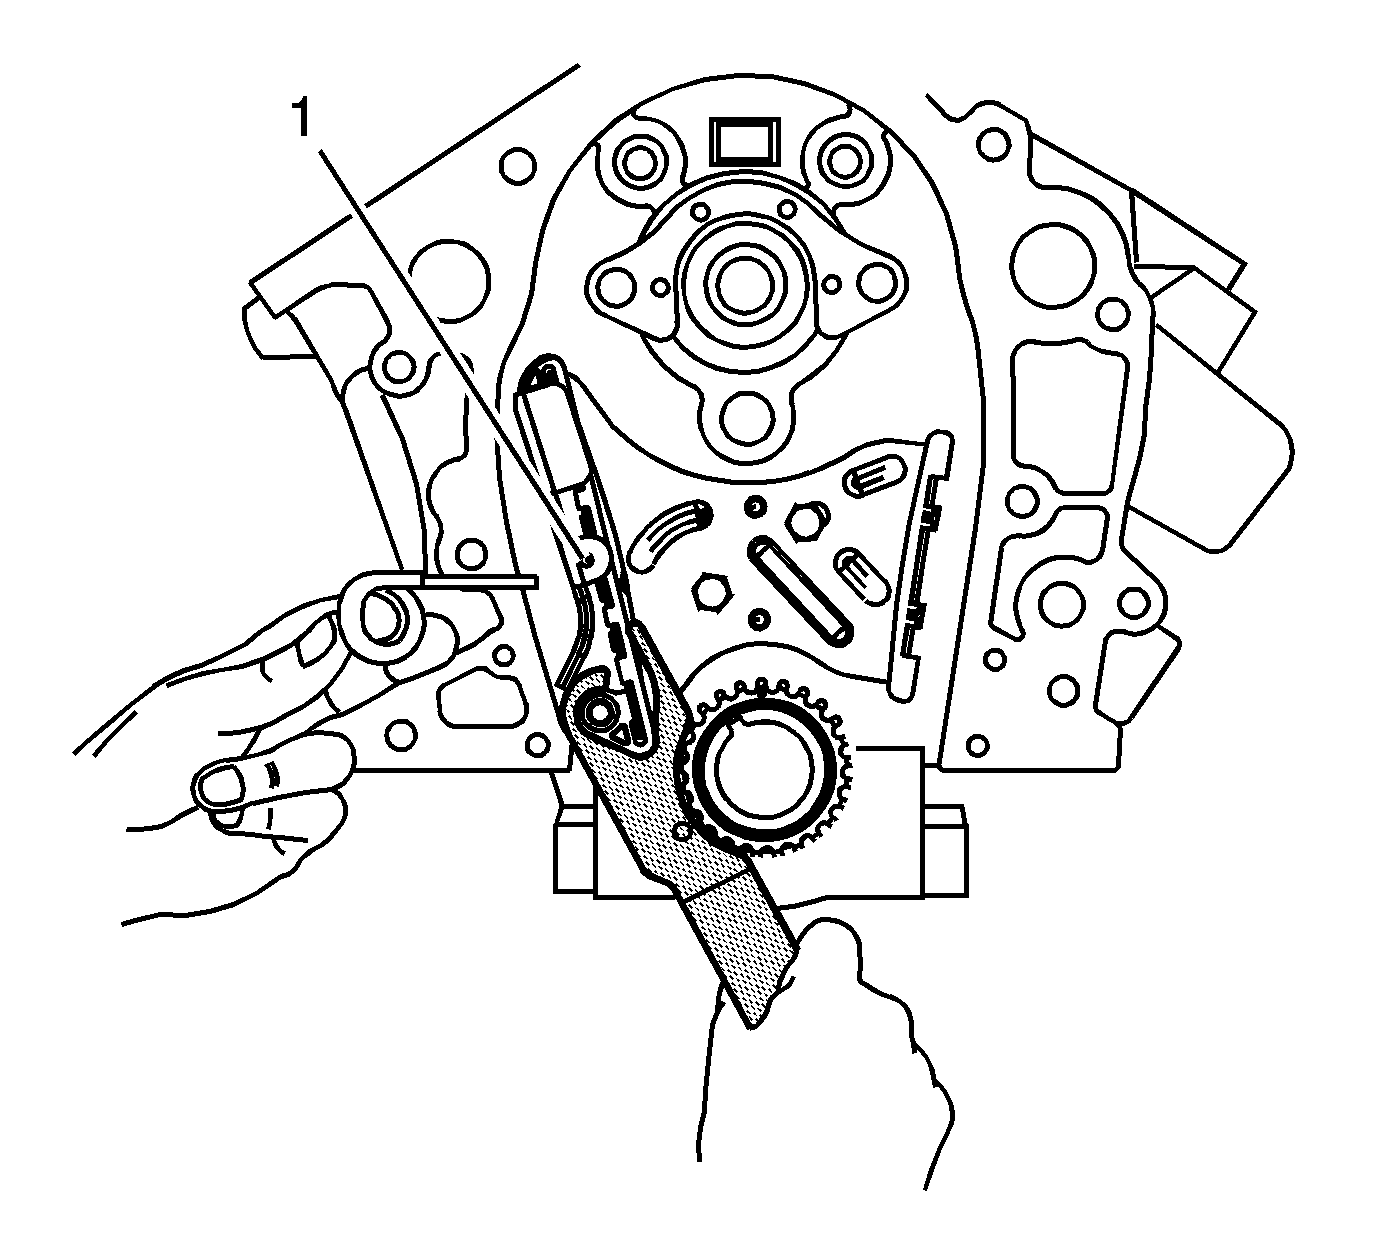
EN-47719 Tensioner Compressor
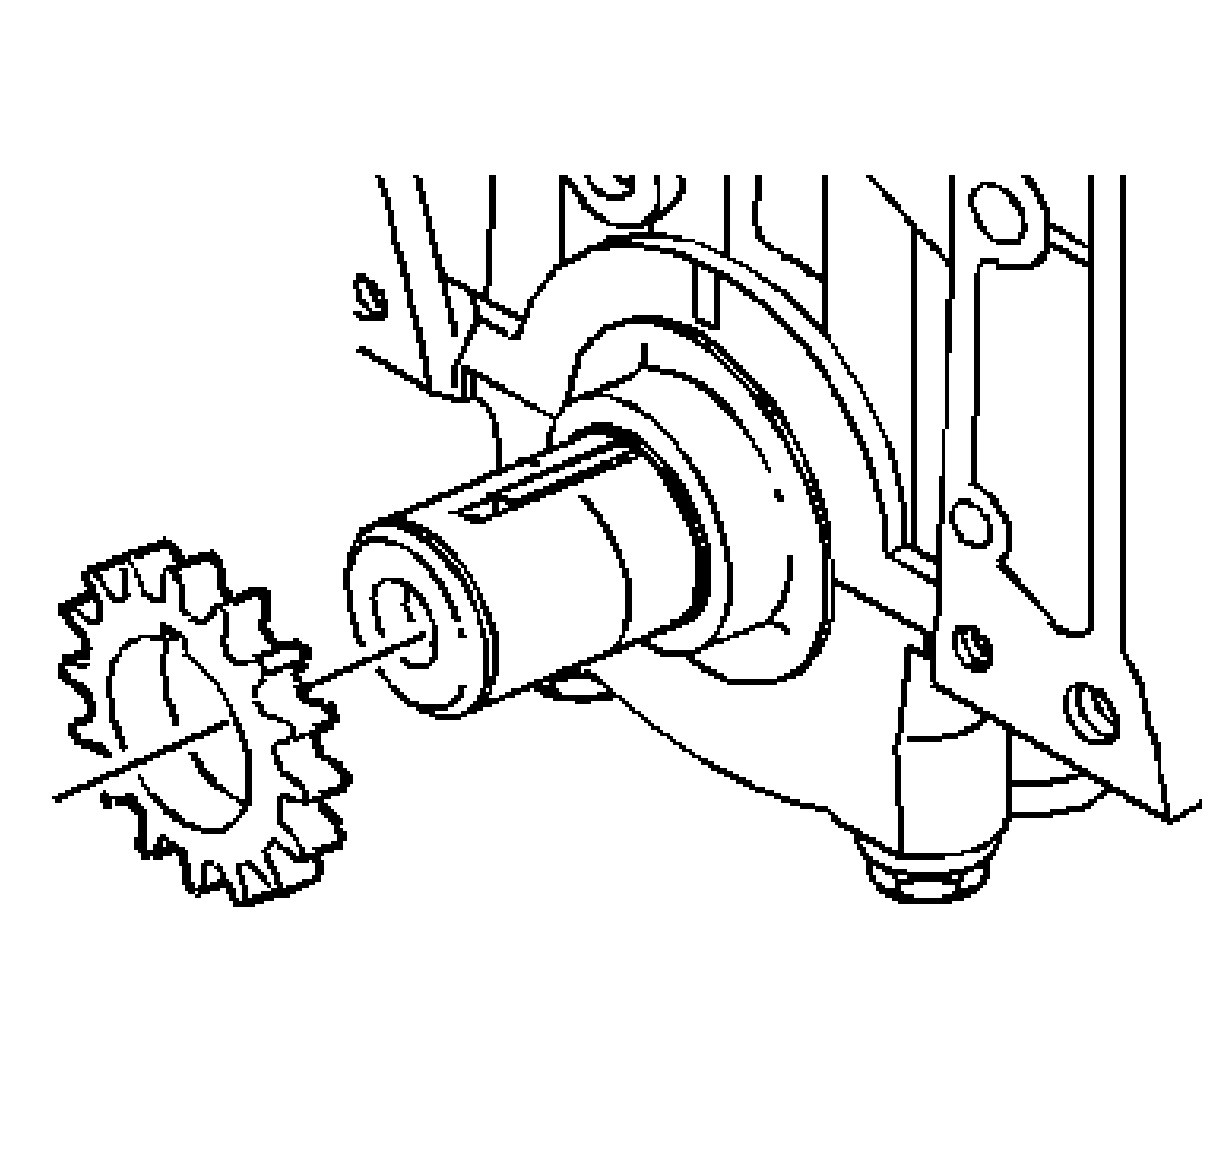
- Install the crankshaft sprocket.
- Apply prelube GM P/N 12345501 (Canadian P/N 992704) or the equivalent to the crankshaft sprocket thrust surface.
- Install the timing chain tensioner.
- Install the timing chain tensioner bolts.
- Using the EN-47719 , fully collapse the tensioner, and place the tensioner retaining pin into the retaining hole (1).
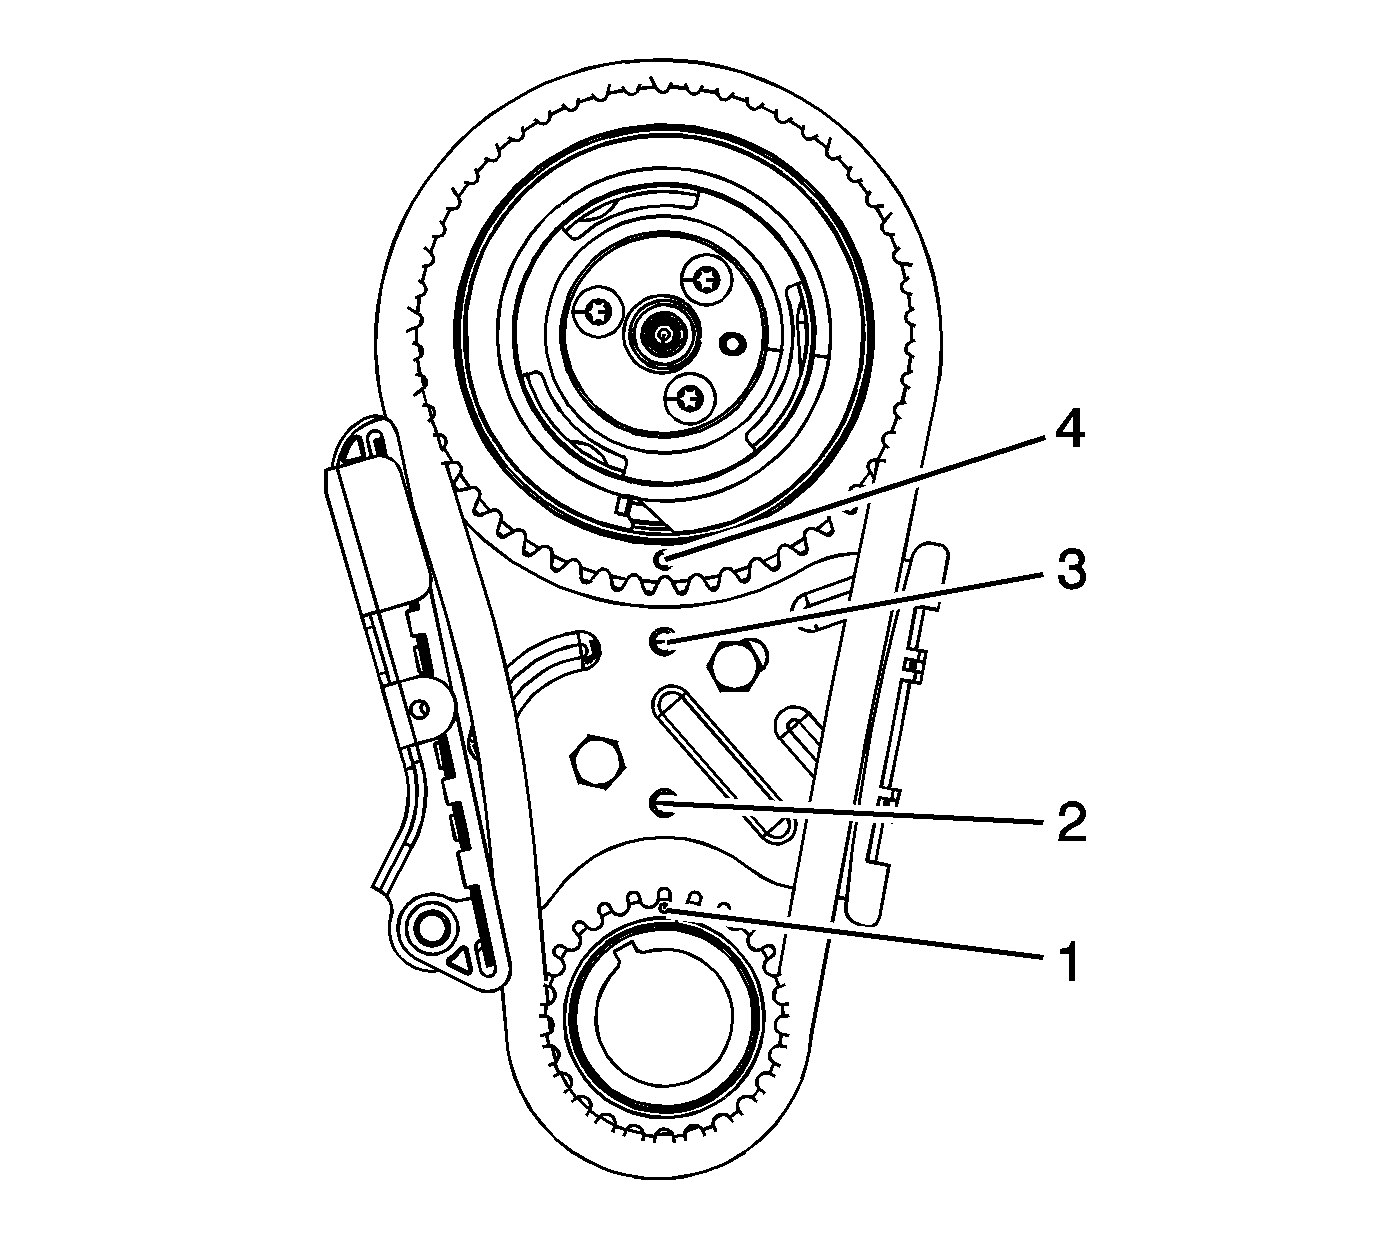
- Align the crankshaft timing mark (1) to the timing mark on the bottom of the timing chain tensioner (2).
- Hold the camshaft sprocket with the timing chain hanging down and install the timing chain to the crankshaft gear.
- Align the timing mark on the camshaft gear (4) with the timing mark on top of the timing chain tensioner (3).
- Align the dowel in the camshaft position actuator with the dowel hole in the camshaft.
- Draw the camshaft sprocket onto the camshaft using the mounting bolts.
- Remove the tensioner retaining pin.
- Coat the crankshaft and camshaft sprocket with engine oil.

Notice: Use the correct fastener in the correct location. Replacement fasteners must be the correct part number for that application. Fasteners requiring replacement or fasteners requiring the use of thread locking compound or sealant are identified in the service procedure. Do not use paints, lubricants, or corrosion inhibitors on fasteners or fastener joint surfaces unless specified. These coatings affect fastener torque and joint clamping force and may damage the fastener. Use the correct tightening sequence and specifications when installing fasteners in order to avoid damage to parts and systems.
Tighten
Tighten the timing chain tensioner bolts to 21 N·m (15 lb ft).
Important: Always install a NEW camshaft position actuator filter, located in pilot nose of camshaft, anytime the camshaft position actuator is removed or installed. Refer to Camshaft and Bearings Cleaning and Inspection for filter changing instructions.


Notice: Use only a Torx Plus® Bit when removing or installing the camshaft position actuator fasteners (1). The Torx Plus® design differs from typical Torx® fastener. Use of a standard Torx® bit on Torx Plus® fasteners may result in a rounded out fastener head or incorrect faster torque.
Important: DO NOT use any type of threadlocking compound on the camshaft position actuator mounting bolts. Usage of a threadlocking compound on the threads could lead to contamination of the camshaft position actuator, possibly resulting in potential damage to the actuator.
Tighten
Tighten the bolts to 16 N·m (12 lb ft).
