Tools Required
| • | J 38185 (SA9111E) Hose Clamp Pliers |
| • | J 24319-B Steering Linkage and Tie Rod Puller |
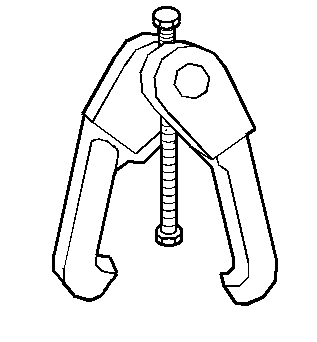
| • | J 41820 Ball Joint Separator |
| • | J 2619-O1 Slide Hammer |
| • | J 29794 Axle Shaft Remover Extension |
| • | J 33008-A Axle Shaft Puller |
| • | J 42640 Steering Column Anti-Rotation Pin |
| • | J 39580 Engine Support Table |
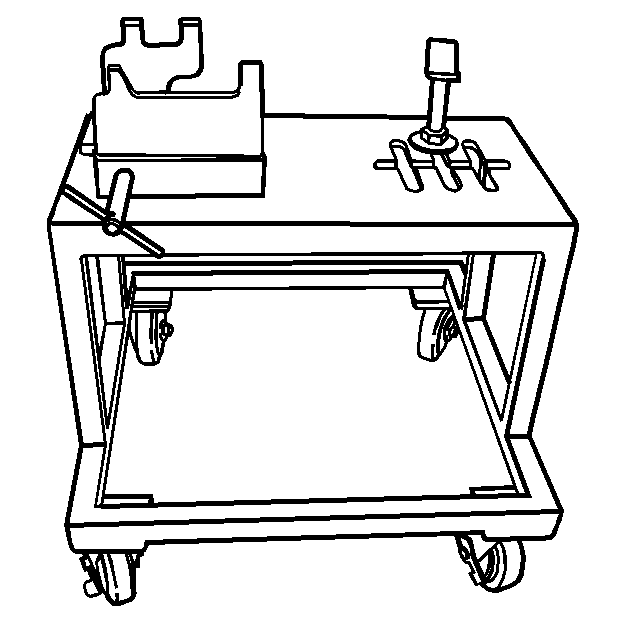
| • | J 37096 Flywheel Holder |
| • | J 45059 Angle Meter |
Removal Procedure
- Lock the steering column by installing the J 42640 into the underside of the steering column.
- Open the hood.
- Remove the engine oil fill cap.
- Pull up on the intake manifold cover in order to disengage the cover from the studs.
- Disconnect the negative battery cable. Refer to Battery Negative Cable Disconnection and Connection .
- Disconnect the positive battery cable.
- Disconnect the battery current sensor. Refer to Battery Current Sensor Replacement .
- Disconnect the auxiliary ground cable on the inner fender.
- Disconnect the positive battery feed at the junction box.
- Remove the lower radiator air baffle. Refer to Radiator Air Baffle Assemblies and Deflectors .
- Drain the cooling system. Refer to Cooling System Draining and Filling .
- Lower the vehicle.
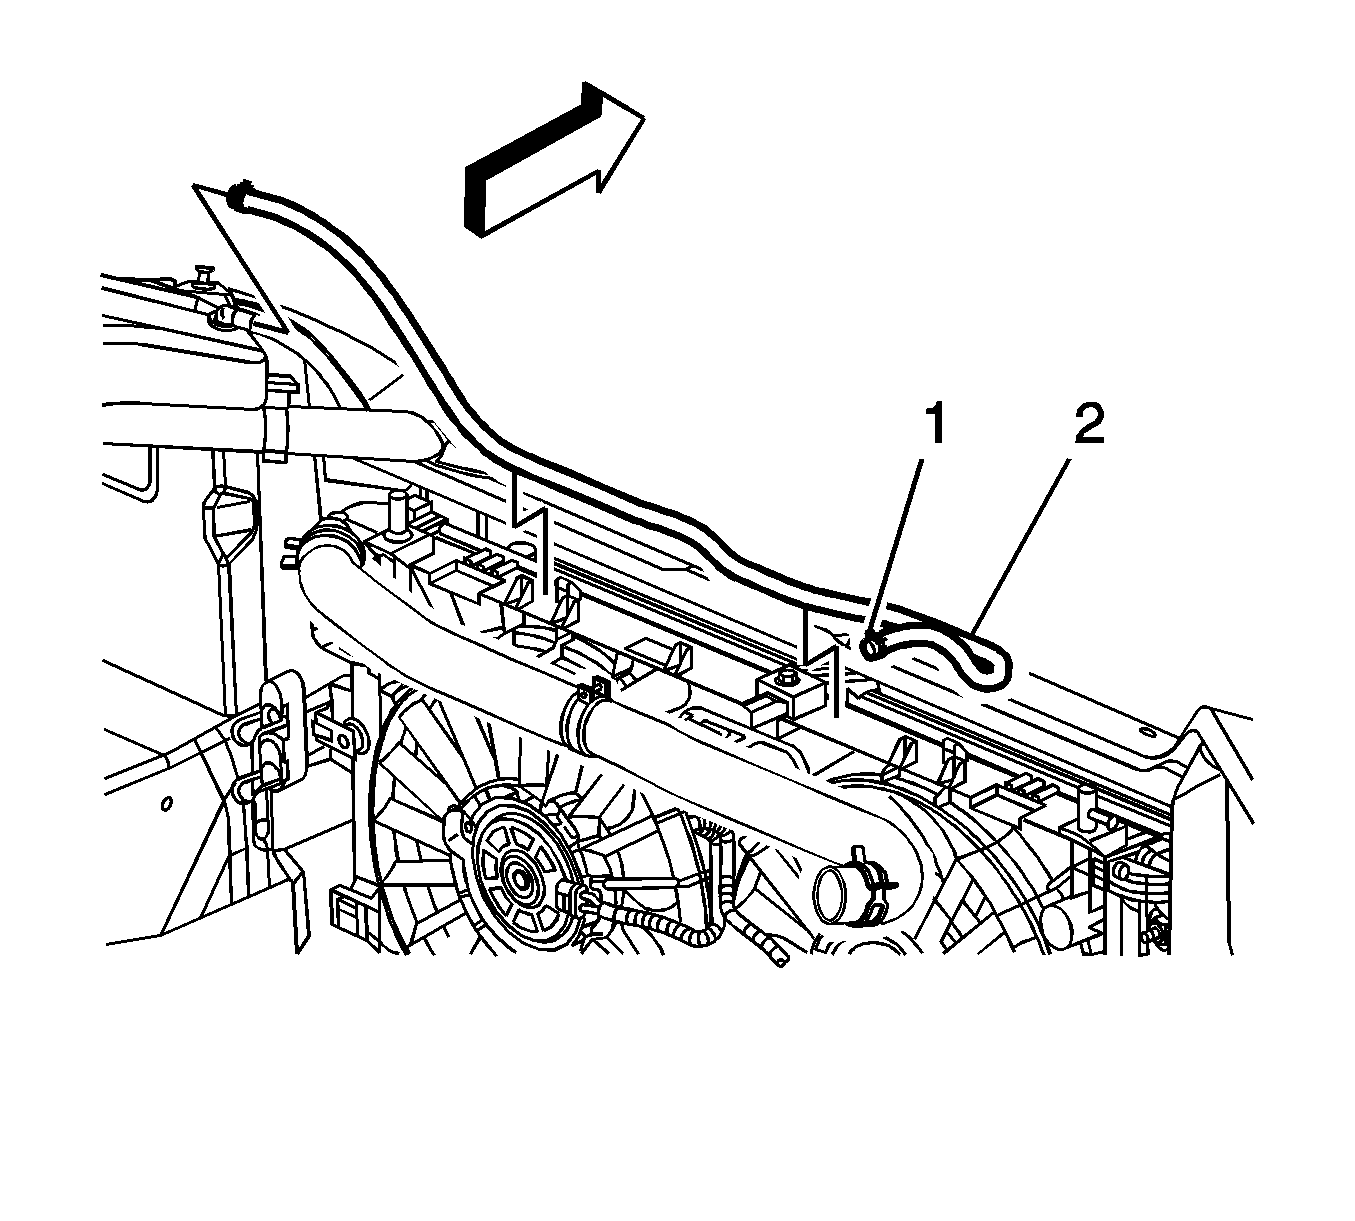
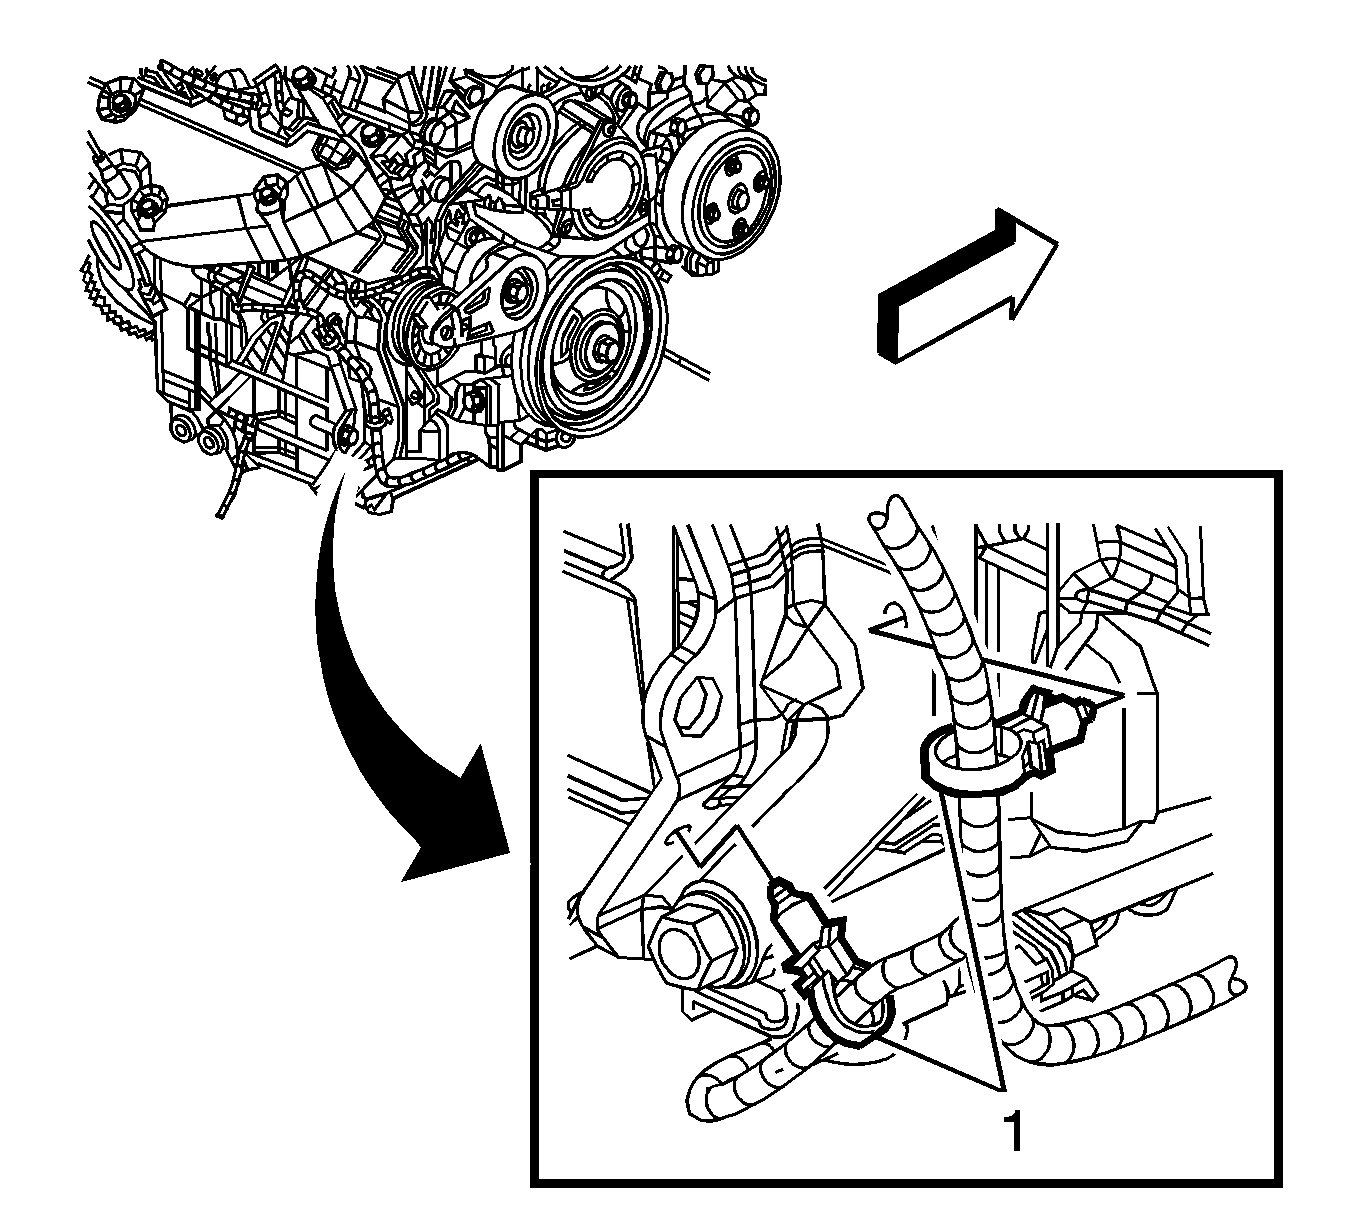
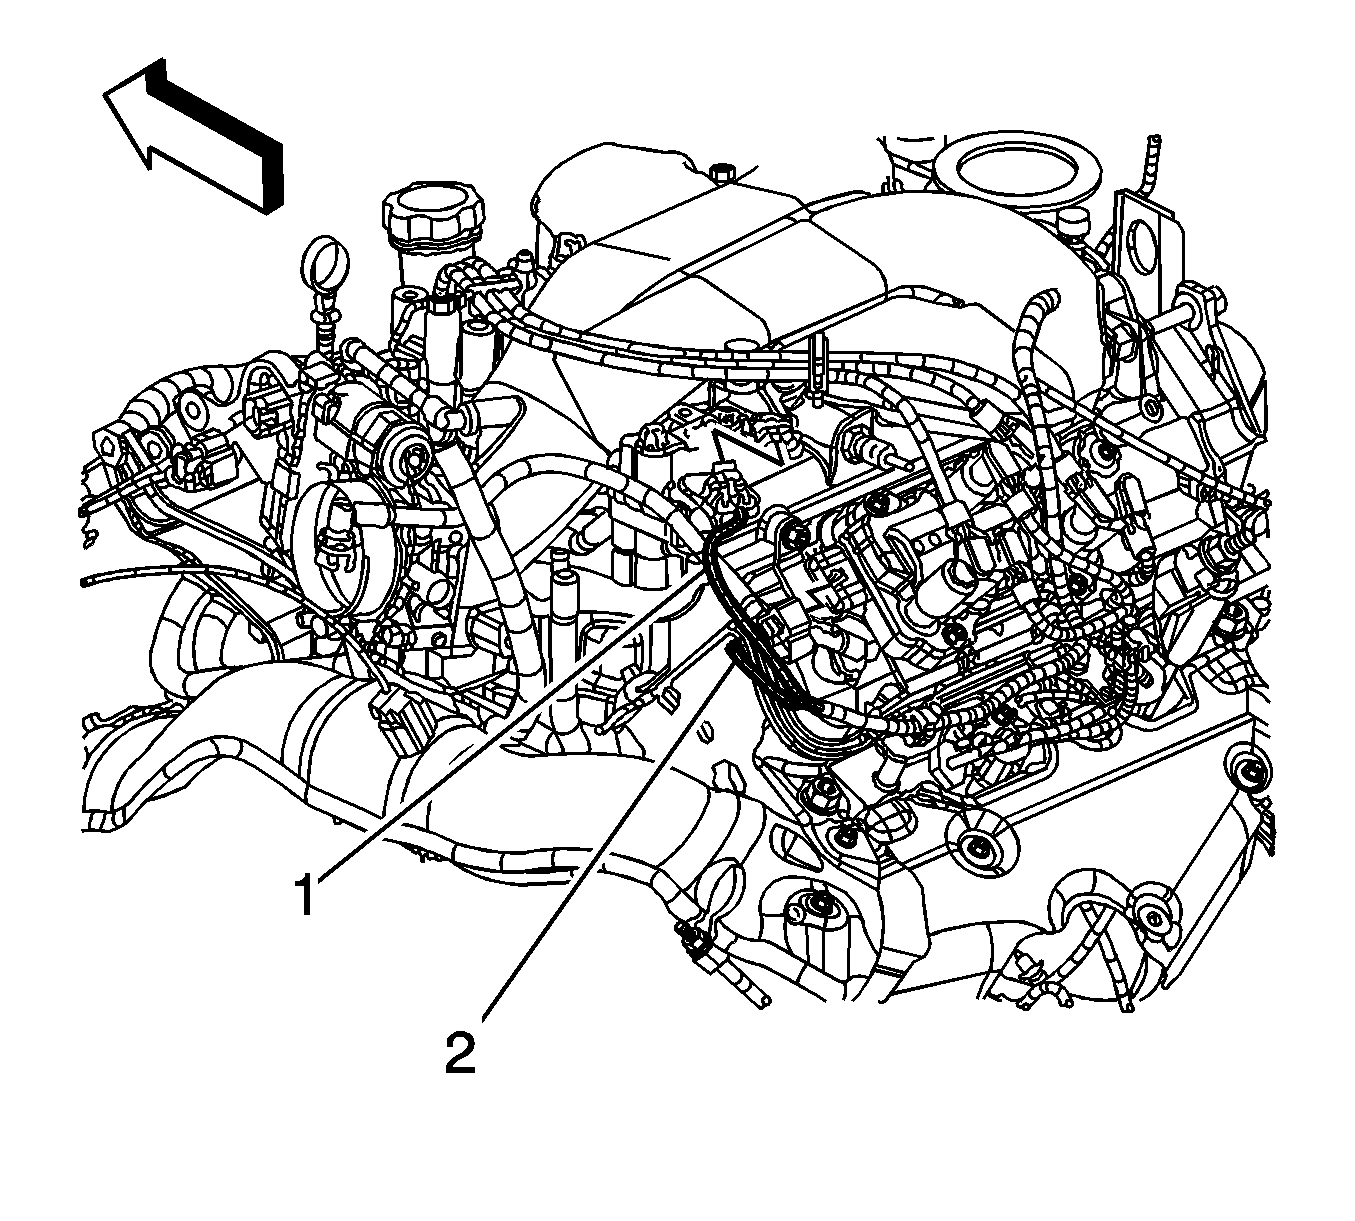
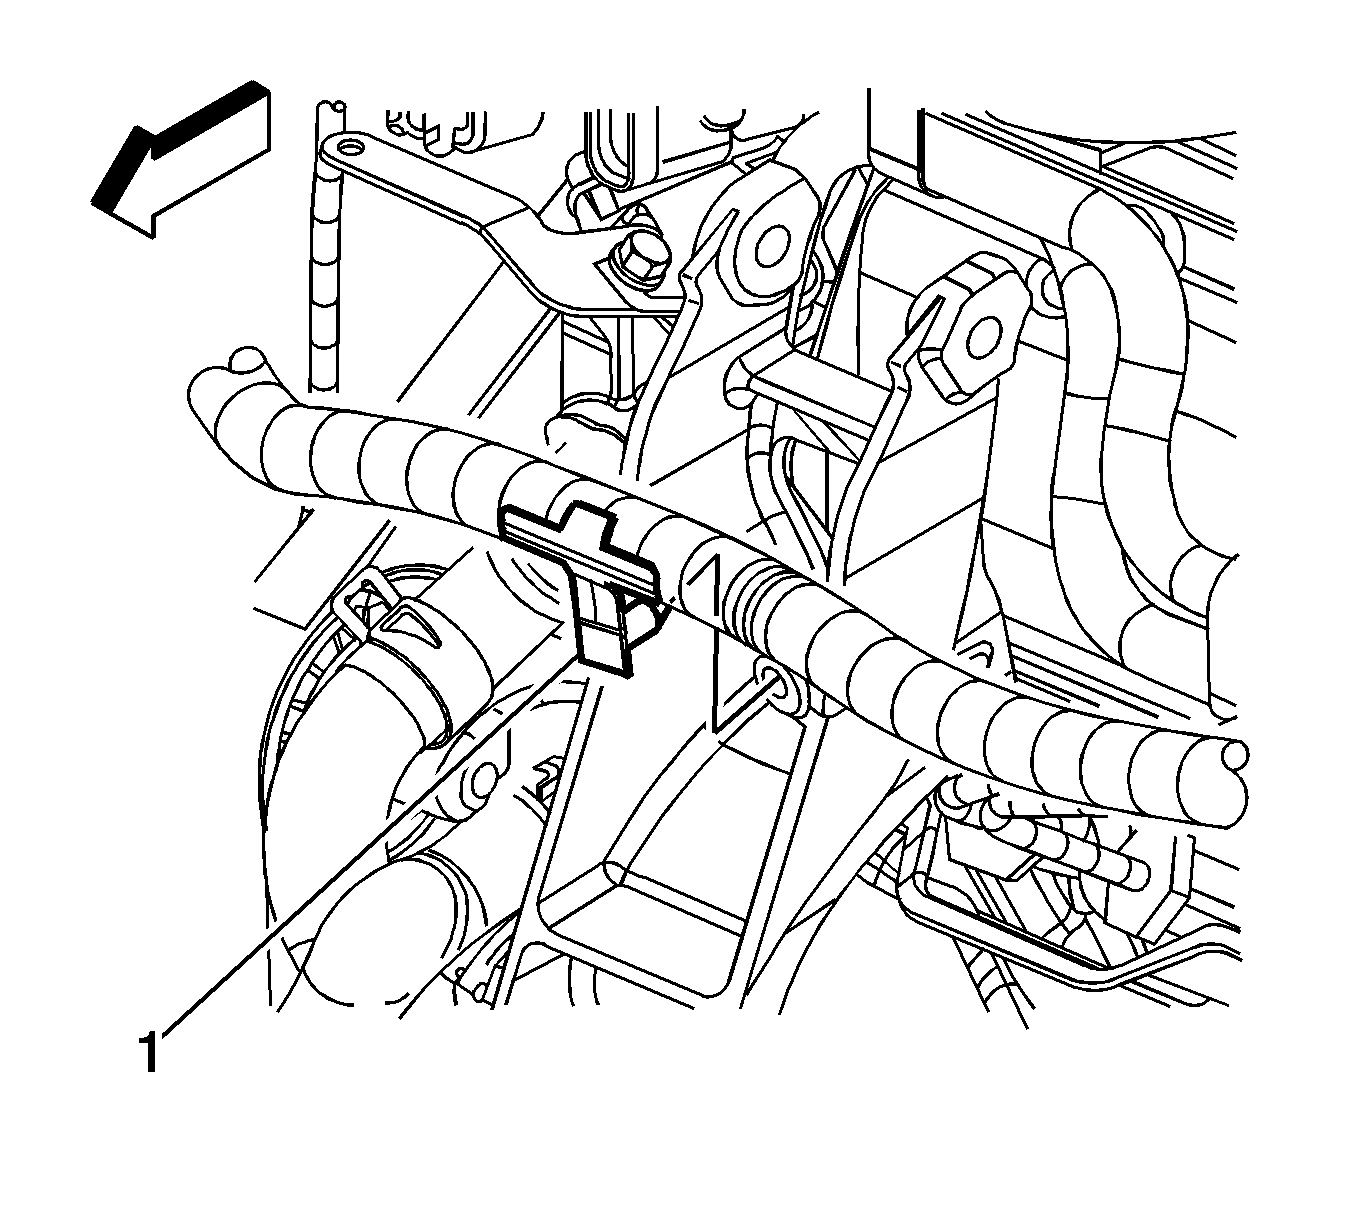
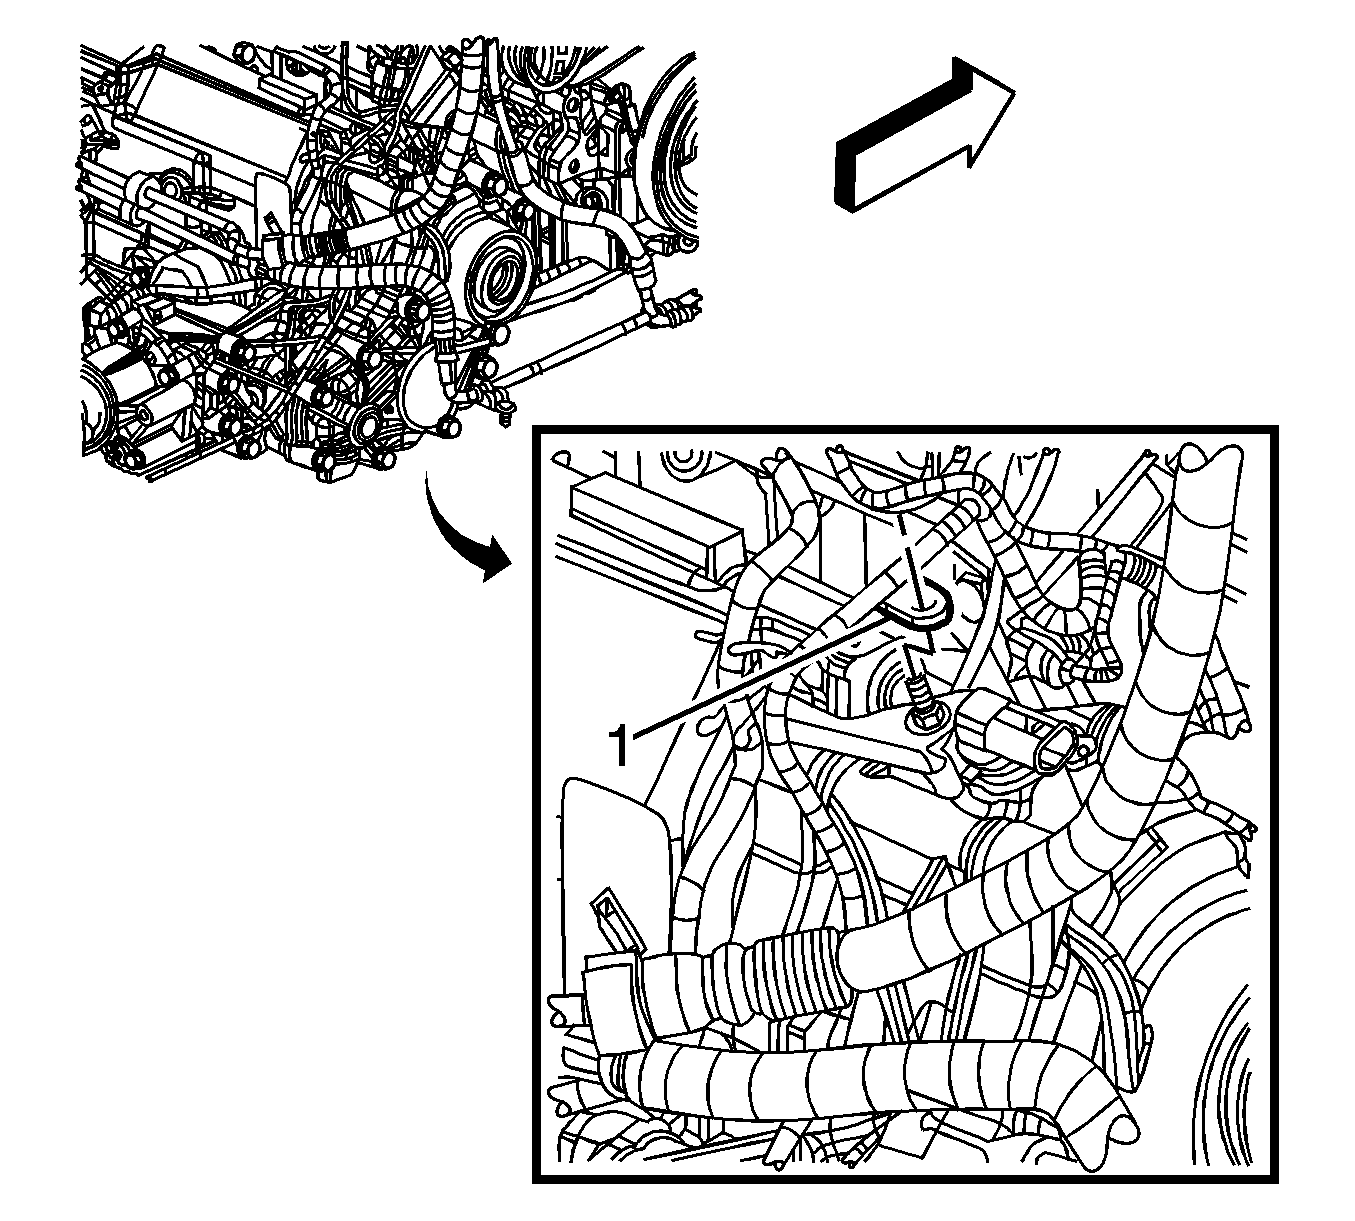
- Reposition the coolant recovery reservoir hose clamp (1) at the coolant crossover.
- Remove the coolant recovery reservoir hose (2) from the crossover.
- Remove the coolant reservoir. Refer to Coolant Recovery Reservoir Replacement .
- Remove the left side diagonal brace. Refer to Front End Sheet Metal Diagonal Brace Replacement .
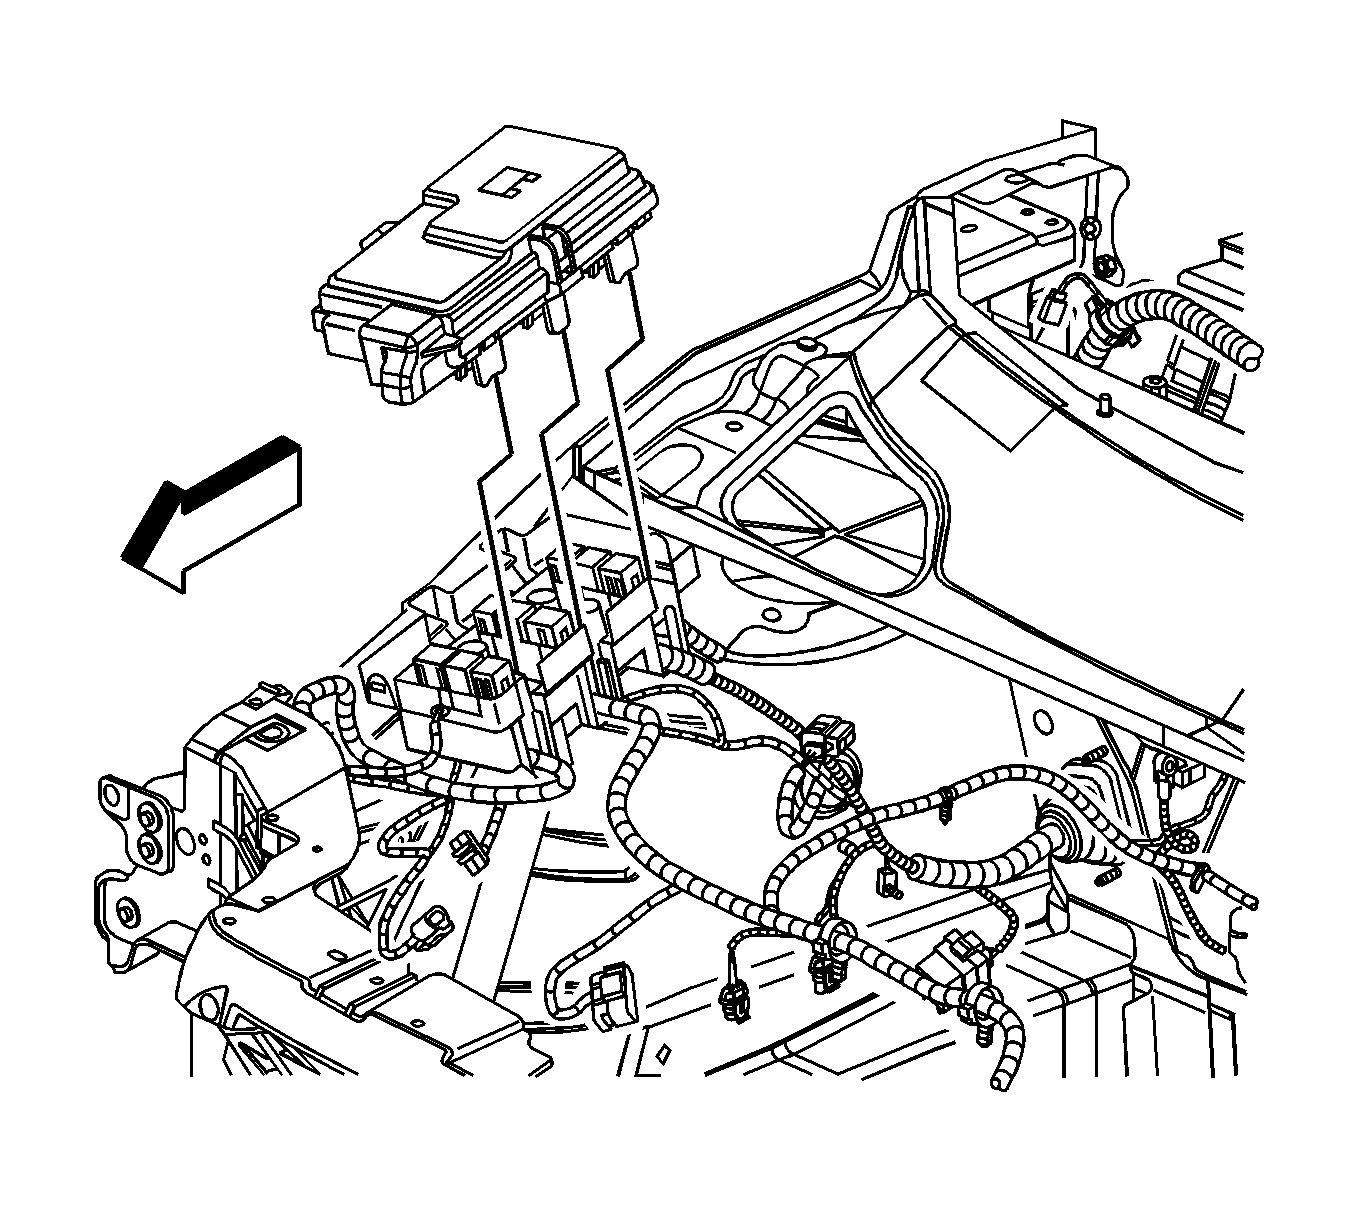
- Unsnap and remove the junction block cover.
- Loosen the air cleaner cover bolts.
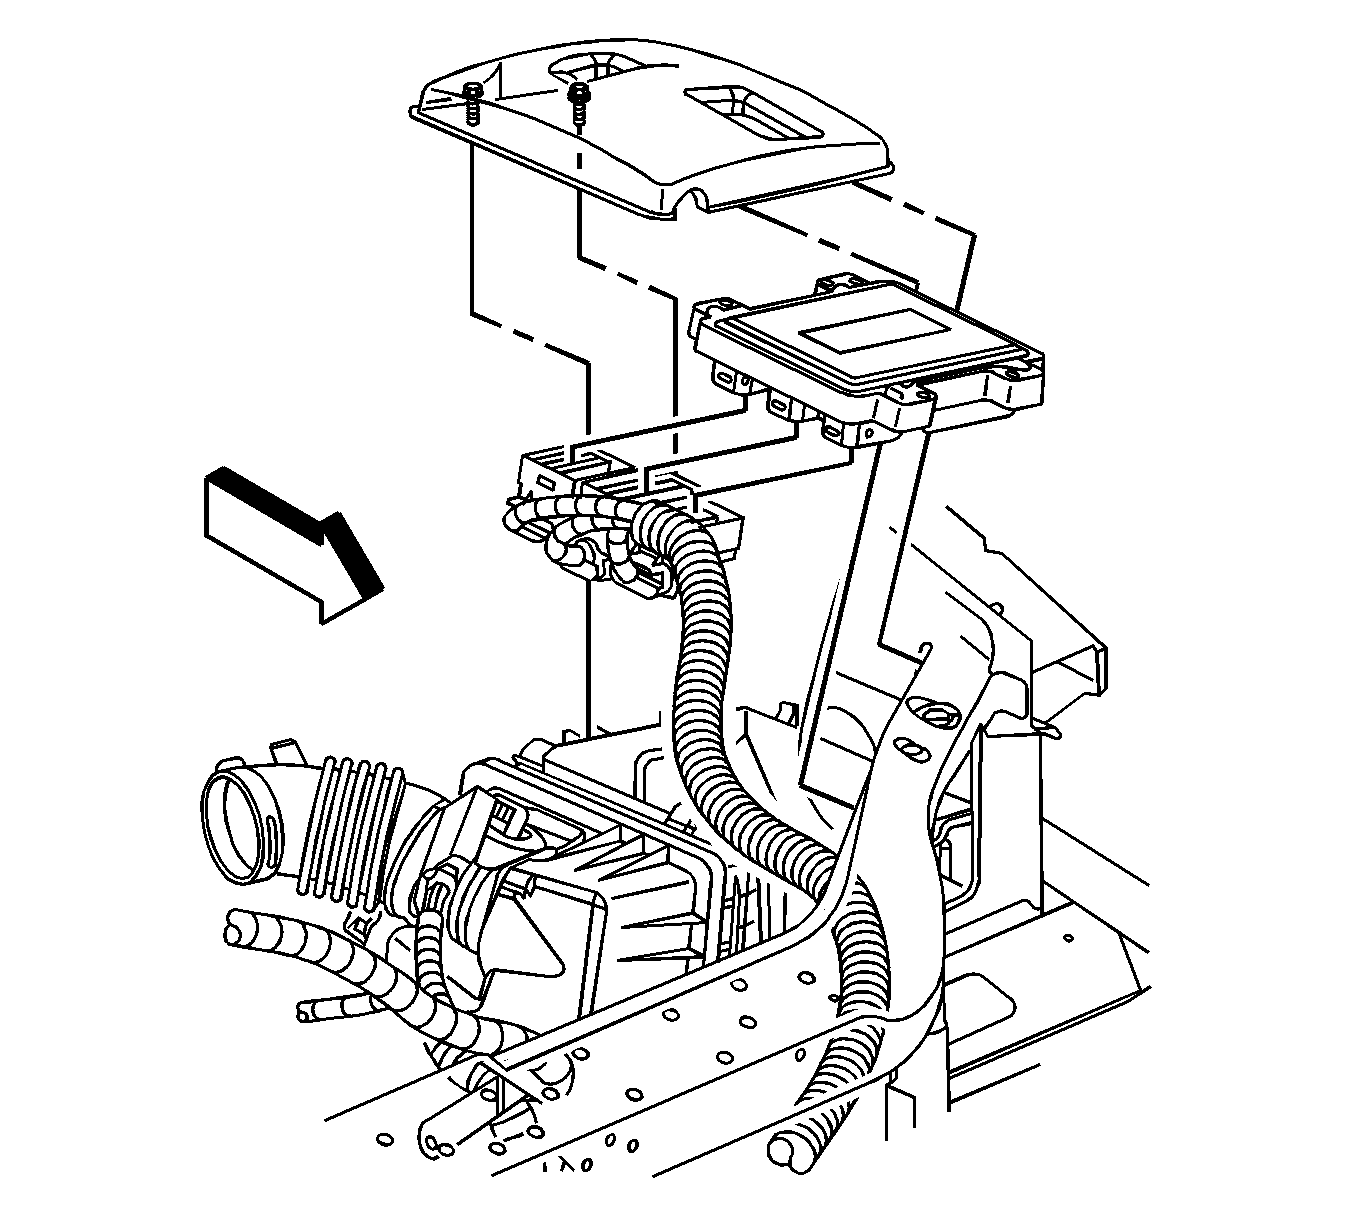
- Remove the air cleaner cover.
- Remove the engine control module (ECM) from the air cleaner cover.
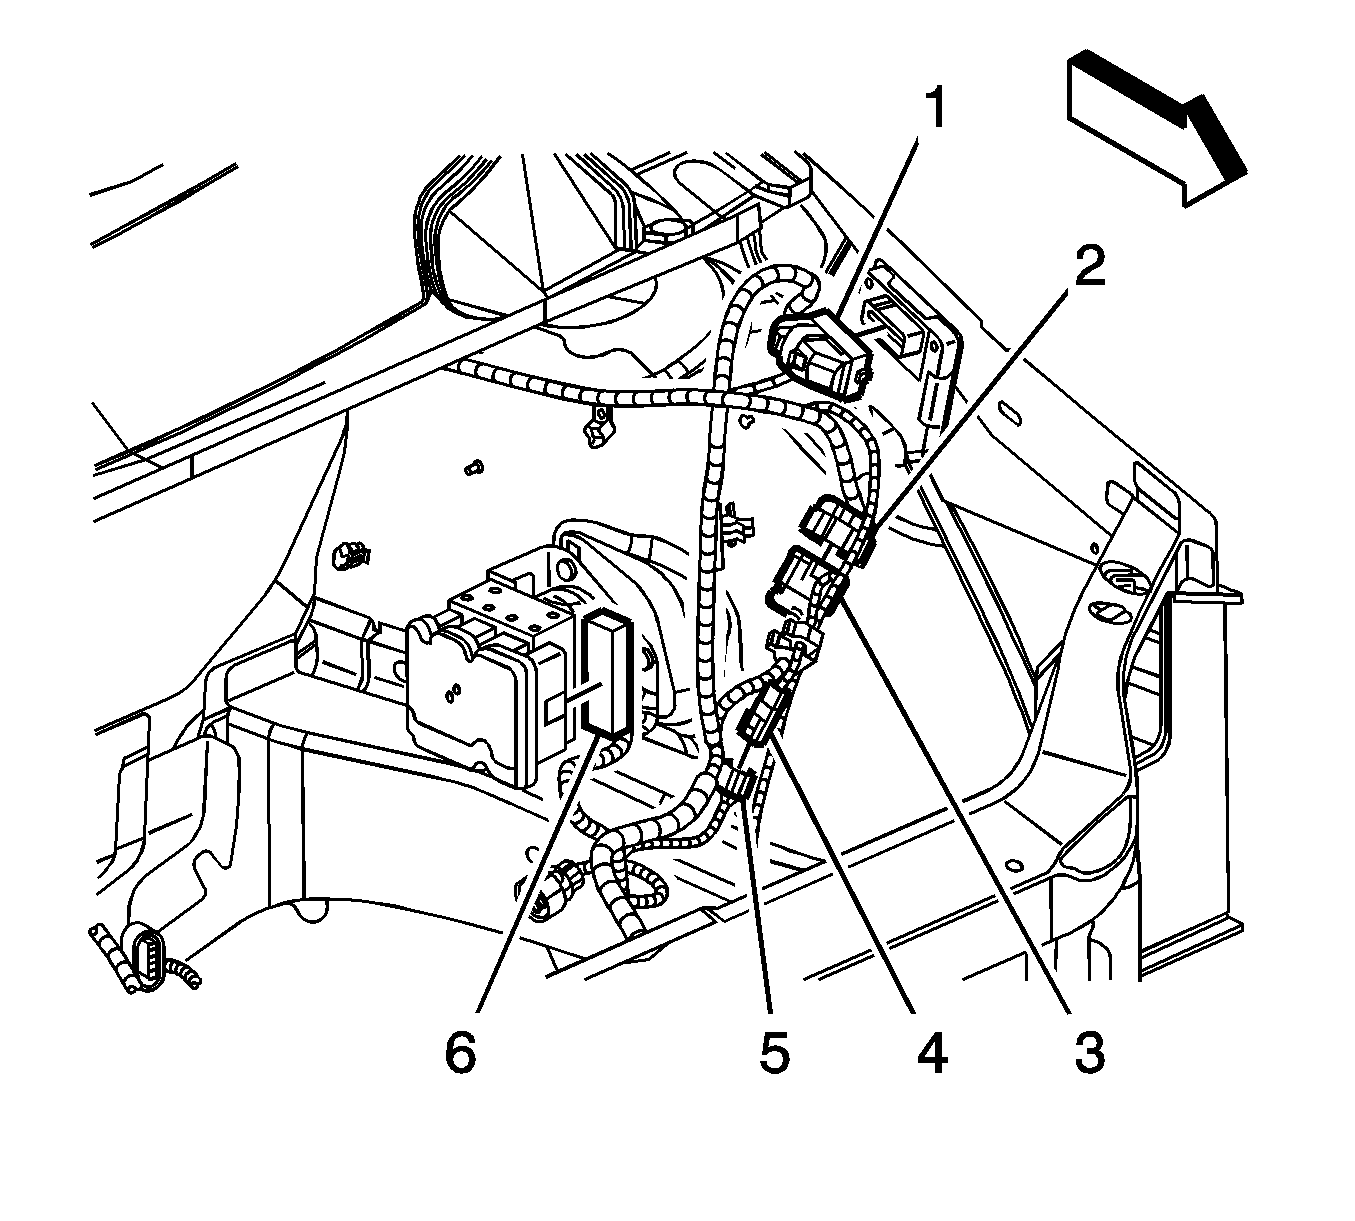
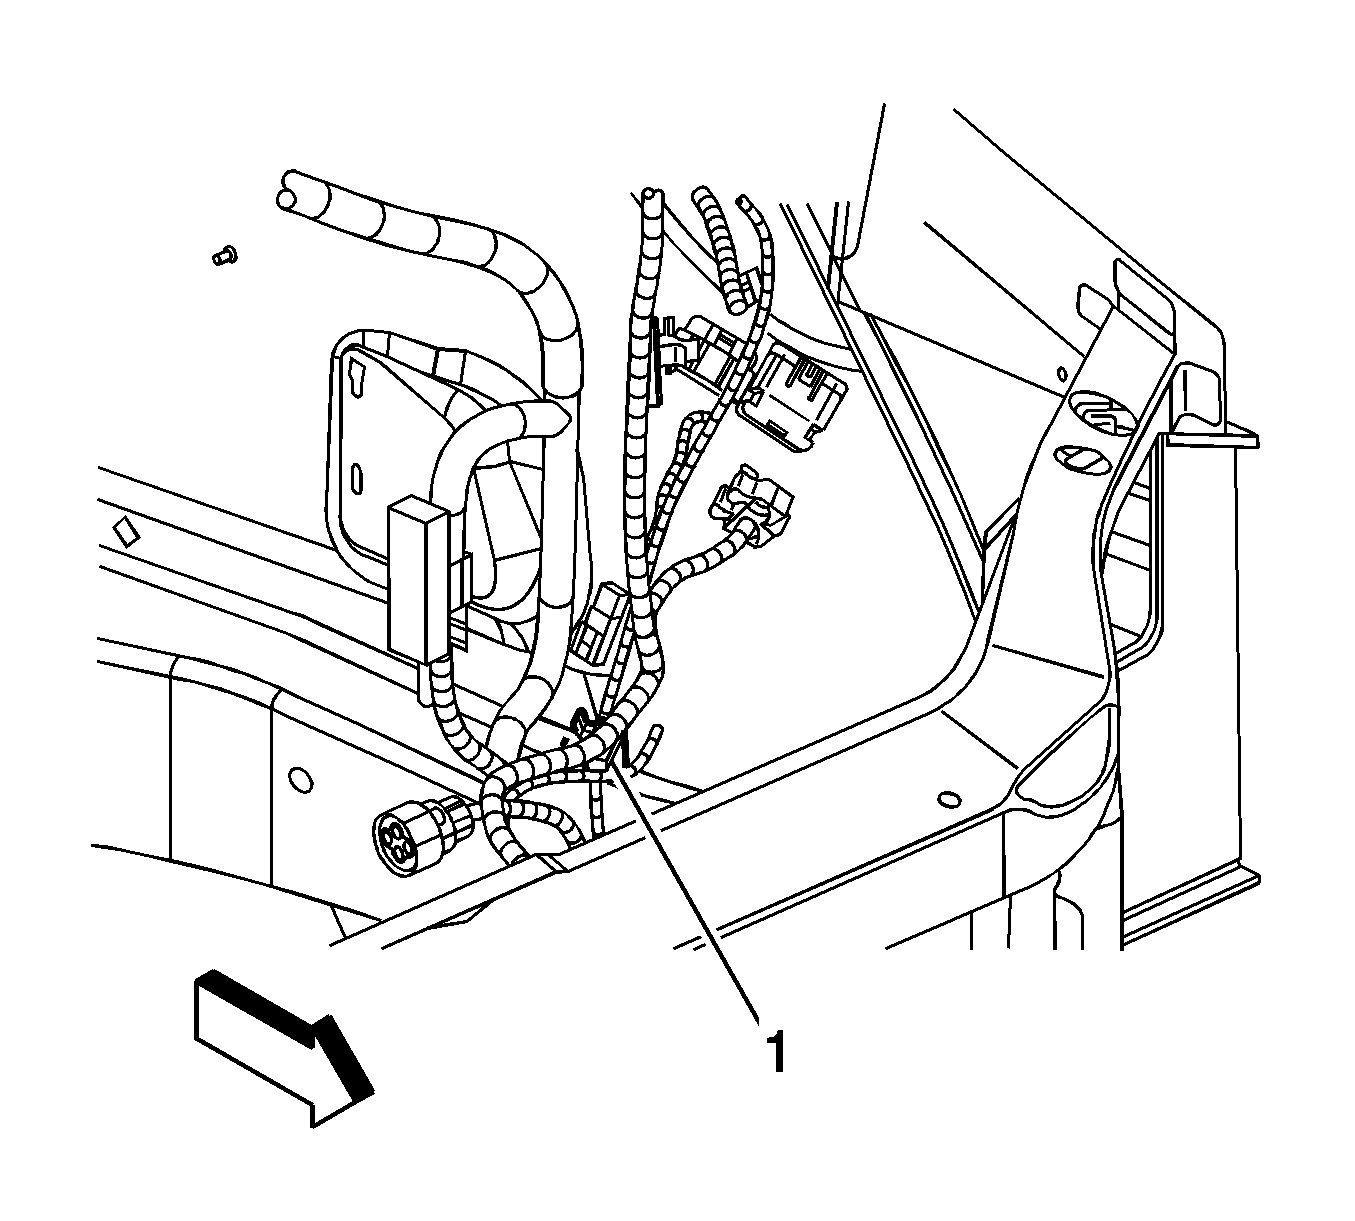
- Disconnect the engine harness electrical connector (1) from the transaxle control module (TCM).
- Disconnect the engine harness electrical connector (3) from the instrument panel (I/P) harness electrical connector (2).
- Disconnect the engine harness electrical connector (5) from the I/P harness electrical connector (4).
- Disconnect the engine harness electrical connector (6) from the ABS module.
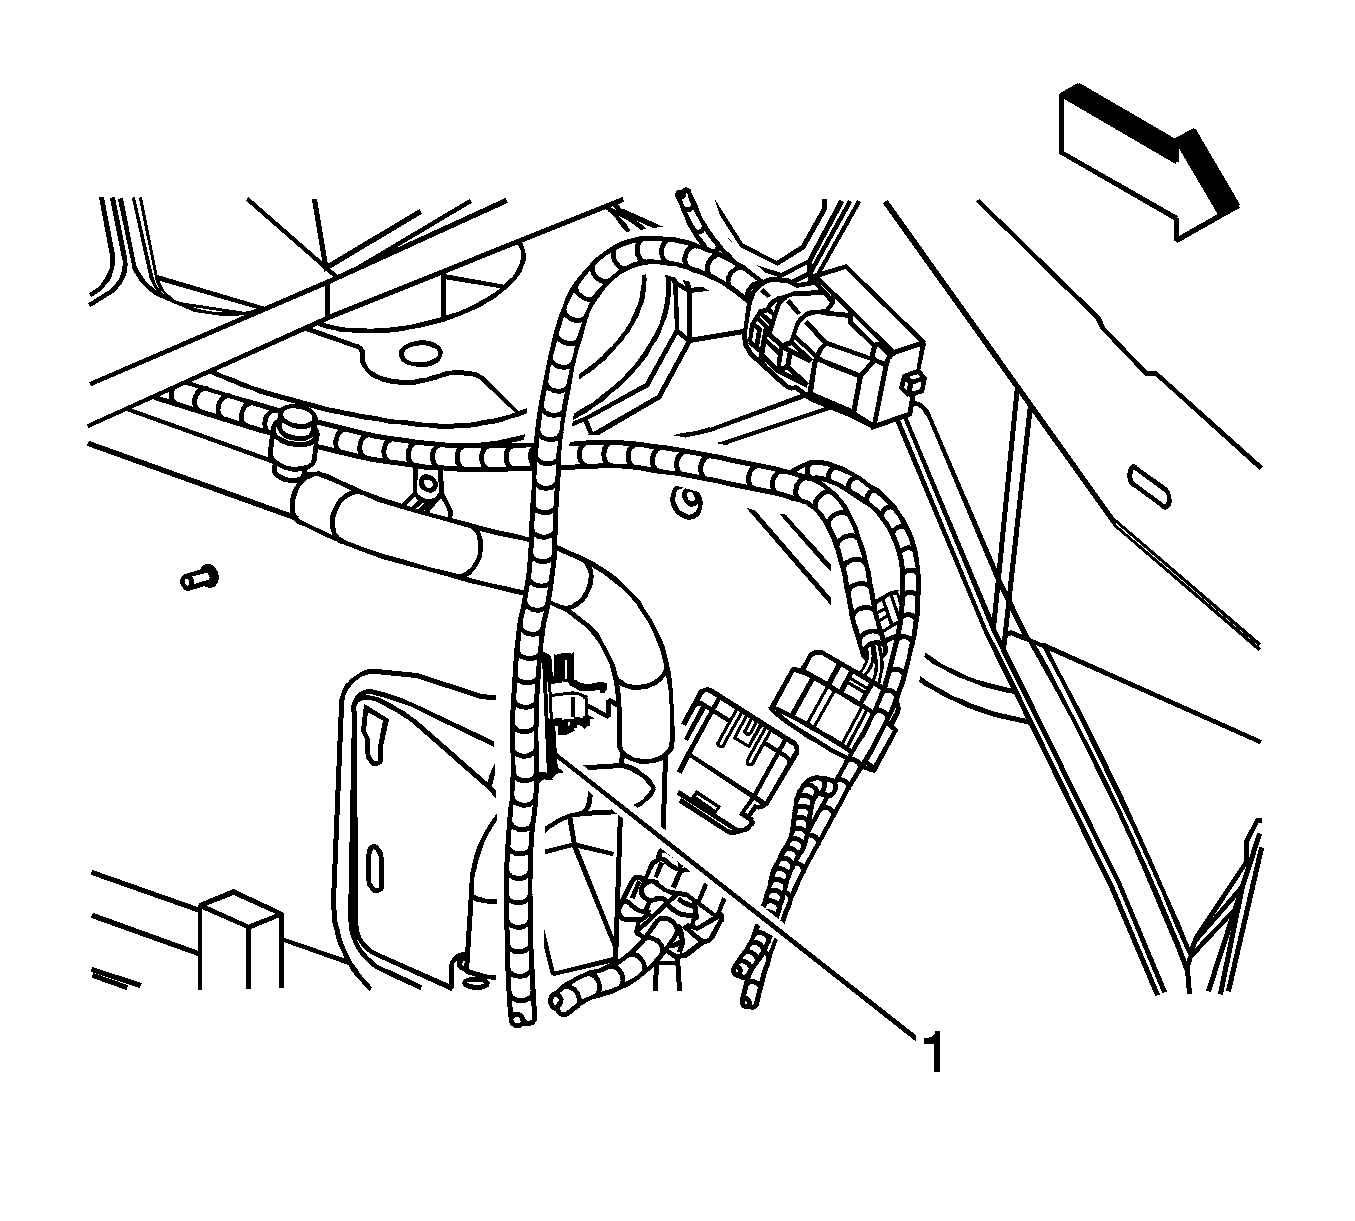
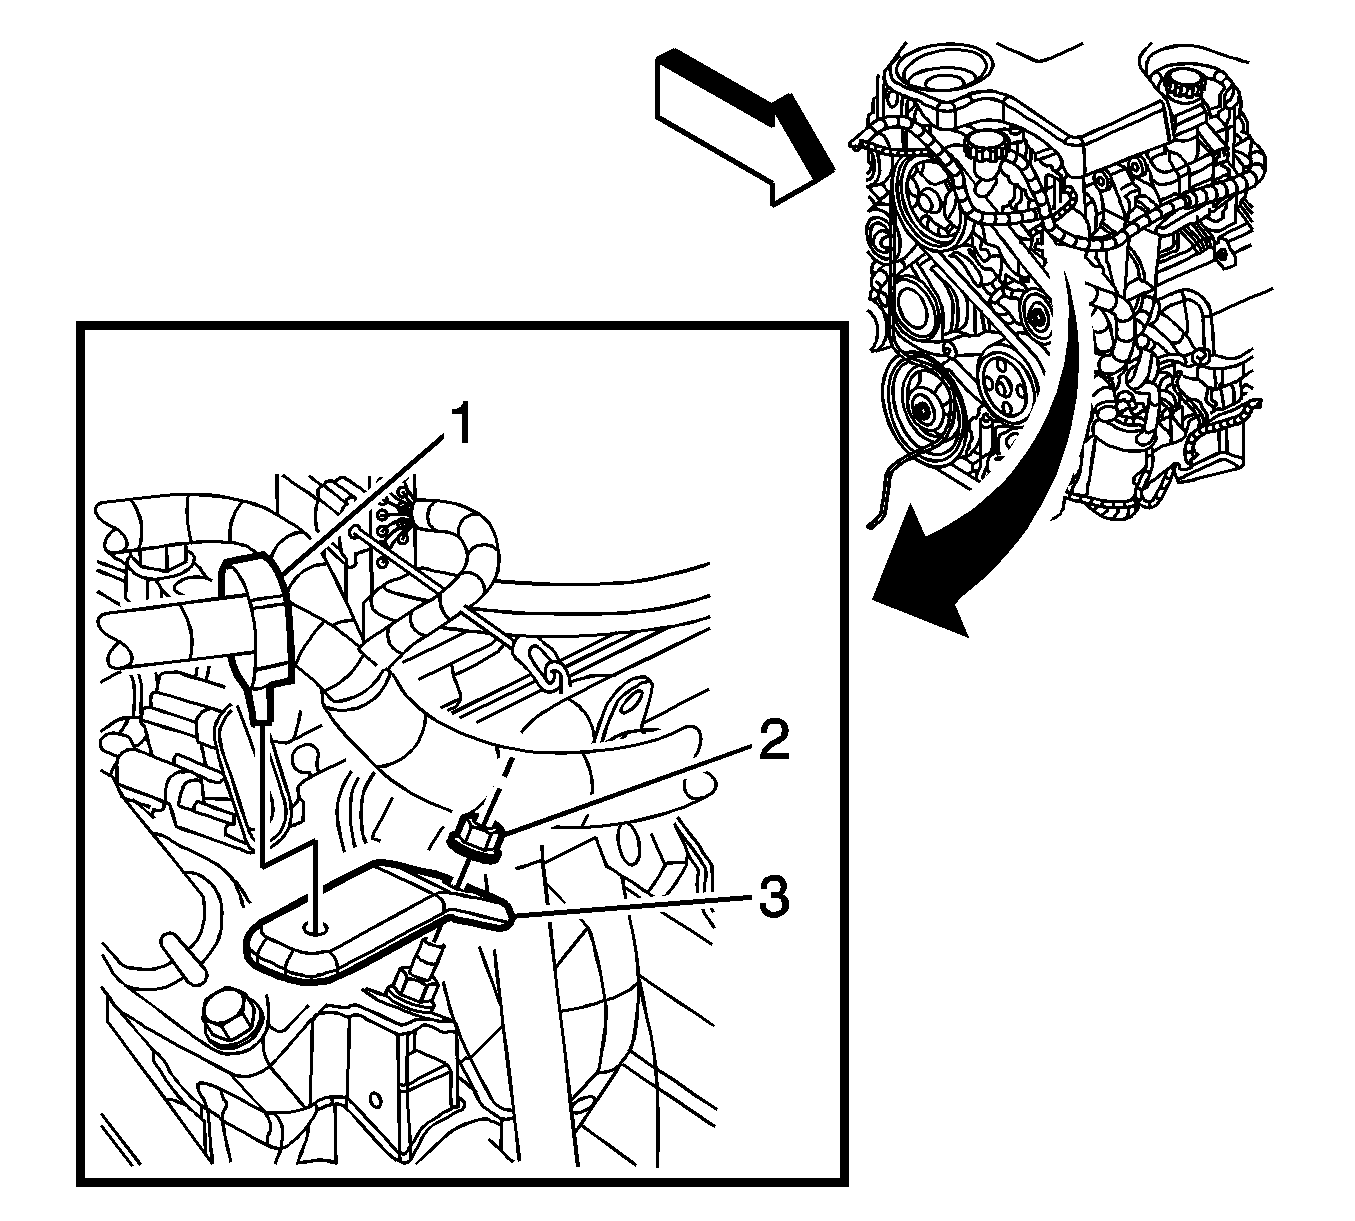
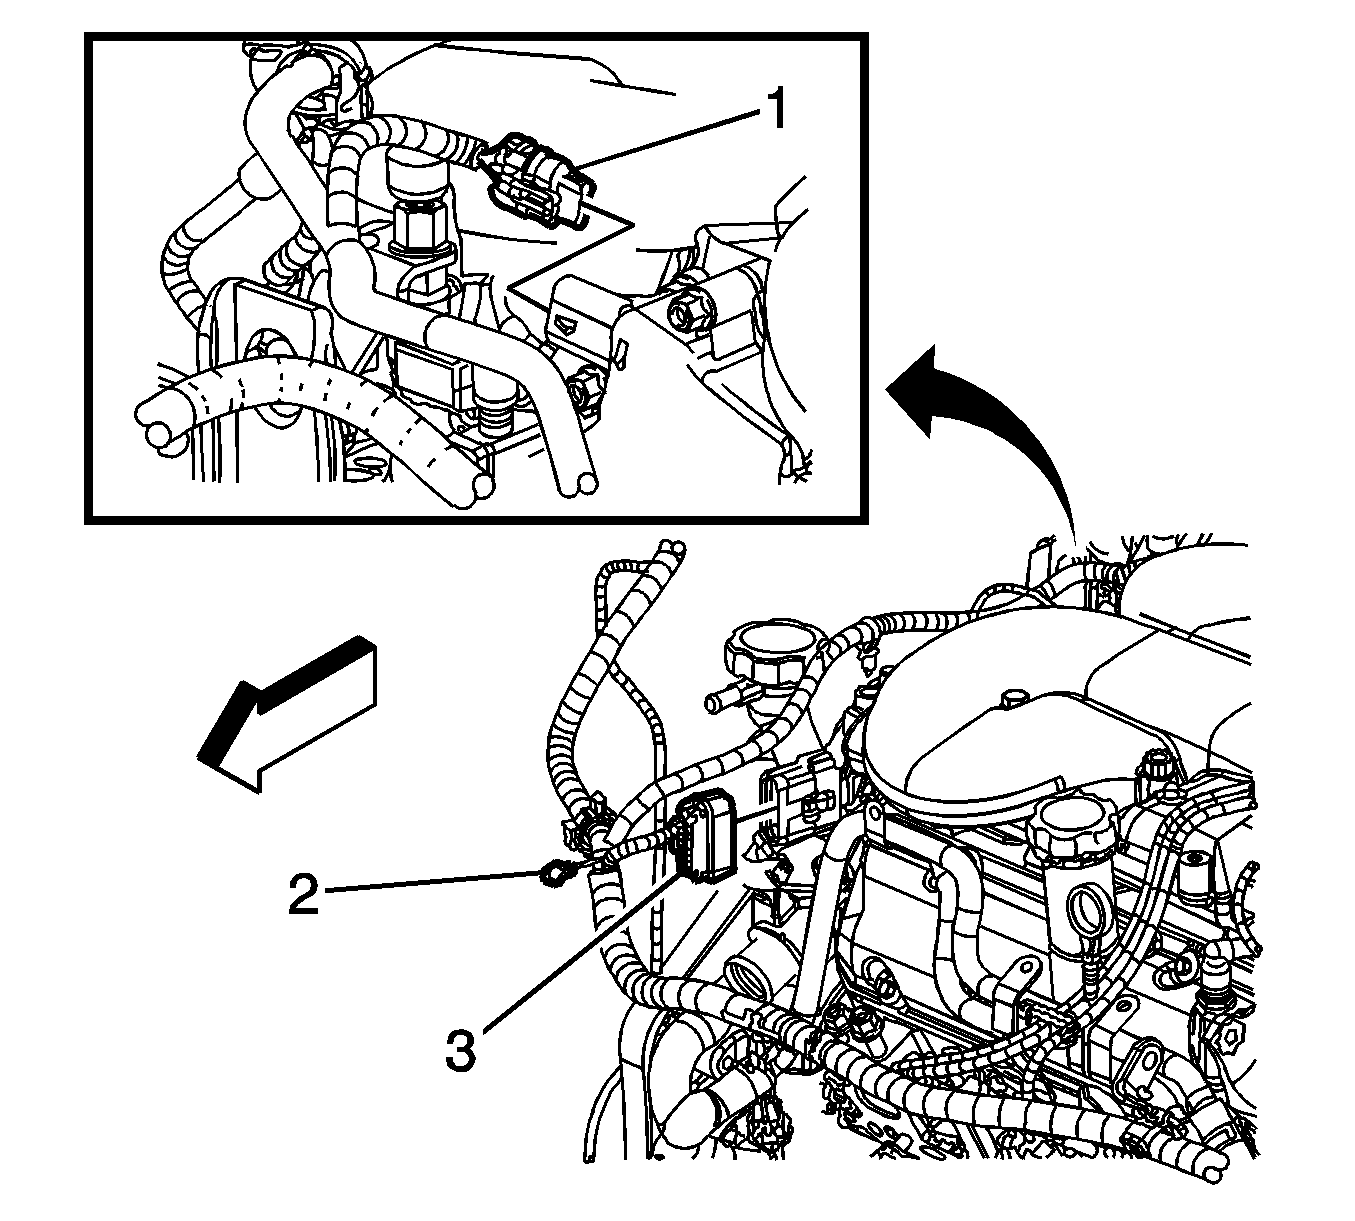
- Remove the engine harness clip (1) from the air conditioning (A/C) line.
- Remove the engine harness clip (1) from the A/C line.
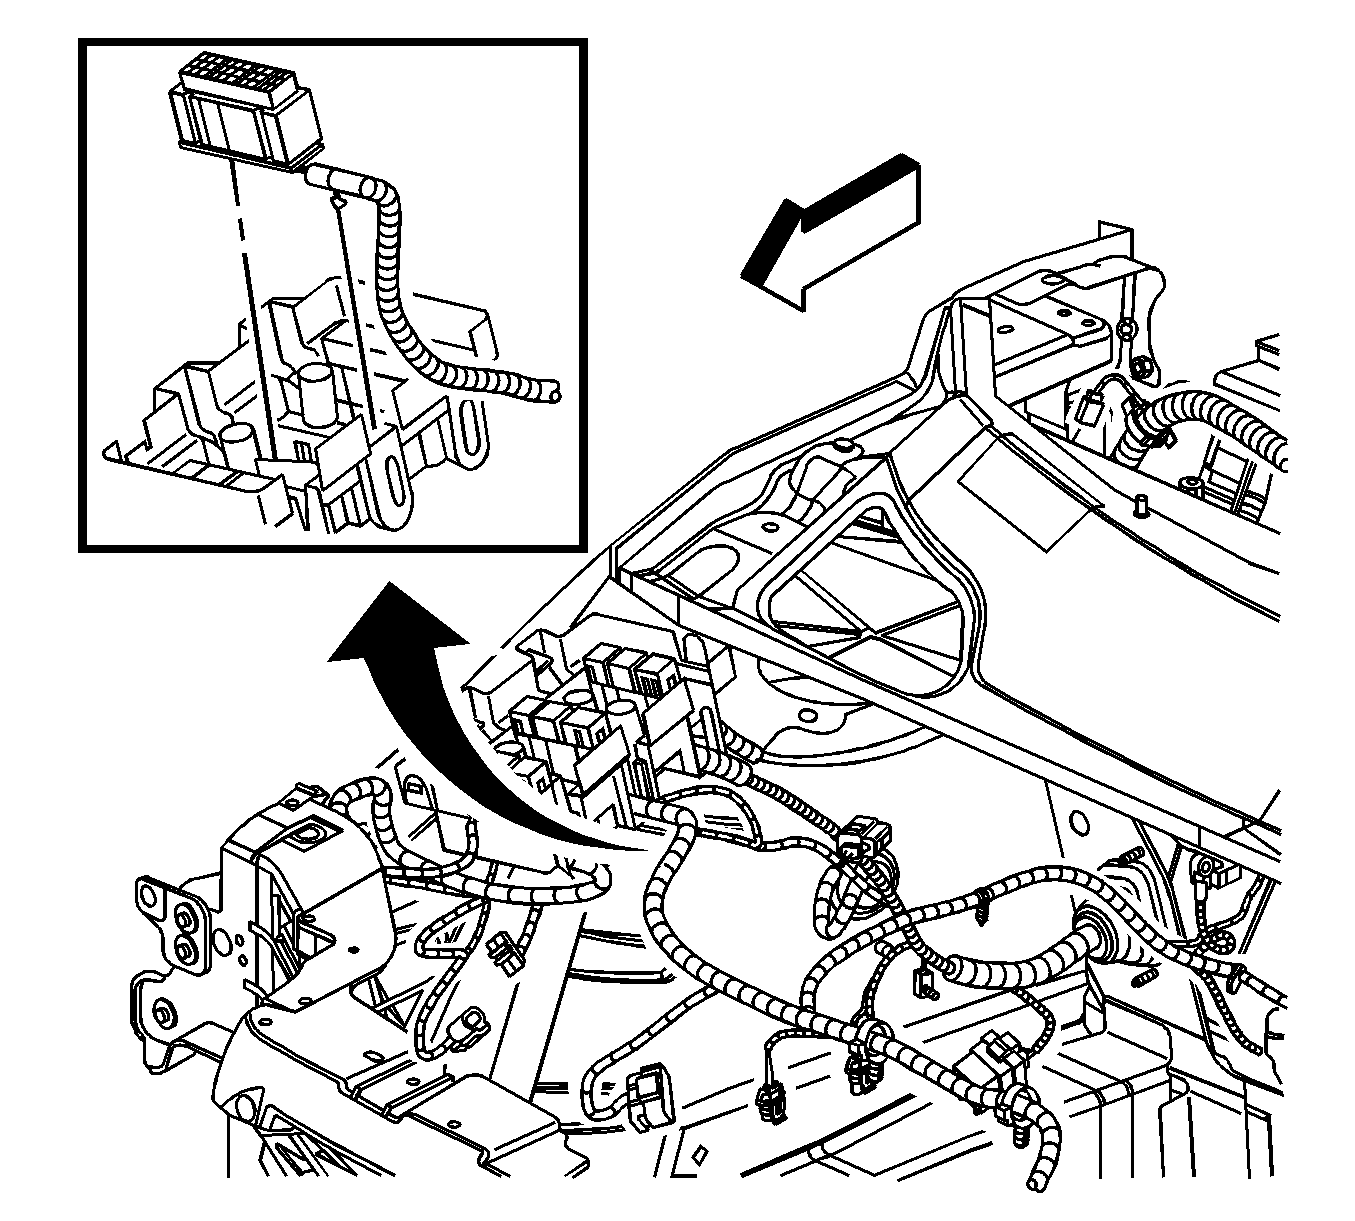
- Remove the underhood junction. Refer to Underhood Electrical Center or Junction Block Replacement .
- Unsnap and remove the engine harness connector from the junction block retainer.
- Disconnect the engine harness electrical connector from the mass air flow (MAF)/intake air temperature (IAT) sensor.
- Disconnect the positive crankcase ventilation (PCV) fresh air tube quick connect fitting from the air cleaner outlet duct. Refer to Plastic Collar Quick Connect Fitting Service .
- Loosen the air cleaner outlet duct clamps at the throttle body and the MAF/IAT sensor.
- Remove the air cleaner outlet duct from the throttle body and MAF/IAT sensor.
- Gather the outer branches of the engine harness and lay them on top of the engine.
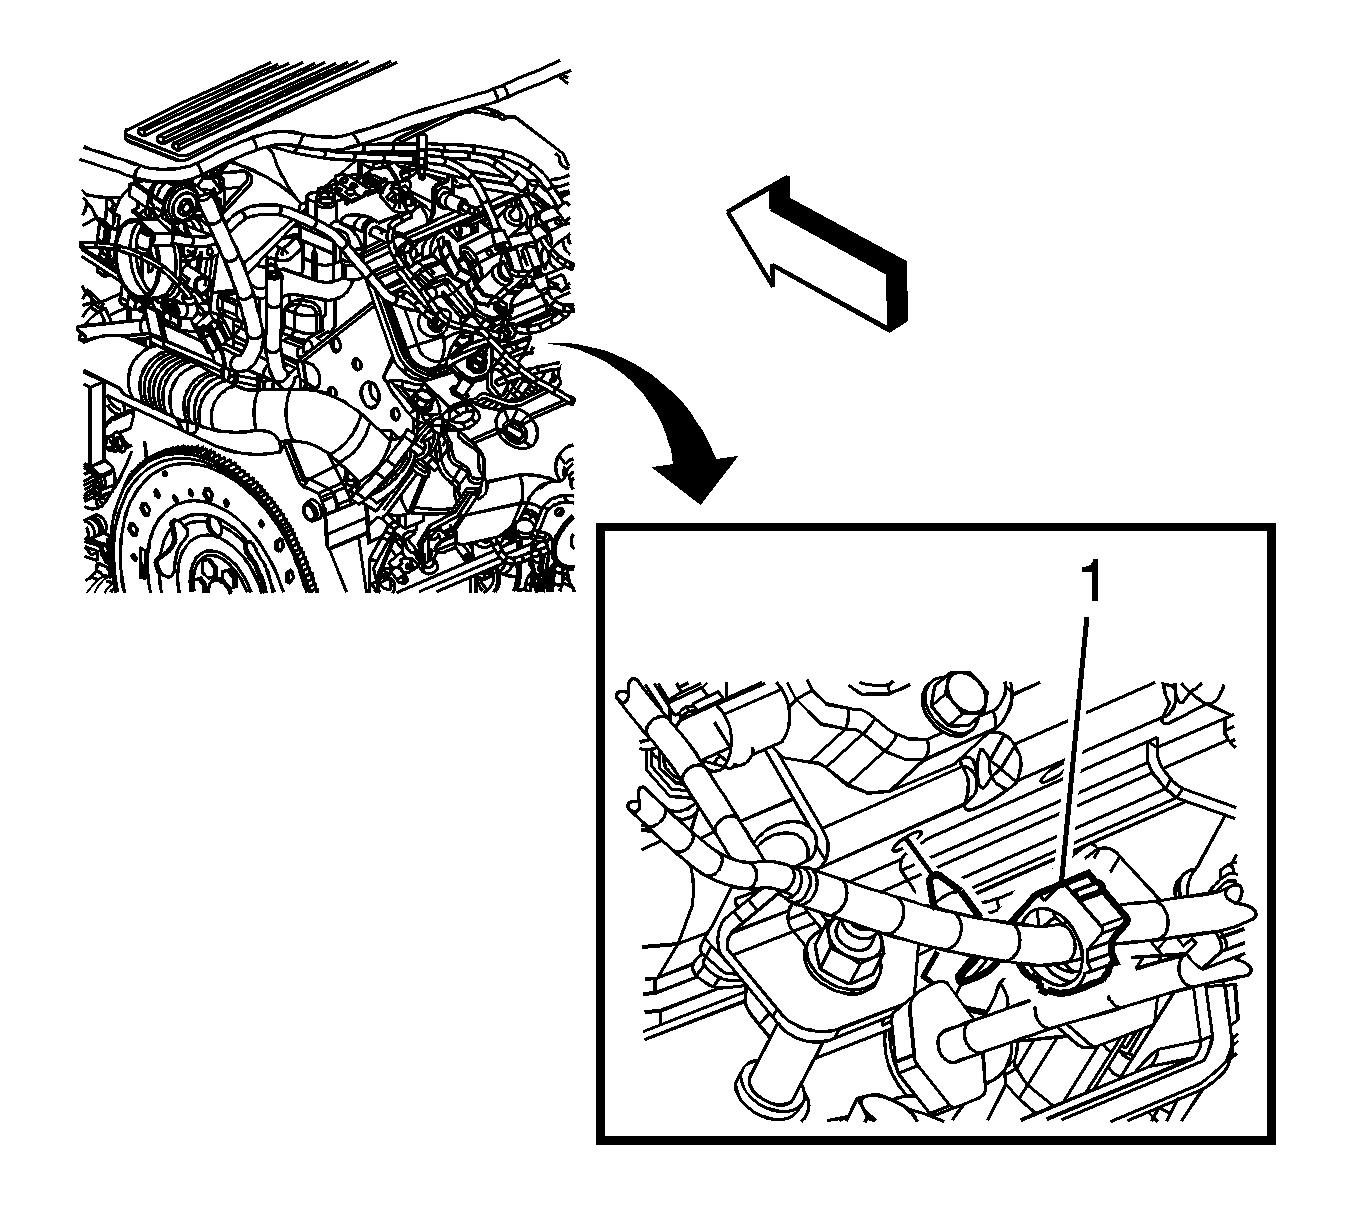
- Using the J 38185 , release the tension on the radiator inlet hose clamp and reposition the clamp.
- Remove the radiator inlet hose from the coolant crossover.
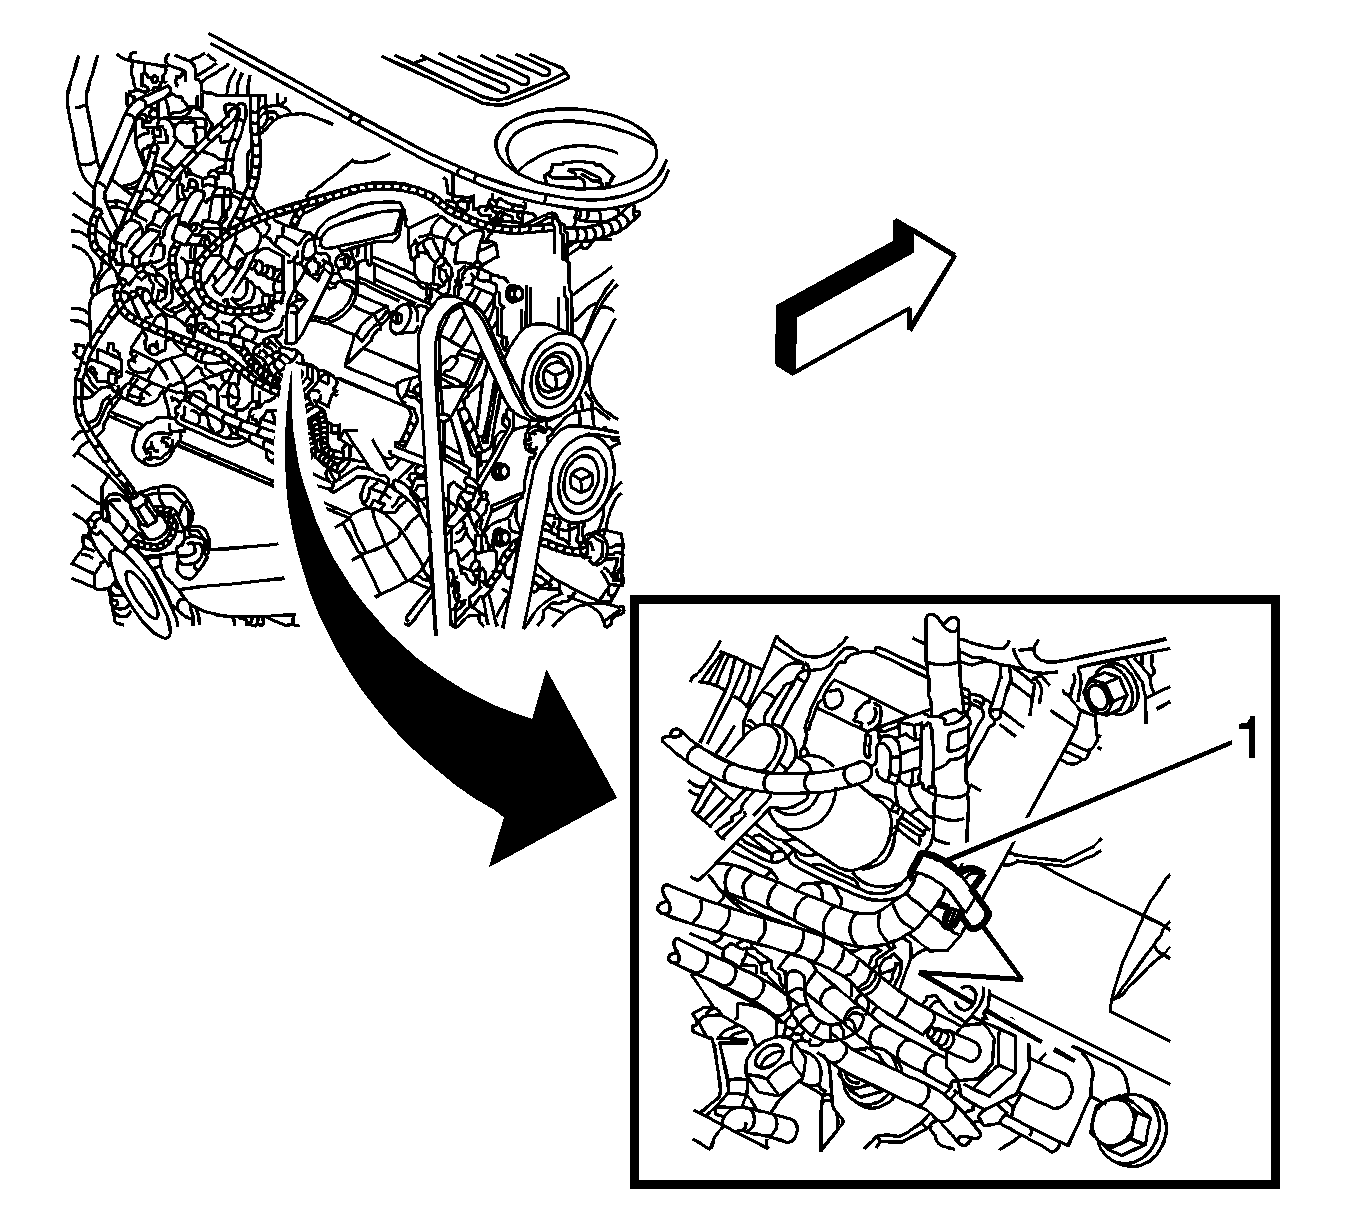
- Using the J 38185 , release the tension on the radiator outlet hose clamp and reposition the clamp.
- Remove the radiator outlet hose from the thermostat housing.
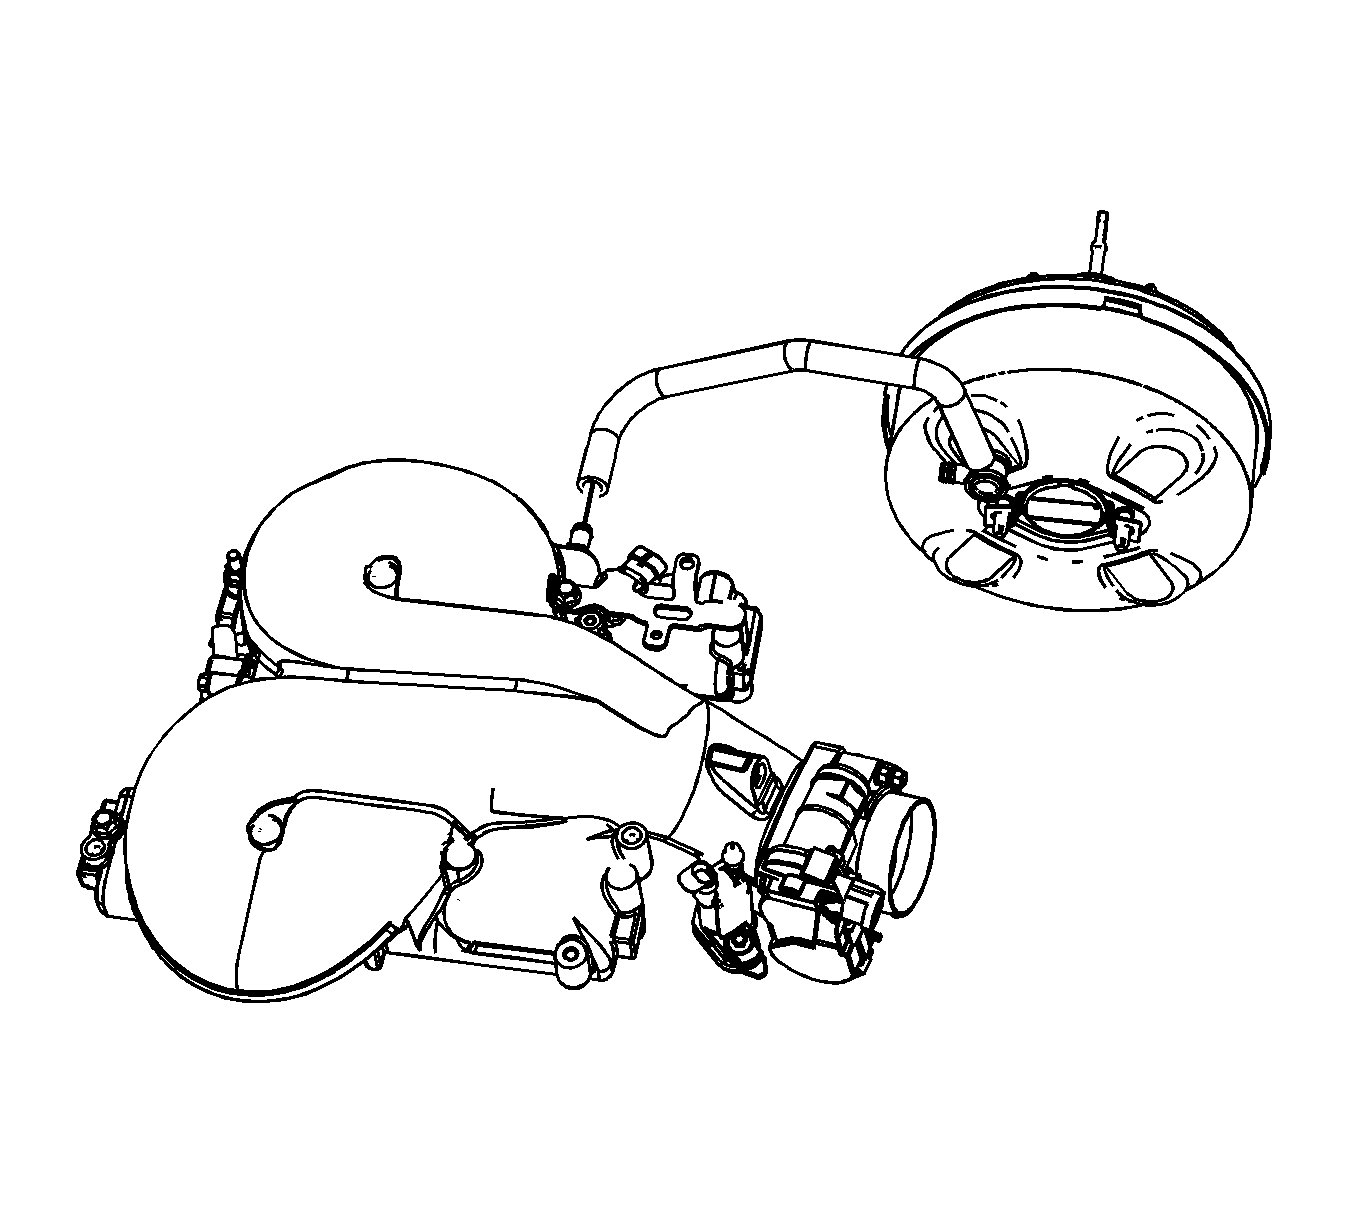
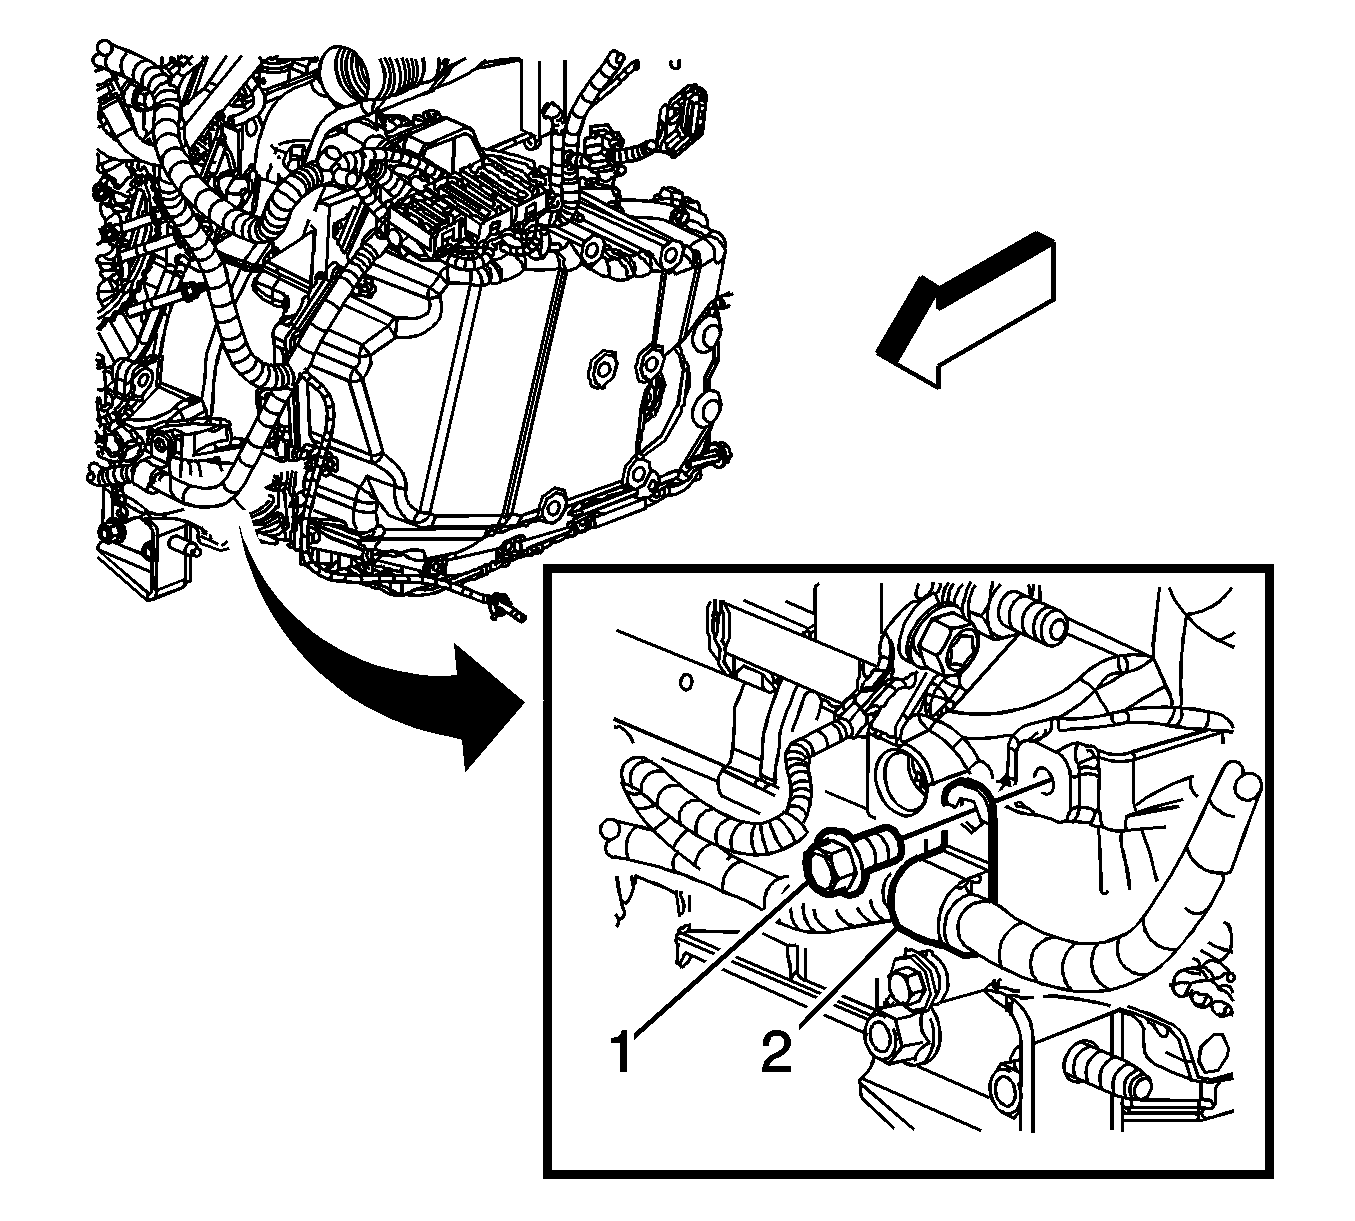
- Disconnect the heater inlet (2) and outlet (1) hose quick connect fittings from the inlet and outlet pipes.
- Remove the brake booster vacuum hose from the upper intake manifold fitting.
- Disconnect the fuel feed (1) and evaporative emission (EVAP) (2) line quick connect fittings. Refer to Metal Collar Quick Connect Fitting Service and Plastic Collar Quick Connect Fitting Service .
- Remove the engine mount struts. Refer to Engine Mount Strut Replacement - Right Side and Engine Mount Strut Bracket Replacement - Left Side .
- Drain the engine oil. Refer to Engine Oil and Oil Filter Replacement .
- Remove the front wheels and tires. Refer to Tire and Wheel Removal and Installation .
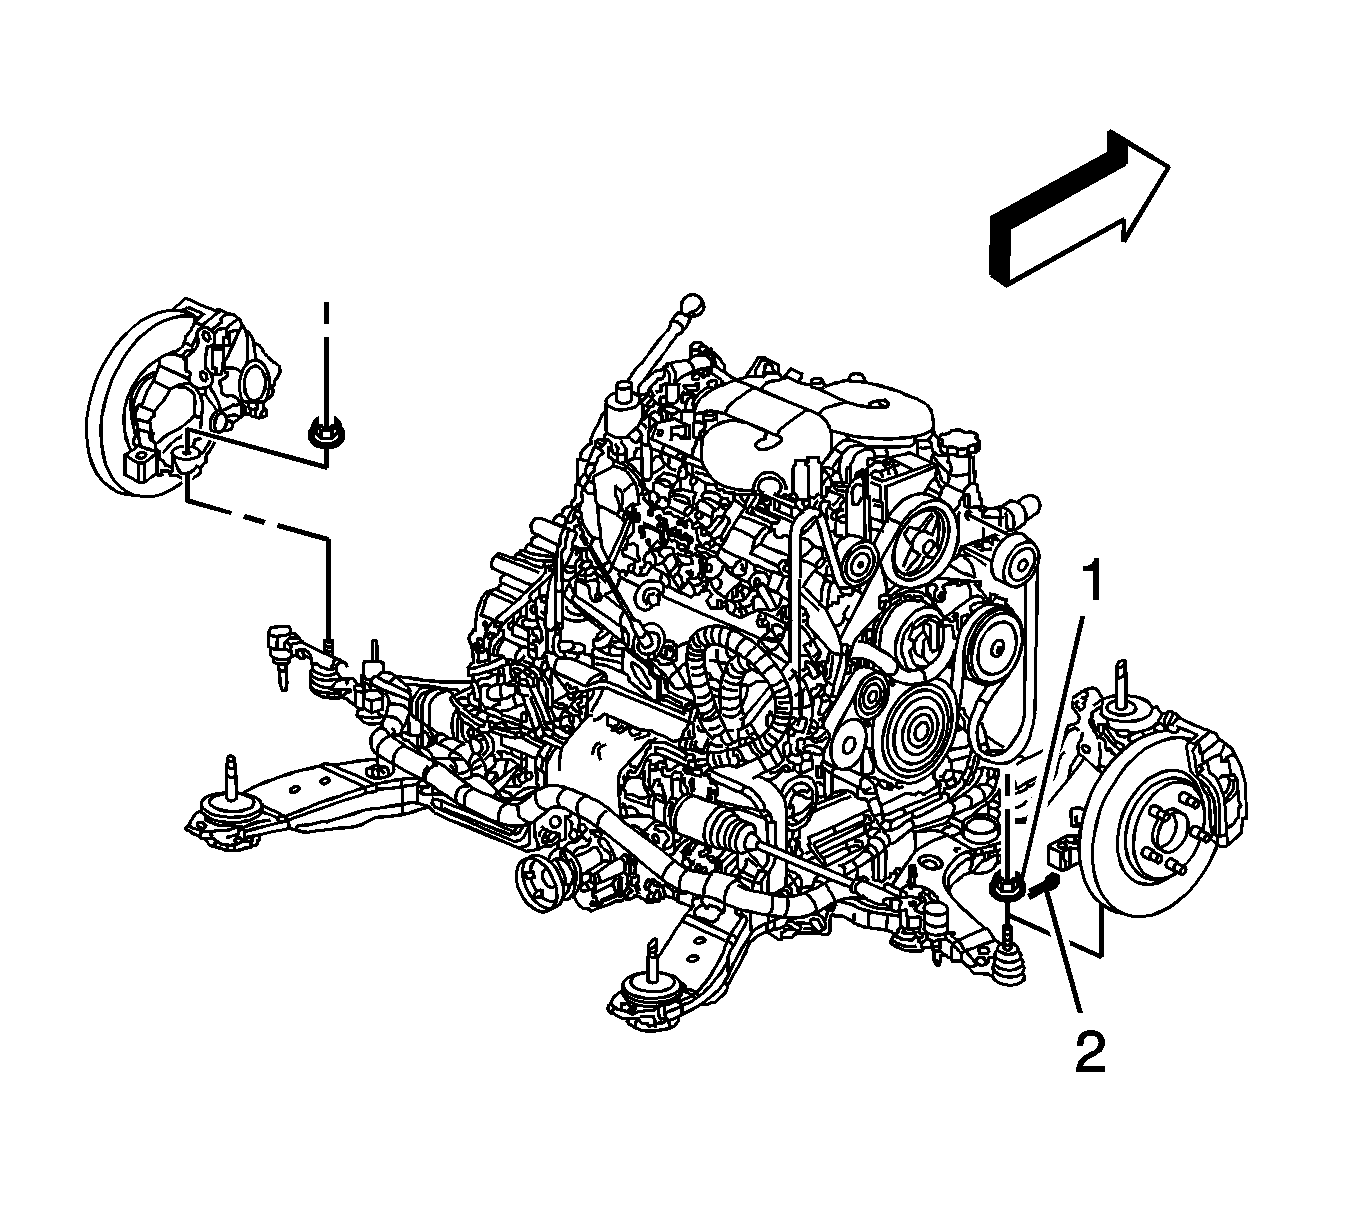
- Disconnect the engine harness electrical connectors (1) from the left and right wheel speed sensors. (right side shown, left side similar).
- Remove the drive belt. Refer to Drive Belt Replacement .
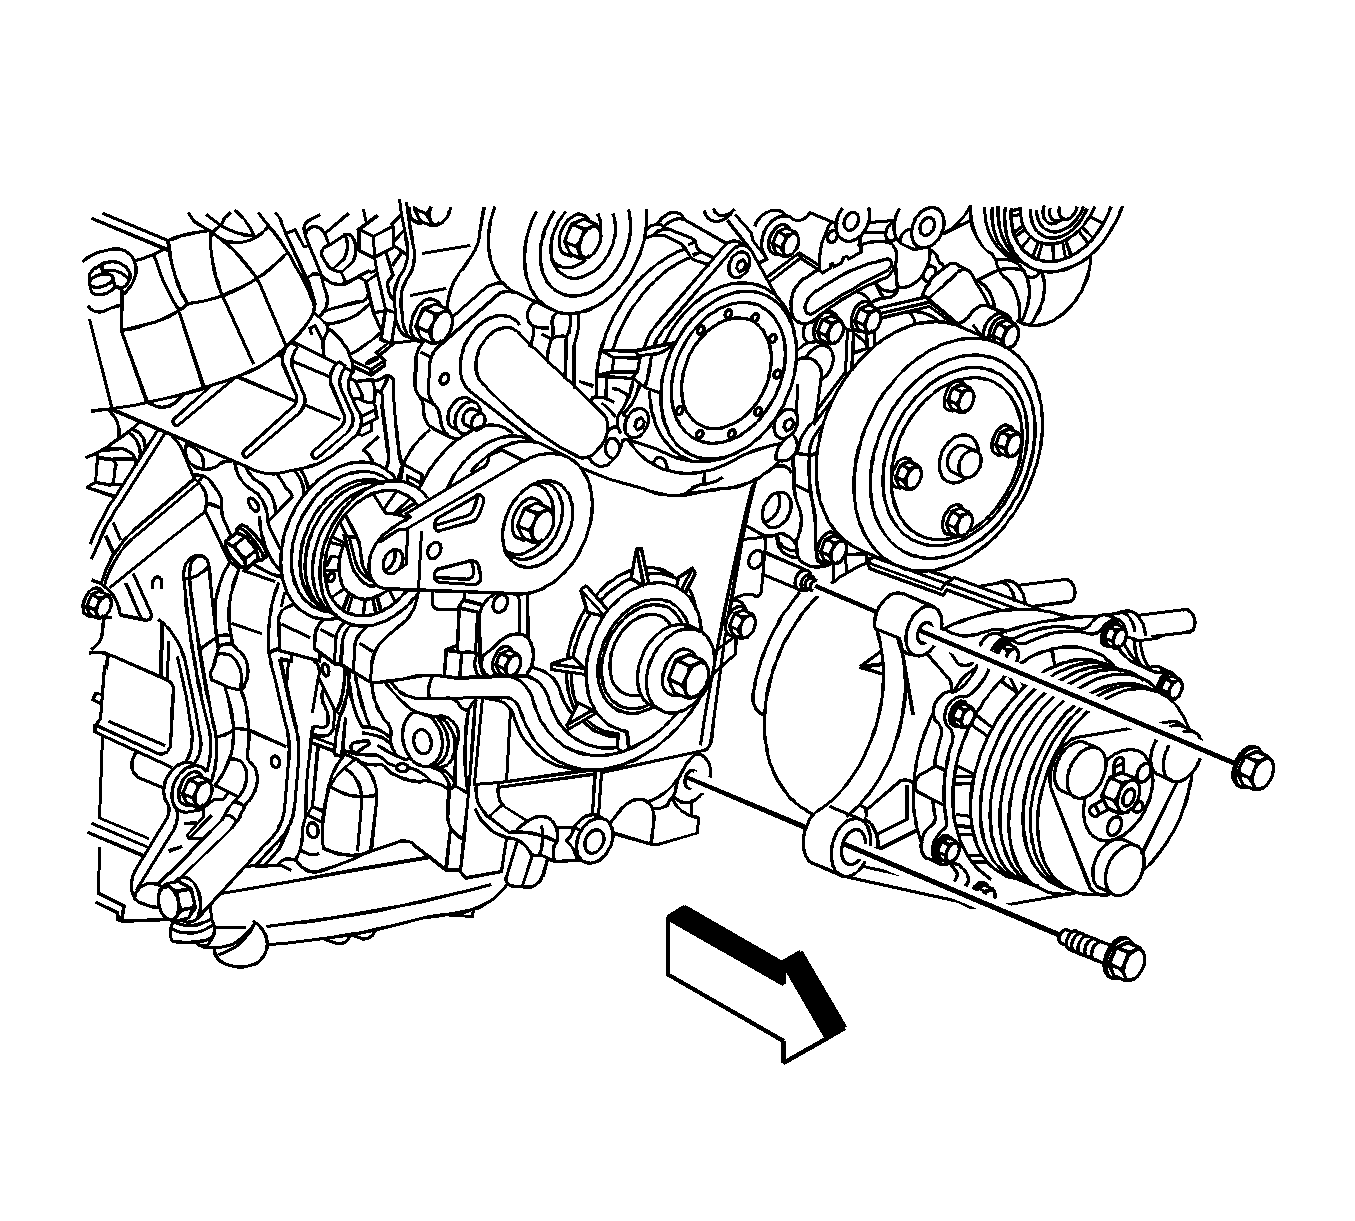
- Disconnect the engine harness electrical connectors from the A/C compressor.
- Remove the A/C compressor front bolt and nut.
- Remove the A/C compressor rear bolt. Reposition and support the A/C compressor out of the way.
- Remove the catalytic converter. Refer to Catalytic Converter Replacement .
- Remove the engine splash shield. Refer to Engine Splash Shield Replacement .
- Disconnect the battery cable retainers at the core support.
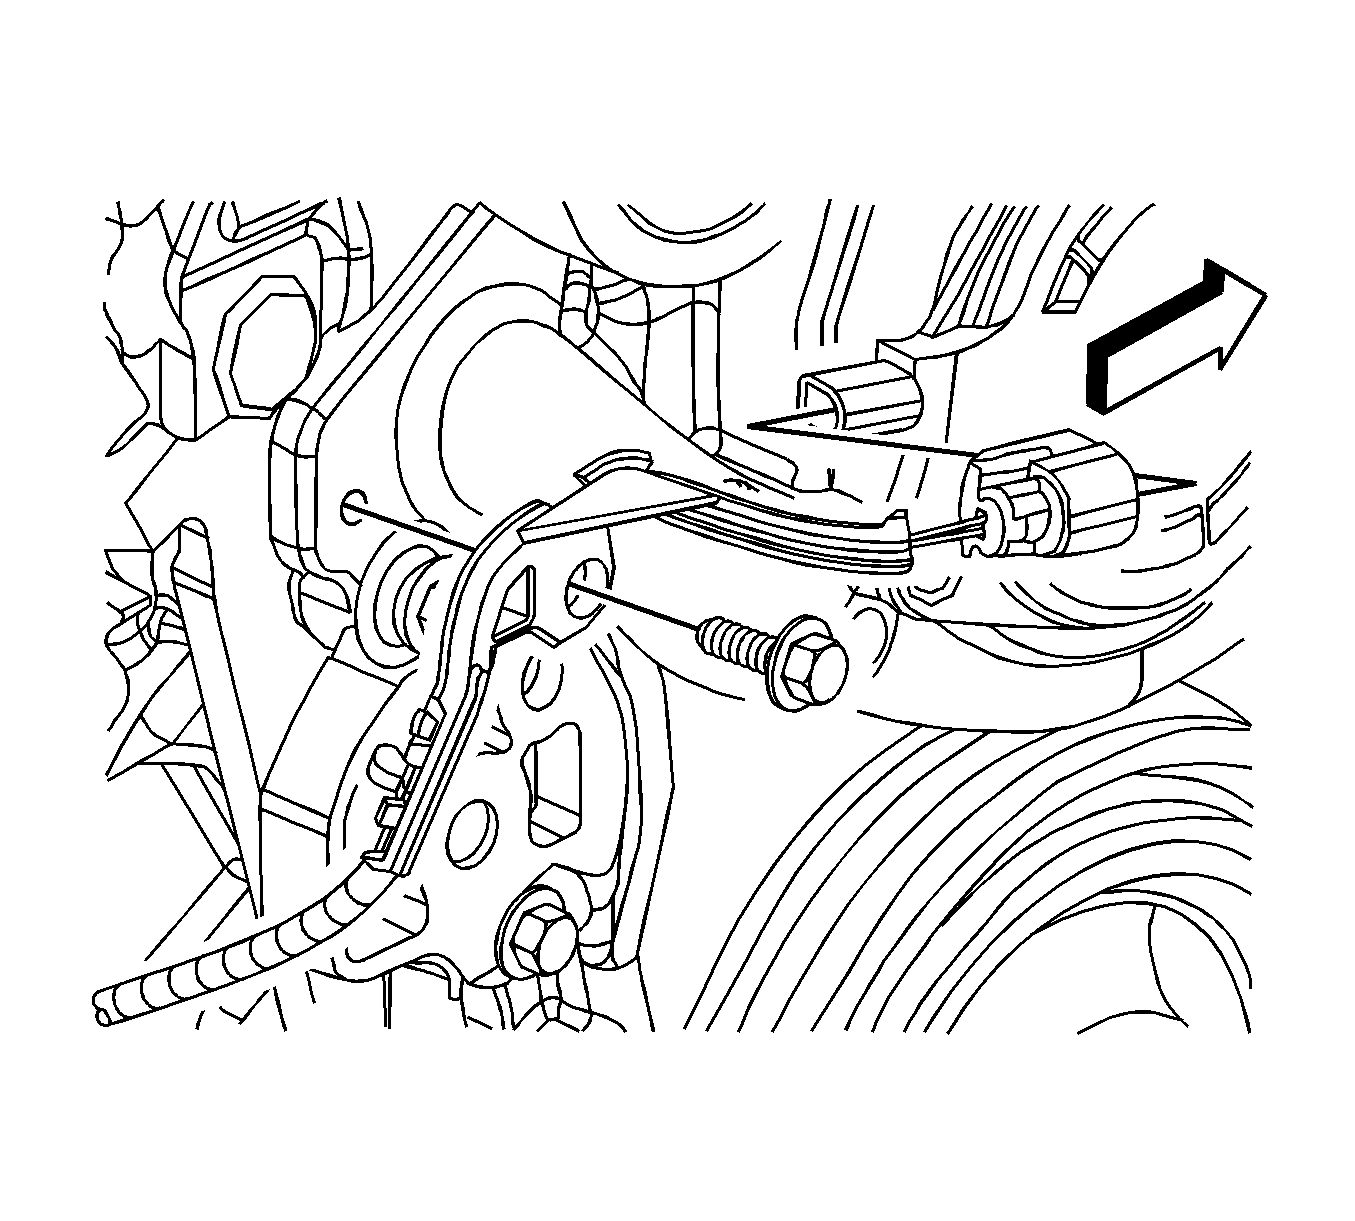
- Remove the engine harness clips (1, 2) from the heat shield.
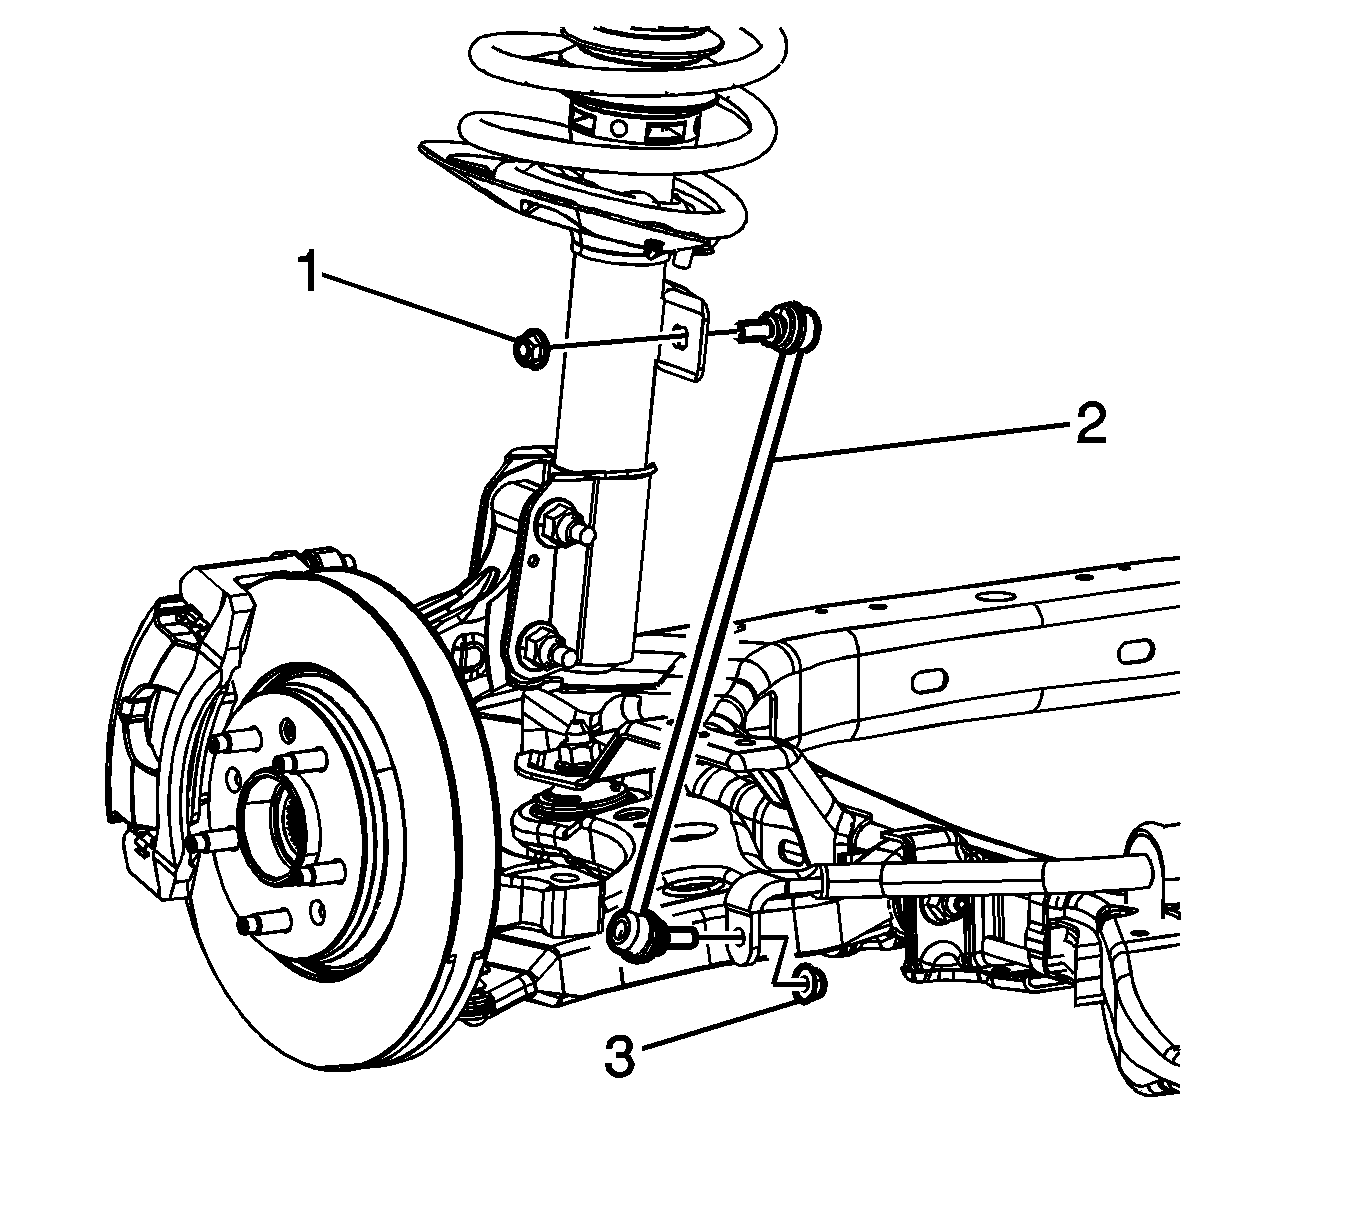
- Remove the stabilizer shaft link lower nuts (3). (left side shown, right side similar).
- Remove the stabilizer shaft links (2) from the stabilizer shaft.
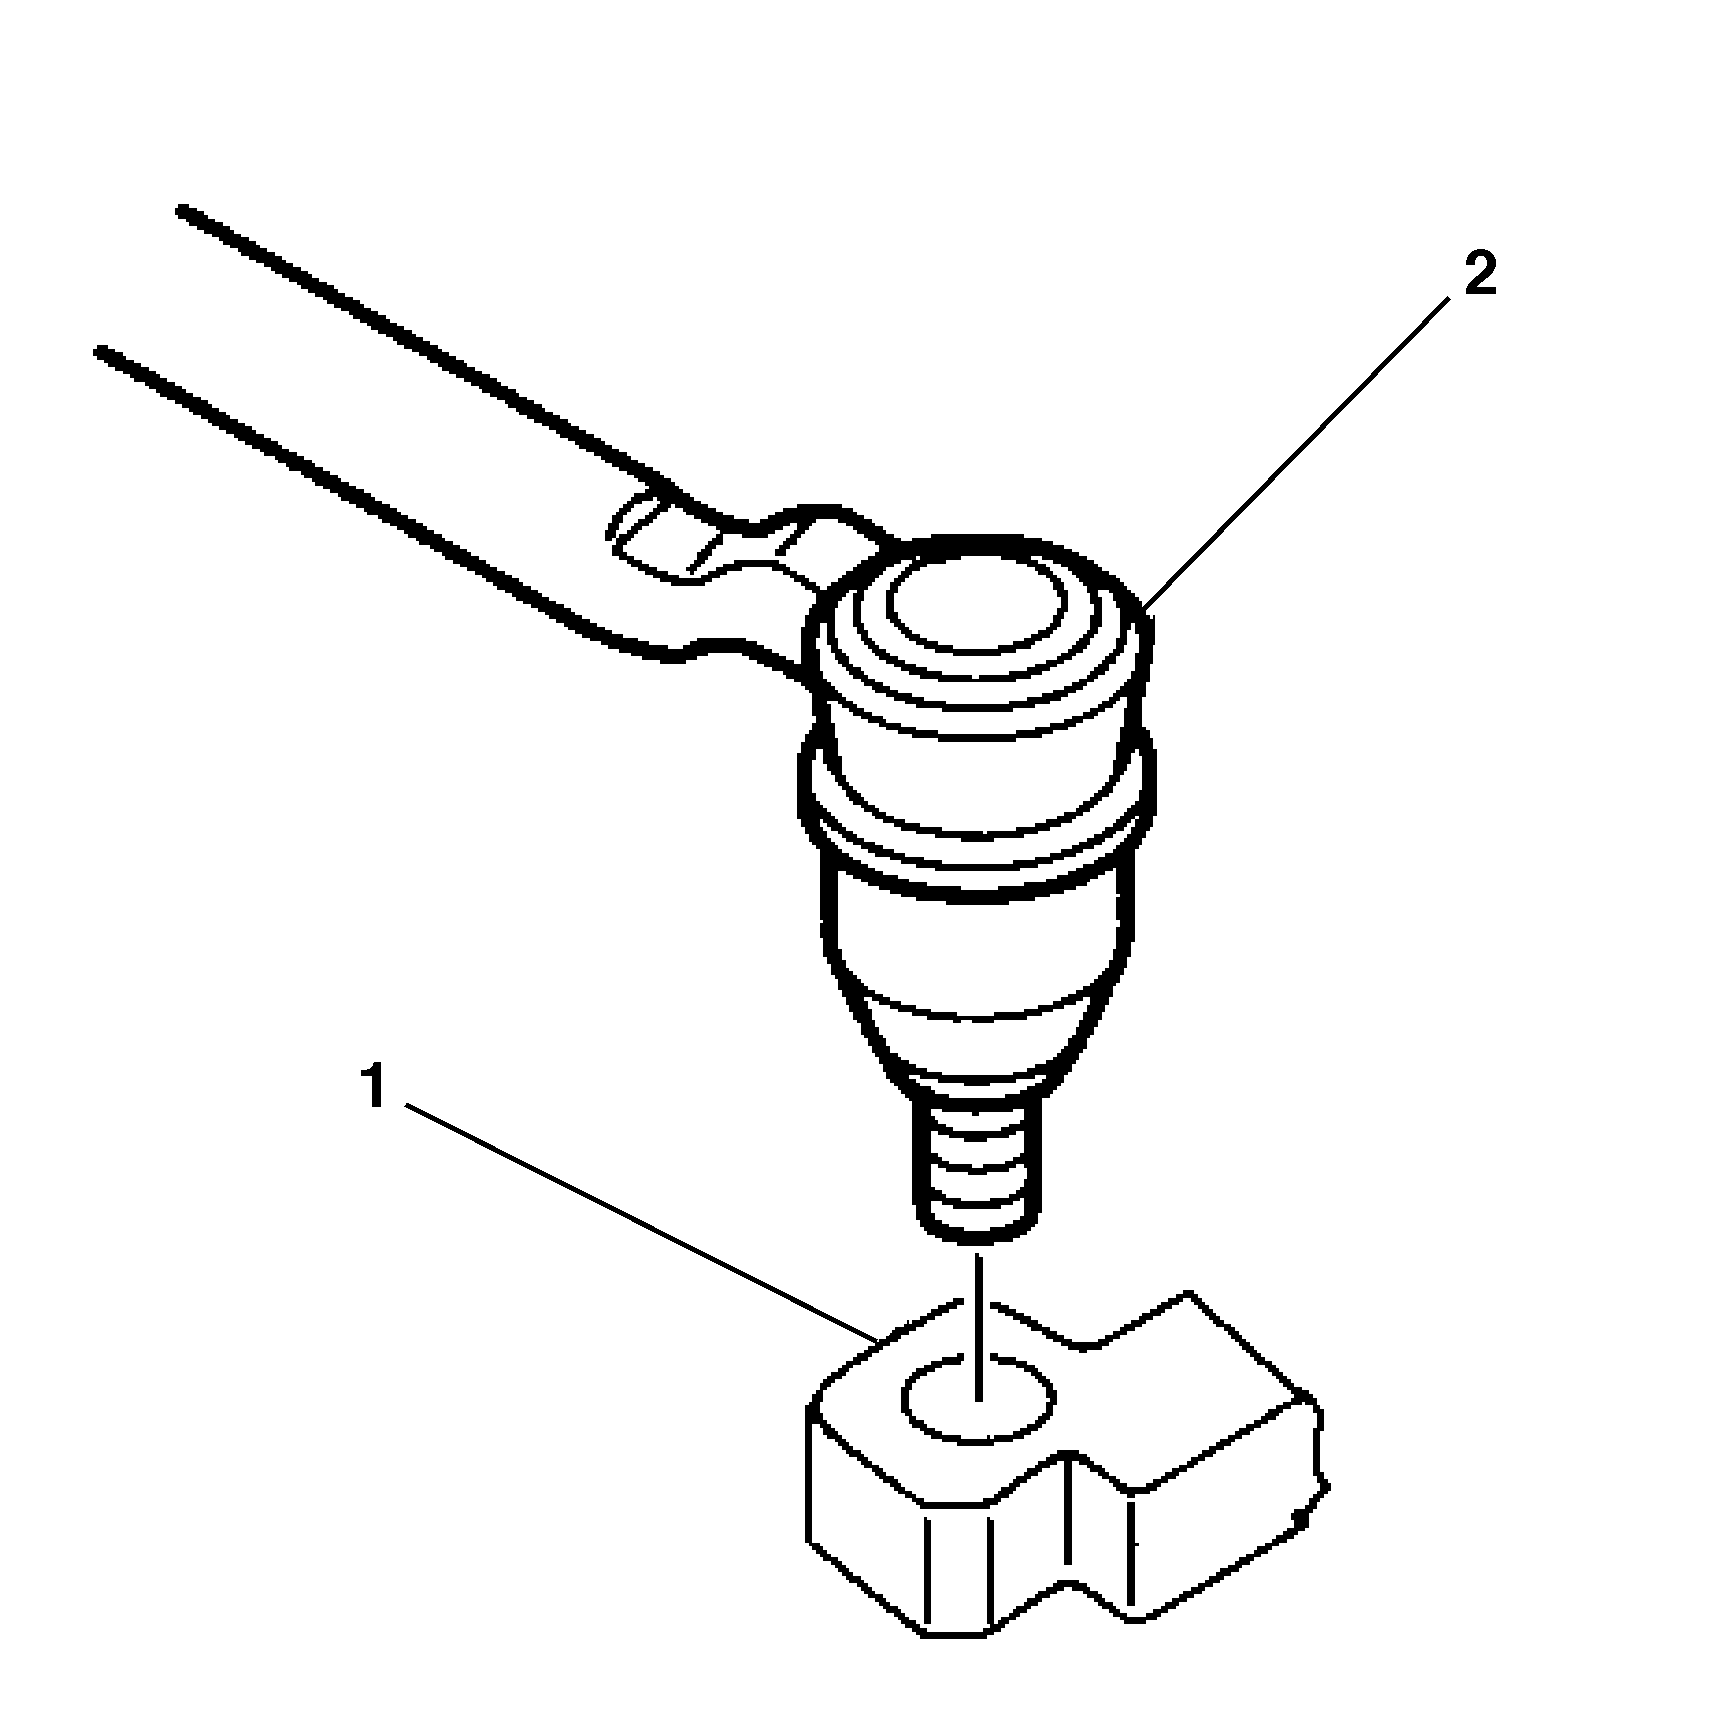
- Remove the tie rod end nuts (1) at the steering knuckles.
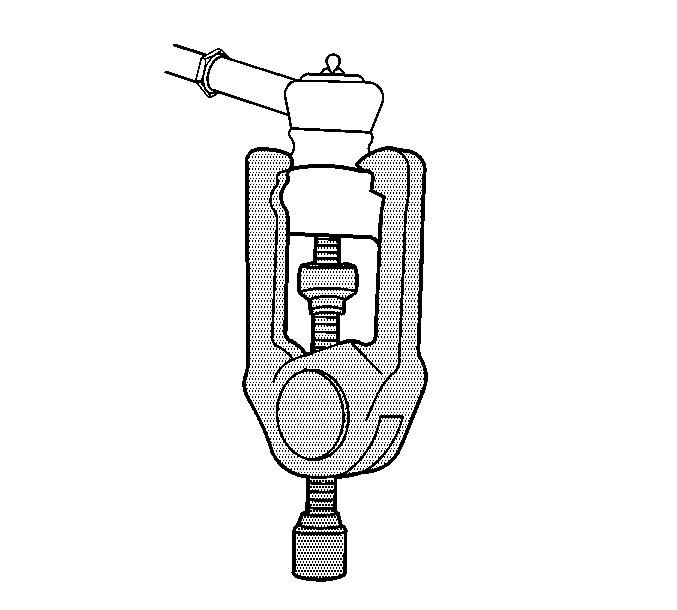
- Using the J 24319-B , separate the outer tie rod ends from the steering knuckle.
- Remove the lower ball joint cotter pins (2) from the ball joints.
- Loosen the lower ball joint castle nuts (1).
- Install the J 41820 over the ball joint and lower control arm as shown.
- Rotate the castle nut counterclockwise in order to separate the ball joint from the steering knuckle.
- Assemble the J 33008-A , J 29794 , and the J 2619-O1 .
- Using the J 33008-A , J 29794 , and the J 2619-O1 disengage the wheel drive shafts from the transaxle. Left side shown, right side similar.
- Secure the wheel drive shafts to the steering knuckle/struts.
- Reposition the intermediate steering shaft seal in order to provide access to the intermediate steering shaft pinch bolt.
- Remove the intermediate steering shaft pinch bolt.
- Disconnect the intermediate steering shaft from the power steering gear.
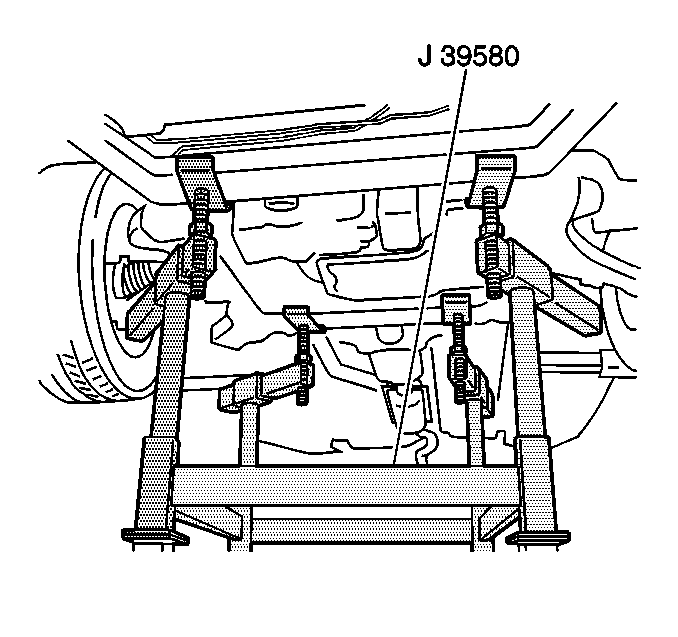
- Place the J 39580 under the frame.
- Lower the vehicle until the frame contacts the J 39580 .
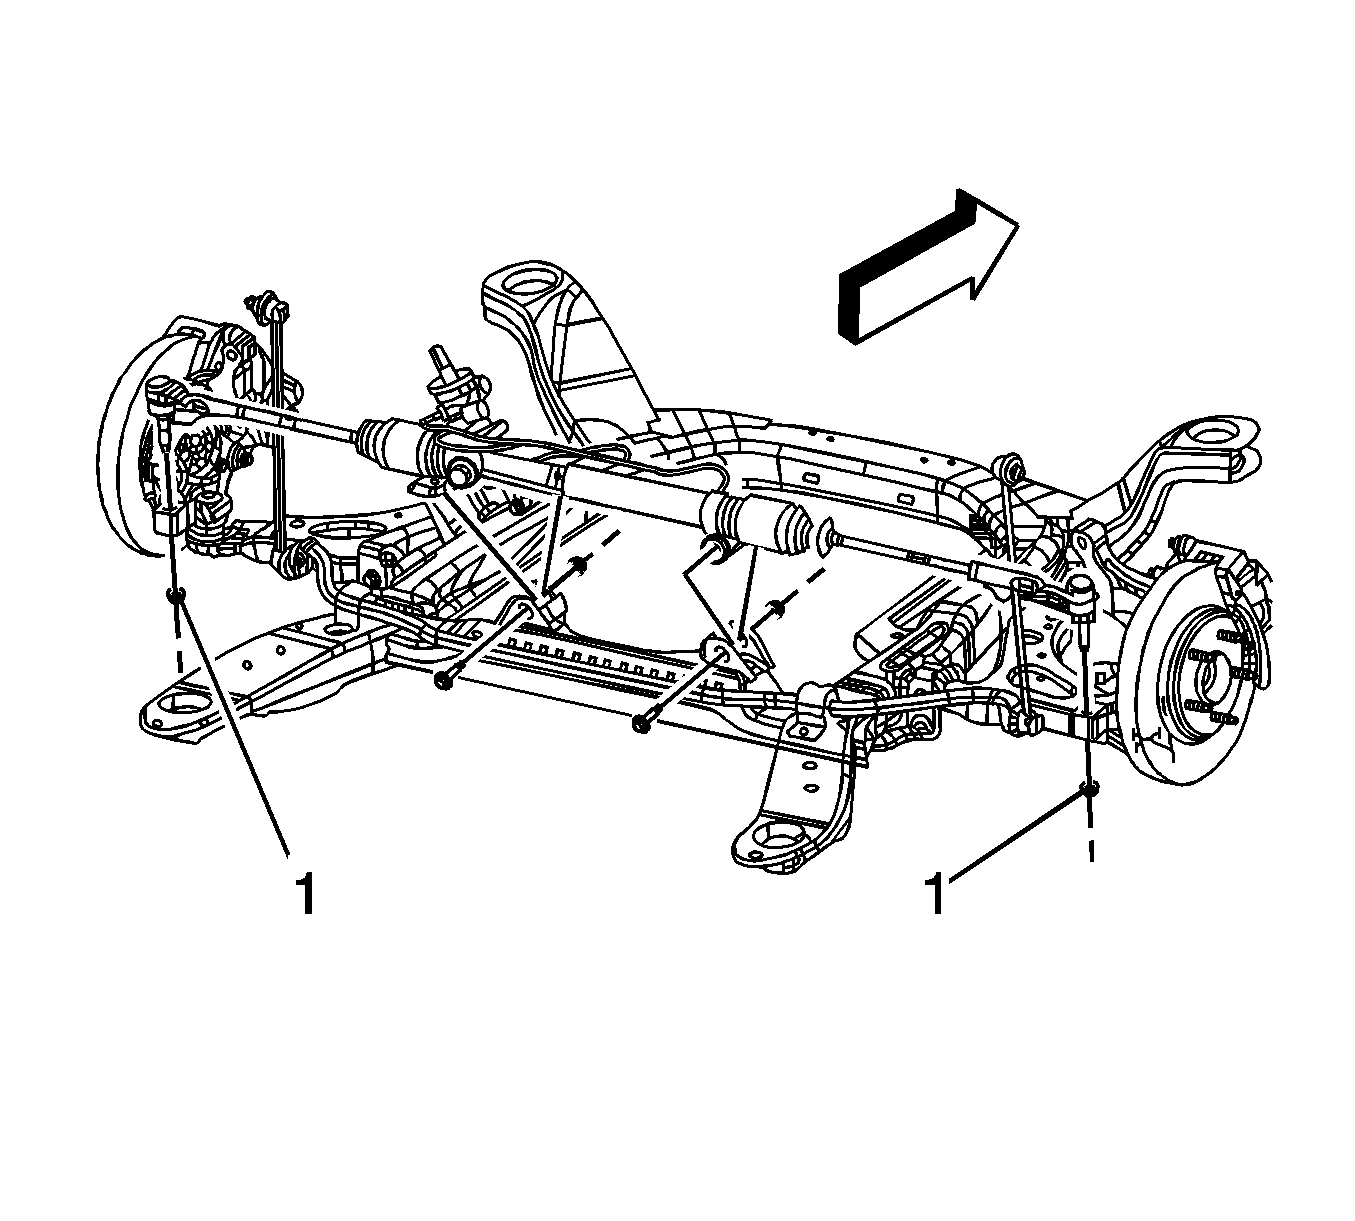
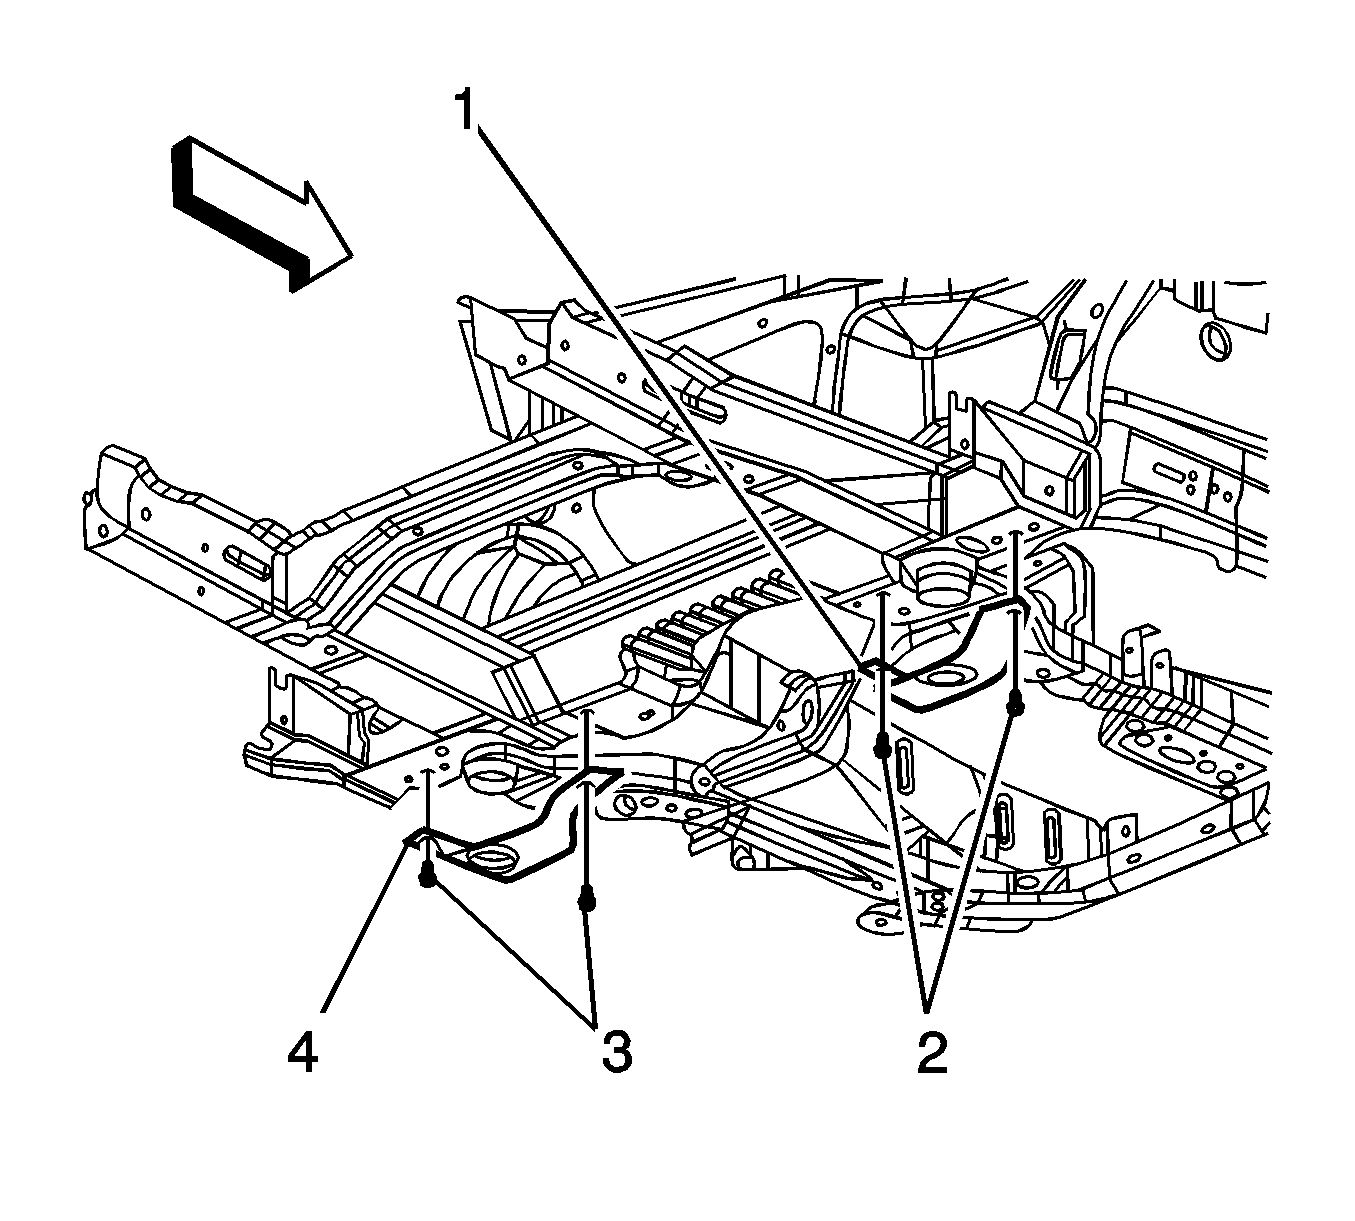
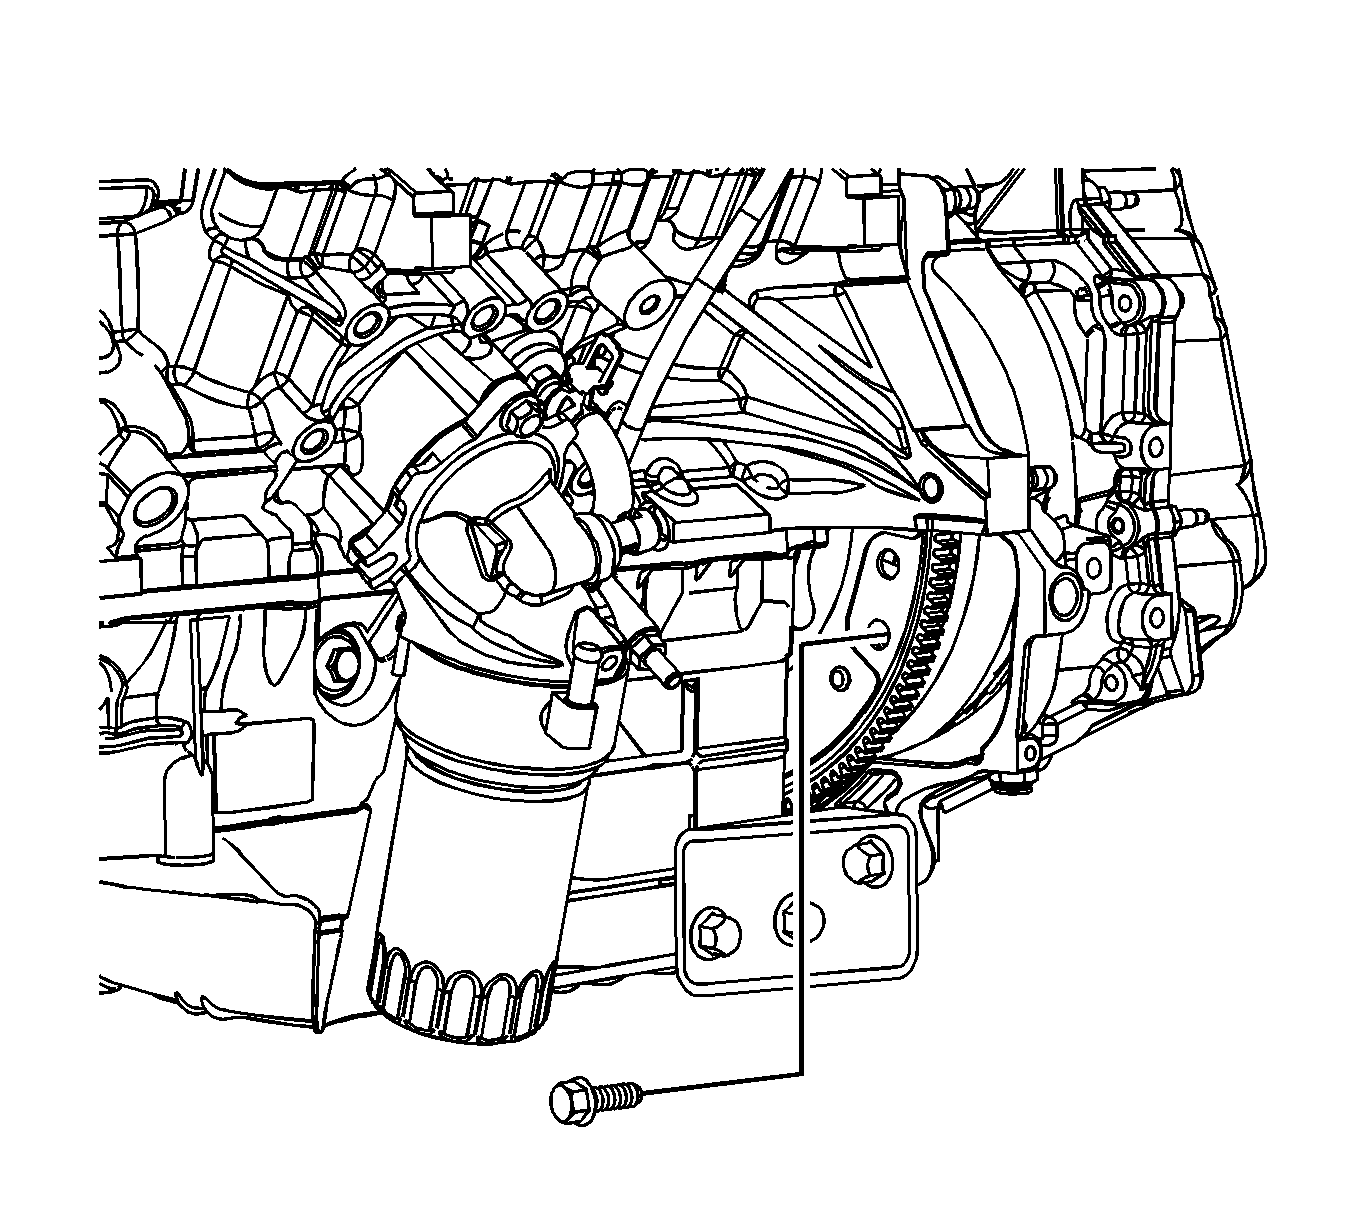
- Remove the front and rear frame bolts (1, 2).
- Remove the frame rear strap bolts (2, 3).
- Remove the frame rear straps (1, 4).
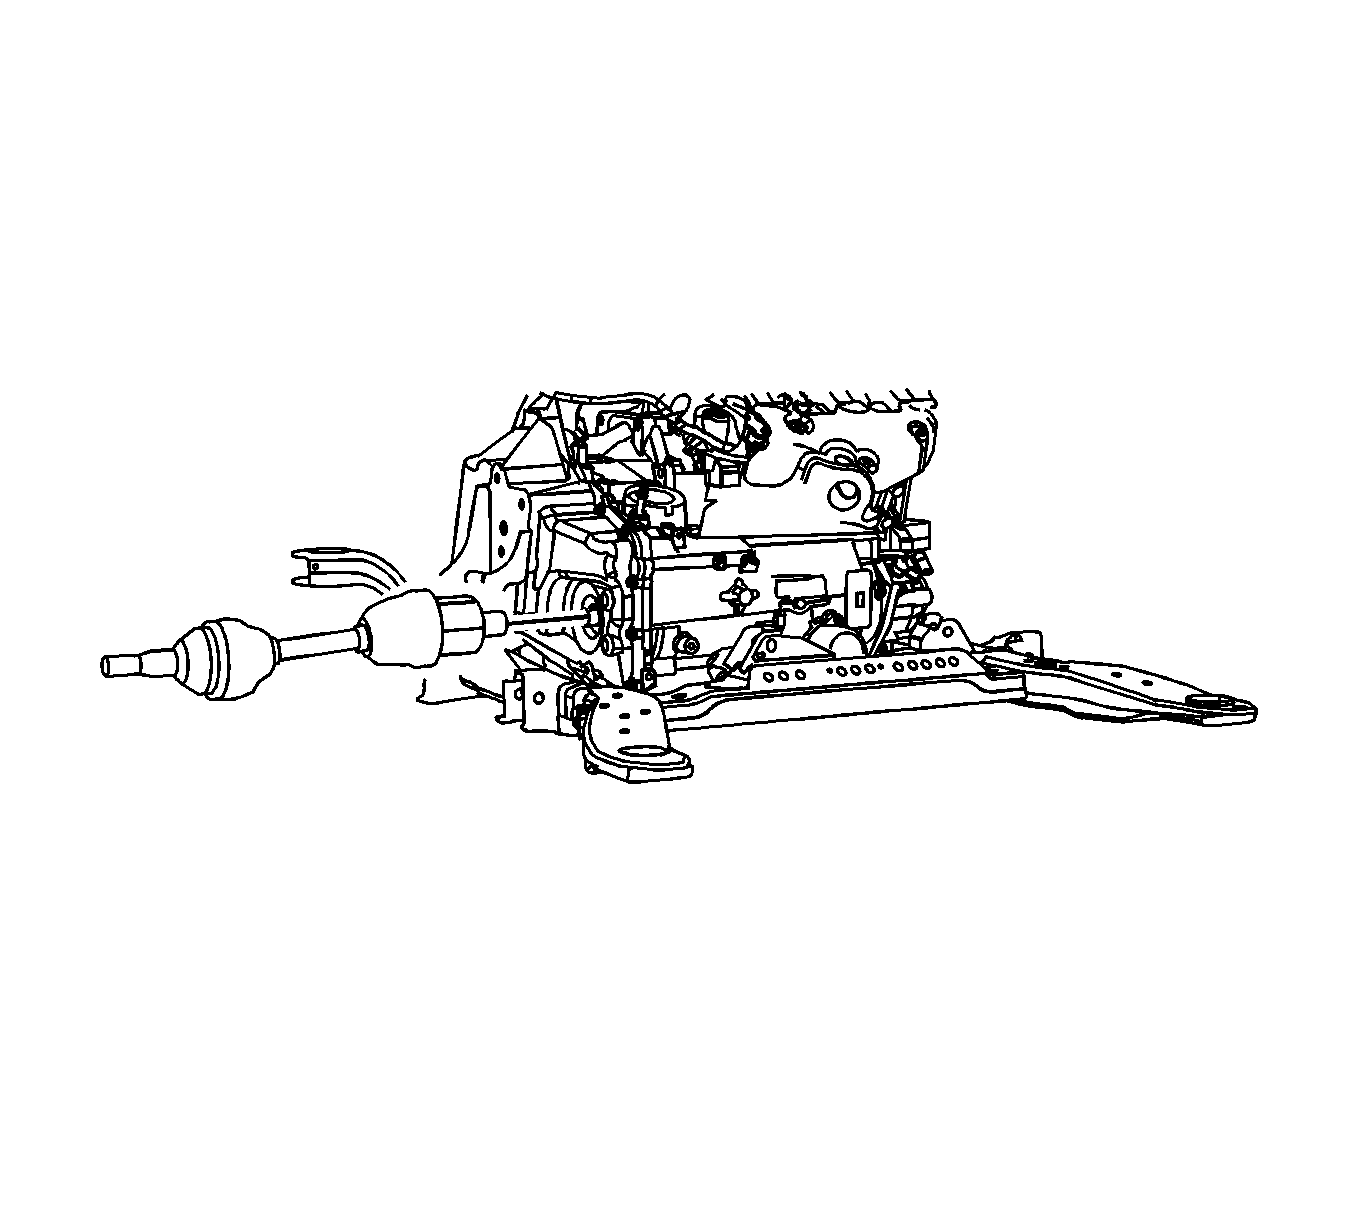
- Raise the vehicle in order to separate the powertrain/frame assembly from the vehicle.
- If necessary perform the following steps, remove the engine harness ground wire nut (1).
- Remove the engine harness positive battery cable (2) from the stud.
- Disconnect the engine harness electrical connector (3) from the starter.
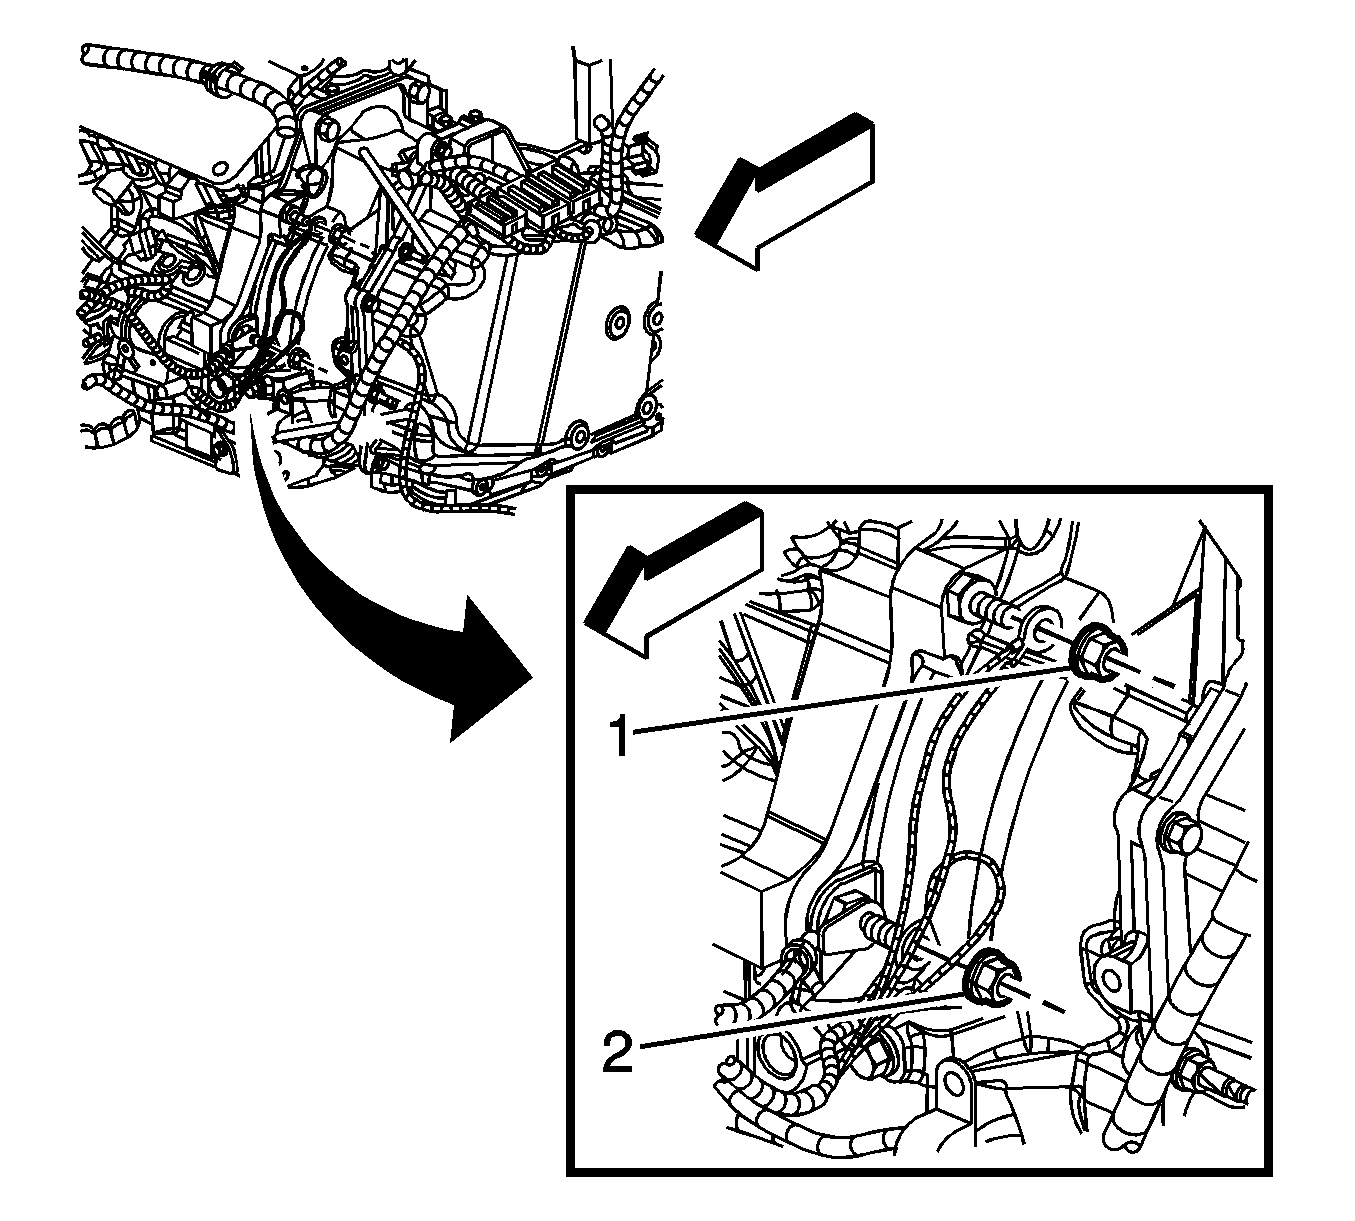
- Remove the engine harness ground nuts (1, 2) from the transaxle studs.
- Remove the engine harness grounds from the studs.
- Remove the negative battery cable from the transaxle stud.
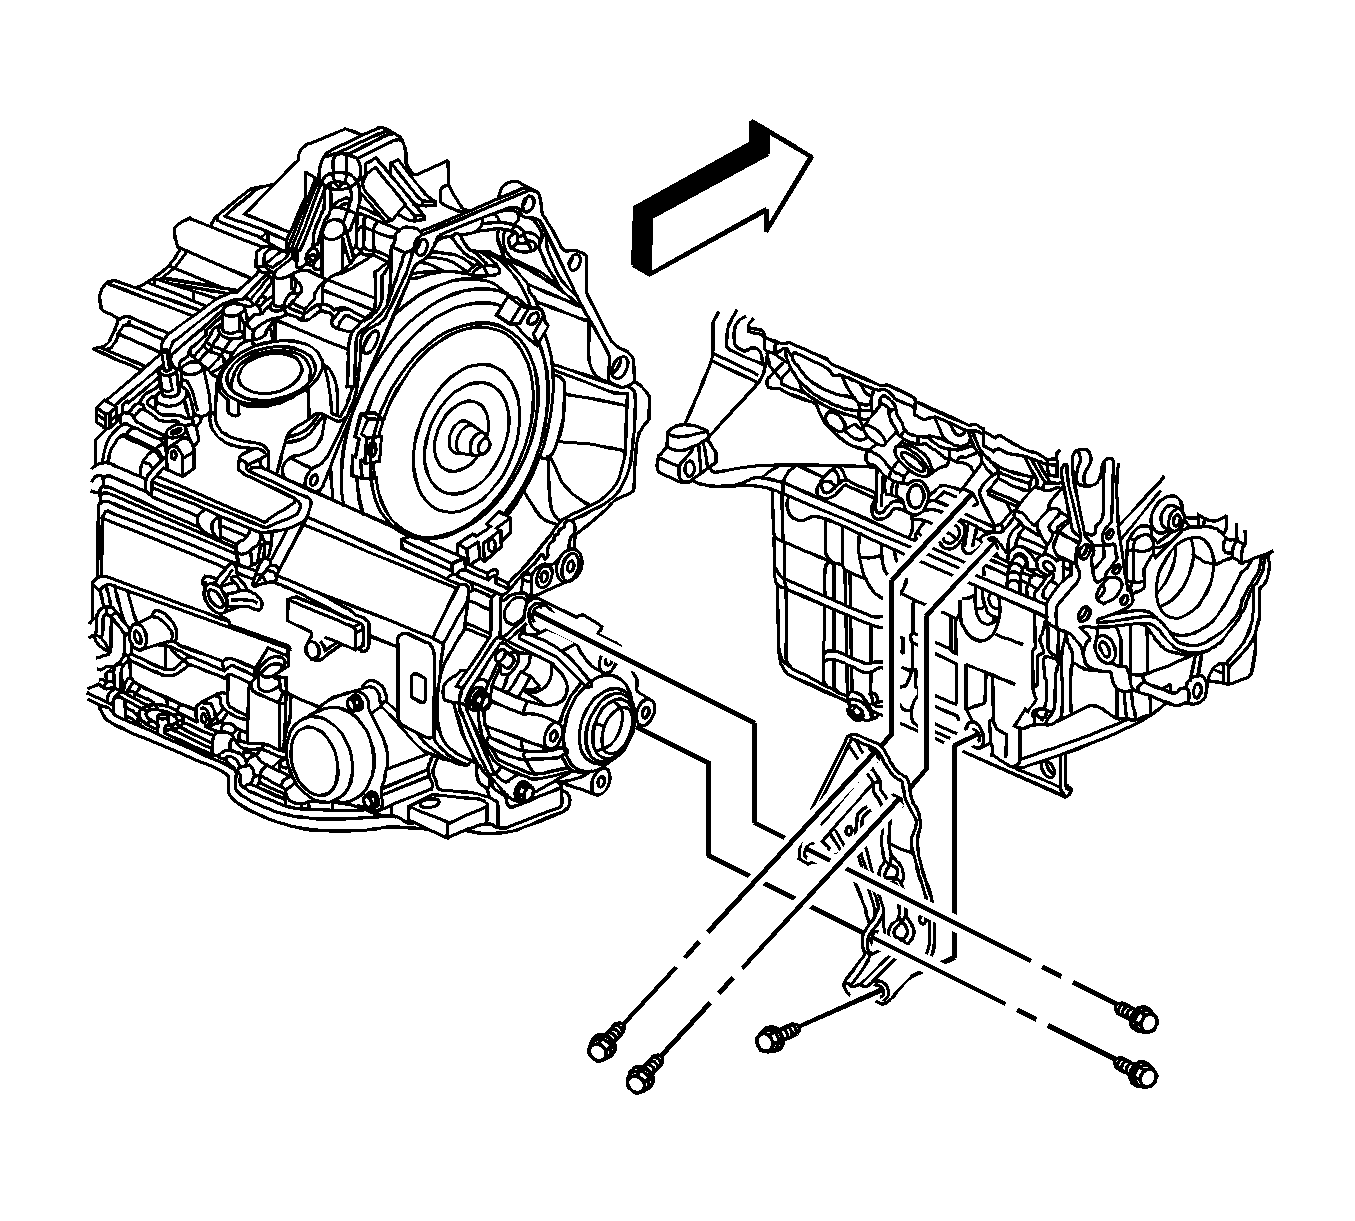
- Remove the engine to transaxle brace .
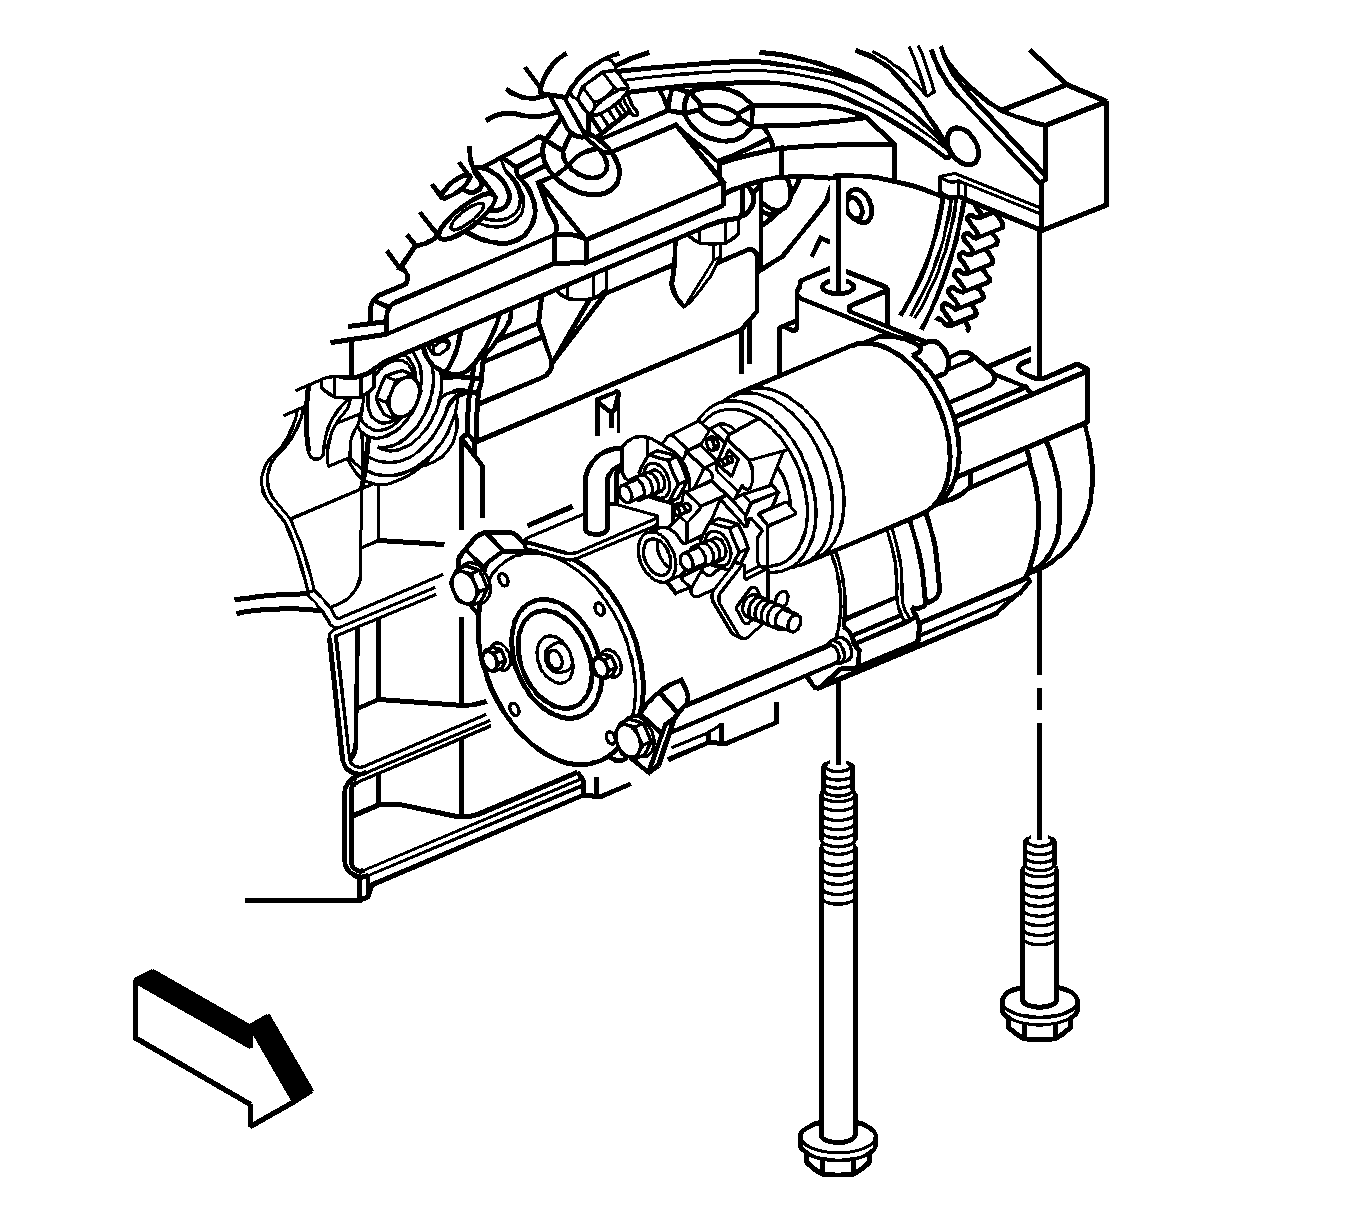
- Remove the starter motor bolts and starter.
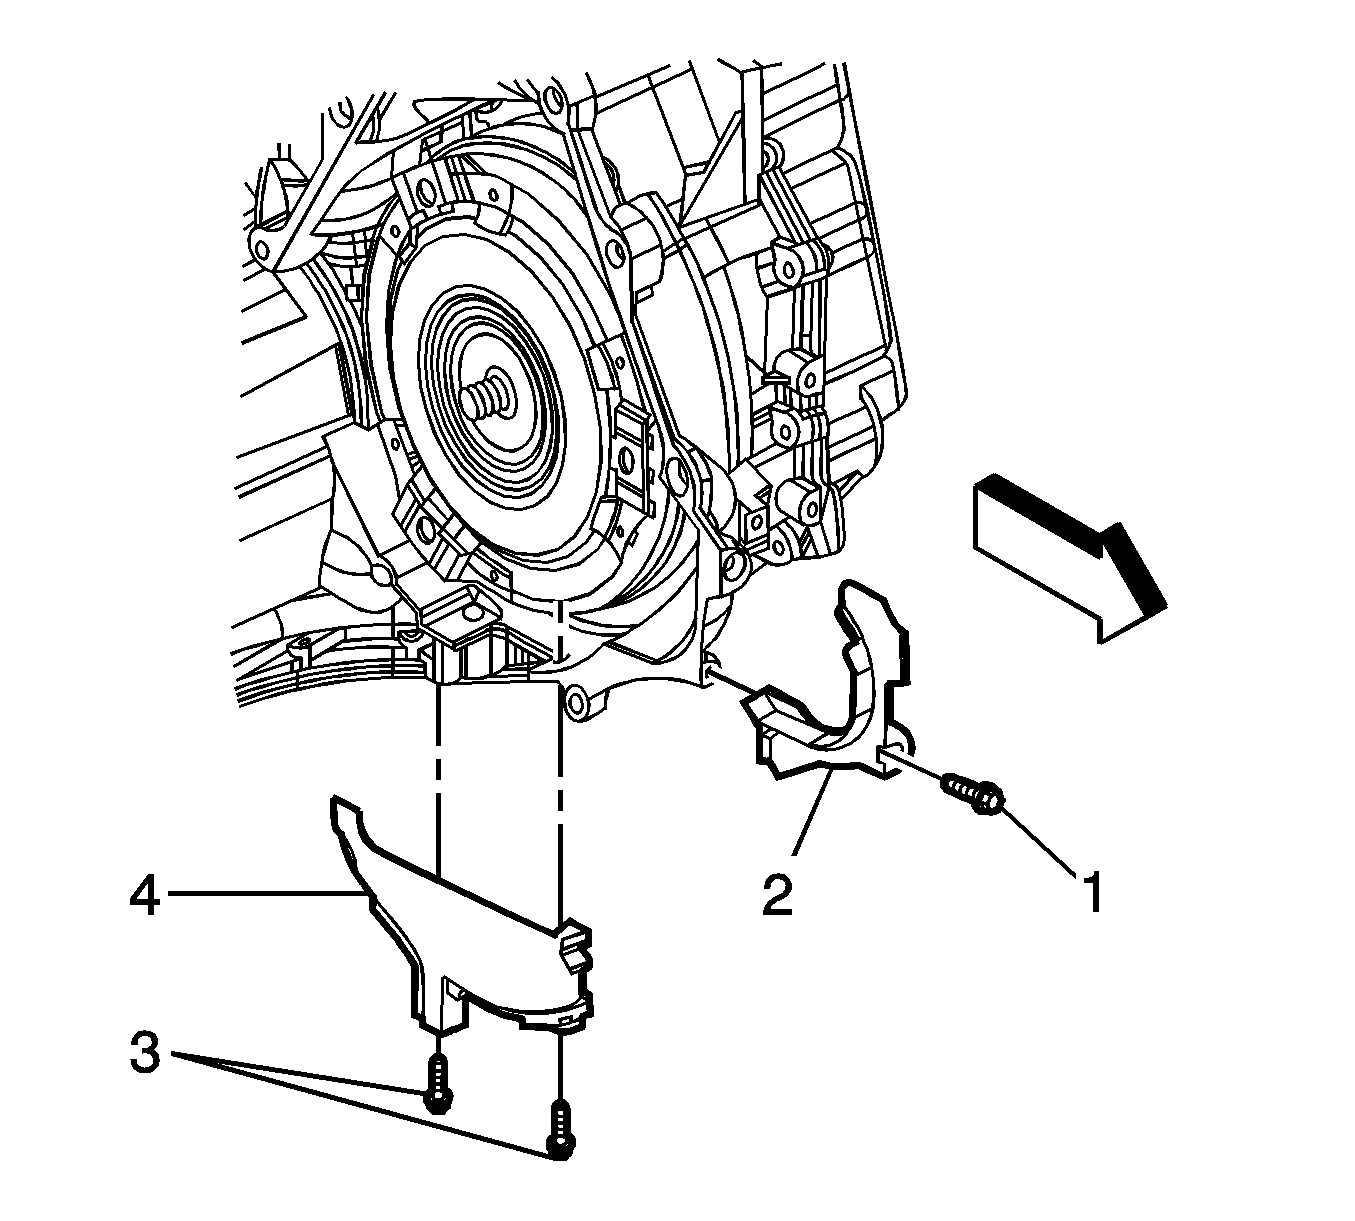
- Remove the torque converter cover bolts (1, 3).
- Remove the torque converter covers (2, 4).
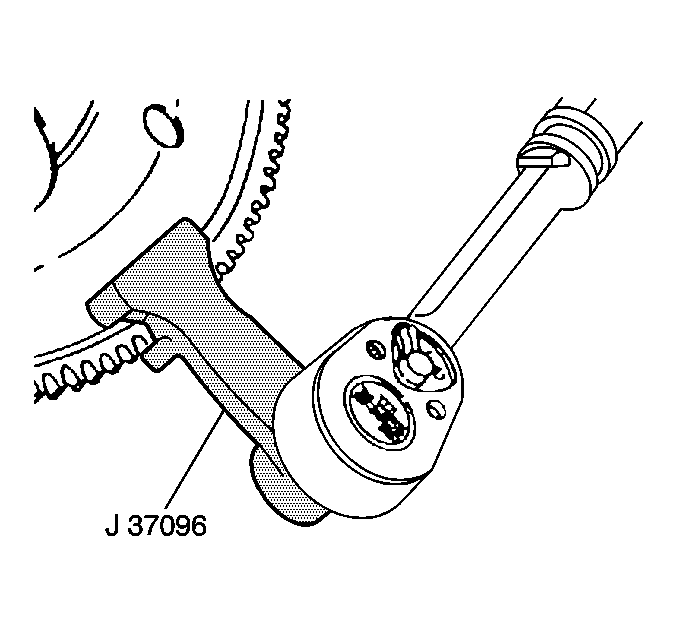
- Use the J 37096 in order to hold the flywheel, and also rotate the flywheel to access the torque converter bolts.
- Remove the torque converter bolts.
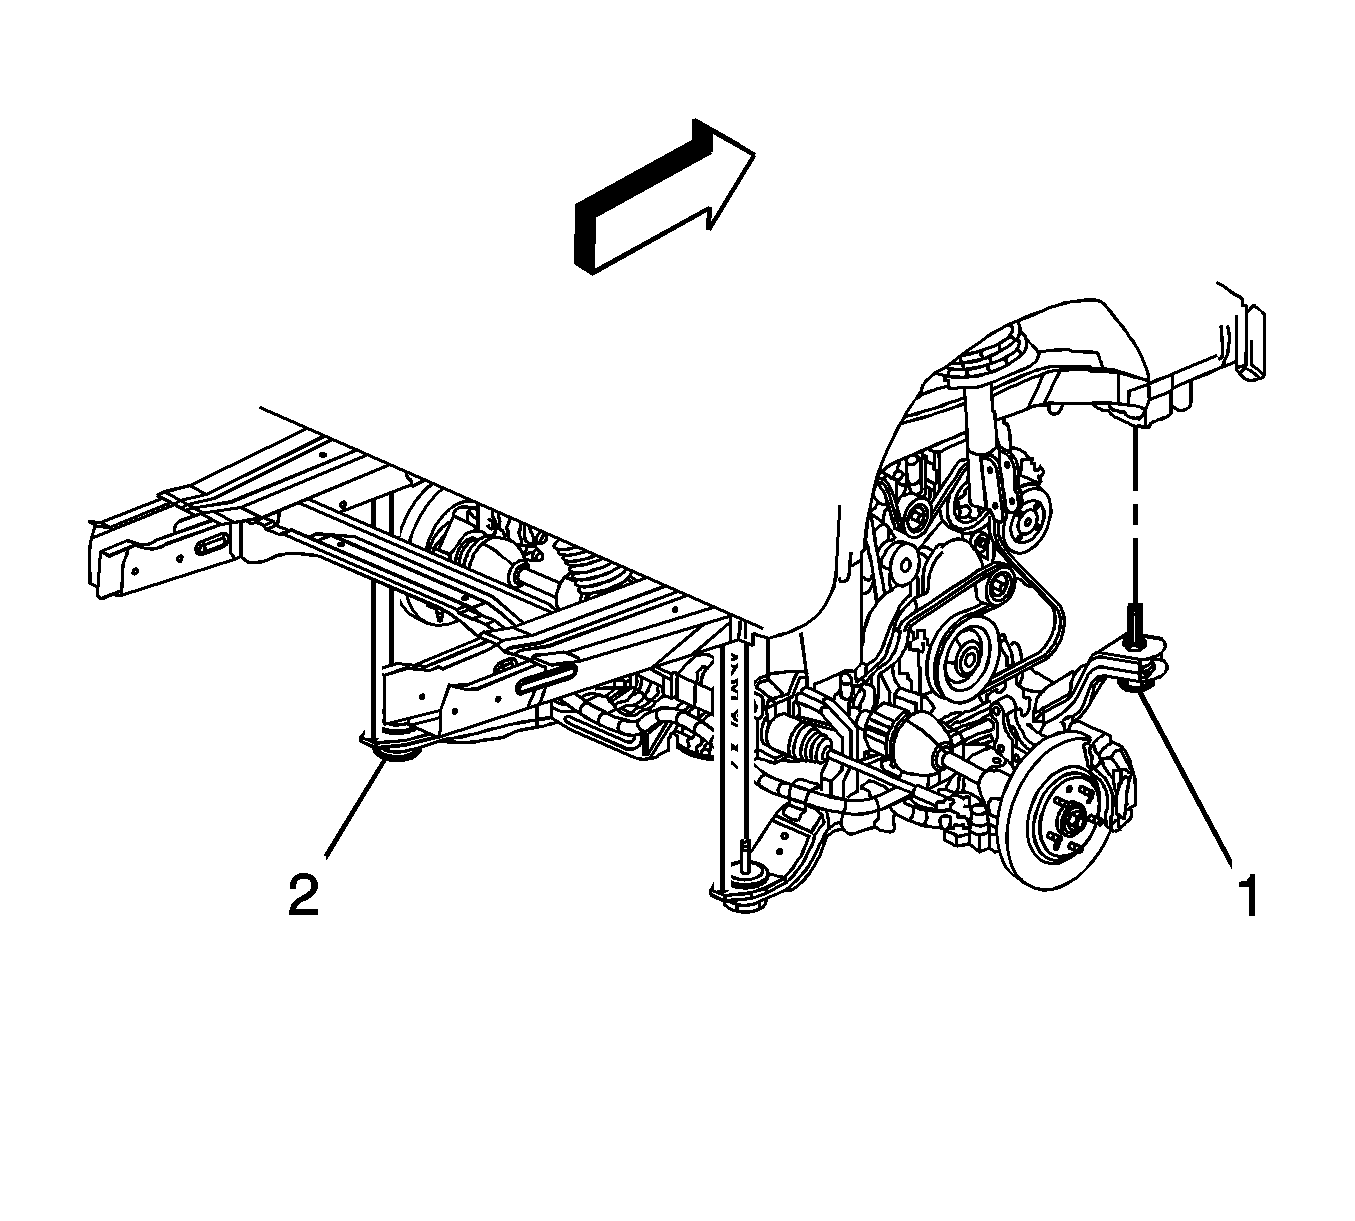
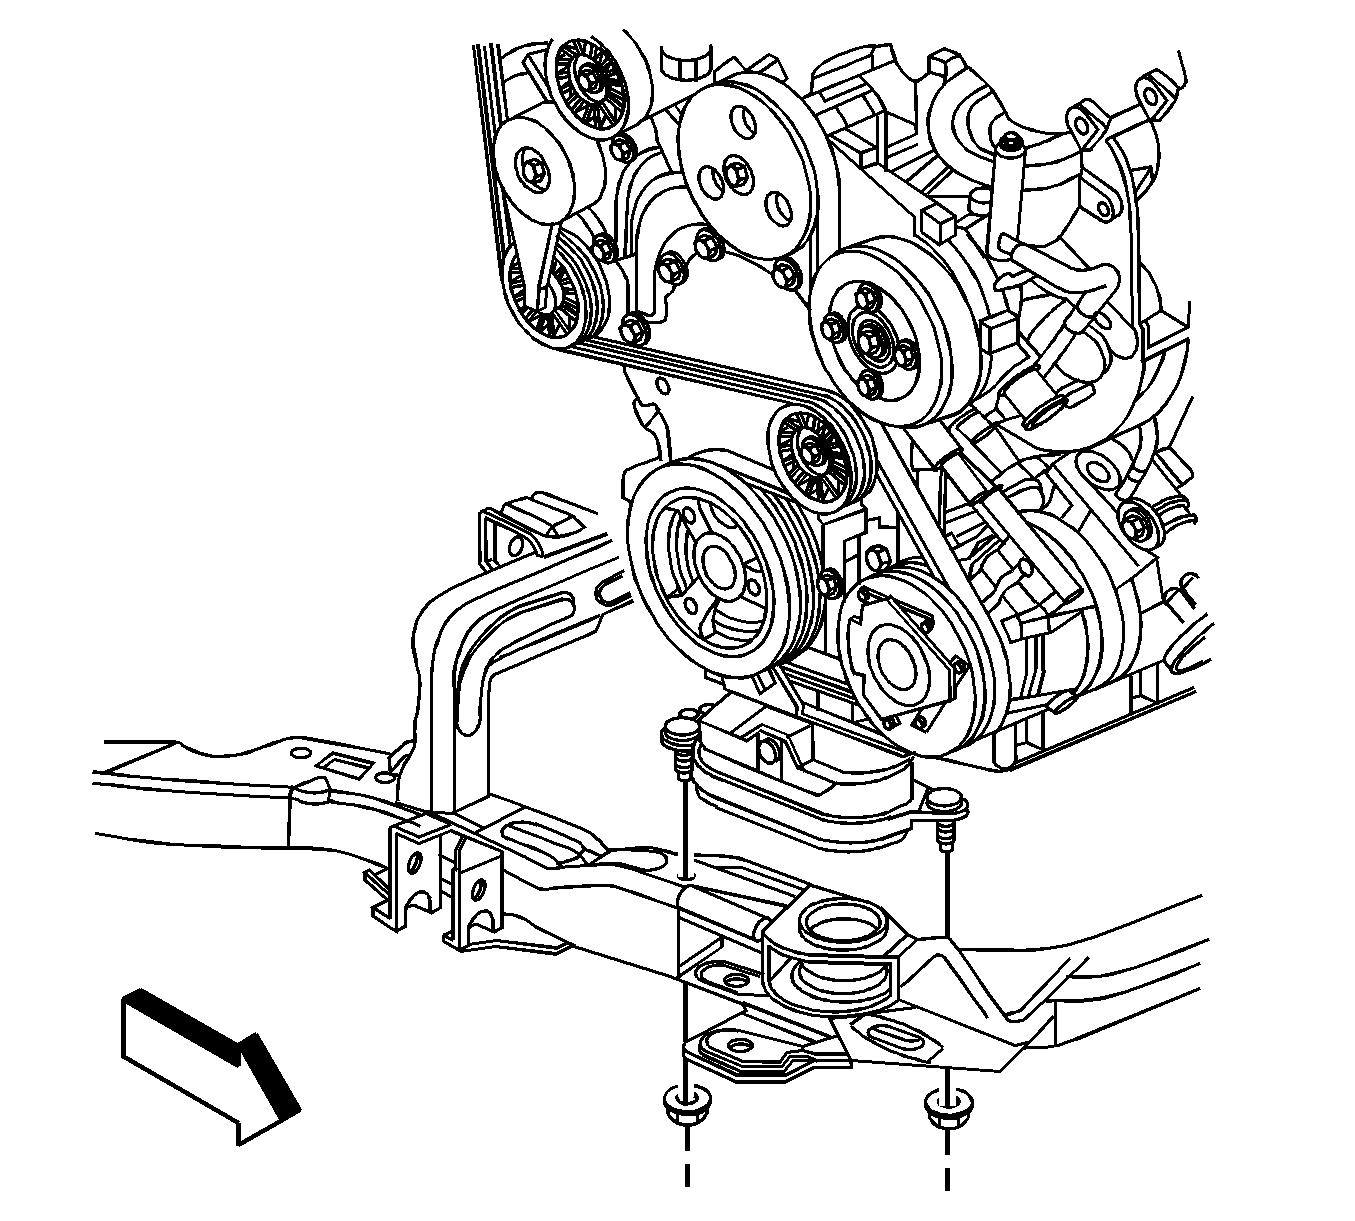
- Remove the engine mount to frame nuts.
- Remove the engine harness clips (1) from the transaxle brace.
- Remove the engine harness clips (1) from the transaxle brace.
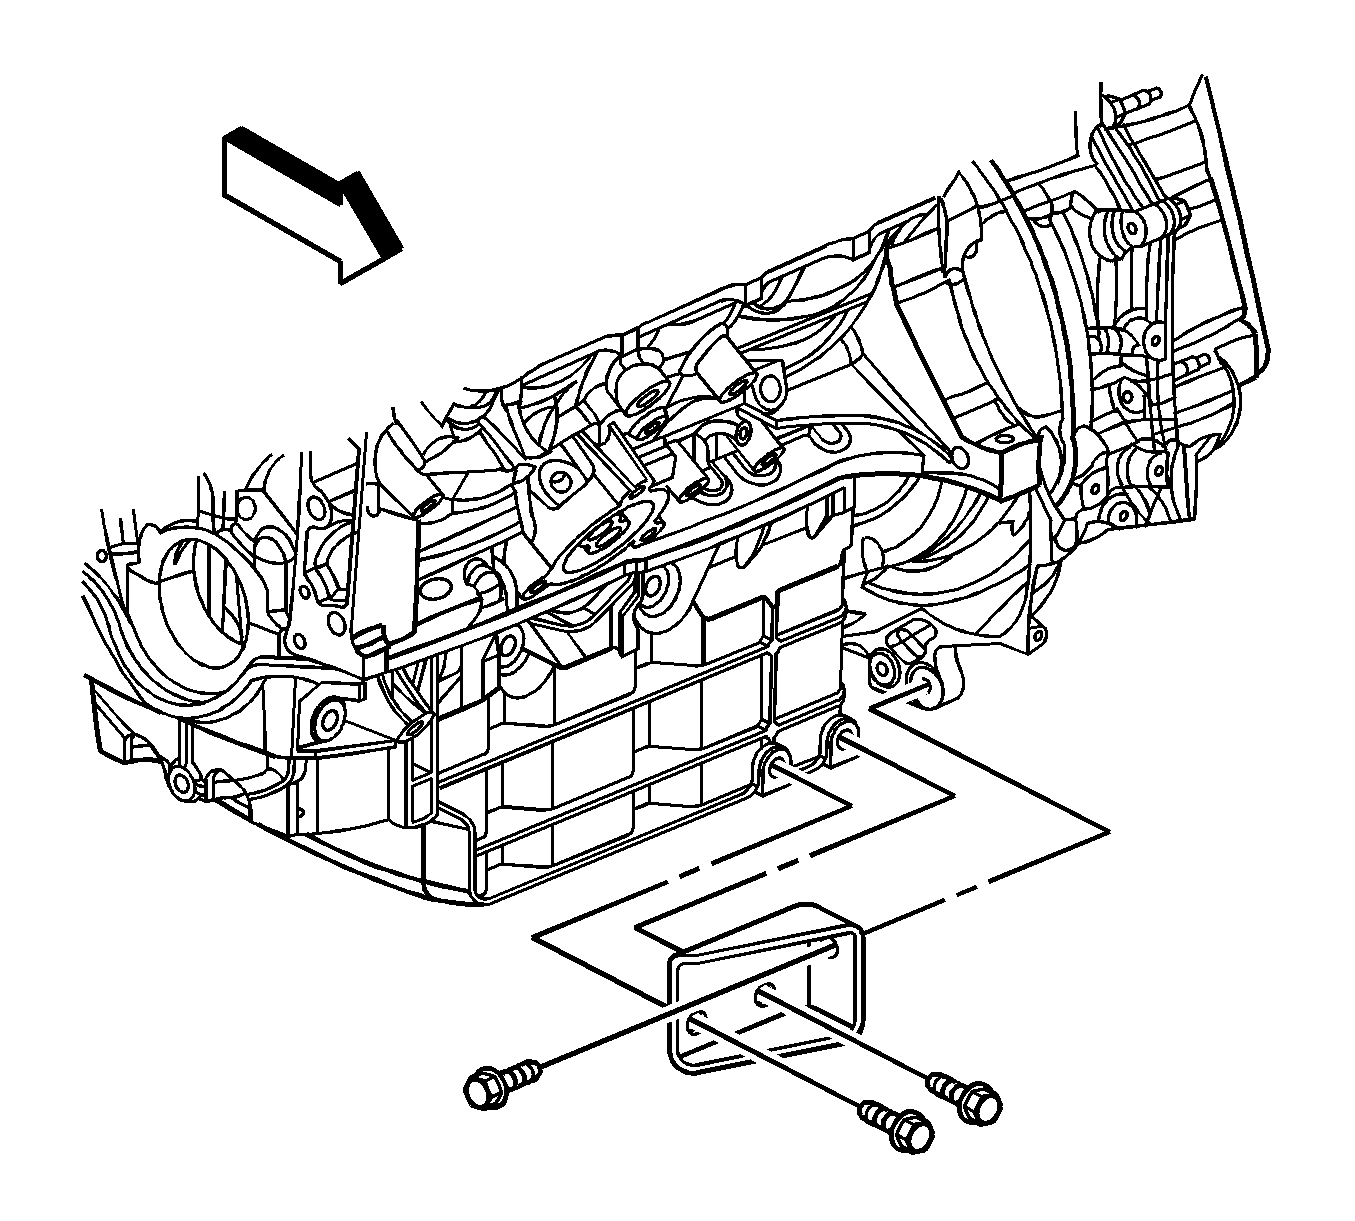
- Remove the transaxle brace bolts and brace.
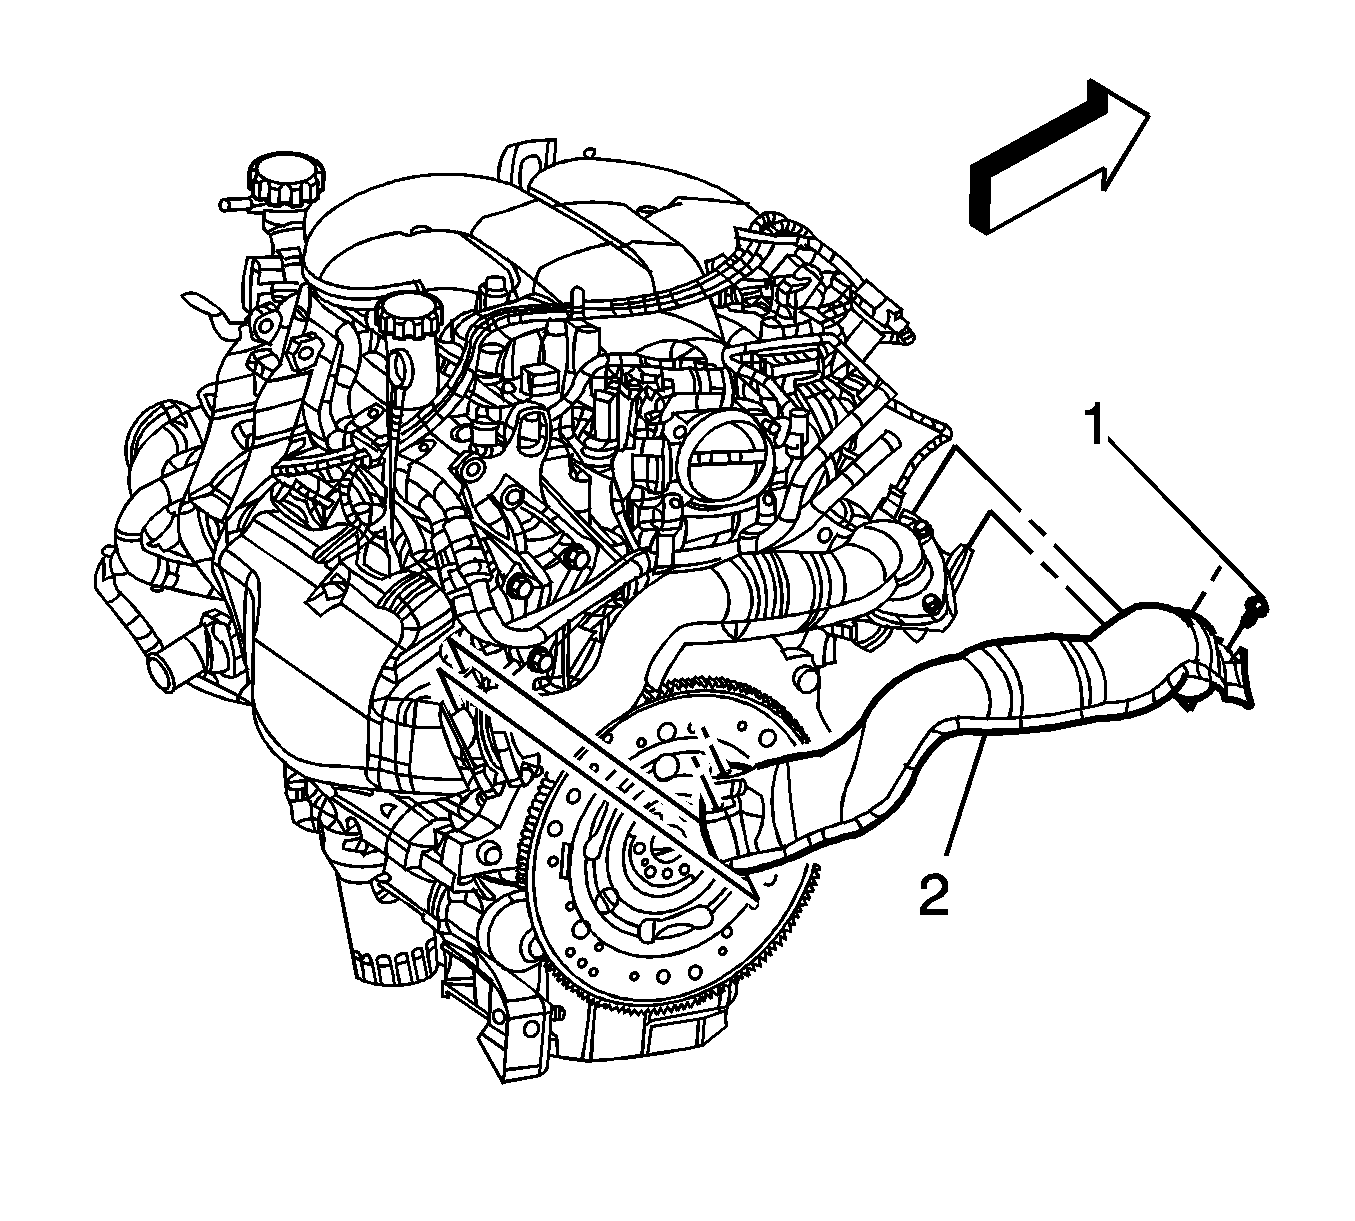
- Remove the exhaust crossover pipe shield bolts (1) and shield (2).
- Remove the exhaust crossover pipe nuts (1) and pipe (2).
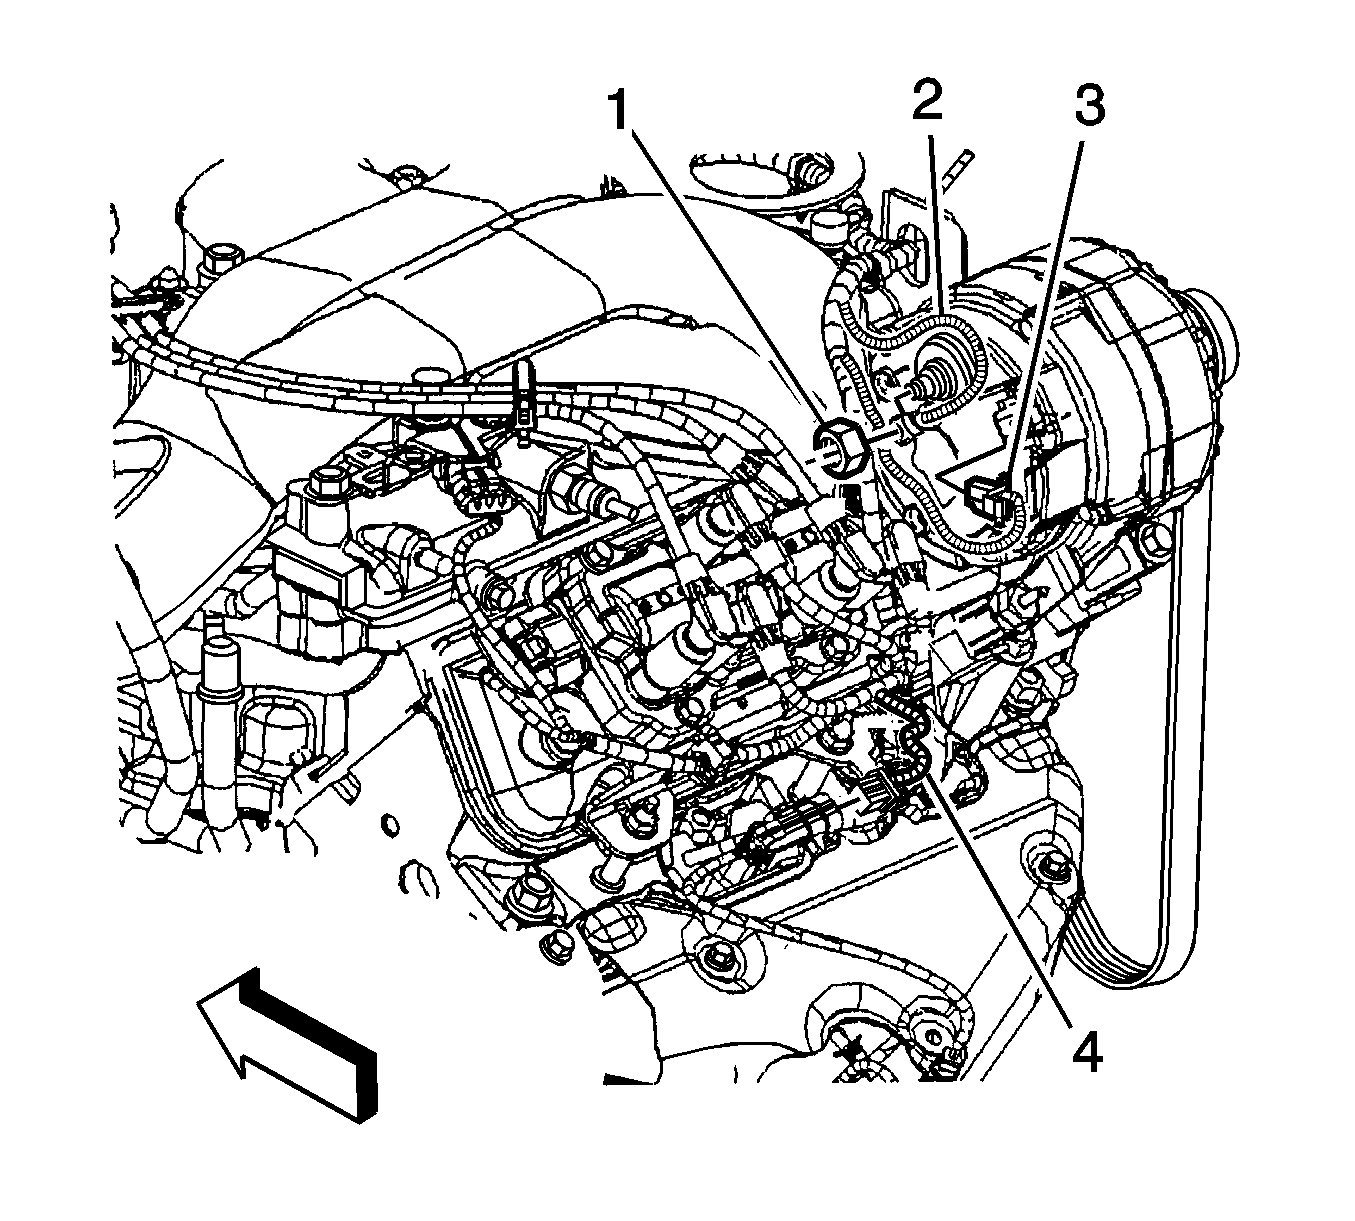
- Disconnect the engine harness electrical connector (1) from the EVAP purge solenoid.
- Disconnect the engine harness electrical connector (2) from the throttle actuator.
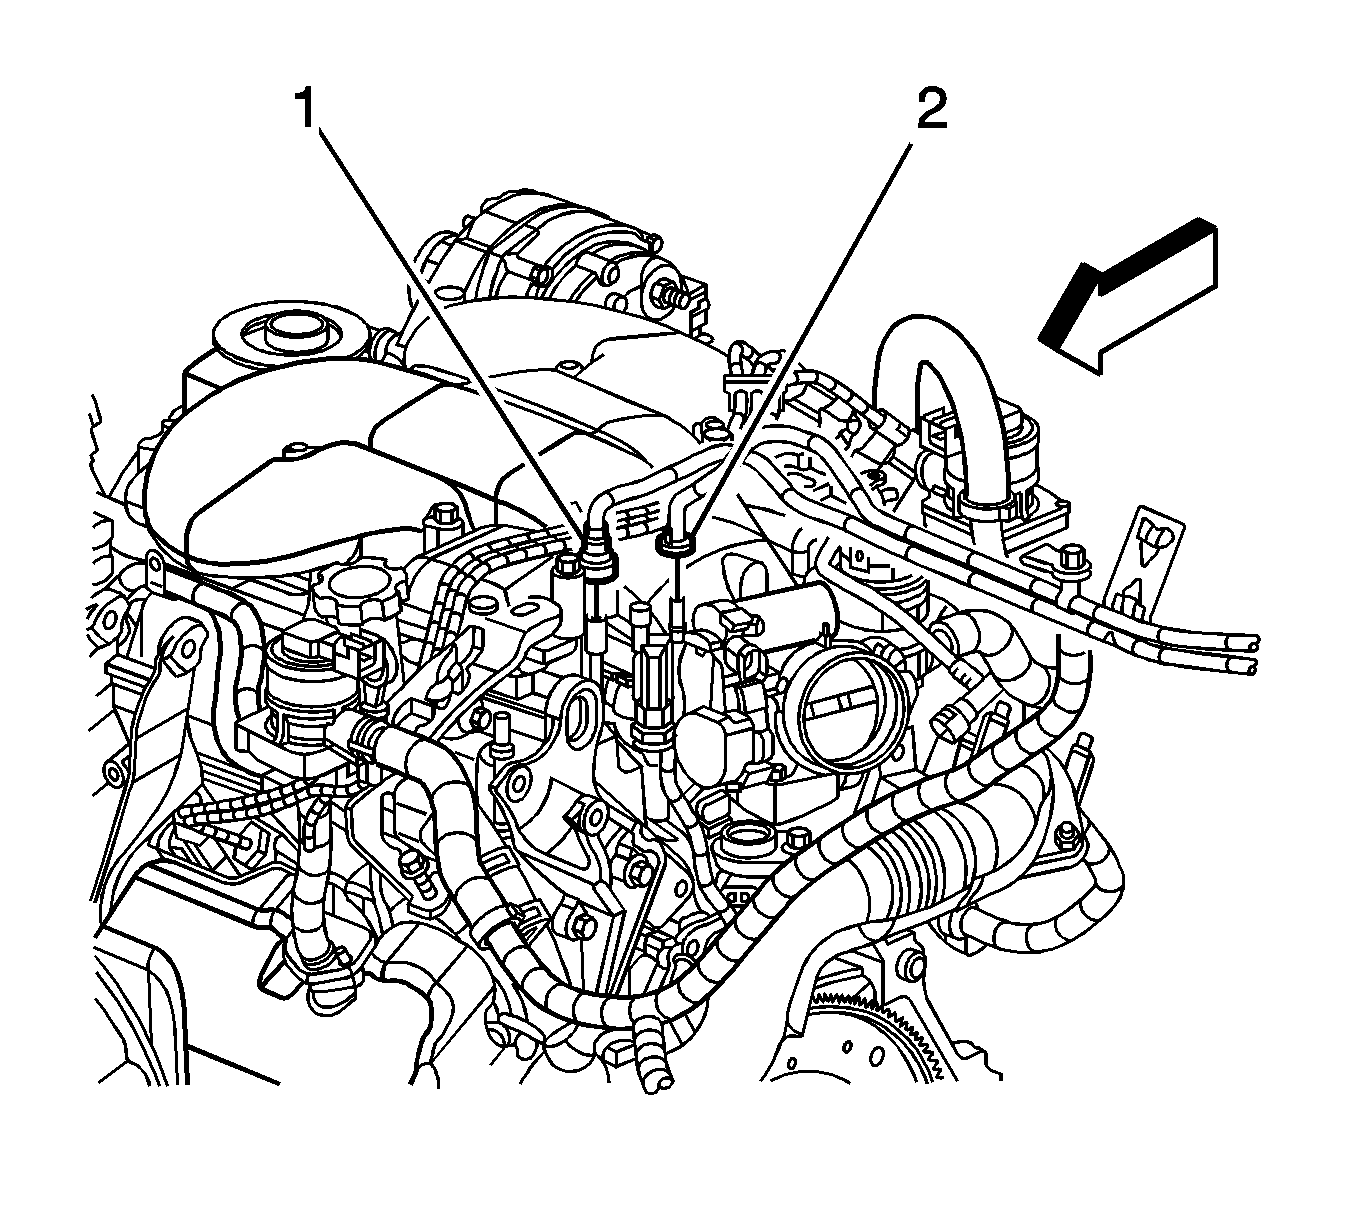
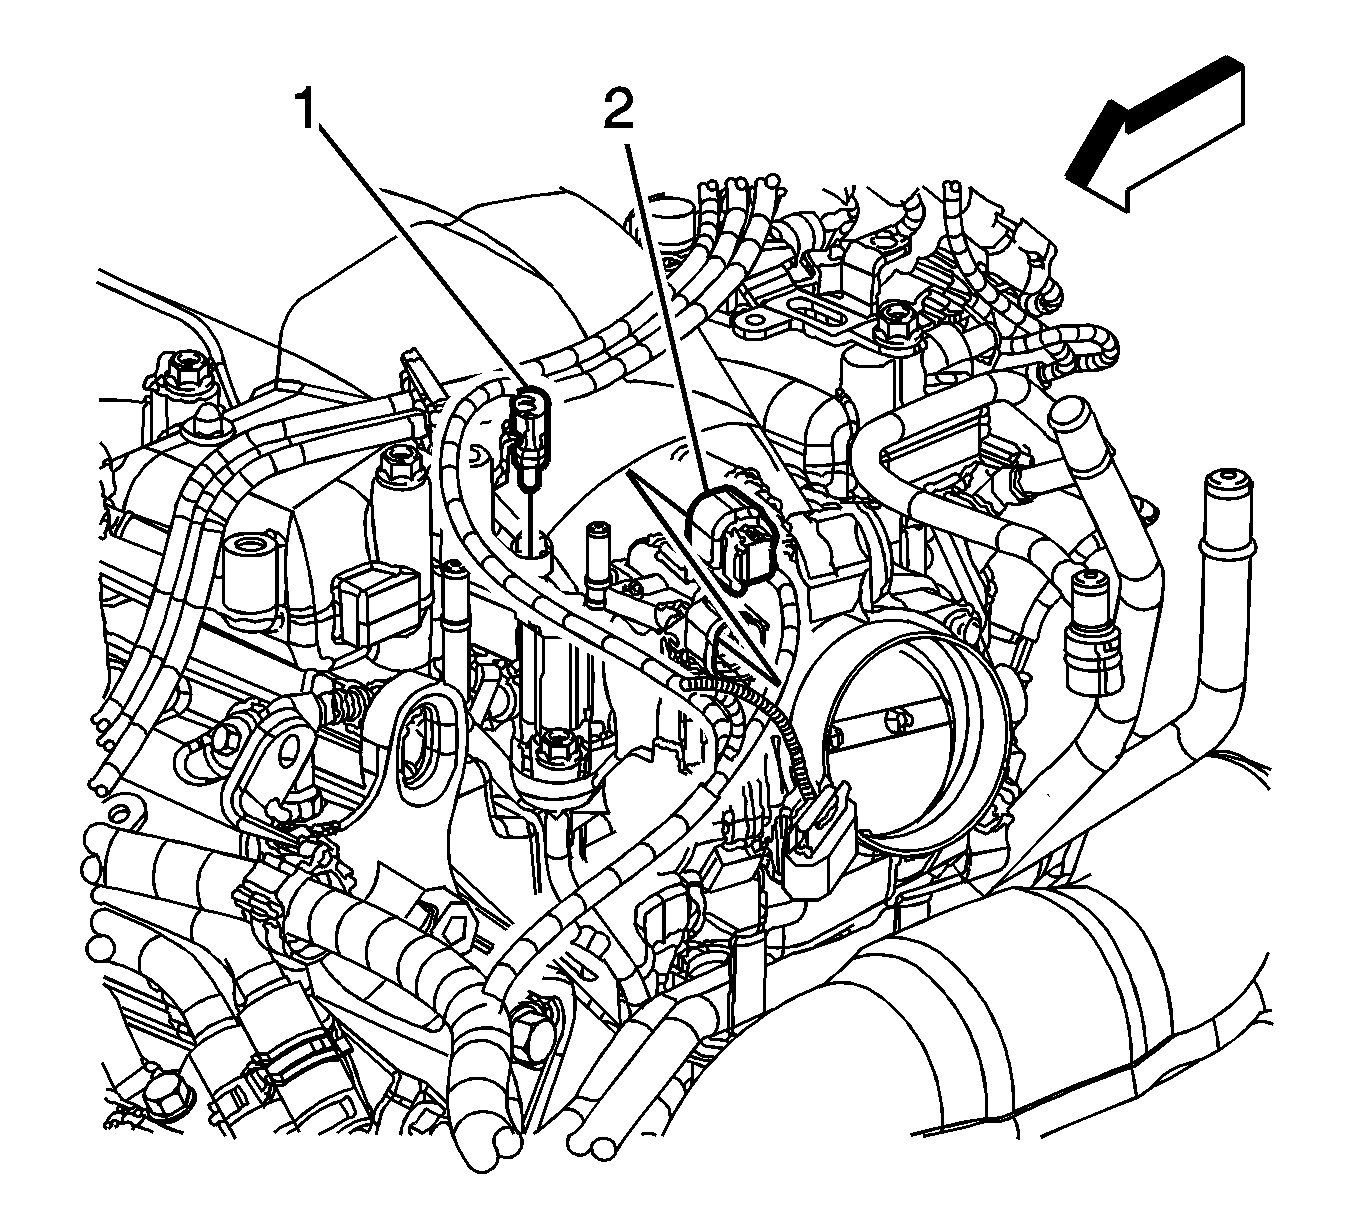
- Disconnect the engine harness electrical connector (1) from the manifold absolute pressure (MAP) sensor.
- Disconnect the engine harness electrical connector (2) from the ignition coil.
- Remove the engine harness clip (1) from the ignition coil bracket.
- Remove the engine harness clip (1) from he ignition coil bracket.
- Remove the engine harness clip from the engine.
- Remove the engine harness bolt.
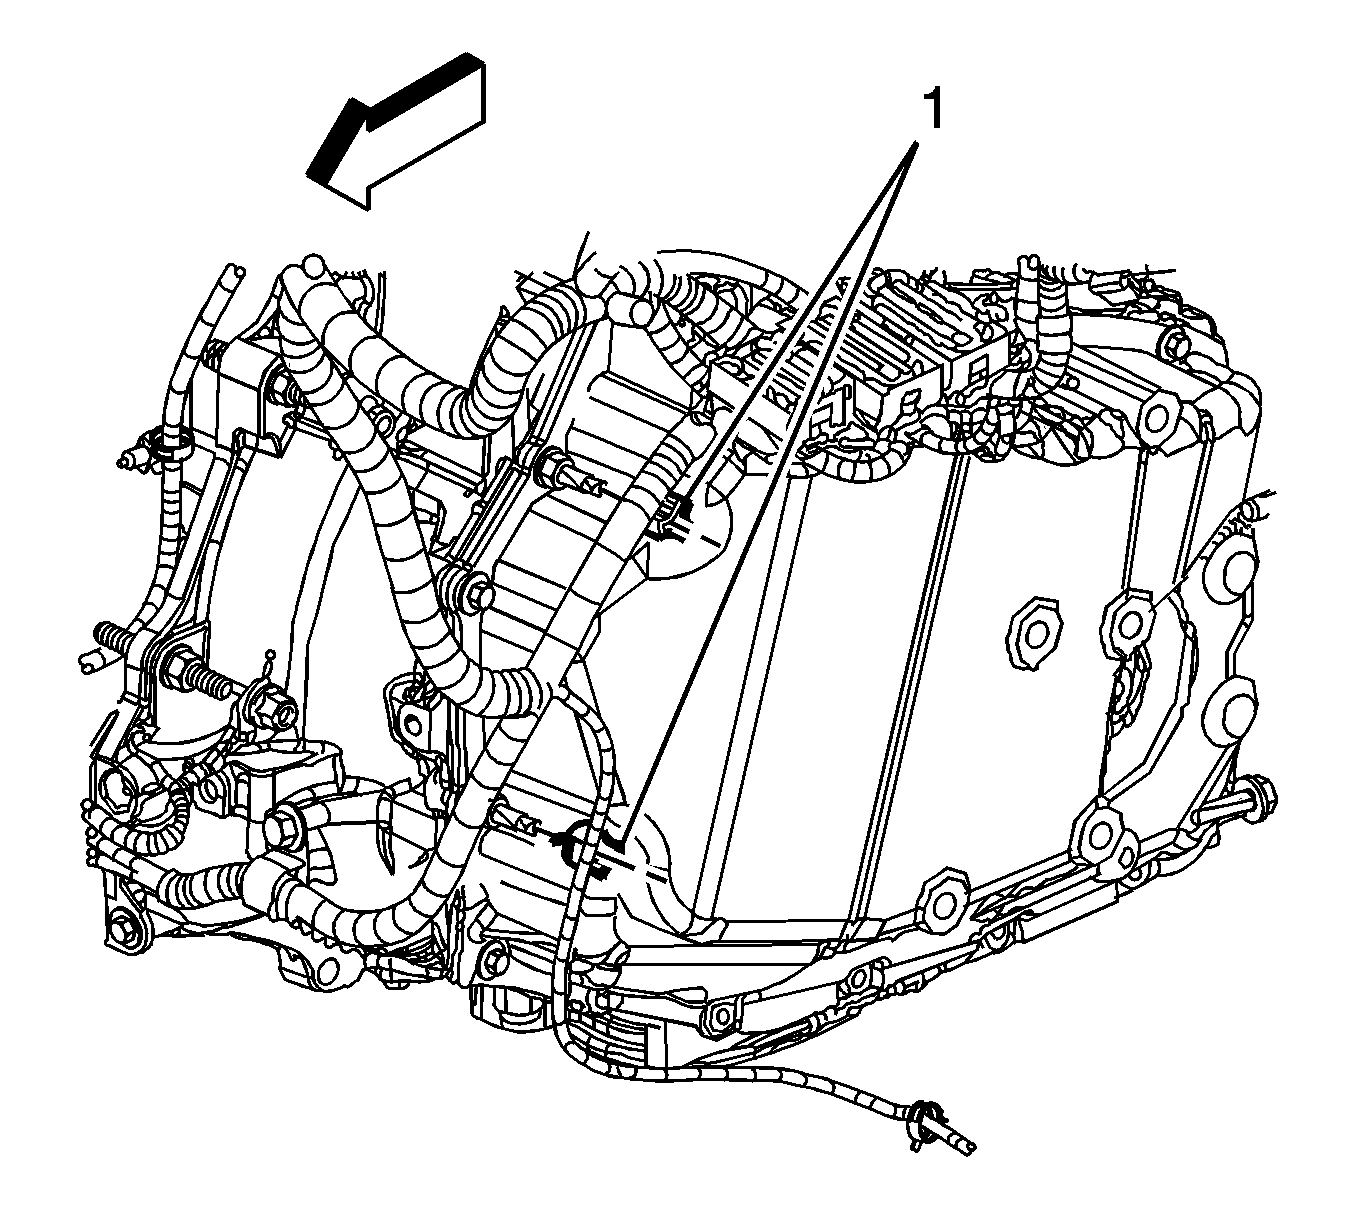
- Disconnect the engine harness electrical connector from the camshaft actuator magnet.
- Remove the engine harness bracket nut (1).
- Remove the engine harness bracket (2) from the stud.
- Remove the engine harness clip (1) from the bracket.
- Disconnect the engine harness electrical connector (1) from the intake manifold tuning valve.
- Remove the connector position assurance (CPA) retainer (2).
- Disconnect the engine harness electrical connector (3) from the fuel injector harness electrical connector.
- Remove the generator terminal nut (1).
- Remove the engine harness lead (2) from the generator.
- Disconnect the engine harness electrical connector (3) from the generator.
- Disconnect the engine harness electrical connector (4) from the heated oxygen sensor (HO2S).
- Remove the engine harness clip (1) from the strut bracket.
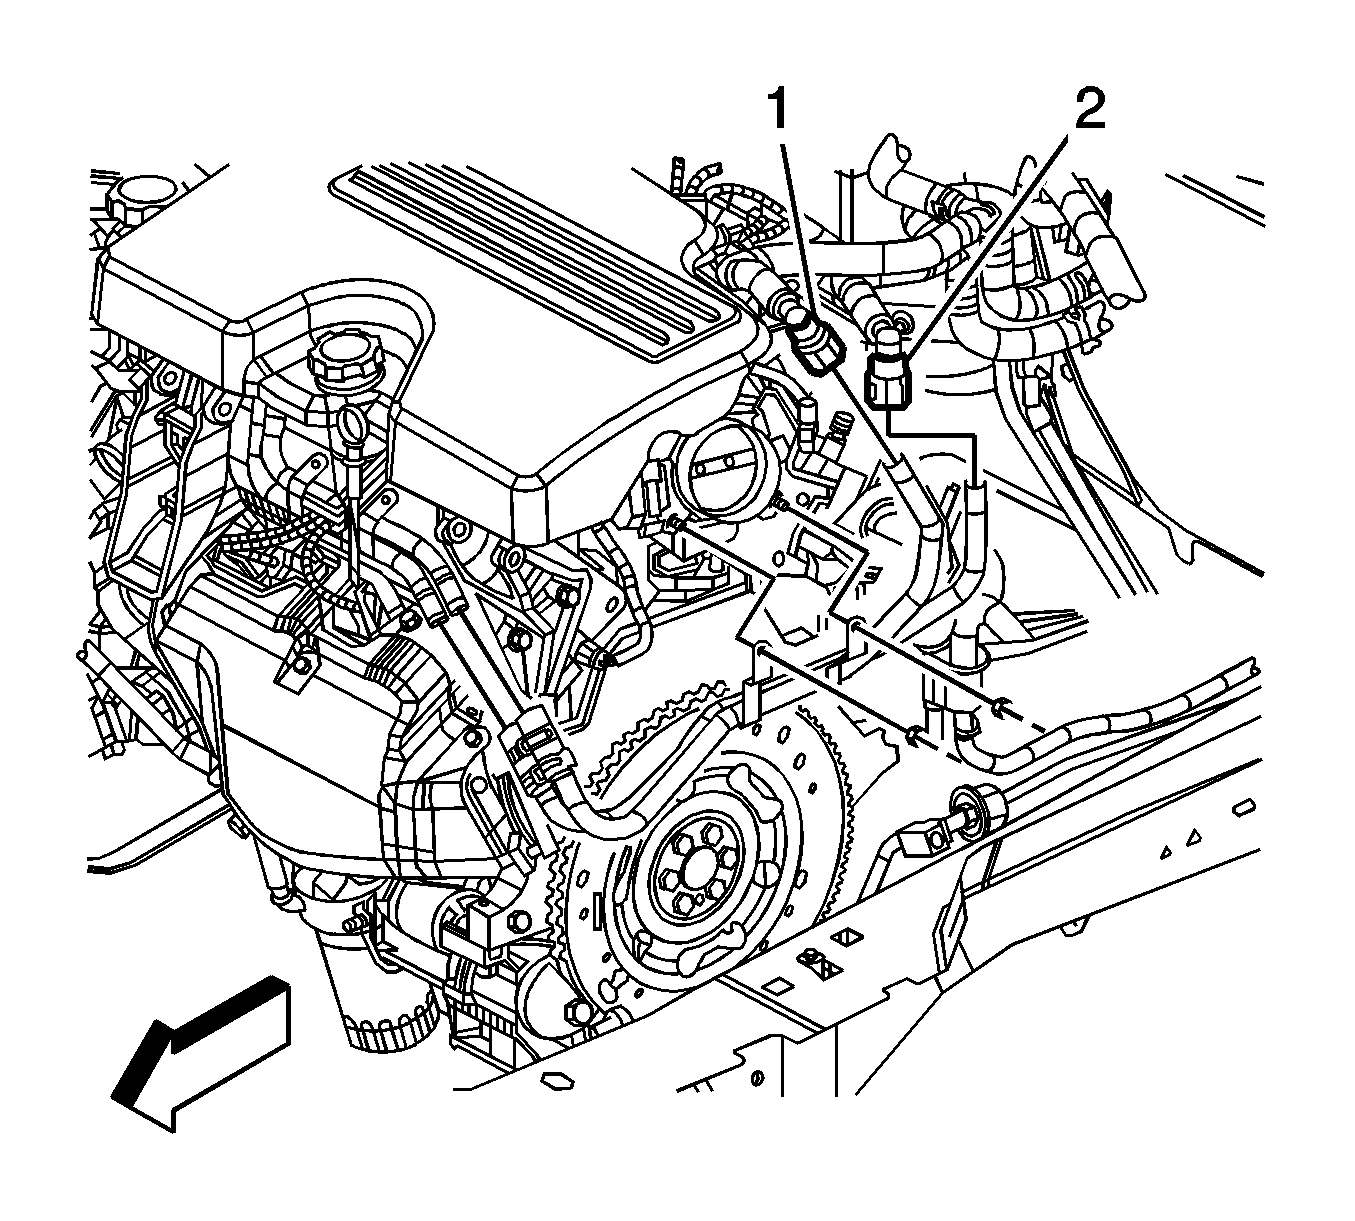
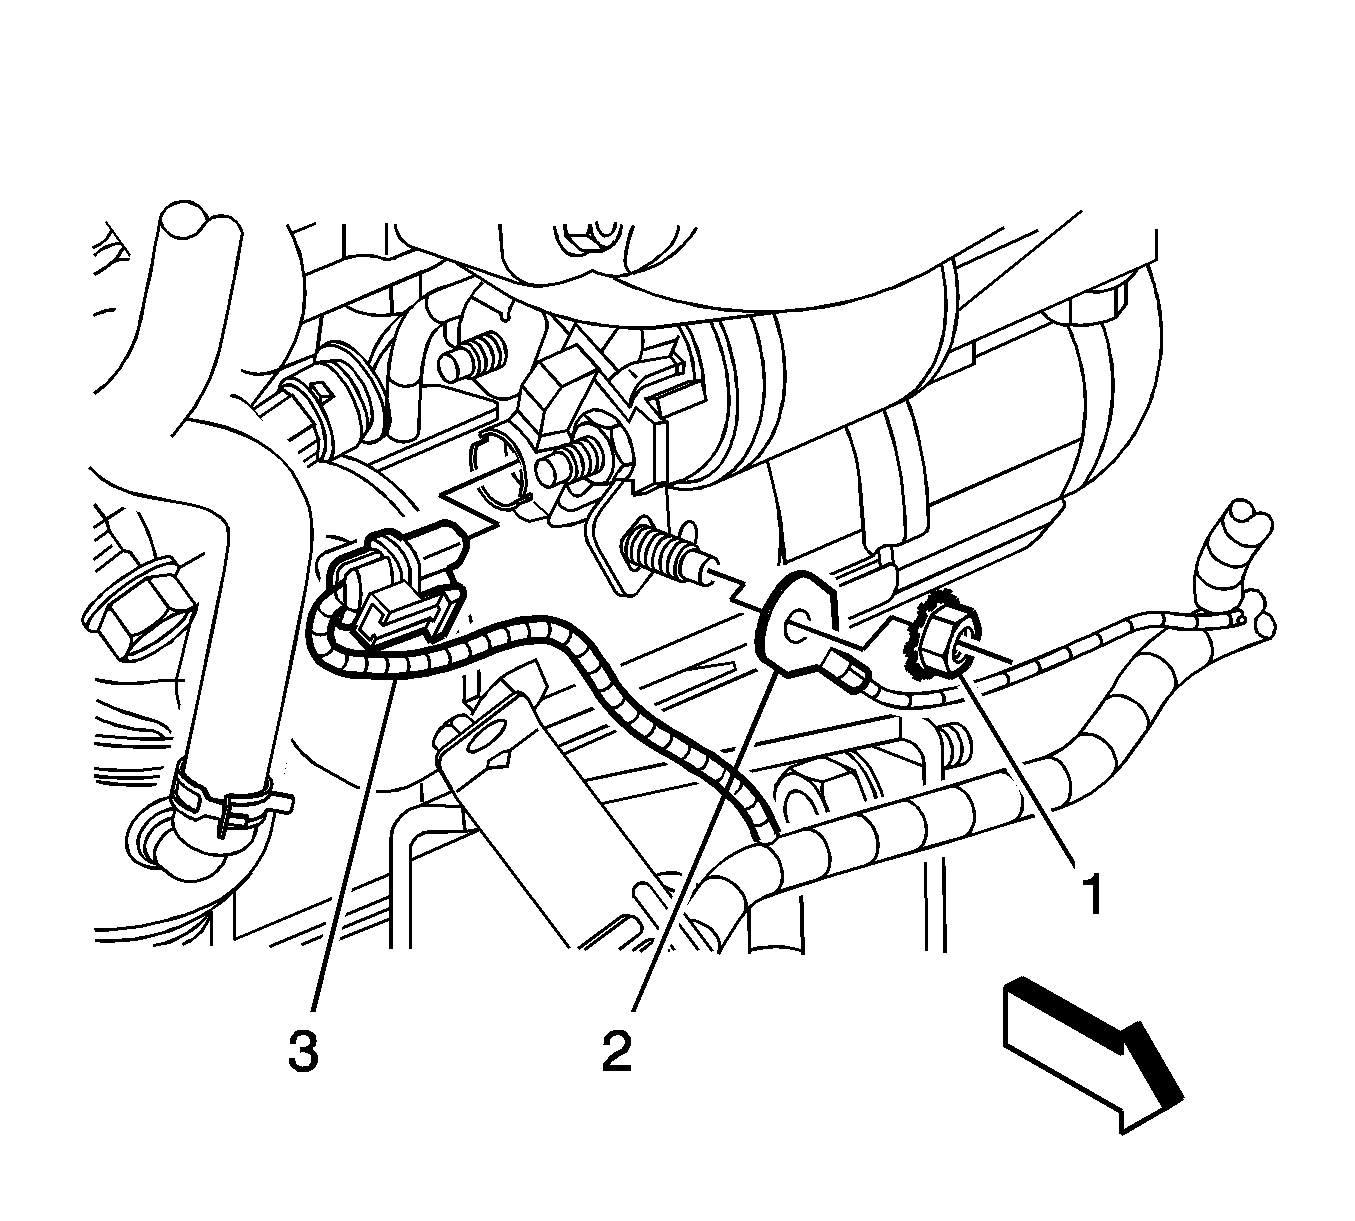
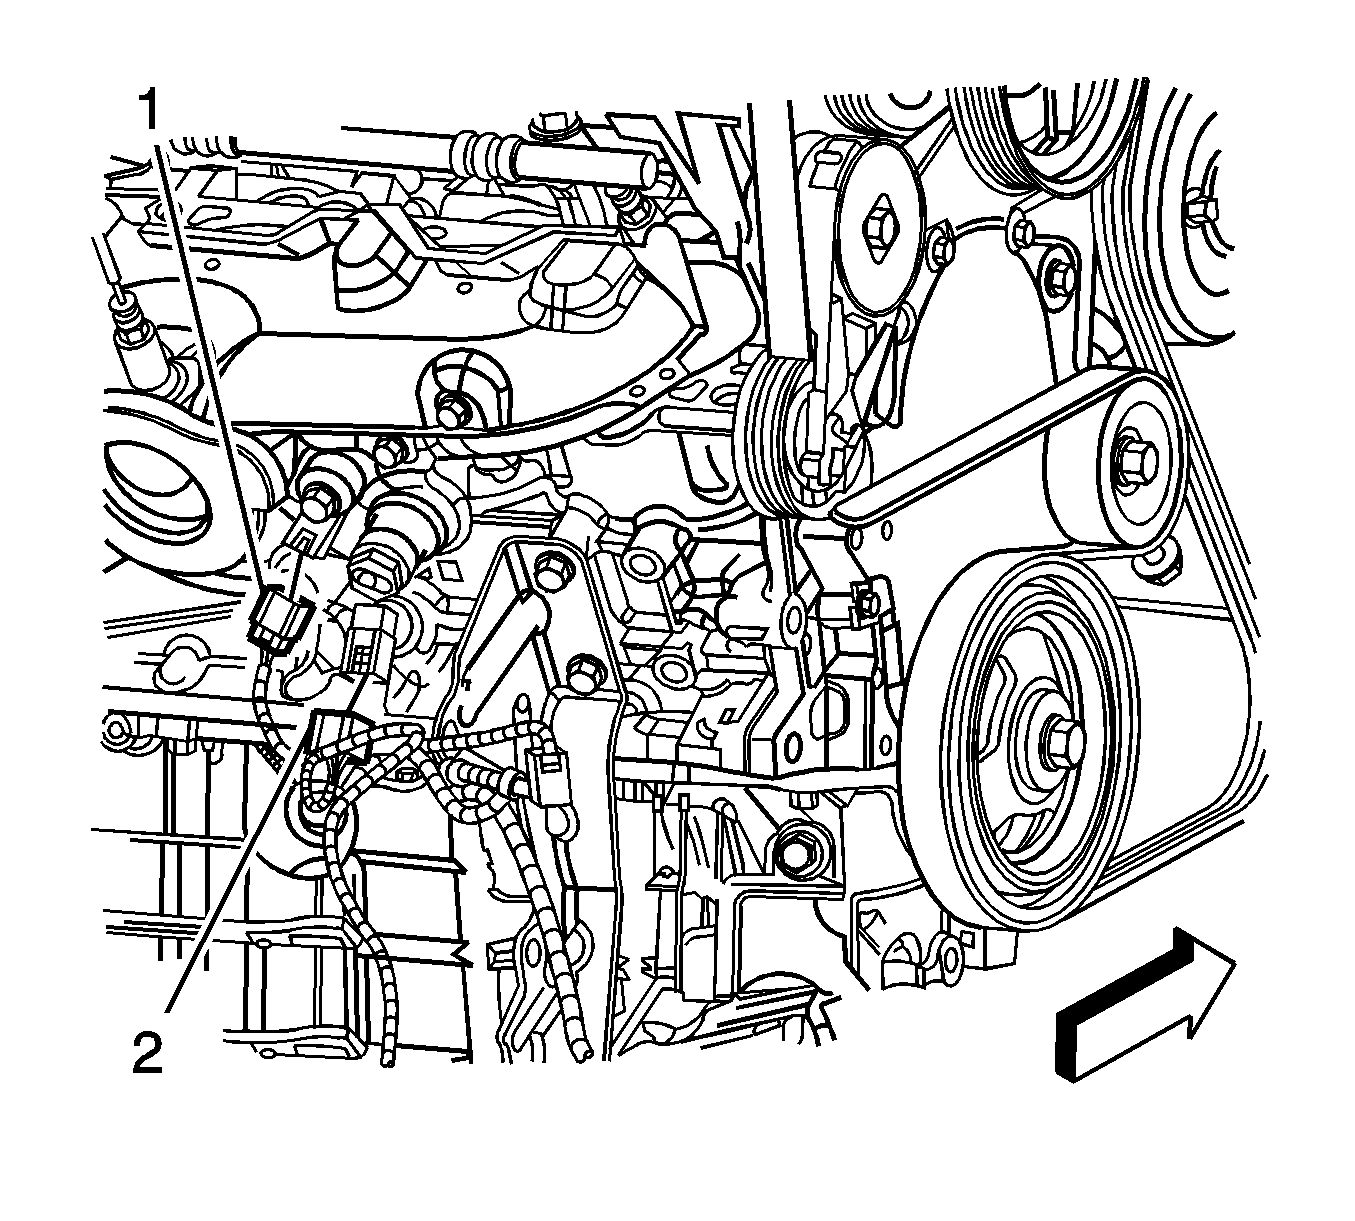
- Disconnect the engine harness electrical connector (1) from the crankshaft position (CKP) sensor.
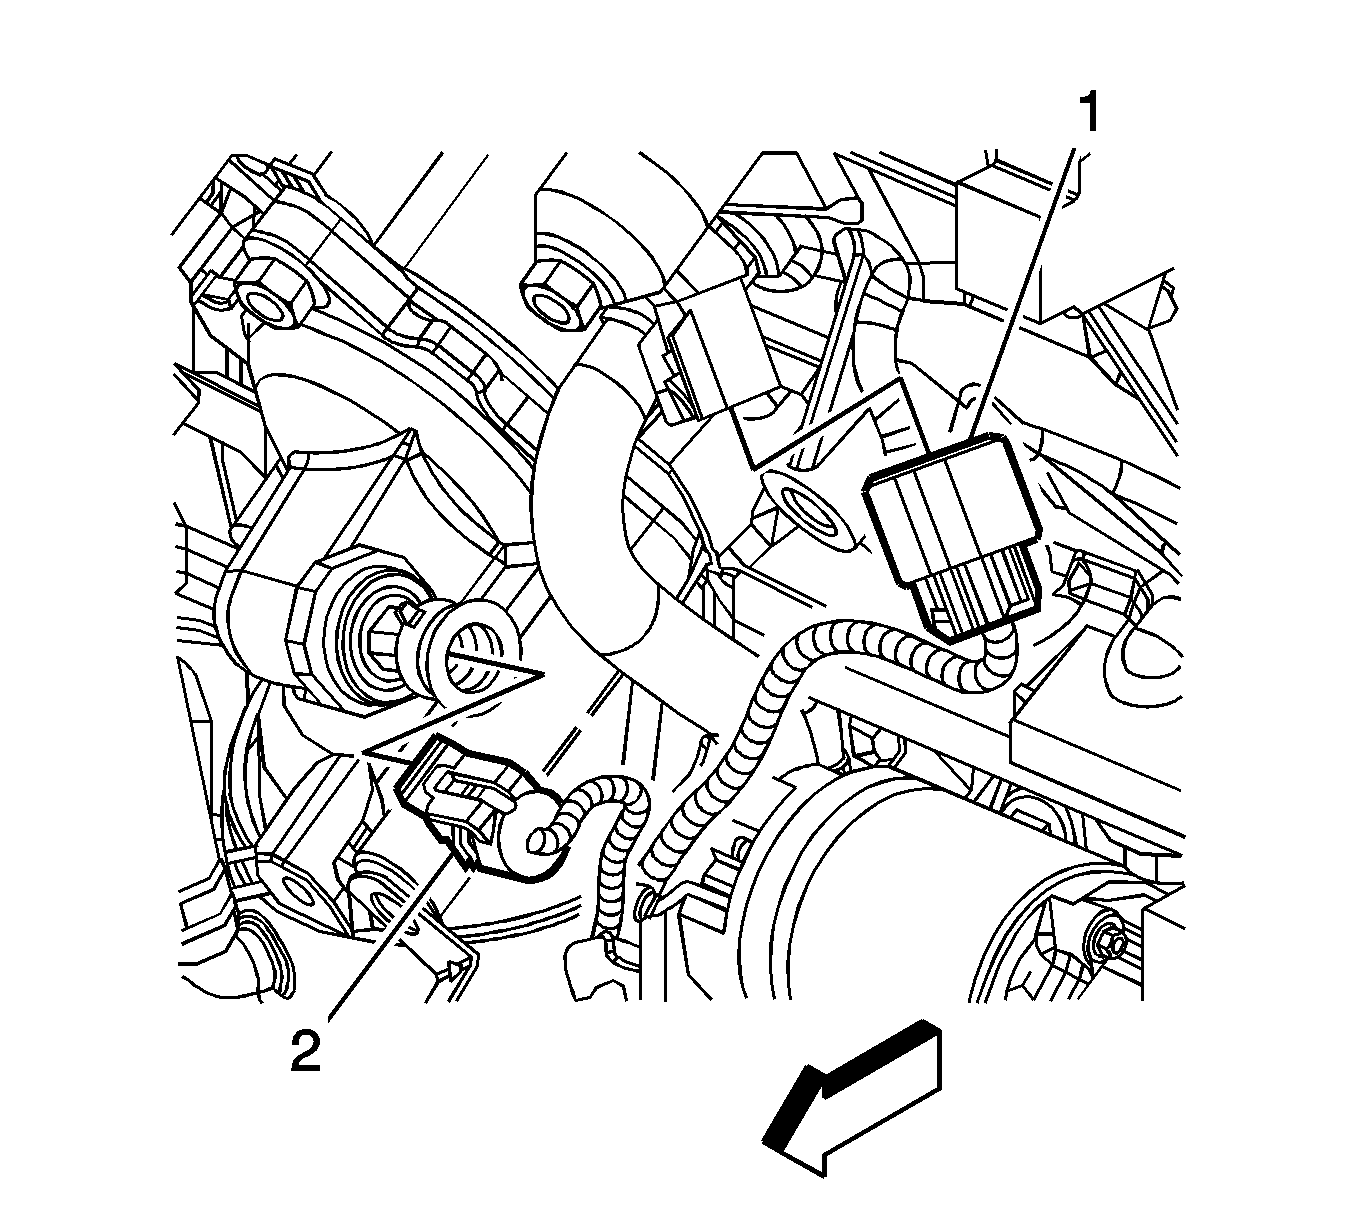
- Disconnect the engine harness electrical connector (1) from the knock sensor.
- Disconnect the engine harness electrical connector (2) from the oil pressure sensor.
- Disconnect the engine harness electrical connector from the transaxle.
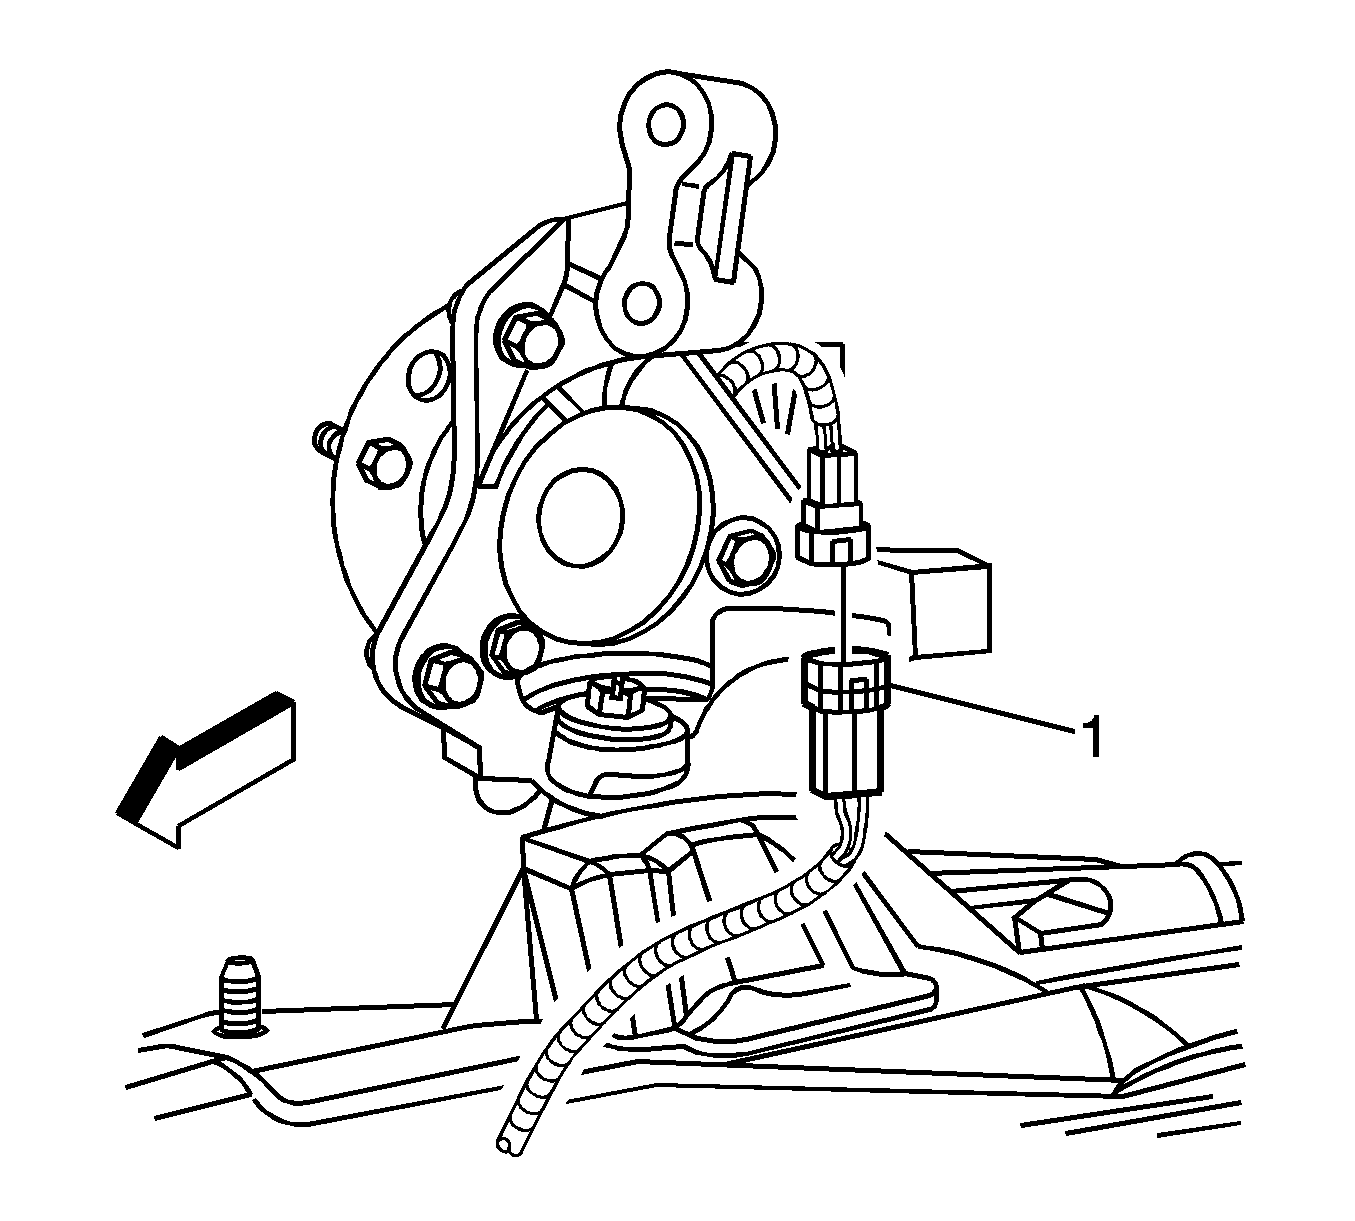
- Disconnect the engine harness electrical connector (1) from the vehicle speed sensor (VSS).
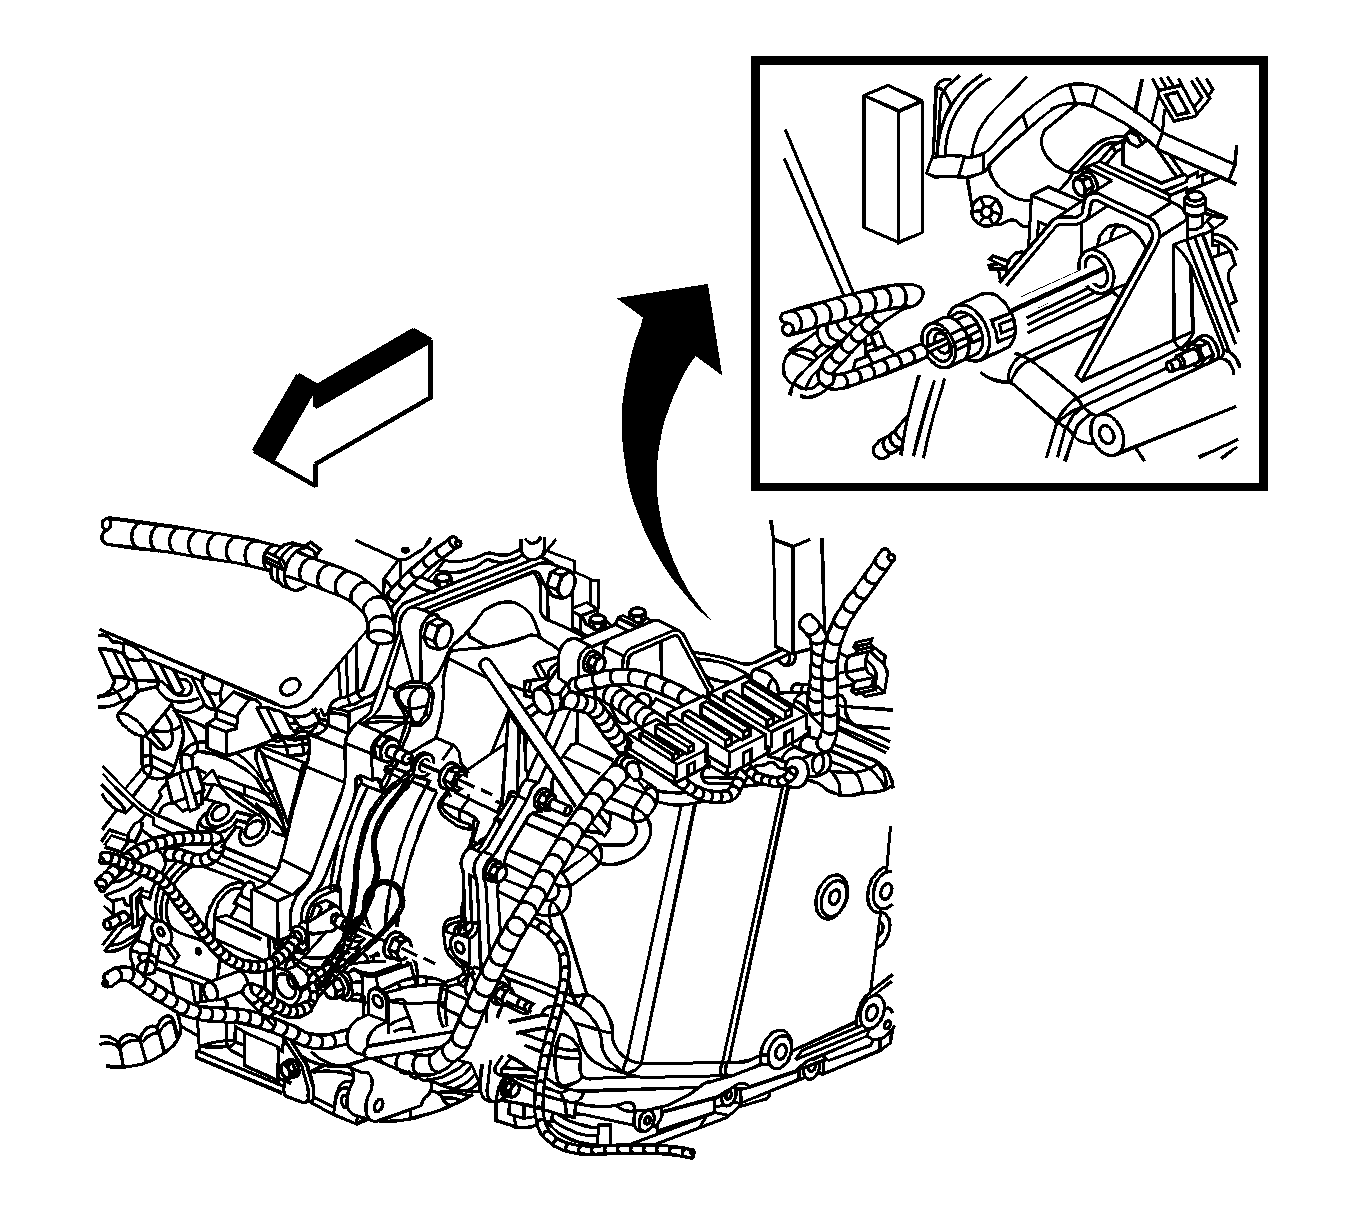
- Remove the engine harness clip (1) from the stud on the transaxle.
- Remove the engine harness clamp bolt (1) from the transaxle.
- Remove the engine harness clips (1) from the transaxle studs.
- Disconnect the engine harness electrical connector from the oil level sensor.
- Remove the engine harness clip from the oil pan.
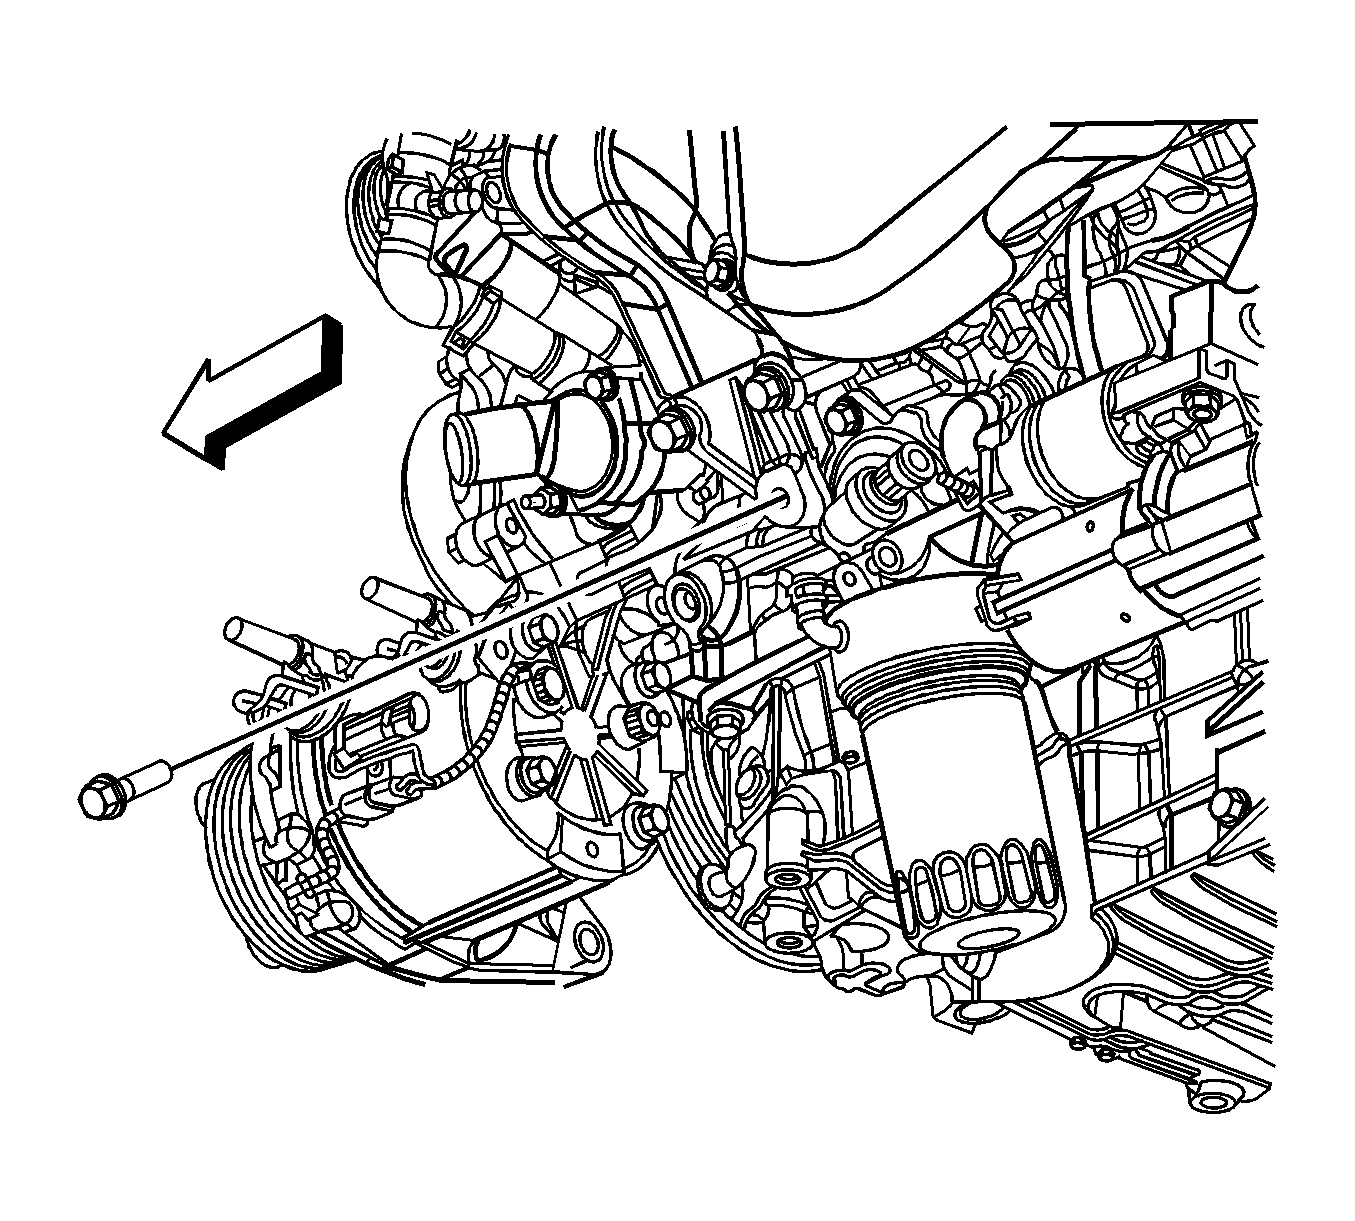
- Gather all branches of the engine harness together and remove the engine harness from the engine.
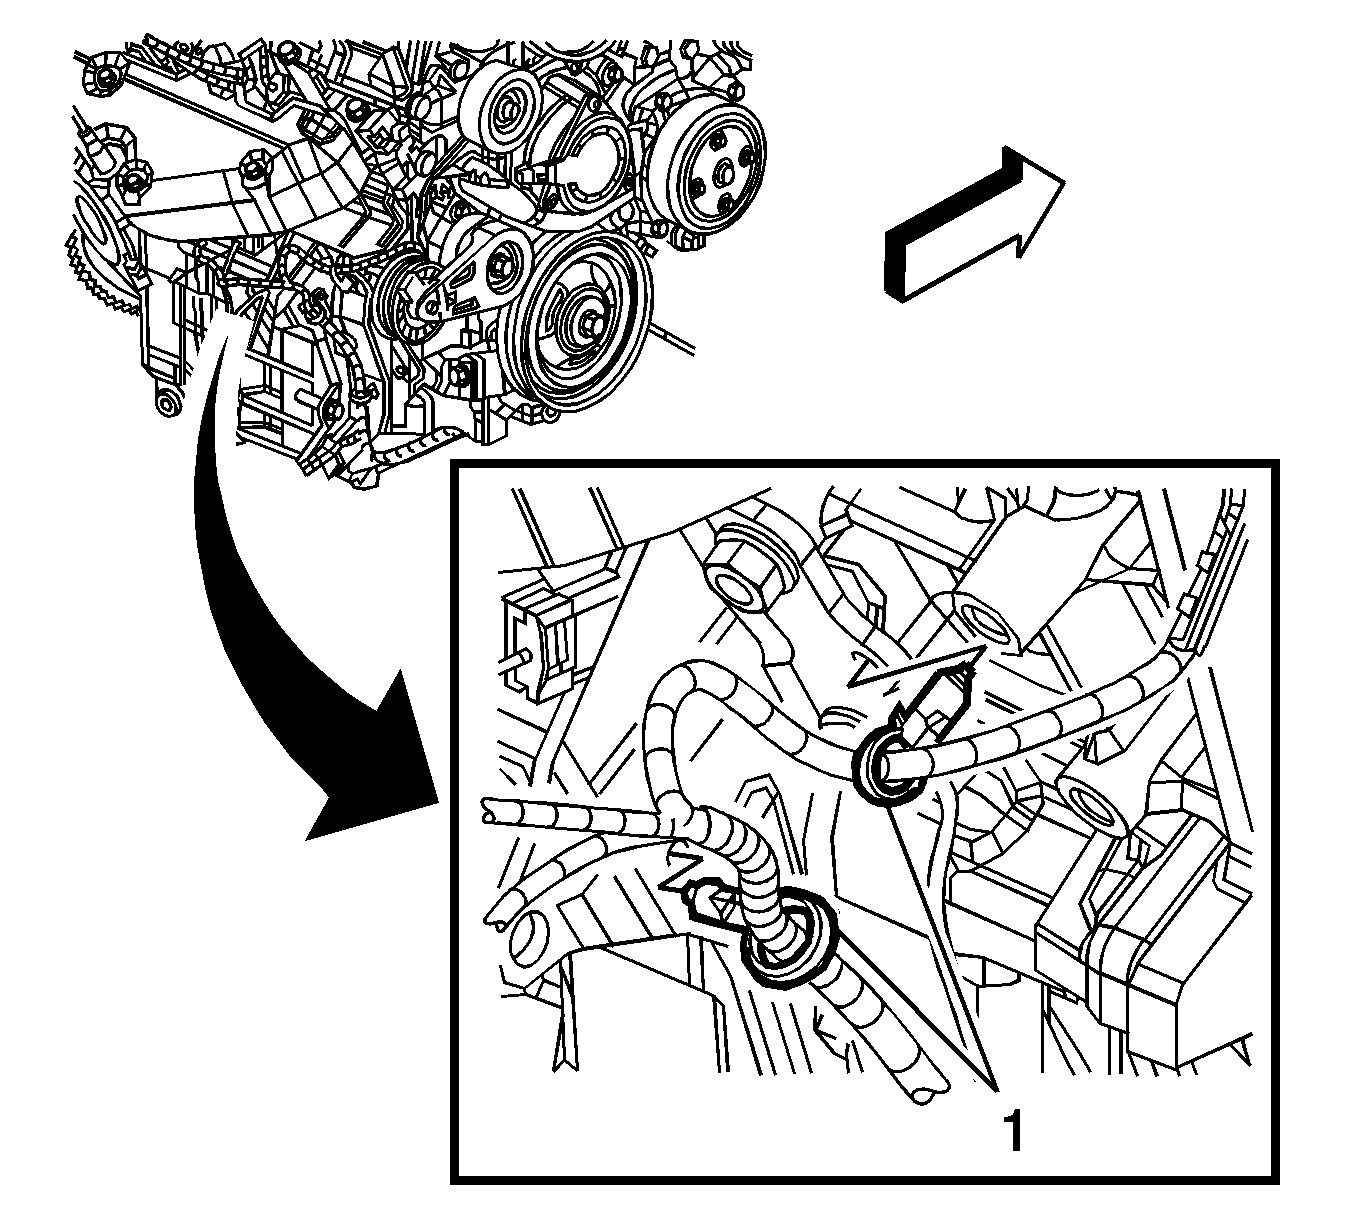
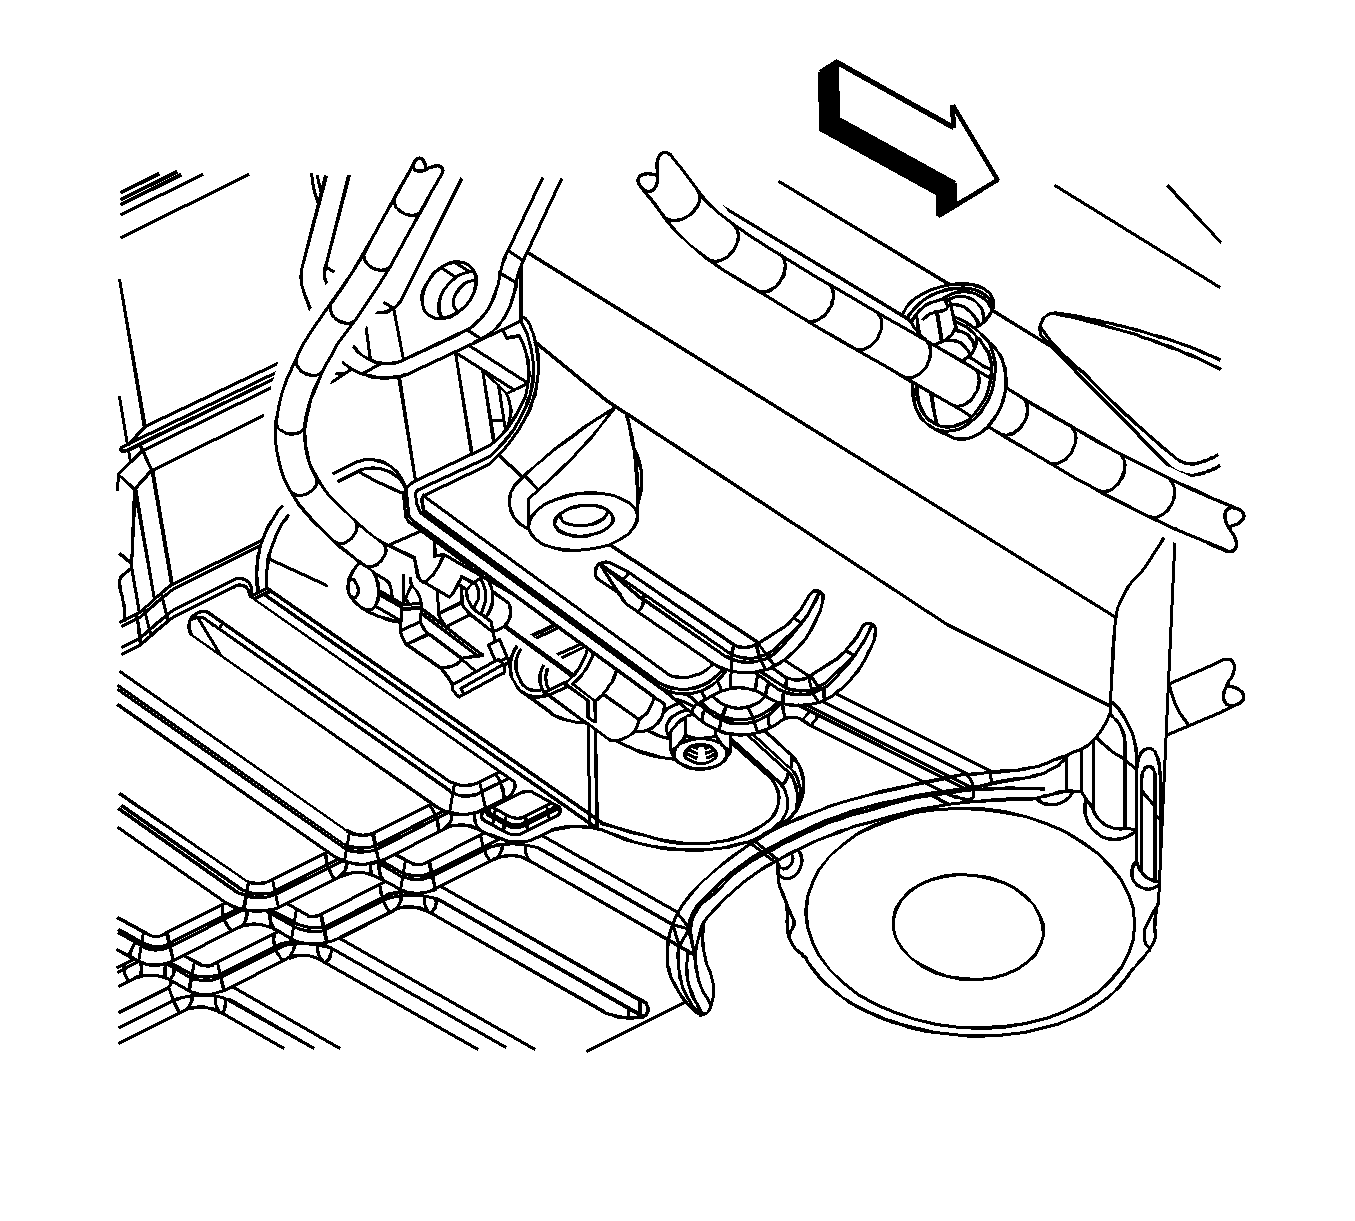
- Disconnect the power steering line retainer from the generator bracket.
- Remove the power steering pressure pipe and return line from the power steering pump and position out of the way. Refer to Power Steering Gear Inlet Pipe/Hose Replacement .
- Install an engine hoist to the engine.
- Remove the transaxle bolts and studs.
- Support the transaxle.
- Separate and remove the engine from the transaxle and the frame.
- Use the J 37096 in order to hold the flywheel.
- Loosen the flywheel bolts.
- Remove 5 of the 6 flywheel bolts leaving one bolt at the top of the crankshaft.
- Grip the flywheel and remove the remaining bolt. Do not drop the flywheel when removing the final bolt.
- Remove the engine flywheel.
- Install the engine to the engine stand.
- Remove the engine hoist from the engine.

Notice: The front wheels of the vehicle must be maintained in the straight ahead position and the steering column must be in the LOCK position before disconnecting the steering column or intermediate shaft. Failure to follow these procedures will cause improper alignment of some components during installation and result in damage to the SIR coil assembly.


Important: It is not necessary to evacuate the A/C system prior to repositioning the A/C compressor.

Notice: Do not attempt to free the ball stud by using a pickle fork or wedge type tool, because seal or bushing damage could result. Use the proper tool to separate all ball joints.
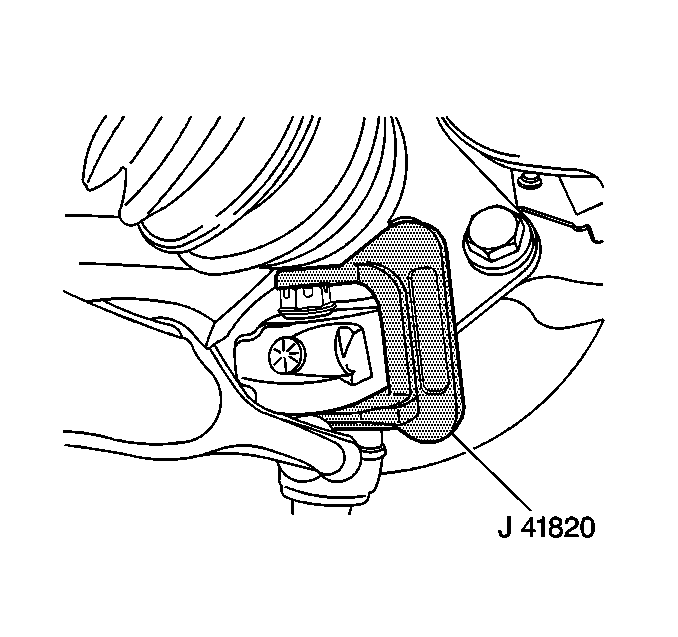
Notice: Use only the recommended tools for separating the ball joint from the knuckle. Do NOT hammer or pry the ball joint from the knuckle. Failure to use the recommended tools may cause damage to the ball joint and seal.
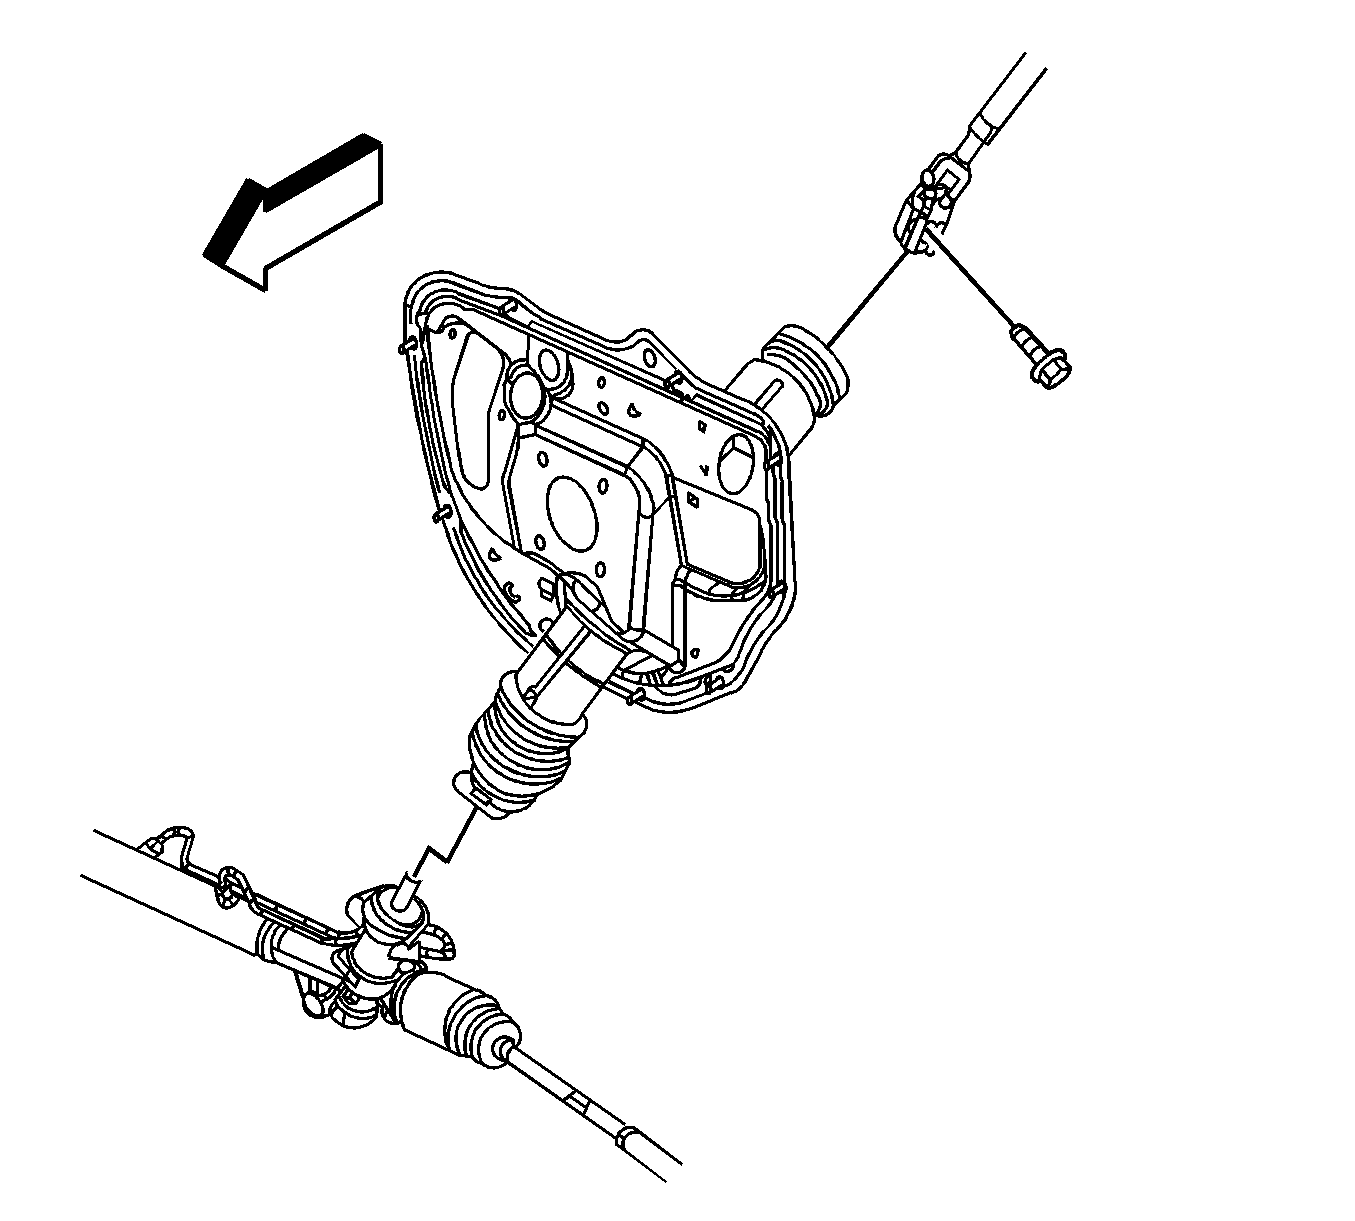
Caution: Failure to disconnect the intermediate shaft from the rack and pinion steering gear stub shaft can result in damage to the steering gear and/or intermediate shaft. This damage may cause loss of steering control which could result in an accident and possible personal injury


Installation Procedure
- Install an engine hoist to the engine.
- Remove the engine from the engine stand.
- Position the flywheel to the crankshaft.
- Install the flywheel bolts finger tight.
- Use the J 37096 in order to hold the flywheel.
- Tighten the flywheel bolts.
- Install the engine to the transaxle and the frame.
- Install the transaxle bolts and studs.
- Remove the support from the transaxle.
- Remove the engine hoist from the engine.
- Install the power steering pressure and return lines to the power steering pump. Refer to Power Steering Gear Inlet Pipe/Hose Replacement .
- Connect the power steering line retainer at the generator bracket.
- Place the engine wiring harness on top of the engine and position the harness branches.
- Install the engine harness clip to the oil pan.
- Connect the engine harness electrical connector to the oil level sensor.
- Install the engine harness clips (1) to the transaxle studs.
- Install the engine harness clamp bolt (1) to the transaxle.
- Install the engine harness clip (1) to the stud on the transaxle.
- Connect the engine harness electrical connector (1) to the VSS.
- Connect the engine harness electrical connector to the transaxle.
- Connect the engine harness electrical connector (1) to the knock sensor.
- Connect the engine harness electrical connector (2) to the oil pressure sensor.
- Connect the engine harness electrical connector (1) to the CKP sensor.
- Install the engine harness clip (1) to the strut bracket.
- Connect the engine harness electrical connector (4) to the HO2S.
- Connect the engine harness electrical connector (3) to the generator.
- Install the engine harness lead (2) to the generator.
- Install the generator terminal nut (1).
- Connect the engine harness electrical connector (3) to the fuel injector harness electrical connector.
- Install the CPA retainer (2).
- Connect the engine harness electrical connector (1) to the intake manifold tuning valve.
- Install the engine harness clip (1) to the bracket.
- Install the engine harness bracket (2) to the stud.
- Install the engine harness bracket nut (1).
- Connect the engine harness electrical connector to the camshaft actuator magnet.
- Install the engine harness bolt.
- Install the engine harness clip to the engine.
- Install the engine harness clip (1) to the ignition coil bracket.
- Install the engine harness clip (1) to the ignition coil bracket.
- Connect the engine harness electrical connector (2) to the ignition coil.
- Connect the engine harness electrical connector (1) to the MAP sensor.
- Connect the engine harness electrical connector (2) to the throttle actuator.
- Connect the engine harness electrical connector (1) to the EVAP purge solenoid.
- Install the exhaust crossover pipe (2) and nuts (1).
- Install the exhaust crossover pipe shield (2) and bolts (1).
- Install the transaxle brace and bolts.
- Install the engine harness clips (1) to the transaxle brace.
- Install the engine harness clips (1) to the transaxle brace.
- Install the engine mount to frame nuts.
- Install the torque converter bolts.
- Use the J 37096 in order to hold the flywheel.
- Tighten the torque converter bolts.
- Install the torque converter covers (2, 4).
- Install the torque converter cover bolts (1, 3).
- Install the starter motor and bolts.
- Install the transaxle brace and bolts.
- Install the negative battery cable to the transaxle stud.
- Install the engine harness grounds to the studs.
- Install the engine harness ground nuts (1, 2) to the transaxle studs.
- If necessary perform the following steps, connect the engine harness electrical connector (3) to the starter.
- Install the engine battery positive wire terminal (2) to the stud.
- Install the engine battery positive wire nut (1).
- Lower the vehicle over the powertrain/frame assembly.
- Position the frame rear straps (1, 4).
- Install the frame rear strap bolts (2, 3).
- Install the front and rear frame bolts (1, 2).
- Raise the vehicle off of the J 39580 .
- Remove the J 39580 from under the frame.
- Connect the intermediate steering shaft to the power steering gear.
- Install the intermediate steering shaft pinch bolt.
- Position the intermediate steering shaft seal onto the steering gear.
- Unsecure the wheel drive shafts from the steering knuckle/struts.
- Install the wheel drive shafts to the transaxle.
- Verify that the wheel drive shaft is properly engaged to the transaxle by grasping the inner tripot housing and pulling outward. Do not pull on the wheel drive shaft bar. The wheel drive shaft will remain firmly in place when properly engaged.
- Install the ball joints to the knuckles.
- Install the ball joint castle nuts.
- If necessary, tighten the castle nut in order to align the nut slot (1) to the cotter pin hole (2) as shown.
- Tighten the lower ball joint castle nuts (1).
- Install NEW lower ball joint cotter pins (2) to the ball joints.
- Bend the ends of the cotter pin as shown in either example.
- Install the outer tie rod (2) to the steering knuckle (1).
- Install the tie rod end nuts (1) at the steering knuckles.
- Install the stabilizer shaft links (2) to the stabilizer shaft. (left side shown, right side similar).
- Install the stabilizer shaft link lower nuts (3).
- Install the engine harness clips (1, 2) to the heat shield.
- Connect the battery cable retainers at the core support.
- Install the engine splash shield. Refer to Engine Splash Shield Replacement .
- Install the catalytic converter. Refer to Catalytic Converter Replacement .
- Position and install the A/C compressor onto the stud.
- Install the A/C compressor front bolt and nut.
- Install the A/C compressor rear bolt.
- Connect the engine harness electrical connectors to the A/C compressor.
- Install the drive belt. Refer to Drive Belt Replacement .
- Connect the engine harness electrical connectors (1) to the left and right wheel speed sensors. (right side shown, left side similar).
- Install the front wheels and tires. Refer to Tire and Wheel Removal and Installation .
- Install the engine mount struts. Refer to Engine Mount Strut Replacement - Right Side and Engine Mount Strut Bracket Replacement - Left Side .
- Connect the fuel feed (1) and EVAP (2) line quick connect fittings. Refer to Metal Collar Quick Connect Fitting Service and Plastic Collar Quick Connect Fitting Service .
- Install the brake booster vacuum hose to the upper intake manifold fitting.
- Connect the heater inlet (2) and outlet (1) hose quick connect fittings to the inlet and outlet pipes.
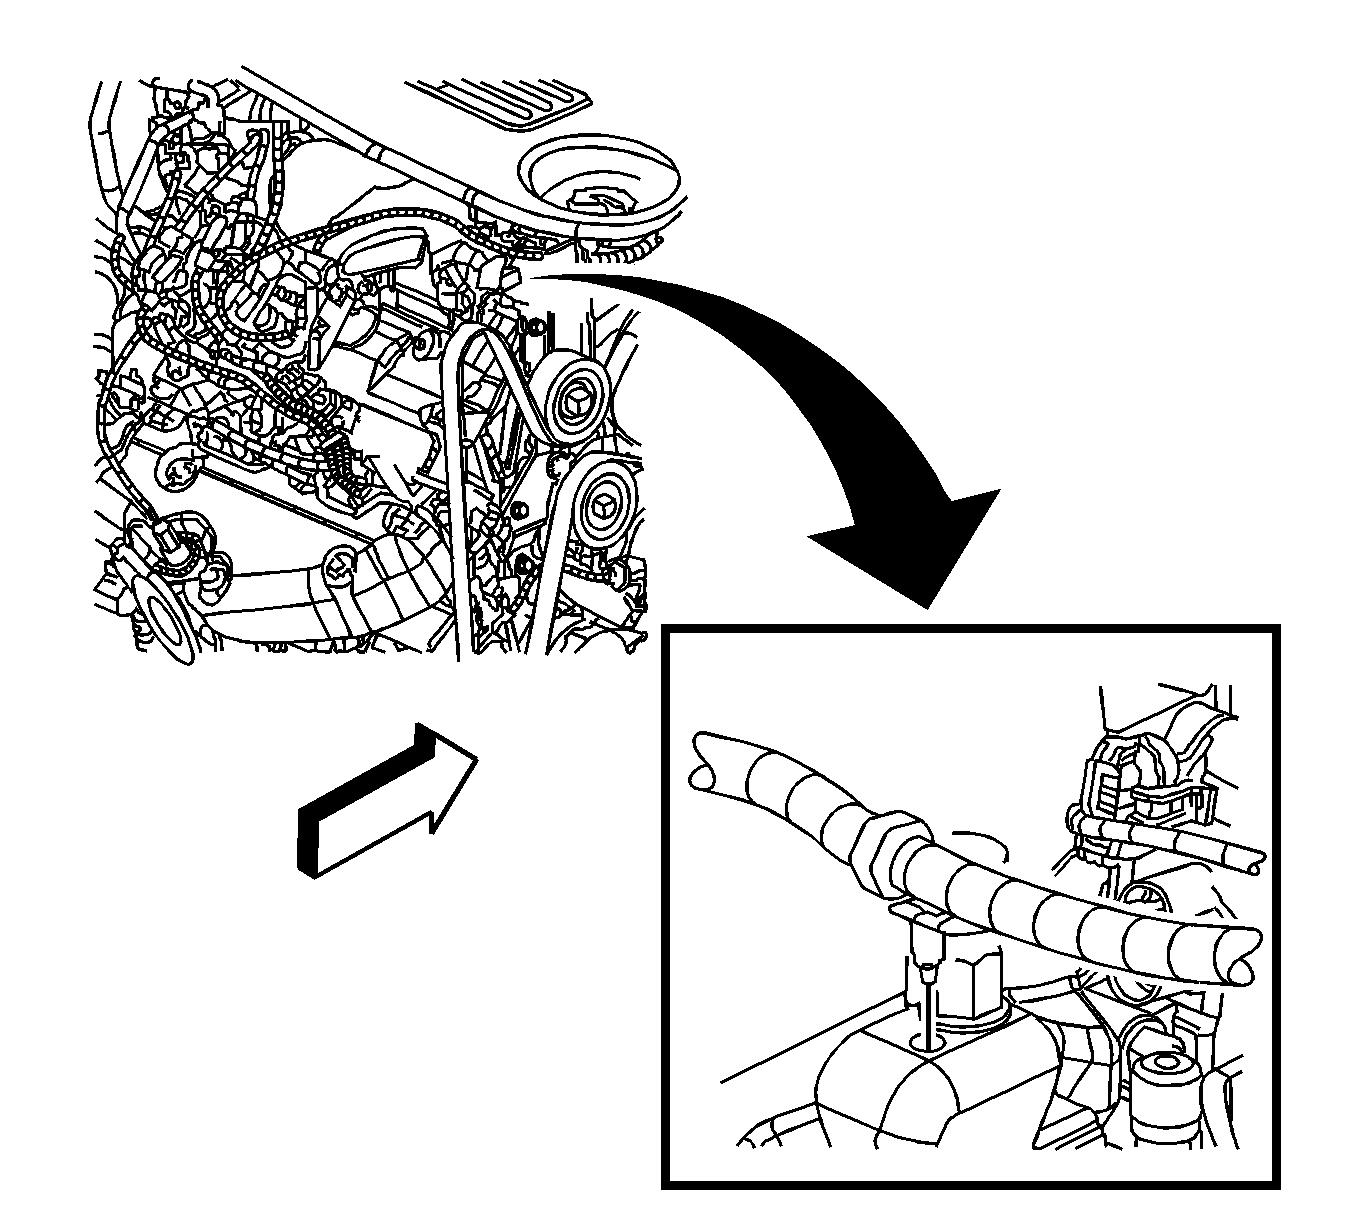
- Install the radiator outlet hose to the thermostat housing.
- Using the J 38185 , release the radiator outlet hose clamp.
- Install the radiator inlet hose to the coolant crossover.
- Using the J 38185 , release the radiator inlet hose clamp.
- Remove the engine harness wiring branch from on top of the engine.
- Install the air cleaner outlet duct to the throttle body and MAF/IAT sensor.
- Tighten the air cleaner outlet duct clamps at the throttle body and the MAF/IAT sensor.
- Connect the PCV fresh air tube quick connect fitting to the air cleaner outlet duct. Refer to Plastic Collar Quick Connect Fitting Service .
- Connect the engine harness electrical connector to the MAF/IAT sensor.
- Install the engine harness connector to the junction block retainer.
- Install the underhood junction block. Refer to Underhood Electrical Center or Junction Block Replacement .
- Install the engine harness clip (1) to the A/C line.
- Install the engine harness clip (1) to the A/C line.
- Connect the engine harness electrical connector (6) to the ABS module.
- Connect the engine harness electrical connector (5) to the I/P harness electrical connector (4).
- Connect the engine harness electrical connector (3) to the I/P harness electrical connector (2).
- Connect the engine harness electrical connector (1) to the TCM.
- Install the ECM to the air cleaner cover.
- Install the air cleaner cover.
- Tighten the air cleaner cover bolts.
- Install the junction block cover.
- Install the left side diagonal brace. Refer to Front End Sheet Metal Diagonal Brace Replacement .
- Install the coolant reservoir. Refer to Coolant Recovery Reservoir Replacement .
- Install the coolant recovery reservoir hose (2) to the crossover.
- Position the coolant recovery reservoir hose clamp (1) at the coolant crossover.
- Remove the J 42640 from the underside of the steering column.
- Install the lower radiator air baffle. Refer to Radiator Air Baffle Assemblies and Deflectors .
- Connect the negative battery cable. Refer to Battery Negative Cable Disconnection and Connection .
- Connect the positive battery cable.
- Connect the positive battery cable at the junction box.
- Connect the auxiliary ground cable on the inner fender.
- Connect the electrical connector to the sensor on the negative battery cable.
- Fill the cooling system. Refer to Cooling System Draining and Filling .
- Fill the engine with oil. Refer to Engine Oil and Oil Filter Replacement .
- Perform the CKP system variation learn procedure. Refer to Crankshaft Position System Variation Learn .
- Align the cover to the studs on the engine, push down on the cover above the stud in order to engage the cover to the studs.
- Install the engine oil fill cap.
- Start the engine listen for unusual noises.
- Inspect the engine for leaks.
Notice: Refer to Fastener Notice in the Preface section.
Tighten
Tighten the bolts to 70 N·m (52 lb ft).
Tighten
Tighten the bolts/studs to 75 N·m (55 lb ft).
Tighten
Tighten the 20 N·m (15 lb ft).
Tighten
Tighten the nut to 30 N·m (22 lb ft).
Tighten
Tighten the bolt to 20 N·m (15 lb ft).
Tighten
Tighten the nuts to 25 N·m (18 lb ft).
Tighten
Tighten the bolts to 10 N·m (89 lb in).
Tighten
Tighten the bolts to 43 N·m (32 lb ft).
Tighten
Tighten the nuts to 47 N·m (35 lb ft).
Tighten
Tighten the bolts to 63 N·m (47 lb ft).
Tighten
Tighten the bolts to 10 N·m (89 lb in).
Tighten
Tighten the bolts to 40 N·m (30 lb ft).
Tighten
Tighten the bolts to 43 N·m (32 lb ft).
Tighten
Tighten the nuts to 25 N·m (18 lb ft).
Tighten
Tighten the nut to 20 N·m (15 lb ft).
Tighten
Tighten the bolts to 50 N·m (37 lb ft).
Tighten
| • | Tighten the front bolts to 130 N·m (96 lb ft). |
| • | Tighten the rear bolts to 240 N·m (177 lb ft). |
Tighten
Tighten the bolt to 48 N·m (35 lb ft).

Important: Align the ball joint cotter pin hole parallel to the knuckle in order to ease the cotter pin installation.
Important: DO NOT loosen the castle nut in order to align the nut to the cotter pin hole.
Tighten
Tighten the nuts to 55 N·m (40 lb ft).
Important: Ensure that the cotter pin ends do NOT contact the ABS wheel speed sensor, the ABS sensor connector, or the drive axle.
Important: This is a prevailing torque type fastener. You may reuse this fastener ONLY under the following conditions:
• The fastener and its counterpart are clean and free from rust. • The fastener develops 2 N·m (18 lb in) of torque/drag against its counterpart prior to fastener seating.
Tighten
Tighten the nuts to 30 N·m (22 lb ft) plus an additional 120 degrees using the
J 45059
.
Tighten
Tighten the nuts to 23 N·m (17 lb ft).
Tighten
Tighten the bolt/nut to 50 N·m (37 lb ft).
Tighten
Tighten the bolt to 50 N·m (37 lb ft).
Tighten
Tighten the clamps to 2 N·m (18 lb in).
Tighten
Tighten the bolts to 4 N·m (35 lb in).
