Parking Brake Adjustment L26 and L32
Caution: Refer to Park Brake Cable to Caliper Caution in the Preface section.
Caution: Refer to Brake Dust Caution in the Preface section.
Adjustment of manual adjustment park brake cable system is necessary whenever the rear brake cables have been disconnected. A need for park brake cable adjustment is indicated if the hydraulic brake system operates with good reserve, but a firm park brake pedal feel cannot be achieved with less than one full stroke of the park brake pedal.
- Apply and release the park brake 4 times.
- Park brake light should be illuminated after park brake has been depressed slightly.
- Check park brake pedal assembly for full release by turning the ignition on and inspecting PARK BRAKE warning light. Light should be off. If PARK BRAKE warning light is on and park brake appears to be fully released, pull the pedal back by hand and continue with the adjustment procedure.
- Raise the vehicle and suitably support. Refer to Lifting and Jacking the Vehicle .
- Check park brake levers on rear calipers. Levers should be against the stops on the caliper housing. If levers are not against stops, check for binding in rear brake cables and position levers against stops.
- Tighten park brake cable at equalizer until either the left or right lever begins to move off stop.
- Loosen adjustment at equalizer until the lever which has moved off the stop, as in step 5, is again resting fully against stops. Loosen tension at equalizer until the cables feel slightly loose to the touch. Cables should not sag under their own weight.
- Operate park brake several times to check adjustment. A firm pedal feel should be obtained by depressing the pedal less than one full stroke.
- Inspect left and right caliper levers. Both levers must be resting on stops after adjustment of parking brake.
- Check the operation of the park brake. Refer to Maintenance Schedule .
- To achieve optimal performance ensure cables are not over-tensioned at the equalizer.
Parking Brake Adjustment Z7U
Tools Required
J 21177-A Drum-to-Brake Shoe Clearance Gage
Caution: Refer to Brake Dust Caution in the Preface section.
Caution: Refer to Brake Fluid Irritant Caution in the Preface section.
Notice: Refer to Brake Fluid Effects on Paint and Electrical Components Notice in the Preface section.
- Apply and fully release the parking brake 6 times.
- Verify that the parking brake pedal releases completely.
- Raise and suitably support the vehicle. Refer to Lifting and Jacking the Vehicle .
- Remove the rear tire and wheel assemblies. Refer to Tire and Wheel Removal and Installation .
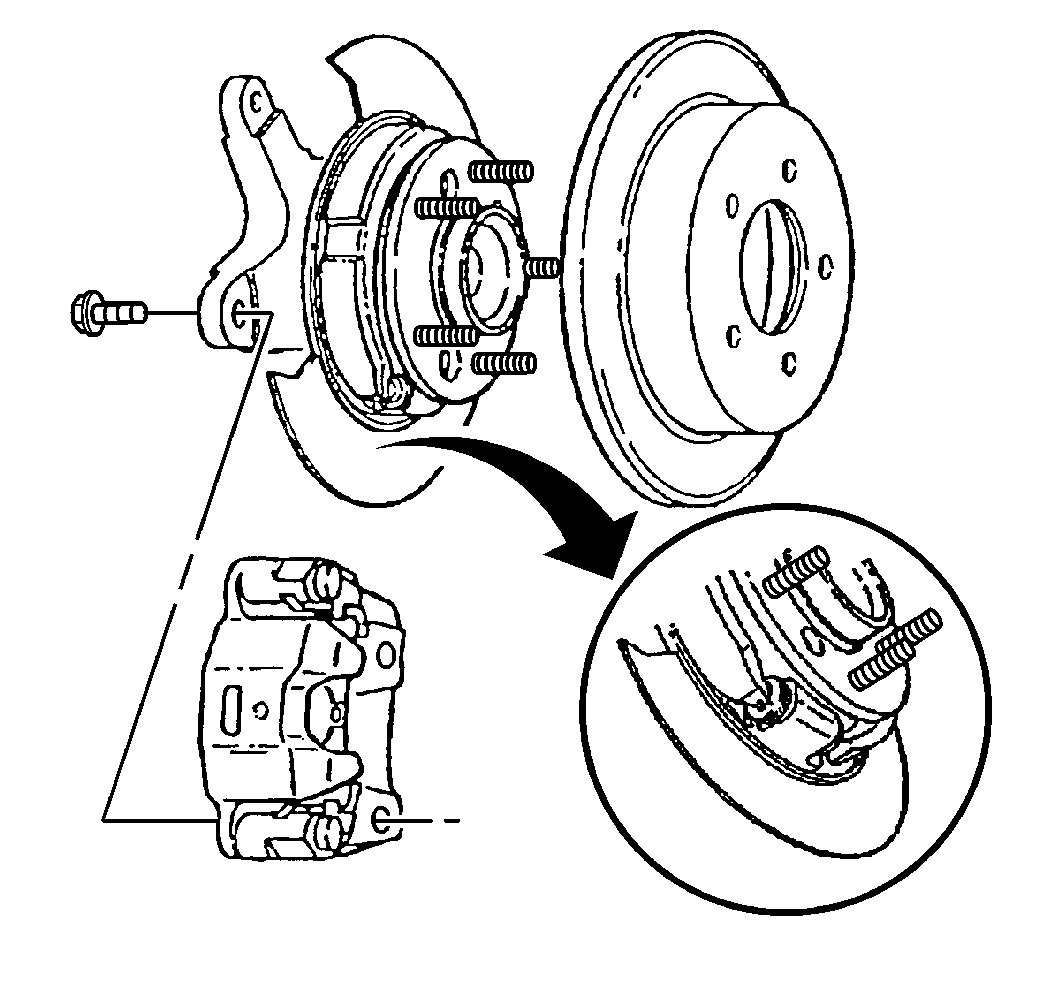
- Remove both rear caliper brackets. Refer to Rear Brake Caliper Bracket Replacement for the disc brakes.
- Relieve tension on the park brake system at the park brake equalizer.
- Remove both rear brake rotors. Refer to Rear Brake Rotor Replacement for the disc brakes.
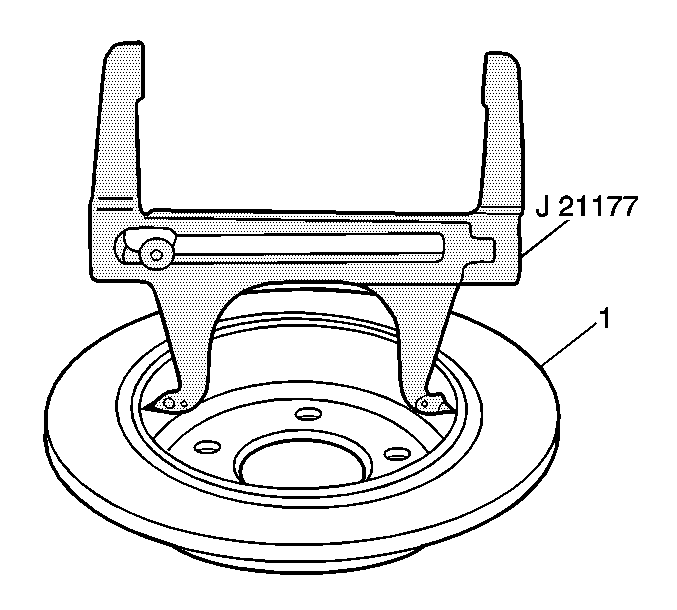
- Set the J 21177-A inside of the park brake drum (1) at the widest point.
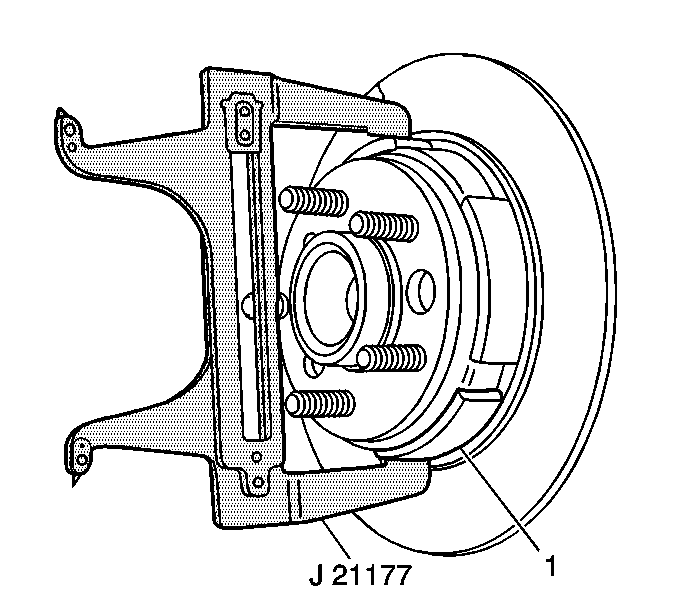
- Position the J 21177-A over the park brake shoe (1) at the widest point.
- Turn the adjuster on the actuator until the park brake shoe just contacts the J 21177-A .
- Repeat steps 8-10 for the opposite side.
- Install both rear brake rotors. Refer to Rear Brake Rotor Replacement for the disc brakes.
- Install both rear caliper brackets. Refer to Rear Brake Caliper Bracket Replacement for the disc brakes.
- Install the rear tire and wheel assemblies. Refer to Tire and Wheel Removal and Installation .
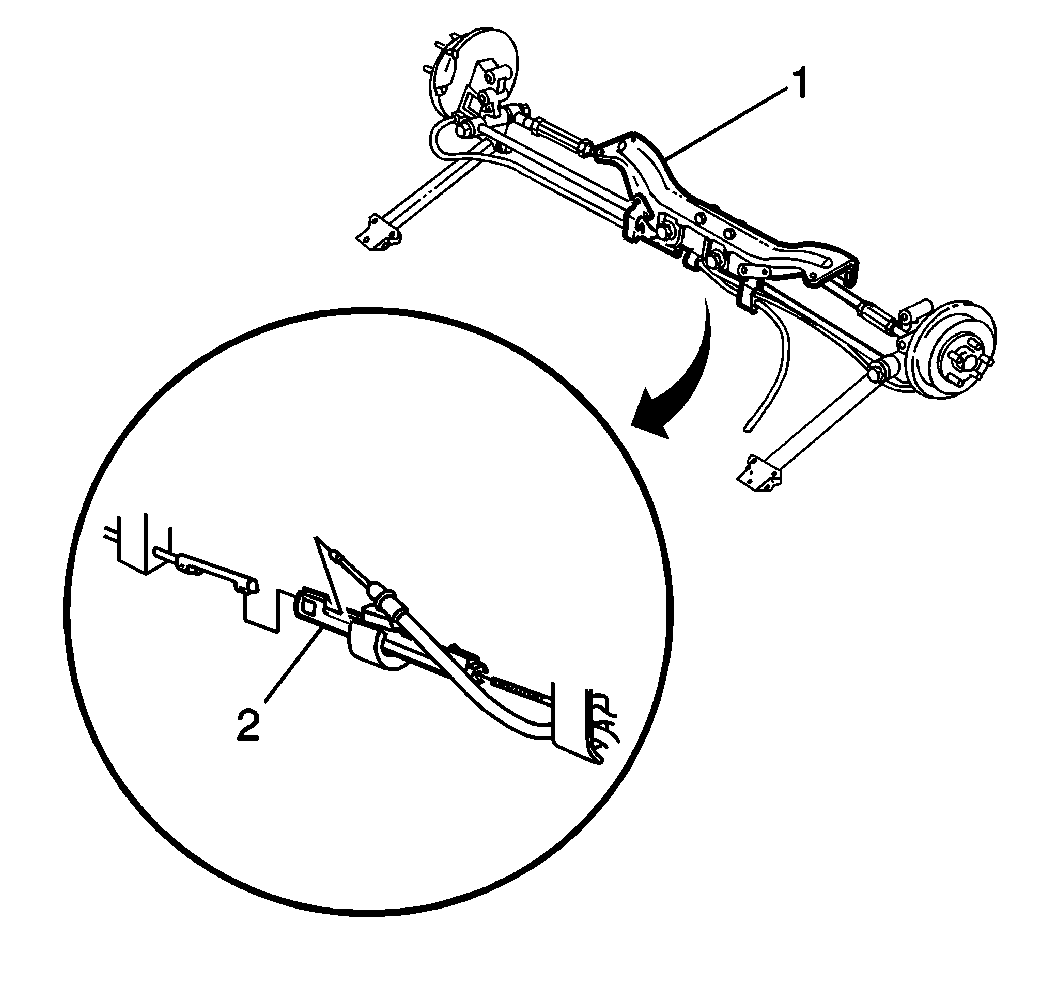
- Adjust the parking brake by turning the nut at the equalizer (2) while spinning both rear wheels. When either rear wheel starts to drag, back off the nut one full turn.
- Lower the vehicle to curb height.
- Apply the parking brake, then inspect for rotation of the rear wheels. If the rear wheels rotate during this inspection, then readjust the parking brake shoes.
- Release the parking brake. Verify that the wheels rotate freely.
- Lower the vehicle.
| • | Turn ON the ignition. Verify that the BRAKE indicator lamp is off. |
| • | If the BRAKE indicator lamp is on, ensure that the parking brake pedal is in release mode and fully returned to stop. Remove the slack in the front parking brake cable by pulling downward on the cable. |


| • | Place the contacts on the tool to the widest point of the drum. |
| • | Tighten the set screw on the tool to ensure the proper measurement when removing the tool from the drum. |


