Front Brake Caliper Bracket Replacement J65, JL9
Removal Procedure
Caution: Refer to Brake Dust Caution in the Preface section.
- Remove the caliper from the mounting bracket and support the caliper with heavy mechanics wire or equivalent. It is not necessary to disconnect the hydraulic brake flexible hose from the caliper. Refer to Front Brake Caliper Replacement .
- Remove the front brake pads.
- Remove the caliper bracket bolts (2).
- Remove the caliper bracket (1).
Notice: Support the brake caliper with heavy mechanic wire, or equivalent, whenever it is separated from its mount and the hydraulic flexible brake hose is still connected. Failure to support the caliper in this manner will cause the flexible brake hose to bear the weight of the caliper, which may cause damage to the brake hose and in turn may cause a brake fluid leak.
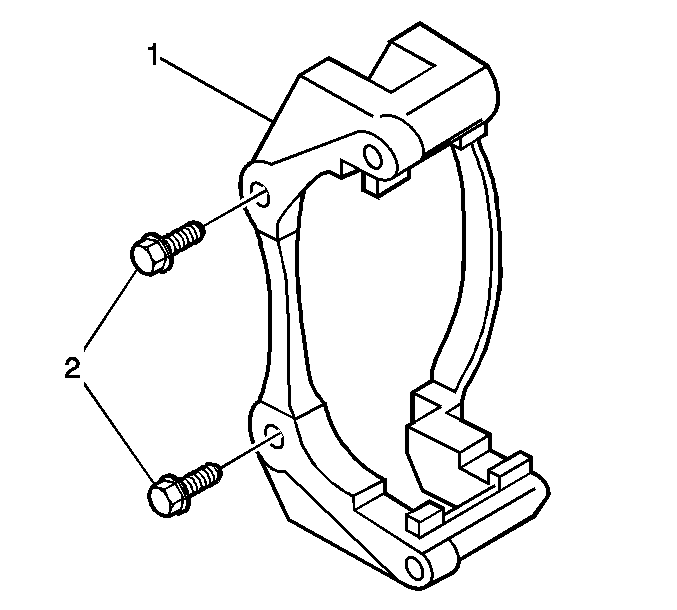
Installation Procedure
- Clean and visually inspect the threads of the caliper bracket bolts (2) and mounting holes in the bracket.
- Apply THREADLOCKER, GM P/N 12345493 (Canadian P/N 10953488) or equivalent, to the threads of the brake caliper bracket bolts (2).
- Install the caliper bracket (1) with the bracket bolts (2).
- Install the front brake pads.
- Install the caliper. Refer to Front Brake Caliper Replacement .
Important: To ensure the proper clamp load will be present when installed, it is imperative the threads on the brake caliper bracket bolts as well as the threaded holes in the caliper bracket are cleaned of all debris and inspected before proceeding with the installation.
Notice: Refer to Fastener Notice in the Preface section.
Tighten
Tighten the caliper bracket bolts to 180 N·m (133 lb ft).
Front Brake Caliper Bracket Replacement Z7U
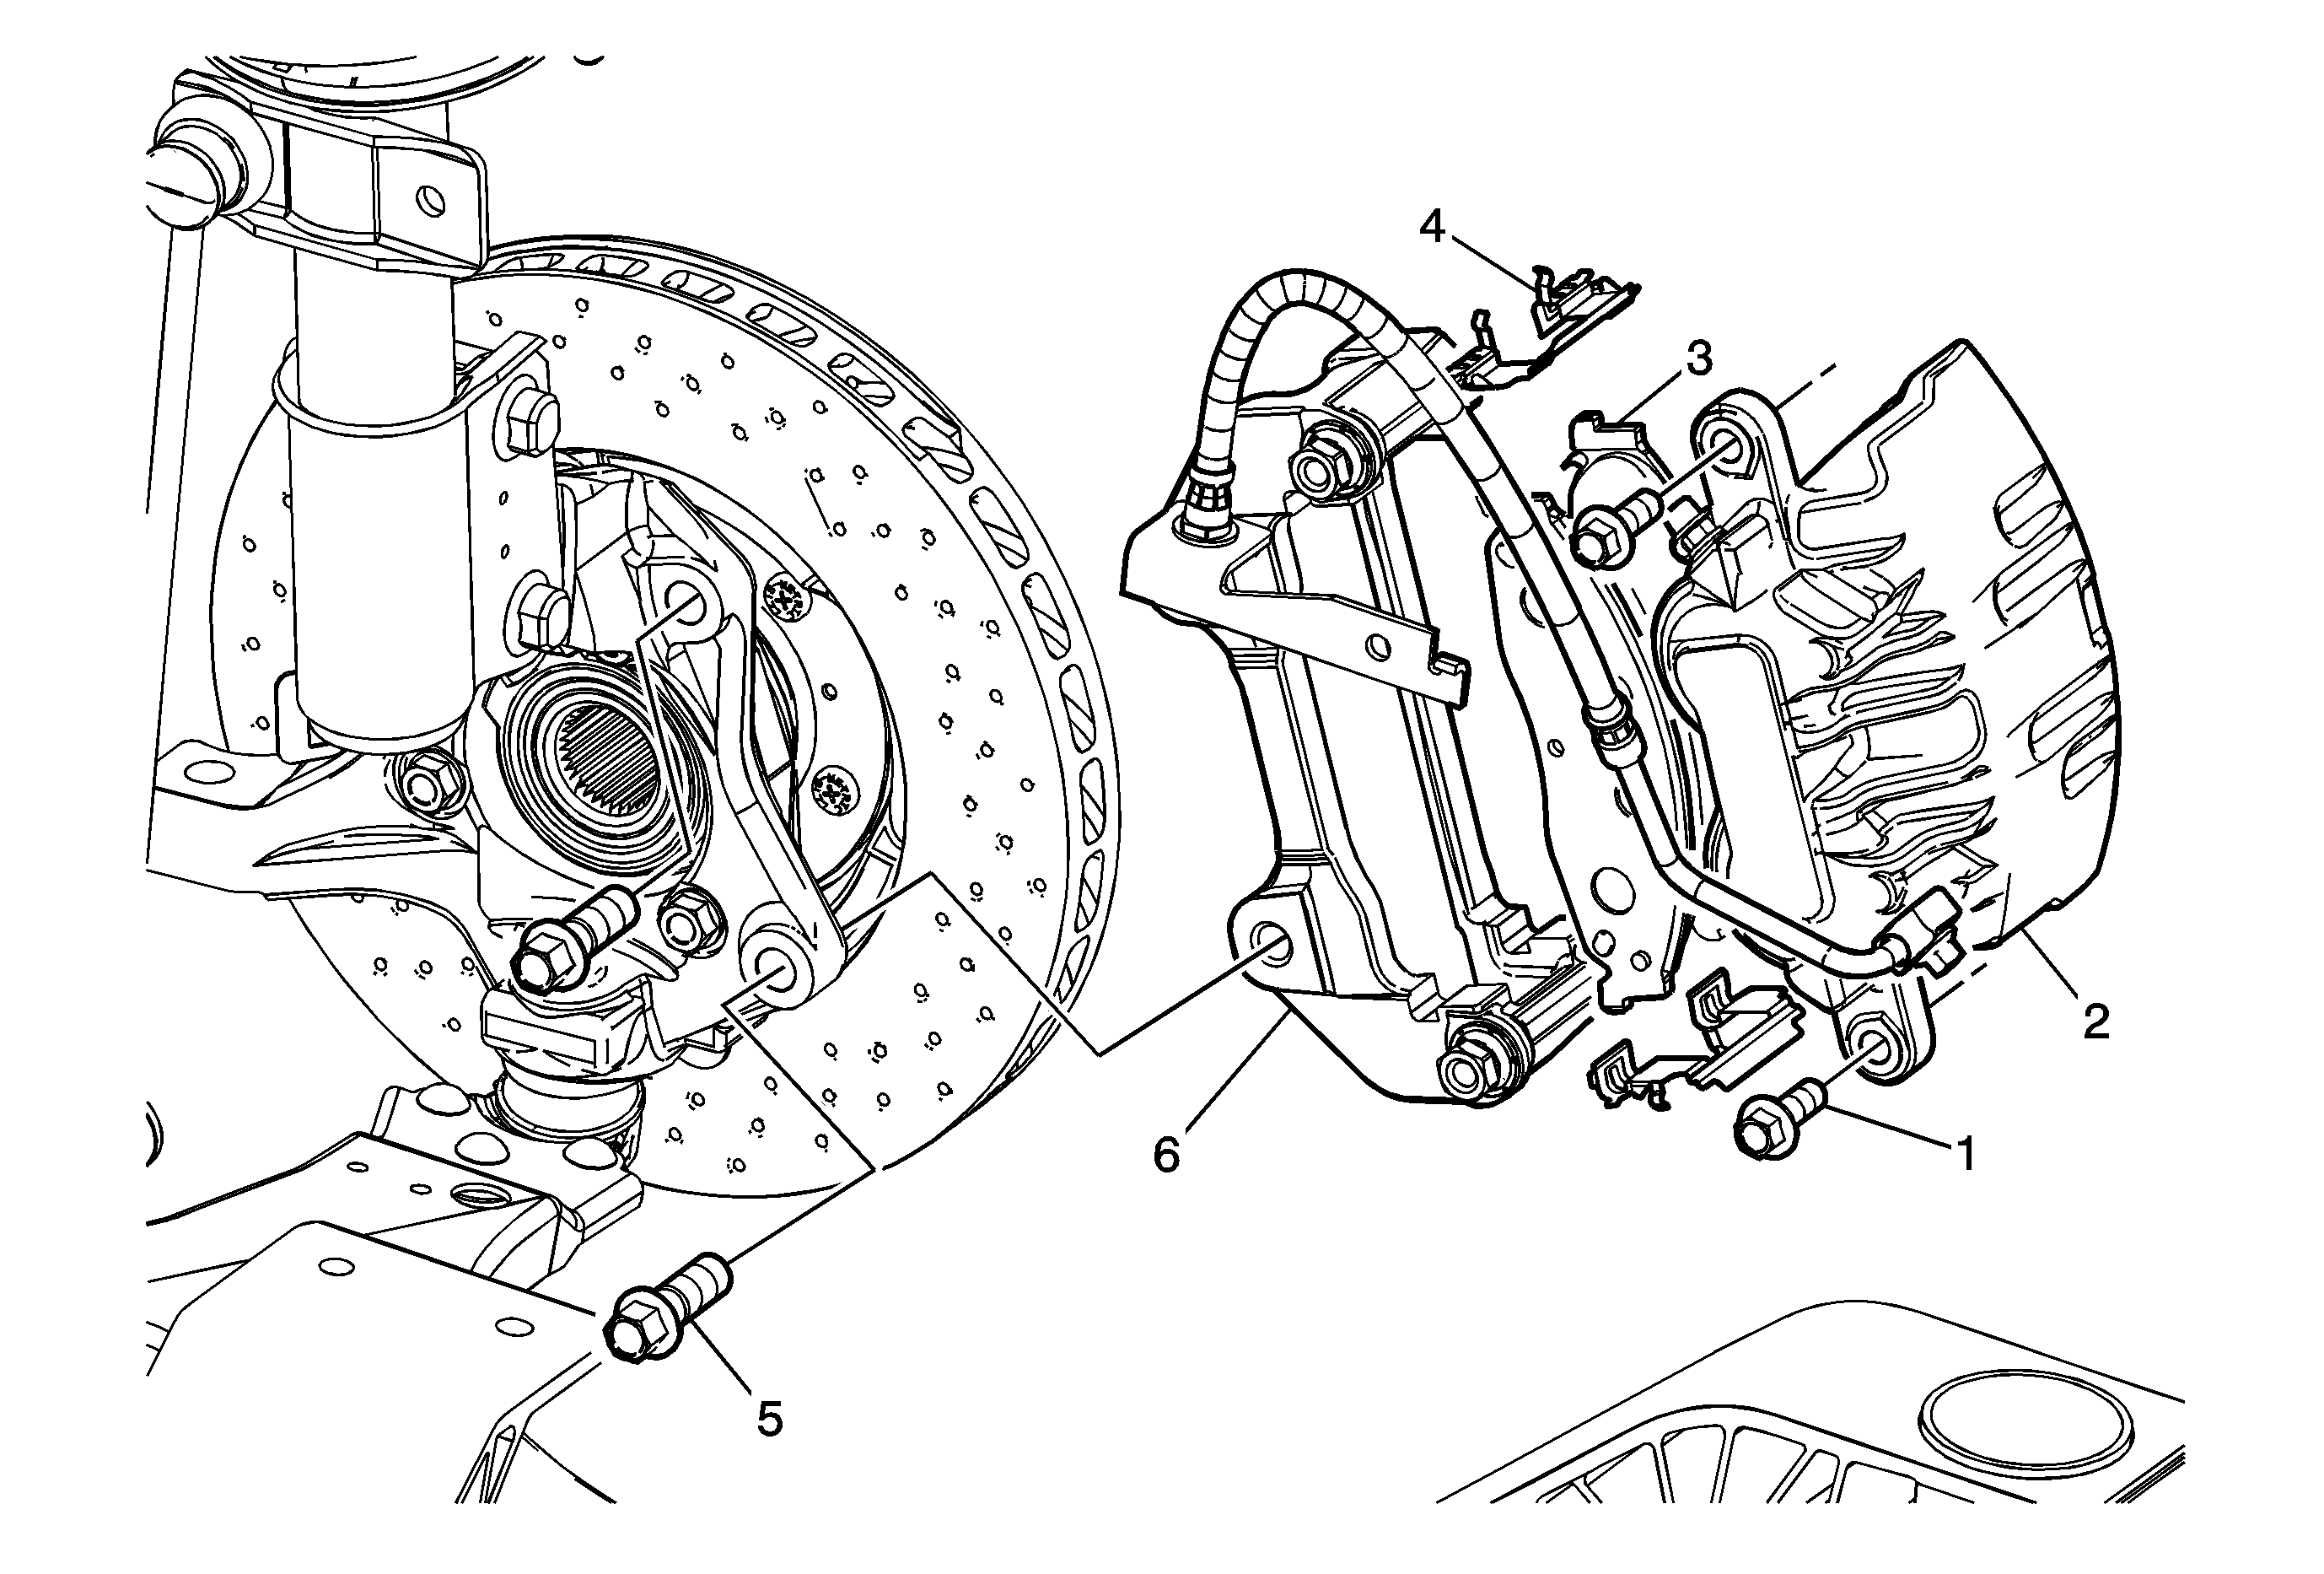
Callout | Component Name |
|---|---|
|
Caution: Refer to Brake Dust Caution in the Preface section. Notice: Support the brake caliper with heavy mechanic wire, or equivalent, whenever it is separated from its mount and the hydraulic flexible brake hose is still connected. Failure to support the caliper in this manner will cause the flexible brake hose to bear the weight of the caliper, which may cause damage to the brake hose and in turn may cause a brake fluid leak. Preliminary Procedures
| |
1 | Brake Caliper Guide Pin Bolt (Qty: 2) Notice: Refer to Fastener Notice in the Preface section. Tighten |
2 | Brake Caliper ProcedurePosition the brake caliper aside and support with heavy mechanics wire or equivalent. |
3 | Disc Brake Pads |
4 | Brake Pad Spring Retainer (Qty: 2) |
5 | Brake Caliper Bracket Bolt (Qty: 2) Tighten |
6 | Brake Caliper Bracket Procedure
Tip |
