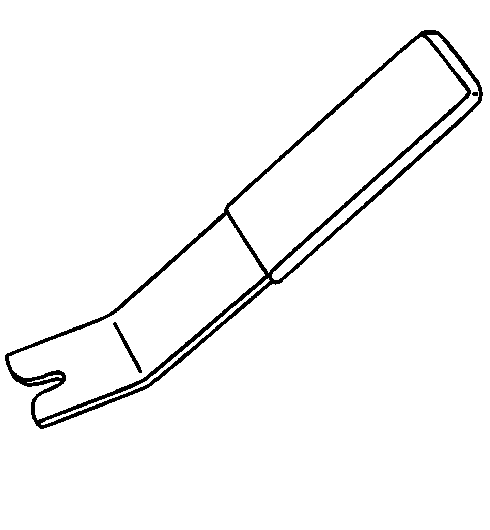
Tools Required
J 38778 Door Trim Pad and Garnish Clip Remover
Removal Procedure
Caution: Do not strike or jolt the inflatable restraint sensing and diagnostic module (SDM). Before applying power to the SDM, make sure that it is securely fastened with the arrow facing toward the front of the vehicle. Failure to observe the correct installation procedure could cause SIR deployment, personal injury, or unnecessary SIR system repairs.
Caution: Refer to SIR Caution in the Preface section.
- Disable the SIR system. Refer to SIR Disabling and Enabling .
- Remove the passenger front seat. Refer to Front Seat Replacement - Bucket.
- Remove the front carpet retainer. Refer to Front Carpet Retainer Replacement.
- Remove the lower center pillar trim panel. Refer to Center Pillar Lower Trim Panel Replacement.
- Remove the quarter lower trim as needed. Refer to Quarter Lower Rear Trim Panel Replacement.
- Using J 38778 remove the push-in retainers which position the carpet on top of the rocker panels.
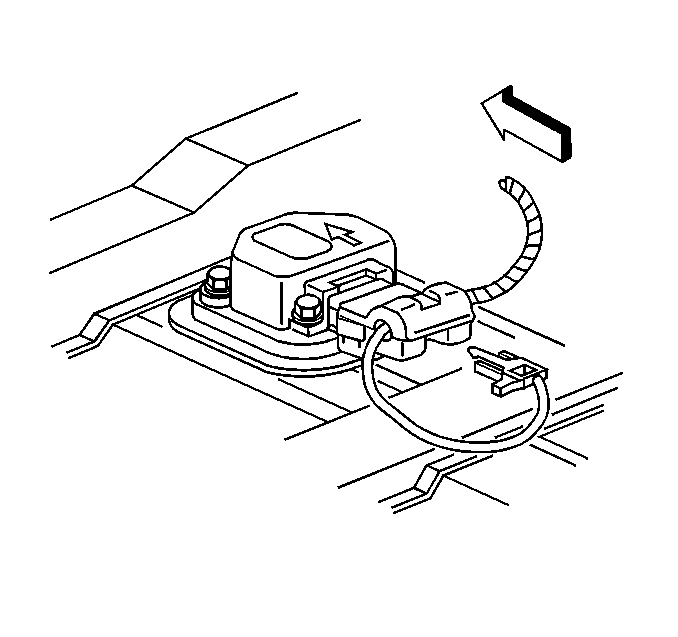
- Roll back the carpet to expose the inflatable restraint sensing and diagnostic module (SDM).
- Remove the connector position assurance (CPA) from the wiring harness connector of the SDM.
- Disconnect the SDM wiring harness connector.
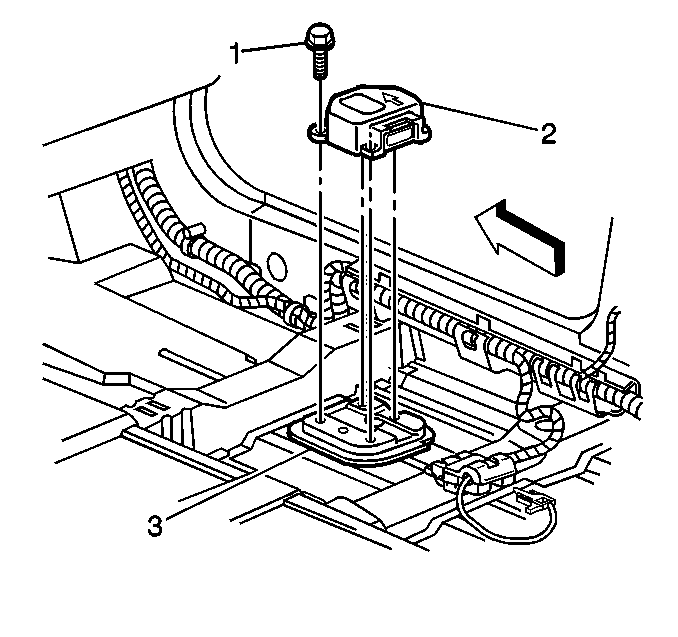
- Remove the SDM mounting fasteners (1).
- Remove the SDM (2) from the floor pan (3).
Installation Procedure
- Remove any dirt, grease, or other impurities from the mounting surface.
- Position the SDM (2) horizontally to the floor pan (3).
- Point the arrow on the SDM toward the front of the vehicle.
- Install the SDM mounting fasteners (1).
Notice: Refer to Fastener Notice in the Preface section.
Tighten
Tighten the fasteners to 10 N·m (89 lb in).
Important: If the SDM mounting holes or fasteners are damaged to the extent that the module can no longer be properly mounted, use the following repair. Torque the replacement fastener with a hand tool in order to prevent stripping the replacement fastener.
First Repair
| 4.1. | Remove and discard the stripped fastener (1). |
| 4.2. | Install the SDM (2) with new fastener GM P/N 10156138. |
Tighten
Tighten the fastener to 10 N·m (89 lb in).
Second Repair
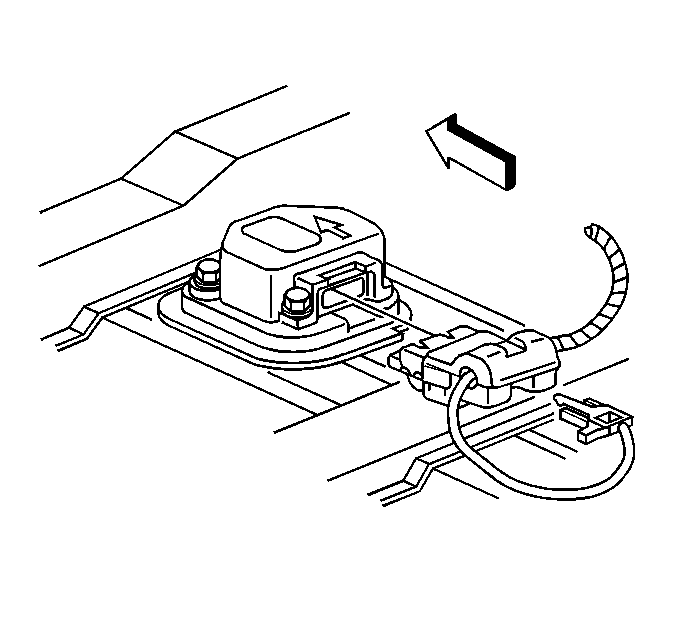
- Install the SDM wiring harness connector.
- Install the CPA to the SDM wiring harness connector.
- Install the push-in retainers which position the carpet on top of the rocker panels.
- Install the lower center pillar trim panel. Refer to Center Pillar Lower Trim Panel Replacement.
- Install the quarter lower trim. Refer to Quarter Lower Rear Trim Panel Replacement.
- Install the carpet and the front carpet retainer. Refer to Front Carpet Retainer Replacement in Interior Trim.
- Install the passenger front seat. Refer to Front Seat Replacement - Bucket.
- Enable the SIR system. Refer to SIR Disabling and Enabling.
- Refer to Control Module References for programming and setup information.
| 4.1. | Remove and discard the stripped fastener (1). |
| 4.2. | Install the SDM (2) using a larger fastener GM P/N 10267482 with a washer GM P/N 11500305. |
Tighten
Tighten the fastener to 5 N·m (44 lb in).
Important: The AIR BAG indicator may remain ON after the SDM has been replaced. DTC B1001 may set requiring the SDM part number to be set in multiple modules. If the indicator remains ON after enabling the SIR system, perform the diagnostic system check and follow the steps thoroughly to ensure that the SDM is set properly.
