For 1990-2009 cars only
Removal Procedure
- Remove the left inner fender brace. Refer to Front Fender Upper Diagonal Brace Replacement .
- Remove the air cleaner intake duct. Refer to Air Cleaner Inlet Duct Replacement .
- Loosen the air cleaner housing bolts.
- Remove the air cleaner upper housing from the air cleaner lower housing.
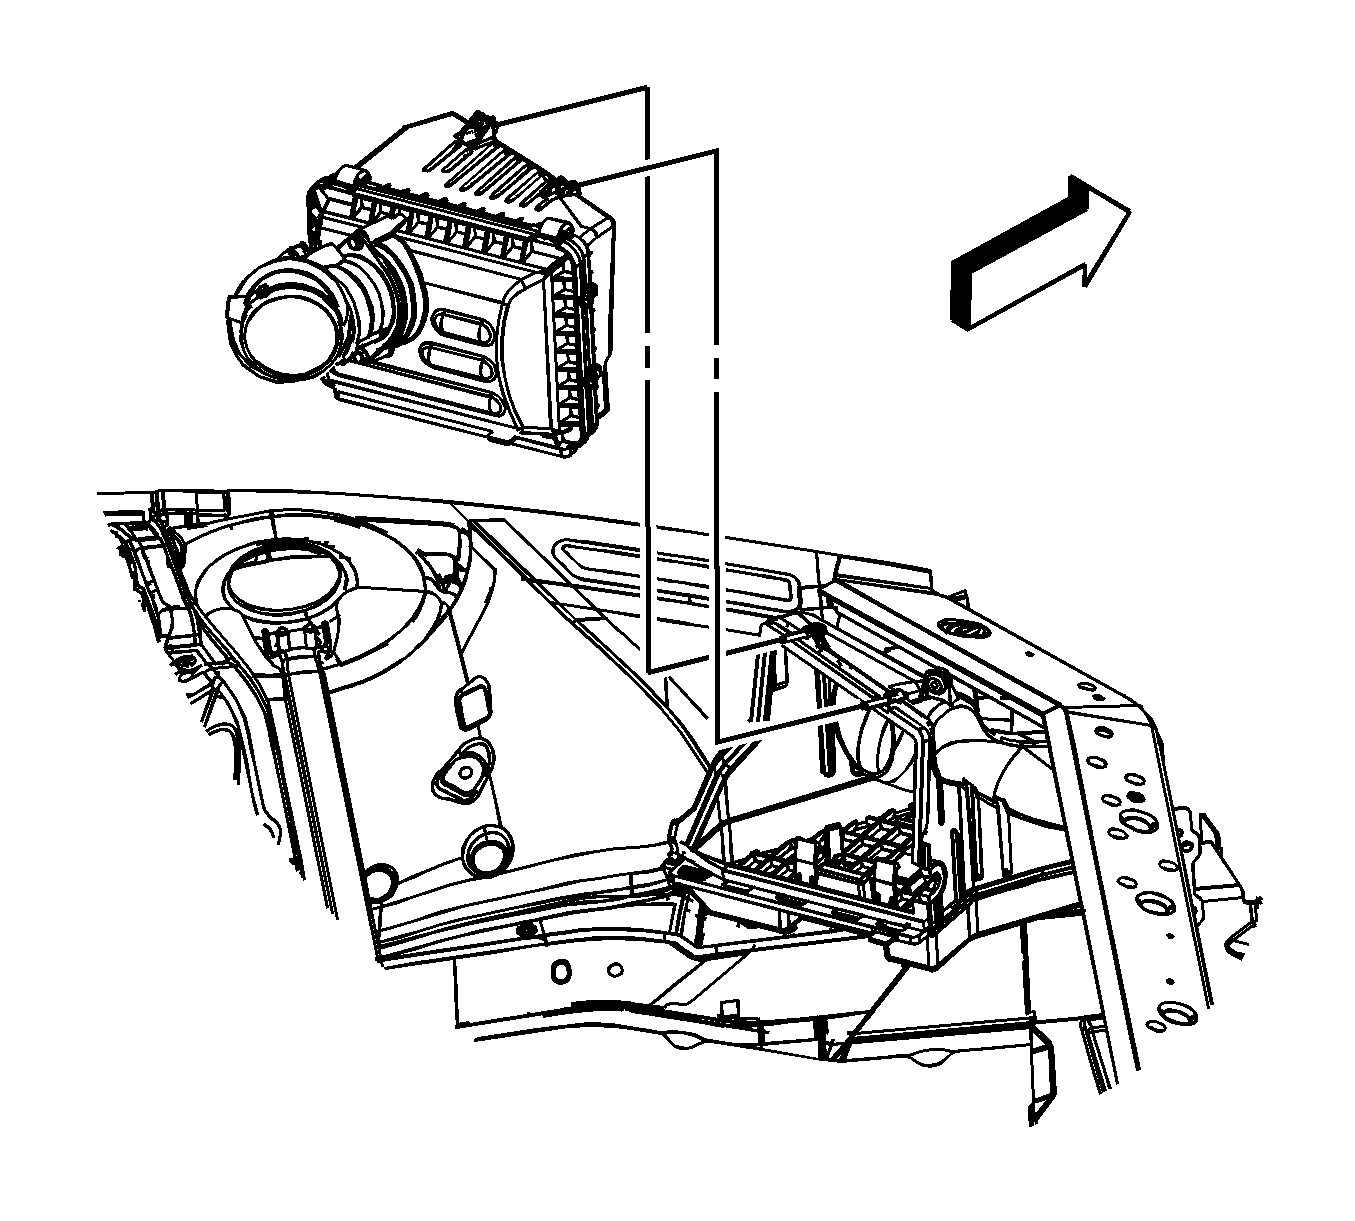
- Without disconnecting the powertrain control module (PCM) electrical connectors, remove the PCM from the air cleaner lower housing.
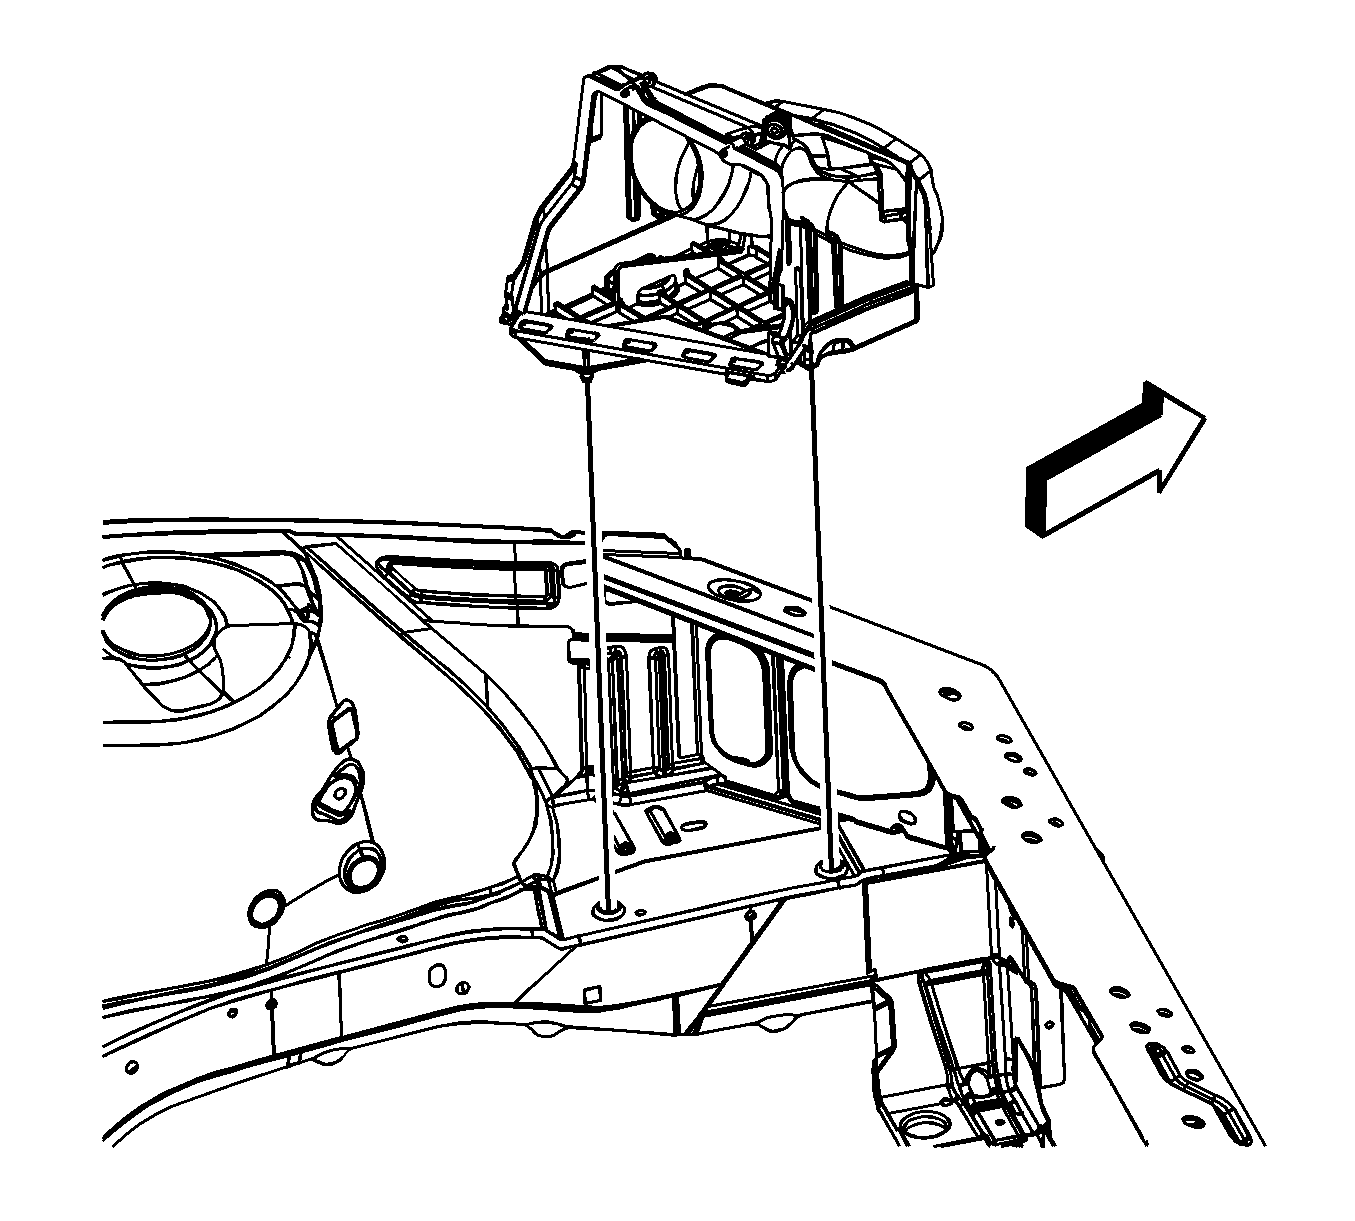
- Remove the air cleaner lower housing by pulling the housing from the 2 rubber grommets.
- Inspect the air cleaner housing assembly for signs of damage and replace if necessary.
Important: The air cleaner upper housing bolts are integral to the lower air cleaner housing.
Installation Procedure
- Install the air cleaner lower housing by firmly pushing the housing down into the 2 rubber grommets.
- Install the PCM into the air cleaner lower housing.
- Install the front tabs of the air cleaner upper housing into the slots in the air cleaner lower housing.
- Align the holes in the upper housing to the integral bolts in the lower housing.
- Tighten the air cleaner housing bolts.
- Install the air cleaner intake duct. Refer to Air Cleaner Inlet Duct Replacement .
- Install the left inner fender brace. Refer to Front Fender Upper Diagonal Brace Replacement .
Notice: Refer to Fastener Notice in the Preface section.
Tighten
Tighten the screws to 4 N·m (35 lb in).
