For 1990-2009 cars only
Tools Required
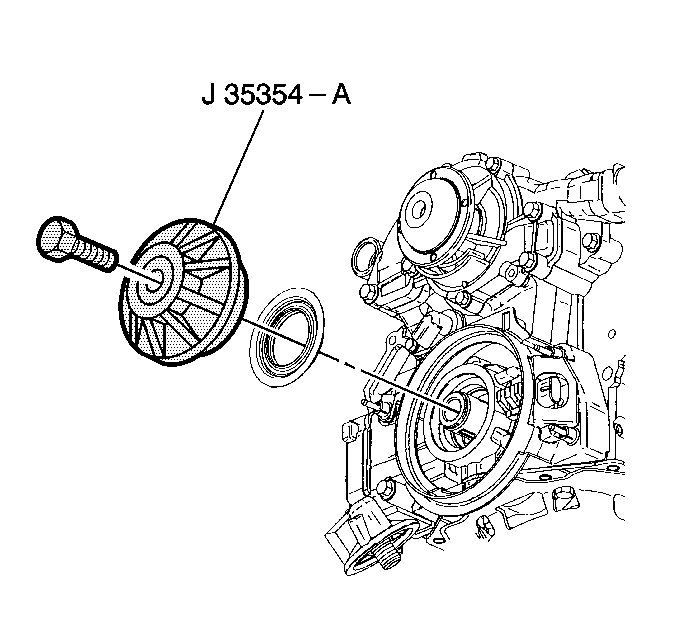
J 35354-A Seal Installer
Removal Procedure
- Disconnect the negative battery cable. Refer to Battery Negative Cable Disconnection and Connection .
- Raise and support the vehicle. Refer to Lifting and Jacking the Vehicle .
- Drain the engine oil. Refer to Engine Oil and Oil Filter Replacement .
- Drain the cooling system. Refer to Cooling System Draining and Filling .
- Lower the vehicle.
- Loosen the water pump pulley bolts.
- Remove the drive belt tensioner. Refer to Drive Belt Tensioner Replacement .
- Remove the water pump pulley.
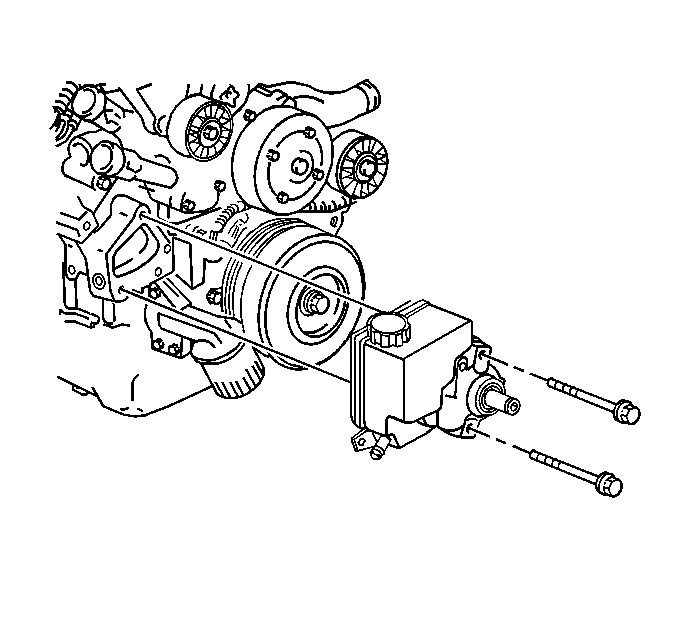
- Remove the power steering pump bolts and reposition the pump.
- Raise the vehicle.
- Remove the crankshaft balancer. Refer to Crankshaft Balancer Replacement .
- Pry out the crankshaft front oil seal with a flat-bladed tool such as a large screwdriver. Use care to avoid damaging the crankshaft front oil seal bore or the crankshaft front oil seal contact surfaces.
- Disconnect the electrical connectors from the following:
- Remove the crankshaft position sensor shield.
- Remove the radiator outlet hose from the water pump. Refer to Radiator Outlet Hose Replacement .
- Lower the vehicle.
- Install the engine support fixture. Refer to Engine Support Fixture .
- Raise the vehicle.
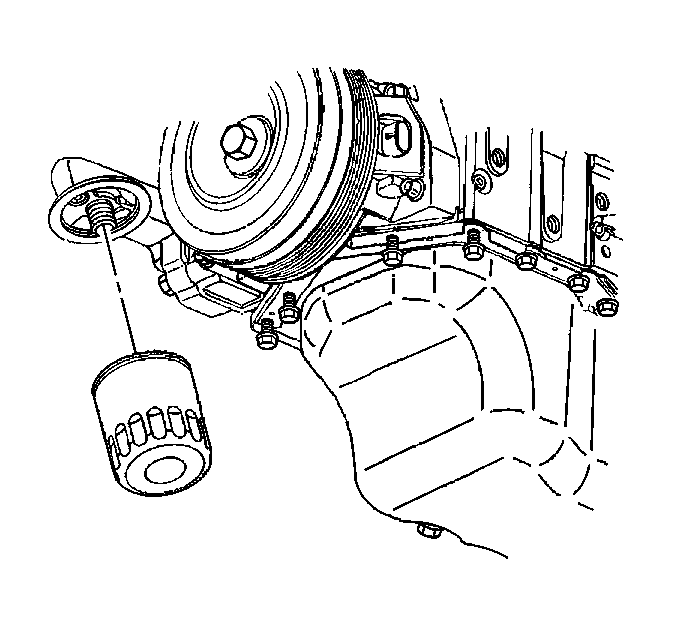
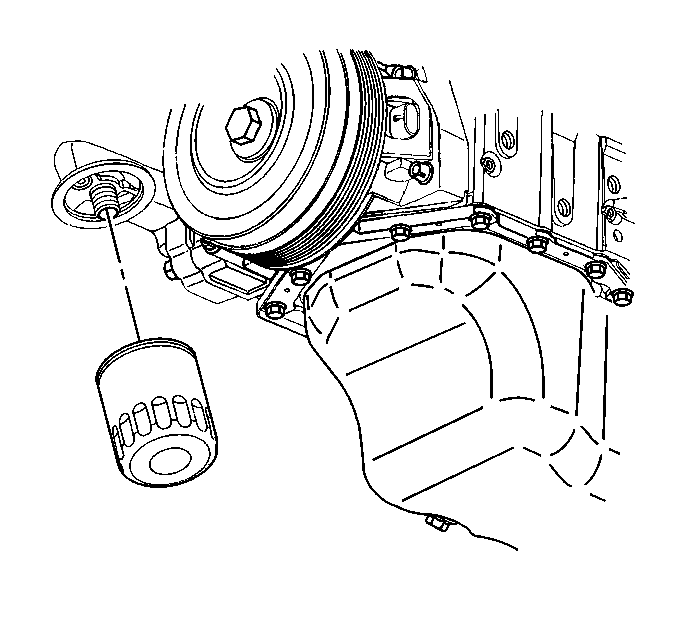
- Remove the oil filter.
- Remove the engine mount bracket for oil pan access. Refer to Engine Mount Bracket Replacement - Right Side .
- Disconnect the oil level sensor electrical connector.
- Remove the oil level sensor.
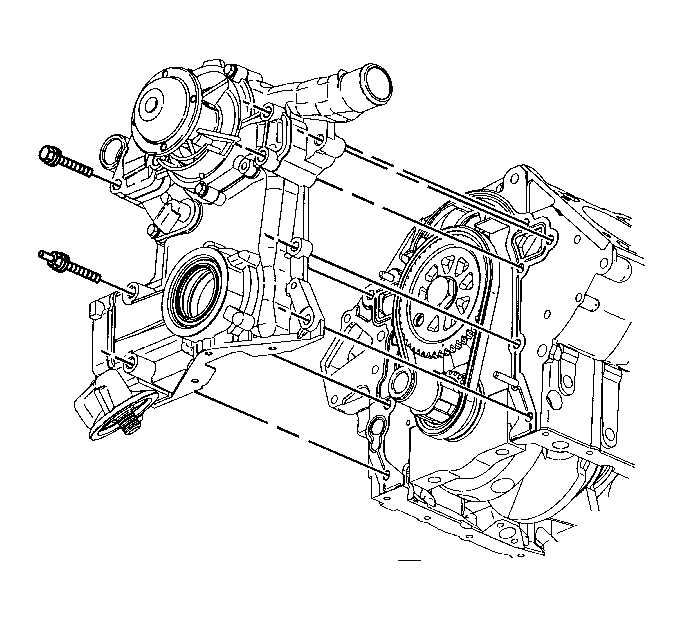
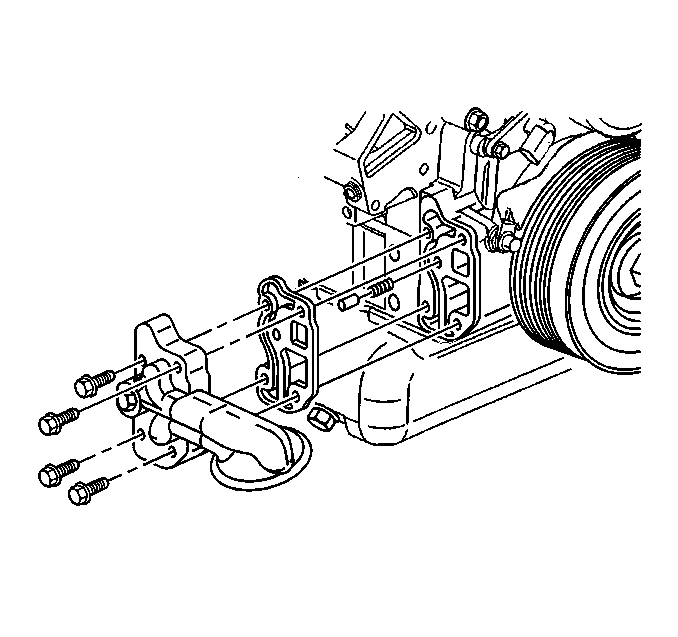
- Remove the oil pan-to-engine front cover bolts.
- Loosen the remaining oil pan bolts to gain access for the engine front cover removal. DO NOT remove the remaining oil pan bolts.
- Remove the crankshaft position sensor.
- Remove the engine front cover bolts.
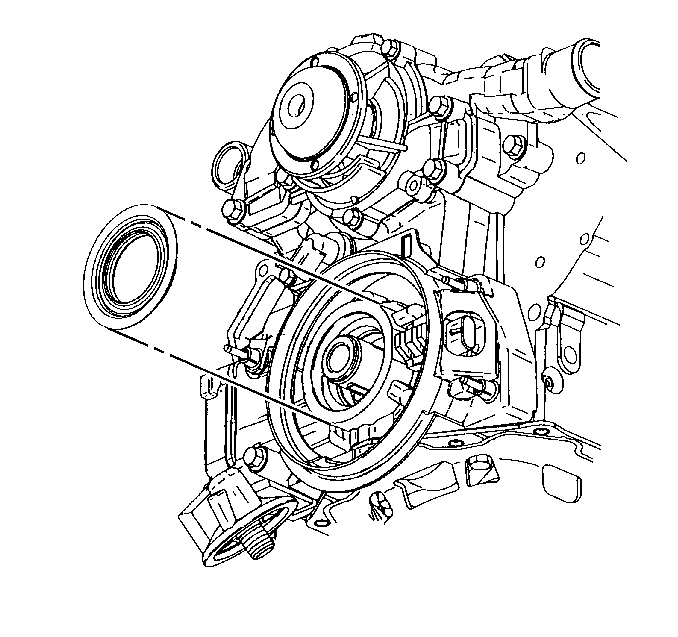
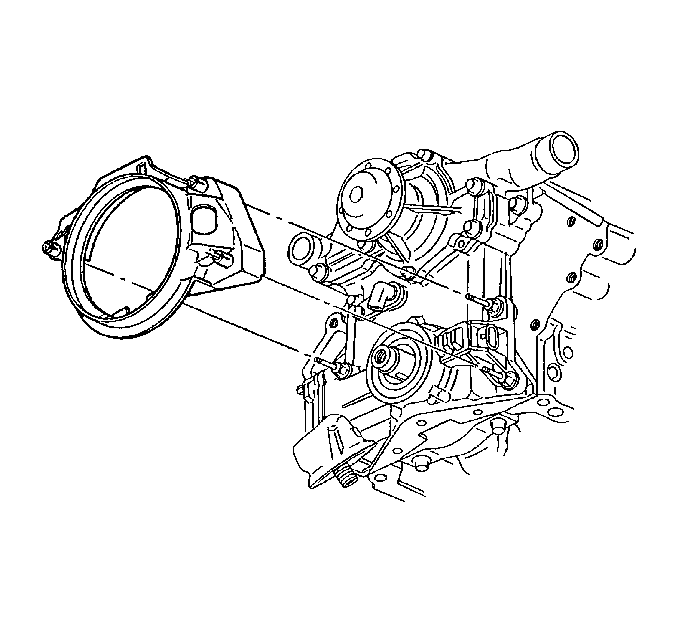
- Remove the engine front cover with the oil filter adapter as one assembly.
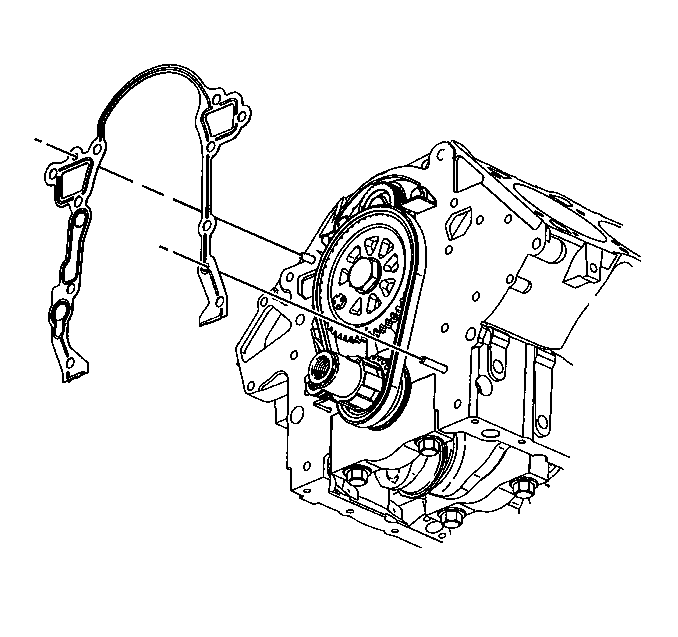
- Remove the engine front cover gasket.
- If replacing the engine front cover, remove the oil filter adapter and pressure relief valve from the engine front cover.
- If replacing the engine front cover, remove the water pump from the engine front cover.
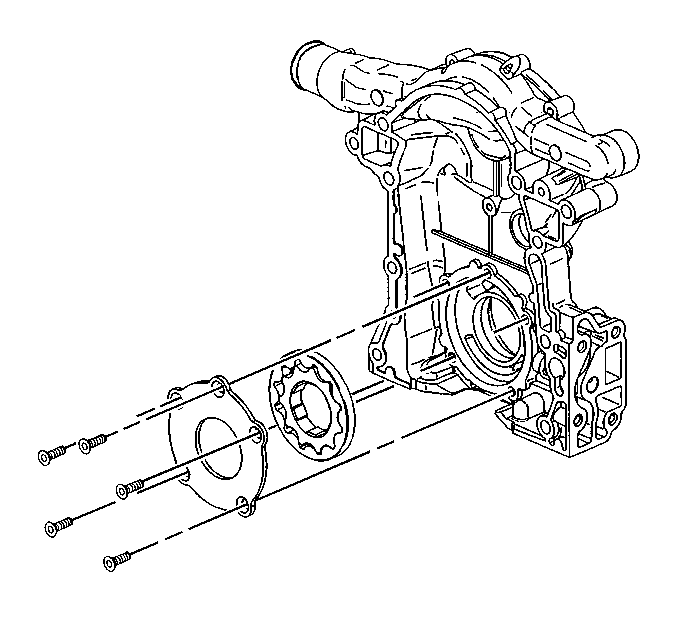
- If replacing the engine front cover, remove the oil pump cover and gear set from the engine front cover. Refer to Oil Pump Cover and Gear Set Replacement .
- Inspect the oil pump cover and gear set. Refer to Oil Pump Cleaning and Inspection .
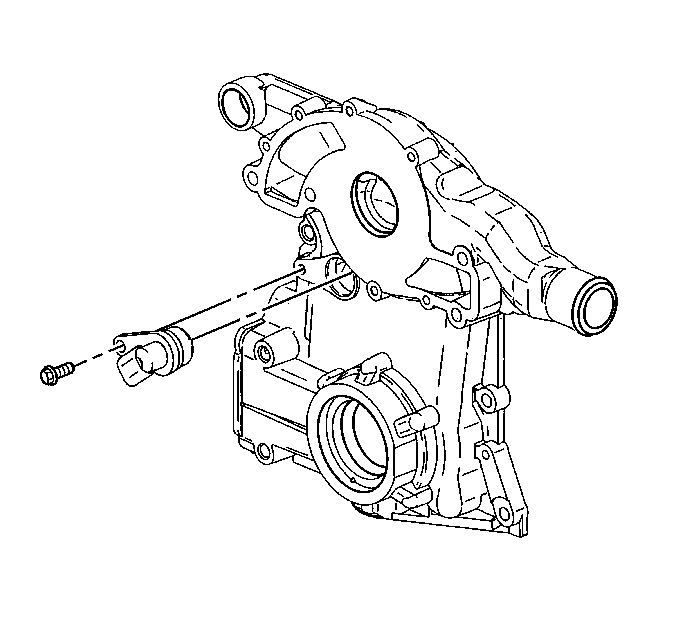
- If replacing the engine front cover, remove the camshaft position sensor from the engine front cover.
- Inspect the timing chain for overall in and out movement. Maximum movement is 25.4 mm (1 in). Refer to Camshaft Timing Chain and Sprocket Cleaning and Inspection .
- Inspect the sprockets for wear.
- Inspect the oil pan gasket. Replace the oil pan gasket if necessary.
- Clean the engine front cover mating surfaces.
Important: Be careful not to damage the crankshaft.
| • | Camshaft position (CMP) sensor |
| • | Crankshaft position (CKP) sensor |
| • | Oil pressure sensor |
Important: The oil pan can be dropped slightly for engine front cover clearance if all pan bolts are loosened and the oil level sensor is removed.


Installation Procedure
- If replacing the engine front cover, install the camshaft position sensor to the engine front cover.
- Install the camshaft position sensor bolt.
- If replacing the engine front cover, install the oil pump cover and gear set to the engine front cover. Refer to Oil Pump Cover and Gear Set Replacement .
- If replacing the engine front cover, install the water pump.
- Install and tighten the water pump bolts.
- If replacing the engine front cover, install the pressure relief valve, the oil filter adapter and the oil filter adapter bolts to the engine front cover.
- Tighten the bolts to 15 N·m (11 lb ft).
- Use the J 45059 to rotate the bolt an additional 50 degrees.
- Install the new engine front cover gasket. Ensure that the sealing surfaces are not damaged.
- Apply sealer to the bolt threads. Refer to Adhesives, Fluids, Lubricants, and Sealers for the correct part number.
- Align the cogs on the crankshaft sprocket with the cogs on the oil pump gear set in the engine front cover.
- Install the engine front cover to the engine.
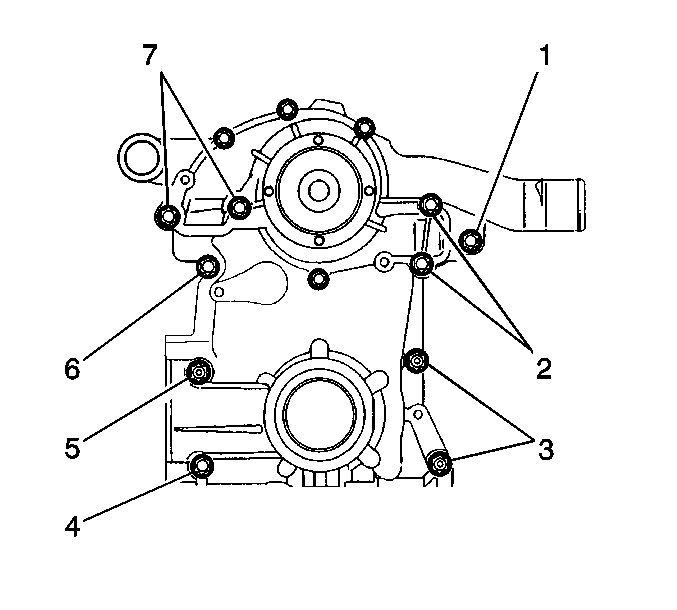
- Install the engine front cover bolts (1-7).
- Tighten the bolts to 20 N·m (15 lb ft).
- Use the J 45059 to rotate the bolt an additional 40 degrees.
- Install the crankshaft position sensor.
- Install the crankshaft position sensor studs.
- Install the oil pan-to-engine front cover bolts.
- Install the oil level sensor.
- Connect the oil level sensor electrical connector.
- Install the engine mount bracket. Refer to Engine Mount Bracket Replacement - Right Side .
- Install the water pump pulley and bolts.
- Install the radiator outlet hose to the water pump. Refer to Radiator Outlet Hose Replacement .
- Install the oil filter. Install the engine oil pan drain plug. Refer to Engine Oil and Oil Filter Replacement .
- Install the new engine front cover seal using J 35354 .
- Tighten the bolt until the crankshaft front oil seal is seated in the engine front cover.
- Remove the J 35354 .
- Install the crankshaft position sensor shield.
- Connect the electrical connectors to the following:
- Install the crankshaft balancer. Refer to Crankshaft Balancer Replacement .
- Lower the vehicle.
- Install the power steering pump and the bolts.
- Remove the engine support fixture.
- Install the drive belt tensioner. Refer to Drive Belt Tensioner Replacement .
- Fill the cooling system. Refer to Cooling System Draining and Filling .
- Fill the crankcase with engine oil. Refer to Engine Oil and Oil Filter Replacement .
- Connect the negative battery cable. Refer to Battery Negative Cable Disconnection and Connection .
- Inspect for leaks.
- Perform the CKP system variation learn procedure. Refer to Crankshaft Position System Variation Learn .
Notice: Refer to Fastener Notice in the Preface section.
Tighten
Tighten the bolt to 10 N·m (89 lb in).
Tighten
| • | Tighten the long water pump bolts to 34 N·m (25 lb ft). |
| • | Tighten the short water pump bolts to 22 N·m (16 lb ft). |
Tighten
Tighten
Tighten
Tighten the studs to 30 N·m (22 lb ft).
Tighten
Tighten the oil pan bolts to 14 N·m (125 lb in).
Tighten
Tighten the sensor to 20 N·m (15 lb ft).
Tighten
Tighten the bolts to 13 N·m (116 lb in).
| • | Oil pressure sensor |
| • | Crankshaft position (CKP) sensor |
| • | Camshaft position (CMP) sensor |
Tighten
Tighten the bolts to 34 N·m (25 lb ft).
