L67 Engine Oil Smell or Odor, Leak at Left or Front Valve Cover (Replace Valve Cover Gasket, Grommets and Spark Plug Wire Retainers for Cylinders 1-3-5)

| Subject: | L67 Engine Oil Smell or Odor, Leak at Left or Front Valve Cover (Replace Valve Cover Gasket, Grommets and Spark Plug Wire Retainers for Cylinders 1-3-5) |
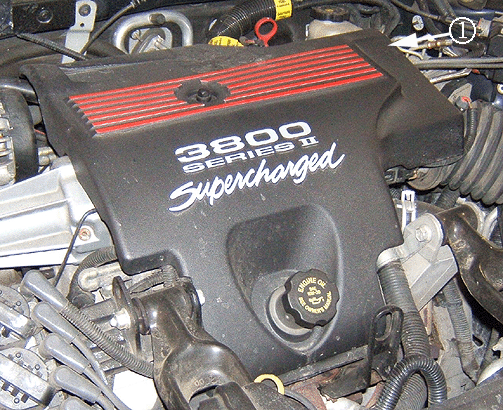
| Models: | 1997-2003 Buick Regal |
| 1997-2003 Pontiac Grand Prix |
| with 3.8L V6 Supercharged Engine (VIN 1 -- RPO L67) |
Condition
Some customers may comment that the vehicle has an engine oil smell or odor. Upon investigation, the technician may find that an oil leak is coming from the left or front valve cover.
Cause
This condition may be caused by drops of engine oil being deposited on the exhaust manifold through hard braking.
Correction
The following service procedure will aid technicians in the removal and installation of the left or front valve cover gasket, grommets and the removal of existing left or front spark plug wire retainer and the installation of a new spark plug wire retainers for cylinders 1-3-5.
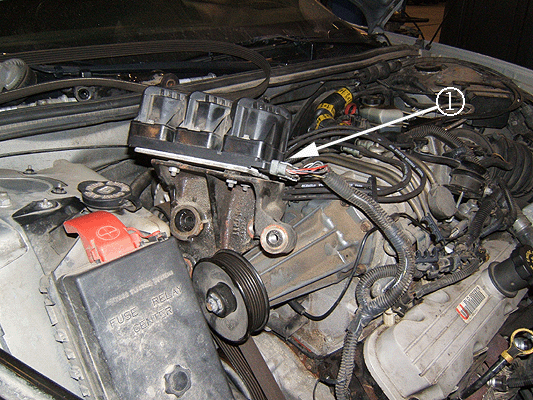
- Remove the fuel injector sight shield (1).
- Remove the left engine mount strut (2).
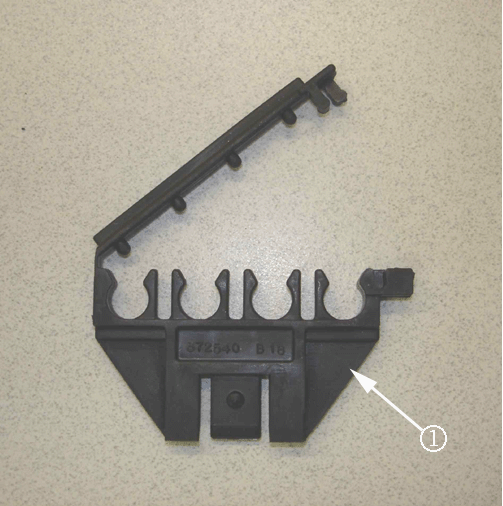
- Remove the 1-3-5 spark plug plastic retaining channel clip/bracket from the engine and discard (1).
- Remove all six spark plug wires from the ignition coils only. Set the spark plug wires aside.
- Remove the supercharger drive belt (1).
- Remove the supercharger drive belt tensioner (1) and idler pulley (2).
- Remove the left engine mount strut bracket assembly (1).
- Remove the left or front engine valve cover (1).
- Install a new left or front valve cover gasket (1) , P/N 24503937, and make sure that valve cover gasket is seated properly in the valve cover groove.
- Install the left engine mount strut bracket assembly to the cylinder head (1).
- Install all six spark plug wires to the ignition coils.
- Install one 7 mm spark plug four wire retainer, P/N 88891792 (Qty 5 - not shown) to spark plug wires 1-3-5. If not available, use 8 mm spark plug four-wire retainer (1), P/N 14066248 (Qty 10) to spark plug wires 1-3-5 or equivalent 7 mm aftermarket spark plug wire retainer. Save the other spark plug four wire retainers for future repairs.
- Install the supercharger drive belt idler pulley (2). Install the supercharger drive belt idler pulley bolt.
- Install the supercharger drive belt tensioner (1). Install the supercharge drive belt tensioner nut.
- Install the supercharger drive belt (1).
- Install left engine mount strut bracket (2).
- Install fuel injector sight shield (1).
- Inspect for the proper oil level.
- Inspect for any oil leaks.
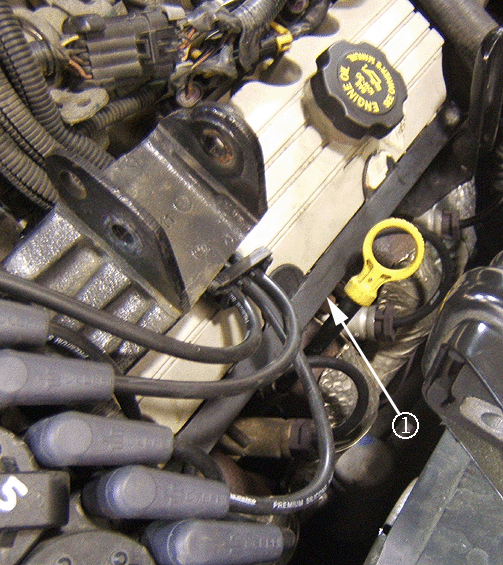
Important: Clean the area around the tube/oil fill cap before removing the tube/oil fill cap in order to prevent contaminants from falling into the valve cover opening.
| 1.1. | Twist counterclockwise to unlock the tube/oil fill cap from the valve cover. |
| 1.2. | Remove the upper intake manifold cover nut holding the fuel injector sight shield to the fuel injector rail brace stud. |
| 1.3. | Lift the fuel injector sight shield up at the front and slide the tab out of the engine bracket. |
| 1.4. | Install the tube/oil fill cap in the valve cover. |
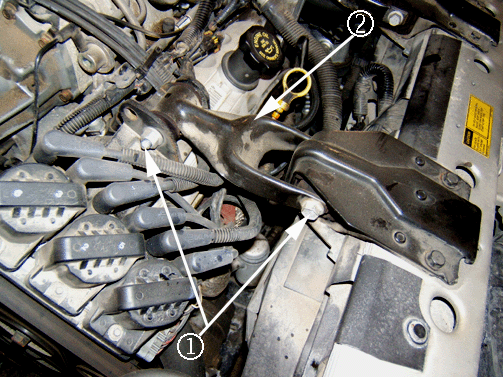
| 2.1. | Remove the bolt and the nut from the left engine mount strut at the left engine mount strut bracket on the engine (1). |
| 2.2. | Remove the bolt and the nut from the left engine mount strut at the left engine mount strut bracket on the upper radiator support (1). |
| 2.3. | Remove the engine mount strut (2). |
Important: It is not necessary to remove the spark plug wires from the spark plugs.
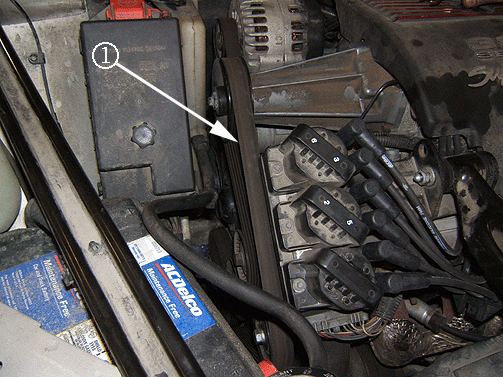
Lift or rotate the supercharger drive belt tensioner using a 15 mm box end wrench on the pulley nut and remove the belt.
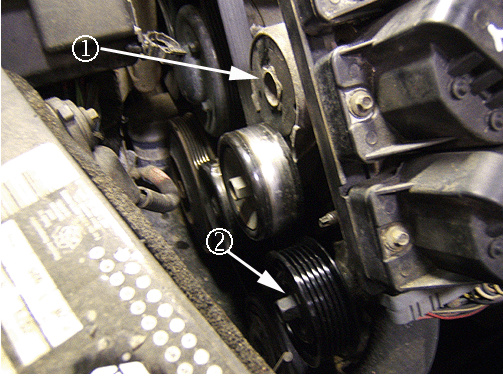
| 6.1. | Remove the supercharger drive belt tensioner nut and remove belt tensioner (1) from the engine. |
| 6.2. | Remove the idler pulley bolt (2). |
| 6.3. | Remove the drive belt idler pulley (2) from the engine. |
| 7.1. | Remove the left engine mount strut bracket assembly nuts. |
| 7.2. | Remove the stud holding the electronic ignition control module ground and left engine mount strut bracket assembly to the cylinder head. |
| 7.3. | Remove the left engine mount strut bracket assembly (1) from the cylinder head and set aside. |
Notice: Before the removal of the left or front engine valve cover, use an engine degreaser, brake cleaner, or equivalent, to remove the oil residue from the exhaust manifold and the oil and dirt residue from the cylinder head and engine block. It may be necessary to use a brush or scraper.
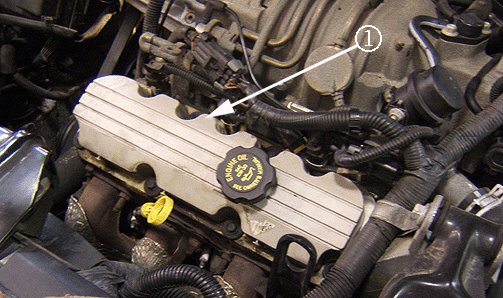
Important: If the valve rocker arm cover adheres to the cylinder head, remove the valve cover by bumping the end of the valve cover with palm of hand or with a soft rubber mallet.
| 8.1. | Remove the valve cover bolts. |
| 8.2. | Remove the valve cover from the engine cylinder head. |
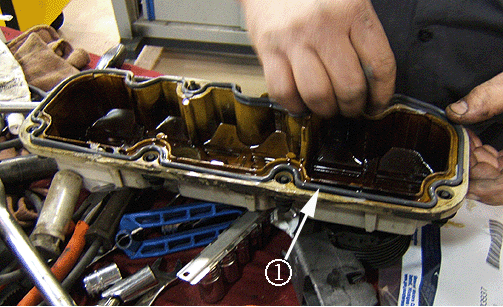
| 8.3. | Remove the valve cover gasket. |
| 8.4. | Clean the sealing surface on the cylinder head and the valve cover with a engine degreaser, brake cleaner or the equivalent. |
| 8.5. | Clean the valve cover bolts of all dirt, grime or thread locking adhesive. |
| 9.1. | Install the valve cover and gasket (1) to the cylinder head. |
| 9.2. | Apply medium strength thread lock compound (blue), GM P/N 12345382 (in Canada use P/N 10953489) or equivalent, to the six valve cover bolt threads. |
| 9.3. | Install the six valve cover bolts and six new grommets. |
| - | Replace with new grommets, P/N 25534749 (package - qty.5). |
| - | Two packages will be needed. Save the other four grommets for future repairs. |
Tighten
Tighten the valve cover bolts to 10 N·m (89 lb in).
| 10.1. | Install the left engine mount strut bracket nuts and stud. |
| 10.2. | Install the stud holding the electronic ignition control module ground and left engine mount strut bracket assembly to the cylinder head. |
Tighten
Tighten the left engine mount strut bracket nuts and stud to 50 N·m (37 lb ft).
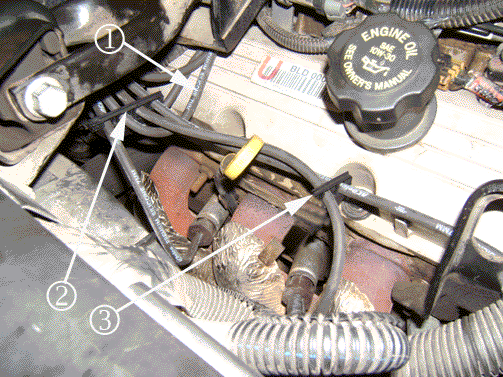
| 12.1. | Install the first 7 mm four-wire retainer to spark plug wire number four (1) then to spark plug wires one, three and five (2). Make sure that spark plug wires two, four and six are secured to the original retainers and under the left engine mount strut bracket (1). |
| 12.2. | Install the second 7 mm two-wire spark plug retainer, P/N 12132229 (Qty 10) to spark plug wires three and five only (3). Make sure the spark plug retainer (3) is approximately 50 mm (2 in) from the oil level indicator. |
Tighten
Tighten the supercharger drive belt idler pulley bolt to 50 N·m (37 lb ft).
Tighten
Tighten the supercharger drive belt idler pulley bolt to 50 N·m (37 lb ft).
Lift or rotate the drive belt tensioner using a 15 mm box end wrench on the pulley nut and install the supercharger drive belt.
| 16.1. | Install the bolt and the nut to the left engine mount strut at the left engine mount strut bracket on the upper radiator support (1). |
Tighten
Tighten the engine mount strut bolt to 48 N·m (35 lb ft).
| Important: If equipped, the P-clip on the engine wiring harness must be vertical to the left engine mount strut bracket when installed. |
| 16.2. | Install the bolt and the nut to the left engine mount strut at the left engine mount strut bracket on the engine (1). |
Tighten
Tighten the engine mount strut bolt to 48 N·m (35 lb ft).
| 17.1. | Remove by twisting counterclockwise to unlock the tube/oil fill cap from the left valve cover. |
| 17.2. | Insert the tab of the fuel injector sight shield under the engine bracket. |
| 17.3. | Place the hole of the fuel injector sight shield onto the oil fill neck of the left valve cover. |
| Important: Make sure the newly installed spark plug retainers are not in contact with the fuel injector sight shield or the exhaust manifold. |
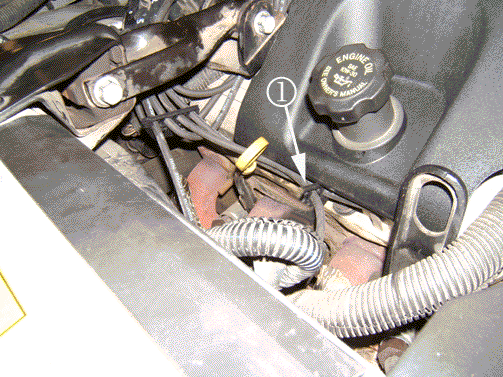
| Important: Make sure new 7 mm two-wire spark plug retainer (1) is approximately 50 mm (2 in) from the oil level indicator. |
| 17.4. | Install the tube/oil fill cap into the left valve cover and twist clockwise in order to lock the detent on the tube into the notch in the valve cover. |
Tighten
Tighten the fuel injector sight shield cover nut to 3 N·m (27 lb in).
Parts Information
Important: Do not order for parts for dealer stock.
Parts are in limited supply. If genuine GM parts are not available, dealers can use aftermarket parts.Part Number | Description | Qty |
|---|---|---|
24503937 | Valve Cover Gasket | 1 |
25534749 | Grommets, Valve Cover/Bolts (Qty 5) | 6 |
88891792 | 7 mm Four-Wire Retainer, Spark Plugs (Qty 5) | 1 |
12132229 | 7 mm Two-Wire Retainer, Spark Plugs (Qty 10) | 1 |
12345382 (US) 10953489 (Canada) | Medium Strength Thread Locker (Blue) | 1 |
Claim Information
For vehicles repaired under this bulletin, use:
Labor Operation | Description | Labor Time |
|---|---|---|
T5700* | Valve Cover Gasket - Replace (GM Part) | 0.8 hr |
T5701** | Valve Cover Gasket - Replace (Aftermarket Part) | |
* Genuine GM Service Parts (A/C Delco®) ** Local Parts Supplier | ||
