Removal Procedure
- Disconnect the battery ground negative cable. Refer to Battery Negative Cable Disconnection and Connection in Engine Electrical.
- Remove the instrument panel (IP) trim pad. Refer to Instrument Panel Trim Pad Replacement .
- Remove the passenger side SIR inflator module. Refer to Inflatable Restraint Instrument Panel Module Replacement in SIR.
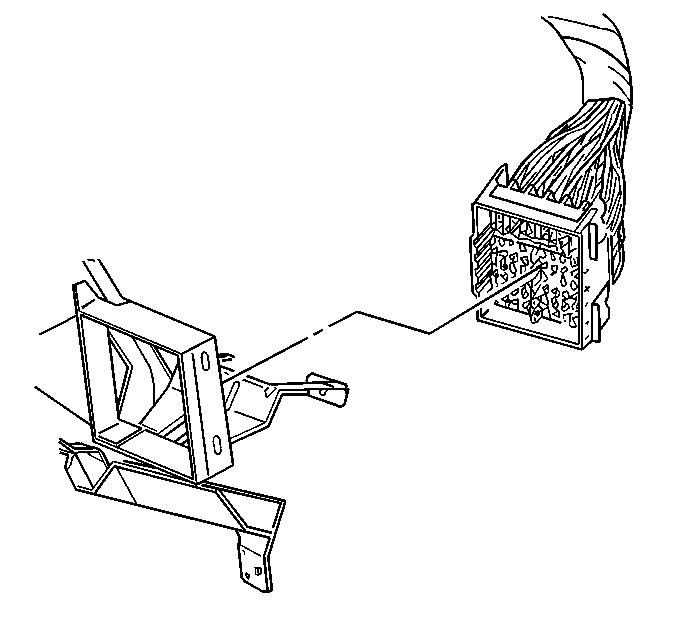
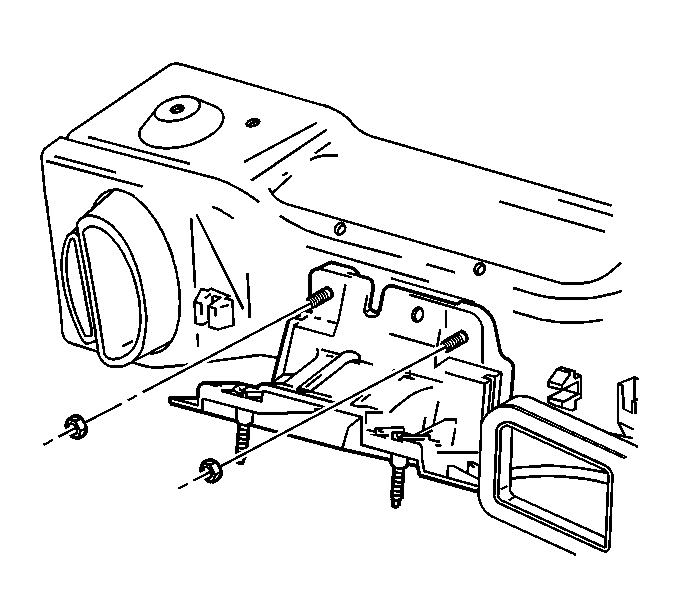
- Unclip the fuse block and position aside.
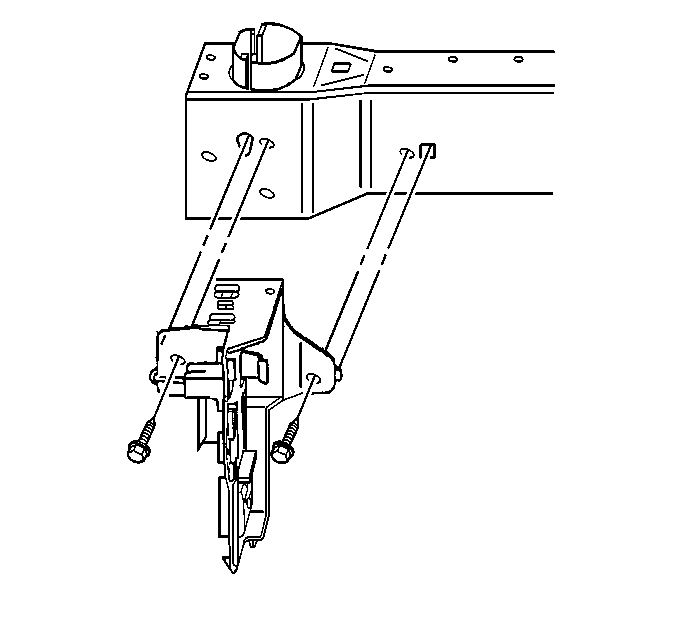
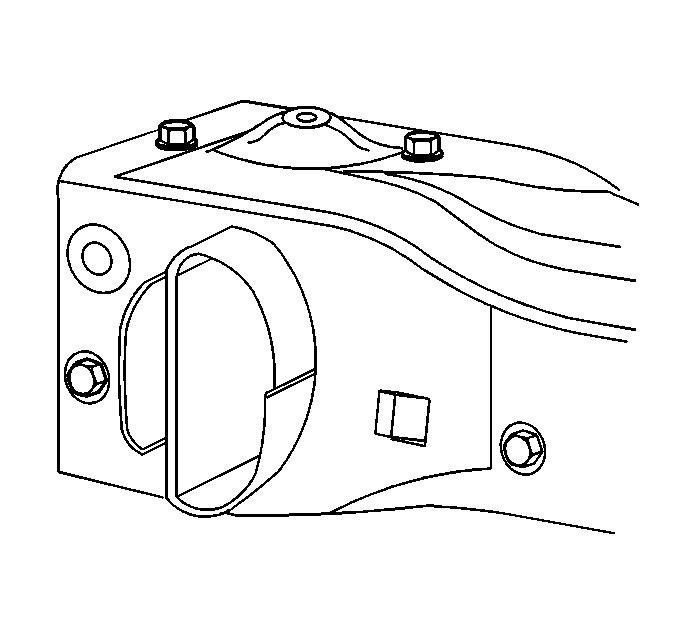
- Remove the brake pedal reinforcement nuts.
- Remove the air distribution ducts. Refer to Auxiliary Air Distributor Duct Replacement in HVAC-Manual.
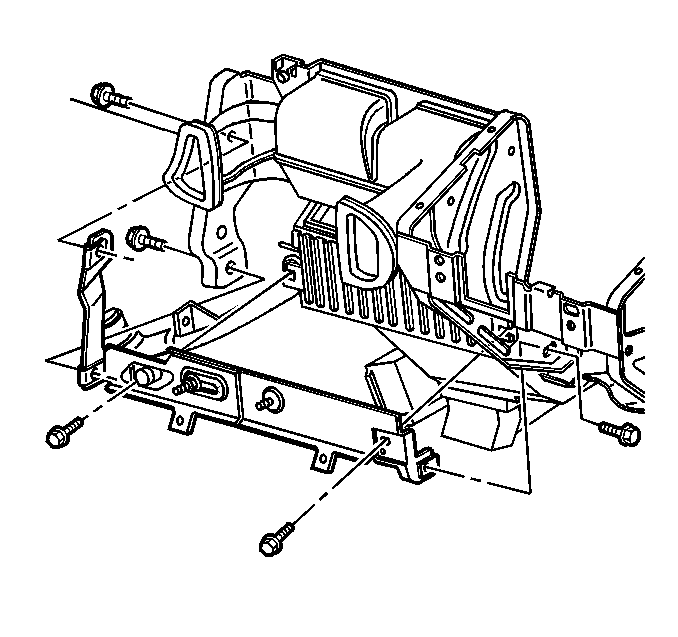
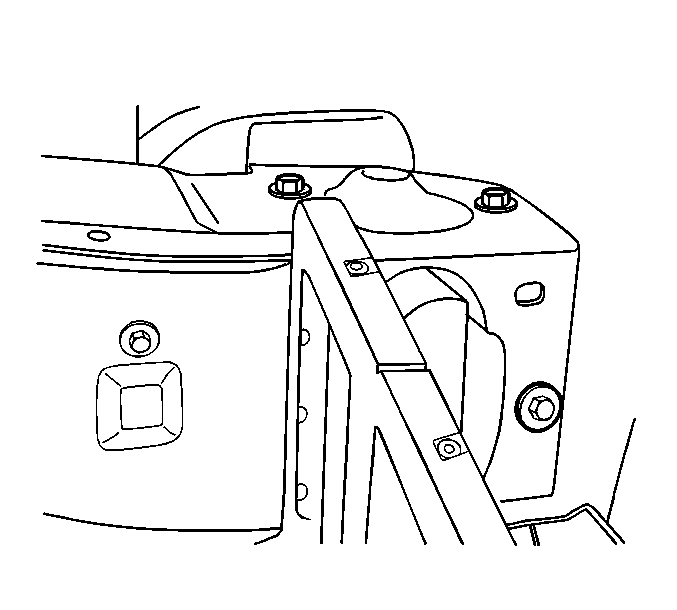
- Remove the retaining bolts and position the BCM bracket aside.
- Release the harness retaining clips and position the IP wiring harness out of the way.
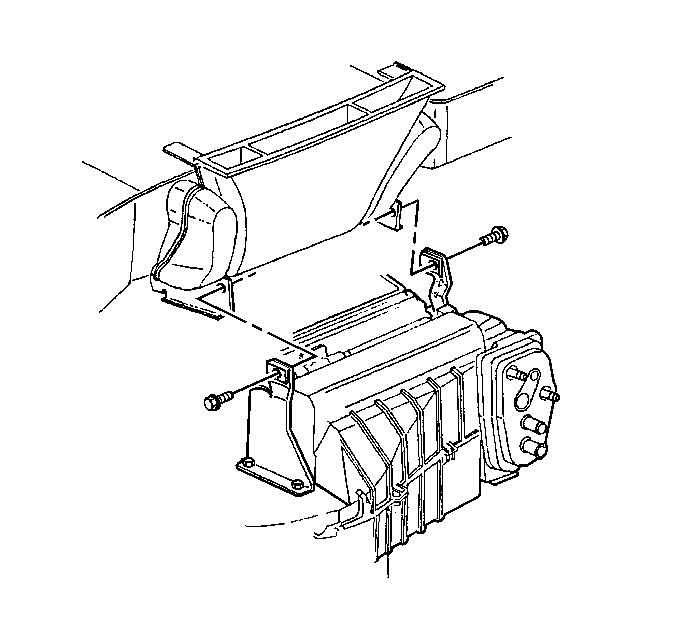
- Remove the retaining bolts from the HVAC module center support bracket.
- Remove the HVAC module center support bracket.
- Remove the retaining bolts from the HVAC module upper support brackets.
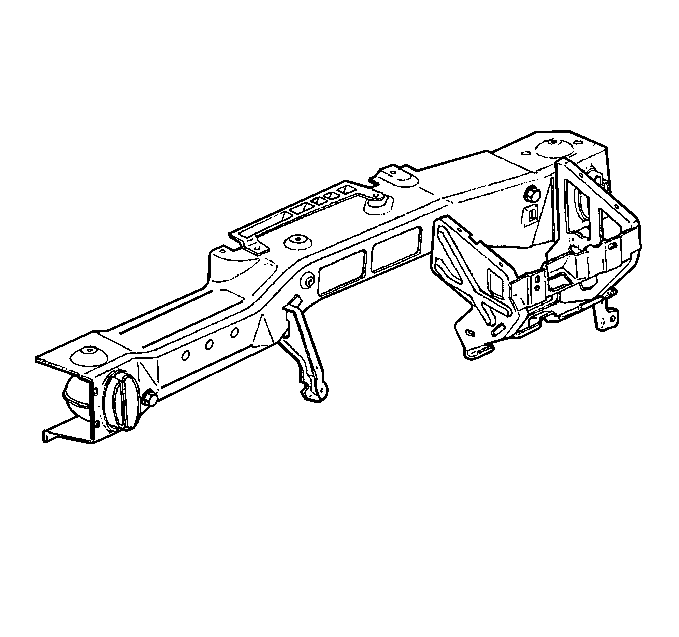
- Remove the bolts which secure the left cross vehicle beam to the hinge pillar.
- Remove the bolts which secure the right cross vehicle beam to the hinge pillar.
- Remove the cross vehicle beam from the vehicle.
Installation Procedure
- Install the cross vehicle beam to the vehicle.
- Install the bolts which secure the right cross vehicle beam to the hinge pillar.
- Install the bolts which secure the left cross vehicle beam to the hinge pillar.
- Install the retaining bolts to the HVAC module upper support brackets.
- Install the HVAC module center support bracket.
- Install the retaining bolts to the HVAC module center support bracket.
- Position the IP wiring harness and install the harness retaining clips.
- Install the BCM bracket and the retaining bolts.
- Install the air distribution ducts. Refer to Auxiliary Air Distributor Duct Replacement in HVAC- Manual.
- Install the fuse block to the holder.
- Install the brake pedal reinforcement nuts.
- Install the passenger side SIR inflator module. Refer to Inflatable Restraint Instrument Panel Module Replacement in SIR.
- Install the IP trim pad. Refer to Instrument Panel Trim Pad Replacement .
Notice: Use the correct fastener in the correct location. Replacement fasteners must be the correct part number for that application. Fasteners requiring replacement or fasteners requiring the use of thread locking compound or sealant are identified in the service procedure. Do not use paints, lubricants, or corrosion inhibitors on fasteners or fastener joint surfaces unless specified. These coatings affect fastener torque and joint clamping force and may damage the fastener. Use the correct tightening sequence and specifications when installing fasteners in order to avoid damage to parts and systems.
Tighten
Tighten both sets of bolts to 20 N·m (15 lb ft).
Tighten
Tighten the bolts to 10 N·m (89 lb in).
Tighten
Tighten the bolts to 10 N·m (89 lb in).
Tighten
Tighten the BCM bracket bolts to 10 N·m (89 lb in).
Tighten
Tighten the nuts to 50 N·m (37 lb ft).
