Removal Procedure
- Raise the hood.
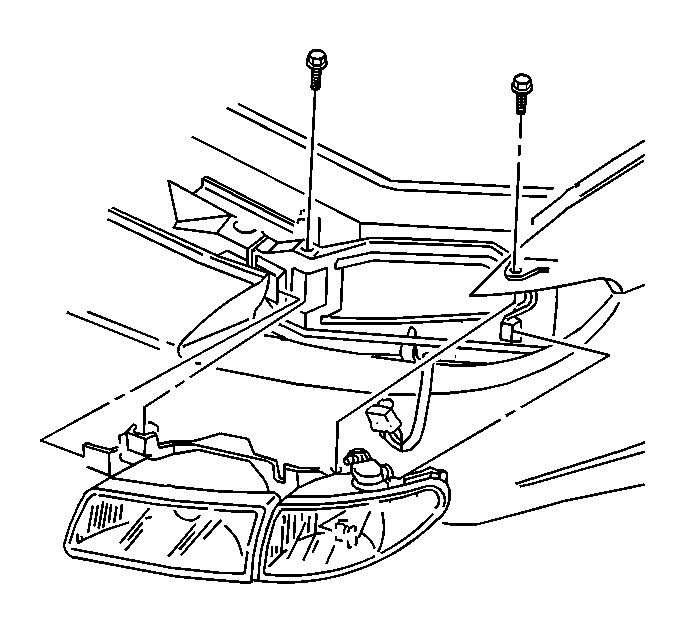
- Remove the headlamp assembly bolts from the upper fascia support.
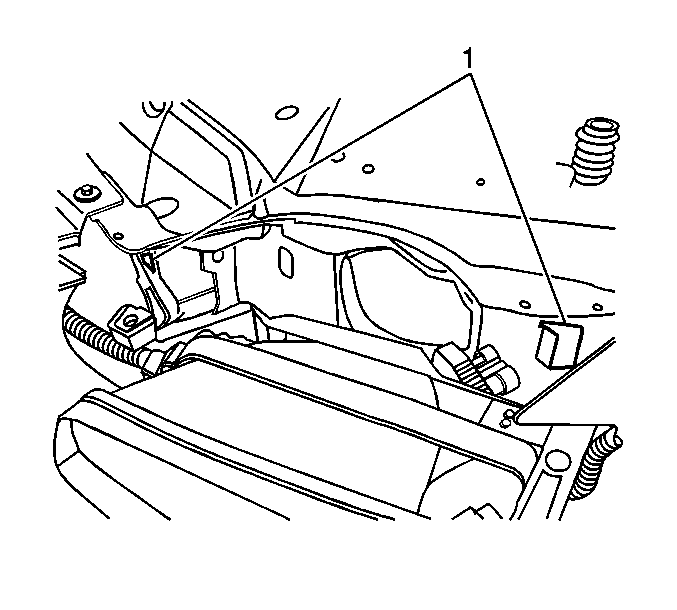
- Slide the headlamp assembly outward enough to release the headlamp bracket tabs from the slots (1) in the upper fascia support.
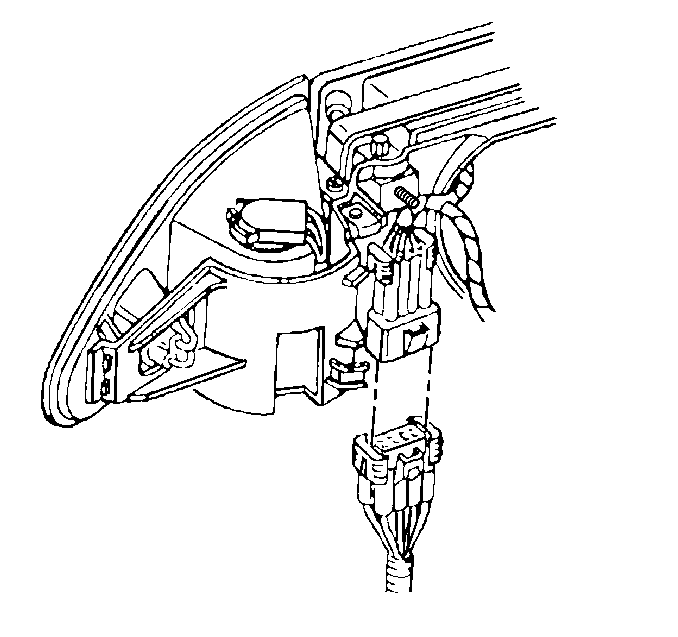
- Position the headlamp assembly away from the vehicle body to access the electrical connector.
- Disconnect the electrical connector from the headlamp assembly.
- Remove the headlamp assembly from the vehicle.
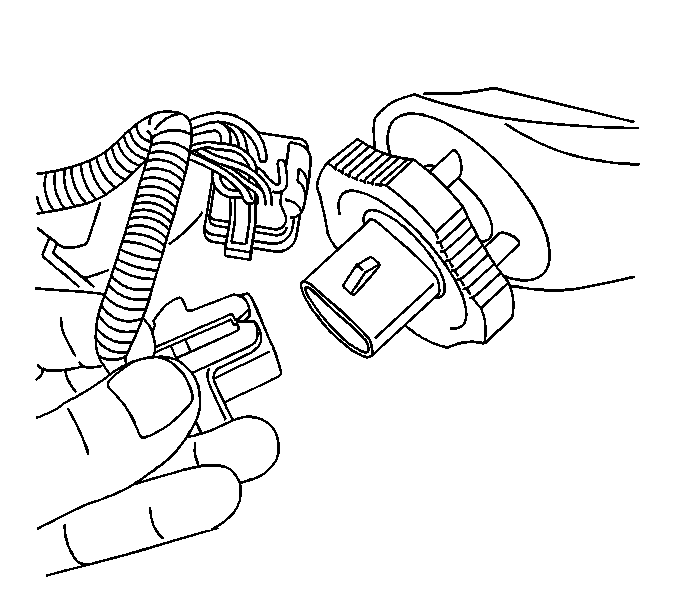
- Disconnect the electrical connector from the headlamp bulb/socket.
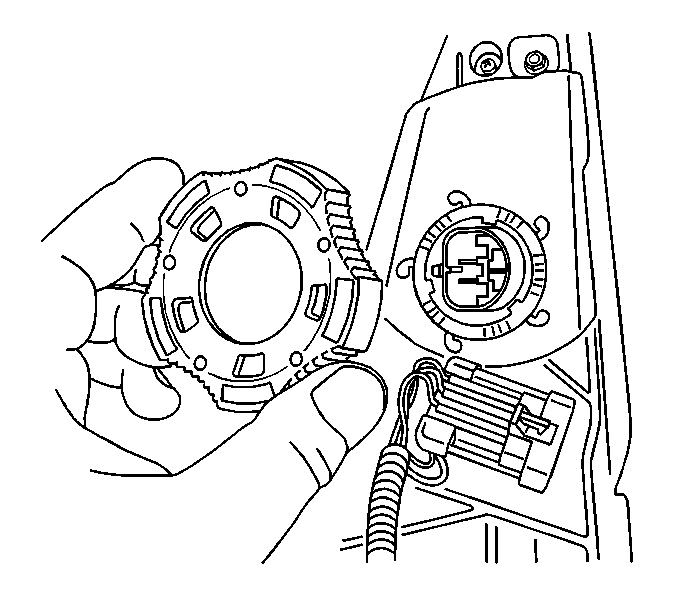
- Remove the headlamp bulb/socket retainer ring from the headlamp, by turning counterclockwise.
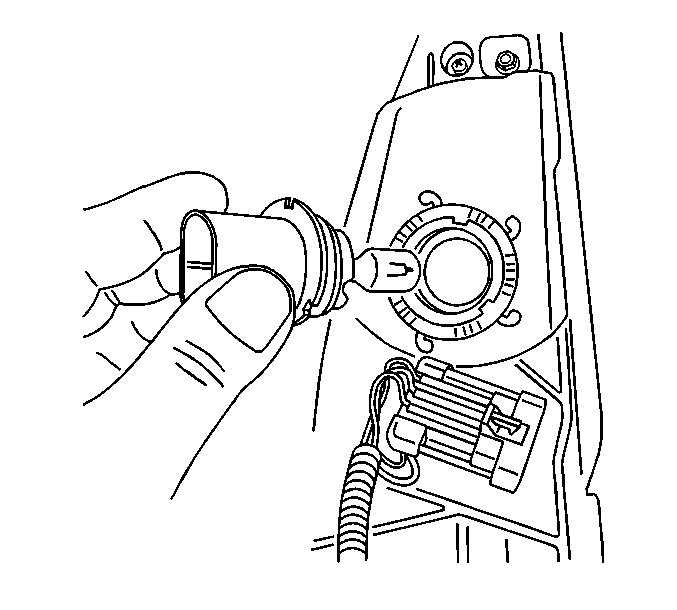
- Remove the headlamp bulb/socket from the headlamp assembly.
Caution: Halogen bulbs contain gas under pressure. Handling a bulb improperly
could cause it to shatter into flying glass fragments. To help avoid personal
injury:
• Turn off the lamp switch and allow the bulb to cool before changing
the bulb. • Leave the lamp switch OFF until the bulb change is complete. • Always wear eye protection when changing a halogen bulb. • Handle the bulb only by its base. Avoid touching the glass. • Keep dirt and moisture off the bulb. • Properly dispose of the used bulb. • Keep halogen bulbs out of the reach of children.
Installation Procedure
- Install the headlamp bulb/socket to the headlamp assembly.
- Install the headlamp bulb/socket retainer ring to the headlamp assembly, turning clockwise until fully seated.
- Connect the electrical connector to the headlamp bulb/socket.
- Connect the electrical connector to the headlamp assembly.
- Position the headlamp assembly to the vehicle body, just outward of the installed position.
- Align the headlamp bracket tabs to the slots (1) in the upper fascia support. Slide the headlamp inbward to engage the tabs.
- Install the headlamp assembly bolts to the upper fascia support.
- Check and adjust the headlamp aim as necessary. Refer to Headlamp Aiming .
- Close the hood.


Notice: Use the correct fastener in the correct location. Replacement fasteners must be the correct part number for that application. Fasteners requiring replacement or fasteners requiring the use of thread locking compound or sealant are identified in the service procedure. Do not use paints, lubricants, or corrosion inhibitors on fasteners or fastener joint surfaces unless specified. These coatings affect fastener torque and joint clamping force and may damage the fastener. Use the correct tightening sequence and specifications when installing fasteners in order to avoid damage to parts and systems.
Tighten
Tighten the headlamp assembly bolts to 6 N·m (53 lb in).
