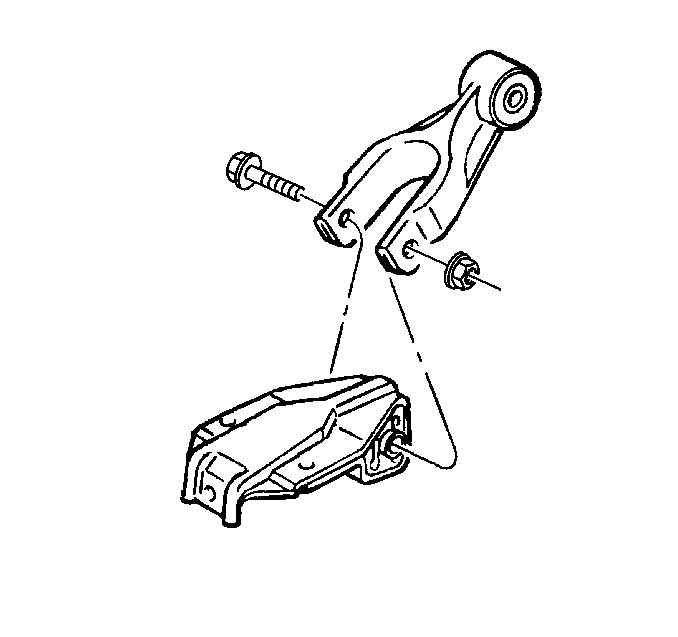
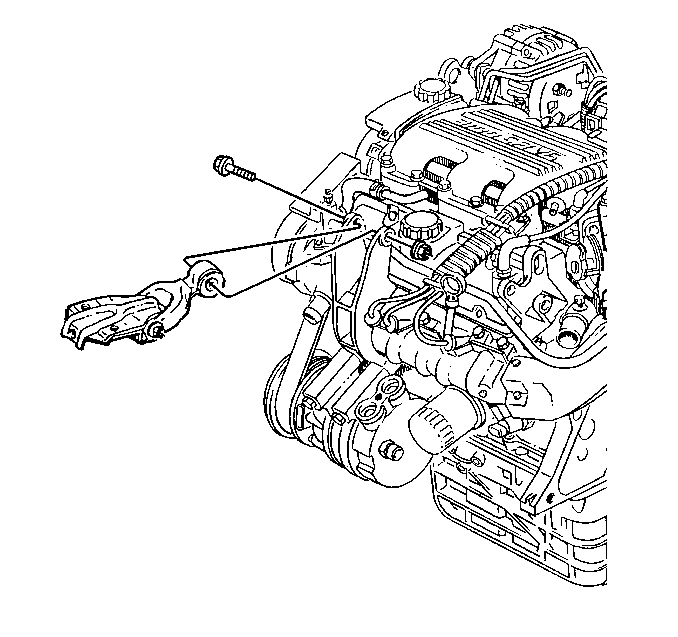
Engine Mount Strut Bracket Replacement Upper Radiator Support
Removal Procedure
- Remove the engine mount strut from the engine mount strut bracket at the upper radiator support. Refer to Engine Mount Strut Replacement .
- Remove the horizontal engine mount strut bracket bolt from the engine mount strut bracket.
- Remove the vertical engine mount strut bracket bolts from the engine mount strut bracket.
- Remove the engine mount strut bracket from the upper radiator support.
Installation Procedure
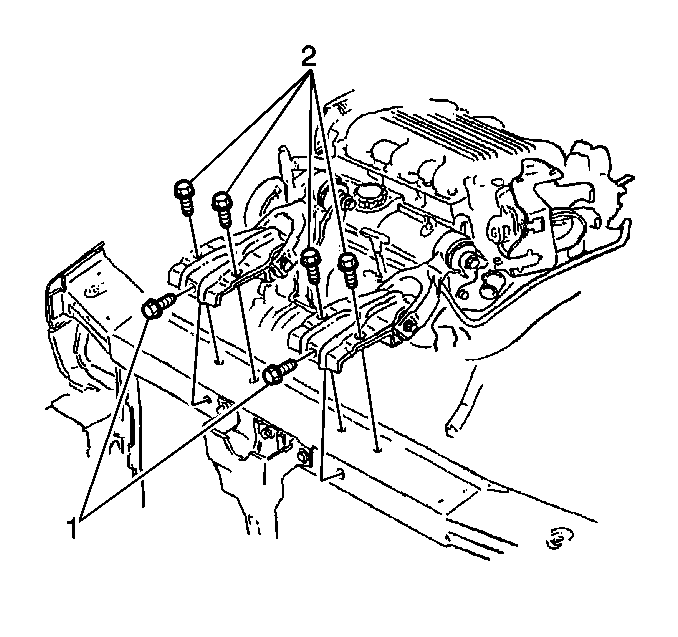
- Position the engine mount strut bracket over the upper radiator support. Make sure that the engine mount strut bracket and the engine mount strut are aligned to the proper holes of the upper radiator support. The proper torque sequence is shown (1,2).
- Install and tighten the engine mount strut bracket bolts. The following is a mandatory torque sequence:
- Install the engine mount strut to the engine mount strut bracket at the upper radiator support. Refer to Engine Mount Strut Replacement .
Notice: Use the correct fastener in the correct location. Replacement fasteners must be the correct part number for that application. Fasteners requiring replacement or fasteners requiring the use of thread locking compound or sealant are identified in the service procedure. Do not use paints, lubricants, or corrosion inhibitors on fasteners or fastener joint surfaces unless specified. These coatings affect fastener torque and joint clamping force and may damage the fastener. Use the correct tightening sequence and specifications when installing fasteners in order to avoid damage to parts and systems.
| 2.1. | Tighten the horizontal engine mount strut bracket bolt (1) to the engine mount strut bracket. |
Tighten
Tighten the horizontal engine mount strut bracket bolt to 26 N·m
(19 lb ft).
| 2.2. | Tighten the vertical engine mount strut bracket bolts (2) to the engine mount strut bracket. |
Tighten
Tighten the vertical engine mount strut bracket bolts to 26 N·m
(19 lb ft).
Engine Mount Strut Bracket Replacement Left
Removal Procedure
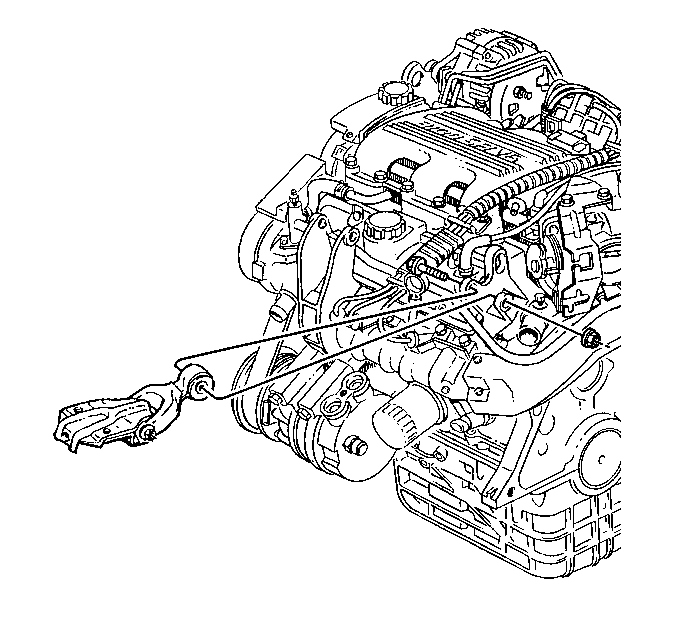
- Remove the engine mount strut from the left engine mount strut bracket. Refer to Engine Mount Strut Replacement .
- Remove the engine mount strut bracket bolts from the left engine mount strut bracket to the cylinder head.
- Remove the left engine mount strut bracket.
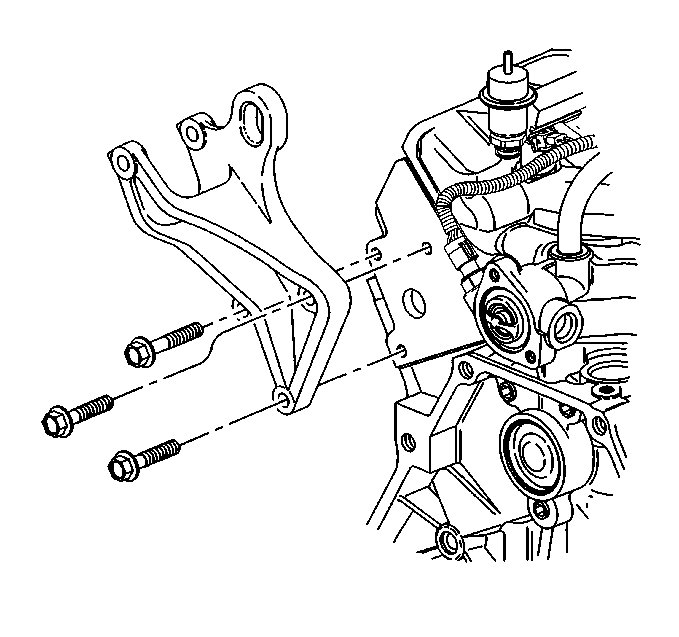
Installation Procedure
- Install the left engine mount strut bracket.
- Install the engine mount strut bracket bolts through the engine mount strut bracket to the cylinder head.
- Install the engine mount strut to the left engine mount strut bracket. Refer to Engine Mount Strut Replacement .
Notice: Use the correct fastener in the correct location. Replacement fasteners must be the correct part number for that application. Fasteners requiring replacement or fasteners requiring the use of thread locking compound or sealant are identified in the service procedure. Do not use paints, lubricants, or corrosion inhibitors on fasteners or fastener joint surfaces unless specified. These coatings affect fastener torque and joint clamping force and may damage the fastener. Use the correct tightening sequence and specifications when installing fasteners in order to avoid damage to parts and systems.
Tighten
Tighten the engine mount strut bracket bolts to 70 N·m
(52 lb ft).
Engine Mount Strut Bracket Replacement Right
Removal Procedure
- Disconnect the battery ground (negative) cable. Refer to Battery Negative Cable Disconnection and Connection in Engine Electrical.
- Remove the right engine mount strut from the right engine mount strut bracket. Refer to Engine Mount Strut Replacement .
- Remove the air conditioning compressor mounting bolts. Refer to Air Conditioning Compressor Replacement in HVAC.
- Remove and set the air conditioning compressor aside.
- Remove the bolts from the right engine mount strut bracket.
- Remove the right engine mount strut bracket.
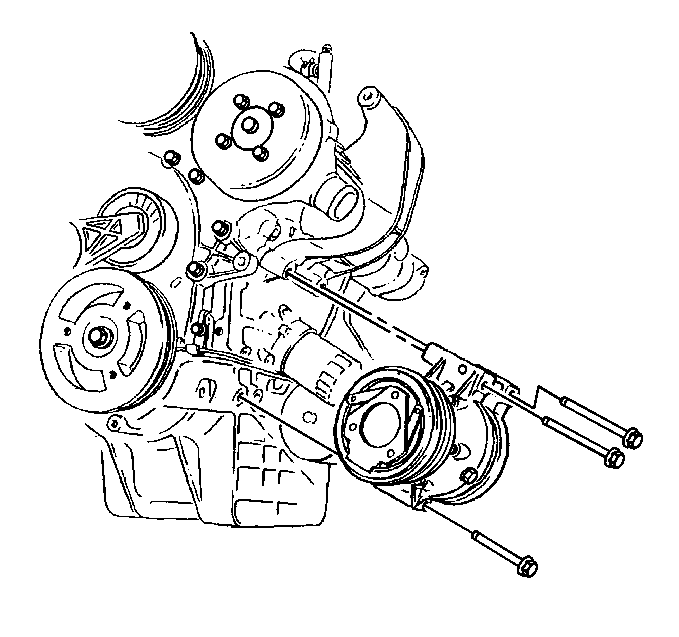
Installation Procedure
- Position the right engine mount strut bracket over the pin locator.
- Install the bolts through the right engine mount strut bracket to the cylinder head.
- Install the air conditioner compressor . Refer to Air Conditioning Compressor Replacement in HVAC.
- Install the right engine mount strut to the right engine mount strut bracket. Refer to Engine Mount Strut Replacement .
- Connect the battery ground (negative) cable. Refer to Battery Negative Cable Disconnection and Connection in Engine Electrical.
Notice: Use the correct fastener in the correct location. Replacement fasteners must be the correct part number for that application. Fasteners requiring replacement or fasteners requiring the use of thread locking compound or sealant are identified in the service procedure. Do not use paints, lubricants, or corrosion inhibitors on fasteners or fastener joint surfaces unless specified. These coatings affect fastener torque and joint clamping force and may damage the fastener. Use the correct tightening sequence and specifications when installing fasteners in order to avoid damage to parts and systems.
Tighten
Tighten the engine mount strut bracket bolt to 50 N·m (37 lb ft).
Tighten
Tighten the air conditioning compressor mounting bolts to 50 N·m
(37 lb ft).
