Throttle Body Assembly Replacement VIN K
Removal Procedure
Notice: Do not use solvent of any type when cleaning the gasket surfaces on the intake manifold and the throttle body assembly, as damage to the gasket surfaces and throttle body assembly may result.
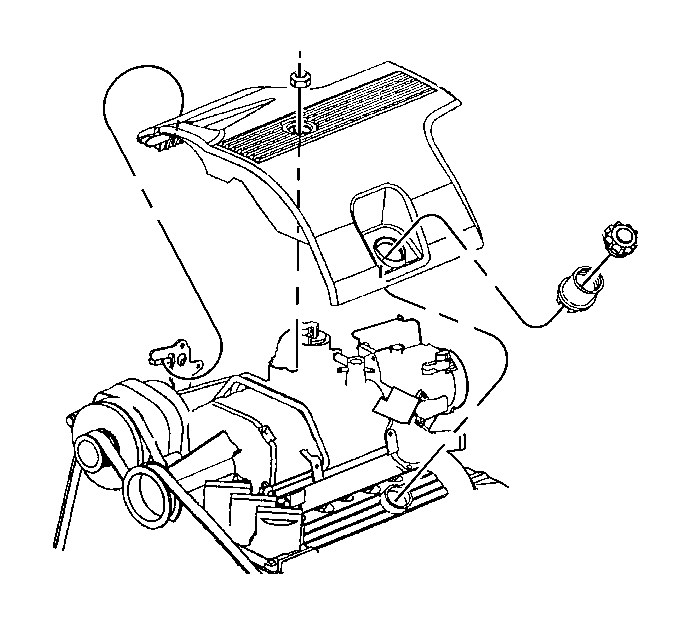
Use care in cleaning the gasket surfaces on the intake manifold and the throttle body assembly, as sharp tools may damage the gasket surfaces.- Remove the injector sight shield. Refer to Fuel Injector Sight Shield Replacement in Engine Mechanical.
- Drain the radiator coolant. Refer to Cooling System Draining and Filling Cooling and Radiator.
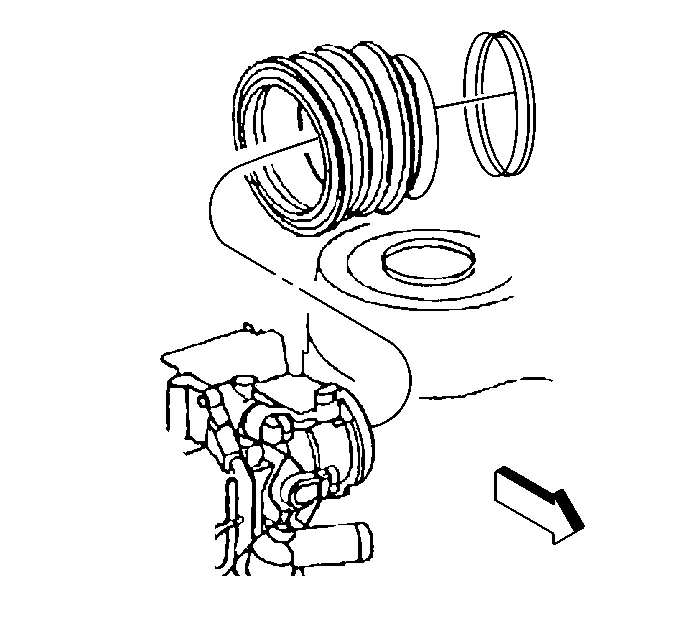
- Remove the air intake tube.
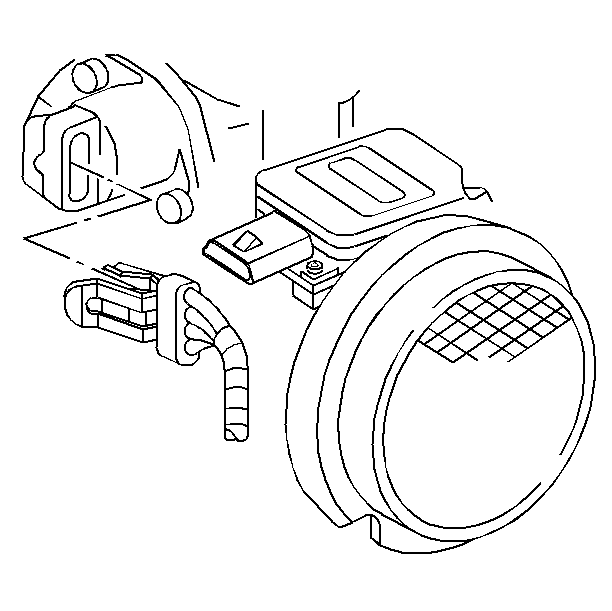
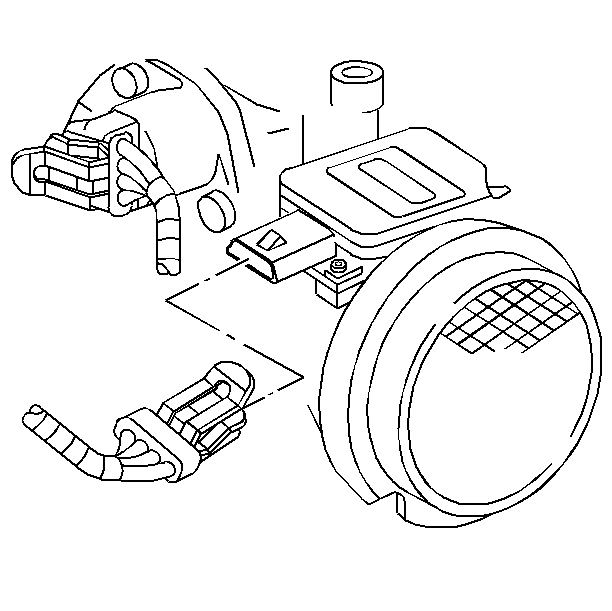
- Disconnect the idle air control (IAC) valve electrical connector.
- Disconnect the mass air flow (MAF) sensor electrical connector.
- Disconnect the throttle position (TP) sensor electrical connector.
- Disconnect the accelerator controls cable. Refer to Accelerator Control Cable Replacement .
- Remove the accelerator controls cable bracket. Refer to Accelerator Control Cable Bracket Replacement .
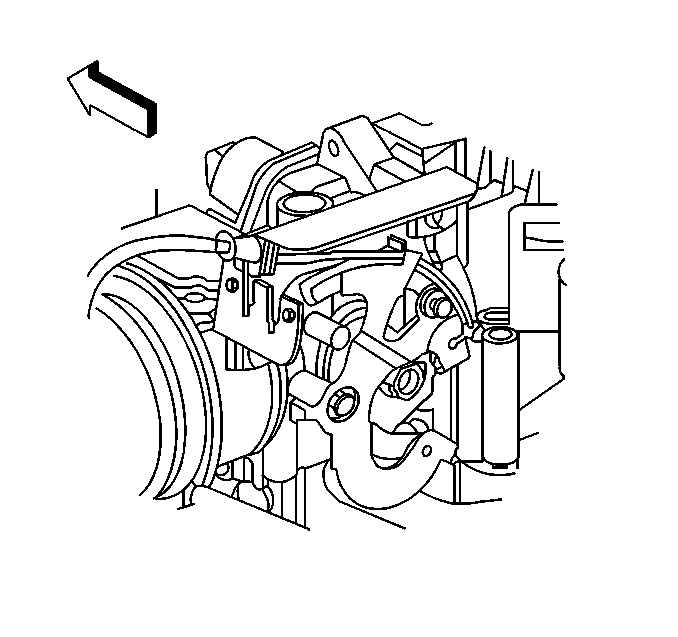
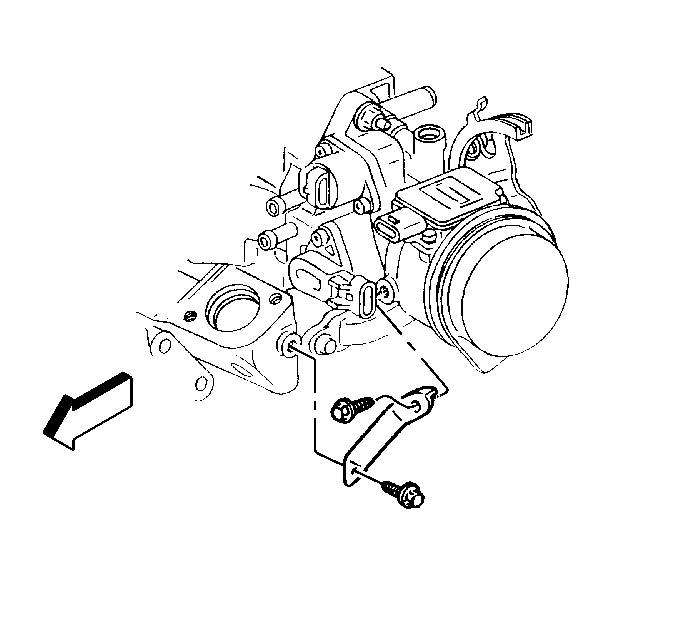
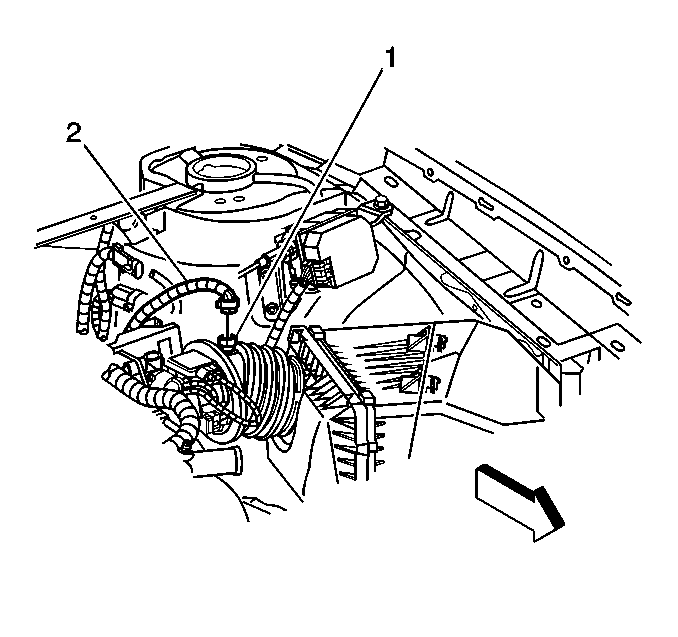
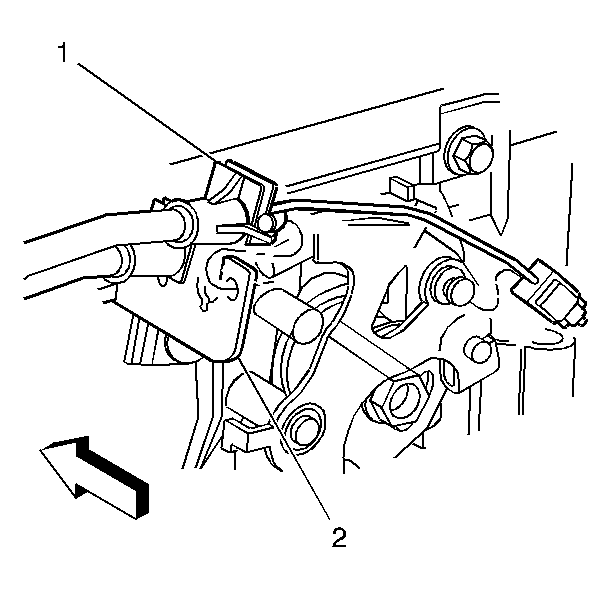
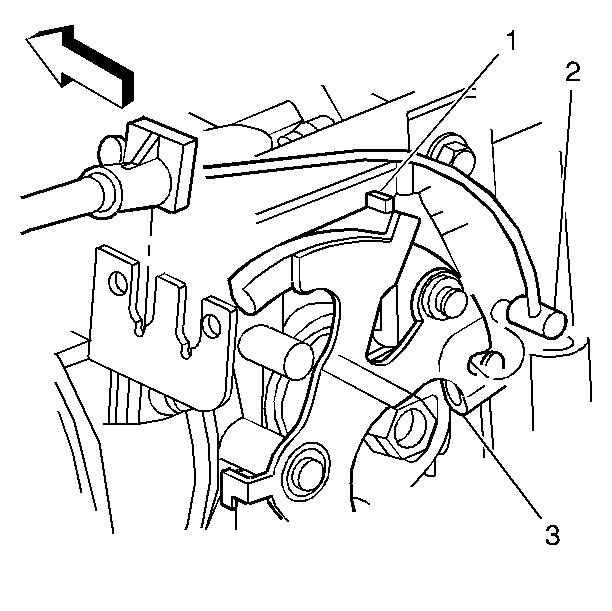
- Disconnect the electrical harness retainer clip (1) and the harness (2) from the accelerator control cable bracket (3).
- Disconnect the vacuum line from the throttle body.
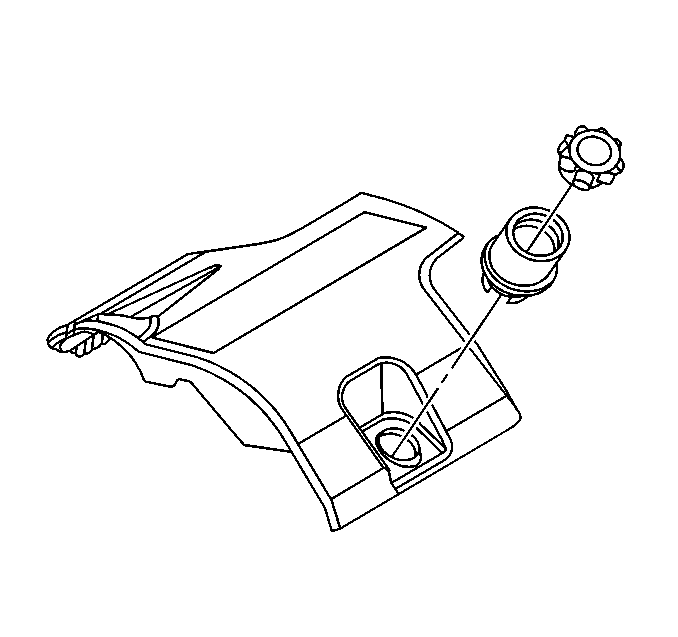
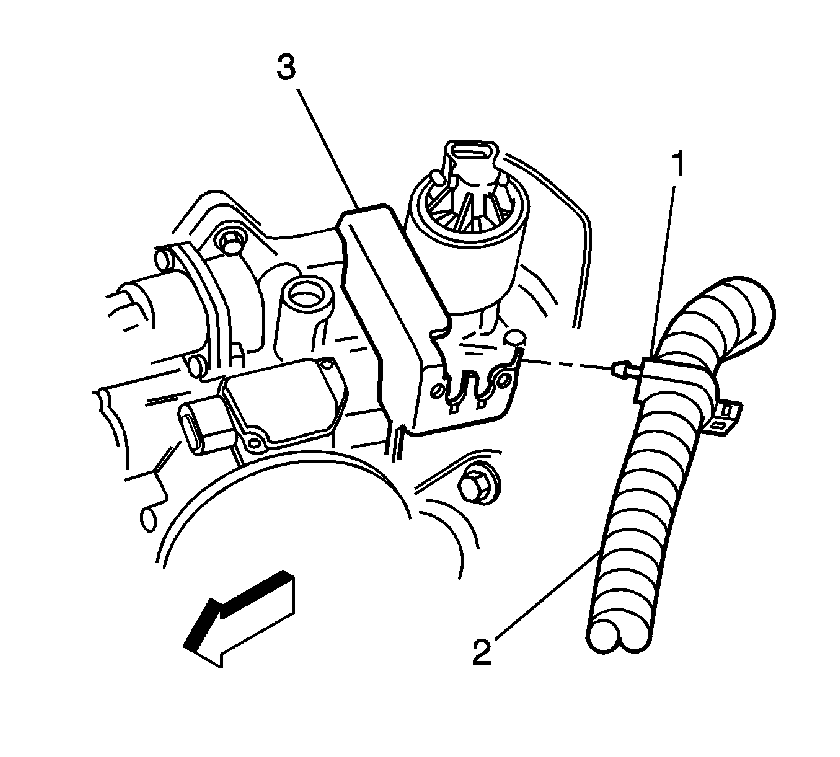
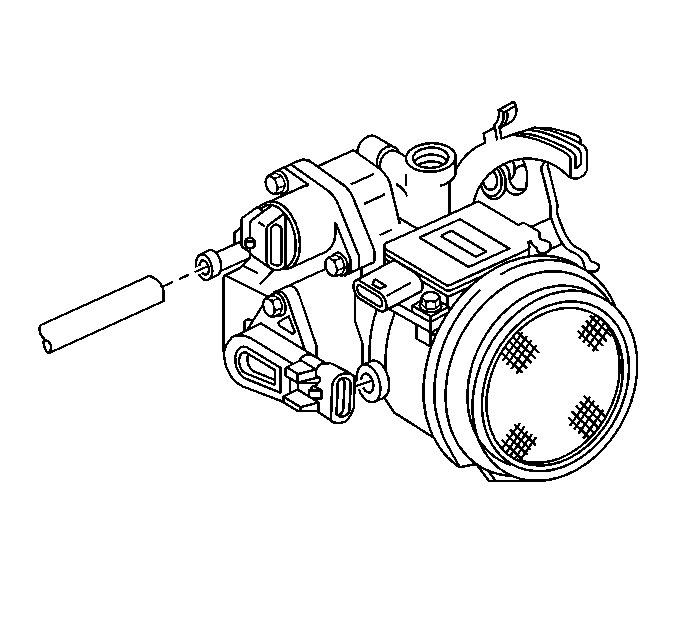
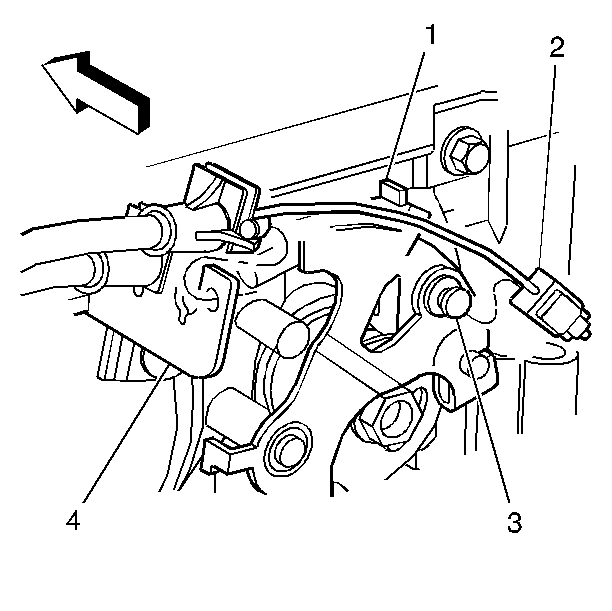
- Remove the nut (2) from the air injection pipe (1), if applicable.
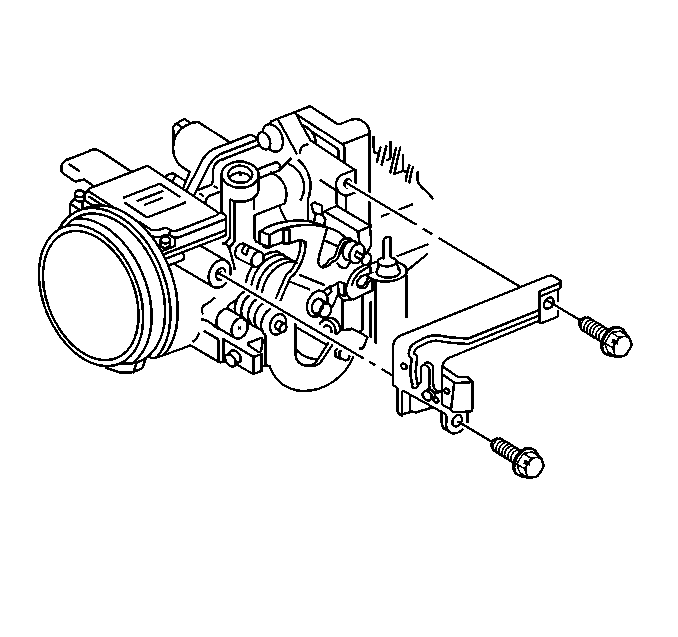
- Remove the throttle body support bracket.
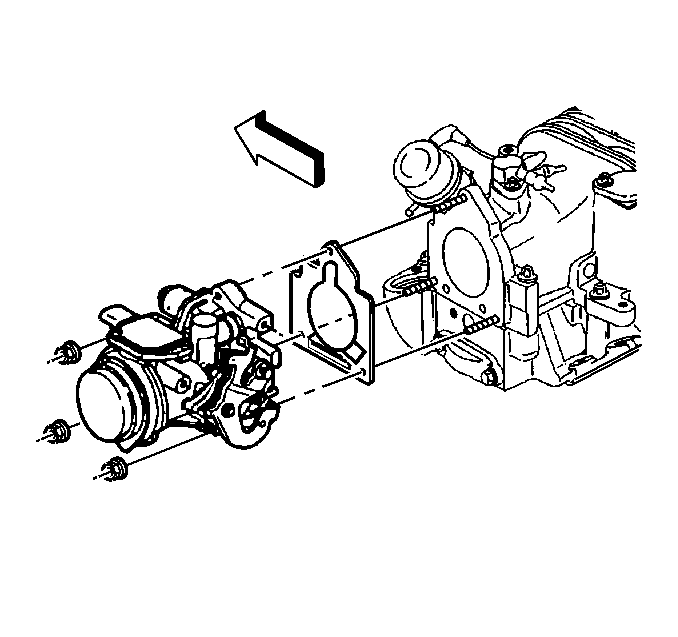
- Remove the nuts and the bolts that hold the throttle body to the intake manifold. Use a wrench on the manifold side of the inserts in order to prevent the inserts from rotating in the manifold casting.
- Remove the throttle body assembly.
- Clean the gasket surface on the intake manifold and on the throttle body assembly.


Installation Procedure
Important: The throttle should operate freely without binding between full closed throttle and wide open throttle.
- Install the new gasket, and install the new inserts and the studs, if necessary.
- Install the throttle body assembly.
- Install the throttle body retaining nuts and bolts.
- Connect the electrical harness retainer clip (1) and harness (2) to the accelerator control cable bracket (3).
- Install the air injection pipe (1) to the throttle body, if applicable.
- Connect the vacuum line to throttle body.
- Connect the IAC valve sensor electrical connector.
- Connect the MAF sensor electrical connector.
- Connect the TP sensor electrical connector.
- Install the air intake tube.
- Refill the radiator in order to replace the lost coolant. Refer to Cooling System Draining and Filling in Cooling and Radiator.
- Install the injector sight shield. Refer to Fuel Injector Sight Shield Replacement in Engine Mechanical.
Notice: Use the correct fastener in the correct location. Replacement fasteners must be the correct part number for that application. Fasteners requiring replacement or fasteners requiring the use of thread locking compound or sealant are identified in the service procedure. Do not use paints, lubricants, or corrosion inhibitors on fasteners or fastener joint surfaces unless specified. These coatings affect fastener torque and joint clamping force and may damage the fastener. Use the correct tightening sequence and specifications when installing fasteners in order to avoid damage to parts and systems.
Tighten
Tighten the throttle body retaining nuts and bolts to 10 N·m
(7 lb ft).
Tighten
Tighten the nut (2) to 10 N·m (7 lb ft).
Throttle Body Assembly Replacement VIN 1
Removal Procedure
- Turn OFF the ignition.
- Drain the radiator coolant. Refer to Cooling System Draining and Filling in Cooling and Radiator.
- Remove the fuel injector sight shield. Refer to Fuel Injector Sight Shield Replacement in Engine Mechanical.
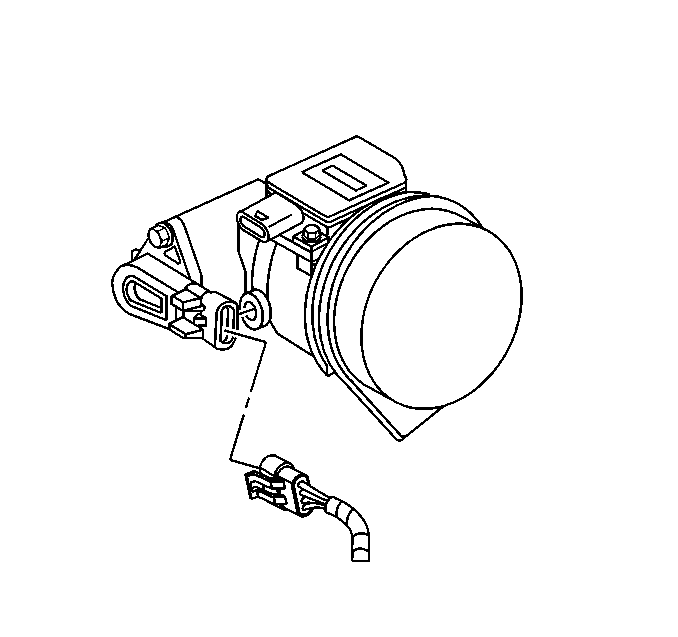
- Disconnect the intake air temperature sensor electrical connector (2) from the intake air temperature sensor (1).
- Disconnect the intake air duct from the throttle body.
- Disconnect the idle air control (IAC) valve electrical connector from the IAC valve.
- Disconnect the throttle position (TP) sensor electrical connector from the TP sensor.
- Disconnect the Mass Air Flow (MAF) sensor electrical connector from the MAF sensor.
- Disconnect the cruise control cable (1) from the accelerator controls cable bracket (2). Refer to Accelerator Control Cable Replacement .
- Disconnect the accelerator controls cable (1) accelerator controls cable bracket (2).
- Disconnect the cruise control cable (2) from the throttle body lever (3). Refer to Cruise Control Cable Replacement in Cruse Control.
- Disconnect the accelerator controls cable (2) from the throttle body lever (3).
- Disconnect the electrical harness (2) retainer clip (1) from the accelerator controls cable bracket (3), if applicable.
- Disconnect the vacuum hoses from the throttle body. Note the location for later installation.
- Remove the nut (2) from the air injection pipe (1), if applicable.
- Remove the 3 nuts and bolts that hold the throttle body to the supercharger.
- Remove the throttle body assembly.
- If you are replacing the throttle body, remove the accelerator controls cable bracket. Refer to Accelerator Control Cable Bracket Replacement .
- Clean the gasket surface on the supercharger and on the throttle body assembly.

Notice: Do not use solvent of any type when cleaning the gasket surfaces on the intake manifold and the throttle body assembly, as damage to the gasket surfaces and throttle body assembly may result.
Use care in cleaning the gasket surfaces on the intake manifold and the throttle body assembly, as sharp tools may damage the gasket surfaces.Installation Procedure
- Install the accelerator controls bracket to the throttle body if necessary.
- Install the new gasket, and install the new inserts and the studs, if necessary.
- Install the throttle body assembly.
- Install the throttle body retaining nuts and bolts.
- Install the nut (2) from the air injection pipe (1), if applicable.
- Connect the vacuum hoses to the throttle body.
- Connect the accelerator controls cable (1) to accelerator controls cable bracket (2) at the throttle body. Refer to Accelerator Control Cable Replacement .
- Connect the cruise control cable (1) to accelerator control bracket at the throttle body (2). Refer to Cruise Control Cable Replacement in Cruise Control.
- Install the accelerator control cable 2) to the throttle body lever (3).
- Connect the cruise control cable (2) to the throttle body lever (3).
- Check for complete throttle opening and closing positions by operating the accelerator controls pedal.
- Connect the electrical harness (2) retainer clip (1) and harness to the accelerator controls bracket (3), if applicable.
- Connect the MAF sensor electrical connector to the MAF sensor.
- Connect the TP sensor electrical connector to the TP sensor.
- Connect the IAC valve electrical connector to the IAC valve.
- Connect the intake air duct to the throttle body.
- Connect the IAT sensor electrical connector (2) to the IAT sensor (1).
- Install the fuel injector sight shield. Refer to Fuel Injector Sight Shield Replacement in Engine Mechanical.
- Refill the radiator in order to replace the lost coolant. Refer to Cooling System Draining and Filling in Engine Cooling.
Notice: Use the correct fastener in the correct location. Replacement fasteners must be the correct part number for that application. Fasteners requiring replacement or fasteners requiring the use of thread locking compound or sealant are identified in the service procedure. Do not use paints, lubricants, or corrosion inhibitors on fasteners or fastener joint surfaces unless specified. These coatings affect fastener torque and joint clamping force and may damage the fastener. Use the correct tightening sequence and specifications when installing fasteners in order to avoid damage to parts and systems.
Tighten
Tighten the bolts to 16 N·m (12 lb ft).
Tighten
Tighten the throttle body retaining nuts and bolts to 10 N·m
(7 lb ft).
Tighten
Tighten the nut to 10 N·m (7 lb ft).
Important: The throttle should operate freely without binding between full closed throttle and wide open throttle.
Tighten
Tighten the clamp to 2 N·m (18 lb in).
