Caution: Do not drain the fuel into an open container. Never store the fuel in
an open container due to the possibility of a fire or an explosion.
Notice: Do not drain fuel through the fuel tank filler pipe in order to prevent
damage to the fuel tank filler pipe check-ball.
- Relieve the fuel system fuel pressure. Refer to
Fuel Pressure Relief
.
- Remove the trunk liner. Refer to
Rear Compartment Trim Panel Replacement
in
Body Rear End.
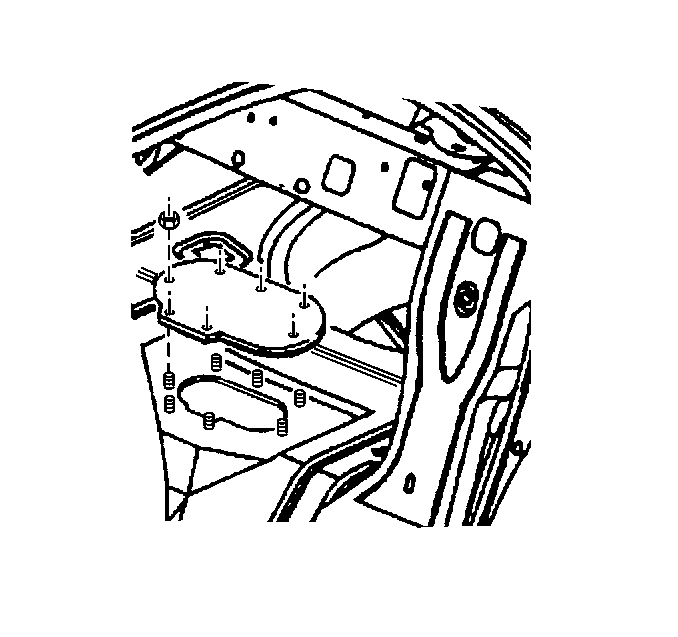
- Remove the 7 nuts retaning the
fuel sender access panel.
- Remove the fuel tank filler pipe cap.
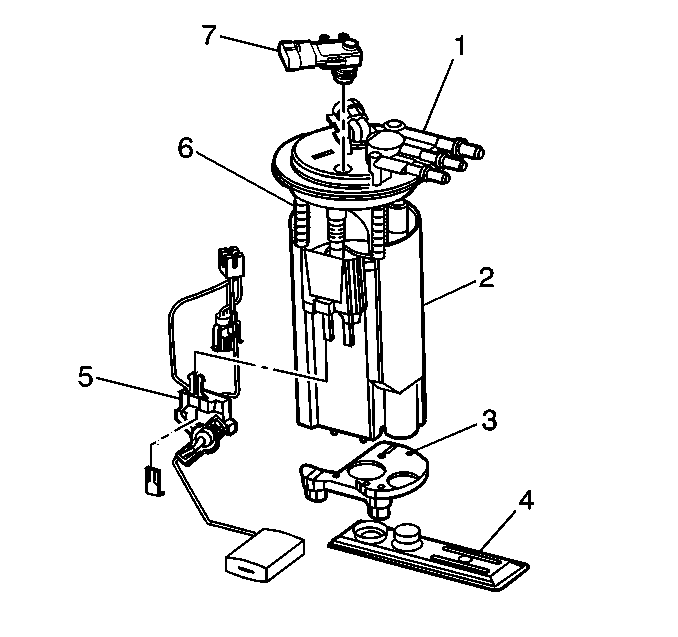
- Remove the fuel sender assembly. Refer
to
Fuel Sender Assembly Replacement
- Use a hand operated fuel pump device in order to drain the fuel
through the fuel sender access panel.
- Reinstall the fuel sender assembly. Refer to
Fuel Sender Assembly Replacement
- Reinstall the fuel access panel and install the trunk liner. Refer
to
Rear Compartment Trim Panel Replacement
in Body Rear End.
- Add fuel and reinstall the fuel tank filler pipe cap.
- Reconnect the negative battery cable. Refer to
Battery Negative Cable Disconnection and Connection
in
engine electrical.
- Inspect for leaks.
| 11.1. | Turn the ignition switch ON for 2 seconds. |
| 11.2. | Turn the ignition switch OFF for 10 seconds. |
| 11.3. | Turn the ignition switch ON. |
| 11.4. | Check for fuel leaks. |
