For 1990-2009 cars only
Removal Procedure
- Remove the headliner. Refer to Headlining Trim Panel Replacement in Interior Trim.
- Remove the I/P sound insulators. Refer to Instrument Panel Insulator Panel Replacement - Left Side and Instrument Panel Insulator Panel Replacement - Right Side in Instrument Panel, Gages and Console.
- Remove the carpet retainer. Refer to Front Carpet Retainer Replacement in Interior Trim.
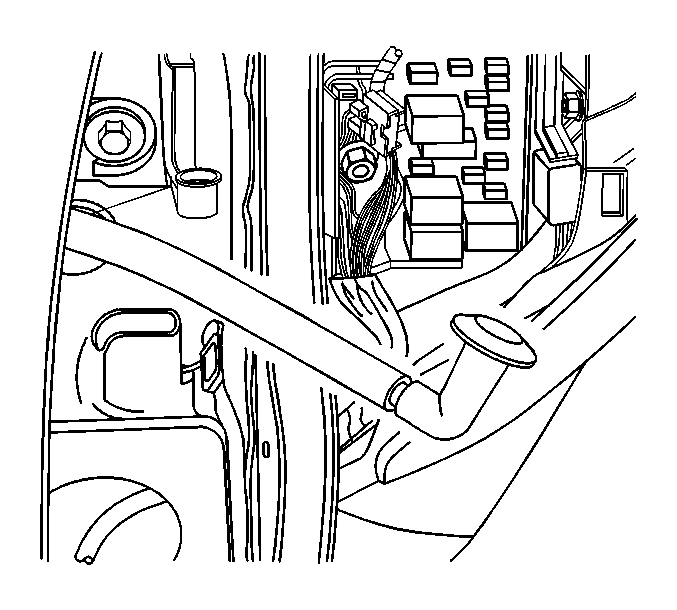
- Pull the carpeting back to expose the rubber body insulator.
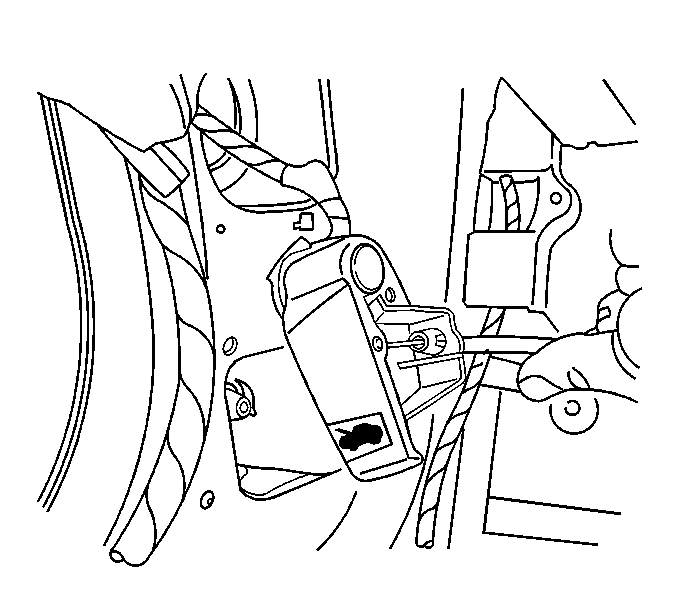
- Remove and set aside the hood latch release lever, driver side only. Refer to Hood Primary Latch Release Cable Handle Replacement in Body Front End.
- Pull the rubber body insulator away from the body to expose the pillar access hole.
- Disconnect the drain hose from the front sun roof drain port.
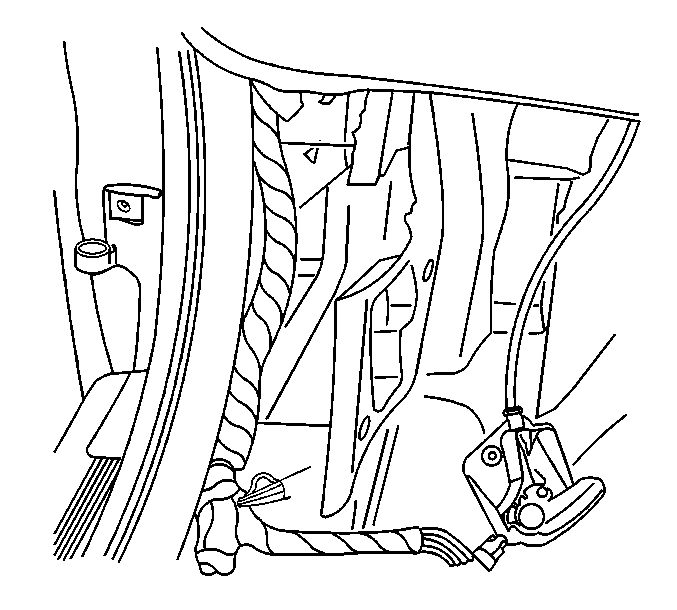
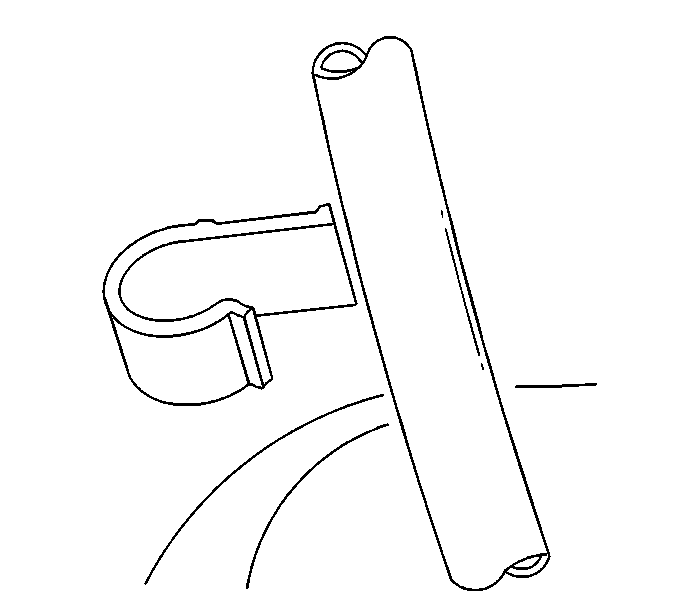
- Release the drain hose from the retaining clip located at the top of the front pillar.
- Pull the drain hose outlet rubber grommet away from the hinge pillar to expose the drain hose.
- Pull the remainder of the drain hose through the hole in the hinge pillar. It may be necessary to assist the hose from inside the vehicle by gaining access to it through an internal pillar access hole.
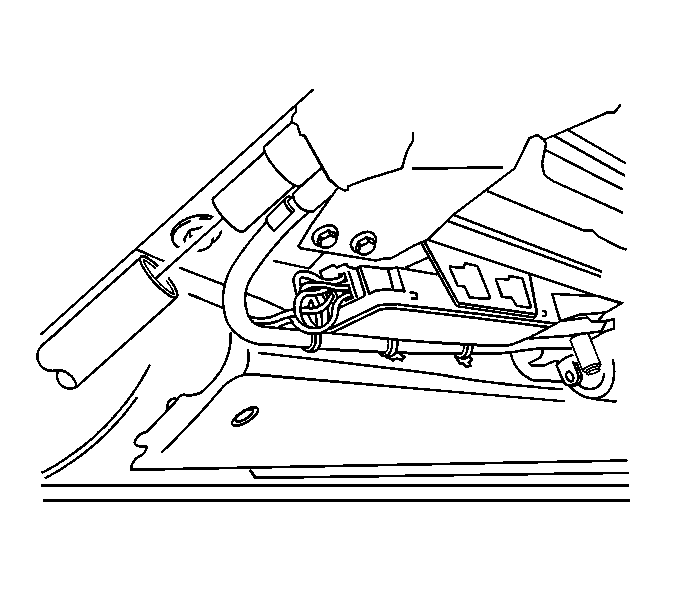
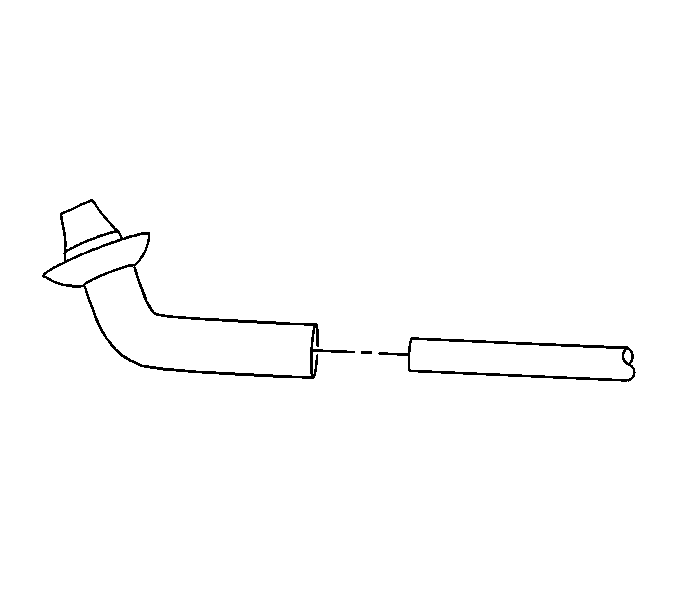
- Disconnect the drain hose outlet from the drain hose.

Installation Procedure
- Install the drain hose down through the front pillar. Connect the drain hose to the front sun roof drain port.
- Press the drain hose into the retaining clip at the top of the front pillar.
- Using a pillar access hole inside the vehicle, guide the drain hose to the exit hole in the hinge pillar.
- Pull the hose through the hole in the hinge pillar and connect the drain hose outlet to the drain hose.
- Push the excess portion of the hose back into the hinge pillar. Ensure that the hose does not bind or fall below the level of the exit hole.
- Press the drain hose outlet rubber grommet into the exit hole. Ensure that the grommet is secured.
- Place the rubber body insulator back into position.
- Position the hood release lever.
- Install the hood release lever bolt.
- Install the carpet retainers. Refer to Front Carpet Retainer Replacement in Interior Trim.
- Install the I/P sound insulator. Refer to Instrument Panel Insulator Panel Replacement - Left Side and Instrument Panel Insulator Panel Replacement - Right Side in Instrument Panel, Gages and Console.
- Install the headliner. Refer to Headlining Trim Panel Replacement in Interior Trim.
Notice: Use the correct fastener in the correct location. Replacement fasteners must be the correct part number for that application. Fasteners requiring replacement or fasteners requiring the use of thread locking compound or sealant are identified in the service procedure. Do not use paints, lubricants, or corrosion inhibitors on fasteners or fastener joint surfaces unless specified. These coatings affect fastener torque and joint clamping force and may damage the fastener. Use the correct tightening sequence and specifications when installing fasteners in order to avoid damage to parts and systems.
Tighten
Tighten the hood release lever bolt to 25 N·m (18 lb ft).
