For 1990-2009 cars only
Removal Procedure
- Remove the coat hooks. Refer to Coat Hook Replacement .
- Remove the sunshades. Refer to Sunshade Replacement .
- Remove the sunshade anchor. Refer to Sunshade Anchor Replacement .
- Pull down the door weatherstrips, as required.
- Remove the sunroof lacing, if equipped.
- Remove the sunroof switch, if equipped. Refer to Sunroof Switch Replacement in Roof.
- Remove the windshield side upper garnish moldings. Refer to Windshield Pillar Garnish Molding Replacement .
- On sedan remove the center pillar upper trim panel. Refer to Center Pillar Upper Trim Panel Replacement .
- Remove the rear quarter upper trim panel. Refer to Rear Quarter Upper Trim Panel Replacement .
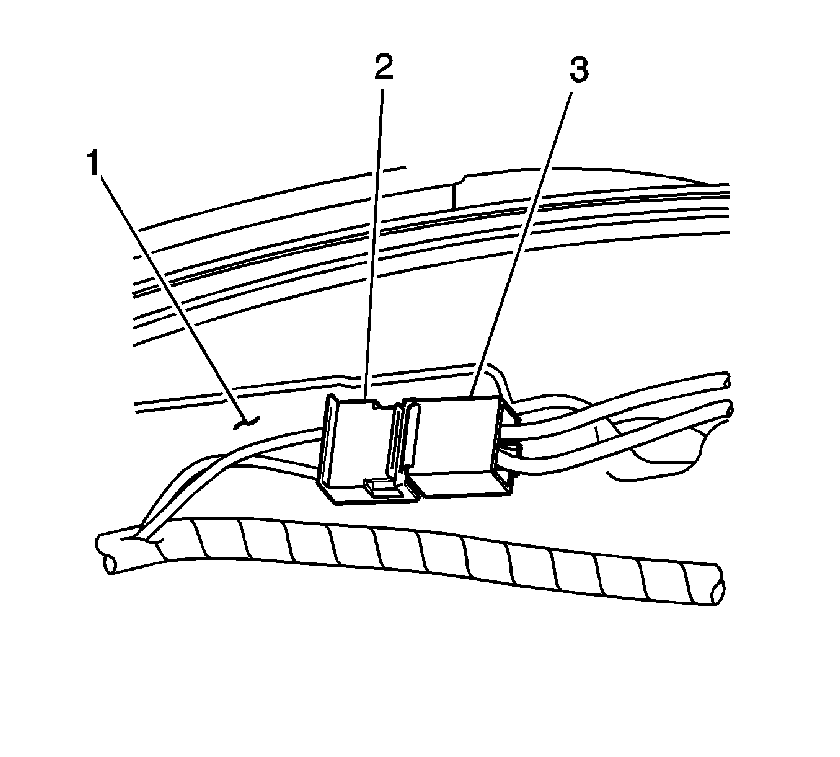
- Pull down the headliner above the left front door. Disconnect the actuator harness connector (3) attached to the headliner (1).
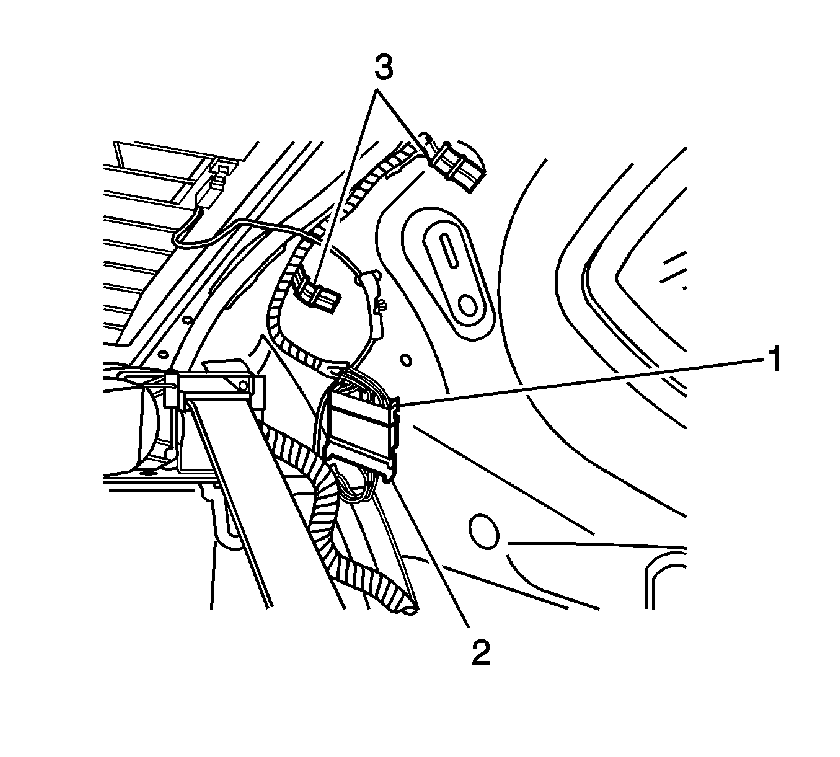
- Remove the rose bud harness hangers (3) which secure the headliner harness to the upper left quarter panel.
- Disconnect the headliner wire harness connector (1) located on the upper left quarter panel.
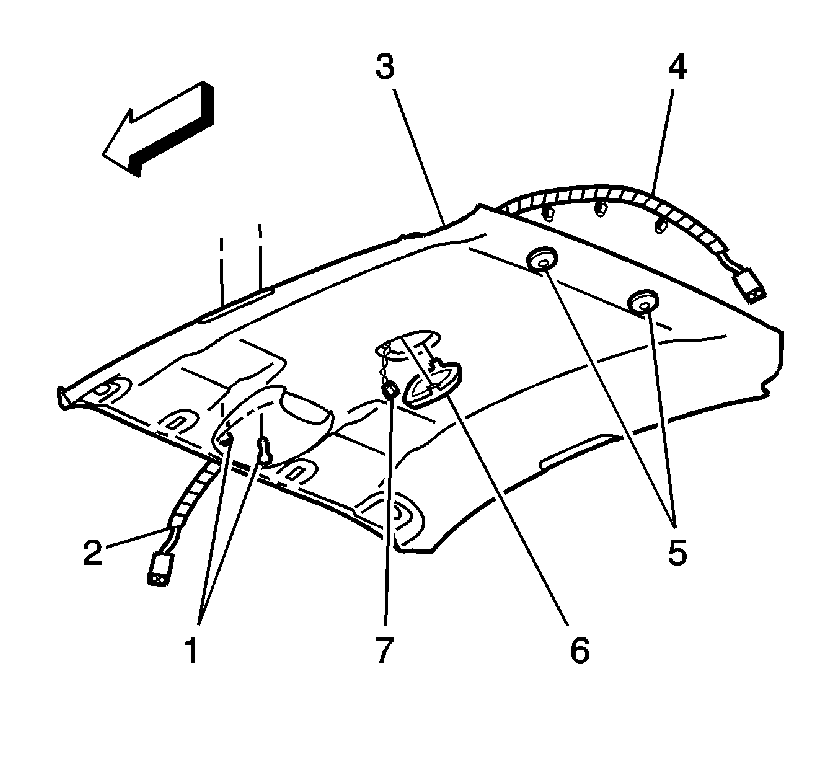
- Disconnect the electrical connector (2) to the windshield rear view mirror, if equipped.
- Remove the dome lamp (6) from the headliner (3).
- Disconnect the dome lamp electrical connector (7).
- Pull down on the front of the overhead console (1) to release the clips.
- Remove the rear retainers (5) from the headliner (3).
- Remove the headliner (3) from the vehicle.
Caution: Do not attempt to repair or alter the head impact energy-absorbing material glued to the headliner or to the garnish trims. If the material is damaged, replace the headliner and/or the garnish trim. Failure to do so could result in personal injury.


Installation Procedure
- Position the headliner (3) in the vehicle.
- Install the rear retainers (5) to the headliner (3).
- Push upward on of the front of the overhead console (1) to retain the clips.
- Connect the dome lamp electrical connector (7).
- Install the dome lamp (6) to the headliner (3).
- Connect the electrical connector (2) to the windshield rear view mirror, if equipped.
- Connect the headliner wire harness connector (1) located on the upper left quarter panel.
- Install the rose bud harness hangers (3) which secure the headliner harness to the upper left quarter panel.
- Pull down the headliner above the left front door. Connect the actuator harness connector (3) attached to the headliner (1).
- Install the rear quarter upper trim panel. Refer to Rear Quarter Upper Trim Panel Replacement .
- On sedan install the center pillar upper trim panel. Refer to Center Pillar Upper Trim Panel Replacement .
- Install the windshield side upper garnish moldings. Refer to Windshield Pillar Garnish Molding Replacement .
- Install the sunroof switch if equipped. Refer to Sunroof Switch Replacement in Roof.
- Install the sunroof lacing, if equipped.
- Install the door weatherstrips.
- Install the sunshade anchor. Refer to Sunshade Anchor Replacement .
- Install the sunshades. Refer to Sunshade Replacement .
- Install the coat hooks. Refer to Coat Hook Replacement .


