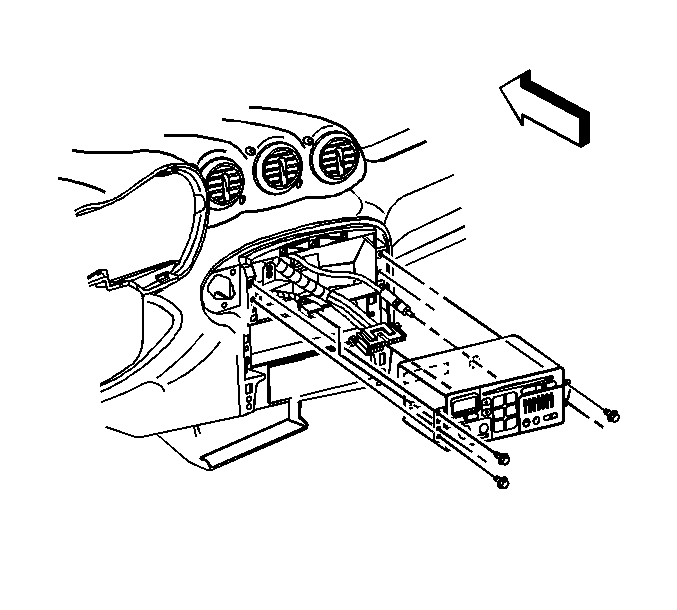
Removal Procedure
- Remove the instrument panel (I/P) accessory trim plate. Refer to Instrument Panel Accessory Trim Plate Replacement.
- Remove the radio screws.
- Pull the radio toward you for access to the connectors.
- Disconnect the I/P wiring harness connectors and the antenna cable connector from the radio.
- Remove the radio from the I/P.

Important: Perform the radio set up procedure for new and reinstalled radios. Refer to Radio Setup .
Installation Procedure
- Position the radio to the I/P.
- Connect the I/P wiring harness connectors and the antenna cable connector to the radio.
- Align the radio locator tab to the I/P locator opening. Install the radio.
- Install the radio screws.
- Install the I/P accessory trim plate. Refer to Instrument Panel Accessory Trim Plate Replacement.
- Perform the radio set up procedure for new and reinstalled radios. Refer to Control Module References for programming and setup information.

Important: If the radio locator tab is difficult to align to the I/P locator opening, pull the radio toward you and reposition the antenna cable.
Notice: Use the correct fastener in the correct location. Replacement fasteners must be the correct part number for that application. Fasteners requiring replacement or fasteners requiring the use of thread locking compound or sealant are identified in the service procedure. Do not use paints, lubricants, or corrosion inhibitors on fasteners or fastener joint surfaces unless specified. These coatings affect fastener torque and joint clamping force and may damage the fastener. Use the correct tightening sequence and specifications when installing fasteners in order to avoid damage to parts and systems.
Tighten
Tighten the radio screws to 2 N·m (18 lb in).
