Removal Procedure
- Remove all related panels and components including the left front cradle bolt.
- Visually inspect and restore as much of the damage as possible to factory specifications.
- Remove all sealers and anti-corrosion materials as necessary.
- Apply 25 mm (1 in) wide tape on the lower rail outer panel following the contour of the cowl.
- Cut the outer panel along the forward edge of the tape. This will provide an overlap tab for welding the service part to the original rail without welding directly to the cowl panel.
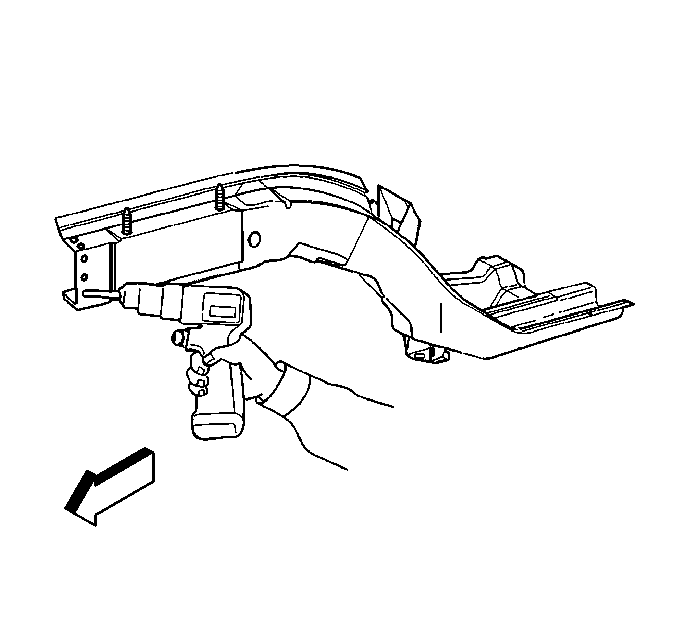
- Drill out factory welds attaching the outer panel to the rail inner panel. Do not drill through the inner panel.
- Remove the rail outer panel.
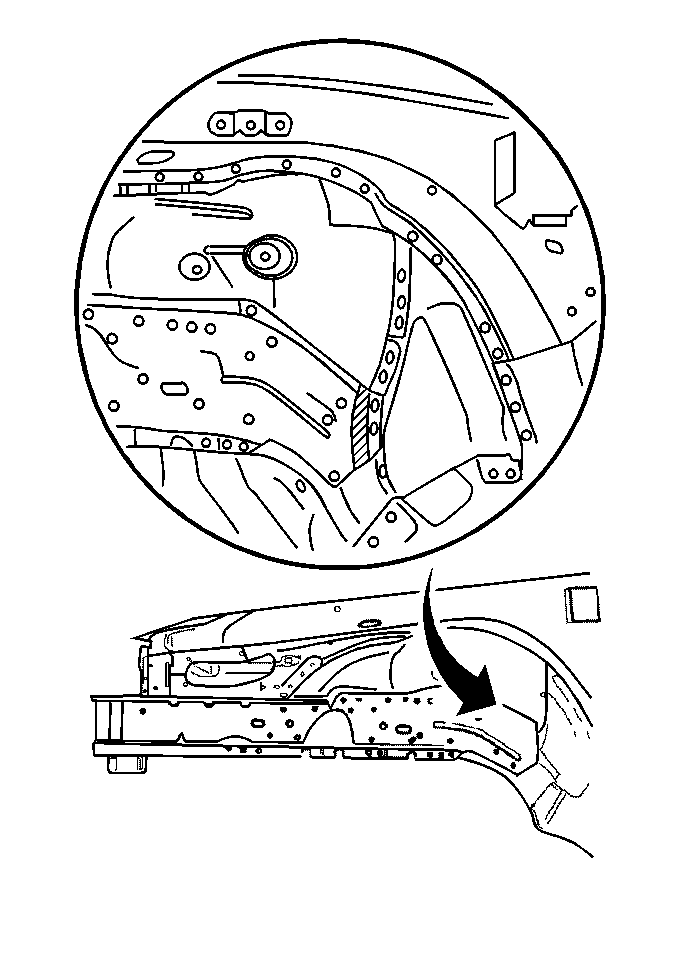
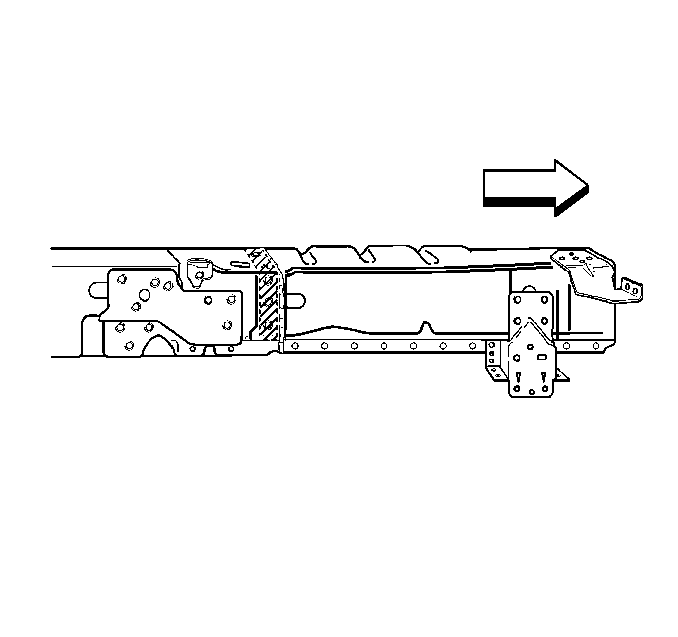
- Locate the 16 x 35 (41/64 in x 1 3/8 in) slot on the in-board side of the rail. Use the hole as a guide and mark a line on all 3 sides of the rail.
- Cut the rail along the marked line and remove the damaged portion of the rail.
Important:
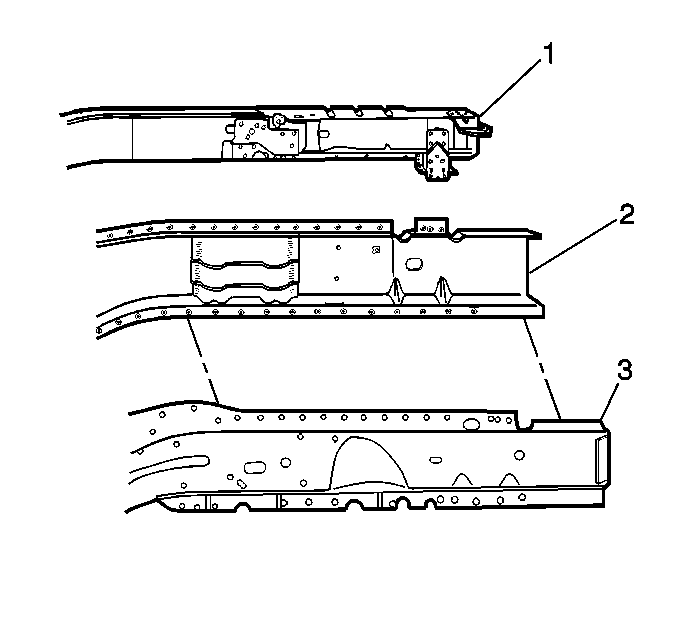
• Damage to the front lower rails must be limited to the portion of the
rail forward of the sectioning joint. If damage exceeds the forward portion, complete
replacement of the rail is recommended. • The lower rail sectioning cut lines vary from left to right. Be certain
to use the correct procedure. • The crush zones vary from left rail (1) to right rail (2).
Remove outer rail (3) at factory seams to section inner rail.
Important: Sectioning of the lower rail does NOT require removal of the powertrain.
Important: Welds on the engine cradle mounting bracket must also be drilled out to remove the outer panel.
Installation Procedure
- Locate and drill out factory welds attaching the outer panel to the inner panel on the service. Drill through one layer ONLY at the front half of the rail.
- Separate the inner from the outer rail using an air chisel.
- Remove the outer panel and set aside.
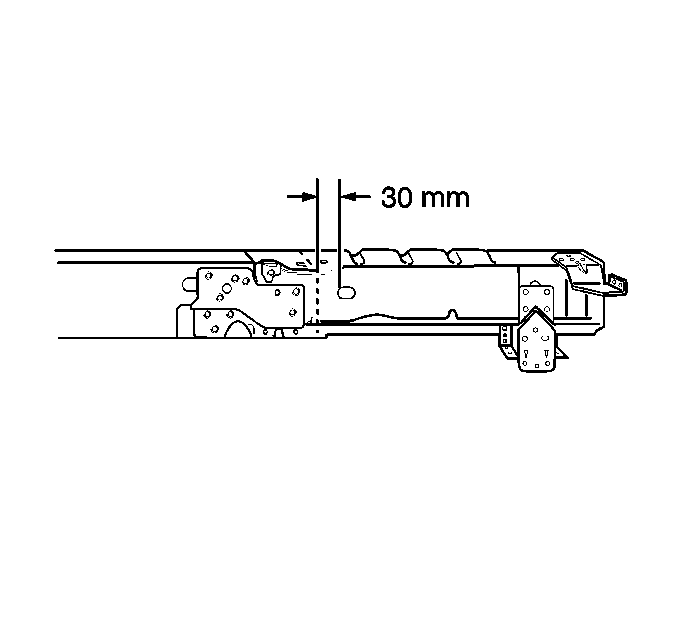
- On the left inner rail service part, mark a line around the panel 30 mm (1 1/4 in) rearward of the 16 x 35 hole on the inner rail.
- Use the hole as a guide and mark a line around the rail.
- Cut the service part along the marked line and discard the unused section.
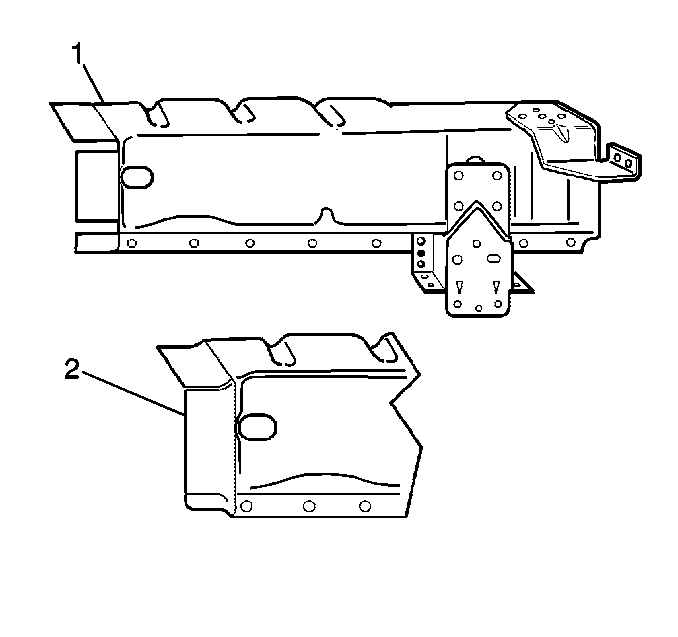
- Cut a 3 mm (1/8 in) gap approximately 30 mm (1 ¼ in) deep along the corners of the inner rail to create tabs on the sectioned service part (1).
- Step the tabs inward (2) to allow the service part section to fit inside the original rail.
- Drill 5 holes for plug welding along the overlap approximately 13 mm (1/2 in) from the sectioning cut.
- Position the modified service part inside the original rail.
- Use three-dimensional measuring to align the rail.
- Trim off the tab that attaches to the cowl panel on the rail outer panel.
- Drill three 8 mm (5/16 in) plug weld holes along the overlap.
- Position the outer panel and check for proper fit and alignment.
- Stitch weld along the entire joint.
- Plug weld all holes drilled during the removal process including holes drilled along overlapped areas.
- Clean and prepare welded surfaces.
- Install all related panels and components.
Important: Welds on the engine cradle mounting bracket must also be drilled out to remove outer panel.
Verify that the engine cradle mounting location is in the proper position. Align and hand tighten bolt. Make 25 mm (1 in) stitch welds along the seam with 25 mm (1 in) gaps between. Go back and complete the stitch weld along the seam.
Important: Prior to refinishing, refer to the publication GM 4901M-2000 GM Approved Refinish Materials for recommended products. Do not combine paint systems. Refer to paint manufacturer's recommendations.
