For 1990-2009 cars only
Engine Replacement Automatic Trans
Tools Required
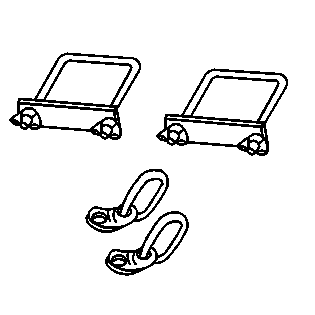
J 42451 Engine Lift Bracket
Removal Procedure
- Remove the hood. Refer to Hood Replacement in Body Front End.
- Disconnect the negative battery cable. Refer to Battery Negative Cable Disconnection and Connection in Engine Electrical.
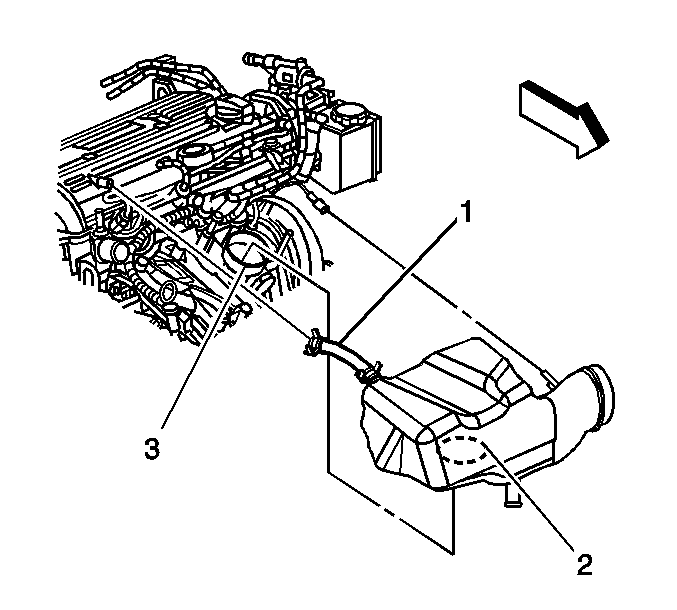
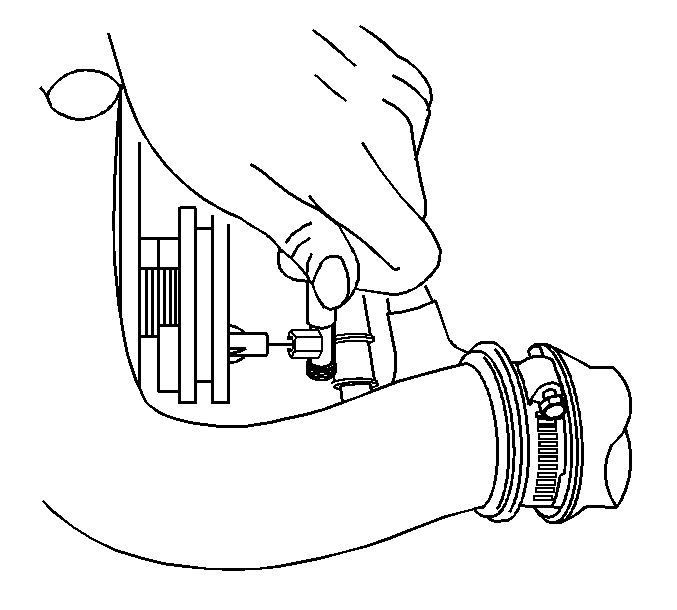
- Remove the air inlet duct and resonator (2). Refer to Air Cleaner Outlet Resonator Replacement in Engine Controls - 2.2L.
- Disconnect the accelerator and cruise control cable. Refer to Accelerator Control Cable Replacement in Engine Controls - 2.2L (L61).
- Disconnect the brake booster hose at the brake booster.
- Remove the power steering pump bolts and set pump aside.
- Disconnect fuel lines. Refer to Fuel Hose/Pipes Replacement - Engine Compartment in Engine Controls - 2.2L (L61).
- Drain the cooling system. Refer to Cooling System Draining and Filling in Engine Cooling.
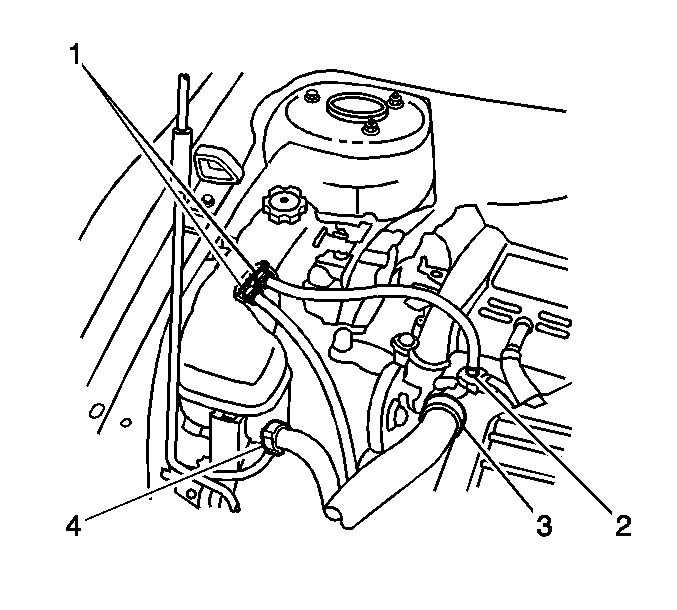
- Remove the radiator inlet hose (3). Refer to Radiator Inlet Hose Replacement in Engine Cooling.
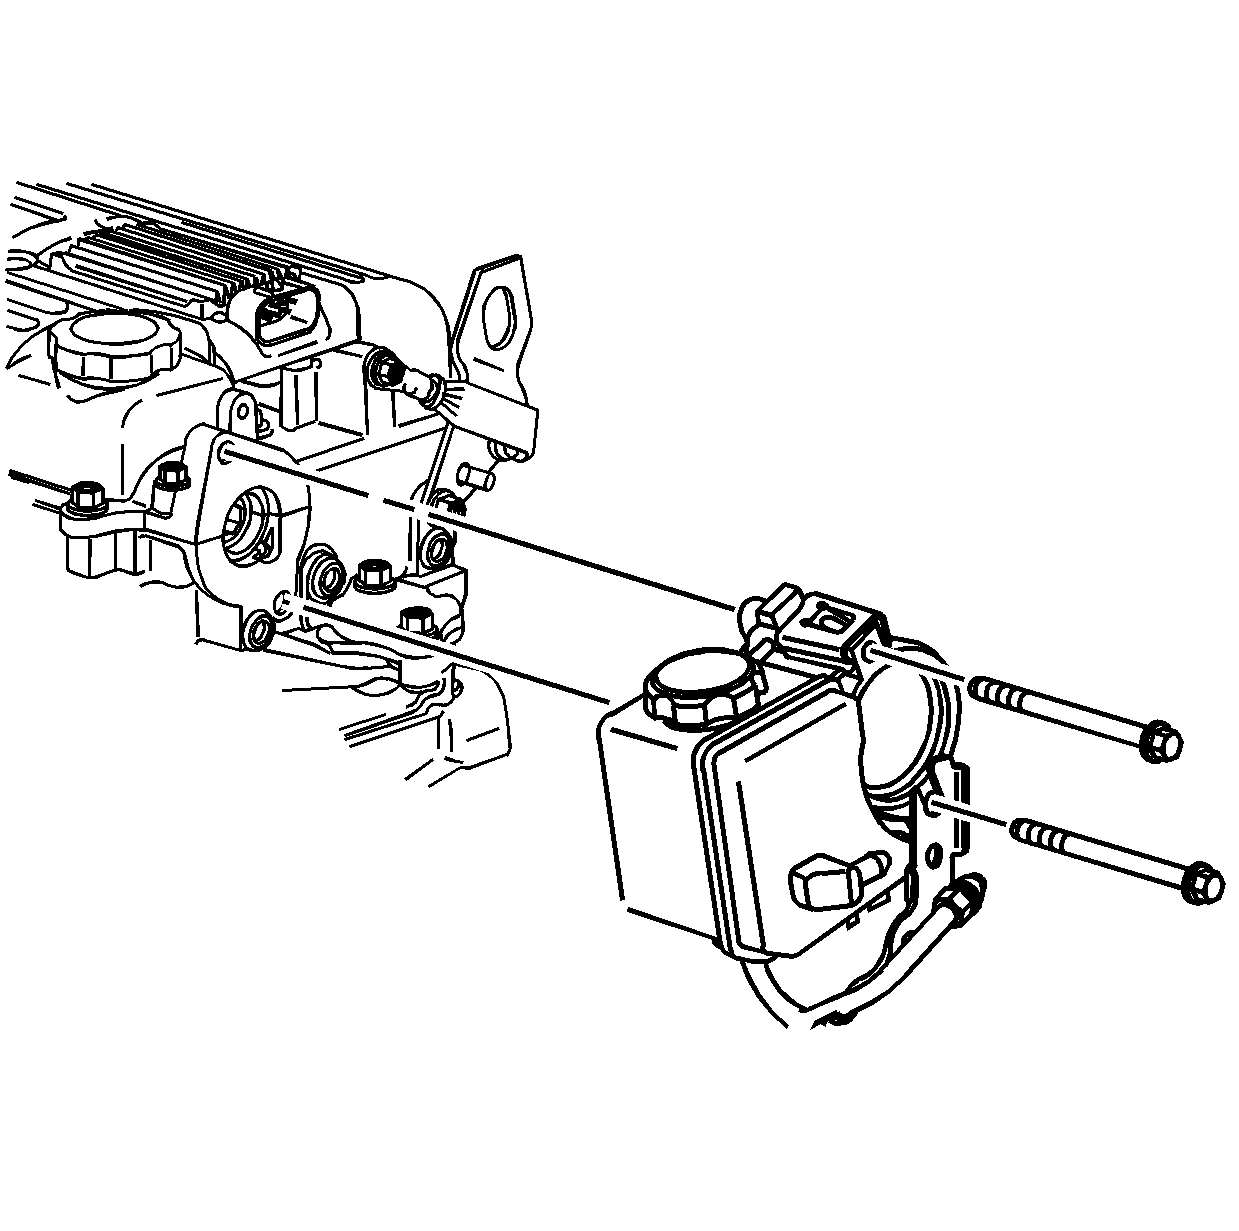
- Remove surge tank to cylinder head hose (2).
- Disconnect the surge tank to radiator outlet hose (3).
- Remove the radiator outlet hose (1). Refer to Radiator Outlet Hose Replacement in Engine Cooling.
- Remove the inlet heater hose (1) and outlet heater hose (2). Refer to Heater Inlet Hose Replacement and to Heater Outlet Hose Replacement in HVAC.
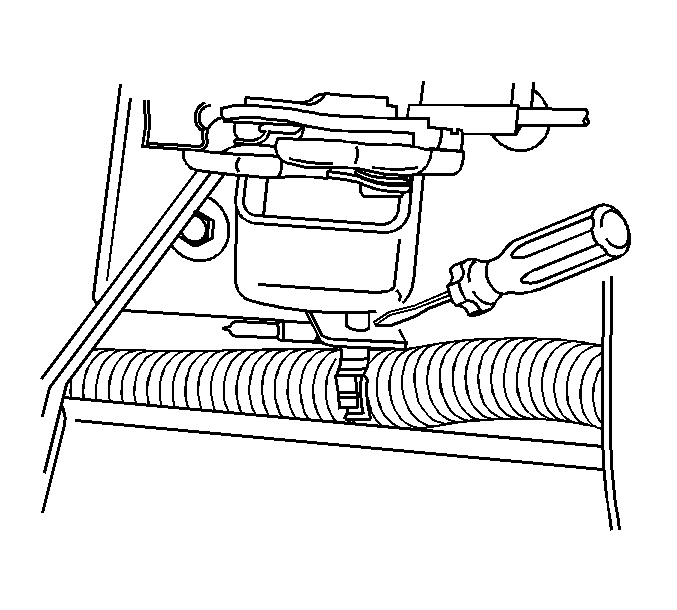
- Remove the bolt retaining the surge tank outlet hose to the intake manifold.
- Disconnect the following electrical connectors:
- Unclip the electrical harness from the engine and set aside.
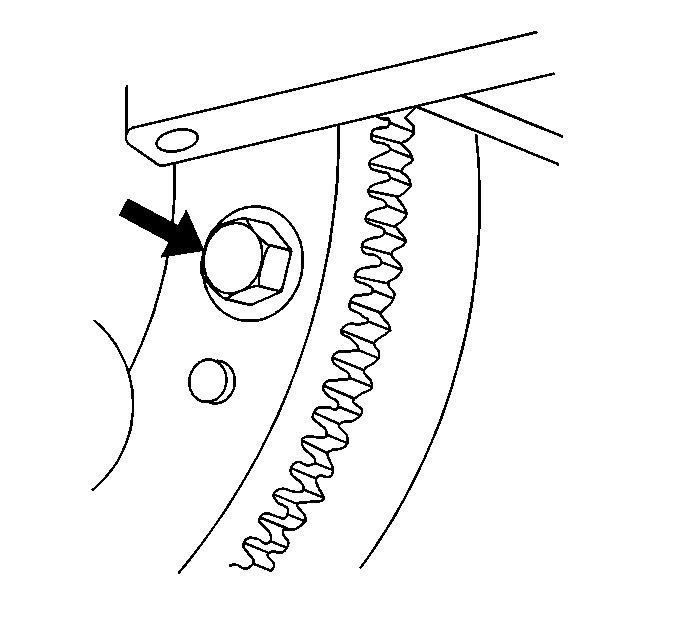
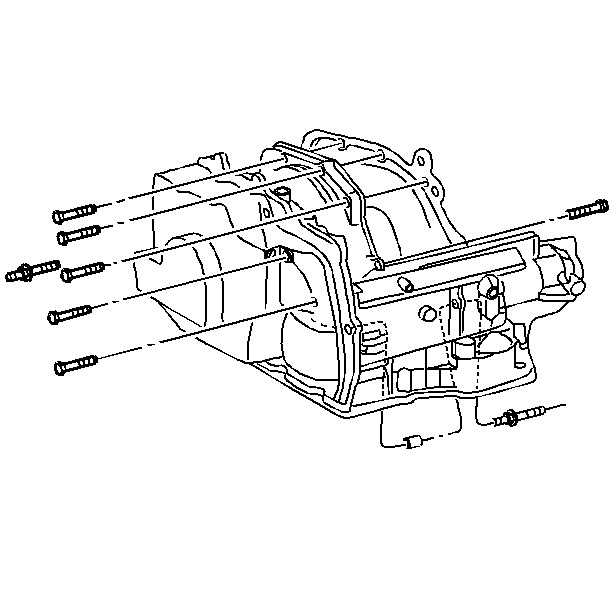
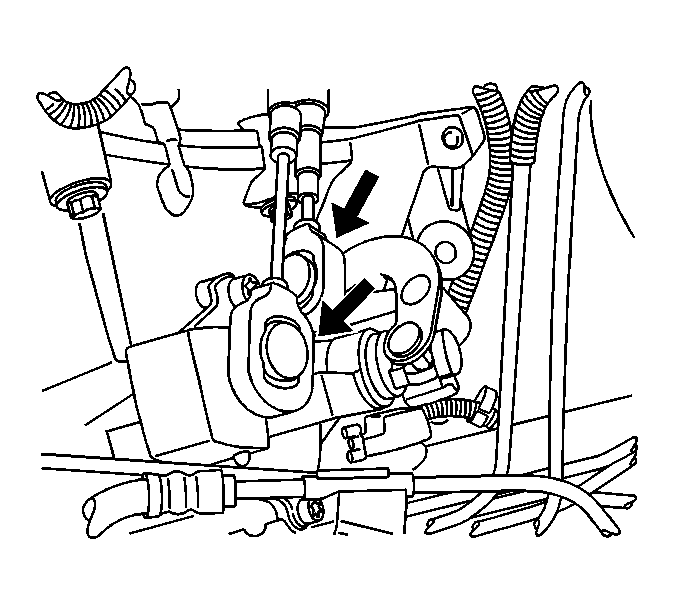
- Remove the upper transmission bellhousing bolts.
- Raise and suitably support the vehicle. Refer to Lifting and Jacking the Vehicle in General Information.
- Remove the engine drive belt. Refer to Drive Belt Replacement .
- Remove the AC compressor bolts and set the compressor aside.
- Remove the crankshaft balancer. Refer to Crankshaft Balancer Replacement .
- Disconnect the generator electrical connectors.
- Disconnect the starter electrical connectors.
- Drain the engine oil.
- Disconnect the front exhaust pipe from the exhaust manifold.
- Remove the starter. Refer to Starter Motor Replacement in Engine Electrical.
- Remove the flywheel to torque convertor bolts.
- Remove the lower transmission bellhousing bolts.
- Remove the transmission to engine brace.
- Lower the vehicle.
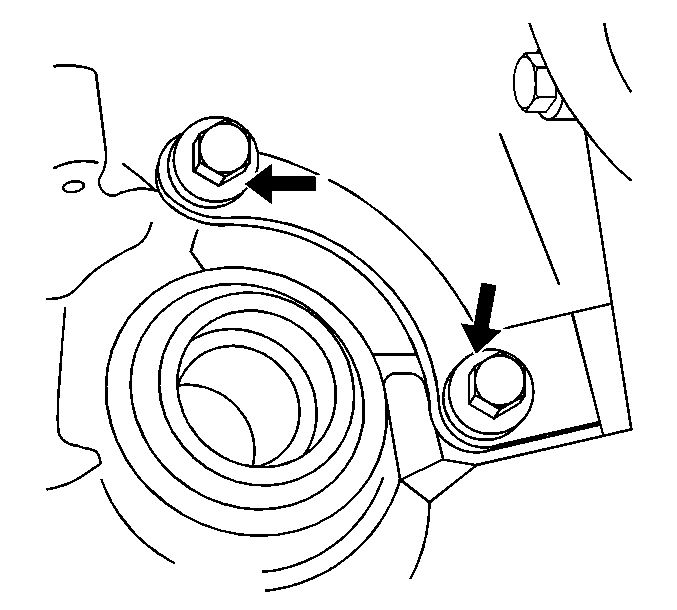
- Install J 42451 or equivalent to the right rear of the cylinder head.
- Install an engine hoist to the engine.
- Remove the front engine mount.
- Remove the upper transmission bellhousing bolts.
- Separate the engine and the transmission.
- Remove the engine from the vehicle.
- Remove the engine flywheel.
- Mount the engine to an engine stand.
- Remove the following components:
- Remove the engine from the stand.
- Remove J 42451 or equivalent to the right rear of the cylinder head.


| • | Idle air control (IAC) motor |
| • | TPS |
| • | Map sensor |
| • | Crankshaft sensor |
| • | Camshaft sensor |
| • | Oil pressure sensor |
| • | Purge solenoid |
| • | Ignition coil and module assembly |
| • | O2 sensor |
| • | Vehicle speed sensor |
| • | Engine temperature sensor |
| • | Back-up lamp switch |
| • | Oil filter cap and filter--Refer to Engine Oil and Oil Filter Replacement . |
| • | Exhaust manifold |
| • | Exhaust manifold studs |
| • | Intake manifold |
| • | Intake manifold studs |
| • | Engine mount bracket |
| • | Engine lift brackets |
| • | Camshaft cover and seal |
| • | Fuel rail |
| • | Engine block heater |
| • | Water pump |
| • | Drive belt tensioner |
| • | Thermostat housing and feed pipe |
| • | Generator |
| • | Oil level indicator and tube |
| • | Crankshaft sensor |
| • | Camshaft sensor |
| • | Oil pressure sensor |
| • | Ignition coil and module assembly |
| • | Crankshaft balancer |
Installation Procedure
- Install J 42451 or equivalent to the right rear of the cylinder head.
- Mount the engine to a stand.
- Install the following components:
- Install an engine hoist to the engine.
- Remove the engine from the engine stand.
- Install the flywheel. Refer to Engine Flywheel Replacement .
- Install the engine to the vehicle.
- Remove J 42451 or equivalent to the right rear of the cylinder head.
- Align the engine to the transmission.
- Install the upper bell housing bolts
- Install the front engine mount. Refer to Engine Mount Bracket Replacement - Right Side .
- Remove the engine hoist.
- Raise and suitably support the vehicle. Refer to Lifting and Jacking the Vehicle in General Information.
- Install the lower bell housing bolts.
- Install the torque convertor bolts.
- Install the starter. Refer to Starter Motor Replacement in Engine Electrical.
- Install the brace from the transmission to the engine.
- Connect the front exhaust pipe to the exhaust manifold.
- Connect the generator electrical connectors.
- Connect the starter electrical connectors.
- Install the AC compressor to the engine.
- Install the engine drive belt. Refer to Drive Belt Replacement .
- Lower the vehicle.
- Connect the following electrical connectors:
- Install the radiator inlet hose (3). Refer to Radiator Inlet Hose Replacement in Engine Cooling.
- Install the surge tank to cylinder head hose (2).
- Connect the surge tank to radiator outlet hose (3).
- Install the radiator outlet hose (1). Refer to Radiator Outlet Hose Replacement in Engine Cooling.
- Install the inlet (1) and outlet (2) heater hoses. Refer to Heater Inlet Hose Replacement and to Heater Outlet Hose Replacement in HVAC.
- Install the bolt securing the surge tank outlet hose to the intake manifold.
- Install the power steering pump.
- Connect the accelerator and cruise control cables. Refer to Accelerator Control Cable Replacement in Engine Controls - 2.2L (L61).
- Connect the brake booster hose.
- Connect the fuel lines. Refer to Fuel Hose/Pipes Replacement - Engine Compartment in Engine Controls - 2.2L (L61).
- Install the air inlet duct and resonator (2). Refer to Air Cleaner Outlet Resonator Replacement in Engine Controls - 2.2L (L61).
- Fill the engine with oil. Refer to Approximate Fluid Capacities in Maintenance and Lubrication.
- Connect the negative battery cable . Refer to Battery Negative Cable Disconnection and Connection in Engine Electrical.
- Fill the cooling system. Refer to Cooling System Draining and Filling in Engine Cooling.
- Install the hood. Refer to Hood Replacement .
| • | Oil filter cap and filter--Refer to Engine Oil and Oil Filter Replacement . |
| • | Exhaust manifold studs |
| • | Exhaust manifold |
| • | Intake manifold studs |
| • | Intake manifold |
| • | Engine mount bracket |
| • | Engine lift brackets |
| • | Camshaft cover and seal |
| • | Fuel rail |
| • | Engine block heater |
| • | Water pump |
| • | Drive belt tensioner |
| • | Thermostat housing and feed pipe |
| • | Generator |
| • | Oil level indicator and tube |
| • | Crankshaft sensor |
| • | Camshaft sensor |
| • | Oil pressure sensor |
| • | Ignition coil and module assembly |
| • | Crankshaft balancer |
Notice: Refer to Fastener Notice in the Preface section.
Tighten
Tighten the bolts to 90 N·m (66 lb ft).
Tighten
Tighten the bolts to 90 N·m (66 lb ft).
Tighten
Tighten the torque convertor bolts to 62 N·m
(46 lb ft).
Tighten
Tighten the brace bolts to 72 N·m (53 lb ft).
| • | Idle air control (IAC) motor |
| • | TPS |
| • | Map sensor |
| • | Crankshaft sensor |
| • | Camshaft sensor |
| • | Oil pressure sensor |
| • | Purge solenoid |
| • | Ignition coil and module assembly |
| • | O2 sensor |
| • | Vehicle speed sensor |
| • | Engine temperature sensor |
Tighten
Tighten the power steering pump bolts to 25 N·m
(18 lb ft).
Engine Replacement Manual Trans
Tools Required
J 42451 Engine Lift Bracket
Removal Procedure
- Remove the hood. Refer to Hood Replacement in Body Front End.
- Disconnect the negative battery cable. Refer to Battery Negative Cable Disconnection and Connection in Engine Electrical.
- Remove the air inlet duct and resonator (2). Refer to Air Cleaner Outlet Resonator Replacement in Engine Controls - 2.2L.
- Disconnect the accelerator and cruise control cable. Refer to Accelerator Control Cable Replacement in Engine Controls - 2.2L (L61).
- Disconnect the hose from the brake booster.
- Remove the power steering pump bolts and set the pump aside.
- Disconnect the fuel lines. Refer to Fuel Hose/Pipes Replacement - Engine Compartment in Engine Controls - 2.2L (L61).
- Disconnect the transmission shift control cables.
- Disconnect the transmission shift control cables from the bracket.
- Disconnect the clutch actuator cylinder from the transmission.
- Drain the cooling system. Refer to Cooling System Draining and Filling in Engine Cooling.
- Remove the radiator inlet hose (3). Refer to Radiator Inlet Hose Replacement in Engine Cooling.
- Remove the hose from the surge tank to the cylinder head (2).
- Disconnect the outlet hose from the surge tank to the radiator (1).
- Remove the bolt retaining the surge tank outlet hose to the intake manifold.
- Remove the radiator outlet hose (1). Refer to Radiator Outlet Hose Replacement in Engine Cooling.
- Remove the inlet (1) and outlet (2) heater hoses. Refer to Heater Inlet Hose Replacement and to Heater Outlet Hose Replacement in HVAC.
- Disconnect the following electrical connectors:
- Unclip the electrical harness from the engine and set the harness aside.
- Raise and suitably support the vehicle. Refer to Lifting and Jacking the Vehicle in General Information.
- Remove the frame . Refer to Frame Replacement in Frame and Underbody.
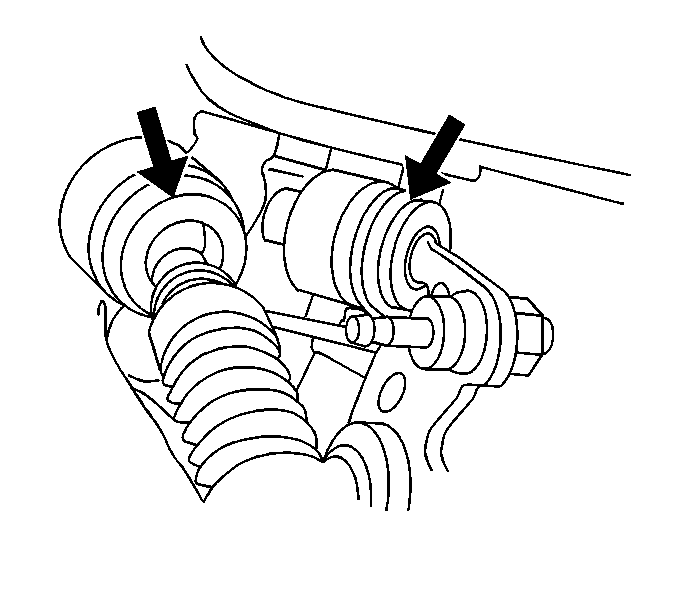
- Remove the drive axles. Refer to Wheel Drive Shaft Replacement in Front Wheel Drive Shafts.
- Remove the engine drive belt. Refer to Drive Belt Replacement .
- Remove the AC compressor bolts and set the compressor aside.
- Disconnect the generator electrical connectors.
- Disconnect the starter electrical connectors.
- Drain the engine oil.
- Disconnect the front exhaust pipe from the exhaust manifold. Refer to Exhaust Manifold Replacement in Engine Exhaust.
- Use a block of wood to support the front of the engine at the front of the oil pan.
- Lower the vehicle onto an engine support table.
- Remove the front engine mount. Refer to Engine Mount Replacement - Right Side .
- Remove the bolts which secure the transmission mounts to the frame.
- Raise the vehicle away from the engine and transmission assembly.
- Install J 42451 or equivalent to the right rear of the cylinder head.
- Install an engine hoist to the engine.
- Remove the transmission bellhousing bolts.
- Separate the engine and the transmission.
- Remove the clutch pressure plate and disk.
- Remove the engine flywheel.
- Mount the engine to an engine stand.
- Remove the following components:
- Remove the engine from the stand.
- Remove J 42451 or equivalent to the right rear of the cylinder head.
| • | Idle air control (IAC) motor |
| • | TPS |
| • | Map sensor |
| • | Crankshaft sensor |
| • | Camshaft sensor |
| • | Oil pressure sensor |
| • | Purge solenoid |
| • | Ignition coil and module assembly |
| • | O2 sensor |
| • | Vehicle speed sensor |
| • | Engine temperature sensor |
| • | Back-up lamp switch |
| • | Oil filter cap and filter--Refer to Engine Oil and Oil Filter Replacement . |
| • | Exhaust manifold studs |
| • | Exhaust manifold |
| • | Intake manifold studs |
| • | Intake manifold |
| • | Engine mount bracket |
| • | Engine lift bracket |
| • | Camshaft cover and seal |
| • | Fuel rail |
| • | Engine block heater |
| • | Water pump |
| • | Drive belt tensioner |
| • | Thermostat housing and feed pipe |
| • | Generator |
| • | Oil level indicator and tube |
| • | Crankshaft sensor |
| • | Camshaft sensor |
| • | Oil pressure sensor |
| • | Ignition coil and module assembly |
| • | Crankshaft balancer |
Installation Procedure
- Install J 42451 or equivalent to the right rear of the cylinder head.
- Mount the engine to a stand.
- Install the following components:
- Install an engine hoist to the engine.
- Remove the engine from the engine stand.
- Install the flywheel. Refer to Engine Flywheel Replacement .
- Install the clutch pressure plate and disk.
- Install the engine to the transmission.
- Install the engine and transmission assembly to an engine support table. Use a block of wood under the front of the engine to support the engine.
- Remove the engine hoist.
- Remove J 42451 or equivalent to the right rear of the cylinder head.
- Position the engine support table under the vehicle.
- Lower the vehicle while aligning the engine and transmission mounts to the vehicle.
- Install the bolts which secure the transmission mount to the frame.
- Install the front engine mount. Refer to Engine Mount Replacement - Right Side .
- Raise the vehicle.
- Connect the front exhaust pipe to the exhaust manifold. Refer to Exhaust Manifold Replacement in Engine Exhaust.
- Connect the generator electrical connectors.
- Connect the starter electrical connectors.
- Install the AC compressor to the engine. Refer to Air Conditioning Compressor Replacement in HVAC.
- Install the engine drive belt. Refer to Drive Belt Replacement .
- Install the drive axles. Refer to Wheel Drive Shaft Replacement in Front Wheel Drive Shafts.
- Install the frame. Refer to Frame Replacement in Frame and Underbody.
- Lower the vehicle.
- Connect the following electrical connectors:
- Install the radiator inlet hose (3). Refer to Radiator Inlet Hose Replacement in Engine Cooling.
- Install the hose from the surge tank to the cylinder head (2).
- Connect the outlet hose from the surge tank to the radiator (1).
- Install the bolt retaining the surge tank outlet hose to the intake manifold.
- Install the radiator outlet hose (1). Refer to Radiator Outlet Hose Replacement in Engine Cooling.
- Install the inlet (1) and outlet (2) heater hoses. Refer to Heater Inlet Hose Replacement and to Heater Outlet Hose Replacement in HVAC.
- Connect the transmission shift control cables to the bracket.
- Connect the transmission shift control cables.
- Connect the clutch actuator cylinder to the transmission.
- Install the power steering pump and bolts. Refer to Power Steering Pump Replacement in Power Steering System.
- Connect the accelerator and cruise control cable. Refer to Accelerator Control Cable Replacement in Engine Controls - 2.2L (L61).
- Connect the brake booster hose at the brake booster.
- Connect fuel lines. Refer to Fuel Hose/Pipes Replacement - Engine Compartment in Engine Controls - 2.2L (L61).
- Install the air inlet duct and resonator (2). Refer to Air Cleaner Outlet Resonator Replacement in Engine Controls - 2.2L (L61).
- Fill the engine with oil. Refer to Approximate Fluid Capacities in Maintenance and Lubrication.
- Connect the negative battery cable . Refer to Battery Negative Cable Disconnection and Connection in Engine Electrical.
- Fill the cooling system. Refer to Cooling System Draining and Filling in Engine Cooling.
- Install the hood. Refer to Hood Replacement .
| • | Oil filter cap and filter--Refer to Engine Oil and Oil Filter Replacement . |
| • | Exhaust manifold studs |
| • | Exhaust manifold |
| • | Intake manifold studs |
| • | Intake manifold |
| • | Engine mount bracket |
| • | Engine lift bracket |
| • | Camshaft cover and seal |
| • | Fuel rail |
| • | Engine block heater |
| • | Water pump |
| • | Drive belt tensioner |
| • | Thermostat housing and feed pipe |
| • | Generator |
| • | Oil level indicator and tube |
| • | Crankshaft sensor |
| • | Camshaft sensor |
| • | Oil pressure sensor |
| • | Ignition coil and module assembly |
| • | Crankshaft balancer |
| • | Idle air control (IAC) motor |
| • | TPS |
| • | Map sensor |
| • | Crankshaft sensor |
| • | Camshaft sensor |
| • | Oil pressure sensor |
| • | Purge solenoid |
| • | Ignition coil and module assembly |
| • | O2 sensor |
| • | Vehicle speed sensor |
| • | Engine temperature sensor |
