VISTA VENT SEAL LEAKS NEW SEAL P/N RELEASED

SUBJECT: VISTA VENT WATER LEAK - REPLACE SEAL
VEHICLES AFFECTED: 1985-90 N CAR
A new vista vent (sunroof) seal was released for 1985 and 1986 "N" models with Option AD3 and is continued for service through the 1990 model year. This part is to be used whenever replacement of the vista vent seal is required. The seal is available through CANSPO under part no.#20698162 and should be installed observing the precautions observed in this bulletin.
CONDITION:
When investigating vista vent water leaks, four areas should be checked:
A - Leaking between glass and seal B - Leaking between the seal and retainer C - Leaking between the module and roof panel D - Leaking between the hinge or latch attaching nuts and the glass
CAUSE:
Conditions "A" and "B" are due to improper sealing between the glass and seal or improper adhesion to the retainer.
Condition "C" is due to improper bond of the module to the roof panel due to voids in the urethane adhesive.
Condition "D" is due to missing, mispositioned, loose or split nut seals.
CORRECTION:
Conditions "A", "B" and "C" proceed as follows:
NOTE: Exercise care in the removal and clean-up steps to not damage the painted surfaces as rust could form.
1. Remove the old sealing strip.
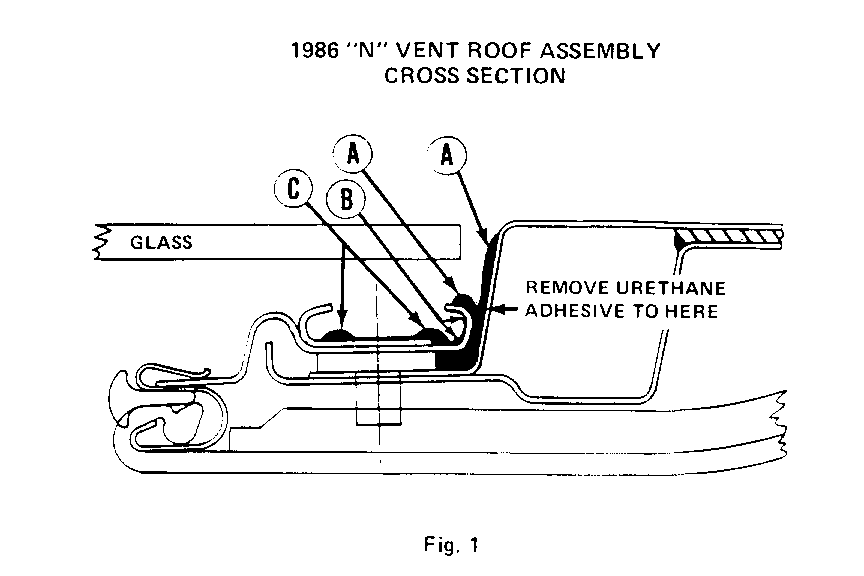
2. Remove any excess urethane or sealer from the area between the retainer and roof panel opening. (Refer to Fig. 1(A))
3. Remove all old adhesive from inside of the retainer using a hard piece of plastic as a scraper (to prevent damaging paint). Adhesive remover or heat may ease the clean-up of the retainer. Refer to (Fig. 1 (B and C)).
4. Coat all surfaces that will have adhesive applied with 3M Window Weld Primer No. 08643 or equivalent. This high zinc content primer will ensure adhesion of the cement as well as provide some rust protection for minor paint fractures. Deep scratches of paint damage must be repaired prior to installing the new seal.
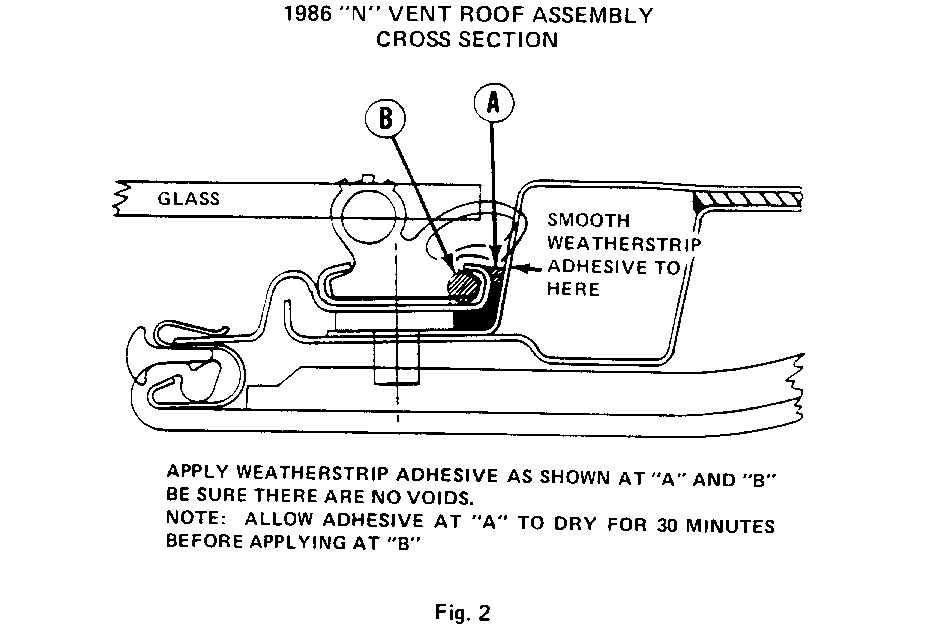
5. Seal the gap between the seal retainer and the roof opening (use 3M No. 8011 Weatherstrip Adhesive or equivalent). Be sure to make the adhesive flush with the top of the retainer as in Fig. 2(A). Allow approximately 30 minutes for this to dry before going to the next step.
6. Apply weatherstrip adhesive (3M No. 08011 or equivalent) inside the retainer at "B" as shown in Fig. 2(B).
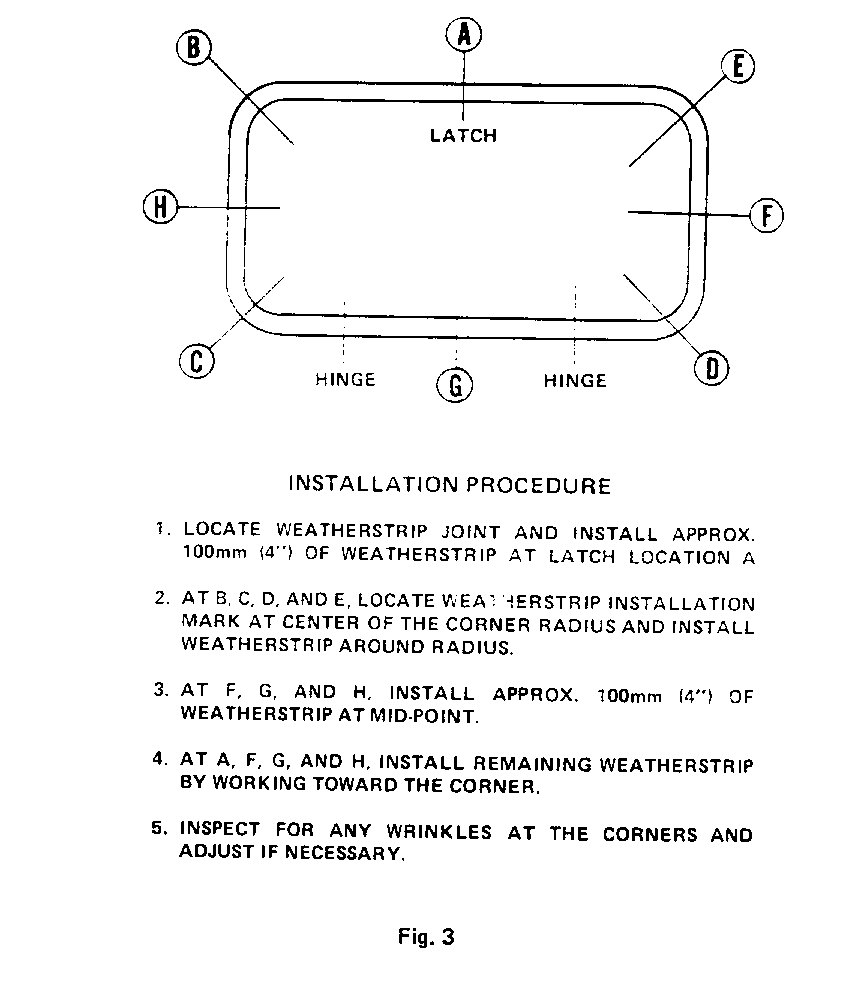
7. Install weatherstrip immediately as outlined in Fig. 3.
8. Reinstall vent glass and retest
Condition "D":
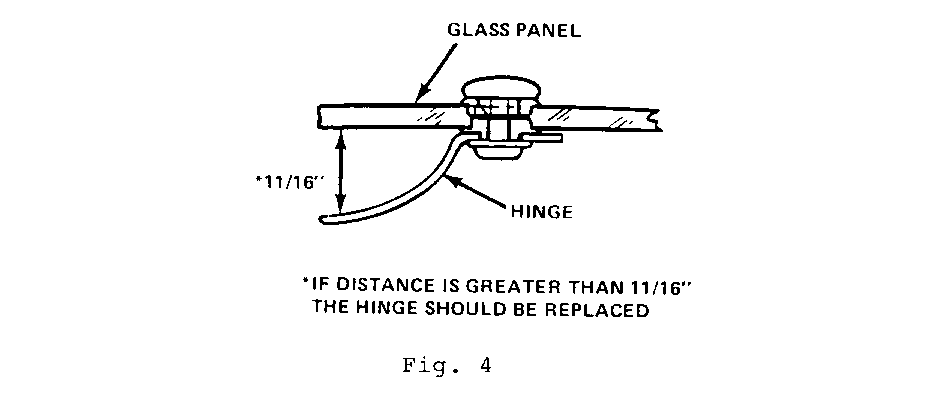
1. Replace hinge or latch retaining nut(s) with seal part no. 20664430. Also check hinge for correct opening. Replace hinge if bent or distorted, as shown in Fig. 4.
Use the most applicable Labour Operation and Time from the Canadian Labour Time Guide.
General Motors bulletins are intended for use by professional technicians, not a "do-it-yourselfer". They are written to inform those technicians of conditions that may occur on some vehicles, or to provide information that could assist in the proper service of a vehicle. Properly trained technicians have the equipment, tools, safety instructions and know-how to do a job properly and safely. If a condition is described, do not assume that the bulletin applies to your vehicle, or that your vehicle will have that condition. See a General Motors dealer servicing your brand of General Motors vehicle for information on whether your vehicle may benefit from the information.
